Kitchen renovations should be planned, as they require a significant investment of material costs if you repair it according to all the rules. First of all, you should decide where to start renovating the kitchen, and if you are far from construction, then we will discuss this issue together.
There comes a time when kitchen renovations can no longer be put off for many reasons. This may be due to the replacement of water and sewer pipes, electrical wiring, doors, and windows.
The decoration of the ceiling, walls and floor have lost their attractiveness and require replacement, there are not enough sockets and everything is on extension cords, and other issues.
The kitchen is one of the most visited places in the apartment, since here we not only eat food, but also gather with our household to communicate, drink a cup of coffee or tea. And for a woman, this is a “second home”, since all culinary delights are created with her hands. Therefore, we will approach the repair responsibly and do it efficiently.
Before deciding where to start renovating the kitchen, you should outline the types of construction work that need to be done. If you plan to arrange the kitchen furniture differently, add kitchen equipment, partly by replacing it with a new, more modern one, then it is better to draw it all to scale.
The main thing is that all innovations fit harmoniously into the dimensions of the kitchen. You need to start with a drawing or sketch out a sketch indicating all the dimensions. If you decide to update your kitchen furniture, then everything is simpler - New furniture to order will be tied to the size of your kitchen after renovation.
Kitchen renovation sequence
On preparatory stage you must decide who you will entrust to do the repairs or whether you will do it yourself. A mixed option is also possible - you can do some of the finishing yourself, and entrust the rest to specialists.
If it’s a construction company, then you won’t have to think about where to start renovating your kitchen. The organization’s specialists will measure everything, draw up an estimate for the kitchen renovation, give it to you for approval, and a contract for signing.
All you have to do is make an advance payment, and upon completion of the repairs, sign a certificate of completion and pay in full. But this option will be somewhat more expensive, since the company will increase its limited costs, overhead costs, profitability, and other costs.
That's why most of us work directly with specialists. This could be a mini team that does the whole range repair work. However, for control, you must calculate the volume of construction work required to complete it in physical terms.
Calculate the ceiling area, the floor area is the same as the ceiling, the area of the walls minus the openings, describe the types of construction work that need to be done - puttying, cladding, painting, wallpapering and the rest in the same vein.
And to know what it will lead to in monetary terms, then estimate the volumes at the prices agreed upon with the craftsmen plus your materials. Then it will be easier to control the performers. As practice has shown, add another 20 percent to the total amount for unaccounted costs
Where to start a step-by-step kitchen renovation
First of all, you need to clear the room of all furniture and household appliances- this is the first step to start renovating the kitchen. Remove all previous finishing. If you do not change the floor, then protect it reliably. Let's start by looking at all the stages of kitchen renovation work in order.
Electric installation work
 If you have an old aluminum electrical wiring, then be sure to replace the electrical wiring in the kitchen with a three-core copper cable. The specialist who will do this will tell you the cable cross-section based on the expected load from electrical appliances.
Add required amount sockets in those places where you plan to install electrical equipment, provide several extra sockets in case new devices appear.
It would be ideal to display all kitchen electrics on a panel in the hallway, if there is one. I have all the rooms of the apartment connected to a common panel in the corridor and, if necessary, I do not turn off the entire apartment, but only the necessary room.
Plumbing work
This is a “sore issue”, in my opinion, for most of us, since a leak can occur at any moment, you will flood your neighbors, and you yourself will be knee-deep in water. To prevent this from happening, who else old version metal pipes, replace them with new generation pipes.
Install modern valves and water meters. You may have to recess the pipes a little, then you will need to trench the wall. Installation of the sink will be carried out after completion of construction work.
Civil works
If you brick the window between the bathroom and the kitchen (in old-style houses), then this increases functional area walls, because then the furniture for the kitchen can be ordered corner, that is, longer.
When replacing old tiles, which came off along with the solution, this area will have to be plastered, just like brickwork blocked window. When you approach the slopes of the openings with plaster, it’s time to install the door frame and change window unit. Protecting a new window plastic film from dust, splashes of primer, putty.
Another point is the hood above the stove. You will need to make a through hole to the street to bring the corrugation there. Look at the layout, but it cannot be vented into the existing ventilation.
Next, proceed to lining the apron; aprons made from glass mosaics look very elegant, or at your discretion, there are plenty of options. We rub it in, you can move on to putty.
Ceilings and walls
First the ceilings. The old layer is cleaned off, we prime the surface and level it with putty. You can paint the ceiling, make a plasterboard version, stretch it, glue tiles - everything is at your discretion.
The same with the walls, we level them with putty, form the slopes of the doors and windows. We glue the baguettes. Finish to suit your taste.
Floors
If you do not plan to leave the old coating, then when dismantling it, evaluate the quality of the base. It may be necessary to perform a leveling screed to eliminate unevenness and eliminate height differences.
The final coating is carried out depending on the type. If it is ceramic tiles, linoleum, then before finishing. The only thing you need to pay attention to when installing the screed is the floor and door threshold marks, so that when laying finishing coating it didn't turn out to be higher. There are such incidents.
After laying the flooring and finishing the walls, install the baseboards. If there is a TV in the kitchen, then hide the cable in the cable channel. You hang the door and install the trim.

The most enjoyable work remains - the second cycle of electrical and plumbing work - installing sockets, a switch, hanging lamps, installing a sink. When ordering a new one kitchen furniture the craftsmen will install the sink and hide it in cabinets gas meter, corrugation from the hood.
Expanding the kitchen with a loggia
The renovation will go a little differently if you have a loggia adjacent to the kitchen, and you want to combine them, thereby expanding usable area eating areas. Where to start renovating the kitchen in this case, you ask. The actions and sequence are the same, except that the loggia should be completely insulated.
This is the line of windows, the space under the windows, the ceiling, floors, heated floors, and end walls. Delete completely balcony block and make a countertop between the kitchen and the loggia. The entire sequence of construction work when connecting the kitchen with the loggia was described by me from my own experience.
Quite recently we were planning where to start renovating the kitchen, but now it’s on paper and has come to the finish line. There were a lot of material costs, but this is not for one year. Now the updated kitchen, with a new design, is ready to welcome all household members for a festive dinner.
Repair work in no other room of the apartment will be as difficult as in the kitchen. Unlike all other rooms, it is important to ensure not only comfort, but also maximum practicality and durability, choose the right combination household appliances, plumbing, furniture and decoration. This task is not the simplest, therefore it is necessary to approach its solution with all thoroughness.

First steps towards renovation
Perhaps the very first decision on the path to carrying out a full kitchen renovation is to develop an understanding of what the result should look like and what steps should lead to its implementation. To create a kitchen renovation design project, it is not necessary to involve professional designer– you can, after thinking carefully, draw up a plan yourself, but it’s definitely not worth starting renovations in an apartment without an exact plan.

In this case, you need to correctly calculate the repair needs. For example, in a new building there is no finishing, but all communications, as a rule, are present, and they are new, that is, there is no need to replace them - accordingly, you only need to select equipment, furniture and finishing. If the same communications are still in good condition, but the need to change the finish is ripe, you need to find a way to dismantle the old coatings so as not to damage something that is not yet planned to be replaced. As for major repairs, in this case it’s worth starting with the complete dismantling of everything, including the window unit, but you should choose the right sequence for further restoration.


The Importance of Planning
Before starting a renovation, it is important not just to see the final picture, but to clearly understand what sequence of steps the plan will consist of, as well as how many consumables will be needed, and how much it will all cost. Agree, there is no point in first assembling kitchen cabinets and then replacing the pipes inside them- this way you can ruin both, create unnecessary inconveniences, and therefore lose money.
Experienced people do not advise relying entirely on the first master whose number you found - try to get at least a little closer to specialists in the field home renovation. Repairers, seeing an inexperienced newcomer, will most likely try to sell you unnecessary goods and services, and will also provide a “bonus” in the form of a markup, so have a clear idea of what you would like to see in your kitchen after renovation, and how much it costs. Prices Consumables and be sure to find out the cost of materials in different places - this way you will get a fair price and even be able to save money.

When selecting consumables, place the main emphasis on the main materials that do not have direct relation to the decor. Only by creating a reliable and durable basis for decor will you be sure that you have not wasted your money, because the latter can be quite expensive and lead you astray from the righteous path, encouraging you to save where saving is inappropriate. Even after carefully calculating everything, do not grab the phone right away - carry the project in your head for a while, think about the details a few more times so that there are no more doubts. If no objections come to mind (or they have already been taken into account in the final plan), all that remains is to set aside the full amount of the cost of repairs - and only now can you call the specialists and agree on the exact date for the work to be completed.


Step-by-step sequence of repair work
Just above we mentioned that the correct algorithm of actions, which involves the stages of repairs in a strict logical order, is already half the success and reduces the risk of unexpected expenses and delays. To explain in detail what the step-by-step procedure for a major overhaul should look like, let us briefly consider all the main types of work.


Dismantling
If the renovation is being carried out in a new building, that is, from scratch, and there was simply no previous renovation in the room, you will not have to go through this stage - there is simply nothing to dismantle. However, when overhauling an old kitchen, this stage cannot be avoided, and certain difficulties may arise here. The fact is that this step in the repair process is usually the simplest; as you know, breaking is not building. Many owners prefer to carry out dismantling before renovation themselves, but in the case of a kitchen this is not always so simple - the same pipes without necessary tools not so easy to disassemble. If there is a man in the house who knows how to work with his hands, you can try to do it yourself, significantly saving on the services of workers, but if you are confident in own strength no, we can’t do without their help. The same applies to minor repairs - if the tasks do not include complete destruction kitchen up bare walls and floors, you should not risk dismantling the structures yourself.


Important point dismantling - waste removal. There is usually a lot of it, and removing it yourself can be even more difficult than destroying the old finish. Removal may be a separate service, the cost of which should be clarified in advance. Be prepared to buy dozens of bags, which will also cost a certain amount.
Preparing walls and ceilings
In general, it would be appropriate to classify this stage as dismantling, but not everyone understands that removing the same old paint– this is also dismantling. All that is needed at first is to clean the walls down to the concrete. Many types of wall and ceiling decoration assume installation exclusively for ideal flat surface, therefore it makes sense to wash the walls and ceiling from dirt, grease and mold, and also level them.


Window
This is the first stage when, during the renovation of the kitchen, we will not only break, but also introduce something new. As a rule, dismantling an old window and installing a new one is carried out by the same specialists; the whole procedure usually takes little time - no more than two hours are spent replacing one block. They begin with the installation of windows for the reason that replacing them provokes the destruction of adjacent sections of the wall, which means after finishing finishing or even preparatory work it's too late to do this. Please note that for many companies, installing the window itself and repairing the slope are different services that are performed by different craftsmen, so you need to plan everything correctly so that further repairs do not spoil the fresh slope.


Electrics
This stage is quite difficult to plan, and it is in this part that inexperienced planners often make mistakes. Before doing any wiring, you should think carefully about the configuration of electrical appliances in the kitchen - since we are doing major renovation, it’s worth doing everything right away so that there is no need for extensions and tees. If the electrical wiring is hidden in the walls, they should be grooved and then the surface leveled, although today the wires are not always hidden inside for ease of possible replacement. It is important to expose the ends of the wires for future sockets, switches and lighting fixtures, although they have not yet put covers on them, limiting themselves to protruding (and unconnected) contacts.


Pipes
Installation plumbing structures in general, it resembles the installation of electrical wiring, with the only difference being that this work is a little more limited geographically. In terms of the renovated premises, you should think in advance where all the equipment that needs to be connected to the water supply and sewerage system will be located. In many modern kitchens, these communications are no longer limited to just the sink - quite often in the same room you can also find washing machine, dishwashers are also being purchased more and more intensively.


Finishing walls and work area
After installing communications, it’s time to gradually move on to the stylistic design of the room. Start off Finishing work Usually it is advised to go from above, gradually moving downwards - this way splashes and falling fragments of finishing materials will not damage the new floor, and will not even stain it - this simply does not exist yet. Materials must be selected in strict accordance with the destructive conditions that arise in the kitchen. Required condition for any kitchen finish is increased resistance to high temperatures and moisture (both liquid and in the form of steam). The part of the wall directly adjacent to the work area (the so-called apron) must have even more sophisticated qualities, for example, it can withstand any temperature, not burn even in direct contact with fire, and can also be easily cleaned of any kind of contamination.


Floor
To protect the floor from contamination or damage from working tools, cleaning it up involves last resort. Getting it right is perhaps the most time-consuming part of a kitchen renovation. Because major work involves pouring a new concrete screed, and it dries very slowly. It is unacceptable to start laying on a screed that has not fully set - such an ill-conceived decision will greatly reduce the service life of the coating.


In some cases, the stages of finishing the floor are intertwined with the stages of finishing the walls and ceiling. For example, if the main work on preparing the walls has been completed and all that remains is to paint them, but for some reason a long break in the work is expected, you can concrete screed pour it right now. Then they move on to painting the walls after it has dried, but still before laying the flooring - paint splashes on the screed themselves are not dangerous if they are then covered on top with laminate or any other floor.


Arrangement of furniture, appliances and accessories
When all of the above stages have been completed, the customer has at his disposal a neat and beautiful, but still empty and impractical kitchen. Its further arrangement is divided into two stages - professional and independent. Modern kitchen does not represent a set of individual accessories - many of its components are interconnected, so the owner simply cannot cope with the installation of this entire system on his own. The final design of the same electrical system, installation of equipment with its connection to the main communications, and even assembly of a kitchen set - all these are tasks that are usually entrusted to professionals. Although because of this you do not even need to know the exact installation procedure, experienced people advise being present during such an assembly - this helps to control the very quality of the work.


Final stage is carried out independently and involves bringing the kitchen to its final condition for everyday use. It consists of arranging furniture and dishes, hanging window textiles and generally decorating the room, and begins with a more banal thing - spring cleaning. In practice, finishing the kitchen can take several weeks, but you can use the room earlier - immediately after all the equipment has been connected, the set has been assembled, and dinner table– included.


Main mistakes
Inexperience often turns out to be a big problem for customers who, in their zeal to do everything as quickly as possible, are often faced with the problem of excessive and thoughtless waste of money, or even with the complete impossibility of bringing their plans to life, although some of the money has already been spent. To warn readers, we point out the most common mistakes.

The first, and also the main, mistake is to start repairs without any plan in the hope that you will be able to figure it out along the way. A kitchen renovation, especially a major one, in principle cannot be extremely fast; it will certainly take several weeks, but by doing as stated above, you risk plunging the room into chaos for months or even years. Without sufficient information about the cost of the desired result, many owners begin work that they are unable to finance in full, which is why the original project has to be redrawn many times along the way. You shouldn’t be surprised if the result with such an attitude will bear very little resemblance to what was intended, and it’s also good if the kitchen can eventually be used, just without inviting guests into it for now. In the worst case, an option cannot be ruled out in which everything will only be destroyed, and there will not be enough money for adequate restoration.

Another huge mistake is getting too ahead of yourself and turning money into consumables. Even with very careful planning of a kitchen renovation, expectations and reality rarely coincide - there are too many details that need to be coordinated with each other. It’s good if, already in the process of repair, the craftsmen or you yourself simply come up with an option on how to do it better than was planned - then, having on hand the materials to implement the original plan, you can sigh and abandon the changes. It is much worse if it turns out that the original plan for some reason cannot be implemented at all, or if its implementation threatens certain inconveniences during further operation. In this case, it turns out that the money on the purchased finishing was wasted, and the cost of repairs will naturally increase - or you will have to put up with what you have.

An even more global mistake is buying furniture early. This option is an even brighter job for the future; the set or table itself can be quite expensive, but they are selected strictly according to design. Having bought such accessories, you will no longer be ready to easily change anything else, which means that it will be truly difficult to deviate from the original plan, even if shortcomings are found in it.

It is often a mistake to contact a designer. His services are expensive, but he will never do absolutely everything for you. He tries to please you as much as possible, so he will only slightly narrow the possible choice of decoration, furniture and appliances, make sure that all these details are in harmony, but he will coordinate every step with you, so you will still have to go shopping.
To carry out a kitchen renovation correctly, you need to carefully plan all actions and carry them out exactly as planned. It consists of the following points:
- First you need to decide what kind of kitchen renovation needs to be done. It can be either cosmetic or major. If the work involves redevelopment of the premises, then you should draw up a plan on paper to determine the future arrangement of furniture. This is done in order to accurately understand the final result.
- Dismantling old coverings, removing furniture, etc.
- Preparing surfaces for coating.
- Carrying out repair work.
Important! At the renovation planning stage, you need to think about replacing communications. If you change the location of the sink, you will need to supply water and sewerage to it. You should also determine the location of sockets for convenient connection of all electrical appliances.
Planning stage: what to consider

The kitchen room is the most multifunctional in the whole house. But the kitchen area in most houses and apartments is limited. For this reason, in order to conveniently arrange household appliances, it is necessary to determine the layout in advance.
Advice! The kitchen is a room with high humidity, therefore, both furniture and coverings here need to be moisture-resistant. In addition, the kitchen environment is very aggressive, so surfaces must be washable, preferably they can be washed with household chemicals.
The planning stage involves the following actions:
- Drawing up a diagram of the future kitchen. Here you need to determine not only the features of the layout, but also the design of the room. If you plan to conduct redecorating kitchen, then you need to decide on the color of the coverings and select the necessary accessories.
- Calculation of materials. This stage can be carried out either independently or entrusted to specialists. Here you will need to think through not only the issue of the amount of finishing materials, but also the nuances of sewerage and water supply, the location of electrical outlets, ventilation system etc. Including communications in the plan allows you to make approximate calculations.
What to do next?

Once everything is planned, you can proceed directly to action. Where to start renovating your kitchen? First of all, it is necessary to remove all furniture and equipment from the premises, and then begin dismantling work. During a major overhaul the following must be dismantled:
- Wall covering.
- Flooring.
- Ceiling.
- Communications.
Important! In some cases, kitchen renovations involve replacing windows. In this case, the work is carried out in the following sequence: first the windows are replaced, and only then a new coating is installed.
The most common kitchen renovation options:
- Best options ceiling covering are panels, suspended plasterboard or tensile structures. If you need the cheapest and practical option, then it is best in this case to cover the ceiling with a paint composition.
- Linoleum, laminate or ceramic tiles can be used as flooring. The last option is the most wear-resistant in this case. It is also possible to finish the floors with porcelain stoneware, obtaining the most durable and wear-resistant coating.
- To decorate the walls, you can use tiles or washable wallpaper. IN Lately The kitchen dining area is increasingly being painted - this way you can create a durable, waterproof and aesthetically attractive coating.

- The apron area is most often finished with tiles. However, it is also possible to use glass or metal panels. The main requirement for this coating is mechanical strength, as well as resistance to moisture, grease, burning, etc. Therefore, using paint or wallpaper here is strictly prohibited.
Important! Furniture should be brought into the kitchen area only after it has been completed full finishing premises, and all surfaces will be thoroughly dried.
When finishing the ceiling, you need to pay attention to proper lighting. Here you need to create lighting for each zone, for which built-in Spotlights. For example, built-in lighting can be provided for a working area, while in a dining area it is best to use classic chandeliers. They will add an atmosphere of sophistication and comfort to the interior.
Advice. To organize lighting above the work area, the lighting built into the lower panels is perfect hanging cabinets. For good lighting dining area V small kitchens A wall-mounted lamp can be used.

Many people get tired of monotony over time. kitchen interior, and therefore sooner or later the question arises of how to renovate the kitchen. As a rule, the start of repair work is very lengthy and labor-intensive. Due to the dismantling of the old coating, a lot of construction waste, from which it is necessary to completely clear the room before covering the walls, ceiling and floor with new finishes.
Important! When the room is completely cleared of old decoration, first of all you need to take care of the electrical wiring. If all switches and sockets are not installed at this stage, then adding any of these elements later can be very problematic.
The presence of sockets is mandatory in the following places:
- If the stove is electric, then there must be a power source next to it.
- At the location of the hood.
- There should be several sockets on the wall near the work area for connecting small household appliances.
- On the wall where the refrigerator is located.
- At the location of the dishwasher.
- If you plan to install a TV in the kitchen, then you should also allocate a separate outlet for it.

Both major and cosmetic renovations of the kitchen in panel house requires priming of all surfaces - this will improve their adhesion to the base. It is advisable to use perforated corners for decorating corners, since in many multi-storey buildings they may be uneven. Cracks, potholes and depressions must be plastered.
The work area may involve the use various types tiles Very often here fine kitchen tiles or "hog". When carrying out renovations for a kitchen using tiles in the apron area, you must do the following:
- Achieve the perfect horizontal level walls.
- Use corner angles to straighten corners.
- Use special plastic crosses that are designed to achieve an even row of tiles.
Remember. The preparation of the kitchen walls depends on the chosen finishing material. For example, if you plan to glue wallpaper, then the putty layer should be small. If you select decorative plaster, then the work must be carried out more carefully. After applying the plaster layer, it is advisable to sand the surface.
Common mistakes when renovating a kitchen

When planning a major kitchen renovation, many people are faced with a lot of problems that arise both during the work and after its completion. The most common mistakes made when renovating a kitchen in an apartment:
- It is recommended to choose non-porous materials for covering floors and work surfaces. Otherwise, difficulties may arise during the cleaning process.
Advice! Although wooden floors are considered an acceptable option for the kitchen, they are nevertheless inferior in practicality to tiles or linoleum. Therefore, especially in the work area, it is advisable to avoid wood.
- If the stove is located far from vent, then the best option would be a circulation hood that does not require an air duct. Bulky and long air ducts take up a lot of space. If you hide them with cabinets, then quite a large usable space will be lost.
- If the kitchen has large area, then the best layout option would be U-shaped. For small kitchens it is better to provide corner layout. In both cases it is necessary to remember correct layout working triangle.

- Glossy facades have an attractive appearance, but are completely impractical. This solution will require daily cleaning.
- To avoid clutter in a small kitchen, you can use wall drawers with open fronts. They will give the kitchen an atmosphere of airiness and lightness.
- The main problem in kitchens is insufficient lighting, so it is best to choose zoned lighting. The placement of switches should also be as convenient as possible, which will eliminate the need to walk to them through a dark room.

Conclusion
At the right approach Carrying out renovations in the kitchen is not something particularly difficult, and every home craftsman can cope with such work. Above we discussed how to renovate a kitchen using modern materials.
Since kitchen renovations are not done very often, experts do not recommend saving on such work. The fact is that cheap repairs kitchen can result in a number of problems in the future, and therefore it is better to choose quality materials finishing, furniture and household appliances.
If you have free time and some money, but life has become too monotonous, you can renovate the kitchen yourself. This will not only save money, but also acquire useful skills and even improve your health, because exercise stress I haven't harmed anyone yet.
The chances of getting a result in which you are not afraid to invite people into your kitchen after doing your own renovation will increase significantly if you take the advice of a specialist.
When deciding how to renovate a kitchen, you must first consider Decoration Materials taking into account the costs of their acquisition and the possibility of self-installation.
Style selection
So that the kitchen does not stand out too much from the rest of the rooms, it is advisable to do everything in the same style
When determining where to start renovating a kitchen, the first thing to do is choose a style. There are more than a dozen of them for kitchen decoration, the most famous: classic, hi-tech, modern, minimalism, baroque - the implementation of many requires considerable funds.
The classics use expensive natural materials- wood kitchen set, parquet on the floor. High-tech and modern require the presence of expensive materials made of plastic and glass and are more suitable for modern young people, baroque with carved furniture Looks best in living rooms and bedrooms.
For established people, one of the options that is simple and affordable is to decorate the kitchen in the Provence style on your own, allowing you to create a beautiful cozy interior characterized by comfort and elegance.
Recently, Provence has been quite popular; it assumes the presence of light pastel colors in the decoration of the room and the furniture itself (finishing like natural light wood), the presence of plants and decorative elements. Provence eliminates the presence of bulky interior items ( heavy curtains, massive chandeliers), the kitchen should be light and a little romantic.

Provence will give your kitchen coziness and warmth, as it looks organic
It is not difficult to do a kitchen renovation with your own hands on a small budget in the Provence style; it does not require much construction experience or special expensive tools.
Ceiling
The most common ceilings used in the kitchen are plasterboard, suspended, painted or wallpapered. You can also use polystyrene foam or polystyrene foam ceiling trim ceiling tiles or PVC panels - it’s not difficult to do the repair yourself, although in the latter case you will need to build a wooden or metal frame to attach the PVC panels.
Coloring
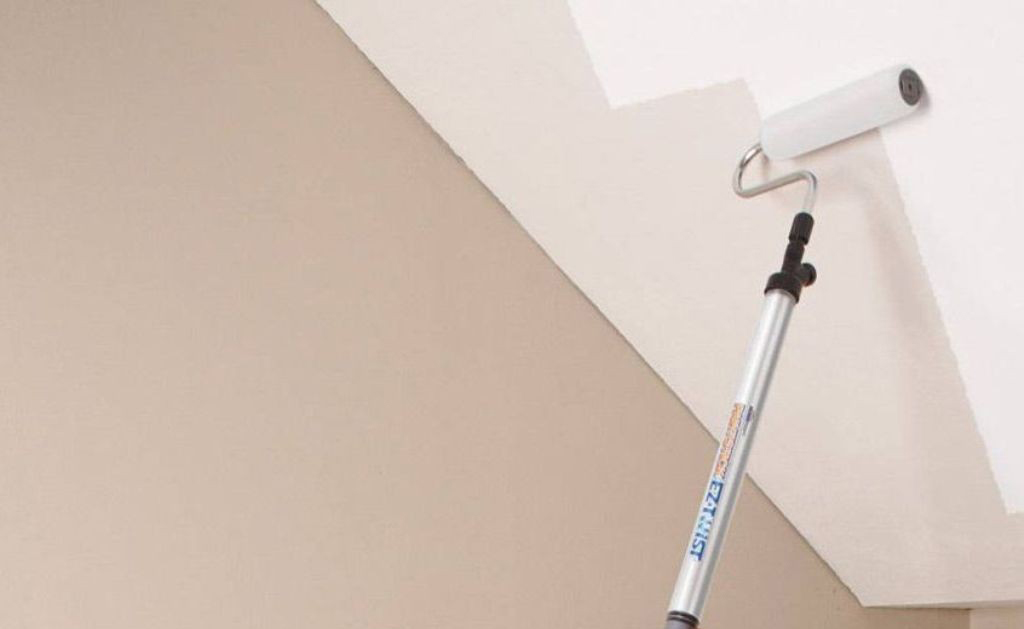
Painting the ceiling is not difficult, all you need is a roller with a long handle
Typically, kitchen ceilings are painted with waterproof paints - acrylic latex, water-based. If the ceiling is fairly smooth and has been painted with waterproof paint, repainting it with a roller will not be difficult.
This must be done at least twice, the first time painting occurs perpendicular to the direction of light from the window, the second time along.
In some cases, it may be necessary to level the ceiling - to do this, you need to rinse it very well and clean it down to the floor slab, prime it and apply putty, and after it dries, rub it with sandpaper.
Wallpaper

Wallpaper on the ceiling looks unusual, but it is advisable to buy a waterproof version
Gluing thick, waterproof types of wallpaper to the ceiling will eliminate the need to level it and give it a more interesting look. aesthetic appearance than in the case of coloring.
The choice of wallpaper for the ceiling is budget option, besides, pasting the ceiling is a fairly simple job that even housewives can handle. It is advisable to prime the ceiling before wallpapering; the stripes should be glued in the direction of the light.
Floor
Do-it-yourself Provence style decoration requires a light wooden floor. Naturally, in a kitchen with high humidity, natural wood is expensive and impractical; it can be replaced with such common finishing materials for the floor as ceramic tiles, laminate or linoleum - all of them are produced with a natural light wood finish.
Ceramic tile

Ceramic tiles are a durable material with water-resistant properties, but require care when handling heavy objects
Not the best suitable option To decorate a kitchen with your own hands, to lay tiles on the kitchen floor you will need a special tool (tile cutter, grinder) and the skills of a qualified tiler.
In almost all kitchen areas Due to the fact that the tile floor is quite cold, it is laid on an electric heating mat in the form of a wire about 5 mm thick. on the grid. This further complicates the task of laying tiles and requires connecting the heater control unit with knock-out holes in the wall and a groove for connecting the electrical wire to install it.
Considering that finishing a kitchen in the Provence style on your own will require hiring specialists to lay the tiles, and the work will be quite expensive, you can refuse this option.
Laminate

It is advisable to choose a waterproof laminate, since there is quite a lot of humidity in the kitchen, and there is a high probability of frequent water getting on the floor
Regular laminate not too much suitable material for the kitchen due to its low water resistance, therefore more expensive moisture-resistant types with special surface treatment and lock connections. Carrying out a kitchen renovation with your own hands by laying laminate flooring on a substrate is quite simple if you follow simple work technology.
Moisture-resistant types of laminate can withstand exposure to water for about 6 hours without consequences, while water-resistant types are not afraid of its impact. Waterproof laminate It is also made in the form of panels of various thicknesses or glued to the floor; its only drawback is its very high price.
Linoleum

If linoleum tears in one place, you will have to replace it in the entire room
A budget option for laying on the kitchen floor, modern views They have a wide range of colors and patterns; commercial brands are highly durable and wear-resistant.
The disadvantages of linoleum when laying in the kitchen include its small thickness, which leads to different floor levels if laminate is laid in the corridor. This is why many people prefer to lay out the kitchen floor from impractical ceramic tiles.
This problem has a simple solution - the floor in the kitchen is filled with a leveling, self-leveling mixture on required thickness(3 - 10 mm.) - this allows you not only to raise the level, but also to level the floor.
You can do the filling work yourself if you have a special toothed roller and a mixer for mixing the solution (self-levelling equipment is sold in bags in the form of a dry mixture).

Before laying linoleum, it is necessary to make a perfectly flat floor so that there are no differences in height.
A construction mixer can be replaced with a household drill by purchasing an inexpensive whisk for mixing the solution, a roller with a metal comb with teeth (using this option is very risky, the liquid self-leveler may not spread well on the floor and it will be damaged).
You can repair the floor by laying linoleum on KS or PVA construction adhesive yourself; this is not a very complicated construction job.
Walls
The walls in the kitchen should also be practical and easy to clean
Kitchen renovation in Provence style involves bright hues, for finishing walls, MDF or PVC panels, ceramic tiles, painting, wallpapering are most often used, and often the types of finishing are combined.
Ceramic tiles Nowadays, it is rare for anyone to finish the entire kitchen even to the middle of the walls; it is too expensive and has gone out of fashion; the work area is mostly tiled.
MDF, fiberboard or PVC panels come in 2 types: from a single sheet ( the average size 1.2 m by 3 m) or type-setting, which are mounted on a wooden or metal frame.
In the latter case, the use of type-setting panels is impractical, since this significantly reduces free space kitchens for the thickness of the frame and panel. In kitchens, it is better to use MDF panels covered with moisture-resistant PVC film or one of the types of fiberboard - laminated hardboard. The sheet panels are about 3 mm thick and are attached to the walls using glue.
Painting

Choose only waterproof paint that will not lose its appearance after washing
To paint walls, preparation is necessary by leveling using putty and rubbing, otherwise the light falling from the windows will highlight all the unevenness. The work is quite complicated for a non-specialist and will require additional financial expenses; also, plain painting of the walls looks rather boring and is unlikely to decorate the interior.
It is well known that they are water resistant acrylic paints It can be washed, but this statement is not entirely true. In the area of the work area, drops of food and grease often fall on the wall, which are absorbed into the porous surface of the paint and practically cannot be washed off.
Wallpaper

3D wallpaper has an unusual texture that will help hide unevenness
The most budget-friendly option is to wallpaper the walls; the most practical way to do this is with glass wallpaper for painting or vinyl. The latter, due to their thickness, will hide unevenness on the walls, and their smooth water-repellent surface perfectly removes all types of contaminants, including grease.
Inexpensive, but high-quality repairs Everyone can make a kitchen. To do this, you need to draw up a budget plan and select all the necessary finishing materials.
Any renovation, regardless of whether the property is an apartment or a private house, requires a significant investment Money. Special attention V residential buildings the kitchen deserves: it should be beautiful, clean and fresh, which is why it is so important to choose practical and high-quality materials. How to organize an inexpensive kitchen renovation without compromising the quality of the finish? In this case, it is important to be smart by choosing simplicity, cheapness, safety and functionality.
Beginning of work
Before making renovations, it is important to think about the general concept of the future room. In determining the style of the room, the personal preferences of the residents play the main role, then a list of the main materials and installation accessories is drawn up. This item allows you to significantly save your own budget. When purchasing cheap materials, it is important to be careful; it is advisable to consult with specialists who will advise on any issue.
Independent activities during repair work will allow you to minimize costs. So, every person can get rid of the old coating, bring in or remove the material. Complex types of work that require professionalism are best left to specialists. They will carry out inexpensive kitchen renovations without any difficulty.
Listing events
Designating a list of things necessary to carry out restoration work will help simplify the actions.
Key points included in the list:
- Elementary work such as cleaning the base surface, punching holes, dismantling old coatings.
- It is better to entrust the activities of leveling the surface, laying electrical wiring, and replacing pipes to experienced craftsmen.
- Surface priming and painting are carried out in-house.
- Laying tiles and linoleum is not difficult, so it can be done by anyone.
In the photo you can see the process of self-assembly.

Advice! Analysis of the list of works allows us to conclude that the bulk of the work can be done without asking for outside help.
Functionality is the main purpose of a kitchen, therefore, while caring about reducing the cost of renovation, it is important not to forget about its main purpose. It is important to remember that excessive simplicity in the future can result in sheer inconvenience and discomfort. Therefore, inexpensive, with proper planning, will add significance, convenience and originality to the room.
Competent repair planning
Before making renovations in a room, it is important to find out what type it will be: current or major. If the first option involves a superficial change in external data, then the second is associated with a complete transformation of the room. In connection with this point, planning for the future kitchen is carried out:
- Zonal division of the room into a work area and a place for eating.
- Dismantling of old coverings, sinks, windows, doors, communications.
- Designation of points for future installation of household appliances, installation of sockets.
- Determining the placement of kitchen furniture.
- Location mark on the wall kitchen apron, tiling the working area with tiles.

How to meet the minimum amount?
Organize budget renovation The kitchen will help to clearly plan expenses, purchase the essentials and ideally match the overall environment.
How to properly purchase materials for subsequent repairs?
- exercise patience and prudence, buying only necessary things;
- purchase building materials in one place for the purpose of exchanging goods if necessary;
- small parts, minor cladding elements, and accessories are purchased last.
Demonstrates certain types of materials bright photo. Attributes are selected according to color scheme premises. You can make repairs that are accessible to everyone by using simple, inexpensive materials. So, inexpensive types of linoleum are suitable for flooring. The photo clearly shows examples of such floor coverings. Upon completion of the restoration work, the kitchen is furnished with furniture and household appliances.

Inexpensive materials for decorating kitchen areas
You can update the room with cheap materials that are optimal for the installed part of the room. When finishing the ceiling, the following are allowed: plasterboard, plastic, putty. Coverings in the form of laminate, tiles, and linoleum are suitable for the floor. It is better to decorate the walls with tiles, treat the remaining surfaces with putty or paste wallpaper. The photo successfully demonstrates the finishing of the kitchen.
Cheap materials have both strong and weak sides. The careful use of plastic elements will allow you to carry out kitchen renovations inexpensively. This material is quickly installed, durable and easy to maintain. However, such coatings quickly become unusable when exposed to bulk objects and melt when high temperatures. Examples of such materials are visible in the photo.
- GKL sheets perfectly level the base, but such material is not entirely practical: the high moisture content in the kitchen will quickly warp the coating.
- Only a person who is well acquainted with all the intricacies of the process can lay tiles.
- It is much easier to make repairs using laminate and linoleum, but any types of damage during operation cannot be excluded.
- Renovating walls will make it cheaper self-application putty if the base coat is smooth and a person who knows the basic nuances of the work.
- When choosing wallpaper, you should choose vinyl sheets: they will simplify the gluing process, which is especially important for a beginner. The photo shows cladding with this type of material.

How to use your own hands and not make a mistake with the repair?
Restoration work needs to start from the ceiling. Finishing this area without the use of additional structures will make repairs cheaper. The base base is carefully leveled, cleaned, primed, and puttied. As the layers dry, the procedure is repeated, after which the ceiling is painted with light paint. As lighting fixture a chandelier is selected or Fluorescent Lamp. In the photo you can see the results of this finishing.
For cladding the kitchen walls, it is better to choose washable wallpaper in discreet shades to match the interior. The work area is finished with tiles, because they are not afraid of heat and soot, and any splashes can be easily cleaned.
First, it is important to prepare the surface: clean, level, prime, putty. Usually glue is applied to the canvas and work begins from the window.
To make floor repairs the cheapest possible, purchase discounted types or remnants of the appropriate coating. When choosing a laminate, the degree of its wear resistance and moisture resistance, which are so necessary for the kitchen, is taken into account. When laying this material, it is important to prepare a high-quality substrate.


