A toilet is the first structure that a land owner builds.
If at first you can somehow get by without a house by building a summer kitchen, then a septic tank cannot in any way be classified as a secondary structure.
For many summer residents, it is with its installation that the acquisition of construction experience begins.
How to build a country toilet? If you want to create a building with an original design, you need to determine the dimensions of the building. You can take a standard drawing and develop a project that suits you based on your individual needs. 
Approximate plan of construction and design work looks like that:
- Start with creating a frame, put the dimensions of the building on the drawing. Calculate the amount of materials required for its construction. On the plan, indicate the cross-section of the wooden beams and the dimensions of the boards.
- Be sure to show in the drawing how it will be cut facing material. The diagram must have a calculation for one side wall of the building, as well as for its front and rear walls. Don't forget to add building materials for the other side wall. Optimal toilet width 1.2 m, height - 2 m.
- If you want to expand the building, make adjustments into the drawing. The front wall, like the back wall, is made rectangular shape. The side ones are trapezoidal, this allows you to achieve the desired roof slope. It is necessary to cut a window in one of the walls of the building, through which light will penetrate into the toilet in the country house. In addition, a window is necessary for ventilation of the room.
- Floor covering made from thick boards 50 mm, then the village toilet is sheathed with OSB sheet. The boards are installed on a timber base; nails are used to connect the parts of the structure. In order to increase the strength of the building, all elements are connected into a groove. Its depth must be at least 50 mm.
- Make a door. Practice shows that the optimal sizes 1.95x70.5 cm. You can make toilets for your dacha from edged boards; construction is often carried out from OSB boards. When erecting the roof, lay the rafters, there should be a pitch of 40 cm between them. To make them, buy boards 100x50 mm. Nail them to the frame; the connection is made using nails. You can cover the toilet roof with slate or profiled sheets.
Maintain proportions. Remember that the increase standard size will entail additional costs for the purchase of building materials.
The standard drawing can be taken as the basis for a wooden toilet. If desired, country toilets can be made to individual sizes.
Drawings and design of a birdhouse type toilet

No matter which toilet you choose, it will require a stall. « Birdhouse » - one of the most popular options.
- To make the frame and floor, buy boards. It is best to choose larch lumber, then the structure will be especially durable. You can use pine boards on doors, sheathing and walls. All parts of the structure should be coated with an antiseptic.
- Make a foundation 1x1 m, place a magpie board on the floor. The front wall has a height of 2 m, and the back wall is 2.3 m. Be sure to use a level during construction.
- When the frame is ready, board the toilet. Install doors, after which you can proceed to work on the roofing installation. The process is completed by performing external work.
If you are going to make a “birdhouse”, equipping it cesspool, make the foundation. Concrete blocks can be used for this purpose. 20x20x40 cm. Cover the roof with a profile sheet, and make the ridge from a bent strip of galvanized steel.
Drawings and design of a hut-type toilet
« Hut » - another popular option.

- First assemble the front wall, and then move to the back. The easiest way to build a building is to make it from edged pine boards thick 30 mm, use self-tapping screws or nails for fastening.
- Install transverse and longitudinal beams, and then spacer. Make a crossbar for the pedestal, be sure to attach it to back wall, don't forget about the spacer beam.
- After you finish working on the frame, boards sew up the base of the floor. Make a platform, and then move on to covering the slopes. After this you can collect and hang a door for a country toilet.
Drawings and design of a “teremok” toilet
For regions where winters are snowy, construction is ideal « teremok » . This toilet is perfectly protected from the wind. The shape is unusual; such a structure can be made from scrap materials.

Pay attention to the shape of the door . Its upper end is rounded, so construction will take more time.
Construction may seem enough to novice builders challenging task. Pay attention to the geometry of the corners, then the building will be symmetrical.
Powder closet
A powder closet is another construction option. Usually, you make a country toilet with your own hands in those places where groundwater comes close to the surface. The design differs in that it does not have underground waste storage.
The powder closet is great for the garden. But a house in which year-round living is planned is best equipped with a septic tank.
- The foundation is concreted, the toilet stall can be of any shape.
- A pedestal is made inside the building with a hole into which a waste container is inserted.
Backlash closet
Backlash closets are made both inside houses and outside.
- The toilet is cleaned using cesspool machines, this is done once a season.
- The cesspool is made airtight, this required condition which should be observed when constructing a building.
The toilet cubicle can be of any shape.
Shower-toilet
A toilet-shower for a summer house is a building that combines two rooms under one roof.
- A partition is erected between the toilet and shower; each section has its own door. Height and width of the building - 2 m, length - 3 m.
- Upper and bottom trim can be made from timber 100×100 mm, and for vertical supports - timber 50×100 mm. Buy timber at sufficient quantity, should do 24 supports.
- Also, do 12 blanks 200 cm long. They will be used for roofing, use timber with a section 50x100 mm.
Let's start construction
Materials and tools
 Before starting work, buy lumber in advance.
- To build the frame, purchase timber. Pay attention to its cross-section, the best option is 100 x 100 mm, to increase the strength of the building, you can buy lumber with a section 150 x 150 mm.
- To trim the toilet you will need an edged board not less than 20 mm thick.
- Laths are required for roof sheathing 50×20 mm, and a tongue and groove board will go on the floor 40×150 mm.
You can easily replace the cladding board by purchasing OSB boards or sheets of waterproof plywood. If you have chosen OSB, then the slats can be cut from these boards.
You will need the following tools:
- hammer, screws and nails;
- shovel and bucket;
- pliers;
- hammer drill or impact drill;
- brush for applying stain and paint;
- containers for solutions and paint.
How to choose a place
Determine the location where you plan to build the toilet. Its distance from the house and other buildings depends on whether it will have a cesspool, or whether the building will be built without one.
Remember that construction should not interfere with neighbors; do not forget to make a 1 meter retreat from the fence. The door should open towards your yard. When digging a cesspool, leave access roads for the sewer truck.
Pit toilet
Most restrictions apply to the construction of cesspools. They must be properly insulated to prevent environmental pollution.

- The cesspool should be located in 25 m from water source. This could be a well, borehole or pond. The rule also applies to water sources located in neighboring areas.
- From the cesspool to the basement or cellar there should be at least 12 m, to the bathhouse or home - 8 m. To buildings where animals are kept, not less than 4 m. Pay attention not only to the location of buildings on your site, but also on your neighbor’s. This will help avoid conflict situations.
Before starting construction, you must select internal organization toilet. The building can be with or without a cesspool.
If groundwater comes close to the surface, being above 3.5 m from the surface, you can only build without a pit. Otherwise, waste products will be found in the water.
If groundwater comes close to the surface, being above 3.5 m from the surface, you can only build without a pit.
Similar restrictions are imposed on buildings built on shale rocks and in areas with natural cracks. Consider the water level in the spring when the snow melts. The lowest point of the cesspool should be 1 m above the maximum water level in spring.
If the groundwater is deep, then any type of garden toilet can be made on the site. The optimal volume of the pit is 1.5 cubic meters; it can be located under the building or to the side of it.
The cesspool can be:
- round shape;
- square shape.
In the first case, concrete rings are used to arrange it. In addition, the walls can be made of brick and rubble stone to make a toilet for a dacha. But remember that this option will require labor, time and certain financial investments.
- Please pay attention Special attention tightness of the bottom and walls. At the bottom they make a castle from a layer of clay. It is compacted, the thickness of the layer should be minimum 30 cm. If you don’t want to work with clay, the bottom can be filled with concrete.
- Be sure to do bitumen waterproofing.
- Inside the toilet it is necessary make a hatch, or leave several boards on the floor loose. You can choose a design in which the hatch is located outside the toilet.
- It is recommended to equip the toilet ventilation system. When the pit is filled to 2/3 of its volume, the contents should be pumped out.
Detailed instructions for building a tire cesspool:
Options without pit
It is much easier to build a wooden toilet for a summer house without a cesspool. Human waste will be collected in a sealed container.
There are several types of such toilets, but the differences relate only to the method of waste processing.
- In biotoilets this is done by microorganisms, in chemical installations - by special substances.
- In the powder closet, the waste is sprinkled with powder, which can be peat, sawdust or ash.
We are building a house
When the work on arranging the cesspool is completed, you can proceed to the construction of the foundation.
It must be sustainable, and its reliability matters. These are the main points to pay attention to.
If the region often experiences windy weather, it is better to use metal pipes as the base. They must be buried in the ground, and the beams must be installed inside. This way the structure will be further strengthened.
If the region often experiences windy weather, it is better to use metal pipes as the base.
The frame is made of wooden beams. For the base, buy lumber of a larger section, and for load-bearing elements You can choose thinner bars. To construct the door opening, take a 100×100 mm beam.
- Saddle the base first, connecting the beams with nails. To make it easier to work, the bars can be pre-fastened with thin strips. Reinforce the base with stiffeners. For this purpose, use lumber with a smaller cross-section. It is very good if the frame and stiffeners are one whole.
- For roofing at the top of the frame make the sheathing. The crush can be covered with slate; you will need one sheet. In order to fix it, fill the strips on the facade and back of the booth. Attach the beams to the bottom of the frame; they will become the basis for the floor. After this, you can proceed to the construction of walls. Cover them with boards, this is the best option. In addition, chipboard or plywood sheets can be used.
- Make a door. After attaching the awnings, install it in the opening.
- Cover the roof with slate or other material.
- If you want, you can paint the toilet.
How to make ventilation
 Exist the following options actions:
- Leave the building as is. In this case, the air in the cabin will move on its own.
- Forced ventilation. It is based on the installation of a fan.
You can choose any option for organizing the hood, but each of them requires the presence of ventilation holes. It's about about supply and exhaust ducts. A mandatory requirement will be the installation of a hood above the cesspool.
Forced ventilation is more efficient and quickly removes unpleasant odors from the toilet. But organizing such a system will require the owner summer cottage certain financial costs.
For organization forced ventilation you need to buy the following:
- fan;
- switches;
- the wire.
Forced ventilation quickly removes methane, but such an installation is quite difficult to assemble. If you want the air in the toilet to always be fresh, this option will be the most suitable. But without electricity, such an installation will not work.
The natural method of ventilation is good because it does not require additional equipment.
In order to do supply ventilation, install a hood in the pit. It is required to ensure that gas does not enter the cabin, but is discharged outside.
Make an exhaust pipe. To do this, buy a product whose diameter is minimum 10 cm. The length of the pipe depends on how deep the hole is made in the toilet. To work, you will need an impact drill; in some cases, you cannot do without a hammer drill. The choice of tools depends on what material the booth is made of.
When laying a pipe in the ground, do not forget about its protection; for this purpose, buy a casing. You will also need fastenings. Those designed for drainage work well. To make the system more efficient, purchase a deflector.
The ventilation installation process consists of the following steps:
- Using the tool make a hole in a cesspool.
- Install fastenings according to the height of the building. Insert the pipe and secure her.
- Install the deflector.
Make holes in the walls of the toilet, placing them on opposite sides. There should be a place for the hood closer to the ceiling, and a supply opening near the floor. Take a mesh and close the ventilation passages; this will prevent debris from entering the toilet and also protect the building from insects.
Install the fan by attaching it to the exhaust vent. For a standard toilet, the area of which does not exceed 2 m², a device whose power does not exceed 30 Watt. Supply electricity by laying a cable. Connect the fan, connect it to the mains.
Lighting
The lighting options in the toilet are as follows:
- air line;
- underground cable;
- solar-powered lanterns.
An overhead line is not the best solution if you do not want wires running over the area from the house to the toilet. Laying the cable underground is more beneficial from an aesthetic point of view, but few people would like to spend so much money and time to install lighting in the toilet.
- you can use LED lights , which are designed to illuminate the garden. There are products on sale different forms and weight. They are inexpensive and every gardener can buy them.
- Because the bright light not needed, installing one flashlight will be enough for lighting. Buy the product, separate it top part. Take a knife and cut off the fasteners, then they will not interfere with you.
- Measure the protruding part of the lantern– one that is equipped with an LED and a battery. If necessary, you can easily replace the battery.
- Make a hole in the wall of the building appropriate size. Insert the flashlight and secure it it with glue. Silicone sealant is best suited for this purpose.
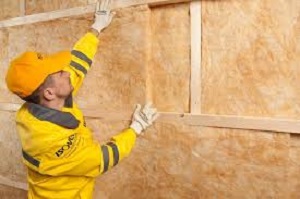
How to make insulation
 Choice suitable option insulation must be determined in advance. Much depends on whether you plan to insulate the internal or external parts of the structure.
When planning work on the interior, remember that space is limited. Choose a material that will not take up much space during installation. It is important that it reliably protects against frost, cold and wind. Another thing that speaks in favor of insulation from the inside is that this type of installation of material will require less money. However, each case is individual.
Choosing external insulation, get ready for more painstaking work. Because of limited space buy thermal insulation materials, the width of which does not exceed 75 mm. The ideal option would be to install mineral wool sheets. To attach it, buy rectangular metal slats.
Due to limited space, buy thermal insulation materials whose width does not exceed 75 mm.
- For waterproofing you will need a film, and for cladding - plasterboard. It is best to opt for moisture-resistant sheets.
- Buy screws and profiles. They will be needed in order to make a high-quality fastening.
- To putty the joints between the sheets, buy putty.
To choose required quantity material, it is necessary to take into account the dimensions of the building. Installation of insulation consists of the following stages:
- Take wooden slats. Make the sheathing by painting it on the walls in increments of 50 cm.
- Lay down insulation sheets. Secure them with self-tapping screws and attach them to the sheathing. The material should be placed on the walls, do not forget about the ceiling.
- Place film on the insulation, it is required to protect mineral wool from moisture. Secure the film with tape.
- Cover the insulation moisture-resistant plasterboard . They are attached to self-tapping screws and mounted on a metal profile.
- Sheet joints seal with putty.
If you want, you can stick wallpaper or tiles onto the drywall.
You can build a toilet by hiring a construction team, or you can buy a ready-made one.
- The cost of the “Hut” or “Birdhouse” starts from 6500 rubles.
- Utility block with toilet – from 12 to 18 thousand rubles.
- Delivery is possible, its cost depends on the destination and region.
You can build a toilet in your country house with your own hands very quickly. All parts of the structure made of wood should be treated with biocides. These drugs are effective against rot. Soak the wood twice with the water-polymer emulsion. This product is inexpensive and will reliably protect lumber from dampness for many years.
- Sheathing with tongue and groove material will show all the advantages if you start filling the board with a horizontal belt. Keep in mind that the ridges should be placed up and the grooves should be placed down. This will prevent moisture from accumulating in the tongue. But the door is always sheathed, placing the boards vertically.
- If you are going to build, and the drawing suggests the construction of curved sections, then cover them with boat boards. Marine cladding will last much longer.
- In regions where in summer and in winter period falls out a large number of precipitation, such cladding will become ideal option. But remember that in regions where strong winds, it is better to give preference to sheet piling cladding.
- if you have electric jigsaw, which has a rotating shoe, then you can make your own boat plank from ordinary edged lumber.
- All parts that face the ground or cesspool must be further processed bitumen mastic or hot bitumen.
Conclusion
Construction country toilet do it yourself - a task that even novice builders can do.
- Before starting work, determine the construction location and level groundwater, the type of construction depends on it.
- Make a drawing.
- Buy lumber in advance and prepare your tools.
You can assemble a toilet for your dacha in a few days.
This video describes in detail how to make a toilet for a summer house:
We all love comfort in Everyday life, but it’s rare that we get it just like that, without making any effort. Some people pay “specialists” to repair their home, often getting sloppily done work, while others prefer to do everything with my own hands, which without the proper approach can also lead to problems.
Moreover, any path involves significant financial costs, and therefore the initially correctly chosen approach not only saves your nerves in the future, but also saves the family budget.
And if at the moment, most apartments are already equipped with all the necessary amenities, then summer cottages things are often somewhat worse; often people arriving from the city to their dacha experience a number of inconveniences, and one of the most noticeable is the lack of a toilet.
In this article I would like to tell you how, using relatively cheap materials, you can make a toilet in your country house with your own hands. Go deeper into the subtleties this process, explain all the nuances and difficulties, because a toilet in the country with your own hands, a photo of which you will see in the article, is not a luxury at all, but a necessity.
So, how to build a toilet in your country house with your own hands?
First of all, you need to know about this process that the construction of such a structure in our time requires greater costs than before, unfortunately, it is connected not even with fashion trends, but with new sanitary requirements, which strictly indicate the need to preserve an environmentally friendly environment.
At the same time, there is an urgent issue about the disposal of accumulated waste, because the need to regularly clean a simple toilet in a country house can turn anyone’s life into a nightmare. This problem will be solved modern technologies, which have now become much cheaper and more accessible, allowing most people to use them on their plots.
Finally, here again the desire to create the maximum comfortable conditions for existence, few people are now satisfied with a small rickety booth with a hole in the floor, which is understandable, because such structures do not improve country holiday, and besides, they spoil the appearance of the site as a whole.
In this regard, it becomes clear that the ideal toilet for a summer cottage should be safe for the environment, convenient in terms of waste disposal, comfortable to use and fit beautifully into the summer cottage.

After defining the main task, it is necessary to solve a number of other important issues:
1. Based on the local conditions, determine how the wastewater will be drained, where it will be discharged, and how it will be disposed of.
2. Find a suitable place on your summer cottage to install a toilet.
3. Make your preferred choice constructive solution– this can be a booth or a cabin.
4. Find decorative design, which would be optimally matched in terms of construction complexity and appearance.
5. Determine the necessary expenses for all.
All these issues are largely interconnected, so they need to be solved in a comprehensive manner, thinking about how to make a toilet in the country with your own hands. At the same time, when building a booth, you can allow yourself more freedom, since only appearance and convenience depend on it, and the most complex and expensive element here is the base.

What to build a toilet in a country house from?
In most cases, it is best to build a wooden toilet for a summer residence; this is due to the low cost of this material; in addition, wood is very easy to process, it has good heat-resistant characteristics and, if done correctly, does not cause any harm to humans. Due to correct processing You can make it resistant to weather conditions and unsuitable for any bacteria or insects to grow on it.
Besides, light wooden the design allows you to save on the foundation, which in some cases may not be useful at all, because the size of a toilet in a country house with your own hands can be small, in which case its cabin can simply be placed on reinforced concrete monoliths or bricks.

To build a simple toilet in the country with your own hands, you need to decide on the types of materials.
For the construction of the frame, ordinary timber is often used; it is convenient to cover the floor and toilet seat with a tongue-and-groove board, for outer skin Cut or tongue-and-groove boards are suitable, and for roof sheathing, cut and uncut boards work well.
In the construction of sheathing, boards made of waterproof plywood or OSB can be effective, which can also be used to create battens for sheathing. A good material can be a tongue and groove board, which, at a slightly higher price, surpasses most other materials in its properties.
For curved sections, it is optimal to use a marine boat plank, which, in addition to everything else, will last much longer in areas where there is frequent precipitation, however, compared to a tongue-and-groove plank, it holds back gusts of wind less well.
All without exception wooden elements must be treated first against rot, then against dampness. It is this sequence that is the most correct, in which the boards will serve the longest time.
Those parts of the toilet that will face inward (towards the cesspool and the ground) must also be treated with bitumen mastic or hot bitumen.

What kind of toilet should I build in my dacha?
Even if you decide to build a simple toilet in your country house with your own hands, you must not forget about the importance of its appearance. Exists whole line types of cabins, in the form of a house, hut, hut, birdhouse. Ultimately, you can always experiment with shapes and do something completely unusual, however, in my article I will focus on the basic options, without going into the area of complex design.
So, what is the difference between the listed types of cabins:
1. When building a hut, you need to understand that it is strong, structural, has good resistance to precipitation and wind, does not require large amounts of materials, at the same time, it requires a lot of space and suffers from a number of inconveniences, primarily from cramped conditions. If you try to make it larger, the benefit from saving materials disappears. The design itself is primitive, and may not suit some summer cottages.
2. In terms of complexity of construction, a birdhouse is even simpler than a hut; it does not require large expenditures of materials and takes minimal space. However, it has a weak design, does not hold temperatures well, and is prone to drafts. Despite the shortcomings, such a design can be optimal if an outdoor toilet is intended for a summer cottage. summer period.
3. In the construction of a house, you can achieve greater heat resistance and strength than a birdhouse. It also requires a little land and materials, but it is more difficult to install a water tank on it. This design allows you to use the most different finishes and design elements.
4. The complexity of constructing a hut exceeds other types of cabins, moreover, it requires more materials. At the same time, its faceted shape allows you to create very durable structures that are well protected from adverse climatic conditions. In terms of functionality and ergonomics, this is one of the best options. And the design possibilities are almost endless.
When the type is finally chosen, it is necessary to determine the size of the toilet in the country.
For a birdhouse with a house, the ideal dimensions of the floor and toilet seat are at least 1.2 meters in width and 1.5 meters in depth. In the case of a hut and a hut, the depth can be left at 1.5 meters, and the width taken around 0.9 meters.
It is important that there is at least 40 centimeters of distance from the head of the person entering to the walls. Wherein optimal height the ceiling can be called several meters. In general, when the question arises of how to build a toilet in a country house, it is important to remember that many of its parameters will depend on your preferences. In this regard, the size of the toilet can be adjusted depending on your own height, etc.
Almost all of the types of cabins listed above suffer from a common drawback, namely exposure to gusts of wind if the toilet door is not closed. To combat this, you simply need to install the door on barn hinges. For more durable hut-type structures, you can use hidden hinges.

Where to put the toilet in the country?
You can’t think about how to make a simple toilet in the country without taking into account such important aspects as its location, especially if it involves the presence of a cesspool, the construction of which is prohibited if groundwater is located at an elevation above 2.5 meters.
The choice of location for construction should be based on a number of factors, such as the type of soil, the proposed foundation, distance from the house, etc. All these elements are closely interconnected and require a serious approach, because not only convenience, but also safety for you and the environment depends on it.
There are strict sanitary standards, which prohibit the location of structures of this kind at a distance closer than 12 meters from the nearest housing, and the distance from a water source must be at least 20 meters. In addition, it is important to remember about the neighbors, who are unlikely to approve of the construction of a toilet right under their fence.
In order to build a toilet for your dacha yourself, you should first decide how far you are willing to walk; in some cases, the distance of the toilet from the house only has a positive effect on the atmosphere of the dacha, and the proximity of the house to the cesspool can be completely unpleasant, for example, due to possible odors. At the same time, the location of the toilet should be accessible for the access of a sewage truck, because maximum length its hose is approximately 7 meters.
It’s good if it is possible to install the toilet in an inconspicuous and secluded place, for example, in the garden, where trees block it from public view. It is also important to remember that placing the toilet in a low area can lead to a faster filling of the cesspool, due to the fact that most of the precipitation will fall directly into it. And the location of such a structure at a height can make it susceptible to strong gusts of wind.
Once the location has been decided it is definitely necessary to decide what type of cesspool is suitable for it.

Types of cesspools for toilets in the country
To build a toilet in your country house step by step, it is important to choose the right type of cesspool. They differ mainly in the degree of penetration of waste into the ground, and are divided into sealed pits, as well as pits with a filter bottom.
Sealed pits require more money due to the more frequent need to clean them. Pits with a filter bottom are cheaper, but are fraught with environmental pollution, and their use is not permissible from the point of view of sanitary standards.
Exist different types walls for cesspools, they can be monolithic, brick, plastic, and also consist of concrete rings. Each option has its own advantages and disadvantages.
Brick cesspools cannot be called cheap, however, they are quite durable, they can be made quite deep, which reduces the need for frequent cleaning, and they have a fairly good seal. It is possible to create both a sealed version and a design with a filter bottom.
Plastic containers are quite inexpensive, but due to their size they will require more frequent cleaning. When creating a sealed structure, only the upper part of the container is cut off; when creating a filter, the lower part is also cut off, and the bottom is covered with a filter layer.
Structures made of concrete rings cannot be airtight because they move easily in the ground; their use is only permissible in places where groundwater is located at a considerable depth. After filling the hole with rings, its bottom is either closed concrete screed, or a filter layer.
Monolithic concrete cesspools have a good seal, but due to the nature of their construction, it can be difficult and expensive to make them too deep, which means they will have to be cleaned frequently.
Talking about cesspools, one might think that building this kind of structure is extremely difficult; below you will see how you can build a toilet in a country house, photos, instructions, description of the process.

Do-it-yourself toilet in the countryside step by step with photos
Approaching the question of how to make a toilet in a dacha yourself, let’s take a relatively simple and comfortable design, accompanying its construction with photographs, because to build a toilet in a dacha with your own hands, drawings are not necessary, it’s quite easy to do without them.
The foundation will be concrete pillars, for which we make holes of 130 millimeters by 0.8 meters. We insert pipes inside to the maximum possible depth (for example, old water pipes). After this, fill everything with solution using roofing material and sleeves.

The strapping will be a 100 by 100 beam, which we will screw to the corners.

We cover the floor and toilet seat with tongue and groove boards. The design for the toilet seat itself is standard, nothing special, you can make it removable.

We make the racks from 50/50 timber.

We make the roof from planed boards 25 by 120, add flat galvanized sheets to them, bending them along the edges at the back and front, and cover the sides of the boards with a galvanized profile.

For the walls and toilet seat we take 9 millimeters of OSB, with inside We cover them with varnish to reduce the risk of splinters, and we also cover the toilet seat with varnish.

The outer sheathing is made from a 25 by 50 block, almost any will do, and we put siding on top of it.


In the lower part along the perimeter of the structure, you can put some scraps from corrugated board, this will help create the desired visual effect.

The threshold can be finished with galvanization.

Polycarbonate can be used for the window at the entrance; small gaps may be allowed to create ventilation.

The door is made from a sheet of OSB, boards 25 by 120 are placed on the bottom and top, with outside The board is also placed, leaving space for the siding; the boards can be fastened to the OSB sheet using simple self-tapping screws. The siding is also attached to the structure with small self-tapping screws.
I hope that the description of how to make a toilet for a dacha with your own hands will step by step photo This process will inspire someone to new feats in improving life comfort, because it is on such little things that getting full pleasure from a country holiday depends.
Now you know how to make a toilet in the country, what difficulties there may be with this and what you need to take into account.
Do-it-yourself toilet in the country. Video of the construction process.
The first building to be erected on a summer cottage is a toilet. A toilet in a country house differs from a city bathroom in the absence of a sewage system. Therefore, building a toilet at the dacha is not only the construction of a cubicle, but also the organization of a waste collection and disposal site. There are several possible options for installing a toilet in a dacha, and how to build a toilet in a dacha with your own hands will be discussed in detail in this material.
Outdoor toilet for a summer residence
Most dachas are used only in the warm season, so the most popular is a summer or outdoor toilet for a dacha. This design is simple and well-tested by time. You can build a summer toilet in your dacha with your own hands from available materials, which is certainly a great advantage.

Fig.1.

Fig.2.

Fig.3.
An outdoor toilet for a summer residence consists of a toilet cubicle and a pit for collecting waste underneath. A toilet stall in a country house can be made of any materials. A pit for a toilet in a country house can be made of any size. The depth of the toilet pit depends on the number of users.

Fig.4.

Fig.5.

Fig.6.
However, a cesspool for a toilet in a country house will only work well if the groundwater level is low. If the groundwater level is high, then the cesspool will be constantly flooded, and it will always overflow. In this case, you will have to abandon this type of toilet, or you will have to use a waterproof container in place of the pit. However, then it is necessary to call the vacuum cleaner at least once a year.

Fig.7.

Fig.8.

Fig.9.
Do-it-yourself wooden toilet for a summer house
The construction of a toilet in a street-type dacha can be divided into three stages: preparing a pit for collecting waste, constructing a foundation and manufacturing a toilet cabin. During construction, it is important to remember that the toilet will last a very long time only if the installation of the toilet in the country house is done correctly.

Fig. 10.

Fig. 11.
Cesspool for a toilet in the country
A toilet pit in a country house is made with reinforced walls. If you do not strengthen the pit for the toilet in the country, then in a short period of time it will quickly collapse. To strengthen the walls of the pit, it is convenient to use a toilet tank from a two hundred liter barrel.

Fig. 12.
If there is a danger of high groundwater levels, then it is necessary to use plastic sealed tank. The barrel is dug into the ground in the place of the cesspool. It will have to be cleaned as you use the toilet. To make this easier and at the same time not to think about where to put the contents, during the operation of the toilet it is necessary to add a special composition to it. This composition can be purchased at any country store. It contains bacteria that will process all waste, after which it can be used as fertilizer.

Fig. 13.
If there is no groundwater, then it is good to use a metal barrel. Holes are made in it so that the liquid phase of the waste goes into the ground. The barrel is filled not with soil, but with gravel. This creates drainage for the liquid fraction. A cesspool for a toilet in a country house, built according to this principle, can operate for more than 10 years and does not require cleaning.

Fig. 14.

Fig. 15.

Fig. 16.
How to make a foundation for a toilet in a country house
By by and large a structure such as a wooden toilet does not require a special foundation. However, in order for the building to serve for a long time, a foundation for a toilet in the country is still needed. In addition, if the cabin is raised above the ground by at least 10 cm, then ventilation of the toilet in the country will be ensured.

Fig. 17.

Fig. 18.
The simplest option for a foundation for an outdoor toilet is to dig holes in the corners of the toilet 20 - 30 cm deep, fill them with sand, and place blocks or curb stones on the sand. It will be just as easy to install a pile foundation; for this you can purchase four screw piles 1 m long.

Fig. 19.

Fig.20.

Fig.21.
Drawings of a wooden toilet for a summer residence
A toilet cabin for a summer house may have a different appearance, but its design is always the same. It is made from wooden beams frame technology. First, a frame is assembled from bars, and then covered with clapboard or any other material.

Fig.22.

Fig.23.

Fig.24.
For the frame, timber 60x80, 80x80 or 100x100 mm is well suited. You can use timber of a smaller cross-section, but then it is necessary to install several diagonal jumpers for the stability of the structure.

Fig.25.

Fig.26.
The construction of a frame toilet for a summer house begins with the assembly of a base of 4 bars 1.5 m long. Next, vertical posts are installed. It is necessary to install door racks. The distance between the posts should be equal to the width of the door including the frame. You can use a 40x120 mm board as rafters. A 20-25mm thick board is laid on top of the rafters, and a corrugated sheet is laid on top of it.

Fig.27.

Fig.28.
How to make a hood in a toilet in a country house
For a summer toilet, it is important to provide a window above the door; this will serve as ventilation for the toilet and a source of lighting. You shouldn't glass this window, otherwise it will be hot and smelly in the toilet.

Fig.29.

Fig.30.
How to cover a toilet for a summer house outside
From the outside, to protect from rain, the frame of the toilet stall can be sheathed with any material, for example, corrugated sheets or siding. However, the most popular material is lining or block house. For the toilet roof, use any roofing material, for example, professional sheet.

Fig.31.

Fig.33.

Fig.34.
Toilet seat in the countryside
Various structures can be used as a seat, from a platform to a hole in the floor. In my opinion, it is most convenient to use a special toilet seat in the country.

Fig.35.

Fig.36.

Fig.37.
Odorless garden toilet
There are several options for organizing an odorless toilet for a summer cottage: a dry closet, a peat toilet, a cesspool and a septic tank. All these options differ in cost, complexity of maintenance and labor intensity of construction.
Chemical toilet at the dacha
A dry toilet is a type of toilet that does not require a sewage system. Waste is accumulated in a special tank.

Fig.38.
Chemical dry toilets are equipped with a tank for storing waste and flushing; water and deodorizing liquid are poured into the flush tank, and a disinfectant-cleaving liquid is added to the waste tank. The use of such a toilet is almost identical to the city one.

Fig.39.
The advantage of chemical dry toilets is their autonomy, and, therefore, they can be installed anywhere, including in the house, without having to build a special structure.

Fig.40.

Fig.41.
The disadvantage is the need to constantly drain the waste. It should be noted that not all chemical liquids allow waste to be discharged into the soil, which means you will have to have a special place for waste disposal.
Finnish toilet for a summer house
A peat toilet for a dacha differs from a chemical one in its simpler design. They do not use in their work chemicals. Structurally peat toilets They are a small tank with a liquid drainage mechanism. To break down waste after each use, you need to pour a little peat into the toilet.

Fig.42.
Fig.48. A septic tank is an autonomous sewage system for a home. Due to the complexity of installation and the need for year-round use, they are usually used in country houses. Sewage entering the septic tank undergoes decomposition. The septic tank does not require regular cleaning.
Considering the complexity of installation and the cost of equipment, septic tanks are usually used in country houses for year-round use.

Fig.49.
We've covered everything possible options toilets for the dacha. Despite the abundance of options, the most widespread are the septic tank and the traditional outdoor toilet for the dacha. A septic tank is good for its autonomy and the ability to organize a complete sewage system. Typically, a septic tank is used in country houses and summer cottages for year-round use. If the dacha is visited only in the summer, then the simplest option for organizing a toilet is rustic option. For village toilet it is necessary to install a cesspool, the role of which is usually played by a barrel, and build a cabin on top. Typically the cabin is made of wood. If you decorate the toilet house well, then in addition to fulfilling its intended purpose, it will also be a wonderful decoration for the site.
Having become accustomed to city comfort, we try to make our country life comfortable. Do you agree, what kind of convenience can we talk about if there is no restroom on site? It is necessary to take care of organizing a latrine at the initial stage of arranging your land plot.
Having step-by-step construction instructions, building a toilet in the country with your own hands is not so difficult; it is more difficult to choose a place for it and the model that suits you best. But we will help you do it.
We will introduce you to the rules of arrangement and typical types of country toilets. In the article you will find step by step instructions with drawings that will help you build a full-fledged bathroom on the site. And to help the novice master, a video is attached to the article, clearly demonstrating the process of building a closet on the site.
A toilet is not a simple utility building. When constructing it, you need to remember some rules, the observance of which will help you not to spoil relations with your neighbors in the country and will eliminate possible problems during the subsequent use of the latrine.
Guided by the rules listed below, we will choose a suitable location for the future building.
It is important that the country toilet is located as far as possible from the water intake point, and if The groundwater approach the surface of the earth closer than 2.5 meters, a latrine with a cesspool cannot be installed at all
List of requirements for the distance of the toilet from other objects located on the site:
- 12 meters– to a house, as well as a barn or garage, in which there are underground structures such as a basement or cellar;
- 25-30 meters– to the source of water intake for drinking;
- 8 meters– to a bathhouse and barn or garage without basement structures;
- 1 meter- to the fence.
Of course, all areas have individual characteristics, which also need to be taken into account. If the area has complex terrain, then for the restroom you need to choose a flat area located below the source drinking water. It is important that feces do not come into contact with groundwater.
If sewage will need to be pumped out periodically, it is necessary to provide for the possibility of access of a sewage truck to the work site. Of course, you should take into account the wind rose of your area so that piquant smells do not bother you or those around you.
All these rules are easy to remember, because they are dictated common sense. This is exactly the approach that should be followed when choosing a structure that you will build on your own site.
Types of country toilets
The main feature that is used for classification outdoor toilets, is a way to dispose of accumulated waste. All the rest, including the material used to make the structure, are secondary.
Do-it-yourself country toilets are divided into two large categories: those that have a design and those that do not.

Of course, the types of booths mentioned below are far from full list, because there is also a fantasy, the flight of which cannot be limited. For example, here is a carriage cabin in which a dry toilet and washbasin are installed
Cabins for latrines can be purchased at finished form or do it yourself.
They are divided into several types:
- house;
- hut;
- hut;
- birdhouse.
They are different from each other appearance, sizes, etc. Typically, summer residents choose a booth that best suits their aesthetic perception.
Image gallery
The construction of such a toilet, as a rule, does not cause any difficulties. In fact, the sewer complex in this case is represented by a cabin and a deep hole. It is into this that waste from the inhabitants of the dacha comes. There they accumulate, evaporating or being partially absorbed into the ground.

When it comes to a toilet with a cesspool, the imagination immediately pictures a building with a hole that you have to aim at, but everything can be conceived and made much more modern and neat
Of course, to service a cesspool, it is still better to use a sewer truck, which is used to remove waste and dispose of it. The size of the pit, the number of users and the intensity of use of the latrine are factors that influence the frequency of calls for vacuum cleaners.
Sometimes the problem is not solved the best way: they simply fill up the cesspool, digging a new one nearby. This can only be done if the pit was shallow and the groundwater is located no closer than 2.5 meters from the surface. As a rule, a fast-growing tree is planted over a filled container.
As for the part of the restroom that is located above the ground, a variety of materials can be used for its construction:
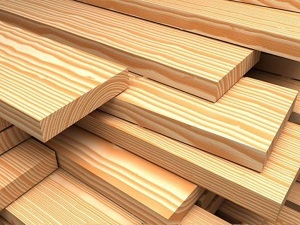
- traditional wood;
- metallic profile;
- slate;
- bricks, etc.
The durability of any of these structures depends on the strength of the frame, and ease of use depends on thermal insulation and quality of ventilation.
Option 1. Budget building made of wood
The obvious advantages of using wood to build a latrine are the relative cheapness of this material and the simplicity of the work performed. The plank frame is quite simple to build. You don't need any special skills to do this job.

A brand new wooden restroom looks very elegant, especially if it is impregnated with a special protective composition for wood and varnish
In addition, a structure made of wood is lightweight, and therefore mobile. If the need for a new cesspool arises, the above-ground structure does not have to be disassembled and reassembled in a new location. You can simply move it carefully.
There is one more thing obvious advantage wooden toilet. If you use your imagination, this structure can become a real decoration of your summer cottage. It can be styled as fairytale house or teremok.
However, along with the advantages, wood has a whole list of disadvantages:
- drying out, cracking and deformation when exposed to direct sunlight;
- fading from ultraviolet radiation;
- frame deformation, mold and fungi are the result of the influence of high humidity.
We should not forget about wear and tear - the influence of time.

If you don’t take care of this building, then in just a few years it can turn into a wretched wreck straight out of a horror movie.
Yes, the building located on outdoors, needs protection. For this purpose, the boards are treated with a primer, after which a special paint for exterior use or varnish is applied to their surface, which beautifully reveals the specifics of the wood.
Option #2. Metal profile construction
There are several options for creating simple and functional design made of metal profiles, which differ from each other in the material used to make the frame of the structure. In the first case, the frame will be wooden, and in the second, metal.
The metal frame can be welded, for example, from a corner. But, of course, to solve this problem you will need welding machine and the skills to use it.
On next stage work, the base is sheathed with a metal profile using self-tapping screws or rivets. When using self-tapping screws, protective washers should be used to prevent moisture from entering the fastening area.
The washers will protect the structure from corrosion and it will last longer. A special coating applied to metal profile sheets during its production also has protective properties.
It is better to place a structure made of metal profiles in a shaded place, because in hot weather the metal gets very hot. Reduce Negative consequences overheating internal space foam sheets, which are used for the interior lining of the restroom, will help.
Option #3.Major bathroom made of brick
A brick building is truly a permanent structure. On the one hand, this is good: she is less exposed to negative external factors and will last a long time. But a permanent structure, especially if it is one, cannot be moved from place to place.
Therefore, you should think in advance and carefully not only about the location of the toilet itself, but also about the method of cleaning the pit under it.

The brick toilet looks monumental: pay attention to it concrete base. It can’t be moved, but that doesn’t matter, because they probably thought carefully about choosing a place for it.
It is advantageous to build such a structure when the brick remains after the construction of the main cottage or garage. This, by the way, will give unity to the entire complex of buildings.
Please note that between the above-ground structure and the underground parts of the structure there should be concrete floor. The total cost of such a toilet will be decent.
Toilets without pit cesspool
If your site has rocky soils close to the surface or there is high level groundwater, then you cannot dig a hole. How to make a toilet in such a country house? The way out of this situation is to erect a structure that functions in accordance with other principles.
These restrooms include:
- bio- or chemical toilet;
- powder-closet;
- backlash-closet.
Each of these restrooms has its own design features that are worth talking about.
No. 1. Hygienic backlash closet
The German word "luft" means air. Backlash closets got their name because they have separate ventilation for the bathroom and cesspool. In this design, a pit dug in the ground is replaced by a sealed container.
Moreover, this waste storage device may be located outside the bathroom itself. As a rule, it is placed at the rear wall of the main heated structure with a toilet.

In this particular case, the connecting pipe between the toilet seat and the reservoir is installed vertically so that waste can flow into the sealed reservoir by gravity
The storage tank and the toilet are connected to each other by a pipe. If the toilet is located above the room with the tank, then the pipe is installed vertically.
An inclined pipe is intended for the tank located behind the wall. Sewage must enter the storage tank under the influence of gravity - by gravity.
To service the backlash closet, you need to contact the vacuum cleaners, who will periodically empty the storage tank. To make their work easier, the sewage tank is given an elongated shape. Of course, this toilet option is more hygienic than those discussed earlier.
Difficulties in operating the backlash closet arise in the cold season, when the storage tank has to be heated to clean it.
No. 2. Waste-free powder closet (peat toilet)
A distinctive feature of the powder closet is its small capacity, only 20 liters, which fits directly under the toilet seat.
This type of latrine is considered the most effective in cases where the groundwater level at the location of the dacha is close to the surface and because of this, excavation work is limited.
DIY country toilet
Even if there is no house or gazebo on a country site, then without a good, neat toilet, any vacation will not be a joy. And although the toilet is usually located in the farthest corner somewhere on the edge of the site, it must be made stylish and comfortable. We will tell you how to build a toilet with your own hands and present to your attention detailed drawings of the most popular designs. With their help, you can quickly install the toilet you like, avoiding mistakes in construction.
Drawings and dimensions for the construction of a wooden toilet
The most common, one might say, standard option at the dacha is toilet in the form wooden house with cesspool. Appeared in Lately biotoilets or peat toilets make it possible to do without a cesspool, but in any case you will have to build a cubicle.
If you want to create your own, original design, then to determine the required amount of material it is best to use a toilet drawing with dimensions, developed personally. Otherwise, you can use the standard project.
While developing a drawing of a country toilet, start with designing the frame. Please indicate dimensions buildings, mark, how many and what materials will be needed, indicate what is required section wooden beam and boards.
Remember that that on the drawing of a wooden toilet it is necessary to indicate the cutting diagram for the facing material. As a rule, the calculation of its quantity is done for the front, rear and one of the side walls due to the symmetry of the structure.Then add required amount building materials for the other side.
When developing a toilet drawing, do not forget that the front side should be higher than the back walls to create the required slope.
If planned wooden floor ceiling, enter the necessary calculations into your plan, and additionally indicate the dimensions of the roofing sheet. At the end of the work, make a final estimate of the materials needed.
As an example, look at finished drawing toilet and familiarize yourself with the features of its design.
- Used for frame timber 100 x 100 mm or 150 x 150 mm And edged board with a thickness of at least 20 mm.
- The height of the toilet should not be less than 2 meters, with a width of 1.2 meters. You can get acquainted with the exact dimensions by studying the drawing of the toilet for the dacha.
- Front and rear walls of the cabin - rectangular, and lateral - trapezoidal, which allows you to achieve the required roof slope.
- For penetration daylight and as exhaust ventilation There is a window cut out in one of the side walls.
- Floor covering done boards 50 mm thick and sewn up OSB sheet.
- It is installed on base made of timber with a section of 150x150 mm connected with nails. To increase the strength of the runners, their joints are made “into a groove” 50 mm deep.
- Drawings for constructing a toilet at the dacha with your own hands indicate required door dimensions 1950x705 mm. For its production, edged OSB boards and boards.
- As you can see, for roof construction , in increments of 400 mm are installed rafters made of boards 100 x 50 mm. They are connected to the frame using nails. Profile sheets or slate are used as roofing.
The ready-made drawing of a wooden toilet, which can be used for a summer residence, taken as a basis, can be modified to suit your conditions. It is important to maintain the necessary proportions. Please also note that increasing the size will entail additional costs for the purchase of material.
Drawings of country toilets of the “birdhouse” type
Regardless of whether you use a chemical, peat dry closet or a structure with a cesspool; to install it outdoors you will need cabin. We bring to your attention drawing of a wooden birdhouse type toilet .
To make the frame of the base and floor, you will need larch boards and beams, and pine lumber can be used on the walls, doors and ceilings.

You need to build a toilet with your own hands from frame assembly, the drawings of which are made on a separate sheet.
Remember that this will determine how smooth and neat the country toilet will be, so strictly observe the dimensions and study the drawings most carefully.
After making the frame start covering the structure with boards And door installation. At the final stage it is carried out roof And external works. The house itself can be painted oil paints or varnishes, and the floor and base additionally need to be treated with an antiseptic.
You can build a toilet in your dacha with your own hands; the drawings we offer have been tested on more than one site. We will only show you some of the nuances of its installation.
If you use a peat or dry toilet, the house can be installed on a bed of crushed stone. To do this, soil up to a depth of 20 cm is removed from the perimeter and filled with crushed stone or broken bricks. There is no need to attach the toilet to the base.
Drawing of a country toilet Drawings and dimensions of a country toilet Table of cutting boards of the right wall Drawing of the frame of a courtyard toilet of the left wall Drawing of the walls of the toilet
The base is a beam with a cross-section of 150×150, treated with an antiseptic Table for cutting boards for the lower floor Table (drawing) for cutting boards for the facade wall Additional rafters for insulating a toilet with foam plastic Table of materials required for building a toilet
If you install a “birdhouse” with a cesspool, you will need a foundation made of concrete blocks 200 x 200 x 400 mm or an overlap of two borders.
A sheet of metal profile is used for the roof, and a bent strip of galvanized steel is used as the ridge.
You can build a country toilet with your own hands over a weekend, since the drawings we presented contain dimensions that have been tested in practice. Moreover, the quality of such a structure will be much higher than that of a purchased product.
Drawings of country toilets of the “hut” type
It’s not at all difficult to make a “hut” type country toilet with your own hands. The drawings and assembly diagrams presented below will help you create a structure in the shortest possible time.
Work should begin with front and rear wall assemblies . For this you will need edged pine board with a thickness of at least 30 mm. The structure can be secured with both nails and self-tapping screws.
Installing cross , longitudinal and spacer beams, start assembling the toilet with your own hands (see drawings). After this, install the pedestal cross member, securing it to the back wall and spacer beam.
Having assembled the frame, cover the base of the floor and the platform with boards . It is better to use hardwood boards up to 50 mm thick for the floor. After this, proceed to covering the slopes. For them you can use edged board 20x100 mm.
Front wall of the toilet Front wall of the toilet Rear wall of the toilet Rear wall of the toilet Toilet frame without flooring
General form frame Sheathing Sheathing Toilet plan: side view Toilet plan: front view
When installing a hut-type toilet, pay attention to the drawings of the rear wall. It is there that a ventilation duct needs to be installed during sheathing.
At the last stage, the door is assembled and hung .
The “hut” toilet, the drawings of which we recommend using in your work, can be assembled by one person in one or two days. Don’t forget to protect the wood of the house with paint or varnish, and additionally treat the base of the floor with an antiseptic.
Choosing material for a country toilet
Most often on suburban areas install wooden structures toilets. This is explained by the simplicity of their construction, availability and low cost of the material. However, even wood treated with antiseptics rots and collapses over time, so such toilets are very short-lived. If the drawing of a country toilet was made by an amateur, then this process can go even faster in the event of an incorrect design of the base floor or errors in the arrangement of the roof.
Considered to be the most durable brick toilet, which is quite easy to build with your own hands; you don’t have to look for drawings. It's important to get it right mark the base, build a foundation And keep the walls vertical. This is the only way to hope for sufficient strength of the structure.
No less reliable is metal country toilet , the drawings and dimensions of which are not a problem in the age of information technology. But to build it you will need a welding machine and the ability to handle it. Despite this, such designs are very simple to manufacture, so they are successfully used in many dachas.
Requirements for placing a toilet
When installing a toilet, approach the issue of its placement in the most careful manner. Here some recommendations :
- The building should not interfere with the neighbors, so be sure to make a retreat from the fence of 1-1.5 meters and install the house with the door towards your yard.
- Consider the depth of the aquifer when arranging a cesspool.
- Be sure to provide access roads for the sewer truck.
- Do not build a toilet in low-lying areas, as it will be flooded during floods.
- Consider the prevailing wind direction in your area.
By listening to these tips and additionally studying and complying with sanitary and hygienic requirements, you will not have to move the toilet to a new location after a short time.
Designs of pits for sewage at the country toilet
All cesspools for toilets are divided into two types: pits with drainage and sealed. The first type is much simpler and cheaper, but if groundwater is located high, it can pollute it and is therefore prohibited by current regulations.
Sealed pits have no restrictions on installation.
You can build a sewage pit in one of the following ways:
- Brickwork.
- Tanks made of polymers.
- Reinforced concrete rings.
- Concrete, poured using lathing.
To build a country toilet with sealed pit from brickwork, reinforced concrete rings or with concrete walls, dig a pit with dimensions corresponding to those applied when making drawings with your own hands. After this, the bottom of the pit is compacted and covered with a layer of sand.
Next, concrete is poured, and after it hardens, depending on the type of walls, they are laid out with bricks, reinforced concrete rings are installed, or sheathing is installed and filled with concrete. Next, the walls need to be plastered and treated together with the bottom with bitumen mastic. Please note that the walls must rise above the surface of the site by at least 16 cm.
The same pit from any of the capital walls described above can be built with a filter bottom. To do this, it is not concreted, but covered with a 30 cm layer of crushed stone or broken brick. It should be noted that the walls of such a pit do not need to be plastered or treated with bitumen. This design facilitates the absorption of the liquid fraction into the soil, so such a pit will have to be cleaned much less frequently.
Installation in a pit plastic container prevents entry fecal matter into the ground, therefore it is allowed by sanitary and hygienic standards for use in any territory.
How to put a wooden toilet in place
In this chapter we will talk about how to build a toilet, the drawing of which is given below. Introducing full instructions to build it:
Assembly drawing Frame drawing Drawings of frame parts
- Set the foundation . For this purpose, it is not necessary to pour a concrete foundation; it is enough to dig concrete blocks around the perimeter of the building wall blocks or pillars.
- Make a frame from a wooden beam 50x50 mm or 80x80 mm . In the same capacity you can use profile metal pipes. The frame must have four vertical supports.
- Longitudinal elements are installed as roof lining protruding at least 30 cm beyond the perimeter of the house.
Sanding the floor Cutting and knocking down the beams Fastening the seam with a pin
Fastening the floor with a bracket. Nailing a block house. Fastening the door frame with a hairpin.
- To strap the base, fasten four strips at the level of the toilet seat . At the same time, be sure to take into account your height for the convenience of using the toilet. Typically, the height of the toilet seat is set no more than 40 cm from the finished floor.
- Next, install the jibs diagonally along the rear and side walls .
Diagonal spacers
- To install the door, add two vertical supports no more than 190 cm high, connected at the top by a jumper.
- Cover the frame with wooden boards , corrugated sheets, slate, etc.
- Make a door on the back wall for easy emptying of waste containers. You can make a cutout along the entire width of the wall to the height of the toilet seat, securing it with hinges.
- When covering the roof, seal it with roofing felt. or other moisture insulator if used wooden planks. Still, it is better to use slate or sheet metal.
Stuffing the sheathing Fixing the ondulin
- If necessary, install ventilation pipe , cutting a hole in the toilet seat and roof. Be sure to seal all cracks.
- Hang the door . Don't forget to equip it with a latch or hook. Make a window in the door for natural light.
Curtain Window Toilet ready
Handle and bolt Lavatory side view Lavatory rear view
Don't forget to paint the toilet to protect it from the elements. If you are installing a metal frame, then it is covered protective layer before sheathing.
Country powder-closet
If your site is located in an area with high groundwater levels, it will not be possible to install a cesspool - this is prohibited by sanitary standards. Drawings will help you get out of this situation, with the help of which you can build an eco-friendly country toilet with your own hands - a powder closet.
Its design provides a container for collecting sewage, which after each visit is “powdered” with a layer of peat or sawdust. After filling sewer tank its contents are dumped into compost heap and then used as fertilizer.
Despite the fact that the powder closet can be installed even in country house, the design is quite labor-intensive to maintain, so it is used only as a temporary solution to the problem.
Backlash closet for a summer residence
You can build a backlash-closet type toilet in your dacha next to the house (see drawing) or even in a specially designated room inside. However, first familiarize yourself with its main feature - since the cesspool is located outside, using the toilet becomes problematic in winter, so the cesspool is heated.
Sometimes, in order to avoid spending on heating, such a toilet is used only in the warm season, completely cleaning the pit before the onset of cold weather. In this case, in winter they resort to using a powder closet or dry closet.
So, look at the drawing of the country toilet and familiarize yourself with the features of its design:
- cesspool - only sealed type, with an electric heating circuit in the walls.
- Availability required exhaust pipe . Ventilation can be done through a stove or fireplace. Sometimes the pit is heated warm air from stove heating dachas
- Set up above the cesspool hatch or cover double design with intermediate insulation.
- A mandatory requirement is presence of slope at the bottom of the pit away from the house.
Despite the obvious ease of use of backlash closets, they are not widely used, as they require additional costs for heating the pit in winter.
Before you start building a toilet in your country house, look at the photos and drawings already existing structures. You might just want to repeat one of them, or maybe take the most original ideas in order to create a toilet cubicle according to your design.


