If the wooden floor has lost its attractive appearance or has unevenness, then you should not immediately dismantle it. It is better to use the recommendations on how to level a wooden floor and varnish it, or you can use decorative coating, for example, linoleum. The work can be carried out without tearing down the boards. Leveling a wooden floor takes place in several stages. Let's take a closer look at them.
Preparatory stage
The first step is to do a thorough inspection of the old wood floor covering. Assess the feasibility of restoration work. Using a building level, determine how large the degree of floor difference in the apartment is. Next, measure the room at the same distance from the corners, mark strokes on the walls, as well as in the center of the floor. Using a building level, distances are measured and the degree of surface difference is determined. In the absence of broken, rotten boards, the presence minor scratches, cracks, chips or damage to the paint layer, the surface can be restored by scraping.
If the floor has significant unevenness, and the difference in different parts of it is more than 5 cm, then for leveling you can make a screed or lay a layer of plywood on the joists.
Puttying the surface

If the difference between the floor level in different parts of it is no more than 3 mm, wooden boards can be treated with acrylic sealant or putty. Before filling, the surface should be primed. If the floor has a small area, then use a construction gun with acrylic sealant. For a large area of wood flooring, you will need acrylic putty, which is sold in large quantities in buckets. It is not recommended to lay a layer of putty more than 3 mm thick. To obtain a treated surface that matches the base, a colored sealant of the same shade is used.
If on aligned wooden base It is planned to lay linoleum on the floor, then the putty surface must be sanded. To eliminate defects on wooden skirting boards wood mastic is used. If you need to solve the problem of how to level a wooden floor under a laminate, then to give greater strength to the wooden base, instead of acrylic-based building materials, you can use a composition based on PVA glue. For a layer no more than 2 mm high, a finishing finish is used. gypsum putty on PVA. With a higher layer height, wooden boards are covered with starting putty or PVA-based wood sawdust.
Due to the increased stickiness of the compounds, it is quite difficult to apply them evenly to the floor, and the resulting surface will require lengthy grinding until completely leveled. However, the base will be durable and can be used under laminate or linoleum.
Processing using a scraping machine
Floor cycling is not difficult process. Even a beginner can level a wooden floor with his own hands. It is recommended to use a scraping machine for processing. Before starting work, you need to make sure that the boards are firmly nailed down and that no screws or nails are sticking out. Otherwise, the machine may break down. A layer of wooden board no more than 3 mm thick is removed mechanically. After removing the top layer of wood covering, all holes and cracks must be sealed with putty, the tone of which matches the color of the base. Mastic is used to seal cracks. IN hard to reach places surface treatment is carried out manually.
It is recommended to use the scraping method in a non-residential apartment. Since the operating process of the machine is accompanied by a lot of noise and high dust formation. To protect your hearing and breathing from dust or noise, you must use a mask, headphones and goggles. Treated boards must be cleaned of dust, wiped with a sponge soaked in solvent, and then covered with varnish or paint.
Options using screeds
There are two ways to level an old wooden floor with a screed:
- pour a regular cement screed,
- use self-leveling building mixtures.
When choosing the first option, it is necessary to take into account that the screed is made of cement mixture thicker than 5 cm, will increase the load on the foundation and floors of the building by more than 70 kg/m2. Due to this cement screed not recommended for use in a private home with wooden floors. When pouring a screed from a cement mixture, to protect the wooden floor from moisture, it must be insulated with a layer of polyethylene. When using a self-leveling mortar to level a wooden floor, an elastic and smooth base is formed, which is well suited for all types of floor coverings, including linoleum.
Work with self-leveling compounds
 This method can be used both in wooden house, and in buildings with concrete floors. On initial stage prepare the wooden surface. It is necessary to check whether the boards are securely attached to the base of the floor, and whether all screws and nails are screwed in below its level. Then sand with a vacuum cleaner wooden base, remove old layers of paint and clean the floor from dust. To seal cracks, special wood mastic is used.
To the prepared wooden surface Apply a layer of moisture-proof primer, which will ensure good adhesion of the base and the self-leveling mixture. Using a building level, mark the upper limit for pouring the mixture on the walls of the room. A reinforcing mesh is laid on the floor, connecting adjacent sheets with an overlap. Then, according to the instructions, prepare a self-leveling mixture and pour it. To distribute the mixture more evenly, you can use a rubber studded roller. After the composition has dried, a covering, for example, linoleum, is laid on the floor.
Leveling a wooden floor using a mixture is one of the simplest and quality ways obtaining a smooth coating in an apartment or private house.
When and what kind of plywood is used
Covering an old wooden base with sheets of plywood will hide even significant damage, as well as even out differences in the floor of more than one centimeter. Let's take a closer look at how to level a wooden floor with plywood.
- First of all, you need to choose the right sheet material. To slightly level the base under linoleum or carpet, you can use sheets of plywood about 1 cm thick. For the base under parquet or laminate, use sheet material at least 2 cm thick.
- The environmental characteristics of the material are also important. In an apartment or private house, plywood of the FK or FSF brands is used. FK brand material is produced without the use of phenols and is as harmless as possible to human health. However, indicators of resistance to moisture and mechanical damage are average. In the production of FSF grade material, formaldehyde resins are used. Plywood does not have high environmental properties, but is more wear-resistant and moisture-resistant.
Leveling a wooden floor with plywood is carried out using the first and second grade sheet material. Linoleum or carpet can be laid on a plywood base.
Preparing the surface and material for work
 First you need to inspect the wooden boards, secure them firmly or replace damaged ones. If communication pipes are located under a wooden base, they are inspected for damage or the need for replacement. Once the plywood covering is installed, it will be more difficult to replace.
The sheet material must be kept indoors for several days. As a result, the humidity of the material and the air in the room will be the same. This will reduce the likelihood of deformation after installation. If you plan to lay linoleum or laminate, you must provide ventilation holes.
Methods for fastening sheet material
There are several ways to secure the material to the surface of a wooden floor.
 Plywood is laid directly on the boards, no joists are used. Adjacent sheets of material are placed at a distance of 0.5 cm and a distance of at least 1.5 cm is made from the walls. Then wood mastic is used to seal the indentations. Sheets of plywood are evenly attached to the highest points of the subfloor. If several layers of material are laid, then brickwork technology is used.
Another method involves creating a base in the form of a grid of logs and boards. Logs are blocks of wood or plywood, about 4 cm wide. The logs are mounted at a distance from the walls of at least three centimeters. Sheet material is attached on top of the resulting base. Mastic is used to seal cracks.
If there are large differences in the level of the subfloor, mini-joists are installed. For getting flat surface floors as a result of work, make accurate calculations of the installation locations of mini-lags, their height and size. To increase the height of the support, the logs are placed on special point supports. The logs are secured using special glue or self-tapping screws.
The logs can be replaced with a sheathing of point supports made from pieces of timber or thick plywood, which are called slabs. The thickness of the supports is calculated based on the difference in floor height. The blocks are installed at a distance of about 40 cm from each other, forming a grid. Sheets of plywood are laid on the resulting grid of blocks and attached to them. Wood mastic is used to eliminate gaps.
To improve the thermal insulation and soundproofing properties floor, thin layer Insulating material is laid on the joists and between them. After installation plywood base It is recommended to varnish it.
For decorative finishing of the floor, linoleum or other finishing material is covered.
Currently in use various technologies for leveling wooden floors.
How can I fix the surface of a plank floor?
| Alignment method | Brief description of the technology |
|---|---|
| Used as a base for finishing floor coverings. For minor unevenness, the work can be completed within one working day. If the difference in height is significant, then the repair time increases and additional special designs for alignment. |
| It is used in cases of natural warping of boards due to violations of flooring technology. Allows you to completely restore the original appearance of the boards, does not require finishing coating. |
| It can be performed without removing the boards, making it possible to level the floor both for subsequent flooring with slabs and for grinding and restoring the surface of the boards. |
| The most complex process, used in case of significant damage to boards and joists. |


pox plate
Leveling wooden floors using slabs in the future involves the use of various finishing coatings. And this is not only additional financial costs, but also a loss of time. In addition, after leveling, instead of floors made of natural boards, the apartments have coatings made of artificial materials.
Why does the floor become uneven?
During operation, all mistakes made during floor laying appear.
- Incorrectly set logs. When laying the floor, the outermost joists are first installed, and a rope is stretched between them, along which all the others are laid. If the outermost joists do not lie in the same plane, then the floor will have a slope.
- The distance between the logs and their dimensions do not correspond to the actual loads. During operation, the most loaded areas sag, the deformation becomes irreversible, and large deflections appear on the floor plane.
- Very wet or very dry boards were used during flooring. As humidity increases, the floor swells in places; as it dries, the boards warp and large gaps appear between them.
- Insufficient efficiency of natural ventilation or improperly made waterproofing. In such conditions, lumber becomes rotten, loses its original load-bearing capacity, and the floor surface sags. The most unpleasant situation is that to eliminate the problems it is necessary to completely change the flooring.


In all the described cases, leveling the floor is necessary, but before starting work, it is imperative to determine the cause of the appearance of unevenness and their nature; this knowledge will help in choosing the right methods.
Determination of the size and nature of floor unevenness
The choice of leveling technology is greatly influenced by the actual condition of the wooden floor. We have already mentioned that rotten boards or joists must be replaced, in this case we're talking about not about leveling, but about replacing the floor. The curvature of the floors must be determined according to three parameters.
- Horizontally. To check, it is better to use a laser level; if you don’t have one, then a water level will do; in extreme cases, deviations can be checked with an ordinary bubble level. Place the laser level beam horizontally at a distance of approximately 10–15 cm from the floor level. Using an ordinary wooden ruler or tape measure, measure the distance from the floor plane to laser beam. Do this around the perimeter of the room and in several places in the center. If the slope of the floor is more than a centimeter, then it can only be leveled with the help of additional logs or special stops. It's long and difficult.
- By deflections. The long rule is to place it on the floor in several places; the deflections are revealed in the light. They can only be in a few parts of the room; below we will talk about a possible option for eliminating such problems without tearing off the boards and without using sheets.
- According to the curvature of the surfaces of the boards. If boards that were too wet were used when laying the floor, they will certainly bend after drying. Apply a rule or level to them and use the light to find out approximately the amount of deflection; the leveling method will depend on its value.


Practical advice. When choosing a technology, always choose one that will preserve natural boards. Such floors are considered to be of the highest quality, constantly fashionable and environmentally friendly. Experienced builders recommend covering a natural floor with various modern materials only when restoring the original characteristics of a wooden floor is impossible for some reason.
We will consider several options for leveling wooden floors while preserving natural boards and restoring them original form. The technology is not very difficult for experienced builders, but it requires a certain skill and a set of special tools. Options for completely dismantling the boards to level them or replace them will not be considered; this is an extreme case and must be used in exceptional situations.
Alignment of logs
The method can be used when unevenness appears due to subsidence of fragile or installed long distance lag Moreover, they are made of slats no more than 5 cm thick, laid on a durable concrete base. To work, you will need a screwdriver and drill, large self-tapping screws with a diameter of 8 mm or more, a pen for drilling holes in wood (the diameter of the drill must correspond to the size of the screw heads) and a level. Joists and boards must be in in good condition without signs of putrefactive damage.
Step 1. Find a place where the boards sag, determine the location of the lag. They are found by the heads of nails or screws.

Step 2. Using a drill with a diameter of approximately 5 mm, drill a through hole in the boards and joists until it touches the concrete base. Measure the distance from the top surface of the floorboards to the concrete base. Separately, find out the thickness of the boards and joists. This can be done after carefully inspecting the hole.
Step 3. Prepare screws of large diameter and decide on their length. The length of the screws should be 10–15 mm greater than the sum of the deflection, the thickness of the log and its distance from the concrete base. Using a grinder with an abrasive disc, cut the tip of the self-tapping screw to the required length. The flat, rather than sharp, end increases the area where the screw will rest on the concrete, which increases the stability of the floor after leveling. The fact that it has become blunt will not interfere with tightening; the hardware is installed in the prepared hole in the joists.
Step 4. Drill a hole in the floorboard with a feather. It should be located strictly in the middle of the log.


Important. While drilling, be careful to ensure that the joist remains intact. The strength of fixation of the self-tapping screw depends on this.
Step 5. Insert a large self-tapping screw into the hole and screw it until it touches the concrete base of the floor. As soon as the end rests on the concrete, unscrew the screw a little and screw it in again. After each repeated screwing in, the joists will rise slightly and the floor will be leveled.


Always monitor the position of the boards using a level. The distance between the screws on the joists, depending on the expected loads on the floor, is within 50–60 cm. After leveling, the holes are sealed and sanded. This leveling method is also suitable for preparing the base for laminate or flexible finishing floor coverings.
Leveling floors made of natural boards using sanding machines
For example, consider the most difficult option– the floor is old, the surface is painted with oil paints, the unevenness of the boards is up to 3 mm. Checking the condition of the surface is determined by the method described above; the integrity of the lumber is beyond doubt. Simultaneously with leveling, the floor is renewed and becomes suitable for use without new coatings.
Step 1. Removing old paint from the floor surface is one of the most difficult and unpleasant operations. Old paint can be removed in several ways:
- chemical There are various special implementations chemical substances. They cover old paint; to prevent too rapid evaporation, the floor should be covered plastic film. After 10–15 minutes, the paint becomes soft and can be removed with a metal spatula. Disadvantages of this method: you only need to work in personal respiratory protection equipment and non-residential premises, the paint is not all removed due to the difference in thickness. In addition, the floor must be treated in small areas, their size should be such that after one soaking you can have time to remove the soft covering. Otherwise, the paint becomes hard again, and you have to start all over again;
- thermal. A special powerful hair dryer heats the layer old paint and while it is hot, remove it with a spatula. Quite difficult, long and smoky work. The method has more disadvantages than advantages;
- mechanical. To remove paint, special metal cutters with a particularly durable, coarse abrasive coating are used. The discs are fixed on electric cylindrical grinders (grinders). To reduce the amount of dust, a cover is put on the grinder, and the device is connected to a powerful industrial vacuum cleaner. The most optimal, according to professionals, method for removing old paint.

Step 2. After removing the paint, vacuum the floor thoroughly, do not leave even the slightest residue, as it will clog the sanding wheels.

The floor is vacuumed after paint removal
Step 3. Sink the nail heads into the boards. To do this, use a metal punch and a hammer. If you don’t have a special finisher, you can make it yourself from a piece of reinforcement or wire rod. The length of the finisher is approximately 10 cm; too long is inconvenient to work with. The depth of penetration depends on the size of the floor unevenness and is determined by eye. If the nails are not pierced, their heads damage the sandpaper and the impeller of the grinding machine. As a result, the quality of surface treatment deteriorates significantly, in some cases it is necessary to change the drive shaft. Besides, a large number of metal caps causes rapid wear of the abrasive paper, requiring frequent replacement, which increases estimated cost works
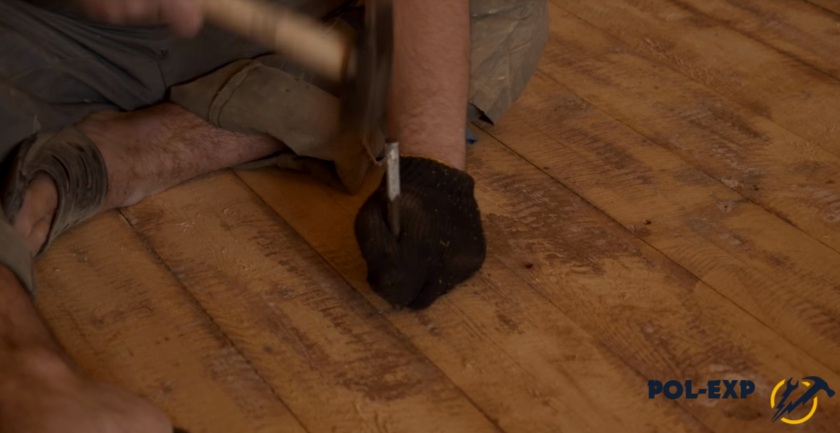
Another problem with protruding caps is that they cannot be puttied; in any case, they will have to be recessed, and after sanding, the surface of the boards can be damaged.
Step 4. Start sanding the floor. This can be done with a grinder or a grinder. In the first case, it is difficult to work, it will take a lot of time, and the premises will become dusty. In addition, the small size of the grinder disc cannot provide a flat surface. Inexperienced builders may leave marks after each pass, which will require additional time to remove. We strongly recommend using grinding machines. There is no need to buy units for one room; you can borrow or rent them.
You need to sand the floor with three types of sandpaper: coarse, medium and fine. The first is used to level the boards, the second performs final leveling and rough sanding, and the third is used for final finishing.


Step 5. Place some coarse sandpaper on your car. The floor boards need to be leveled in a diagonal direction, and the machine cannot be stopped in one place, it must constantly move.

Practical advice. Do not try to remove large uneven areas in one pass, this is very dangerous and may leave noticeable furrows. If the floor is very uneven, then you need to go over its entire surface several times until final leveling. Without diagonal sanding, waves will remain on the floor surface, remember this rule. As practice shows, leveling will require at least four passes of the machine over the entire area of the room.


Step 6. Use a powerful vacuum cleaner to remove dust from the surface. Special attention Pay attention to the corners around the perimeter of the room and the gaps between the boards. Inspect all the gaps; if you find hard dirt in them, remove it with a metal spatula or other flat object.
Step 7 Prepare putty for sealing genital cracks. You can buy it ready-made in a specialized store or make it yourself. The color of the putty can be a wood tone or contrasting. The second solution is currently considered fashionable style, this method is used to make expensive deck floors. Decide for yourself which option to choose; the leveling technology does not change.
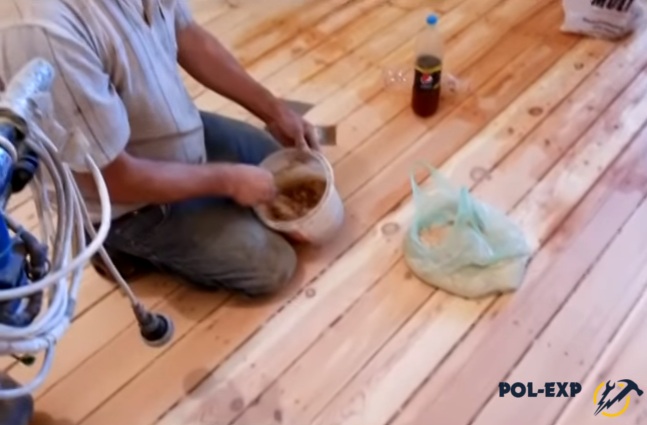
Step 8 Carefully fill all cracks in the floor. Pack the material tightly with a small flat spatula. Do not smear the putty on the surface of the boards, but rather stuff it into the cracks. Remove excess and reuse.


Practical advice. There are several types of putty available: polymer, acrylic and oil. Polymer is the most expensive and of the highest quality; acrylic is suitable in all respects, but less wear-resistant. Oil paint takes a long time to dry and gives large shrinkage. You will have to repeat the putty after the first drying.
If you don’t have factory putty, you can make it yourself. In stores there are special liquids for preparing putty mass. Add sawdust collected after leveling the floor with a machine. Never use PVA for putty. The fact is that the glue heated during sanding becomes soft and stretches, and hard-to-remove stripes appear on the floor. You can use wood varnishes; this putty can only be used to seal narrow cracks. It is not recommended to make putty based on drying oil or ordinary vegetable oil.

Step 9 After completely dry putty, start sanding the floor. The movements should be longitudinal, while alternately changing the sanding paper to a finer-grained one. Thanks to this technology, the surface will be as smooth and even as possible.

Due to the large dimensions, Grinder drum type cannot reach restricted areas, areas along walls will have to be sanded by hand. To make the work easier, you can use a small surface grinder. Make sure that the quality of floor leveling is the same over the entire surface. Use the same sanding paper numbers as for the drum type machine.
Important. Remember that without electric machines it is impossible to obtain a flat floor of the required quality. Sanding the floor with wooden block not only very tedious, but also ineffective.
Step 10 Use a vacuum cleaner to carefully remove dust. If the room is large, it is recommended to repeat the cleaning the next day. During this time, the dust will settle from the air to the floor; repeated cleaning will prevent it from getting on the paintwork materials.
Finishing
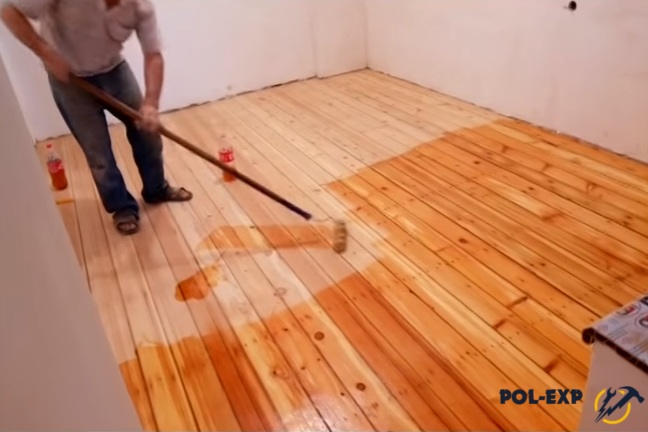
Next, you can begin finishing the smooth and sanded floor. To improve adhesion to lumber and protect it from the negative effects of moisture, it is recommended to prime the surface. For these purposes, special compositions are used; the specific name of the materials does not matter; all have normal performance characteristics.

The primer performs another very important function– lifts the smallest lint on the wood. If it is not applied, the floor surface will become rough after varnishing. The primer is applied with a roller; in hard-to-reach places, use a paint brush. After drying, you can continue working.
Step 1. Remove any raised lint from the boards. To do this, you need to use P120 sandpaper; larger grains will leave marks. It is recommended to sand the pile by hand, this will ensure the highest quality work. To control, you should periodically run your palm over the surface; the boards should be perfectly smooth. Start working from the farthest area and move towards the exit from the room.
Step 2. Remove dust with a vacuum cleaner and vacuum the room twice.
Step 3. Start covering the floor with varnish. To achieve high quality you need at least two layers of varnish. The second is applied only after the first has completely dried.

Important. While applying varnish, close doors and windows and avoid drafts. They bring dust, which can only be removed from the floor surface by sanding. This means that all work will have to be repeated, which is expensive and time-consuming.

If you do everything correctly, the old floor will not only become smooth, but will also look stylish, taking into account modern requirements for the interior of premises. We will look at how to level a wooden floor using plywood or OSB in a separate article. Let us say right away that such repairs do not ultimately allow us to have a finishing flooring made of natural boards, and this is a big drawback of the technology.
Answers on questions
How to remove rotten boards?
If there are a lot of them, then everything can be solved simply - use a crowbar and a nail puller, try not to damage only the joists. And if there are only a few such boards, then the leaky ones should be dismantled very carefully. In order not to damage nearby ones, rotten ones should be cut in several places and removed in parts. Never rest the tool on normal boards, do not leave marks on them. As a last resort, you can use wooden spacers, but they sometimes leave dents.


Is it possible to use a sanding machine to level a wooden floor?
It is possible, but not necessary for several reasons. Firstly, it removes a very large thickness of boards. Secondly, the machine leaves a wide and high untreated strip around the perimeter, which is very difficult to remove manually. Thirdly, modern grinding machines, using sandpapers with different numbers, perfectly perform two jobs at the same time. Fourthly, scraping machines are dangerous units; a flying metal knife causes complex injuries. Fifthly, knives are often damaged by metal objects.

An old floor may have nails driven in not only above the joists; it is very difficult to notice them. Damaged knives need to be sharpened or replaced with new ones. For turning you will need a special machine; such work cannot be done manually. Search grinding machine or buying new knives is a waste of time and money.

Prices for popular sanding machines
scraping machine
Video - How to sand a wooden floor yourself
Floor is a basic element in the interior of a house. Along with windows and doors, furniture and lighting, the condition of the floor plays a key role in creating a comfortable and comfortable living space. Therefore, work on this important element in a house, apartment or any other space should be done with high quality and with full responsibility. And wooden floors require a particularly careful approach.
Features: pros and cons
The most popular at all times were precisely wooden crafts. First of all, because wood is a symbol of warmth and reliability, moreover, it is incredibly pleasant to the touch and seems to be “alive.” Wood itself is a durable material, however, over time it can lose its attractiveness, deform, bend, sag, dry out and crack. But this is not at all a reason for stupor and bewilderment.


Many owners, in order to hide the flaws that have appeared over time, prefer to install any modern coatings on a wooden base. It can be laminate, tile or linoleum. To do this, of course, it is necessary to improve the characteristics of the floor as much as possible, and more specifically, to level its surface so that the new coating fits on it without any difficulties or defects.
Even with minimal technical skills, you can do the work of leveling the floor covering yourself, choosing from a variety of methods the most appropriate one.
Floor condition assessment
It is much easier and cheaper to resuscitate and restore an old wooden base than to completely replace the covering. The duration of its service depends on the curvature coefficient. Often, connection locks lose their strength over time, and cracks begin to form where dirt and moisture collect. Therefore, before leveling and laying a new coating, it is necessary to conduct a complete analysis of the sub-floor.


To determine the degree of damage, it is necessary to walk along its surface and examine in detail almost every centimeter. Perhaps remove a few boards and check the condition of the joists. It happens that upon inspection, rotten boards worn away by insects are discovered; in this case, a complete or partial replacement of the floor will most likely be required.
If after checking it turns out that the problem is only peeling paint, pits and bumps, if the boards and joists are in tolerable condition, without rotten or cracked areas, if the floor does not bend underfoot under load, then restoration work will be carried out with minimal costs energy and time.


It is very important to determine how much the floor deviates horizontally. Typically, the operation is carried out using a laser level, which is installed at the highest corner in the room and indicates the difference between the horizon line and uneven areas of the surface.
If the boards sag and wobble under your feet, it is necessary to rotate the wooden floor.
If upon inspection there are gaps between the boards wider than 8-10 mm or a degree of slope of the surface from a flat one horizontal line is very obvious, the surface of the sagging floor must be laid with sheet material, for example, chipboard.


Materials and tools
First of all, to level the floors, it is necessary that all the necessary tools are always at hand. If the work is being done in a large room, experts often recommend dividing it into several squares and leveling each of them separately. It’s good when more than one pair of hands is involved in the work. This will help save nerves and time.

Choice necessary tools depends on the type of leveling work.
The standard set, as a rule, is:
- tape measure (for taking measurements);
- levels (hydraulic and laser levels);
- steel brush (for cleaning the surface from flaking in hard-to-reach places);
- brush-brush (for cleaning debris from the base of the floor);
- spatula (a tool for leveling the solution on a plane);
- trowel (for leveling the cement-sand mass);
- hammer drill (for drilling in wood);


- electric drill (for preparing leveler);
- needle roller (for rolling out self-leveling material);
- hacksaw (for cutting wood);
- plane (removes small wood shavings, leveling uneven surfaces);
- screwdriver (for screwing in and out of screws).
Using PVA and sawdust
Leveling the surface using PVA glue and sawdust is a modern and convenient method that does not require large expenses and uses good characteristics and reviews among builders. Before starting the process itself, it is necessary to clean the floor and nail the beacons along laser level. Next, the sawdust needs to be slightly moistened and mixed with glue. The mixture should be medium thick (should resemble sour cream).


After this, the resulting mass must be poured between the beacons and leveled. If the surface is not level the first time, you may need to apply several layers of the mixture. The layer should be at least 1-2 cm. There can be any number of similar layers, the goal is to keep the height differences to a minimum. Before applying each new layer, it is important to wait until the previous layer has completely dried. As you can see, the method is simple and practical.
Putty
With the help of properly selected putty, you can hide all cracks, smooth out seams and irregularities, and also ensure long service life. wooden floor. This leveling method is used not only if you want to lay a new floor covering, but also for cosmetic repairs. Today, there is a wide selection of putty mixtures that have a color that matches the color of real wood.


Putty may vary in composition, but there are a number general requirements, which includes:
- Elasticity. This will allow the mixture to evenly fill all the cracks and holes in the surface.
- High percentage of adhesion(adhesion) of putty material to wood. This will eliminate the possibility of delamination of the coating and guarantee its long-term service.
- Uniformity. The composition must be a completely homogeneous mass, without the presence of foreign impurities.
- Fire resistance. This property of the putty mixture guarantees the safety of the wooden floor in case of fire.
- Antiseptic properties. They protect the surface from the formation of fungus and mold, which are harmful to wood and human health.


Mastic
Mastic is a material that is applied over a wooden floor. Performs both leveling and protective functions. One of the advantages of this material is its antibacterial property. The mastic is applied to the surface in several layers and gives it a glossy tint. If the owner’s task is to restore the wooden floor covering and restore, improve it appearance, then one of the best means To achieve this goal, rub the floor with mastic.

Nowadays you can see a huge variety of this product on the construction market. Mastic can be sold ready-made, or it can be in a prepared state, which must be mixed with other ingredients and, for example, with warm water. The material also comes in different colors and can be transparent. Based on their composition, they are divided into wax, water-based, turpentine and water-soluble mastics.


To apply the material to the floor surface you will need paint roller, which will help the solution to be evenly distributed over the area of the room. The composition can be applied in several layers, so it protective properties will be higher.
Of course, a product based natural composition has best qualities. It will take only 2-3 days for such mastic to dry completely, and it is much easier to update it.

Polyurethane foam
Polyurethane foam is a great way to combat the problem of creaking floors. Wood, as mentioned above, is susceptible to environment. Changes in temperature, humidity - all this, over time, contributes to the fact that wood boards begin to creak underfoot. Application polyurethane foam It will not only help get rid of the defect, but also insulate the wooden floor in the house.
To do this, after general cleaning of the surface and securing the boards to the joists, it is necessary to drill holes in those places where there is the most creaking. Next, through this hole, using polyurethane foam, the empty space above the floor is filled, which helps to securely fasten the boards from below. It is worth noting that the drilled holes should match, or better yet, be slightly wider than the diameter of the polyurethane foam nozzle.
Important point– do not overdo it with foam injection so that the surface does not rise with the so-called hump.


Expanded clay
Expanded clay is a material based on a natural composition. It is capable of not only leveling even the most hopeless uneven surfaces, but also soundproofing and insulating the floor. Expanded clay – environmentally friendly material, which has fire resistance, durability, strength, resistance to temperature changes, antibacterial properties and affordability.


For proper installation of the material, it is necessary to carry out preparatory work:
- The first is to clear the room of debris, seal gaps and strengthen the boards.
- Next, it is necessary to waterproof the base in order to prevent leaks and damage to the screed.
- Along the walls, a damper tape is attached directly to the waterproofing, which is necessary to compensate for the possible expansion of materials during operation.
- To maintain an even screed level, beacons are installed.
- Now it’s time to lay the expanded clay.


Expanded clay is laid on a base prepared in advance so that the layer does not reach the top of the lighthouse. The layer is leveled and compacted well. The evenness of the resulting layer can be checked with a level. If the result satisfies you, you can apply the solution over the insulation.
Sometimes, in order to avoid shifts and deformations, masters repair work fill the expanded clay with special cement laitance and leave it to dry for a day until it hardens, after which the expanded clay “cushion” is covered with the solution

Another way - dry leveling floor using expanded clay. This method is perhaps the simplest and does not require much time. Dry expanded clay is laid at the level of the beacons and distributed evenly. A layer of 3-4 cm is enough to create a stable coating. Sheets of the material you choose (OSB, chipboard, plywood sheets, etc.) are laid on the formed expanded clay “cushion”.

Plates
In this case, leveling the floor occurs by laying special slabs on a wooden surface.

OSB boards are sheets formed from compressed wood chips using an adhesive mixture. There are 3 types of particle boards: OSB-2, OSB-3 and OSB-4, each of which is intended for use in certain conditions and has different thicknesses and properties. It is important to determine which material is suitable in your case. It is worth noting that in comparison with chipboard, OSB boards have a high percentage of strength and are characterized by maximum thickness. The material also guarantees heat and sound insulation.


The material is secured by nailing it required length to supports located at a distance of about 30 cm from each other. OSB can be laid on the logs themselves or using point support. In the second case, the more often the supports are located, the more resistant to use the surface will be. It is mandatory to eliminate gaps at the junction of the canvases themselves and the canvases with the walls.

To obtain a durable and even surface, GVL coating is often used. GVL-coating is a technology for leveling the floor by covering plank surfaces with gypsum fiber sheets. The product contains reinforced gypsum and cellulose. This composition guarantees high density and strength finished product, the ability to withstand severe mechanical loads. The material is moisture resistant and retains heat well.


The method of laying gypsum fiber depends on the quality of the base. Most often, additional leveling material is used. The sheets are laid in 2 layers, where the first is attached to the slats, and the second is glued on top of the first.
To securely fasten the board to the base, special screws are used. Working with self-tapping screws ensures long life wooden floor.
Moreover, when purchasing such a tool you should be extremely careful. Savings in this case are a guarantee that soon there will be a need to repair the wooden floor again.
The size of the screws can vary significantly. Choosing the appropriate size depends on the thickness of the floor covering.

Self-leveling mixtures
Self-leveling mixtures are solutions that are designed to fill the floor, and are also one of the best and fastest levelers.
There are several types of leveling mixtures:
- Fast-hardening. It is used when it is necessary to quickly harden the solution. Can be applied in both thin and thick layers.
- Finishers. Used upon completion of work, immediately before finishing floor. The thickness of the applied layer should be no more than 5 mm. It is worth paying attention to the fact that the time for complete drying of the solution is much less than the drying time for the screed.
- Thick-layer. Here the name speaks for itself. If you apply a thin layer of a solution of this type, the effect of the application will be almost unnoticeable.
- Special. This solution has the greatest strength and is used in small quantities to fill cracks and crevices. The mixture contains special elements that increase the percentage of wood adhesion to the base.
A floor made of wood pleases its owners until problems arise, such as creaking, sagging, rotting, etc. In any of these cases, a full one is required. But if your problem lies in unevenness, then you will learn how to level without tearing the boards and get a great result in the end!
Why is coating leveling required?
Leveling is carried out in order to prepare the floor for the finishing coating and solve the following problems:
- Strengthen the base.
- Make the surface even and horizontal.
- Distribute the loads acting on the floor.
- Provide sound insulation, thermal insulation and waterproofing.
- Disguise communication systems.
- Create a base to secure the final coating.
Based on functional objectives, any floor leveling actions must meet certain requirements:
- Ensure maximum mechanical strength around the entire perimeter.
- Resistant to any type of use.

Selection of materials and method
How to level a wooden floor without tearing off the boards, and what is meant by unevenness?
- Height differences in different areas of the room.
- Chips of paint.
- Recesses.
- Deformation of all or some boards.
If the boards are pressed tightly together, do not creak, the joists and floorboards are dry, and have been treated with an antiseptic solution, you can begin leveling.
Don't know without tearing down old boards? Various technologies for performing work are known:
- Grinder machine.
- Putty.
- Laying sheet material.
- Screed.
It is impossible to eliminate uneven flooring using rolled (linoleum, laminate, PVC boards, carpet) or tile material.
In order to correctly determine how to level a wooden floor without tearing off the boards, it is necessary to determine the degree of unevenness. Minor flaws (up to 3 mm) can be eliminated with a grinding machine or using acrylic putty. Elastic putty is able to withstand temporary uneven loads that occur when walking. Using this method, you can prepare the floor for laying the final covering. In other cases, laying sheet covering is required.

For the base, it is best to use moisture-resistant plywood; more economical options - chipboard and OSB - are also suitable.
When choosing sheet material, you should pay great attention to its thickness; it ranges from 8 to 24 mm. The greater the thickness, the higher the rigidity and the larger the gap between the lags. Installing thick sheets is much more difficult, and the load on the base increases. The maximum thickness can only be used on substrates made of reinforced concrete slabs, in other cases, thinner sheets should be selected.
So, in the end we get:
- For flaws up to 1 mm, scraping is used.
- 2-3 mm - putty;
- The difference is up to 10 cm - laying out the sheet material on the logs.
Cycling
The scraping device can be used strictly for horizontally located boards. It is not necessary to purchase equipment; for one-time use, as a rule, it is rented.
How to level a wooden floor without tearing off the boards under linoleum? Stages of work:
- Provide personal protection(respirator, earplugs, etc.).
- Removing equipment and furniture from the premises.
- Insulation of the remaining rooms (during work, very fine dust is formed, which easily seeps into the smallest cracks).
- Removing nails. Using a hammer, it is necessary to drive in all nail heads below the field level by 2 mm.
- Working with a grinding machine. The movement begins from the distant corner of the room to the opposite one, then turns 180 degrees and moves in the opposite direction. Then continue in the same way.
- Clean the surface from any dust that has formed, and fill large cracks with putty in the color of the wood.
- After complete drying, repeat sanding.
- Cover the flat floor with varnish and lay the final covering (linoleum, laminate, etc.).

Wood floor putty
In this case it applies acrylic sealant or final If the height difference is 3 mm, it is recommended to straighten the floor with putty on PVA glue. This is done so that the composition does not crack even if the floor sag. Despite the fact that the acrylic composition has good ductility, with a layer of 3 mm it can break. Level with putty only small areas floor. After the composition has dried, the finishing coat is applied.
Important! This method leveling is suitable exclusively for linoleum and carpet. Tiles and laminate cannot be laid using this method.
Laying plywood
How to level a wooden floor without tearing off the boards under the laminate? Leveling a wooden floor with plywood sheets is the most common option. Laying is possible in different ways:
- Attaching to the base.
- Application of strip joists.
- Using logs made of timber.
The laying method is selected depending on the degree of unevenness of the flooring:
- The height difference does not exceed 6 mm per 1 sq. m - it is possible to do without lags.
- No more than 10 mm - strip joists; the plywood sheet should be divided into pieces measuring 60*60.

Leveling the floor with fastening to the base
How to level a wooden floor without tearing off the boards with plywood? If there is a small difference in height, the plywood sheets are secured to the base using self-tapping screws.
- Leveling is done at the maximum height, and in areas where the level is too low, spacers are placed under the sheets. In this case, it is better to use building material with a thickness of 8-10 mm; if necessary, laying in two layers is possible.
- Laying is done in rows, and each next row shifts in relation to the previous one by no less than ¼ of the width of the plywood sheet.
- The initial row should be located at a distance of 8 mm from the wall (for this, a strip of suitable width is strengthened).
- There should be a gap of 3 mm between the sheets.
- The screw heads must be “recessed” into the plywood.
To eliminate the possibility of a defect building material, holes should be drilled at the screw attachment points.
Fastening on strip logs. How to level a wood floor without tearing the boards down in an old house
For moderate defects, the plywood material is reinforced with strip joists. Logs are strips made of plywood, the width of the part is 22-30 cm, thickness is 9-11 mm. They are fixed to the base, at a distance of 60 cm between centers. Laying occurs in parallel. Alignment of lags is carried out according to the level, with a backing made of film heat insulator required thickness. Plywood sheets are laid according to the same pattern as in the first case.

Fastening to timber logs
If there is a large difference in height around the perimeter of the floor, plywood sheets are laid on logs made of bars measuring 50*50. The leveling process takes place by screwing screws into the base to the required depth:
- The screw beacons are arranged in the form of quadrangles with sides of approximately 30 cm.
- The wooden beam is fixed to the base with self-tapping screws parallel to each other at a distance of 55 cm.
- The screw caps are leveled horizontally using a level.
- The logs are aligned with the heads of the self-tapping beacons.
- Plywood quadrangles are fixed approximately in the middle of the beam.
Important! Before laying the plywood, it is filled with mineral wool/foam or other material that retains heat.
Application of concrete screed
Leveling a wooden floor with concrete mortar is complicated by the impressive weight of the structure. The thickness of the concrete screed is from 9 to 11 cm.
Execution steps:
- Filling is carried out according to beacons installed at a distance of 55-60 cm.
- The wooden floor is covered with polyethylene film so that its ends extend onto the wall higher than the height of the screed.
- The borders of the film are glued with tape, and it is applied with an overlap.
- The screed is carried out with reinforcement with a masonry network laid 4-5 cm above the base.
- The floor is poured in two layers, the composition is carefully compacted and leveled.

When looking for an answer to the question of how to level a wooden floor without tearing off the boards, pay attention to such points as:
- Technical capabilities.
- Necessity.
- The ratio of quality and cost.
- Labor costs.
By answering these questions, you can easily understand how to level a wooden floor without tearing off the boards in a private house or apartment, and which technology is right for you.
Despite the abundance of floor coverings, wooden floors are not uncommon these days - you can find them, for example, in private households. The owners of such houses know firsthand that over time, wooden floors become less attractive and periodically require repairs. There are many ways to level an old wooden floor in a private house, and since this issue is still relevant, let’s look at the advantages and disadvantages of each method.
What is the purpose of leveling wooden floors?
First of all, the need for leveling floors arises when preparing them for the final coating. Alignment solves several problems at once:
Evenly distributes the loads acting on the floor
Gives the floor perfect horizontal evenness
Strengthens the foundation
Facilitates the installation of external floor coverings
Promotes moisture insulation
Keeps the house warm
Masks communication systems
Isolates living space from extraneous noise
The curvature of the floors leads to the fact that pieces of furniture are installed askew, and baseboards move away from the walls - which is why it is the evenness of the floor that largely determines the quality of the repair as a whole.
It is quite possible to do the work yourself, without the involvement of expensive specialists. And in order to subsequently evaluate how successfully the leveling of the floor in a wooden house has been completed, check its compliance with the following requirements:
Strength and resistance to mechanical stress and deformation
Complete stability, eliminating squeaks and vibrations
Smooth and monolithic surface over the entire floor area
Heat loss resistance
Resistance to high humidity
For a high-quality result in your work, you will need a professional tool. As a rule, the list of everything necessary for leveling floors includes a plane, level gauge, metal rulers, hacksaws, electric jigsaw and much more. We will tell you more about this in the section where alignment methods will be described - for each of them there will be a full list the required tool.
Regardless of the chosen method of floor repair, you need to start by preparing the base or ceiling. Remove all previously installed coverings and assess the wear and tear of the entire structure: how damaged and aging the sheathing, joists and other floor elements are. If necessary, replace them with new ones.
If there is contamination on the wooden base of the floor, it is cleaned, after which the wood is processed special drugs against rotting, as well as antiseptic substances. Using a prepared level gauge, determine how level the base is in the horizontal plane. The tool will also allow you to identify areas of the floor with the minimum and highest levels.
Ways to level a wooden floor
Before deciding how to put wood floors in order, evaluate its condition and how durable the floors are - depending on these factors, the repair method is chosen. It is also worth considering your financial opportunities and the type of finish you plan to apply to your wood floor.
If the floor is well preserved and in good condition, then you will only need to sand the surface. Sanding a wooden floor is suitable for this purpose. Here is a list of tools that should be prepared in advance:
building level
scraping and grinding machines
sanding paper
paint brush
screwdriver
screwdriver
During the preparation stage, carefully look for and remove any protruding metal obstructions, for example, drive protruding nail heads completely into the floor with a hammer. After this, the floor will be ready for processing with a scraping machine. Let's talk in more detail about the stages of scraping.
First of all, all unevenness and gross flaws are eliminated - run the machine from the far corners over the entire surface. When the entire area is cleared of the top layer, prepare a special putty for wood - it is better to choose a shade that matches the color of the wood. You can make your own putty by mixing PVA glue and sawdust– The consistency of the mass should resemble thick sour cream. It is most convenient to use a construction mixer for mixing.
Separately, it is worth mentioning the features of using putty. Immediately before applying the mass, it is necessary to remove grease and dirt from the floor, after which wooden beacon strips are installed on the surface. The installation step is 60 cm, the height of the strip should be equal to the thickness of the layer of the future screed.
Next, all visible dents, cracks, and recesses in the floor are sealed with a putty mixture. As soon as the applied putty has dried sufficiently, sanding is carried out again - this is necessary in order to completely smooth out all areas sealed with the mixture.
The described method is suitable, for example, for leveling the floor before further installation of laminate or more affordable linoleum. If you plan to install laminate flooring, then rough surface should be perfectly flat.
To level the floor using putty you will need:
-
construction mixer
-
Grinder
screwdriver
Putty made from carefully mixed glue and sawdust is applied with a spatula to the floor in layers no more than a centimeter high. Each new layer is applied only after the previous one has dried. When finished layer When the putty is completely dry, it is leveled to the height of the previously installed beacon strips.
Method of leveling a floor using a self-leveling mixture

A more modern and technically easier way to level wooden floors is to pour a leveling mixture. Attention: when purchasing building materials, choose mixtures for leveling wooden floors - they can be found in specialized stores of goods for construction and repair. It makes sense to use a leveling mixture, for example, if your floor has very strong unevenness. Applying the mixture up to two centimeters thick will not leave a single hint of curvature.
To apply the self-leveling mixture, prepare the following tool:
-
Building level
construction mixer
Grinder
paint brush
rubber roller
Before pouring, you need to carry out preparatory measures, namely, using a grinding machine, completely remove traces of old paint on the floor surface. Next, use the same leveling mixture, but in a thicker consistency, to seal all the cracks and cracks, after which the floor is primed with a waterproofing compound. At the end of the preparation, seal the lower part of the wall with tape or tape - to a height equal to the thickness of the future screed.
Immediately before pouring the self-leveling layer, install a reinforcing mesh on the primed floor - it will subsequently lie on it mortar. Secure the mesh frame using a construction stapler. The dry mixture must be prepared exactly according to the instructions on the package. Simultaneously with the pouring process, the finished mixture is smoothed with a roller with a smooth rubber surface. Drying of the leveled surface is carried out according to the instructions for the construction mixture.
Leveling the floor with plywood sheets

The most affordable and widespread is leveling a wooden floor with plywood. Plywood for this method is approximately 8-10 mm thick; if necessary, it can be laid in a double layer. Before installation, the plywood sheet is cut into even squares with a side of 60 cm.
To work you will need the following tools:
-
Grinder
file
jigsaw
screwdriver
-
screwdriver
grinder saw
-
electric drill
metal ruler
building level
To level a floor with plywood, three different methods are used: installing plywood on a base, attaching it to strip joists, installing sheet plywood on timber joists
The choice of method is made based on how curved the floor is. For example, if after measuring the level difference it does not exceed six millimeters, then the installation of auxiliary logs is not necessary. If there are irregularities up to 10 millimeters, strip joists are used.
Installation of plywood without the use of joists
If the floor is fairly level, the plywood is attached directly to the wood using screws. Leveling is done at the highest point of the floor, and in those places where the floor level becomes lower, pads are placed under the plywood. Plywood squares are laid in rows, the row closest to the wall should move slightly away from the wall, no more than 8 mm; it is easier to control the distance if a special strip of the required width is attached to the wall.
It is recommended to leave a gap between the rows of plywood squares, but it should not exceed three millimeters. In addition, each next row is installed with an offset relative to the previous one - at least 15 centimeters. The fastening screws must be completely recessed with their heads into the floor. To avoid damage to the plywood when attaching it to the floor, make markings - drill small holes in the plywood in the places where the screws are installed.
Installing plywood on strip joists

If there are mid-level unevenness on the floor, it is necessary to install strip joists before installing plywood sheets. Required design made from strips of plywood - the thickness should be from 8 to 10 mm, the width of the logs is cut 20-25 mm. The finished strips are installed on a wooden base parallel to each other, while the distance between the centers of two adjacent logs should not exceed 60 cm. To align them at the highest point of the floor, pads are installed in the required places under the logs.
Fill the space between the lags with film heat-insulating material; in particular, polyethylene foam or polystyrene foam is perfect for this. These materials will not only retain heat, but also serve as a seal. To fasten the actual plywood squares, screws are used; they must be installed in the center of the joists. As in the previous case, the rows of squares are installed offset relative to each other and with a small gap between the rows.
Installation of plywood on timber logs
Wooden floor with big difference heights can be leveled with plywood only on timber logs. For the manufacture of logs, bars up to 50x50 mm in size are allowed. To align the logs when installing them on a wooden floor, you can use “beacons”, for example, from screws - they are screwed into the wooden base of the floor to the required depth. To align the heads of the beacon screws on a horizontal plane, use building level one to two meters long.
Wooden beams are attached to the wooden floor with screws, and the beams are installed parallel to each other at a distance of 60 cm from the adjacent one. The log beams are aligned with the heads of the beacon screws. Before installing sheet plywood, fill the space between the joists with mineral wool insulation, polystyrene foam or other material with high heat-insulating properties. The plywood sheets are fastened to the joists using screws: screw them in the center of the beams.
Leveling wooden floors using chipboard
If you have chipboard sheets available, you can use them to properly level a wooden floor. In general, to level the floor you can use the widest list sheet materials, from modern ones, for example, oriented strands are suitable OSB boards. But practice shows: most often when repairing a floor it is used chipboard sheet. To carry out the work, select a material of the required thickness, namely at least 18-20 mm.
The leveling technology is the same as in the case of using plywood. If you prefer modern oriented strand boards, then from their large selection it is recommended to purchase OSB-3 boards - with a relatively small thickness of 10 mm, they have excellent water resistance, which is extremely important when leveling a wooden floor. The method of attaching them is the same as when working with plywood or chipboard.
Is concrete screed allowed for leveling floors?

In the case of concrete, it is worth noting: a structure made of a cement-sand mixture will be very heavy, which means that after complete drying it will begin to exert constant excessive loads on the wooden base of the floor. Experienced craftsmen advise to replace concrete screed more practical - with a base made of expanded clay. It will make the weight load more acceptable for the wood.
Immediately before pouring, prepare the floor: spread a film of dense polyethylene on it, and the ends of the film should bend onto the walls to a height slightly higher than the level of the future screed. Place the film so that adjacent strips overlap each other with edges and carefully tape the joints with tape.
The next step will be the installation of reinforcing mesh: reinforcement will make the floor especially strong, and even in the case of high loads will prevent gradual cracking of the concrete mixture. When choosing between plastic and metal mesh, it is worth considering: plastic is not subject to corrosive effects, and is significantly lighter, which means that installation of a polymer product will be easier than a metal one. The mesh must be installed at a level of 3-4 cm from the wooden base of the floor; for this, special supports of the appropriate height are installed on the subfloor, and the mesh is installed on them. Note that it is recommended to lay the reinforcing material in two layers.
To prepare a solution for the screed, you will need M400 Portland cement, sand and expanded clay in proportions of 1:3:8. The mixture is mixed evenly and thoroughly, after which it is poured. Optimal thickness The screed layer is 8-10 cm, and for a more even filling, you can install screws on the wooden base of the floor that will perform the function of beacons: distribute the beacons over the entire area at a distance of 50-60 cm between adjacent rows. A high-quality poured floor with your own hands is used to level the mixture and compact it. The solution itself is poured in two layers.
So, if the condition of your wooden floors is far from ideal, then you can level them yourself, and there are many suitable ways for this. Minor flaws can be easily eliminated by scraping or puttying. More serious destruction will require a different technique: for high-quality leveling, use any of the sheet materials, for example, chipboard, plywood, oriented strand boards OSB. Which screed technology to choose will become known only after a thorough study of the condition of the wooden floors.


