Covering “wet” areas with ceramic tiles is the most correct and therefore very popular way of finishing a bathroom. There is a huge range of tiled cladding on the market, thanks to which the apartment owner can create a unique, original interior, completely consistent with it individual requirements and opportunities. But in order to carry out repairs correctly, you should prepare the walls of the room in advance for final finishing, which will be discussed below.
Requirements for walls for tiled finishing
Considering the benefits tiles, professionals are sure to note minimum requirements to the condition of the surface being coated. Leveling the walls in the bathroom for tiles may be required only in two cases: if the surfaces are very uneven and have many defects, and also in cases of use mosaic tiles for decorating a room that places high demands on the evenness of the surfaces being coated.
To make sure that it is necessary to level the partitions under the tiles before repairs, you must first check the verticality of the walls. Ceramic tiles are installed only perfectly vertical surfaces. When attempting to install on a surface with significant unevenness and other imperfections, it may be necessary to pre-cut the cladding, which will negatively affect the attractiveness of the interior.
To check the wall for verticality, use a standard plumb line. To do this, a nail is fixed at the top of the wall, after which the position of the thread next to the floor is checked. If the distance from the thread to the wall at floor level is exactly the same as next to the fixed nail, the wall is considered level and vertical. Leveling the walls for tiles is required if the vertical slope is more than 1 cm.
After checking the verticality, you need to make sure that there are no irregularities in the wall. This can be done with a long rod or a rule: you need to apply the tool to the surface and evaluate the presence of depressions and significant protrusions on it. The check must be carried out multiple times, different areas walls, the more surface is checked, the more accurately its condition can be determined. A large number of defects leads to the need to level the surface using plasterboard sheets. The type of gypsum board fastening is selected taking into account the size of the protrusions on the wall. If they are more than 2 cm, then the sheets should be attached to the sheathing; to eliminate minor defects, you can level the surface with plasterboard, securing the sheets with self-tapping screws or glue directly to the wall.
If there are significant depressions and potholes on the wall, they will first have to be filled. Each individual case requires an individual set preparatory work, before final finishing using tiles. To find out how to level the walls in the bathroom, you need to take into account all the identified surface defects. Only large peaks and valleys and vertical deviations require alignment. In the presence of minor defects and cracks, the wall can be faced without preliminary preparation.
Leveling walls in “wet” areas with cement mortar
Surface leveling method cement mortar suitable for eliminating almost any shortcomings. Before starting repairs, you should purchase required amount cement and sand. There is no need to be afraid to buy a little more mixture than required, good cement It will definitely come in handy on the farm more than once, especially since it can retain its technical characteristics for a long time.
For repairs you will also need plaster, rope, tape measure, plumb line, level and slats for beacons. Having everything necessary tools, you can deal with the most significant defects of the walls, which are vertical deviations. If the wall is not only tilted, but also has significant potholes and depressions, the repair procedure will be even more difficult.
So, in order to level the walls in the bathroom, you need to first evaluate the surface for the presence of crumbling areas. If they are found, they are carefully removed with a construction hammer. Now you need to prepare some cement mortar according to the manufacturer’s instructions and install beacons along the wall. The first beacon is mounted at a distance of up to 300 mm from the corner; the distance between several beacons should be less than the total length of the rule used.
To install a beacon, you need to sketch vertical stripe cement mortar to the entire height of the wall. The lighthouse batten is sunk into this solution and its verticality is checked with a level. If the rail is not initially vertical, it is adjusted by pressing in the right places. The second beacon is installed in exactly the same way at a distance from the first slightly less than the length of the existing rule. When the beacons are installed, you need to give them a little time for the solution to completely harden, usually no more than 3-4 hours.
You can level the walls in the bathroom under the tiles using cement mortar only by throwing the mortar onto the wall. If the mixture is simply spread on the surface, its adhesion will be unsatisfactory, which is very important, considering big whole ceramic tiles.
You can use a trowel or ladle to apply the mortar. It is very important to throw the cement mixture in such a way that it lies in even rows on the surface to be treated without gaps. In the process of filling the distance between the beacons with solution, you will definitely learn how to do this simple work which only seems complicated.

The mass is thrown onto the surface from bottom to top, trying to maintain a layer thickness of no more than 1-2 centimeters of the thickness of the slats used for beacons. Every 50-60 centimeters of the wall covered with mortar, excess cement must be removed as a rule, leaning it against the beacons and moving it from the bottom up. The excess remaining on the rule can simply be dumped back into the bucket with the solution.
When one section of the wall is sealed with mortar, you can move on to the next section. You should not be afraid of throwing on too much concrete, even if it cracks a little after drying, this will not have any effect negative influence on the quality of adhesion of the final layer of cladding to the surface being treated.
Leveling the wall in the bathroom with plasterboard - features and difficulties
The second method of preparing a tiled surface for repair involves installing moisture-resistant plasterboard sheets over the entire wall area. This method allows you to effectively level the wall, even if it has very serious defects and protrusions. First you need to mark the wall for installing horizontal metal profiles. They should be spaced 60cm apart when using standard size plasterboard sheets. Professionals also recommend installing vertical profiles. It is not necessary to attach drywall to them; the main thing is that they will not allow the sheets being mounted to sag towards the wall. To prepare metal profiles suitable for the length and height of the room, they are first cut with metal scissors.

The guide profile is fixed on the floor with dowels, and on the wall - suspensions at a distance of up to 60 cm from each other. It is very important that all installed hangers are located on the same vertical line. Now the outer profiles are installed, the evenness of which must be controlled with a level. After setting the profiles, they are secured with self-tapping screws, and the long perforated tapes bent so that they do not interfere with the installation of hyposarton.
Ropes are pulled between the outer profiles to install vertical profiles. When installing gypsum boards of a standard size of 1.2 m, the axis line of the vertical profiles should be located on the edge of the sheet. The distance between individual profiles in the middle of the gypsum board may vary depending on the configuration of the wall and the thickness of the material used.
When all the preliminary work is completed, all that remains is to secure the plasterboard to the profiles with self-tapping screws. Screw in the screws slowly and carefully. Drywall is a fragile material, and with a high torque, the head of the screw can push through the slab. The joints of all slabs should be located along the axes of the profiles, while there should be enough space on the profiles for installing the second, third and all other purchased plasterboard slabs on the wall.
When deciding how to line the walls in the bathroom with tiles, you should not even consider the option pre-finishing surfaces with plaster. This material is not durable and may simply not withstand the weight of the tiles installed on top of it. If installing gypsum boards on the sheathing seems too complicated, and the wall does not have protrusions larger than 2 cm, drywall can be installed directly on the wall, securing the sheets with self-tapping screws or special glue.
There are no walls that are smooth enough for laying tiles. The surface should always be leveled, since even a few millimeters of unevenness will spoil appearance canvases. 
The important alignment process is straightforward and can be done by anyone, but it does require time, attention to detail, and effort.
The problem of wall curvature is especially acute in old houses. As a result of repeated repair and finishing work, each layer forms unevenness.
At major renovation To prepare for laying tiles, before starting preparatory work, it is recommended to remove the old finishing layers completely, stripping the walls to the base.
In some cases, local roughness problems can be solved with putty, while in others drastic measures are necessary.
The need for major preparation with stripping of the coating for cladding to the base is determined based on:
- angle accuracy;
- the presence of protrusions and depressions;
- line changes.
You can check the evenness of the walls using plumb lines, slats, a thin cord and a measuring tape. Alignment of the walls is necessary if the deviation on any plane is more than 3 mm.
There are 2 ways to solve the problem: plastering to eliminate local and minor defects, or covering with sheet materials.

The first method is comparatively more labor-intensive, and at the same time solves the problem better. Sheathing with plastic or plasterboard allows you to compensate for the significant curvature of the bathroom walls.
Important! The procedure for leveling walls for laying ceramic tiles is of key importance for the appearance of the coating and its durability. The work should be carried out carefully, choosing high-quality materials without excessive savings.
Ceramic tiles are rightfully considered the best finishing material. It has a number of advantages, which include durability, hygiene, strength and aesthetic appearance. However, due to the high cost of the material, it makes sense to take care of leveling the base so that the tile looks decent. Leveling is important when laying any type of tile, and for ceramic tiles it is necessary.
Important! Tile laid on a base with defects has a significantly reduced durability due to voids in areas of unevenness. Before you start working with tiles, you should carefully level the walls.
Materials
The choice of material for leveling walls before cladding depends on the condition of the coating and the degree of its curvature. You can use plaster or drywall. In both cases preference should be given quality materials, because the
Important! Saving on the basis always turns out to be unprofitable, especially when we're talking about about expensive ceramic tiles.
Drywall

When walls intended for laying tiles have significant curvature, it is more cost-effective to use sheet material. Drywall is used in cases where too large a layer of plaster is required to eliminate defects.
There are 2 types of fixation sheet material: construction of a frame from steel profile and planting with special glue. In the case of gluing material to the wall, usually the sequence of work is as follows:
- Cleaning the wall from dirt and treating it with a primer deep penetration, to prevent the development of microflora under the tiles.
- Sheet cutting the right size drywall with a jigsaw.
- Gluing fragments. In this case, the glue is applied pointwise, the elements are mounted from bottom to top and their evenness is controlled by a level, with correction rubber mallet as needed.
- Final sealing. After the glue has dried, the joints are sealed silicone sealant, and the sheets are covered with finely dispersed moisture-resistant putty.
Note! When installing a metal wall frame, it is enough to assemble and cut the structure, and then secure it using a level.
Plaster: which is better?

The most common leveling method is to apply cement mortar to the wall. Also economical material there is a cement-sand-lime mixture known as prancing. When applying a thick layer (more than 5 mm), the plaster is applied using steel reinforcing mesh.
The disadvantages of traditional materials include the duration of complete hardening of up to a month and the high risk of unsatisfactory quality if the ratio of sand, water and cement in the solution is incorrect.
More modern and reliable option– ready-made waterproof putty for the bathroom, produced industrially.
After choosing a leveling method based on the dimensions of the room and the degree of unevenness of the walls, you should begin processing base surface. The sequence of work depends on what kind of coating was previously on the wall. Removal technology old tiles, paints and plasters should be considered separately.
If there are old tiles, they are removed using a chisel with a hammer and a hammer drill. A hammer drill significantly speeds up the work process, and you can pry loose tiles with a chisel. Unlike other work with tiles, it is more convenient to remove from top to bottom.
Important! This will avoid the risk of injury if the layer collapses.

The paint layer can be easily removed from the wall using a hair dryer and a spatula. To simplify the work, you can use special paint removal solutions, taking precautions.
After removal upper layers, the base is visually inspected for defects. Old layers of plaster are removed.
Obvious depressions are sealed with cement-sand mortar first.
If there are cracks in the wall, they should be slightly widened and then carefully repaired. In these places it is recommended to make small notches for better adhesion of the layers. It is advisable to make notches along the entire wall to improve the adhesion of the applied solution.
This method is most effective on reinforced concrete smooth walls Oh.
It wouldn’t hurt to treat the base with a primer. It makes sense to perform all of the above actions after removing all the old layers accumulated from previous repairs.
Attention! The listed measures are necessary when using the plastering method, and unevenness of the base within 6 mm. In other cases it is mounted moisture resistant drywall on any surface.
Brick
The most problematic walls are in brick buildings, especially when their service life is more than 10 years. Leveling can be done by plastering, but in most cases sheet material is a more acceptable option. Curvature of wall surfaces in brick houses can reach 5 cm.
Important! It is not advisable to use plaster.
Tree

The main problem with wooden walls is the high difficulty of removing the old coating from them. Removing layers old plaster With wooden wall often more difficult than erecting an additional partition.
Concrete
IN panel houses Difficulties with uneven apartment walls rarely arise. If wall block has no design defects, the best option is to remove the finish to the base and apply an even layer of plaster. IN concrete buildings Sheet covering is used in rare cases, when working on a large area or when there are base defects.
Monolith
In monolithic buildings bearing wall made of concrete, and the rest of foam concrete or gypsum. In apartments of monolithic buildings, significant curvature of the bases does not occur, so the plastering method is always preferable.
Preparatory work and cleaning

Traditional method leveling the walls means cleaning down to the base layer and applying plaster. This method is the most common and appropriate even for unevenness reaching 5 cm.
Preparatory activities are carried out in the following sequence:
- Removing old finishing layers with a spatula. To reduce dust in the room during the process, it is convenient to use a spray bottle.
- Expanding obvious cracks with a trowel and then filling them with cement.
- Applying primer to the cleaned surface. At the same time, deeply penetrating mixtures are recommended for porous walls, and concrete contact mixtures are recommended for dense walls.
- It is advisable to reinforce all loose and fragile places on the walls steel mesh. In apartments it is better to use chain-link, and in private houses it is more convenient to use shingles.
Beacons are mounted along plumb lines in increments of up to 150 cm for ease of alignment. After this, you can proceed directly to plastering the wall to level it before laying the tiles.
Attention! When plastering, it is important to take into account that it is dirty finishing work, so plumbing, household appliances and other interior elements should be covered with film, and yourself should be protected with a respirator and protective clothing.
Cutting down hillocks

An important step in removing the old layer of plaster is cutting down the mounds. This is often where the leveling of walls without tiles begins. For plaster and gypsum, it is convenient to use a chisel and a hammer, and for denser layers, a hammer drill or sander. It is important to select the correct attachments and discs for the material to avoid damage to the tools.
Important! Particular care must be taken where wiring runs, usually under the ceiling, in corners and near outlets.
Additional hanging
Finishing work is carried out from bottom to top. Therefore, for hanging, it is necessary to install slats around the perimeter of the floor. They are installed at the height of the finished floor or baseboard. After installing the slats, the surface is hung to install beacons along the upper level on each wall.
Beacons must be stretched strictly along a flat, horizontal or vertical line.
For hanging vertical beacons, a plumb line is used, and for horizontal ones, a level is used. When installing beacons, the thickness of the tiles and plaster layers is taken into account. The beacons are attached to the same mortar as the tiles, using nail marks installed during the hanging process.
The purpose of hanging is to find out the most protruding part of the wall in order to plaster the entire wall up to this line, so this stage is carried out after cutting down the mounds. The tools you will need are: a level, a plumb line, a long ruler, nails, even slats for the beacons and clamps for attaching them.
Hanging algorithm

Hanging is necessary to create an even finishing coating for the tiles. The hanging technology is as follows:
- At a distance of 30-40 cm from the ceiling, the first nail is driven in, the head of which should approximately mark the thickness of the plaster mortar;
- a plumb line descends from the nail, along which a second nail is driven in similarly 30 cm above the floor;
- a third nail is driven between them along the same plumb line;
- the procedure is repeated in another corner of the same wall;
- to check diagonally, tighten 1 from 6 and 2 from 4 nails with a cord;
- where the cord touches the base, the unevenness on the wall is cut off;
- Beacons are installed and fixed along the nail heads.
When hanging, the distance between the nails should not exceed 2 m. On long or uneven walls, you can hang a central vertical row of beacons. Lighthouses should be 10-12 cm away from the corners.
How to properly level the walls in a new building?
The process of leveling the base for tiles in old houses and new buildings is slightly different. The difference is that in new apartments, dismantling the coating is usually not required. If the old coating is sufficiently smooth, it can also be left.
The tiles can also be glued to old tile without plastering, using ceramic glue.
The best way to level: a tool for leveling under tiles

To plaster a wall before laying tiles, you will need the following tools:
- level;
- roulette;
- rule;
- Master OK;
- primer brush;
- wide spatula for plaster;
- bucket with a volume of 5 liters or more. for preparing a solution;
- drill with stirring attachment;
- grout grater;
- work gloves.
How to choose a starting mixture for leveling?
Plastering the walls before laying the tiles is done with cement-sand mortar, gypsum mixture or ready-made waterproof putty.
It is not advisable to use gypsum bases in wet rooms, since there is a possibility of deformation under high humidity, although manufacturers are often silent about this in the instructions.
What plaster should I use to plaster uneven walls with a large gap?
![]()
When leveling walls with significant differences, use ready-made mixtures too expensive. A profitable option for plaster is sand-cement mortar. It is made independently using traditional technology.
But there are nuances - you need to sift the sand well and monitor the ratio of water, cement and sand.
However, a common practice when leveling walls with large uneven areas is to use sheet material such as plasterboard.
What mixture should I use to level the tiles in the bathroom?
After fixing the beacons, you can begin to prepare the solution. You can buy it ready-made or mix it yourself. Homemade cement mortar is mixed in a ratio of 1:2 to 1:3 with sifted sand and moderate addition of water.
When choosing a proportion, follow the instructions on the bag. The solution is prepared in parts, with the expectation that you need to use up a portion in 30 minutes.
The applied plaster must dry, and the period for its hardening is also indicated in the instructions for the material.
Attention! When making the mixture, it is important to add the required amount of water, since working with a liquid solution is inconvenient.
When can follow-up work be carried out?

After completing the preparatory work of removing old finishing coatings and hanging, you should begin preparing and applying the solution. The mixture is prepared according to the instructions on the package. It is applied to the leveled wall with a spatula in small areas, with alignment using the beacon rule.
After applying the solution to the entire wall, the beacons are carefully removed and the recesses are filled with the solution. The finished wall must be completely dry. A deep penetration primer is applied to the dry putty.
Attention! You can begin laying the tiles directly only after the primer has dried.
Conclusion
The problem for laying tiles is equal to uneven and smooth walls. All irregularities should be eliminated with level control, and notches should be made on reinforced concrete and other smooth surfaces before plastering.
Overview of methods


Ceramic tiles have no equal in durability and hygiene. If you do not want to use the expensive services of professionals or want to entrust the finishing to craftsmen, but control them, you need to have a good understanding of what needs to be done. Your experience and diligence will be facilitated by knowing how and with what to level the walls in the bathroom, how to treat the surfaces, and how to ensure a high-quality result of expensive repairs.
The range of preparatory work includes measuring the base, preparing for cladding, choosing its layout and developing a laying plan. You should calculate the number of tiles in advance. It is necessary to measure the curvature of the walls and take into account that with leveling the surfaces, the number of tiles can be significantly reduced. Minimizing cutting work and saving time and money is easy with multiple tiles installed on each wall. For creating beautiful interiors you should take into account the materials used, the method of preliminary preparation of the walls to be covered, know laying techniques, and methods of filling joints.
The main quality of the areas where they wash and wash is high level hygiene. During the renovation, the prepared areas of the rooms will be tiled. With the right building materials, the bathroom will not only be attractive, but also “indifferent” to shampoos and washing powders.
Choosing ceramic material for indoors, its moisture absorption, wear resistance (for example, to the effects of abrasive cleaning substances - I on the PEI scale - or 3 on the PEI scale) should be taken into account international system ISO), resistance to aggressive household chemicals (designation “AA” is the highest stability, “D” is the lowest). The presence of glaze contributes to water resistance and resistance to abrasion.

Non-standard oversized tiles are often used for wall cladding. They are not easy to work with. They are heavy and require carefully prepared surfaces. After all, even a small unevenness will lead to bulging, which when large format blocks catches your eye. Small tiles for the bathroom are called mosaics. It is easy for her not only to line walls, but also to lay out the bowls of swimming pools or bathtub bodies. Interesting interiors helps create glass mosaics. Bathroom spaces are emphasized by using friezes.
Preparatory work and cleaning
Preparing the walls in the bathroom begins with removing old coatings (tiles, paint, varnish, wood, wallpaper). The mounds are cut off, and the holes and depressions are covered with mortar. The walls are measured and the presence of irregularities is examined. If necessary, they are leveled. Required preparatory stage- hanging.

What are we cleaning? Dust, dirt, soot, grease, traces of old mastic. All this can worsen the adhesive properties of the new glue and the reliability of fastening the tiles. In the fight against greasy spots detergents may be ineffective. In this case, let's turn to a 3% solution of hydrochloric acid or a 5% solution soda ash . Working with them requires caution. If solutions come into contact with the skin or mucous membranes, be sure to rinse with water.
What tools do we use?
- abrasive;
- grinding;
- as well as scrapers, brushes or brushes with stiff bristles.
Excessively rough areas are treated with putty in order to level the walls in the bathroom.
What to do with old tiles
There are 2 ways to get rid of the old one:
- removing the used layer (starting from the top row, after taking care to protect the plumbing);
- laying a new layer on top of the existing one.
The second method is a “dust-free” repair option. In addition, it is used for urgent rework. If the former tiles were laid evenly and correctly, then this layer can be used as a base. Here it is important to choose the right special adhesive for ceramic surfaces and carefully examine the evenness of the ceramics.

Perfect evenness is very rare. Even 2-3 years of operation do not pass without leaving a trace and small and large defects, such as cracks, are revealed. If there are deviations along the axes, the tiles will have to be disposed of by chipping, which in itself is labor-intensive and almost always damages the sub-tile base. The latter will have to be sealed and leveled with cement mortar.
What tools will you need?
- a hammer drill, which significantly speeds up the process;
- hammer;
- chisel (we pry up the edge of each of the tiles and separate one from the wall).
Under the tiles you may find layers of cement, thickly rubbed paint, and crumbling plaster. With additional stress, these fragile layers will fall off. Such risk zones are determined by preliminary tapping. If the “walls are bubbling”, i.e. the sound is dull, we pick up the hammer drill and continue. The resulting potholes are repaired.
Just enough for a coat of paint
Is it possible not to remove the paint? Yes, but the only paint that gives good adhesion to the tiles is water-based paint. But you should also stretch the mesh over it, and then use a special adhesive mixture.
All others are old paint coatings removed by:
- washing solutions (for example, AFT-1). They are applied with a brush and the paint is removed after bubbling;
- construction hair dryers, after heating, the paint is removed with a spatula or scraper;

- hammer drills with a special blade attachment;
- cutting machine (with inserted card brush);
- sometimes a hatchet, a spatula or scraper, sandpaper.

Cutting down hillocks
Usually, leveling the walls in the bathroom begins with cutting down the bumps. For soft surfaces (plaster, gypsum blocks) use a spatula or a hammer with a chisel. For others - a hammer drill with an attachment or grinder. In order not to break, the disc must be suitable for the type of surface. Reinforced concrete, on the contrary, creates the problem of smooth walls. There's nothing to grab onto! Notches will be required using a hammer drill or chisel. Caution should be used when working in corners of rooms, near ceilings or near electrical outlets.

Plaster solutions for leveling walls are used only for minor roughness. Mixtures based on gypsum or cement are recommended. If the difference is more than 6 cm, plasterboard sheets with a special water-repellent impregnation are used. The material is easy to cut, join, and seal with putty. There is no need for priming or cutting down the bumps. Ideal false walls allow you to leave layers between the partitions and drywall. This contributes to both sound and thermal insulation.
Additional hanging
The purpose of hanging is to identify the most protruding part of the wall. It is determined minimum distance between the cord and the wall. This means that when leveling, there is room for the thinnest layer of plaster.
What will you need?
- long ruler;
- level;
- a cord or a special weight (a plumb line with a cord and a fixed weight);
- nails around which marks of plaster or mortar will be placed.

Hanging algorithm
- Having retreated 30-40 cm from the ceiling and the corner, we drive in the first nail;
- the distance from the cap to the base of the wall is equal to the size of the plaster layer;
- We lower the weight from the nail, not reaching the floor;
- at a height of 30 cm from the floor we drive in nail number 2;
- its cap should touch the cord;
- Drive the 3rd nail vertically between 1 and 2 so that the head also touches the cord;
- in the 2nd corner of the same wall the procedure is repeated;
- hammer in the 4th, 5th and 6th nails;
- to check the base of the wall, the 1st and 6th, 2nd and 4th nails are tightened with a cord diagonally;
- if the cord touches the base, then the wall there is uneven;
- if the bulges are not cut down, the nails are removed from one row and driven in again so that the thickness of the plaster on the bulges is 20 cm - 25 cm;
- intermediate beacons are placed on the plaster, retreating from the wall by 100 mm - 120 mm (in order to then have a layer of glue of a fixed thickness);
- horizontally nails 7 and 8 between 1 and 4;
- nails 9 and 10 between 3 and 5;
- 11 and 12 between 2 and 6;
- the distance from nail to nail is less than 2 m, and in case of strong unevenness it is less;
- The procedure is completed by a similar first check for flatness, detection of convexity and fit.

To make stamps, take 2 layers of solution with a diameter of about 50 mm and a thickness of 5 mm above the nail head. After the solution has set, the top of the mark is cut off to the base of the cap, and the plane of the mark remains strictly parallel to the wall. After cutting off the sides of the stamps, 30-40 mm squares remain, onto which the rule is attached (with mortar, nails) and begin plastering work. Thus, upon completion of hanging the walls, installing lighthouse tiles and mortar marks, the walls are ready for cladding.
Video instruction
In order for the tiles to look good in the bathroom and not fall off in the next few years, you need to properly prepare the walls for this procedure. If they were uneven, this deficiency must be eliminated. Today there are many ways to quickly level surfaces. There are also certain rules for choosing a technique. How to level the walls under the tiles in the bathroom will be discussed further.
How to identify unevenness
To level the walls for laying tiles, you need to measure how large the unevenness is. To do this you will need to use simple construction tools. With their help, it will be possible to check whether the corners in the room are even, as well as the compliance of the vertical and horizontal lines each other. In addition, you will need to determine whether there are potholes and bulges, and what their size is.
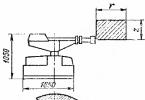
First check the verticality of the walls. For this, a plumb line is used. A nail and thread are secured at the top of the wall. Next, measure the distance from it to the wall at the top and bottom of the room. If the difference is more than 1 cm, the walls will need to be leveled.
Using a long rule, the surface of the wall is examined for the presence of bulges and depressions. It is applied to the base. Then the differences are assessed. If they are more than 2 cm, you will need to pay sufficient attention to the alignment process.
It is also assessed how many irregularities there are on the wall. If there are few of them, you can solve the problem locally. The bulges can be cut down and the depressions can be sealed with mortar.
Alignment methods
How to line the walls in the bathroom with tiles? There are several ways to solve this problem. The choice of technique depends on the results of checking the evenness of the walls. If the surface has many small irregularities, it can be covered with plaster. Very small irregularities and cracks can be repaired locally with mortar, without treating the entire wall. If there are many defects, or the wall begins to crumble, it is better to cover the entire surface with a layer of mortar.

Drywall sheets are often used for leveling. This material can be glued to the wall or mounted on a special metal carcass. Second option will do only if the bathroom is spacious. Otherwise inner space will be significantly reduced. This method allows you to remove the most complex, large irregularities.
If you glue plasterboard to the walls, the size of the bathroom will decrease slightly. This method is suitable for bases that have a lot of small damage.
Types of plaster
What mixture should I use to level the walls under the tiles? There are two main types of plaster on the market. They differ in their basis. These are cement-sand and gypsum compositions. To choose the right solution, you need to take the advice of experts. They claim that plaster plaster mixtures suitable for dry rooms. Their scope is limited.

If you level the walls in the bathroom gypsum plaster, it will strongly absorb moisture, swelling and deforming. As a result, the tile will fall off such a surface very quickly. And for dry rooms, gypsum compositions are preferable, as they allow you to maintain correct parameters microclimate.
Cement-sand plaster is ideal for the bathroom. She is not afraid of exposure to moisture. At the same time, sand cement differs good performance adhesion. It will ensure a long service life of the tile. Using such solutions, you can qualitatively level the wall in accordance with all rules and regulations.
Tools
Some owners of private houses and apartments cannot decide whether to level the walls themselves or turn to specialists. The second option is preferable if you do not have time to do repairs. Then you should hire a team of professionals, paying not only for materials, but also for the work of repairmen. So, for example, to level the walls in a bathroom with tiles in Domodedovo costs about 180-200 rubles/m². The price varies depending on the complexity of the work and its volume.

If the owners of the house have enough free time to carry out repairs themselves, they must prepare a number of tools and materials. The job of leveling the walls is relatively simple. You just need to know some nuances.
In the process of leveling the base, the master will need a building level, usually a sand-cement trowel and a primer brush. You also need to purchase a wide spatula and grater. To mix the solution, you will need a container of approximately 5 liters. When processing walls, you will need safety glasses, a respirator, and gloves. You need to prepare a grinder and a drill with an attachment for mixing cement. Measurements are made using a tape measure and pencil.
Cement-sand mixture
How to line the walls in the bathroom with tiles? Need to purchase cement-sand mortar, as well as a primer. The amount of materials is selected in accordance with the dimensions of the room. Available for sale Construction Materials in different packaging.

As a rule, sand concrete grade M300 is used to level the bases in the bathroom. It is sold in bags of different packaging. Most often they purchase a 50 kilogram package.
The most frequently purchased formulations today are:
- Dauer - 181 rub.
- Fix - 159 rub.
- “Titanite” - 144 rubles.
- Baumax - 167 rub.
- De Luxe - 179 rub.
Prices are presented per bag weighing 50 kg, but they can vary significantly depending on the composition, additives included in the component and performance properties.
Primer
During the work process, a primer must be used. The choice of composition depends on the type of walls in the room. So, if it is a porous surface, such as brick, you will need to purchase a deep penetration primer. It will reduce consumption cement mixture, will improve its adhesion to the surface.

Today, the most popular deep penetration primers are “Ceresit ST-17” (1 liter - 115 rubles), “Bauproffi” (2.5 kg - 100 rubles). The composition penetrates the wall structure and closes the pores.
How to level concrete wall under the tiles? In this case, a completely different type of primer will be required. It creates a special film that improves the adhesion of cement mortar to a smooth base. This is concrete contact. A special type of composition allows you to create a rough coating on the surface. The best in this area are the compositions “Krafor” (3 l - 260 rubles), “Ceresit ST-19” (5 l - 460 rubles), “Dali” (3.5 l - 365 rubles).
Preparing the base
Having considered the best way to level the walls under the tiles, it is worth paying attention to the features of this process. It is worth noting that before treating the surface with a solution or fixing drywall to it, you need to properly prepare the base.
To do this, remove from the walls old finishing using a spatula. They are used to clean off all remaining materials. It is recommended to remove all furniture and other items from the bathroom. Preparing walls is a dusty job, so it is carried out with a respirator, safety glasses and gloves.
To speed up the process, you can use a grinder. To reduce the amount of dust, you can periodically moisten the surface with water from a spray bottle. If small cracks remain after treatment, they can be widened at a right angle and sealed with mortar.
Plastering walls
How to properly level walls for tiles? You need to start by installing beacons. These are guides that regulate the thickness of the layer of cement-sand mixture. It can be applied to surfaces with a thickness of 5-20 mm.

Beacons are installed with such a step that you can follow them with a rule. Typically this figure is 150 cm.
You need to prepare a solution that is consumed within 30 minutes. It should be thick enough not to run off the surface. Next, it is spread on the wall or thrown over it with cakes. The second option is more difficult. It’s easier to spread the thick solution onto the surface of the base with a spatula.
Leveling the solution
After carrying out the above manipulations, you need to level the solution. How to level walls for tiles with your own hands? First, a rule is carried out along the surface. Both ends should slide along the beacons. This creates an almost flat surface. If there are depressions, add solution to them.
You need to leave the wall to dry for 60 minutes. During this time, the solution will stick, but will not dry completely. At this moment you need to remove the beacons from it. The cavities should be sealed with cement mortar. Next, you need to let the solution dry completely. Ideal for tiles is not so important Smooth surface, so the finish does not need to be sanded.
When the solution dries, remove debris and dust from it. The surface is coated with a deep penetration primer. After this, you can begin installing the tiles.
Drywall with glue
You can line the walls in the bathroom under the tiles with plasterboard. The sheets are glued to the surface. To do this, you will need to purchase moisture-resistant drywall and special glue. This method is suitable for surfaces with height differences of no more than 2 cm.
Before leveling, the walls are prepared in the same way as before puttying. Cutting the material is simple. To do this, just use a stationery knife. The sheets are glued to a pre-primed surface.
GCR is applied along the perimeter and in the center adhesive composition. This is a thick mixture that needs to be applied in small cakes. The step between them should be 30 cm. After this, the drywall is simply pressed to the surface. Next you need to use building level. It is used to check whether the sheet was attached evenly. If necessary, its position is adjusted.
Frame application
While considering, it is worth remembering one more method. Installing drywall on a frame is justified only if the unevenness of the walls is more than 2 cm. If the space in the room is small, it is better to give preference to other options.
First you need to make a drawing. The plan provides for the location of all frame elements, as well as the outlet locations for water, sewer, electrical and other communications. This is necessary to prevent mistakes during the installation process.
Each profile is installed at a distance of 60 cm from each other. This is due standard size sheets of drywall. Their fixation occurs strictly in the center of the profile surface. If the sheet is cut, this must be taken into account when creating the frame.
Profiles must ensure structural rigidity. It is unacceptable for hypocardboard sheets to sag. Therefore, intermediate profiles must be installed in the frame. They will provide additional fixation of the sheets in the center. In this case, drywall does not even have to be screwed to them. You just need to support the sheet on an additional metal crossbar.
When considering how to level the walls under tiles in the bathroom, you should take into account a number of recommendations from experts. They advise purchasing a profile for vertical installation, which will correspond to the ceiling height in the room. If you need to cut the profile, use metal scissors or a grinder.
Installation process

How to level the walls under tiles in the bathroom using drywall? First, the profile is installed on the floor using dowels. Perforated hangers are fixed on the wall in increments of 60 cm. It is necessary to check that they are all located on a vertical line.
Having aligned all the frame elements according to the diagram, they are fixed with self-tapping screws. Next, install sheets of drywall. They are also fixed with self-tapping screws, which should not be overtightened. There is no need to putty the joints between the sheets. Sheets should not bend. Otherwise, the tile will fall off from such a surface.
Modern construction technologies offer a wide variety of methods for finishing walls in rooms with an aggressive microclimate. Sometimes even moisture-resistant wallpaper is used, but the feasibility of such a solution is questionable. We'll talk about beautiful and practical ways leveling the walls in the bathroom.
What materials are used?
No construction guarantees acceptable finishing wall quality. To install most finishing materials, such as tiles, the walls must first be leveled. The two most commonly used options are:
- drywall;
- plaster.
Let's look at these methods.
Leveling the wall with plasterboard
Application of drywall
Plasterboard sheets are ideal for creating a flat surface. To do this, you just need to assemble the frame correctly. This is done using UD and CD profiles and special U-shaped brackets (the frame is installed on them).
First you need to set and attach UD profiles to the walls, floor and ceiling. This creates a frame. Fastening is done using dowels and screws. The frame is set strictly according to the level with mandatory control of right angles in three dimensions. If the room area is small, a frame is enough to securely fasten the drywall.
Next, after installing the UD profiles, the wall is marked for installation of U-shaped brackets. The markings are parallel lines with a pitch of 30 cm. Holes are made along these lines and brackets are attached. The calculation is made in such a way that there are 4 CD profiles per sheet of drywall. In this case, each last element must be the starting element for the next sheet. Drywall is attached to the profiles with small self-tapping screws, and they, in turn, are attached to the brackets with special small self-tapping screws - “fleas”.
In the bathroom, plasterboard requires constant monitoring of the level and horizontalness of the surface. It is convenient to do this with a nylon thread stretched between the outer profiles. On average, 60-70 25-piece self-tapping screws are used to screw one sheet of drywall.
Application of plaster
You can also level the walls in the bathroom with plaster. This method is called lighthouse plaster. It allows you to save space in the room and at the same time create a flat surface. To create lighthouse plaster, the following ingredients are required:
- Cement (preferably grade 400 or 500);
- Sifted sand (without lumps and large elements);
- Water;
- Lighthouses.
The work is performed in the following sequence. First the wall is primed. Next, beacons are installed on quick-hardening construction mixtures (gypsum or putty). The distance between the beacons is chosen such that it usually reaches two adjacent ones at the same time.
The plaster is mixed in a ratio of one to three. Ready solution is thrown into the space between the beacons and then leveled with movements from bottom to top. If the mixture disappears, you will have to plaster in two layers. In this case, fill the void halfway and wait until it dries. As a rule, it does not take more than an hour. Then repeat the operation.
After applying the plaster, you need to wait several hours for the mixture to harden. Naturally, the surface will not be completely smooth and after hardening, another treatment will be required. To do this, the irregularities are cleaned off and the cavities are filled with solution. All that remains is to pull it straight and go over it with a trowel moistened with water. Now you can install tiles or other finishing materials on the wall.
Alternative Methods
There are other methods for leveling walls. For example - putty. In this case, the speed of the process increases significantly due to rapid hardening and a more convenient consistency to work with. After applying the putty, you need to go through it with a float and remove any marks from the spatula or straightener. As a result, a smooth surface is obtained in a couple of passes.

Putty for leveling walls in the bathroom
The disadvantage of putty is poor moisture resistance. Its use in the bathroom is not advisable. In addition, the cost of materials increases.
How to finish?
So, we figured out how to line the walls in the bathroom, and now we need to finish it. Now let’s figure out which materials are best suited to which base.
Today the following finishing materials are used:
- ceramic tile;
- tree;
- grout;
- plastic;
- washable wallpaper;
- dye;
- combinations of different types.
The choice is rich, but is it possible to attach tiles to drywall, or wallpaper to plaster? Let's figure this out now.

Tiling bathroom walls
Ceramic tiles – classic finishing material for bathrooms. Among the options used, this is the most practical, since the tiles are not afraid of water and household chemicals, are easy to clean, durable, and much more. Trade offers a wide selection of colors, sizes, textures, etc. It is possible to decorate plasterboard walls with tiles, but it is not advisable. The fact is that it is heavy and can fall off if the base gets wet. For this reason, a rigid base of plaster or putty is preferable for tiles.
Wood is a common material. This type of finish can be attached to any surface and often does not even require leveling the base, but due to instability to moisture and susceptibility to rotting, the service life is limited.
Grout is the same putty, only after hardening it becomes highly hard and waterproof. The grout paints well and can be used as a base for tiling.
Of the wallpaper in the bathroom, only acrylic and vinyl can be used, which can withstand high humidity. They are glued to drywall. Wallpaper follows the shape of the wall, so it requires a flat surface. Plaster is not suitable in this case due to its hygroscopicity.
Plastic tiles - budget and practical option. It retains its appearance for a long time. Plastic finishing can be done on any surface, although a plasterboard base is best suited for this.
Painting walls is also a good option if you use acrylic. It is clear that smooth plastered walls are being painted. When painting drywall, joints, screw heads, etc. are first smoothed out with putty.
You need to combine materials carefully, taking into account the characteristics of the base.