The final stage of construction is finishing the inside of a wooden house, and in this case, photos can help the owners decide on the style of their future home, but they will have to choose the materials themselves, as well as carry out a series of preparatory work. Wood has special requirements for subsequent finishing, so when carrying out interior work its properties and characteristics should be taken into account. In addition, do not forget that a house made of wood is not only beautiful and warm, but also has a special energy. Its interior design can either emphasize unity and harmony with nature, creating an atmosphere of unique comfort, or be ultra-modern, but no less comfortable.
When should interior finishing work be carried out?
The interior decoration of a wood house should be carried out only after the main shrinkage has passed (this only applies to “fresh” log houses). At this stage, active shrinkage of the tree occurs, the beams or logs change their dimensions downward, and the insulation is pressed. If the interior finishing is done before the shrinkage is completed, the result can be a curved coating, which may also fall off and you will have to start all over again.
The duration of shrinkage is affected by:
- Type of house construction.
- Material (timber, log, etc.), its initial moisture content.
- Climatic zone of construction.
- Construction time.
In particular, a house made of laminated veneer lumber shows the main shrinkage 3-4 weeks after construction, this is the fastest time. Other types of wooden houses require several months or even years to shrink. On average, finishing inside a house can begin only 10-12 months after the completion of construction itself.
Interior decoration of a wooden house is the most creative construction process, during which you can recreate the design that your imagination requires. Now construction market offers a lot finishing materials, among which you can always choose the one that suits your price and style. The interior decoration of the home will indicate the owner’s taste, because how the house is decorated is how its owners are judged.
Preparation before interior finishing of the log house
Before you begin to repair interior walls, you need to learn about some features that should be taken into account when carrying out interior decoration:

Types of interior wall decoration
Wall decoration in wooden house can be carried out different ways. Everything depends only on the desires and capabilities of the owner himself. First you need to determine the goal that should be achieved as a result of finishing. The options can be completely varied: from the natural beauty of wood to a modern style made alternative materials. In practice, there has been a tendency to decorate the inside of wooden houses with progressive materials that completely hide the wood structure. Below we will discuss how traditional ways finishing, as well as those that are becoming increasingly popular among owners of timber houses.

Decoration with carriage board
Lining is a simple and affordable material with which you can finish not only walls, but also floors and ceilings. To create an even coating, you need to worry about the sheathing in advance. Creating a sheathing will help hide unnecessary pipes and wires, as well as additionally insulate the walls, if necessary.
The construction market offers buyers three types of lining that can be purchased:
- Ordinary carriage boards are simple sanded boards that do not have recesses or recesses. This is the cheapest finishing material among those presented. This board is fastened to the sheathing with galvanized nails. The disadvantage of this material is the lack of adhesion of the boards to each other during installation, which can lead to an incorrect and crooked fit to the surface. Also, during installation, chipping of the boards is common due to their small thickness.
- Universal type carriage board. This material is more convenient and practical. Due to the fact that the boards have tongues and grooves, they can be easily adjusted to each other and this design will no longer be bent. This lining is reliable and practical in finishing.
- Block House carriage board. This is a type of lining, very similar to the second option, but on one side it imitates a rounded log. It was created in order to create an even more pleasant look for the entire design. The mounting method is the same as for the universal board.
Important! The lining must be treated with an antiseptic and other compounds that increase its service life.
Like any material, carriage boards have their own advantages:
- The design becomes more decorative, wood adds coziness and comfort to the house.
- Lining helps to hide communications that are unpleasant to the eye (pipes or defects in the log house itself)
- This finish helps retain heat in the room. Even the thinnest lining can make a house warmer without the use of special material.
- Easy installation, thanks to which you can completely decorate the house even with your own hands.
But, despite all the advantages that distinguish the lining, it also has several negative sides:
- The material does not resist fire like any wood, so it must be treated with special compounds. This treatment will increase finishing costs.
- Additional components for such a design greatly increase the cost of finishing with economical lining.

Natural finish
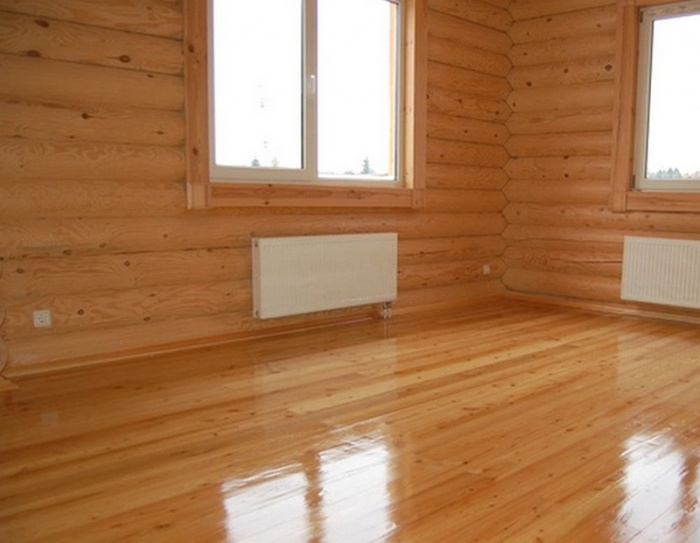
Pristine beauty interior design made of wood will help preserve paint and varnish products. This option will do only if the log house itself is sufficiently insulated and treated with special solutions to protect it from moisture.
Before finishing, be sure to clean the surfaces from dirt and dust and sand them thoroughly. It will not be superfluous to treat with putty and primer.

It is believed that there is no need to wait for the house to shrink before painting. This assumption is correct, but painting is also not done immediately after construction due to the fact that the moisture present in the wood will come out, forming smudges and bubbles on the surface.
If the house was built using the “paw” method, then it is best to cover the surface with paint, and if it was built “in a bowl”, then ordinary transparent varnish will look great, which will not hide the natural grain of the wood.
Using paint, you can create accents on certain surfaces or zone a room. Materials for interior wall decoration should be as environmentally friendly as possible, because the safety of the coating is especially important inside the house.
IN Lately Art painting of walls and ceilings is very popular. This design will bring modern notes to the interior, without affecting the virgin beauty of the wood pattern.
Important! With this finishing, communications cannot be hidden, so the wiring is placed in the corners of the room, and the pipes are placed in a pre-created frame.
The floors and ceilings with this type of wall decoration are made of carriage boards or parquet.
This type of interior decoration also has its advantages and disadvantages that you should be aware of:
- Saved original style wooden frame.
- Material costs are much lower than with alternative finishes.
- The coating must be renewed every 4 years so that it does not lose its decorative qualities.
- After shrinkage, log houses, as a rule, become slightly curved, and finishing with paint or varnish will no longer provide the opportunity to visually adjust this situation.

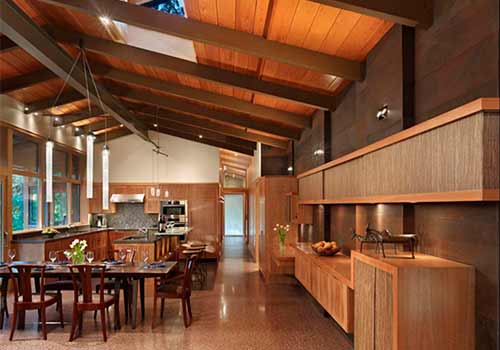
Usually, a house made of wood on the outside already presupposes the same finishing on the inside, so the amazement of guests will know no bounds if, upon entering the wooden frame, they discover a modern interior that has nothing in common with the village. At the moment, it is possible to decorate your home this way. For the floor, parquet, laminate or carpet are best suited in this case; in some rooms there may be tiles. Most often used for ceilings hanging structures or drywall.
Plasterboard decoration
Drywall is a very convenient material for finishing, which allows you to create any desired structure without any problems. In order to attach drywall to the wall, you need to create a frame from a galvanized profile, onto which the material is attached with self-tapping screws.

Important! Plasterboard finishing should be done after the house has settled, as cracks may appear during the process, which will ruin the appearance.
The advantages of plasterboard design include ease of installation, low cost, and the ability to hide all unnecessary communications.
Since this material is very fragile, its main disadvantage is that it is not at all resistant to mechanical damage. Also a small negative point is that finished design plasterboard needs to be improved, for example, with wallpaper or putty. The interior finishing of the wooden house in the photo was done with plasterboard.

Decoration with plastic panels and plaster
Installation of plastic panels is as simple as installation of drywall. The main and most significant difference from the previous material is the variety of colors and patterns, thanks to which you can decorate the room in different styles by combining materials.
Another advantage of this finishing material is that, thanks to laying on the lathing, you can hide unnecessary communications. This coating can be washed, as the plastic is resistant to moisture.

Plaster too interesting option wall decoration in a wooden house. Due to the fact that now there are decorative types of plaster, it is not necessary to completely level the surface. With the help of such material you can easily create the necessary relief or even drawings using the sgraffito technique, as shown in the photo below. The coating is very reliable and durable, so it will last for decades.
Interior finishing of ceiling and floor
The cladding of the floor and ceiling must be in harmony with the decoration of the walls of the house. The most good options The floor will be parquet or laminate. This is due to the fact that such a coating retains heat better and is environmentally friendly, which is very important inside the house, because the safety of all its inhabitants depends on it.
Important! After assembly, the parquet is covered with paraffin and parquet varnish.
Proper installation of parquet will give you the opportunity to enjoy an ideal floor for many years. The varnish coating is refreshed every 2 years due to the fact that it wears out.
You should take the cladding of the ceilings in a house made of timber very seriously. Finishing can be done only after the house has completely settled, and this is a period of 2 - 3 years. Otherwise, ceiling structure It simply becomes deformed, which will ruin all subsequent repairs.

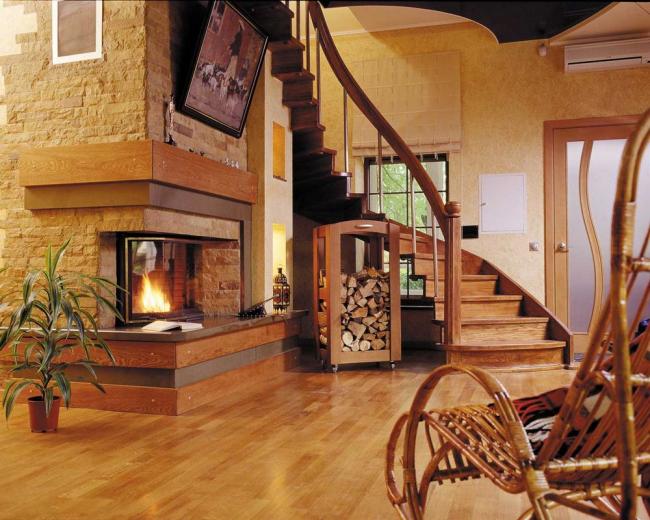
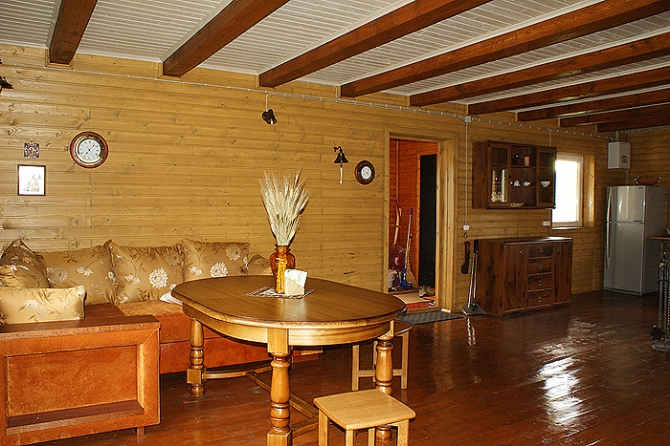
For interior in modern style It is enough to install a suspended ceiling, which will eliminate problems with plastering and other related work. If the interior is designed in Scandinavian or rustic style ceiling beams They don’t hide them, but on the contrary, they focus attention on them. They can be painted in any color that suits the style or covered with stain for better decorative effect from natural wood.
Important! If there is an attic on the second floor of the house, then the space between the rough and finished ceiling lined with insulation and vapor barrier materials.
Previously, houses were built mainly from wood. Today, the material has given up most of its positions to brick, concrete and other modern analogues. But still, many houses are still built from wood. There are many reasons for this:
- wood is cheaper than, for example, concrete;
- the material is natural, and therefore environmentally friendly;
- beams, logs and other types of processed wood weigh little. For them, you do not need to call a crane, as, for example, for concrete blocks;
- The wood is strong enough both for transportation and for the building itself.
All this contributes to the construction of houses made of wood. In addition, there are many old houses made of the same material. Like other buildings, there are features here in many nuances - for example, in the interior decoration. If this matter is approached incorrectly, there is a high probability of repeated work. In addition, finishing materials that are not so appropriate in other cases are suitable for such houses. However, first things first.
When can finishing begin?
Some owners can begin decorating the inside of a wooden house immediately after its construction. In fact, you can't do this. The tree shrinks, and not immediately, but over a certain period, sometimes quite long. Thus, the interior decoration of a house made of laminated veneer lumber can be completed in 3-4 weeks. In most cases, this period ranges from several months. For example, log house can be finished in a year. Some houses are even finished a couple of years after construction, although complete shrinkage can take two and a half times longer.
What to do during these months? The owner of the house will have a lot to do. For example, you need to caulk the joints well. The first time this is done a few weeks after the construction of the house, the next time - after 6-8 months. You also need to take care of processing the wood so that it does not rot and attract insects, and install communications (pipes, electricity, etc.). After the second caulking, you need to measure the height of the walls from time to time. If the results do not decrease within a couple of months, the shrinkage is complete. Now you can start decorating the interior of the house.
Materials for finishing walls inside the house
Let's look at the most popular ways of finishing a wooden house. Each of which involves certain materials.
Varnishes and paints
The log house itself looks great. Therefore, finishing the interior walls of a wooden house is not so necessary. If the log house is well protected from weather influences (rain and wind), the walls can simply be covered with paints and varnishes.
To begin with, the frame should be sanded. Now you can start applying the material. Varnish is well suited for floors: it prevents the coating from wearing out for a long time. For walls and ceilings, you can choose, for example, tinting antiseptics.

Materials must be chosen carefully, knowing both the advantages and disadvantages of each. Here are several options for varnishes and paints:
- oil-based: environmentally friendly, do not attract dust, but dry for about three days; in addition, over time, wood coated with such an analogue begins to turn yellow;
- alkyd: cost little, protect against moisture and fungus; but they dry for a day and emit an unpleasant odor for a long time;
- polyurethane: wear-resistant, dry quickly (about two hours), are expensive and highly toxic;
- nitrate: create a beautiful appearance (not in last resort thanks to the wide color scheme), dry quite quickly, but are toxic; the environmental friendliness of the tree also suffers from them;
- acrylic: environmentally friendly, allows the wood flooring to “breathe”, prevents fading, and lasts a very long time; on the other hand, the price of materials is considerable.
What's good about this option? paints and varnishes They are not so expensive because of the finishing touches. In addition, they emphasize the natural beauty of the tree. True, caulked seams also remain open, which can spoil the appearance. Here a twisted cord can come to the rescue, with which these same seams are sealed. Another problem is communications. In this case, it is better to conduct wiring in the corners and floor; pipes (for example, water pipes) can be hidden by covering them with a wooden frame.
The paintwork is not durable, so it needs to be renewed every few years. However, the finishing can get boring, and repainting will cost less than replacing, for example, wall panels. Another drawback is the possible distortion of the walls after shrinkage: finishing can hide this drawback, but varnishes and paints cannot.
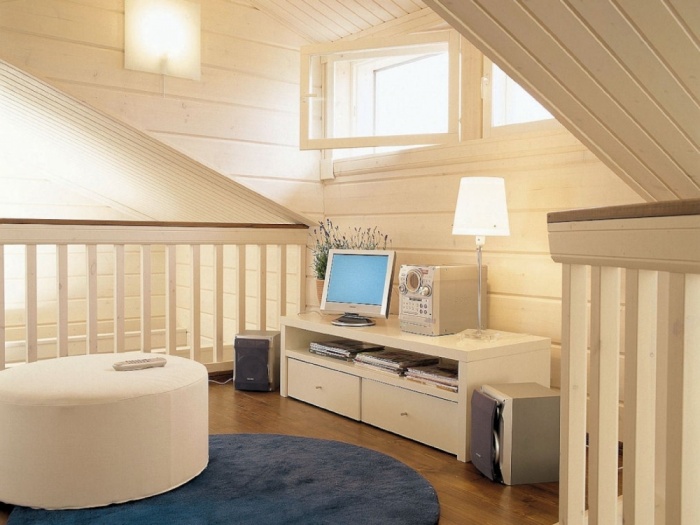
Lining
If you want to decorate the interior walls of the house, but preserve the originality that wood creates, you can choose lining. This is dried and processed edged board, which is connected using tongues and grooves. Thus, the house remains entirely wooden with all the ensuing advantages. By the way, they can be listed:
- environmental friendliness;
- beautiful appearance;
- ease of installation;
- pleasant woody aroma;
- good heat and sound insulation properties.
Well, to be fair, it’s worth mentioning the disadvantages:
- low fire resistance;
- need for periodic painting.

Some also include a high price here. True, many will say that lining, on the contrary, is cheap. Both are right. The fact is that the lining has four classes:
- Extra class. This material has perfect flat surface without any knots, holes, etc. This type of lining is excellent for wall cladding, but is more expensive;
- Class A. Defects are already allowed here, but quite few;
- Class B. On such wood the number of defects is greater than in the previous case;
- Class C. This lining has the largest number of defects such as knots, cracks, etc. It is cheaper, but you need to choose boards carefully so as not to get defective.

Wood for lining is used in a variety of ways. Here are just a few types:
- pine: good tree, not subject to rotting, easy to process (since it has few knots);
- alder: has beautiful colour and aroma; but such lining is expensive;
- oak: very durable and dense material, is famous not only in the finishing segment. Thus, furniture made from this type of wood is highly valued;
- spruce: retains heat very well, but actively absorbs moisture. Therefore, it is better to decorate dry rooms with such lining.

In addition to the usual one, there is also eurolining that meets European standards. But this is not the only difference. Thus, the Euro version is made from dry planed boards (the usual ones are dried in natural conditions), has a deeper tongue-and-groove joint and other parameters. The eurolining also has ventilation grooves that remove condensation, thereby preventing rotting processes. The material itself is more different high quality, since the requirements for manufacturers are quite stringent. The price of European material is, of course, higher, but the operation of such lining is longer and of higher quality.
Drywall
This material for finishing walls inside the house is also quite popular. And that's why:
- drywall is inexpensive;
- the sheets weigh little and have a convenient shape, which simplifies installation;
- finishing material increases the heat and sound insulation of walls;
- In such a wall it is convenient to make a shelf, a niche, or mount a lamp;
- the surface provides the possibility finishing. So, it can be painted, wallpapered, painted, etc.;
- The material is environmentally friendly and therefore safe for health.
However, finishing a wooden house with plasterboard is not so easy. And all because of the shrinkage of the house, which, as you know, can last quite a long time. If, for example, you can paint the walls almost immediately, then quick installation of drywall almost always involves a loss of quality. Here it is better to trust an experienced craftsman who will carry out the calculations and secure the sheets correctly.

There are several options for drywall that are used in finishing:
- traditional (installed only in dry rooms);
- moisture-resistant (by the way, fungus does not spread on it);
- fire-resistant (which is very important for wooden houses);
- combined (good for wooden premises With high humidity).
One of the secrets of finishing with plasterboard is a movable frame that moves when the wood shrinks. Thanks to this, the seams between the sheets do not crack. However, the creation similar system requires the necessary skills, so it makes sense to hire specialists. Yes, this entails additional expenses, but there will be more confidence that the finish will remain intact.
In order to paste over or plaster a plasterboard layer, the sheets must be primed. If you just want to paint the walls, you just need to paint them. The paint color is selected based on the desired background.
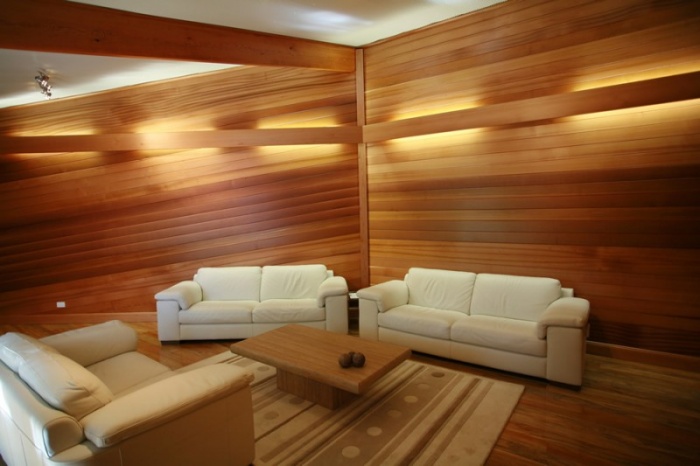
Wall panels
Another rather interesting material for finishing wooden walls inside the house. The main advantage is that the panels are made from various materials, which makes it easy to choose what you need. According to this criterion they are divided into:
- wooden, this solution is suitable for those who want to hide the walls, but not disturb the originality of the room with other material. By the way, lining, in fact, is also a wall panel, but is considered as a separate type;
- from MDF (veneered or laminated);
- glass;
- polymer;
- leather
The installation of panels also varies. You can install them vertically, horizontally, herringbone, diagonally. The latter method, however, is used extremely rarely, but in this way you can create an original appearance. Create Beautiful design maybe the type of components: for example, glass panels achieve certain results with the help of corrugation or smoothness, the presence of color or transparency, etc.
Panel sizes may vary significantly depending on the type. Thus, slatted types can reach 4 meters in length, but the width does not exceed 30 cm. Such panels, as a rule, are attached using a tongue-and-groove system and include a sheathing. Tile panels also have different parameters, ranging from 3030 cm to meter squares. Such elements are good for laying out original drawings. But with sheet panels, finishing goes faster, thanks to large sizes. Here the installation is carried out using glue.
Bottom line
This is the main list of materials for interior decoration of a private wooden house. Each of them has its own characteristics and advantages:
- varnishes and paints allow you to leave wooden wall in sight;
- the lining hides all the imperfections of the wall, but leaves wood as the dominant material;
- plasterboard allows you to paste or paint the wall;
- wall panels create an original design.
Based on the advantages, disadvantages and characteristics, everyone chooses what suits their taste best. Of course, finishing a wooden house is not very easy: for example, due to shrinkage of the material, the wall may deteriorate. In addition, you need to monitor fire and moisture resistance, because moisture absorption can destroy wood, and fire will destroy such a house with a much higher probability than, for example, a brick or concrete one. But still, the advantages that this natural material has contribute to the construction of wooden houses to this day, which means their interior decoration remains a very important issue.
In conclusion, we can advise you to monitor modern trends, because some finishing materials may become outdated (although this is not a fact), during this time new, modern analogues are born. And the fact that they will appear is an almost undeniable fact, since houses made of wood, apparently, will be built as long as the world exists.
A private house built of wood cannot always be considered a finished structure, since in many cases it requires external and internal finishing of the walls. There are many various options, but not all of them are suitable for cladding this kind of building. In this article we will look at how you can cover a wooden house inside and outside and how best to do it yourself.
When to sheathe a wooden house
To begin with, it is worth highlighting those buildings that initially it does not make sense to sheathe the outside in any way, much less insulate them. Whatever finishing option you choose, it will not be cheap, and therefore is not practical for wooden houses for summer or periodic use. As for decorating the inside of a home, this is more a matter of design and the wishes of the homeowner than a necessity. After all, wooden walls made of timber or rounded logs always look attractive.
Now let's look at cases where wooden houses are sheathed from the outside:
- there is a good-quality and strong frame available, but it is quite old, which is why the appearance of the building leaves much to be desired;
- frame buildings made of wood must be clad in any case on both sides, this is their design;
- if a wooden house, built from timber or logs, needs additional protection and wall insulation.
It is not uncommon to find log houses that have stood for more than 50 years and are ready to serve for the same amount of time. Additional cladding from the street will not only change the appearance of the home for the better, but also protect the wood from precipitation and thus extend its service life. The same protection will not interfere with walls that need insulation. Since thermal insulation is usually carried out outside, and not inside, a wooden house, the insulation needs to be hidden behind a water barrier and covered, which will be discussed later.
Advice. Exterior finishing of a wooden house that has just been erected is carried out after 1 year. The shrinkage of buildings of this type is quite significant, as a result of which the external design of the finished walls may suffer and everything will have to be redone.

Materials for external and internal finishing
Despite the wide selection of cladding materials, their list for wooden houses is somewhat limited due to various reasons. For example, it is relatively inexpensive to decorate a house using plaster, but this method is only suitable for frame buildings sheathed on the outside with OSB sheets, as shown in the diagram below. Plastering a log house or a dwelling made of timber will be problematic.

As can be seen in the diagram, the basic mineral wool insulation located inside the wall is supplemented by a layer of polystyrene foam or expanded polystyrene attached to sheets of OSB plywood sheathing. And only after that the tinted one is applied decorative plaster. But such facade decoration is rare for a wooden house; it is more common following materials for external cladding:
- vinyl siding;
- wood siding, the so-called block house;
- lining;
- complex system “ventilated facade”.
For reference. The cheapest and fastest way to cover the walls of a house is with painted corrugated sheets; this practice also takes place. But at the same time, the design of the building looks completely cheap and resembles manufacture building. In addition, corrugated sheets quickly fade in the sun and lose color. Unless you buy expensive material coated with a pattern, as in the photo:

Vinyl siding is a very popular material, it is relatively inexpensive and retains its appearance for a long time, and with its help it is quite possible to sheathe a wooden house yourself. It will be more expensive to decorate the walls with other siding - imitation timber and rounded logs called “block house”.

This is a very attractive and pretty material, but it requires maintenance, just like regular wood paneling.

If we talk about what is the best way to cover a wooden house without reference to the cost of materials, then the “ventilated facade” system is beyond competition. It is a frame made of galvanized profiles, inside of which insulation is attached, and on the outside – finishing elements. Moreover, the latter may look like siding, brick or natural stone– to choose from. True, the system can hardly be called cheap, and not every homeowner can handle the installation.

It is easier to solve the problem than to decorate the walls of a wooden house from the inside. For this purpose the following are most often used:
- regular and moisture-resistant drywall;
- OSB chip sheets;
- ordinary cladding boards - lining.
Drywall and OSB are an excellent basis for any finishing layer - various wallpapers, tiles and other materials. Moisture-resistant gypsum boards are perfect for internal lining bathroom, and the lining is for a bathhouse built inside the house. OSB boards are not used so often inside buildings, since drywall is much more environmentally friendly.
A few words about the insulation materials used. It is well known that houses built of wood must “breathe”. This means that the wall material is transparent to vapor, due to which moisture from inside the premises is removed to the outside, passing through the wood. If a vapor-tight barrier is placed in their path, then moisture will begin to condense in front of it, which will lead to the gradual destruction of the fence. Therefore, the use of water-repellent polymers such as penoplex or penofol is not recommended.
The best solution for insulation when finishing a wooden house is mineral or basalt wool. It is vapor permeable and absolutely not subject to combustion.

An exception to the rule is a frame building, where a layer of mineral wool is part of the enclosing structure, but there is no main wall. Here the insulation is protected from the penetration of vapors by a film on one side and waterproofing on the other, as shown in the diagram:

Covering a wooden house with siding
This exterior finishing of the house can be done with or without insulation, as necessary. But in any case, it is necessary to provide between the vinyl siding and the wall air gap for ventilation. Its task is to remove moisture entering from the outside onto the diffusion membrane, which plays the role of a hydro- and wind barrier. This is why vinyl siding sheets are not attached directly to walls, no matter how smooth they are. First you need to assemble the sheathing from wooden beams, less often - from galvanized profiles.

Advice. Before covering an old log house, you should thoroughly caulk the cracks between the logs, using natural materials - felt, tow or moss.
Width of bars for sheathing during installation exterior finishing without insulation it should be from 3 to 5 cm to provide an air gap. The interval between the slats is 40-50 cm. But first of all, a diffusion membrane is laid; it is capable of passing vapors, but reflecting water. The membrane sheets are laid horizontally, starting from the bottom, with an overlap of 10 cm and taped at the joints. After this, it is pressed with bars or sheathing profiles installed vertically.

Note. If you plan to install vertical siding, then the beams should be mounted horizontally. They should first be treated with an antiseptic composition.
Also, all openings – windows and entrance doors. Wherein wooden elements It is better to nail it to the wall rather than screw it with self-tapping screws. The latter do not allow structures to move during shrinkage or thermal expansion. Important point: the surfaces of all bars must be strictly vertical and aligned in one plane. Now you can begin installing the siding, using the starting and other types of planks shown in the figure:

When adjusting siding, it is important to take into account its thermal elongation, so the ends of the vinyl strips should not rest against the sockets corner strips, standing on the sides (meaning horizontal installation). The strips must be cut and inserted between the planks with a gap of 3-5 mm, and the nails must not be driven in all the way. This is why oval holes are made in the siding so that the strip can move a little. By the way, installation is carried out from starting bar- down up.

When the length of 1 strip is not enough to cover the entire wall of a wooden house, then you need to install one or more connecting strips, placing them as aesthetically as possible. Although siding can be laid with an overlap (without a strip), such a connection looks unpleasant, and therefore it should be used as a last resort. Well, there are special vinyl planks for framing windows and doors.
If it is decided to combine the finishing process with insulation, then the order of work includes installation thermal insulation material. Considering its thickness (at least 100 mm, and in the northern regions up to 150 mm), it is necessary to take lathing bars of the appropriate width. Moreover, the membrane is not applied directly to the wall, but already on top of the insulation. It is secured by nailing 30 mm thick counter-lattice strips on top. Further work is carried out in the same way as described above.
Decorating a wooden house with a block house
In essence, a block house for cladding a house is the same siding, only made of wood, and the algorithm for carrying out the work is the same.

True, there are a number of differences that we will focus your attention on:
- There are no starting, corner or connecting strips here. All joints will have to be faced from the outside with shaped wooden elements;
- strips of block house are cut strictly to size, and when forming internal and external corners, the material is cut at an angle of 45° for joining;
- The panels are fastened from bottom to top using nails or special clamps. True, the latter tend to unbend and the stripes may fall out over time;
- When the boards are oriented horizontally, it is better to install them with the tenon up and the groove down.

One of the most complex units is the adjoining of the cladding in the form internal corner. Of course, you can ignore the resulting gap and sheathe the corner with a shaped element. But in order for the cladding of a wooden house with a block house, made by yourself, to be of high quality, it is worth cutting out an arched cutout in the adjacent part, as shown in the photo:

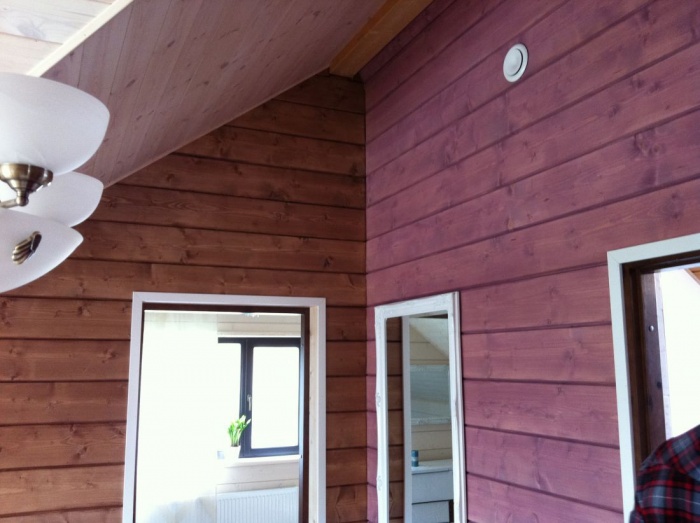
At the end, an antiseptic primer is applied to the finished surface, after which it is finished with several layers of varnish or paint.
Interior finishing with clapboard
This is one of the most popular methods of cladding the inside of private wooden houses, used in almost all rooms, and especially in the steam room. There are currently several types of lining available for sale:
- classical;
- block house;
- softline;
- landhouse;
- American.

The technology for covering walls inside the house is the same for all types, and work begins with installing a vapor-proof layer of film and installing the sheathing. The film is laid out with an overlap of 10 to 15 cm, after which the joints should be carefully glued with double-sided or regular tape. From above it is pressed against the wall with sheathing slats, whose thickness is 20 mm. The slats are nailed to the wall vertically (when installing the cladding horizontally) at intervals of 40-50 cm.
Important. All sheathing slats must be placed in one vertical plane using various shims or mounting wedges.

The first board is secured with self-tapping screws at a distance of 40-50 mm from the floor, taking into account the subsequent installation of the plinth. It is best to fasten all subsequent planks using metal elements - clamps, placed on the previous board and nailed to the sheathing bars with nails. It is not recommended to fasten the sheathing by driving nails into the grooves of the lining.

As with the outer cladding of a house with a block house, all joints and corners should be lined with shaped parts or wooden baseboard. After this, all that remains is to treat the wood with an antiseptic and cover it with several layers of varnish. The finishing technology is shown in more detail in the video:
Interior finishing with plasterboard
Drywall is an excellent material for rough finishing of any internal surfaces wooden house, including the ceiling. Also, moisture-resistant plasterboard is indispensable in rooms with high humidity - in bathrooms and dressing rooms. Subsequently, you can put on it tiles or apply liquid wallpaper. The technology here is simple: first, galvanized profiles are attached to the wall or ceiling so that their shelves are in the same plane. To strengthen the structure, jumpers made of the same profiles are placed between the vertical profiles.

Sheets of drywall are screwed to the shelves of the profiles with self-tapping screws so that their caps are flush with the surface of the plasterboard. The step between adjacent screws is 10-15 cm. Where it is impossible to screw a whole sheet, you need to accurately measure and cut off part of it. This is done with a sharpened knife or specialized tool. When the wall is completely sewn up, the joints and heads of the screws need to be leveled with putty, which, after drying, should be rubbed with sandpaper. At this point, the surface is ready for further cladding.

Conclusion
Thanks to the existing facing materials You can give any wooden house a presentable appearance, and even “turn” it into a stone one using exterior cladding. In addition, finishing will allow you to preserve the wood longer and increase the service life of the building as a whole. It will not be superfluous to take measures to insulate the house from the outside, which will result in lower heating costs.