Many residents apartment buildings are faced with the problem of a shortage of square meters. An excellent solution to this issue could be self-insulation loggias. This is a painstaking task that requires the performer to have certain construction skills and time. However, the finished result is worth it. A warm balcony expands the possibilities of using space, “ennobles” the living space and can become a source of pride for a home craftsman.
The need to insulate the loggia
Each apartment owner decides for himself how to use additional square meters loggias. Some set up a storage room or workshop on the balcony, others use the room more rationally - create a “winter garden” or a separate room. An insulated loggia can be converted into a cozy place for relaxation, work, a compact gym or an area for children’s creativity.

In addition, an insulated balcony solves a number of problems:
- heat loss from the premises and heating costs for the apartment are reduced;
- reduces the risk of mold on the walls of the balcony.
You can perform external or internal insulation. Obvious advantages of the external method:
- the usable area is not “eaten up”;
- simplification interior decoration walls
A significant advantage of internal insulation is the ability to complete the work yourself without hiring workers.
Selection of thermal insulation material
Various thermal insulation materials are used as insulation, ranging from traditional, inexpensive ones to modern high-tech ones. To insulate the loggia from the inside, it is better to use thin, lightweight materials. Thanks to their small width, you can save useful space.
Let's consider the characteristics of the main thermal insulation materials for insulating a loggia/balcony.
Foil polyethylene foam - a layer of foil is applied to one side of the polyethylene, which reflects infrared radiation and “throws” heat flows back. Insulation characteristics:
- roll width - 1 m, thickness - 2-5 cm;
- ease of installation - polyethylene foam can be easily cut with a knife;
- laying method - butt or overlap;
- thermal insulation efficiency almost doubles;
- the material is used to insulate ceilings and walls.
Insulation of the loggia: step-by-step instruction. Use of penofol
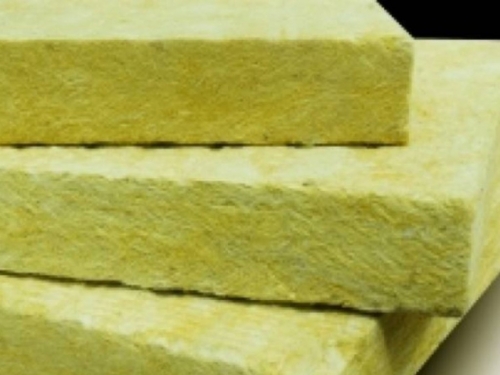
Mineral wool has good thermal insulation qualities and an affordable price. However, experts do not recommend using this material to insulate a loggia for a number of reasons:
- poor moisture resistance - mineral wool absorbs liquid, so you will have to further strengthen the waterproofing;
- when using mineral wool, natural ventilation is required - a gap must be left above the insulation, which slightly “conceals” the area of the balcony;
- To cover the loggia, you will need to reinforce the wall and carry out additional measures.
Foam plastic is foamed plastic of varying densities. The bulk of the material is gas. Polystyrene foam has the following characteristics:
- slab size - 1*1 m;
- insulation thickness 2-10 cm;
- foam density - 15 or 25 kg/sq.cm;
- durability.
Extruded polystyrene foam (penoplex) is a modern heat insulator that resembles polystyrene foam, but has a more durable structure and functionality. Properties of expanded polystyrene:
- rectangular slabs 1200*600 mm;
- thickness - 2-10 cm;
- penoplex density - 35-45 kg/sq.cm;
- vapor tightness;
- frost resistance;
- the slabs are chamfered for tighter installation;
- light weight and ease of installation;
- flammability class - G-1;
- the material is not used in open areas where UV rays penetrate.
Insulating a loggia with your own hands: step-by-step instructions. Photo of penoplex installation

Methods for attaching insulation
The choice of insulation method primarily depends on the heat-insulating material used and further finishing of the walls.
Insulation under putty and plaster is suitable when using penoplex or polystyrene foam. Thermal insulation panels are glued to the base with tile adhesive. The slabs are additionally fixed with dowel mushrooms. You can start plastering/puttying walls or ceilings the day after installing the insulation.
Laying of foil polyethylene foam occurs under the base of the frame. It does not matter how the profiles are attached - to the wall or using U-shaped fasteners. Penofol sheets are applied to the ceiling/wall of the loggia and fixed with slats. In this case, an overlap connection is acceptable, and the joining strip can be taped.

Insulation under the base of the frame is only possible when using thin insulation up to 20 mm thick. Pressing thicker thermal insulation will affect the rigidity of the slats and fastenings
If you plan to cover the balcony with plasterboard or PVC or MDF panels, then it is advisable to lay the heat-insulating material in the cells of the frame. 15-density foam or mineral wool is used as insulation. The disadvantage of this technology is the increase in the thickness of the thermal insulation “pie”.
Options for arranging a “warm” floor
The technology for insulating the floor on a loggia is somewhat different from the thermal insulation of the canopy and ceiling. Excessive demands are placed on this element of the balcony.
There are several main options for arranging a “warm floor”:

Insulating a loggia with your own hands: step-by-step instructions
Below are step-by-step instructions for insulating a loggia with penoplex.
Tools and materials
To work you will need:
- foam boards;
- construction level, stationery knife, marker;
- PVC pipes for laying cables;
- container for mixing glue;
- construction mixer;
- trowel;
- polyurethane foam;
- mounting gun;
- grater for grinding thermal insulation sheets;
- plastic flat trowel for grouting the floor;
- metal grid;
- sand concrete M300 coarse-grained;
- polyurethane glue.
Insulating a loggia: step-by-step instructions. Photo - diagram of a thermal insulation “pie”.

Preparatory work
First of all, you need to install energy-saving plastic windows on the loggia. There is no point in saving on glazing - it is better to choose double-glazed windows and fittings from companies that have proven themselves well in the window market.
If high-quality windows are already installed on the balcony, then you can proceed to insulating the balcony.
Preparatory activities:

Ceiling insulation

Installation of heat insulator on walls and parapet

Insulating the loggia floor with penoplex: step-by-step instructions
Let's consider the stages of creating a “warm floor” using penoplex and cement-sand screed:

- If necessary installation load-bearing frame It is better to use galvanized metal profiles. Unlike wood, it does not rot and is not heavy.
- Thermal insulation work should be carried out in dry weather. Many adhesive mixtures and primers have special features for use in conditions of high humidity.
- The cracks on the loggia are treated with foam that is resistant to low temperatures.
- The wood used must be dried and then treated with anti-fire and rotting agents.
Insulating a loggia with your own hands: step-by-step instructions. Video.
As usual, a loggia in a city apartment is a practically unused living space.
How to make these “square meters” convenient for use?
After all, this will be the best option for increasing the usable area of your apartment. There is only one way out: glaze and insulate. This will significantly reduce heat loss, the penetration of street noise, dust and harmful emissions with which the atmosphere of our metropolis is so saturated. This is especially noticeable in apartments whose windows overlook avenues and busy streets. Correct and efficient equipment of the loggia plays a significant role in the improvement of a modern apartment, so it is better to entrust this work to specialists who have extensive experience in this area. This will save you from inevitable mistakes and turn the loggia into a cozy and favorite corner of your home.
So, the very first and main step to obtaining warm loggia– this is glazing it with warm plastic structures. Since our market is overcrowded with a variety of profile systems, emphasis should be placed on already famous brands, the quality of which has been tested in practice by Russian consumers.
They are produced in Russia under license, and some profile systems are imported from Germany. Do not forget that the structures must have a double-chamber double-glazed window with a thickness of 32 mm. or more. When placing an order for glazing, do not forget about additional expansion profiles, which are installed on top and sides (left, right) of structures. They are necessary for subsequent installation of insulation and finishing.
When glazing loggias, you may need preliminary work. Such work includes work on laying a parapet (if the parapet on the loggia is metal or it does not coincide with the upper ceiling at the vertical level) and side walls made of foam block or lightweight ceramic bricks.
Loggia after installation plastic glazing become more comfortable and beautiful, but not warm. The temperature on a glazed, uninsulated loggia during the cold season is usually a couple of degrees higher than outside. If you have the desire and opportunity to make a loggia extra room, it is necessary to insulate it. This will require additional work and transformations. To make the loggia warm and dry, you need to insulate the parapet, side walls, ceiling and floor.
Thermal insulation work on the loggia is impossible without the use of modern extruded and roll insulation. These are insulation materials such as Penoplex, Penofol, Izolon PPE. The small thickness and unique heat-saving properties of these insulation materials make them indispensable when insulating a small space, where every centimeter is important. There are several options for insulating loggias, but we propose to insulate the loggia using our time-tested technology.
When carrying out work on insulating loggias (according to the requirements of SNiP 31-01 “Residential multi-apartment buildings” and SNiP 21-01-97 “ Fire safety buildings and structures”) we use insulation brands“Penoplex” and “Penofol”, which are low-flammable and low-flammability materials and are included in the groups of materials G1 and B1.
After installing the plastic structures, check the installation seams around the perimeter of the window frame. They must be well and densely foamed. On the street side, the installation seams must be covered with plastic strips or treated with façade sealant to protect the foam from destruction and moisture.

To get a warm loggia a necessary condition is the use of extruded Penoplex with a thickness of at least 30 - 50mm. Penoplex 50mm thick. It is better to use when combining a room and a loggia into one single space and for colder (northern) regions of our country. Penoplex is installed as the first layer to a concrete wall and secured using plastic “mushrooms” (see photo). All seams and junctions are treated with polyurethane foam (this is also a necessary condition). For this it is better to use a special foam gun, because foam for manual use, forms many hidden voids during hardening - installation seam It turns out empty inside.

The second layer, on top of Penoplex, is Penofol, with foil inside the room (see photo). Penofol plays a very important role in our technology and combines two functions. It is a second additional insulation and at the same time performs the function of a vapor barrier so that vapors from the air in the room do not penetrate into the contact area between Penoplex and the concrete wall. When installing Penofol, it is important to avoid overlaps; butt installation is the most suitable option. For complete thermal insulation, it is necessary to glue the joints of Penofol sheets with aluminum tape.

Remember that it is necessary to create an appropriate thermal insulation package consisting of massive Penoplex insulation with a thickness of 30 - 50 mm, reflective Penofol insulation with a thickness of 10 mm, an air gap between the foil and internal lining thickness of at least 15mm. through wooden frame(see photo). It is necessary to treat with polyurethane foam the seams between Penoplex slabs (if slabs without a quarter are used) and the junctions with the enclosing structures, foil-lined tape joints in the Penofol layer! In other words, it is necessary to create the so-called “thermos effect”, thanks to which the heat will be retained on the loggia. According to this scheme, it is necessary to insulate the side walls, parapet, ceiling and floor.

However, it is not always possible to leave an air gap between Penofol and the top floor covering in the thermal insulation structure of the bottom floor slab. In such cases, Penofol will act as a uniform heat distributor (in the case of a cable “warm” floor). But when installing an electric cable floor, it is necessary to use not Penofol, but lavsan-coated insulation or Polif special insulation for heated floors, in which the foil is under a protective layer of film.
Insulating the floor on the loggia– this is a separate topic of conversation. We offer two options for insulating the floor on the loggia. The first option is to create an insulated floor with wooden base(see photo). It can also be used as a basis for installing the “Devicell Dry” screedless system. The second option is to install a warm electric floor on the loggia, which in turn is also divided into two options. The first option is to install a heated floor with pouring concrete screed(see also fiber screed for heated floors) for gluing ceramic floor tiles onto it, the second option is “KNOW-HOW” from DEVI. This is the “Devicell Dry” system - it allows you to dry install a heating cable under a specialized laminated parquet board. This system has huge advantages, namely:
- You can start using heated floors immediately after installation, rather than waiting a whole month, as in the option with a screed;
- the load on the loggia floor (floor) is lightened by 2-3 times (depending on the covered floor area of the loggia);
- installation is carried out within one working day;
- installation can be done at any time negative temperature environment, which cannot be allowed in the option with a screed.
The frame on the walls, ceiling and parapet is made of dry wooden beams and is set at vertical and horizontal levels. Attaches directly to concrete using dowels and self-tapping screws. Attached to the frame finishing. Usually these are plastic Wall panels 25cm wide, wooden eurolining different varieties wood or moisture-resistant plasterboard/aquapanel KNAUF (see photo). If plasterboard is used, additional Finishing work, namely: priming, puttying, corner processing, leveling, wallpapering, cork panels or painting.


Do not forget that lighting devices must be installed on your loggia. These can be either built-in Spotlights, as well as overhead ceiling/wall lamps, switches and sockets. To install them, you initially need to install an electrical cable of the required cross-section (usually 2 x 1.5 or 3 x 1.5 is enough), which is pulled and located under the finishing. In some cases, a necessary condition is to power all the electrics on the loggia with a separate cable (2 x 2.5 or 3 x 2.5) directly from electrical panel on site with the installation of a separate machine. Electric installation work on loggias should be carried out competently and in accordance with modern standards and requirements.
Common solutions for heating an insulated balcony or loggia
Remember, no matter how well you take care of maintaining heat on the loggia, there will be no heat if there is no heat source(insulation materials can only retain heat, but not generate it). Since it is strictly forbidden to place central heating pipes on loggias (see Housing Code of the Russian Federation), we offer several alternative solutions.


1. The most common solution is the use and installation of electric heating devices. These are devices such as oil mobile heaters, electric fireplaces or electric convectors(see photo). This solution is the simplest, most accessible and economical. On a loggia of 3 - 4 sq.m. It is quite enough to install an electric convector with a power of 0.75 - 1.0 kW. If the loggia is larger (6 - 9 sq.m.), then it is better to install two convectors of 1.0 kW each on it than one powerful one of 1.5 - 2 kW. This will ensure faster and more uniform heating of the entire area of the loggia.
2. Another common solution is to install and use a cable heating system on the floor - a warm electric floor on the loggia (see photo). It is a mistaken belief that a warm cable floor consumes a lot of electricity. The power of the installed cable in loggias is usually 180 - 200 W per square meter. And even if your loggia has an area of 6 sq.m., then your heated floor will consume less electricity than Electric kettle or iron. And with the correct use of temperature sensors and modern thermostats (for example, DEVIREG 550), the problem of electricity consumption by cable floors ceases to be relevant for you. You can lay it on top of a heated floor ceramic tiles, laminate and even linoleum. But the best covering for heated floors will always remain ceramic tiles.
3. Less common, “exotic”, but no less effective solution is the use of an air conditioner on the loggia, which works even in winter (see photo). All air conditioners operate in cooling/heating mode down to -5*C. But if external unit air conditioner has been improved to work in winter period, then the air conditioner will operate in both modes all year round (in winter up to – 25*C). This is confirmed most reliable option are DAIKIN air conditioners. This option is the most expensive of all the proposed solutions. But with such an air conditioner, the loggia will be warm - cold winter and cool - in hot summer.
If there is a water leak on the loggia, then it must be treated with sealant interpanel seams. Ideal option One-component polyurethane sealants are used for this purpose. If there is a clear water leakage from above on the loggia, then you should not limit yourself to internal work on waterproofing the seams. It is best to eliminate such leaks from above, i.e. carry out work directly on the upper loggia or on the roof.
This insulation technology is ideal solution when combining a room with a loggia.
When insulating/combining a loggia you can get:
- expanding the children's room area
- computer (work) office
- additional area in the kitchen
- additional seating area
- home workshop
- hostess corner
- winter Garden
New technical solutions
In recent years, the problem of loads on a single floor (floor) of a loggia relative to the total load in the common riser of the loggia along the facade of the building has become relevant. On this moment It is no longer uncommon for several loggias in a row, which are located one below the other, to be finished using one riser of a building. This creates a large additional load on the entire façade of the building. And of course, under such circumstances, it becomes necessary technical solutions, which make it possible to minimize the load on a single concrete floor, and, accordingly, to all nodes of the common riser of the loggia along the facade of the building.
We offer you 3 new solutions, which we have come to thanks to our large practical experience and new technologies of the 21st century. These solutions allow you to avoid the problem of overloading panel ceilings on loggias, even within the strict framework of GOST standards for modern construction:
- application in production masonry work on loggias there is foam concrete (foam block) instead of ceramic brick, which significantly lightens the load on the floor;
- the use of single-chamber double-glazed windows with low-emissivity glass for glazing loggias and the simultaneous injection of inert Argon gas into it;
- use of a heated electric floor system based on the screedless DEVICELL DRY system as an additional heat gain on loggias.
- the use of fiberglass when pouring concrete screed in the DEVI underfloor heating system.
A competent combination of all these solutions provides a significant gain in terms of load weight on a single loggia floor, and accordingly on the entire façade of the building, which in turn guarantees high safety of the work we carry out!
Insulating and finishing the loggia will change your idea of comfort and coziness so much that the loggia can become your favorite relaxation area in your home!
Remember that we recommend that all work related to the refurbishment and redevelopment of an apartment, including loggias, be carried out after consultation with specialists and after obtaining the necessary permission!
We will find out how to properly insulate a loggia or balcony, decide on the method and materials, and talk about laying electrical wiring.
Apartments with additional space, which is a loggia or balcony, have a greater advantage in the eyes of owners of apartments without these premises. But how are these same loggias and balconies used? In the summer you can put a light table and chairs there, breathe fresh air, or simply stretch clotheslines and dry washed clothes.
How to insulate a loggia or balcony
- Glazing of the loggia
- Insulating the loggia floor
- Electrics on the loggia
With the onset of the first cold weather, balconies and loggias become places for storing various unnecessary belongings; with the first frosts, they allow you to do without a refrigerator and store perishable food without any problems. But square meters of living space are expensive today - why do we forget about “ownerless” premises that can easily be converted into living rooms using modern insulating materials? Without delaying until “tomorrow”, we begin to insulate the loggia and balcony - the guide is in this article.
Questions that need to be resolved before starting work on insulating the loggia
First of all, you need to decide on the purpose of the future insulated room, whether it will be a study, a children's room or, for example, a room for sports training. To a large extent, this choice will depend on the size of the loggia, and to a greater extent on its width - if it is less than one and a half meters, then it will be too narrow for a study. The purpose of using the insulated loggia in the future depends on the layout of the electrical wiring, the positions and number of electrical outlets, and lighting fixtures.
Important: completely abandon the idea of combining a loggia and an adjacent room by removing part of the wall between them!
This is the external wall of the building, which means it is load-bearing; there are no additional expansions of the opening in it, except, perhaps, by removing the frame and door frame(if the loggia is located behind the kitchen) it is strictly forbidden to do so! News channels periodically contain reports of partial destruction of entire entrances in multi-storey residential buildings due to the fact that the owner of one of the apartments intended to increase living space by demolishing part load-bearing wall- don’t even think about it!
The reason why loggias freeze seriously in winter is due to the large glass area of this room - after all, it was designed by architects for a clothes dryer, and not for a living space. It would seem that there’s nothing complicated about it - blocking up part of the window opening brickwork or facade plasterboard with a layer of insulation between its panels and the problem is solved.
But not everything is so simple - from the position of official government agencies, reducing the glazing area of the loggia is an interference in the architectural appearance of the building, and therefore is not allowed. Glazing the balcony is another matter; it is permitted because it reduces the risk of fire from an accidental cigarette butt from the upper floors. In recent years, supervisory government agencies have not responded in any way to these very interventions in the “architectural appearance,” but this does not mean that they will not continue to pay attention - it is better not to make serious changes to the existing glazing of the loggia.
Heat loss through the glazing of the loggia can be significantly reduced by installing modern double-glazed windows and carefully sealing the joints between new ones window frames, as well as frames and adjacent walls.
It is necessary to think about heating the loggia - if after insulation this room will be used as a full-fledged room in which a person is present for a long time, then there is no way to do without it. The idea of installing it on a loggia is tempting heating battery, powered from the central system, but this is prohibited by municipal legislation.
The reason for the ban is this: when designing the building and its heating system, loggias were not taken into account, so installing a heating battery in these rooms will lead to a lack of temperature in the system to heat other apartments. As you can see, this is not a matter of heat theft at all, and your attempts to include the loggia area in the total heated area of the apartment are guaranteed to be rejected by all authorities.
Installing a water radiator on the loggia is allowed only if your apartment has an individual heating system, that is, it is heated from a boiler installed in it. The only option left is to heat the loggia with electric heaters - infrared, convection or using electric underfloor heating.
Preparing the loggia (balcony) for insulation
At this stage, the loggia room is completely cleared of everything that is stored in it - after cleaning it should become completely empty. The existing wooden frames with single glazing will then need to be removed as they will need to be replaced with modern ones. If the balcony has metal fencing- it needs to be cut off (you will need a grinder), instead of the old parapet, lay out a new one, made of light ceramic bricks or foam blocks.
The new parapet can be raised a little higher than the old fence, but not excessively - change the “architectural appearance”. Completely remove the floor covering of the loggia, if it is done tiles- you can leave it by cutting out part of the tile to accommodate the brick parapet.
Measure the dimensions of the free opening above the parapet, and you need to remove them using a building level - with the same heights on opposite sides, there may be a serious horizontal difference, i.e., opposite points may be on different heights from the horizontal floor level. Measure the corners and take dimensions from each of the walls, ceiling and floor, make a drawing with these dimensions - it will come in handy.
Glazing of the loggia
Depending on the purposes of insulation and the temperatures of the cold season, new frames can be with one glass or with double-glazed windows of two or three glasses with a heat-reflecting film inside. The frames themselves can be aluminum, wood or plastic reinforced from the inside with a galvanized metal profile.
A glazing opening measurer will give you measurements and recommendations for glazing the loggia; he will also perform all measurements - take into account at least one window in the total glazing area for ventilation of the insulated loggia in the future.
Warn the measurer that you need free vertical areas between the outer frames and the wall about 70 mm wide on each side, i.e. the frames on the sides of the glazed skylight should not be located close to the walls.
Subsequent insulation of the walls of the loggia will require attaching a layer of insulation, a metal profile or a wooden beam to them and subsequent finishing cladding, so the walls will move slightly inside the loggia - if you install double-glazed windows close to the walls, then the side profiles of the frames will be “recessed” into the insulated wall. In the free areas between the frames and the wall, a beam will be installed and two layers of insulation will be laid (before and after the beam).
During the installation of new glazing, require the contractors to install a special strip on the outside plastic tape, its width can be from 30 to 70 mm. And yet - despite the adhesive layer on back side strip, you should attach it to the frame using short self-tapping screws with a pitch of 500 mm, because over time the glue will dry and the strip will certainly come off.
Insulating the loggia floor
There are two main ways to do this: lay the insulation directly on the floor, lay the main covering on top; Place the logs, insulation and subfloor base on top of them, and the main covering on top. If possible, simplify the task and not raise the floor by wooden joists- we lay only roofing felt, glue its joints with sealing tape and, if the height of the floor allows it to reach the threshold of the loggia door, we lay the base of the floor from chipboard or OSB boards, impregnated with drying oil and further drying. In this case, we will not lay insulation, since there is no room for it.
Penofol or Penoplex are most often used as a heat and vapor barrier in the process of insulating a loggia or balcony; the first insulation consists of foamed polyethylene, the second - from extruded polystyrene foam. Having good thermal insulation characteristics, easy to use and virtually waste-free, both of these materials are not recommended for use in residential premises.
The reasons are as follows: despite the declared flammability classes, according to which these insulation materials do not burn and do not support combustion, their manufacturers are being dishonest - “Penofol” and “Penoplex” smolder well, releasing a significant amount of carbon dioxide and carbon monoxide. It is better to protect the residents of the apartment and the entire house as much as possible from such consequences of fire by using only mineral wool-based insulation.
So, to lay an insulated floor on a loggia we will need: roofing material, which is enough to cover the area of the loggia floor with a slight overlap on the walls; a roll of self-adhesive tape-sealant of the “Guerlen” type; wooden beam 50 mm wide for placing logs; rolled mineral wool with a thickness of 50 mm; flooring for base floor ( chipboard sheets, OSB 20 mm thick); finishing coated floors (linoleum, laminate).
The floor surface is cleaned of debris and dust, and roofing felt is laid on top of it in one layer. The joints between sheets of roofing felt and between the roofing felt and the adjacent wall are covered with self-adhesive sealant tape. Logs are installed on top of the roofing material in increments of 500 mm, and the timber under them is selected with a height that will allow the plane of the new floor to be brought to the level of the door threshold. When determining the height of the timber for the logs, take into account: the thickness of the roofing material (usually 5 mm), the thickness of the slabs for the base of the floor, the thickness of the finishing flooring.
Logs are set according to construction level, are connected to each other by bars of smaller thickness. The logs should not be properly fastened at this stage - their structure will have to be disassembled for treatment against rotting. To obtain a perfectly horizontal floor surface, you will need to place small support boards under the joists; they should not be attached to the floor, as the roofing material will be damaged.
In the design of some balconies, the slabs that form the floor are sloped towards the side of the fence to remove rainwater - differences of up to 90 mm horizontally between the inner and external sides floor slab. Take this into account when setting lags.
After bringing the upper plane formed by the logs to horizontal level, it is necessary to disassemble the entire structure and treat the timber with oxol drying oil to protect it from rotting. After waiting completely dry layer of drying oil applied with a paint brush, we assemble the logs again, this time we need to fasten them together with the greatest care. The slabs chosen for the base of the floor also need to be covered with a layer of drying oil on both sides and along all ends.
Having completed the treatment with drying oil, drying and setting the logs, we proceed to laying mineral wool insulation, for which it needs to be cut into blocks according to the size of the compartments between installed logs. Mineral wool is easily cut with a regular joiner's saw; while working with it, you need to wear a bandage or a respirator - small particles of mineral wool will break off and rise into the air when cutting and laying.
At the next stage after laying the insulation, the base plates are installed on the joists and secured to them with wood screws. Further work on the flooring is stopped at this stage - first it is necessary to complete the insulation and finishing work of the ceiling and walls. During work on the ceiling and walls, the surface of the rough floor base is covered with two layers of PVC film, secured along the contour with masking tape.
Insulation of the walls and ceiling of the loggia - the initial stage
Inspect the surfaces of the ceiling and walls for cracks and falling plaster, tiles, unstitch all weak seams, then fill them with foam, seal the top with sealant tape.
Nand the next stage is the installation of wooden beams with a cross-section of 40x50 mm (pre-treated with drying oil) on the walls and ceiling. The beam is placed across the walls and ceiling in increments of 500 mm, the installation begins at the junction of the planes of the ceiling and walls, i.e., at the junction points, the beam is attached to both the ceiling and the wall, close to each other. To fasten the timber, concrete screws are used with a pitch of 300 mm.
At this point, work on the walls and ceiling temporarily stops - then it’s the turn of the electricians.
Electrics on the loggia
Usually, old electrical wiring The loggia is represented by a 2x1.5 aluminum wire in a common braid, designed for the simplest lamp with one 100 W lamp. For a full-fledged living space, such wiring is not suitable at all - we will install a new one.
First, you need to find out where the junction box is located in the room closest to the loggia - this issue should be clarified with an electrician at the local housing office or get a wiring diagram for your apartment from this office. If for some reason you don’t want to contact the housing office, then you can run new wiring from the electrical outlet closest to the loggia, drilling a channel from it to the wall between the loggia and the room, then drill a hole through this wall. Detailed description For this process, see our article.
For wiring to the loggia, you can use an aluminum cable, for example, APPV 2x2.5 or 3x2.5, if grounding is expected (in residential buildings, most often there is no grounding). You can use a VVG 2x1.5 copper cable - it will be better. Electrical cable must be placed in a PVC corrugated hose designed to completely prevent fire from a short circuit.
Accordingly, the channel for laying the cable must have sufficient width and depth to accommodate the corrugated hose (a corrugated hose with a diameter of 16 mm is suitable for one cable). In turn, the drilled hole in the wall to the loggia must accommodate a metal tube through which, according to the rules for electrical wiring, the cable to the loggia is passed.
At the exit from the hole into the loggia room, the cable is again threaded through the corrugated hose and inserted into the junction box indoor installation- the place for it is determined and prepared in advance; to attach it, it is necessary to install a wooden mortgage (a board of sufficient size) and secure it to the wooden sheathing.
It is most convenient to place the junction box on the wall separating the loggia from the adjacent living room, 250 mm from the existing ceiling (without insulation and finishing). A corrugated hose with an electrical cable inside is threaded between the wall and the beam attached to it; if necessary, holes slightly larger than the diameter of the corrugated hose are drilled in the areas where the beam and the wall meet. Holes are drilled in the embedded boards for the electrical cable outlet.
Decide on the installation locations of electrical sockets and switches, the installation location of the lamp(s), heating device, hung on the wall - at each installation point of electrical installation products and electrical appliances mounted on the wall, it is necessary to install mortgages to which these electrical appliances will be attached in turn.
The cable in places where electrical installation products are installed and in junction boxes is brought out to a greater length than is actually necessary - 70 mm, which will make it possible to replace the electrical device in the future if necessary. In no case should the exposed ends of the wiring extend beyond the electrical installations and junction boxes!
Important: all switches and sockets mounted on an insulated loggia must be for external installation only.
Important: connect the electrical cable supplying power from the living quarters to the loggia with the cables supplying power to sockets and switches in a junction box only through the DIN rail of the terminal block - no twisting!
Having finished installing the electrical wiring, turn off the general power supply to the apartment and connect the loggia wiring in the junction box of the living room or in the outlet to which the channel was drilled. Connection in any version (junction box or socket) is made through a terminal block (DIN rail).
Please note that direct contact between copper and aluminum cables when twisted, it will cause heating of the aluminum wire, which can lead to a fire - the mediation of the terminal block with steel contacts will eliminate heating and the threat of fire. Use the terminal block in any case, even if the apartment wiring is made entirely of copper cable. If there is no DIN rail in the old junction box in the room, purchase and connect the electrical cables through it.
So, all work on laying electrical wiring to the loggia is completed - turn on the power supply to the apartment and make sure that all electrical installations have power. Next, we seal the grooved channel in the living room and again begin to insulate the loggia.
Insulation of the walls and ceiling of the loggia - continue
Let's return to insulating the walls and ceiling of the loggia. The beam is already fixed, it’s time to lay mineral wool and vapor barrier, you will need knitting wire. We cut the mineral wool into blocks of width equal to the areas between the timber on the walls and the ceiling; we begin laying it from the ceiling - you will need an assistant.
Of the tools needed construction stapler with 12 mm staples - we use them to fasten the end of the binding wire to the edge of the beam, lay the insulation and hold it with the wire, bringing it between two adjacent ones wooden blocks in a zigzag manner, securing each sharp corner with a stapler.
Having finished laying the insulation on the ceiling, we move on to the external walls - the wall between the loggia and the living room does not need to be insulated, because it is already “warm”, but the timber is attached to it in the same way as on the external walls. Therefore, try to place electrical installation products on this particular wall - it will not need to be insulated and covered with a vapor barrier film, which means there will be no difficulties with placing insulation under the embedded board for an electrical outlet or switch.
A vapor barrier film must be placed on top of the insulation, slightly stretched and secured - it must be applied to the surface, secured to the top beam and then along the perimeter of the walls (ceiling). Installation of the film should begin from the ceiling plane. In the areas where the walls and ceiling meet, it is necessary to overlap the film fixed to the walls by approximately 50 mm. In those places where electrical installation products are located, the film is slightly cut and wrapped around the cable going to the product, i.e. the electrical cable is pushed through it.
Important: installation of a vapor barrier film is mandatory, otherwise the wooden beam will rot and the mineral wool will sag under the influence of moisture penetrating in the form of steam from the room. Water vapor will be formed due to high pressure indoors and be attracted to external walls, the partial pressure outside of which is lower due to the lower temperature of the cold season.
Finishing of walls, ceilings and floors
Walls and ceiling can be finished various coatings- plastic or MDF panels, plasterboard or lining. For flooring, you can use laminate, linoleum, or save money and simply cover the base of the floor with two layers of varnish or paint.
The final covering should begin with the ceiling, then the floor covering and only after that the wall covering. After installing the floor covering, its entire surface should be covered again with PVC film to protect it from damage during wall covering. IN wall covering a hole is cut in the area where the wiring box is installed, in the places where electrical installation products are installed, only holes are cut for the electrical cable - I remind you that all sockets and switches must be externally installed, i.e., protruding completely above the plane of the wall covering.
Upon completion of the covering external walls Loggia sockets and switches are connected to the cable supplying power to them and mounted in their places.
Work on insulating the loggia ends with the installation of the plinth and, in the case of sheathing with plastic or MDF panels, butt strips on all edges and corners formed by the wall and ceiling coverings.
If you intend to replace the existing loggia door with a new one, then its installation must be carried out before laying the logs or the base of the floor and before installing the timber on the walls.published
Subscribe to our Yandex Zen channel!
If you have any questions on this topic, ask them to the experts and readers of our project.
The main types of insulation used in DIY balcony insulation technology include:
- Polystyrene foam (expanded polystyrene), consisting of cells of environmentally friendly foamed polystyrene, effective at high humidity. It is a cheap type of material and is most often used for insulating residential premises. Correct styling and operation retain their working properties for up to 30 years.
- Penoplex (slabs). A medium-hard material with good thermal insulation and waterproofing parameters, slightly more expensive than polystyrene foam. When processing a balcony or loggia, extruded penoplex with a thickness of at least 30 mm is recommended.
- Polyurethane foam. A rigid and high-strength material suitable for insulating complex (non-standard) balcony structures.
- When insulating external waterproofing, waterproofing (gidrostekloizol) is often used with a guaranteed service life of over 20 years. Fiberglass materials are not subject to rotting, are characterized by strength and flexibility, and are in demand when creating welded frame structures with insulation inside. When installing walls made of foam blocks and insulating with penoplex, waterproofing is not required.
- Foam block is a type of foam concrete ( cellular concrete), made from a cement solution with the addition of a foaming agent. The material, characterized by high sound-proofing and heat-insulating qualities, is characterized by a low coefficient of water absorption and high heat resistance. Foam blocks are often used on balconies with a metal parapet base for additional strengthening.
- For interior work (waterproofing, vapor barrier), penofol and foil-coated polyethylene are used, which helps prevent freezing and the occurrence of cold bridges. During installation, overlaps and joints at the junctions of enclosing structures should be avoided. The connections are fixed with tape (aluminum).
- A warm floor that allows you to save room height due to the total thickness with a heat-reflecting film of no more than 4 mm.
How to choose insulation for a balcony
Insulating a balcony is an important stage in its repair and expansion, and the creation of an additional room on it. I already wrote about welding work and the choice of roofing material.
Which insulation to choose, what should it be? We need insulation that will have the best properties and at the same time not take up much space.
Choosing insulation for the balcony
In order to decide which insulation is best suited for your balcony, you need to know the properties of the material. Indeed, depending on the chosen thermal insulation material, there will be heat consumption or heat savings.
Probably no one wants to heat the street at their own expense. Therefore, the insulation of the balcony must be approached responsibly. Before starting insulation work, you need to carefully seal all seams and cracks, and then begin insulating the balcony.
Another important point. The main insulation is best done outside. This, firstly, will prevent the appearance of moisture during the cold season, and will also save space inside the balcony.
There are many parameters for choosing a thermal insulation material, these are thermal conductivity, vapor permeability, waterproofing. durability, fire resistance, environmental friendliness and weight.
The main characteristic of insulation is thermal conductivity, which shows how a particular material retains heat.
The density of a material is the weight of 1 cubic meter insulation. The weight of the balcony structure depends on the density of the thermal insulation material. Naturally, you need to choose lighter materials so as not to further increase the load.
Nowadays you can find a considerable amount of insulation on the market. To insulate a balcony, you can use the following materials: penofol, penoplex, polyurethane foam, polystyrene foam (expanded polystyrene), styrodur, mineral wool (isover).
The average user cannot know all the characteristics. Therefore, I will dwell in more detail on the main and more popular types of thermal insulation materials.
Types of insulation for balconies
Penofol is a reflective insulation. This is a multilayer material that consists of polyethylene foam of different densities, structures and thicknesses, and foil.
The thickness of penofol is only a few millimeters, but it can replace 80-100 mm of mineral wool insulation. Penofol can be used for thermal insulation of walls, floors, ceilings, roofs, attic premises, baths, saunas.
Advantages of penofol: reflects up to 97% of thermal energy, lightweight, thin, wide range of operating temperatures from -60 to +100 degrees, durability, easy to install, relatively low price. Can be used for internal insulation.
Polyurethane foam is one of the best insulation materials used for insulating balconies. It is environmentally friendly and has low flammability, which is especially important when insulating balconies on the first floors. Yes, and it’s not completely mounted in the usual way spraying or filling.
The material hardens quickly and does not require additional fasteners. It sticks to all surfaces except water and film
The layer turns out to be continuous, and all irregularities and crevices are filled in, which is important for additional waterproofing
Penoplex is extruded polystyrene foam. Due to its structure, penoplex has low water absorption and low thermal conductivity. Excellent for insulating a balcony from the outside.
Styrodur is a green extruded polystyrene foam from BASF, which has good thermal insulation properties, low water absorption and high strength properties.
Expanded polystyrene is an environmentally friendly, non-toxic heat and sound insulating material, which has proven itself to be the most economical and convenient for insulation, having low thermal conductivity and vapor permeability.
Isover rolls or sheets of fiberglass-based mineral wool highest quality. It provides effective thermal and sound insulation, and is used for structures where the thermal insulation material does not bear the load.
In order for your balcony to be dry after renovation and no excess moisture to appear on it, you need to use not only a layer of insulation, but also a layer of vapor barrier, that is, penofol.
Ultimately, the choice of insulating a balcony will depend on many related factors, among which the important one will be what material will be used as exterior finishing.
How to insulate a loggia
Insulating a loggia is a painstaking and time-consuming job. During thermal insulation, many questions arise regarding the quantity and type of materials and tools. To prevent the leakage of thermal masses, it is necessary not only to glaze the loggia, but also to insulate the ceiling and floor surfaces, parapet, walls and corners between the warm and cold walls. If the walls border on unheated rooms or the street, then thermal insulation is mandatory. In some cases, it will be necessary to lay a parapet if it is missing or does not coincide with the window structures.
High-quality balconies also provide for obtaining a closed space from the inside with thermal insulation of all surfaces, that is, the effect of a thermos.
Self-insulation
The technology for insulating balconies and loggias, if you have some skills in the field of construction and the use of modern types of insulation, can be done with your own hands.
The procedure begins with glazing, which is performed using plastic structures (2-chamber double-glazed windows). At the top and along the edges (walls) it is necessary to install expansion profiles required in the following stages.
Plastic elements increase aesthetics, but not the overall temperature in the room. Further insulation of the perimeter with high-quality materials is required.
Heated floor system
The next stage, which includes strengthening the walls and ceiling, is carried out with a combined thermal insulation coating. Expanded polystyrene (35-55 mm thick) is secured with dowels, and the joints and seams are filled with foam (mounting foam).
The second layer is polyethylene (inside the room with a layer of foil), which has a vapor barrier effect and also provides insulation due to heat reflection. The seams are fixed with special tape.
Wooden sheathing for interior decoration is mounted to the surfaces with self-tapping screws or dowels. The finishing is fixed to it with a gypsum fiber sheet or plastic panels.
To strengthen the floor, a layer of polystyrene foam boards is laid, then foil-coated polyethylene (up to 15 mm thick).
The base of the floors on the thermal insulation layer is carried out using one of the following methods:
- A screed, the thickness of which must be at least 40 mm with a temperature gap (up to 10 mm). After it hardens, tiles or another type of covering are laid on top.
- Arrangement of a heated floor, the installation of which is carried out according to the manufacturer’s technology, providing not only insulation, but also heating.
- Laying the floor with joists. Wooden logs are placed on top of the insulation, secured with screws or foam. Flooring in the form of boards, plywood, OSB is placed on them, followed by covering the floor.
Initial stage - glazing
Work on insulating a balcony or loggia is intended to preserve heat, the source of which is a warm floor or electric heaters. In this case electrical wiring must be installed before interior trim is placed.
High-quality insulation of loggias or balconies consists of a layer of special materials(waterproofing and thermal insulation). External insulation prevents moisture from entering from the street, and internal insulation prevents moisture from penetrating from the inside.
Also read with this article:
Features of balcony insulation
Features of choosing the design of a balcony parapet and glazing
To figure out how and how best to insulate a balcony, you need to analyze what a balcony originally is:
- If this room is in a new multi-storey building with existing double-glazed windows and a reliable stone parapet, then, most likely, only internal insulation using one or several types of thermal insulation materials will be sufficient.
- If the balcony is old with metal rods instead of a parapet and is not glazed, you will need to put in a lot more effort and, naturally, invest more money.
The choice of double-glazed windows for a balcony has its own characteristics:
- By glazing the balcony with one layer of glass, heat loss in winter will be over 70%.
- Installing a single-chamber metal-plastic double-glazed window (with two layers of glass) will significantly improve the situation.
- If the task of creating a living space out of a balcony is serious, it is necessary to install double-glazed windows with two or more chambers.
Foam block for the construction of a balcony parapet would also be a good solution
Features of external and internal insulation of balconies
The following balcony insulation options are available:
- external;
- internal.
Initially, according to SNiP standards, it is recommended to insulate the balcony exclusively from the outside in order to avoid the formation of condensation and accumulation of moisture inside the balcony room.
If it is not possible to carry out external insulation, internal insulation is carried out, based on the features that each type of balcony insulation has:
- material for insulating a balcony must be protected on both sides with a foil (polypropylene) layer, which is necessary to prevent moisture condensation inside the insulation. Condensation is promoted by the temperature difference at the boundaries of the insulation (bordering the cold parapet and contacting the warm internal air).
- The foil barrier protects the insulation from the penetration of water vapor into it and, accordingly, eliminates steam condensation inside the insulation, thereby not reducing thermal characteristics insulation and preventing the appearance of mold indoors due to accumulating moisture.
- The attractiveness of external insulation of a balcony is determined by the so-called dew point - the point at which the temperature difference causes water molecules to condense. With external insulation, the dew point is moved outside the room, and even if moisture penetrates through the hydro- and vapor barrier into the insulation, negative processes will occur outside the balcony.
Device nuances
The process of insulating a balcony room itself is, in fact, not difficult at all. The difficulty lies in the fact that along with the installation of the insulator, other work must be carried out. As such, they have nothing to do with isolation; however, they must be implemented in conjunction with it.
If we proceed from the laws of physics, then insulation must be organized from the outside, i.e., from the cold side. Then the floor, ceiling and walls will move into a warm zone with positive temperatures. This allows moisture vapor coming out from the inside, without accumulating, to freely exit through the insulation layer.
However, in practice it is impossible to insulate all parts of the balcony from the outside. It remains to limit ourselves to the internal option.
Where does moisture come from?

The usual insulating structure for a balcony is:
- warm balcony;
- insulation layer;
- external fence located in a cold zone (outside).
Lack of moisture is only a matter of time. This is just evidence that the insulation and other related materials are still able to hold it. At the same time, it itself remains wet and, in addition to losing its properties, turns into an ideal place for the development of fungus and mold due to constant dampness.
How to avoid condensation
There are two common technologies that will help you really insulate your balcony and practically forget about condensation.
Vapor barrier
 This technology for insulating a balcony involves the use of a special vapor barrier layer, a vapor barrier, which is installed directly in front of the insulation. The method is quite universal and can be used with insulation of any vapor permeability, including those that are “afraid” of moisture.
The most common polyethylene film or foil can act as a vapor barrier. The use of a vapor barrier is especially effective in dry construction and makes it possible to use finishing materials more widely; for example, instead of plasterboard, you can use MDF or wooden lining.
However, it must be said that the presence of a barrier does not guarantee the absence of condensation. It is also necessary to observe the correct sequence of layers in the fencing structure.
An obvious advantage of the described technology for insulating standard balconies is the complete absence of so-called “wet processes”. The only exception is filling seams when using plasterboard sheets.
When installing a vapor barrier, all seams are sealed with tape. With all the advantages of this design, this method also has a certain drawback - the wall will not “breathe”. To remove moisture from the room, other methods of ventilation will have to be provided.
The use of insulation with low vapor permeability
According to this method, the installation of a vapor barrier is excluded, and the absence of condensation provides a material with low vapor permeability. Using this technology, polystyrene foam can be used, whereas mineral wool cannot be used - it does not have the necessary properties.
In order for the balcony to always remain dry and warm, it is necessary to choose a material whose thickness simply does not allow moisture to accumulate in large quantities. In other words, the appearance of condensation can be avoided if the insulation creates a pair of normal resistance.
The design will be in the form: 
- external balcony fencing;
- glue;
- appropriate insulation;
- glue;
- reinforcing layer in the form of fiberglass mesh;
- glue;
- finishing finishing materials.
Foam construction
As an example, let’s look at the structure of a foam structure. Regardless of its type, polystyrene foam is attached to the fencing structure using special adhesives. After initial hardening, the insulation boards are additionally secured with dowels with large plate-shaped caps (“fungi”) for greater reliability.

Next comes a reinforcing layer of the same glue:
- the surface of the foam is cleaned with coarse sandpaper (2-3 mm),
- apply glue,
- a fiberglass mesh resistant to various alkalis is embedded into it (cell size – 5×5),
- Apply another additional layer of glue.
That is, the fiberglass mesh ends up in the middle of two adhesive layers - only in this case can it perform a reinforcing function.
The application of putty begins after the reinforced layer has hardened. What to do next depends on individual preferences. The putty surface can be painted, wallpapered or applied decorative plaster with one texture or another.
In any case, you need to know that only the presence of a vapor barrier or the use of a material with low vapor permeability will ensure comfortable use of the balcony area.
Insulation options
Having considered the properties of materials, you can consider options for insulating the loggia.
- If you consider the likelihood of fire to be very significant, then the best option is mineral wool. And from the point of view of thermal insulation, this is a very good option. But good mineral wool is significantly more expensive than polystyrene foam.
- If you are looking for the most thermally insulating option and can protect the insulation from fire, then insulating the loggia with PPU (polyurethane foam) seems optimal. However, this is also significantly more expensive than insulating balconies or loggias with foam plastic.
- If you choose the optimal combination of price and quality, then this is expanded polystyrene (foam plastic). Moreover, it is always at hand fire retardant materials, for example, the same drywall.
We use the best option for insulation for balconies
The balcony can be used for various purposes: as a utility area for storing vegetables and, for example, drying clothes, or as a living space - an office, a winter garden, etc. but in any of the above cases he, by virtue of his design features requires insulation. When preparing for thermal insulation, the first thing you should do is find out for yourself which better insulation for the balcony, choose exactly in your case.
Since there are now many thermal insulation materials on offer, it is necessary to learn how to correctly evaluate their quality. To do this, in turn, you need to define a list of evaluation criteria. So, this article will analyze the quality of insulation for balconies from the point of view of their direct purpose.
Materials for insulation and waterproofing of balconies
Quality criteria for thermal insulation material
To objectively assess the quality of insulation materials, we will use the following list of properties:
The thermal conductivity value of the material. This parameter determines the amount of heat coming from heated rooms, which the material will transfer over a period of time to the external cold space.
Accordingly, the lower the thermal conductivity, the better thermal insulation. The insulation acts as a barrier at the boundary between warm and cold environments.
The lower the density of the material, the more porous the material, the smaller the pores, and the lower the moisture content, the lower the thermal conductivity will be.
The degree of predisposition to moisture absorption (vapor permeability). Some materials, for example, are highly hygroscopic - a tendency to absorb water vapor from the air, as a result of which, due to high concentration, the vapor turns into water, and the thermal conductivity of the material increases significantly.
Fire safety of the material - flammability or non-flammability, ignition temperature at flammability. This is one of the determining factors for the safety of human life and health.
Environmental friendliness - a predisposition to release elements harmful to health both in a passive state and during combustion.
Durability. The longer the material retains its original integrity and properties, the better.
Easy to use. The ease of processing and installation of thermal insulation material is not the least important when choosing.
Soundproofing and other properties of materials.
Price.
Comparison of thermal insulation materials for balconies
The most popular and widespread are insulation for balconies such as penoplex, polystyrene foam and mineral wool, and it is among these materials that we will try to determine the objectively best one according to the criteria specified earlier.
Characteristics of penoplex
The first among insulation materials to be analyzed is such a thermal insulation material as penoplex, which is most often used today for insulating balconies and loggias and not only.
This is not surprising, because specifications penoplex are really impressive:
- The thermal conductivity coefficient of penoplex boards is 0.03 W/(m*K). and this is significantly below the average among most insulation materials.
- The water absorption of this insulation boards is very low. and during operation in wet conditions Due to this, thermal conductivity fluctuates very slightly - only 3-9%. Moisture absorption during daily exposure to water is up to 0.5%.
- As for fire safety, penoplex is a flammable material. The ignition temperature is 320 degrees, while it emits gas that is poisonous to humans.
The above applies to the most inexpensive modification of insulation. New technologies for its production make it possible to obtain materials that are more resistant to high temperatures.
- The durability of penoplex is quite high - service life original material must be at least 40 years old.
- The material is moderately hard, but at the same time light and not hard, easy to cut. All this makes it very easy to prepare the slabs and lay them on insulated surfaces.
- The soundproofing properties of the material are somewhat inferior to alternative insulating materials. its noise insulation is about 20 dB per 20-30 mm of material thickness.
- In terms of cost, the material is significantly inferior to other insulation materials.
Step-by-step instructions for thermal insulation of a loggia
You can insulate the surfaces of the balcony with the following main layers:
- Waterproofing.
- Thermal insulation.
- Vapor barrier.
- Lathing.
- Finish coating.
First of all, the insulation of the loggia begins with its glazing.
It is important to note that for glazing balconies and loggias it is necessary to use high-quality two-chamber window profiles. After installation window designs on the balcony it is necessary to seal the seams with polyurethane foam
Detailed instructions for insulation work from the inside:
- Cleaning the room (removing things and debris), sealing cracks and cracks with sealant.
- Treatment of walls, ceilings, parapets from the inside with antifungal agents, antiseptics and other biological solutions.
- Waterproofing flooring. If roofing felt is used, it is laid overlapping, cutting out the excess with a knife. If film materials are used, the joints are taped.
- Insulation with extruded penoplex foam 30 mm thick using mushroom-shaped plastic dowels (insulation can be done with mineral wool, polystyrene foam and other heat-insulating materials). Penoplex can be installed on glue, or on glue and dowels at the same time.
- Treatment of adjacent seams with polyurethane foam, the excess of which, after some hardening, is removed with a knife. For more uniform foaming, it is effective to use a special gun for polyurethane foam.
- Laying penofol or foil isolon 10 mm thick so that the foil is from the inside of the loggia. This material acts as insulation and at the same time a vapor barrier. As noted earlier, penofol is correctly laid joint-to-joint, and not overlapping. If penofol is purchased without a self-adhesive side, then in this case it is fixed using screws or dowels.
- Sealing the joining seams with foil tape.
- Installation of wooden sheathing on walls, ceiling surface, parapet of a loggia or balcony. The frame is made of bars and fixed using a level along the horizontal and vertical stripes dowels, providing a gap of 0.5 m between the slats. Providing air space contributes to effective thermal insulation.
- Fastening the final finishing (panels, lining, drywall) to the sheathing with self-tapping screws, nails, or a stapler, depending on the type finishing coating.

Scheme of insulating a balcony from the inside (without vapor barrier)
It is worth noting that it is advisable to insulate walls bordering warm rooms using a smaller thickness of insulation.
The insulation of the loggia floor deserves special attention:
To level the floor surface, you can use self-leveling mixtures based on sand and cement; to raise the floor, you can lay expanded clay 5 cm thick.
To insulate the floor, you need to go through several stages:
- laying a vapor barrier (polyethylene or membrane-type vapor barrier film, roofing felt) to prevent the appearance of mold and fungi;
- insulation of the floor surface with foam plastic or 50 mm penoplex;
- laying a second layer of heat and vapor barrier with penofol or foil isolone;
- laying wood sheathing;
- sealing joints and cavities with polyurethane foam;
- laying 30 mm thick slats on the floor to avoid squeaking under the weight of a person’s body;
- secondary sealing of seams with polyurethane foam;
- plywood flooring;
- installation of electric heated floor is desirable;
- laying the finishing coating (linoleum, parquet, carpet, cork flooring).
If expanded clay serves as floor insulation, then waterproofing is impractical, since the stones of the material are resistant to getting wet. To level the expanded clay surface, you must adhere to the level of the sheathing. Next, the floor is filled with concrete screed.
According to the Housing Code of the Russian Federation, the central heating pipeline cannot be placed on the loggia and balcony. Therefore for additional source For heat on the loggia, you can use mobile electric heaters: radiators, convectors, or stationary ones - electric fireplaces, heated floors.
Thus, thanks to proper glazing, proper thermal insulation with high-quality insulation, together with hydro- and vapor barrier, we end up with a comfortable, insulated room.
Internal insulation
It is more convenient to install the system indoors in a loggia with your own hands, but not more useful for loggia structures. But in cases where it is problematic to carry out external work, it is permissible to install a thermal insulation system inside.
First, you need to decide which surfaces of the loggia need to be insulated and how. If behind a wall, floor slab or ceiling street conditions, which means it is better to insulate with penoplex with a thickness of at least 50 mm.
If behind them there is an insulated or at least glazed loggia of neighbors, you can limit yourself to their repair and waterproofing.
Solid walls separating the balcony from the room do not need to be insulated.
Work technology
The procedure for insulating the surfaces of loggias with penoplex, mineral wool with your own hands is determined by the contractor at will - ceiling, floor, walls. There is no consensus on this matter.
The first stage - surface preparation is carried out by analogy with external work.
Ceiling
The ceiling of the loggias is insulated with your own hands only using the dry method. If it is difficult to fix the sheathing beams on a concrete slab, then they are attached to the wall surface.
Walls
The walls of loggias can be insulated from the inside, as well as from the outside, with wet or dry mineral wool, penoplex, extruded foam, penofol.
Floor

It is worth insulating the floor with high-quality material.
Wooden beams - logs - are laid on the floor, between which insulation is placed.
The loggia floors are insulated with dense slabs of mineral wool and expanded polystyrene. The use of bulk materials is not recommended - too thick a layer of expanded clay or sawdust will have to be poured in order to ensure the necessary thermal insulation qualities of the system.
The second option is to fill the concrete floor with a “warm” mixture. The composition of such cement-sand mortars includes expanded clay, wood shavings, foam chips, etc. You can prepare the mixture yourself or purchase it ready-made at a construction market.
Ventilation
If you do not take care of this point, the exterior finishing surfaces will “cry.” High humidity is an ideal condition for the formation of fungus and mold.
A balcony or loggia is unheated premises in the apartment. Consequently, they are a source of heat loss from an apartment or house. Even good glass balcony transmits a significant amount of heat.
To avoid this, insulate the balcony or loggia from the inside. It is worth noting that there are different approaches to insulating this type of room.
The type and method of insulation of a balcony and loggia depends on:
- intended purpose:
- the balcony is not intended for storage; it is insulated to reduce heat loss from the room. In this case, the work is carried out according to a scheme similar to external heating. That is, only one side of it, adjacent to the wall of the room, is insulated;
- The balcony is for storage. Insulated around the perimeter of all surfaces. Because it shouldn't be here high temperature, then the requirements for thermal insulation materials are not particularly high;
- a balcony that is a continuation of the living room or serves as an office, library, gym, etc. In this case, heat loss through windows and all surfaces is eliminated. And the materials used are heat insulators with high density and considerable thickness. Special attention is paid to the thermal conductivity coefficient of the material and the rules of its installation.
- budget for insulation. Determines the type of insulation, the area of insulation, and further finishing. It also determines whether to entrust the work to professionals or do the insulation of the balcony with your own hands;
- time of year. Any type of insulation can withstand low temperatures. But solutions, adhesives and foam must be used taking into account the ambient temperature. Usually, " winter varieties" expensive. And the duration of work in winter is longer;

Let's look at ways to insulate a balcony using various insulation materials and give some important practical tips on how to make the insulation of a loggia more effective. We will proceed from the fact that it is necessary to insulate the balcony efficiently and inexpensively on all surfaces inside - walls, ceiling and floor.
Insulation requirements:
- light weight. In order not to burden the balcony, which is much lower in strength than a loggia;
- small volume. In order not to occupy the useful living space of a balcony or loggia;
- low cost;
- safety. Fire and environmental;
- the opportunity to do the work yourself.
Insulation for balconies and loggias - types and properties
If you have not yet decided what is the best way to insulate a balcony or loggia from the inside, we suggest that you familiarize yourself with popular thermal insulation materials. Each of them has advantages and disadvantages, which include characteristics, cost and installation methods.

Expanded polystyrene
Lasting, dense material, which does not support combustion well. It is resistant to moisture and has a low thermal conductivity coefficient.

Styrofoam
Dense insulation. It has the lowest thermal conductivity coefficient, light weight, high strength and low cost.

Basalt and mineral wool
Soft insulation. It works due to its structure. Fibers arranged in a chaotic manner contain air, which does not allow heat to penetrate through the cotton wool. When working with cotton wool, you need to create an additional frame.

Polyurethane foam (PPU)
Sprayed insulation. The good thing about the material is that it does not allow moisture to pass through, makes it possible to adjust the thickness of the insulation and allows you to obtain a coating without seams. And this, in turn, eliminates the appearance of cold bridges.

Penofol
Multilayer material. The polystyrene backing retains heat, and the aluminum screen, which is like a thermal mirror, allows the heat to be reflected into the home. Can be used on its own or in combination with other insulation materials.

Expanded clay
Bulk insulation. It has a porous structure, thanks to which it retains heat well. Used for floor insulation.
Using these materials to insulate balconies and loggias, you can additionally provide good sound insulation(subject to glazing with plastic windows).
 A mandatory accompanying attribute when insulating from the inside with most of these materials is a vapor and hygrobarrier film or a superdiffusion membrane. It is designed to protect the insulation, especially soft ones, from getting wet and condensation.
Material prepared for the website www.site
How to insulate a balcony with your own hands - step-by-step instructions
- Clearing the premises. It is impossible to do quality work if you have to constantly move things from place to place.
- Sealing cracks. We assume that high-quality double-glazed windows are installed on the windows. In any case, there are gaps between the balcony and the wall, where the ceiling and floor meet. So they need to be sealed using foam, sealants or solutions. Large gaps are sealed with pieces of polystyrene foam.
- Waterproofing of balcony/loggia. It is necessary to prevent water from getting inside. Moreover, it can enter through micropores in concrete. For this purpose, you can use a deeply penetrating primer.
- In case of using cotton wool, it is necessary to install waterproofing film. It is overlapped and secured with tape.
- Installation of insulation. There are two methods here:
- Frame method. In this case, you must first equip the frame from antiseptic-treated wooden boards or galvanized profiles. Boards are more popular because they are cheaper and allow you to adjust the thickness of the frame. The most commonly used timber is 50x50. Insulation is inserted into the resulting cells.
- Frameless method. More preferable, but suitable only for rigid insulation. This is due to the fact that the frame material when frame method remains uncovered by insulation. That is, wood or metal serve as cold bridges and conduct heat well. Therefore, in the vast majority of cases, rigid insulation is installed without constructing a frame.
- Laying penofol, vapor barrier film or superdiffusion membrane.
- The floor is insulated.
- The final stage is decorative finishing of the balcony or plasterboard.
Insulation of balconies and loggias with mineral wool
The wool is laid so that it fits tightly to the frame elements, but is not “rammed”, i.e. there is no need to further compact it. This will change the structure of the mineral wool and some of the air will evaporate. This will reduce the thermal insulation properties of wool. In order for the wool to hold securely on the wall, and especially on the ceiling, it must be additionally fixed using wire or umbrellas (dowels with a wide head).


 Mineral wool fixed with "umbrellas"
Sometimes the cotton wool is placed behind the frame, as shown in the figure. Then the frame elements are held in place by cotton wool. However, professionals do not recommend using this approach for low-density wool (less than 50 kg/m3), since wool held in only a few places will settle over time, opening part of the wall to the movement of cold air.


The cotton wool is covered with a vapor barrier film. Then the counter-lattice is stuffed. It allows you to protect the cotton wool from touching finishing material and avoid the appearance of a dew point in this place.
The stages of installation of wool are presented in more detail in the diagram.
- Subfloor
- Floor joists
- Frame
- Basalt wool
- Vapor barrier film
- Counter-lattice
- Finishing material

Balcony insulation with polystyrene foam and polystyrene foam
Rigid insulation is also laid in sections of the frame and fixed with foam or special glue. The insulation is not laid close to the frame, but with a gap of 5-10 mm. The gap is subsequently filled with foam, and the foam sheet is additionally secured with a plastic dowel - an umbrella (fungus).
Fastening foam plastic using a frame method


Fastening polystyrene foam using a frame method


The foam sheets are pressed tightly against each other, and the joints are blown with foam.


Expanded polystyrene sheets are joined using the tongue-and-groove principle.


The spraying method stands apart in this group. A thermal insulation material such as polyurethane foam is applied to the wall by spraying. A relatively new material on the market, it is quickly gaining its fans among professionals and amateurs. Because it allows for insulation without additional preparation of the base. The high speed of work completion - less than one day - also speaks in favor of PPU. Disadvantages include high cost and the inability to do the work yourself without special equipment.


- Firstly, reliable protection moisture insulation;
- Secondly, additional internal insulation;
- Thirdly, the foil reflects 90% of the heat back. Which is very important for a balcony or loggia, which by law cannot have their own heating sources.


