If you have already glazed your balcony, it’s time to think about laying the flooring to make the room look beautiful and feel comfortable to be in. Listen to the opinion of experts, they advise installing a wooden floor.
It is not difficult to lay an environmentally friendly covering on the balcony with your own hands; it is only important to protect the base from moisture and correctly install the balcony covering.
Wood has long been used in the construction of residential and non-residential buildings due to its high heat-saving properties. Compliance with the technology of laying plank flooring on the balcony will please you with a flat surface, and wide choose coating materials equips you with the ability to implement your own design.
What are the advantages of wooden floorboards:

- the reality of obtaining a flat surface even with dilapidated concrete slabs of the balcony base;
- ease of processing and fastening wooden slabs for high-quality insulation of a balcony room;
- strength without special load for a concrete slab and long term aesthetically pleasing coating services.
Advice. The choice in favor of plank flooring is especially relevant if there is a significant difference in height between the apartment and the apartment. By laying a wooden base along the joists, it is possible to raise the balcony floor to the apartment level. Even with existing unevenness of the concrete slab, the surface of the flooring will be smooth.
Despite the many advantages of using wooden structures, we should not forget about some disadvantages that can upset you after glazing a balcony:
- wood has a high flammability;
- natural material is subject to rotting processes and can be damaged by insects;
- the tree is defenseless against moisture, which will lead to deformation of the coating.
The few disadvantages of a wooden floor can be easily minimized if, before laying the floor structures, the material is treated with a high-quality antiseptic against rotting and impregnated with fire retardants that prevent fire. Protection from moisture absorption will be provided by varnishing or painting the floor, which will also extend the service life of the boardwalk.
How to prepare a concrete balcony base
If you have ever done construction work, you have a set of necessary tools. To install a wooden floor on your balcony with your own hands, you will also need building materials (timber logs, boards), which should be treated with a special impregnation or buy wood that has already been treated with a protective solution.
When starting work, it is necessary to clear the space of the balcony slab from debris and remove any that have become unusable. cement screed, A old mortar clean thoroughly.
Overall plan further actions as follows:
- Arrangement of waterproofing of the surface of the subfloor.

- Laying wooden logs and then securing them.

- Work on insulation of floors covered with logs.

- Installation of a wooden structure on the balcony.

- Finishing floorboards.
If it is necessary to pour a new cement screed, the joint between the wall of the house and the balcony slab is filled with waterproofing mastic. Then a temporary formwork frame is installed around the perimeter, not forgetting about the beacons along the wall and leveling them horizontally. After pouring the cement mortar (the next day), the beacons are removed, the voids are filled with cement and the screed is left to dry for two weeks.
Wooden floor waterproofing work
To protect the wood on the balcony from moisture, it is necessary to insulate the base so that due to dampness you do not have to deal with fungus or mold. How to implement an event:
- seal all cracks to protect against moisture penetration from the outside;
- apply the first layer of thick waterproofing film to the balcony floor;
- The second layer of waterproofing is used to cover the slab after installing the insulation.

Comment. The easiest way is to isolate the surface plastic film, you can use penofol (polyethylene reinforced with aluminum foil). The hydrobarrier sheets are laid with an overlap (15 cm), and the edges are sealed with tape. Some craftsmen isolate the base liquid glass or liquid rubber.
Technology for installing wooden floors on joists
In some cases, it is possible to lay wooden flooring on top of a cement screed, but practice shows that it is more reliable to install a balcony floor on joists. This will eliminate the height difference on the balcony and in the apartment, and will make the balcony warmer.

Floor joist installation plan
This stage of construction work can be called the most critical; its implementation will ensure the horizontality of the balcony base. To install a wooden frame, you will need three well-dried timber of a certain cross-section. We begin laying the boards on the base of the balcony slab.
- We lay two beams along the length of the balcony - along the edge of the base near the wall and parallel along the edge of the balcony.
- Having measured the distance between the logs, you need to cut the bars according to the measured length for laying crossbars between the longitudinal beams.
- We fasten the transverse and longitudinal bars of the sheathing using metal corners and self-tapping screws.
- To level the structure horizontally, we use a level and use plywood or plastic as supports.
- The resulting wooden frame is fixed with dowels to the surface of the concrete base.
Video instructions for installing wooden logs:
While attaching the horizontal and longitudinal joists, you should use a self-tapping screw to stitch through the gasket located under the bars. The distance between the transverse sections laid under heavy longitudinal beams must be at least 50-80 cm. It is necessary to ensure that approximately 5 cm is maintained from the transverse beam to the wall.
Important. When calculating the height of the sheathing structure, you should take into account the height of the floor along with installation finishing coating. Otherwise, the surface furnished with your own hands may end up higher than the balcony threshold.
Measures for insulating floors with joists

To protect the floor installed on the balcony from the threat of freezing from below, you need to know how to properly insulate a wooden structure. This step is especially important if the balcony below is not glazed or the space is completely open. If you do not plan to install a “warm floor” system, insulation can be done with the following materials:
- rigid products in the form of slabs made of perlite cement mixture, blocks of extruded polystyrene foam;
- roll insulation made from various types of mineral wool;
- sawdust or specially made backfills.
It’s very easy to do it yourself, taking into account an important rule - the thickness of the beams and insulation should be the same. The material selected for insulation is cut into rectangular pieces according to the size of the space between the laid joists with an allowance of 2-3 cm for a tight fit.
Before laying the insulating material, the balcony slab can be covered with a layer of insulation, the sheet of which is mounted overlapping the walls (20-25 cm). If a loose insulator is selected, the space between the joists is filled with it, a flat surface is achieved by compacting the material, adding backfill if necessary. Choosing insulation from mineral wool, it must be covered with a vapor barrier material to protect against condensation accumulation.
Comment. There is no need to waste effort on insulating a balcony without glazing. On the floor of an open space exposed to the environment, moisture will accumulate in the insulating gasket, which can lead to its rotting and destruction of the wooden structure.
DIY plank flooring

Today, home craftsmen will not have any difficulty laying wooden flooring thanks to the presence of special tongue-and-groove locking fasteners along the edges of the floorboard. This innovation makes it easy to adjust the floorboards during the installation process. The boards are laid on the joists in the direction away from the wall. When starting to install the first plank sheet, the lock tenon is cut off from it, and the board itself is laid strictly perpendicular to the vertical wall.
Important point. Before attaching the floorboard with self-tapping screws to the joists, make sure there is a gap of no more than 1.5 cm. The first board with its three edges should not touch the walls, a gap of up to 15 mm should be left, and the screws should be screwed in at an angle of 45 degrees.
Elements of the boardwalk, by analogy with the bars already fixed to the balcony floor, must be pre-treated with an antiseptic. Special attention should be given to the underside and ends; after laying the wooden floor, it will be impossible to reach them. The next action plan is as follows:
- At a distance equal to the width of the board (maybe a little more), install an auxiliary rail, securing it with self-tapping screws.
- When starting to attach the second covering element, insert its tenon into the groove of the previous panel.
- To ensure that the boards fit tightly together, drive a couple of wedges between the batten and the second board.
- Install the remaining parts of the floor in a similar way, additionally fixing each board at an angle (into the groove) with self-tapping screws.
- Fix the first and last element of the boardwalk longitudinally, securing it to the joists with self-tapping screws.
Video instruction:
When the wooden floor is completely installed, the gaps formed along the walls are covered with plinths. Craftsmen advise before finishing the floor structure to open it with varnish or paint it to protect the wood from absorbing moisture. It is advisable to apply 2-3 layers of the composition with mandatory drying of the surface after each treatment.
Floor finishing options
Mounted and varnished wooden structure ready for use. To ensure long service life of the decking on the balcony, it is worth considering the finishing coating before installing the baseboards. What material is suitable for the floor on the balcony:
- facing tiles – the ability to choose a pattern and ease of cleaning;

- laminate or parquet boards create the illusion of continuation of the room;
- terrace board – resistant to moisture and temperature changes;

- linoleum or carpeting will make the floor pleasant for walking barefoot.

If wooden base If you don't want to cover it with anything, treat a well-sanded wooden board with a deep-penetrating varnish, choosing the tone you like. In the case of floorboards of different sizes and not particularly attractive appearance, paint the balcony floor with paint intended for outdoor use. This will help mask coating defects.
You can arrange the floor on the balcony with your own hands in a variety of ways and materials. The choice depends on the skill, financial capabilities and taste preferences of the property owners. Before deciding what to make the floor on the balcony from, you need to decide on the purpose of this room and the conditions in which it will be used.
Options for using a glazed balcony.
The determining factor in deciding what to cover the floor on the balcony with is the presence or absence of glazing. There are virtually no restrictions.

Views of an open balcony.
If the floor is very crooked and you need to raise it higher, then you can use brackets and corners. Video below.
The covering for their arrangement is chosen as for ordinary residential and auxiliary rooms in an apartment. However, when there is a fire escape hatch in the floor, the finishing material must be laid taking into account this nuance. The floor on an open balcony is exposed to factors such as moisture, solar radiation and significant temperature changes. Based on this, the covering for an open space must be selected thoughtfully and carefully, taking into account all possible restrictions. Let's look at how to make a floor on a balcony with your own hands, without resorting to the services of hired workers.
The subfloor can be leveled using wedges. Video below.
Finishing the balcony floor with linoleum
When choosing a covering for arranging a balcony, many people opt for linoleum. This material has an affordable price and a variety of colors. Linoleum on the balcony looks good and presentable, not inferior to ceramics and laminate. It is so easy and simple to work with it that even a person who is far from construction and repair business can lay it. Another important factor in favor of linoleum is that it can be laid on any curved surface. You need to buy linoleum for a balcony in such a way as to avoid additional work on thermal insulation. It is better to take material with a warm backing. The insulated material absorbs the cold coming from the concrete slab.
In order to properly lay linoleum, you will need the following devices:
- roulette;
- marker;
- glue;
- scissors;
- stationery knife;
- scotch.
It is advisable to buy material of such width as to cover the floors with one continuous strip. This will avoid the process of making joints. After purchasing the roll, you need to roll it out and leave it for a day. This will prevent wrinkles from appearing after installation.
Floors should be covered with linoleum as follows:
- Clean the stove from debris and dust. Knock down the fragments protruding from it. Fill large potholes and holes with cement mortar. After the solution has hardened, treat the subfloor with a liquid primer.
- Take measurements. You should measure more than just length and width load-bearing slab, but also its diagonals.
- Transfer measurement data to linoleum. If necessary, immediately cut off the excess to make work easier.
- Place the workpiece on the stove. Make a precise adjustment using a knife and scissors. Glue one end of the covering to the slab.
- Roll the linoleum into a roll to the gluing area. Apply glue to its back surface and glue the material over the entire area.
- Seal the coating around the perimeter. Duplicate the connection with tape, placing it on the walls.
- Where the hatch is located, make slits that are covered with a decorative threshold made of metal or plastic.

Linoleum on the floor.
Good linoleum can last for several decades if treated carefully and with care.
Balcony finishing with ceramic tiles
As a rule, this is how a loggia is arranged. Its floor plate has a secure support on 3 sides. For a balcony, you need to choose the thinnest and lightest tiles so as not to provoke deformation of the supporting slab. Laying a tiled floor on a balcony with your own hands requires certain construction skills, care and patience. But the end result is worth it. If you decide which floor is better to make on the balcony, then more practical solution You can't think of anything better than ceramic tiles. With its help you can create your own unique pattern on the floor. This is a strong and durable material that is resistant to all influences. external factors. In order not to burden the structure, leveling the slab on the balcony under the tiles must be done using light gypsum mixtures with the addition of expanded clay. This technique will allow you to immediately resolve the issue of how to insulate the floor on the balcony.
To work you will need:
- level;
- Bulgarian;
- roulette;
- hammer drill with mixer;
- steel and rubber spatulas;
- tile adhesive;
- grout for seams;
- plastic crosses;
- liquid primer.
Before laying the floor on the balcony, it is necessary to glaze it, if provided for by the project. The relevance of this event is determined by the fact that the installation of the floor on the balcony involves sealing the junction of the plastic sections and the slab. This is exactly the task that the glue and tiles placed on the screed will accomplish.
The work is carried out in the following sequence:
- The screed is being installed. Its height is determined by the degree of inclination of the supporting slab. After hardening, the surface is treated with a liquid primer.
- Floor tiles are being laid. Correct operation is controlled using a level and plastic crosses. The correction is performed with a mallet. The edge tiles are cut off.
- Held final finishing floor on the balcony by grouting the joints. Already 2 hours after the end of this process, the tile coating is ready for use.

Floor finishing with tiles.
The heating issue can be solved by installing an electric heating system under the tiles.
Using decking boards
Terrace boards on the balcony are used in cases where this room does not have glazing. The main enemy in this situation for the flooring is snow and water, which will accumulate on its surface. Decking consists of polymer plastic with the addition of wood flour and dyes. This material is absolutely not susceptible to moisture, ultraviolet radiation and temperature changes. It can be used to disguise the fire hatch and defects in the load-bearing slab.
In order to make decking from decking boards, you will need:
- perforator;
- level;
- roulette;
- hacksaw for metal;
- Bulgarian;
- profile pipe.
Together with terrace board There is a special fastener that makes installation easy and simple.
The decking should be laid as follows:
- Assemble the frame from a profile board. It should be noted that the flooring made must have a slight slope for water drainage.
- Take measurements and cut the pieces to the required length. Treat their edges to remove irregularities and burrs.
- Attach the clamps to the frame. To do this, it is better to use stainless steel screws for metal so that you can easily dismantle the laid floor.

Terrace board.
The base slab needs to be cleaned periodically, as dampness and all kinds of debris will accumulate under it. To prevent the formation of mold, it is advisable to treat the reinforced concrete slab with an antiseptic.
Arrangement of balconies with carpet
For obvious reasons, this finish can only be used for balcony floors closed type where protection from snow and rain is guaranteed. Carpet on a balcony can be used as a temporary or permanent covering. In the first case, it spreads directly onto the concrete slab without rigid fixation to the base. When the material is laid with the expectation of long-term use, a subfloor is installed on the plywood balcony. This must be done in order to protect the material from the dampness and cold of the concrete slab.
In order to complete this work, you will need the following materials and equipment:
- hacksaw;
- screwdriver;
- roulette;
- building level;
- stapler;
- hammer;
- glue;
- timber according to your sizes;
- drying oil;
- antiseptic;
- primer;
- expanded clay;
- scotch.
The work can be carried out at any time of the year. Knowing how to properly make a carpet floor, you can complete it within 1 day.
Finishing is carried out in the following sequence:
- The concrete slab is treated with an antiseptic and a deep penetration primer. The level of its slope is checked, measurements are taken of the length and width.
- The frame is made from timber. Its horizontal position is verified using supports and slats. Fine expanded clay is poured into the cavity of the frame. It will play the role of a heat insulator and humidity level regulator.
- A membrane film is fixed over the timber frame. Its fastening is done with a stapler.
- Blanks are cut from sheets of thick plywood. They are attached to the frame. To do this, it is better to use wood screws. The joints between the plates are sealed with sealant and taped.
- The carpet is adjusted to size and laid on the prepared base. Its fastening is carried out using glue or staples. At the same time, in order to avoid wrinkles, the carpet must be fixed over its entire area.

Floor finishing with carpet.
In some cases, the floor on the balcony is made of chipboard as a base for carpeting. This material has low thermal conductivity and quite well retains the cold that comes from reinforced concrete slab. Chipboard has a fairly large margin of strength to be laid even without a frame. You can create an additional layer of thermal insulation using foam boards laid on the floor. But first you need to level it with cement mortar. In this case, laminated chipboard can be used as a finishing coating, which is used for making furniture. For these purposes, doors and table tops are used from cabinet furniture that has served its purpose, or custom-made products.
You can lay anything on a well-prepared subfloor.
How to make a subfloor on a balcony. What is better to use as a floor covering for finishing: linoleum, parquet, tiles or laminate. How whimsical this or that surface is. Let's look at each question to determine optimal material taking into account the technical features of the premises and budget capabilities.
In order for the balcony to look beautiful and provide the necessary comfort, preparing the base should not be limited to leveling it with a screed. It needs to be further insulated by installing wooden frame with insulation. And for maximum comfort in the cold season, you can install a “warm floor” electrical system.
Wooden frame with insulation
The most popular subfloor design, due to its simplicity and relatively low costs, consists of:
- wooden frame;
- insulation (mineral wool, expanded polystyrene);
- flooring (chipboard, plywood).
Used as lathing wooden joists, which are attached to the base of the balcony with anchors and form cells for laying insulation. Both mineral wool and expanded polystyrene (foam plastic) can serve as insulation material, since their thermal insulation properties are comparable.
Note! If you will insulate the floor on the balcony with mineral wool, take care of reliable waterproofing. Unlike expanded polystyrene, mineral wool completely loses its thermal insulation properties when wet.
When choosing between chipboard and plywood, keep in mind that the first option has a lower coefficient of linear expansion. Chipboard retains its shape much better and deforms only if it stays in water for a long time.
Combination “wooden logs + mineral wool + chipboard”
Warm floor system
Insulating materials reduce heat loss indoors, but do not emit heat themselves. To maintain a comfortable temperature in any weather, it is better to install an electric heated floor on the balcony. Such a system costs an order of magnitude more than a conventional wooden frame with insulation. But thanks to it, you will get additional living space where you can arrange a relaxation area or a study.
To install the system use electrical cable or infrared film. The choice of a specific option primarily depends on the geometry of the base. If the room is of irregular shape, it is better to use a cable, which can also be easily laid on an uneven surface, so leveling the base is not required. For infrared film It is critically important to install it on a perfectly flat surface, and the geometry of the balcony or loggia should be rectangular. The advantage of the film is that the floor covering can be laid directly on it, whereas the use of cable requires a finishing screed.

How smaller step cable laying, the greater the power of the “warm floor”
The cable and film in the “warm floor” system must be laid on a heat insulator, which will prevent heat from escaping downwards.
You will have to pay for the comfort provided. It's not just about expensive materials. The system operates from electrical network, which means it is an additional consumer of electricity. The consumption of “warm floor” depends on the external air temperature, on average it ranges from 100-200 W per 1 m².

The variety of floor coverings confronts craftsmen with difficult choices.
Linoleum
There are several types of linoleum, which are produced on the basis of different materials: glyphthalic, colloxylin, rubber, PVC, natural.
Cheap linoleum is easily scratched, does not withstand low temperatures, and can emit harmful substances.
Rubber-based linoleum has the most durable characteristics - it is not afraid of moisture, is fire-resistant, and tolerates mechanical loads well. If the balcony will be used as a residential insulated room, it is better to buy linoleum at natural basis. It costs more, but it is environmentally friendly and looks expensive.

Linoleum can imitate any floor covering
Advantages of linoleum:
- resists moisture well and does not rot;
- serves as additional heat and sound insulation;
- It does not require special care;
- easy to install;
- It's inexpensive.
Disadvantages of linoleum:
- sensitive to fats and chemically active substances;
- may crack in severe frost;
- deformed under high load;
- cheap models are made from artificial, non-ecological materials.
Carpet
In terms of price, carpet is comparable to linoleum, but before you put it on the balcony floor, weigh the pros and cons. The carpet is pleasant to the touch and warm at any time of the year. Carpet makes the room more comfortable and homey. This floor is suitable for a recreation area; it is not recommended to use it for a balcony-storage room or “smoking room”.
Unlike linoleum, carpet very quickly becomes saturated with dust, so you will have to clean it much more often. It absorbs odors better than other materials, including those from cigarettes. Keep this in mind if small children will have access to the balcony. If you plan to use the room for drying clothes or as a flower garden, then you need to use carpet exclusively with a rubber base.

Carpet will “domesticate” any room, but has a number of operational disadvantages
Advantages of carpet:
- creates cozy atmosphere in room;
- pleasant to the touch;
- easy to install;
- relatively inexpensive.
Disadvantages of carpet:
- requires frequent care;
- quickly absorbs dust and odors;
- fabric-based coating does not tolerate high humidity.
Laminate
The basis of the laminate is a wood-polymer material, upper layer- paper with designs. Moisture resistance and durability of the coating are ensured by several layers acrylic resin. The more layers, the better surface copes with moisture and mechanical stress.
The laminate pattern can imitate any material. Nai in great demand Wood imitation is used, which is why this type of floor is often called laminate (or laminated) parquet.
Laminate is more expensive than linoleum and carpet, but it justifies its cost beautiful view. Laying a laminate floor on a balcony is a more complex task, requiring careful preparation surfaces.
Laminate does not tolerate temperature changes well; indoors, even in winter, should not be colder than 5 °C.

Laminate looks solid
Advantages of laminate:
- beautiful view;
- easy care;
- resistance to mechanical damage;
- The appearance of mold and mildew is excluded.
Disadvantages of laminate:
- sensitivity to temperature changes;
- possible susceptibility to moisture (if the thickness of the protective layer is insufficient);
- increased acoustic effect;
- complex installation.
Installing a wooden floor on a balcony has its own characteristics. The parquet looks great, is natural, and environmentally friendly. But many types of wood are not resistant to moisture and temperature changes. Therefore, in case of poor waterproofing and poor insulation of the room, the parquet board may become deformed. This will at least lead to unpleasant squeaks when walking.
In this case, what is better to lay on a loggia or balcony for “wood lovers”? First, you need to choose a type of wood that is weakly susceptible to moisture and low temperatures. This type includes, for example, teak, from which decking is made. Secondly, after installation, the floor is covered with several layers of moisture-resistant varnish to protect it from aggressive factors. Therefore, labor costs and installation costs parquet board– the highest among all floor coverings.

Wooden parquet is an expensive and quite fancy material
Advantages of parquet:
- naturalness and environmental friendliness of the floor;
- great view;
- good sound and heat insulation.
Disadvantages of parquet:
- may be deformed due to the influence of external factors;
- serious labor costs during installation;
- high price of material.
Tiles are the best option for open balconies. Not afraid of rain, direct sunlight, temperature changes. It is easier to clean other surfaces from dirt; it allows the use of aggressive chemicals. For flooring, you need to choose ceramic tiles with a rough surface, then the risk of slipping, even on a wet surface, will be minimal.
Note! In particularly harsh conditions, instead of ceramic, porcelain tiles with a denser structure are used; they can withstand temperatures down to -50 °C.
Ceramics are classified as “cold” materials, so when walking barefoot on tiles without heating, a person does not experience a very pleasant sensation. To avoid this, it is better to cover the floor on the balcony with a carpet or wear slippers.

Tiles are used both on insulated and open objects
Advantages of ceramic tiles:
- high resistance to atmospheric influences;
- very easy care;
- resistance to all detergents;
- reasonable price.
Disadvantages of ceramic tiles:
- "cold" effect;
- complex installation;
- fragility, can be damaged by a heavy hard object.
Summing up: which floor is better for a balcony
Calculate the renovation budget, think about the purpose and design of the object. If the economic component is at the forefront, choose linoleum. The material is universal and can be used on all types of balconies and loggias. If your budget allows you to choose any option, make a decision based on functional criteria.
- Study
Take care of the environmental friendliness of your flooring. Do not use cheap linoleum, it smells unpleasant and emits harmful substances. Natural linoleum, laminate or parquet are suitable.

The main criteria for flooring for a work area are quality and environmental friendliness
- Recreation area or gym
For relaxation or sports, it is better to lay carpet. This floor will allow you to completely relax your feet after a hard day at work, freeing them from uncomfortable shoes.

Imitation of grass allows you to relax not only physically, but also psychologically
Plants need to be watered regularly. Ceramic tiles can cope with high humidity. In addition, due to its high thermal conductivity, such a floor covering will allow you to use the “warm floor” system as efficiently as possible.
For your information. The effectiveness of “warm floor” directly depends on the thermal conductivity of the floor covering. The higher it is, the less heat loss will be. The most suitable in this regard is tile, followed in descending order by laminate, linoleum, parquet, and carpet.

The winter garden places demands not only on the quality and reliability of the floor, but also on the room temperature
If the balcony or loggia is well insulated and has reliable waterproofing, then you can use almost any coating; the choice is limited only by the financial component and personal preferences. If there is no hydro- and thermal insulation, it is better to make the balcony floor from unpretentious, weather-resistant materials.
How to make a subfloor for any floor covering
Heated floor systems for balconies and loggias
Warming and styling quartz vinyl tiles
Laying porcelain tiles on an open balcony
Repairing a balcony room seems to be a simple process that does not require significant time or money. But we must not forget that this room most of all requires protection from temperatures and precipitation, because it is located on outdoors and consists of fragile facing structures. Open balconies are especially affected, the interior decoration of which, along with external materials, is susceptible to constant corrosion and destruction. And how can we forget that it is from the balcony that the draft and cold from the concrete floor enter the apartment. Therefore, the question: what to lay on the floor on the balcony is of interest to the average person.
The need for insulation
Most of all, the need to insulate the surface of the balcony floor arises in winter time years, when a merciless draft enters the apartment. Housewives save themselves by covering the floor cracks, but this is not the most effective way. Some people prefer to lay warm carpets on the floor on the balcony, but this option will do only in glassed rooms.
Raising the floor level on the balcony
The most common and economical ways Insulation of the room means raising the floor level and using additional heat-saving materials. We must not forget that facing materials can also slightly increase the warmth of the floor surface.
Raising a concrete pad
A universal option that is suitable for both open spaces and glazed balconies- This is the application of an additional layer of cement mortar. This method will save you from questions about how to lay the floor on the balcony. This technique has a number of undeniable advantages, including the durability of the material, ease of laying the floor, increasing the level of the surface and its heat resistance, short time to complete the work, as well as the possibility of surface coating with any facing material.

Applying an additional layer of cement on the balcony
Before starting work, you should prepare all the necessary materials, namely: a level, a spatula, dry mortar, clean water and a mixing cavity. First you need to clean the surface from dust and excess moisture, if any. Then you need to measure the floor level and its unevenness. It is important to remember that pouring work should begin from the side where the floor height is greater. Next, gradually, moving from one edge to the other, an even layer of cement is applied, which takes about two days to harden. This rough coating, which after drying will need to be leveled with facial fill.
After finishing all work and drying finishing fill you should decide what to cover the floor on the balcony in the apartment. The warmth of the floor and its comfort during operation depend on the facing material. The modern consumer is offered a lot of available options, which vary in price, color solutions and operational features.
Logs - a method of insulation
If you decide that you should put a wooden covering on the floor of an unheated balcony, then you cannot do without the help of logs. By the way, this is one of the most effective ways insulation. The fact is that the organization of a wooden covering is associated with the creation of an air cushion between concrete surface And wooden flooring, which prevents the transfer of cold from the main structure to the floor covering. Also, creating such a niche allows you to place in it different kinds thermal insulation material.
Working with lags begins with cleaning the surface, as well as measuring its level. Since concrete can accumulate dampness, it is necessary to first cover the surface with a layer of fiberboard treated with stain. This will prevent the entry of water and dampness. What is better to lay on the floor on the balcony as waterproofing, if not this kind of material? The fiberboard is attached using self-tapping screws. After this, wooden logs are placed on the floor at equal distances. They not only adjust the height of the future floor, but also make it possible to level the surface. To do this, durable, non-sagging material should be placed under the beams in the right places.

Floor insulation with logs and fiberboard
After the procedure is completed, you will have a surface with uniform niches in which the insulation is placed. You can choose any type of insulation material, from expanded clay to all types of fiberglass. What to lay on the floor on the balcony as insulation should be decided according to your personal needs and capabilities. The final stage is fixing the facing board surface, which is then covered with varnish, paint or laminate.
Linoleum and laminate
The facing material is no less important than the layer underneath, so the selection of materials must be taken with full responsibility. If you are deciding what to lay on the floor on an open balcony, then linoleum will be for you ideal option. This is a material that is practically unaffected by atmospheric phenomena. The only thing that may be damaged is the paint of the design. But this will not reduce the quality of the base at all. Linoleum also refers to budget materials and its fastening does not require significant effort. The advantage of this option is that it can equally be fixed both on a concrete pad and on wooden floor. The main thing is to pay attention to the fact that the edges of the covering at the walls of the balcony do not create gaps for the passage of moisture.

Laminate on the balcony
Laminate flooring is more susceptible to weather conditions, especially with regard to frequent precipitation. Therefore, when choosing what is best to put on the floor on the balcony with an open facade, laminate should be excluded from the list. This material will not retain moisture and will not prevent dampness. If the coating is used on a glazed facade, then a warm carpet can be laid on top of the laminate, which will add comfort and coziness to your balcony room.
Decorative tiles
Cladding tiles are a good option if you are busy looking for solutions on what to put on the floor on your balcony. It can only be laid on a flat concrete pad, since the installation method implies the presence of gaps between the units of material. Tiles are a durable material, so they will serve you for a long time and reliably. The technique also has disadvantages. In particular, when moisture gets on the surface, it becomes slippery and dangerous, so additional coverage should be provided to protect you and your family from accidents. You also need to pay attention to the fact that the material may be damaged by mechanical shock. Overall, this is one of the best options- how to lay the floor on the balcony when there is a lack of time and resources.
If you have not yet decided what is best to lay on the floor on the balcony, then pay attention to more expensive options. Overhaul the surface and use only reliable and quality materials will allow you to forget for a long time about the problems of leveling and insulating the balcony room. Moreover, the balcony area is small, and you can do all the work yourself.

We make wooden floors on the balcony ourselves
After reading the article, you will learn what materials and tools are needed to build a wooden floor, how to properly mark and prepare the slab (base), fix the flag and adjust it according to the insulation level of the balcony floor and cover it with laminate.
And so you decided to do interior decoration own balcony.
It begins with the installation of the floor - this is the main phase of the work, since the mark of the wall frame with plastic, MDF or wooden underlay is made from ground level.
This involves binding the bottom rod or profile to which the platform is attached.
The floor on the balcony can be cement, bulk, wood, tiled, linoleum, carpeted or other floor covering.
Let's consider the technology of attaching a wooden floor to a standard three-meter balcony of an ordinary five-story building.

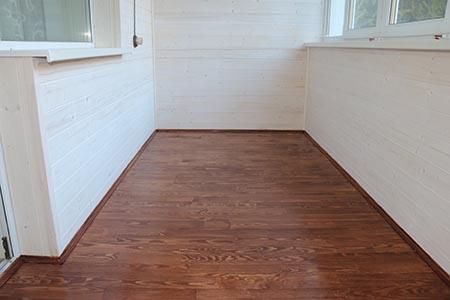
Photo of the balcony after exterior finishing and removal on the window shelf.
Materials and tools
To complete the job you will need:
- console 50 * 100 - 6 m;
- straight suspension 47 * 17 - 20 pieces;
- dowels 6 * 30 without cover - 40 pieces;
- 32 mm end pieces with press - 40 pieces, 35 mm wood - 100 pieces, 45 mm - 50 pieces;
- OSB sheet 2500 * 1250 * 21 moisture resistant - 1 piece;
- foam assembly;
- outflow (mineral wool) - 3 m2;
- limited - 2.5 m2;
- pedestal 2.5 m - 3 pcs.
Corners and connectors;
- standard set of tools - drilling with a concrete drill with a diameter of 6 mm, drilling, hammer, construction knives, saw, tape, pencil and construction level.
Installation and preparation of the balcony panel
Installing a balcony floor begins with clearing the panel of debris and foreign objects. Fill the assembly foam into the slots left after closing the balcony from the outside. Not only wind and humidity can penetrate through them, but also insects and even birds!
Particular attention should be paid to the cut along the periphery of the plate, which is located between it and the outer finishing material, as a rule, exceeds a distance of several centimeters. The outer skin falls off so the foam is not visible from the outside. If the distance is too high, place it with a stick, polystyrene or galvanized cover.
Continue marking the panel.
The magazines are finished, the distance between them is 60 cm. The size was not chosen at random. Firstly, depending on the rods, which lie at such a distance from each other, the OSB board under the weight of a person will not be difficult. Secondly, with this support arrangement, the OSB sheet can be practically used without residues with the smallest number of pieces.
The first lag from which the marking begins is on the side of the balcony, which is at a distance of 10-15 cm.
from the edge of the panel. Using the line, we remove the line, we can pour it out, roughly lay it out, and we already explain them along the bedside counter. The tape measure determines the location of the third and fifth lags.
Yes Yes! She was third and fifth! They will combine the joints of the cut parts of the OSB sheets.
I'll repeat this. The first gap is located at a distance of 10-15 cm from the edge of the panel, the third - 126 cm. The distance is taken along the width of the panel - a distance of 125 cm + 1 cm. The center of the fifth interruption should be at a distance of 125 cm from the center of the third, with the following OSB plates 125 cm , the edges of which lie in the center of these two rays.
All magazines must be perpendicular to load-bearing wall Houses.
You can control the market.
The second and fourth lags are among the open ones, and the distance between the fifth and fourth, and the fourth and third is 60 cm, and between the first three it is reduced to about 50 (due to the first beam moving 15 cm, the plate lies on the edge ).
This will result in stiffness and power on the floor when exiting the balcony.
The last 6th lag is placed at the end at a distance of 10-15 cm from the other end of the balcony.
Place the uneven rods, mark their location on the concrete and remove.
Magazine montage
On towed lines, attach dowels to the hanger - three fasteners to each stop.
Dissolve the dimensions narrower and the size.
Reliable floor on the balcony - what to do, choose the material
Since flat plates are extremely rare, the level is controlled by a wire at the highest point, and the remainder is adjusted using wooden blocks or plastic wedges. We eliminate congestion by securing them through hangers.

Photos backlog on the balcony.
The height of the floor on the balcony is adjusted in accordance with the floor in the apartment and the presence of a door before departure.
Heat and place the base plate on the balcony
Soil the soil with mineral wool.
As an alternative, you can use foam, polystyrene foam or penofol foam. Thermal insulation between support stops and cover with pre-impregnated OSB plate.

The procedure for installing a wooden floor on a balcony.
The table is over. The measured soil width is reduced by 1-2 cm taking into account the gap. We receive 2 parts 1250 mm. (width of leaves) by 750 mm, which are completely located on predetermined flags.
The last piece is cut to the size of the rest of the irregular bottom and adds the missing door piece.
The plates are screwed into the flag using screws, with “foam” on the threshold. The floor is ready!
Laminate on the balcony

Photo of laminate on the balcony.
The laminate is laid on the inner wall of the wall.
To avoid shrinkage and rattling, use a soft base, starting with the entire tape along the balcony. Leave a gap of 5 mm from the edge of the covering to the perimeter walls. For presentation, you can use cut bars with half or special plastic wedges.

Interior decoration of the balcony with wooden flooring.
The laminate is compressed at the edges with a plastic sheet and gives the entire appearance of the floor.
Profile Views:
Selection of materials
Leveling the floor on the balcony
Installing a wooden floor on logs
Laminate flooring for balconies
Linoleum
Floor heating on the balcony
Plate for closing the bottom of the loggia
Most homeowners enjoy an outdoor balcony and strive for glazing and insulation using the best technology available today.
Regardless, the floor on the balcony is not difficult. The approach to this should be professional, take into account all stages of work, and then the floors will be warm, beautiful and last for a very long time. Think about how the floor will be with yours with my own hands.

Selection of materials
It is difficult to imagine a comfortable house that does not have glazing and insulation.
In this way, the microclimate suitable for indoor flowers or for filling with fresh air is improved in the room. Simple glazing can increase the temperature on the body by about 5-7 ° C, and if the apartment is on the south side - about 10-12 ° C. An insulated loggia is another complete apartment.

If you decide to combine a loggia and an adjacent room, warm the walls and floor well.
When choosing material for the floor on the balcony, you must analyze everything available options and remain the most suitable.
You can insulate your floor in several ways. For example, installing a “warm floor” system.
But before that you need to do other types of work:
- soil leveling;
- thermal insulation;
- fire protection.
You can then begin the underfloor heating and final finishing.
Depending on the capabilities of the owners and the properties of the premises, the materials necessary for all stages of floor installation are selected.
Note:
- characteristics of the device on the balcony;
- degree of insulation;
- Glazing type;
- financial opportunities;
- target temperature after heating.
Even if insulation and glazing are not carried out, the installation on the balcony floor takes the following steps:
- surface leveling;
- finishing.
Economy, reliability and beauty are an integral part of the balcony floor.
The building materials from which it is made must convey:
- environmental impact;
- sudden changes in temperature;
- precipitation and weather surprises.
You should also consider the type of house.
If it is an open balcony, concrete screeds with expanded clay should be made, and at the end - ceramics or tiles, porcelain stoneware, artificial or a natural stone. And if it is closed, finishing the floor on the balcony can be done using materials such as laminate, lining, warm linoleum (read: “Reliable floors on the balcony - what to do, choose the material”).
Leveling the floor on the balcony
Typical homes have poor surfaces and curved surfaces. Since almost all finishing materials must be laid on a flat surface, the floor must be level on the balcony.
This will also prevent water from accumulating and entering the room.
If upon superficial inspection it is clear that the bottom of the stock is uneven, then the quality of the final extensions must be maintained.
Minor irregularities and deficiencies should also be avoided. A self-leveling mixture is used for this purpose. In case of serious surface defects, a screed or lag on wooden floors is used for leveling (see “On the balcony we level the soil: leveling possibilities”).

No additional load should be placed on the base plate; the installation of the floor on the balcony should be made of lightweight materials.
Regardless of what final materials will be used, installing the floor on the balcony with your own hands is carried out using the following technology:
- removing old gaskets;
- get rid of rot and moisture;
- seal all existing seams and cracks;
- treatment with an antifungal drug;
- leveling and sealing;
- introduce the surface or prepare the base for finishing.
Level the floor in the house in several ways:
- Standard cement screed without thermal insulation and without filler.
- Dry screeds with foamed polystyrene or expanded clay insulation;
- Dry and semi-dry screed with heater.
- Harmonization in the “warm floor” system.
- Wooden floor on a log with or without a heater (read more: “How to make wooden floors on a balcony - installation and processing instructions”).
- Under linoleum or laminate, leveling can be done in any way.
- Slate under tiles.
Layer of expanded clay for good heating must be at least 3 cm.
Dry sawing is allowed with expanded clay, but this only occurs if the soil is sealed on the glass box.
It is made from a mixture of sand and cement, the ratio of which depends on the ratio between water and sand. The cement brand should also be considered. There is little water in a semi-dry screed, and the cement and sand mix well. The grout will crack if it is dry, especially if the temperature is high or low. The solution for guests is not difficult.
The solution for leveling the soil should be thick with sour cream. This solution completely covers the expanded clay, and if the mixture is very liquid, it may float.
DIY balcony floors: step-by-step instructions
Dry screed is laid out from gypsum fibers or fibrous sheets on a well-balanced cliché surface. The joints of the sheets are glued together and secured with screws at intervals of approximately 20 cm. Then set aside the polyethylene foam foil and apply laminate or linoleum to it.
Installing a wooden floor on logs
If it is difficult to choose materials for the floor, it is better to use wood.
This natural material, wear-resistant. Wood has been used longer than other finishing materials to complete floors in homes.
Not only can you make a floor from wood, but you can also make an inverted balcony wall.
You should also choose the color of the floor on the balcony.

Conventional installation of a floor on a balcony with your own hands is carried out using the following technology:
- Clean the surface and prepare for leveling.
- A simple screed is performed.
- When the screed has dried, the floor is waterproof on the balcony.
To do this,
expanding the waterproof film. - The magazines are stacked and attached to the base.
- Claydite or other insulation covered.
- The base layer or backing is placed at the end.
In soil on logs, it is necessary to take into account the height of the threshold of the door on the balcony and the insulating layer.
The size of the sticks is selected separately, since the height of the floor on the balcony may be different. For example, if you intend to install multiple layers of insulation, then you must raise the floor height. The wood covering is made directly on the concrete slab. It is recommended to apply a waterproofing film.

If you want to put a flag on your balcony, you need the same distance from each other and better in all directions.
This will make it easier to adjust the horizontal level. The space between the flags is covered with expanded clay.
The end plates are tied to the logs. You can use ready-made wooden shield and secure it with a tripod.
Do not forget about the existence of a threshold, which should be beautifully decorated (more: “We produce balconies: what material to choose”). It will open a gap and widen the difference in floor height between the balcony and the living areas.
Laminate flooring for balconies
If the area of the house is small, you can buy expensive and high-quality laminate flooring. It will take a little time, and therefore its purchase will not have a significant impact on the budget. For a balcony or loggia, buy a laminate that is resistant to moisture, as water will become damp with regular laminate and weaken (also read: “The laminate was placed in a log installation with your own hands”).

If you intend to install a "warm floor" system, you must choose a laminate with the appropriate label. However, such material will cost more.
Linoleum
The floors are also sealed in logs using insulated linoleum.
This flooring is practical. Unlike simple thin linoleum, there is a large thickness and fibrous base. The price of insulated linoleum is higher, but the difference is obvious. Soils will be much warmer than regular linoleum, you can walk barefoot.
The base for linoleum is also stable and warm. Thin linoleum can also be warm if you insulate the base or use a “warm floor” system.

Ideally, the whole piece will be there. If the floor is complex on the balcony, the maximum space and length are measured, and these dimensions add 2-5 cm. When you buy linoleum of the appropriate size, it needs to be stretched at home, so it will be level. After a few days, the leaf shape is spread under the floor of the box with a sharp knife. The edges must be crushed by something heavy.
If you suddenly remove an extra 2-3 cm, don't worry, these defects will hide the pedestal. How well the edging works depends on the quality of the linoleum.
It is advisable to use removable strips with an adjustable edge. It completely surrounds the surfaces of the joints.
You can hide under the footer:
- communications and wires;
- fixed telephone line;
- electrical cable;
- Internet cable;
- Antenna cable for TV.
Measuring the length of the knitting is necessary taking into account the connection that fixes the decorative corner.
After placing the platform on all sides, the corners are assembled. All corners should be well secured and secured to the wall. The entire length of the base is attached to the wall using a self-tapping screw with the same pitch.
How to make log floors from linoleum? This task is not easy. "Cold welding" is used to fasten parts with completely straight edges. To heat the adhesive that applies to the back of the linoleum, cardboard or other host material is placed under the bundle. Then the heating must be extended either with a hair dryer or a hot iron so that the glue “takes.”
The glue is very difficult to remove, so it should not protrude through the seam. Once the glue is complete, the boxes and cartons will be removed. The result is a smooth seam.
Floor heating on the balcony
Think about how to make a warm floor on the balcony. To obtain high-quality insulated floors, all seams and cracks must be very well sealed. There should be on the balcony good waterproofing floor. For this purpose it is easier to use pre-assembled foam, silicone or sealant.
Care must be taken to ensure that everything is pleasant to see. To clean silicone pigments, any remaining foam must be removed.
When designing a heated floor, there are two layers:
- Draft with installed heating system;
- Finish with finishing.

As top cover you can choose:
- marble slabs;
- porcelain tiles;
- tile;
- carpet covering;
- parquet board;
- laminate;
- linoleum.
The height of the base layer for insulation of any type of “warm floor” should be 10-15 cm.
Thresholds will hide the difference in levels.
It is better to have heated floors installed by professionals. To save money, you can create your own zip ties.
Plate for closing the bottom of the loggia
An open box will give the perfect finish to any tile, especially if the base is a cement screed. The choice of color, pattern, texture is huge. More often than not, you will end up finding tiles that ceramic tiles and porcelain pots.
The soil of such materials will of course be reliable and durable, as long as you do not hit heavy objects. The bottom of the tiles has disadvantages: slippery and cold. As a rule, a warm carpet is installed on such a floor.

The floor is laid on the balcony as follows:
- Old surfaces are removed and the surface is ready for leveling.
- The waterproofing film is washed.
- The heater is foldable.
- We evaluate or make a mixture.
- In the usual way, using “crosses”, which are necessary to ensure that the seams are of equal thickness, the tiles are placed on the appropriate adhesive.
- Treatment of joints using an injection mass or sealant.
The balcony floor is better than a hard porcelain pot.
However, there are problems with installation: due to its power, it shrinks significantly. There is also a special tile that is laid without seams. It even forms hard surface, for example, under marble.
It was found out how to properly make floors on the balcony various materials, so it turned out beautiful and lasted a long time.
Types of flooring
Features of linoleum
Laminate characteristics
Carpet on the balcony
Laying ceramic tiles
Wood floors
Self-leveling floors - modern coating
Which coating should you choose?
Everyone who decides to equip their balcony strives to make it beautiful, high-quality and functional.
To do this, the floor, wall and ceiling decoration are changed. Let's consider what is better to lay on the floor on the balcony.

Types of flooring
There is no single option than to cover the floor on the balcony.
Almost all floor coverings have the same characteristics and perform their functions perfectly.
To make floors on the loggia, the options may be as follows:
- linoleum;
- laminate;
- carpet;
- ceramic tile;
- wooden floors;
- Self-leveling floors.
Let's look at the features of each type of coating and decide which floor is best for the balcony.
Features of linoleum
Linoleum has a number of positive characteristics:
- Low price.
- Easy to use.
- Quite easy to install.
- A variety of colors and types, which allows you to easily and quickly choose exactly what you need.
- Long service life.
- Quite high quality.

Linoleum, in addition to the listed advantages, has several disadvantages.
The floor on the balcony should be made of a single piece of material. If you cover the floor with several pieces, then moisture will accumulate under the linoleum, and this is bad.
And one more minus: after some time the coating fades and loses its original appearance.
Laminate characteristics
What else can you lay on the floor on the balcony? Laminate can be used to finish the floor. A wide range allows you to choose a coating suitable for any design.
The laminate is laid on a flat concrete base, on which a backing is spread that prevents friction between plastic and concrete, and also serves as insulation (more details: “Laying laminate on loggias - do-it-yourself installation”).
In winter, laminate flooring cannot be laid on the balcony. Especially if the temperature is below 10 degrees and the air humidity is more than 70%.
Work can be carried out at temperatures above 5 degrees.
This material is beautiful and lightweight, however, it has a significant drawback - it does not tolerate high humidity. Can be used on a balcony only if it is glazed with high quality and moisture does not get inside.
Carpet on the balcony
You can also use carpet on the loggia.
This material has a long service life. Adapts perfectly to different conditions. Carpet can also be used on uneven surfaces. However, to make it convenient and comfortable to walk on it, it is necessary concrete screed make it as smooth as possible.

You can walk on the carpet barefoot, as it is pleasant and soft to the touch. Big choice color range, which makes it possible to select materials for any interior.
The disadvantage of this coating is that it absorbs a lot of dust, so you need to vacuum it often.
Laying ceramic tiles
When choosing what to put on the floor on the balcony, you can decide in favor of ceramic tiles.
Beautiful appearance, a huge number of color variations and patterns. You can lay tiles on the balcony yourself. The service life is quite long. The appearance does not change for approximately 10 years. Easy to clean: most often just wipe with a damp cloth.

The tiles are of high quality.
However, this material is very cold and requires additional insulation. This can be done using various underfloor heating systems (for more details: “How to make a heated floor on a loggia with your own hands”). Ceramics is a heavy material, and it is not advisable to overload the balcony slab. Therefore, you should pay attention to lighter types of ceramic tiles.
Wood floors
The pressing question that arises when a loggia floor is being made is: what should it be made of?
You can use wood. It's the easiest to work with. The material itself is warm, so it requires almost no insulation. Your feet will always be warm and comfortable on a wooden floor. The advantages of the boards are their light weight and wear resistance (read: “How to make a wooden floor on a balcony - installation and processing instructions”).
When choosing boards, you should pay attention to their humidity; it should be no higher than 10%. And also for distortions along the edge and thickness, no more than 2 mm and 1 mm, respectively.

To ensure that the wooden floor does not rot and lasts for a very long time, the boards must be treated with special protective compounds and varnished.
Making such a floor on a balcony is not difficult; even a non-professional can handle it.
The disadvantages of such a floor include the need to periodically update the coating. After some time it will lose its attractive appearance.
Self-leveling floors - modern coating
Self-leveling floors are not in great demand.
It's pretty high-quality coating. The floor can be made of absolutely any color; for this you need to add the appropriate color scheme.
You can also draw a design you like or cover the floor with various patterns (read more: “How to fill a self-leveling floor on a balcony with your own hands”).

The self-leveling floor requires additional insulation. In order for the coating to last as long as possible, it must be coated with several layers of varnish. This floor needs periodic updating.
How to lay the floor on the balcony
Which coating should you choose?
It was decided to improve the floor on the balcony, what to make better of - a question that everyone asks. When choosing a material, you need to take into account all the features of a particular floor covering.
The final decision is influenced by the service life and quality of the material, ease of installation, range, cost and weight.
Under any selected floor covering it is necessary to install vapor and moisture insulation. They will not allow moisture from the lower tiers to enter the room. In this case, there will be no high humidity on the loggia (read also: “How to make a floor on a loggia with your own hands - finishing stages”).
If you are finishing a balcony in an old house, then it is better to choose lighter materials. You should not create additional load on load-bearing concrete slabs that have lost their original strength.

The easiest material to install is linoleum.
All you need is a sharp utility knife and a tape measure. If the humidity percentage in the room is higher than allowed for linoleum, then you should not lay it.
Then what should the floor on the balcony be made of? In this case, you can make the floor from wood (oak or hornbeam). This option is simple and high quality. A floor made from this material is very simple to make; moreover, it is warm and has a long service life.
Wooden materials are considered the best in terms of price and quality.
Repairs to such a coating will not be necessary soon. It only needs to be re-varnished or painted every few years to maintain its original appearance.
Let's sum it up
There are flooring materials that will make the flooring warm and cozy, and will also match the interior. a large number of. And yet, what floor is better to make on the loggia?
Among the coatings that are in great demand in terms of price-quality ratio, wooden floors occupy a leading position.
The price of wood is lower than, for example, tiles.
Tools and materials you will need to install the floor on the balcony with your own hands:
Layout diagram
- perforator;
- bolt drills and nozzles;
- sawing machines (as far as possible);
- hammer;
- construction knife;
- balloon mounting foam;
- construction gun;
- pencil;
- roulette;
- dowels;
- self-tapping screws;
- heater 5 mm thick;
- I don't know;
- plywood;
- polystyrene or expanded polystyrene.

Laying insulation
All work on a balcony or loggia, especially for processing, must begin with cleaning.
You need to thoroughly clean the soil, wash it and carry it properly. First, flags are placed to provide a higher layer of insulation.

Installation diagram on glass mesh.
Then you need to engage in such a creative process as insulation isolation. Thermal insulation should be thin and placed over the entire surface of the balcony.
It should be cut back where necessary and try to be set in such a way that the outputs and conclusions are as small as possible.
When the first layer is laid, you should carefully review the result. If this is satisfactory, you can proceed to install the embedded foam around the entire circumference of the insulation. Each seam and seam is foamed and then the results are looked at again.
Finally, the excess foam must be cut with a knife.
Then you need to put another layer of insulation.
On the balcony we produce floors: 3 simple steps from concrete slab to laminate or tiles
To make this layer precise and of good quality, it will be necessary to do the laying movement, while we try to avoid the impact of the bottom and bottom seams. All this ripens together, dries and reduces the excess again. After this, isolation is no longer needed.
You should know that you don't need to install logs. In some cases you can do this without them.
Laying order
The next step will be laying the wood and plywood.
Before you do such an important job, you will need to measure your balcony. The soil is measured from the wall to the parapets, after which some measurements are taken.
Particular attention should be paid to measuring angles, which are often asymmetrical, so the distance to the balcony fence may vary.
Once the required data is obtained, the lattice and plywood will be measured and cut.
The first stick should not be placed close to the wall, but with an alignment of 10 cm. All subsequent segments of rods should be placed parallel to each other, the distance between them should be at least 40 cm.
The last part should be installed in the same way as the first.

Balcony location.
Expanded polystyrene or polystyrene foam is firmly inserted into the cells between the rods.
The second option is better. This is due to the fact that the foam releases small amounts of toxic substances and is therefore not even advisable to use it in logs that will be used as a flat. In addition, foam can break easily. Remember that you will need to fill the slots left after installation by fixing foam.
Then the second layer of the beam is applied.
It should be perpendicular to the first one. This method of thermal insulation can create air cushion, which can improve thermal insulation and add strength to the base.
On the second layer of the beam is plywood, in which the finishing material should be laid in the future.
It should be noted that not all boilers will be located on the balcony. We do not recommend using expanded clay instead of plywood. This material is a poor thermal insulator and requires a thick insulating layer to work. You can use mineral wool, but this may cause additional inconvenience in the form of vapor barrier equipment, which must be carried out in the highest class.
Electric floor heating device
It should be noted that you can simply install electric heated floors on the balcony.
In this case, the heating cable must be installed under a special parking panel. This arrangement can be done in winter period, while you use it on the day of installation.

Electric heating installation diagram.
Electric floor heating will not lead to high energy costs.
In this case, the main thing is correct installation equipment and its economical use. Another advantage of this floor is that it does not require additional heating of the balcony.
If other methods are used, even with the strictest work technological process and high quality insulation in winter, it can get quite cold. You will need to install additional heat sources.
It should be noted that heating the loggia using central heating is strictly prohibited.
The most suitable sources of additional heat for insulating a balcony are electric heaters.
In addition, oil heaters and convectors can fit perfectly inside and provide a comfortable temperature. Installing air conditioners will perform a double service: you will get coolness in the summer and a warm-up in the winter.
Various conclusions are possible
Everyone understands that the easiest way to complete a painting.
Several types of colors are suitable for this: pentaphentine, alkyd and silicone.
First, the surface must be washed and dried.
In the case of wells and irregularities, they can be cemented with cement mortar. Don't forget that you will need to set a flag.
The advantage of this method is its low cost.
Weaknesses - This floor cannot last long.
Another option is heating and coating wooden panel. The panel should run along the length of the balcony. In this case, plywood can be useful (for wall decoration). First you must set the flag.
The disadvantage is that the tree is not solid and has a habit of bursting due to differences in humidity and temperature.
The next option is linoleum. In this case, you should measure the dimensions of the balcony before purchasing and buying linoleum in one piece.
Stacking is done in one piece. Linoleum should be chosen thick and lined to provide at least additional warmth. In this case, no deviation is required.
Just like with paint trim, you'll need to repair any cracks or cracks. If this is not done, the linoleum can be sold.
The advantage of this option is that linoleum has a pleasant appearance and can usually be washed with a damp cloth.
Instead of linoleum, you can use laminate.
It is very easy to maintain, has a stylish appearance and does not require calling in experts to install laminate flooring. If the bottom is uneven, you will need to install logs.
Making a wooden floor on the balcony with your own hands
After reading the article, you will learn what materials and tools are needed to install a wooden floor, how to properly mark and prepare the slab (base), secure the logs and level them, how to insulate the floor on the balcony and cover it with laminate.
And so, you decided to do the interior decoration of your balcony yourself.
It’s worth starting with installing the floor - this is the main stage of work, since marking the frame for covering the walls with plastic, MDF or wooden clapboard is made from the flooring level.
The bottom beam or profile to which the plinth is attached is also attached to it.
The floor on the balcony can be cement, self-leveling, wood, covered with tiles, linoleum, carpet or other floor coverings.
Let's consider the technology of installing a wooden floor on a standard three-meter balcony of an ordinary five-story building.
Photo of the balcony after exterior finishing and removal along the windowsill.
Materials and tools
To complete the work you will need:
- timber 50*100 – 6 m;
- straight suspension 47*17 - 20 pcs.;
- dowels 6*30 without cap - 40 pcs.;
- sharp self-tapping screws 32 mm with a press washer - 40 pcs., for wood 35 mm - 100 pcs., 45 mm - 50 pcs.;
- OSB sheet 2500*1250*21 moisture resistant - 1 pc.;
- polyurethane foam;
- isover (mineral wool) - 3 m2;
- laminate – 2.5 m2;
- skirting boards 2.5 m – 3 pcs.
Corners and connectors;
- standard set of tools - a hammer drill with a concrete drill with a diameter of 6 mm, a drill, a hammer, construction knives, a hacksaw, a tape measure, a pencil and a construction level.
Marking and preparing balcony slabs
We begin installing the floor on the balcony by cleaning the slab from debris and foreign objects.
Fill in polyurethane foam cracks left after cladding the outside of the balcony. Through them, not only wind and moisture can penetrate under the flooring, but insects and even birds! Particular attention should be paid to the gaps around the perimeter of the slab, since, as a rule, there is a distance of several centimeters between it and the exterior finishing material.
The outer skin is lowered, so the foam will not be visible from the outside. If the distance is too large, cover it with timber, polystyrene or cover it with a galvanized strip.
Let's start marking the slab. The logs are placed crosswise, the distance between them is 60 cm.
The size was not chosen by chance. Firstly, resting on beams lying at such a distance from each other, the OSB board will not bend under the weight of a person. Secondly, with this arrangement of supports, the OSB sheet can be used practically without residue with a minimum number of cuts.
The first log, from which the marking begins, is located on the side of the balcony exit at a distance of 10-15 cm.
from the edge of the slab. Using a level, we draw a line; you can cut the logs, roughly lay them out and outline them along the lying timber. Using a tape measure, we determine the location of the third and fifth logs. Yes Yes! Exactly the third and fifth! The joints of the sawn parts of the OSB sheet will fall on them.
I repeat. The first lag is located at a distance of 10-15 cm.
from the edge of the slab, the third - 126 cm. The distance is taken along the width of the slab - 125 cm + 1 cm of gap. The center of the fifth log should be at a distance of 125 cm from the center of the third, the next 125 cm piece will fall on them OSB boards, the edges of which will lie in the center of these 2 beams.
All logs must be perpendicular to the load-bearing wall of the house.
You can control it with a square.
The 2nd and 4th logs are placed between the exposed ones, the distance between the fifth and fourth and fourth and third will be equal to 60 cm, and between the first three it will decrease to approximately 50 (due to the fact that the first beam was shifted from 15 cm, and the slab lies to the edge). This will give rigidity and strength to the floor at the exit to the balcony.
We lay the last 6th log at the end at a distance of 10-15 cm from the other edge of the balcony.
Having laid out the beams, we draw their location on the concrete and remove them.
Installation of logs
Along the drawn lines we fasten the suspensions with dowels - three fasteners for each joist.
We arrange the logs already cut to size in them and set them according to the level. Since even slabs are extremely rare, we control the level from the beam, which is at the highest point, adjusting the rest using pieces of wood or plastic wedges placed under them.
We fix the logs by screwing them through the hangers.
Photo of leveled logs on the balcony.
The height of the floor on the balcony is adjusted relative to the floor in the apartment and the presence of a threshold in front of the exit.
We insulate and lay the base floor slab on the balcony
We insulate the floor with mineral wool.
As an option, you can use foam boards, polystyrene foam or foil foam. We lay the insulation between the load-bearing joists and cover it with a pre-sawn OSB board.
The process of installing a wooden floor on the balcony.
The slab is sawn across.
We reduce the measured width of the floor by 1-2 cm, taking into account the gaps. We get 2 pieces of 1250 mm. (sheet width) by 750 mm, which will fit perfectly on pre-set logs. We cut out the last piece to the size of the remaining part of the misplaced floor and add the missing part of the threshold.
We screw the slabs to the joists with self-tapping screws, and “foam” a piece at the threshold.
The subfloor is ready!
Laying laminate flooring on the balcony
Photo of laying laminate flooring on the balcony.
Laminate flooring is installed after internal lining walls
What floor to lay on the balcony
To avoid squeaking and knocking, we use a soft substrate, starting with a whole strip along the balcony. From the edge of the covering to the walls around the perimeter we leave a gap of 5 mm. To set it up, you can use half-centimeter bars chopped or special plastic wedges.
Interior decoration of balcony with wooden floor.
The laminate is pressed along the edges with a plastic plinth and gives the floor a finished look.
10 minutes to read.
Wood is one of the the best materials for the manufacture of flooring. It is used with equal success for flooring in residential premises, on terraces and, naturally, on loggias and balconies. Touching it with your bare feet does not create the feeling of discomfort that occurs when stepping onto a bare concrete slab. In this article we will talk about some more reasons why you should install a wooden floor on the balcony, and how to make it yourself.
Advantages and disadvantages of wooden flooring on the balcony
Wood is a natural material traditionally used in flooring. Its main advantage is its low thermal conductivity. Thanks to this property of wood, wooden floors are very warm and are installed where it is not possible to heat the surface in any other way, for example, with the “” system.
Other benefits of wooden floors:
- Aesthetics - combines with almost any interior;
- Wood is easy to process (cutting, fastening);
- Environmental friendliness - completely natural material;
- Strength. Some types of wood, such as beech, oak, and larch, can last for several decades without changing their texture.
Wood also has many disadvantages. For example, it is highly flammable, rotting, and can be damaged by wood borers. These disadvantages are minimized by the use of special compounds: fire retardants and antiseptics. Another significant disadvantage of wood is its natural ability to absorb moisture. You can completely get rid of this drawback by varnishing or painting the floor. A protective layer of paint or varnish will also reduce the wear and tear of the floor.
Important. Wooden floors are usually installed on closed balconies with glazing, and are used in conditions similar to living rooms. In some situations, they can be laid on an open balcony, but in this case the wood requires more careful care.
How to make a cement screed on a balcony:

 New screed
 If the floor on the balcony is still strong and does not need major renovation, they simply clean it, seal the cracks with mortar, correct other defects, and immediately begin installing the plank floor.
There are two technologies for installing a wooden floor: on logs and on a concrete base. The first of them is used more often, but in certain conditions the wooden flooring is laid directly on the cement screed.
Installation of wooden floors on joists
If the balcony slab and the floor in the room with access to the balcony are at different horizontal levels, using the balcony is not entirely convenient, since you have to climb a high step near the threshold. This is especially inconvenient for young children and the elderly. By installing a plank floor on joists, you can level two floor surfaces (in the apartment and on the balcony) in the same plane.
Read also: Choosing a heated floor for the balcony
 Installing joists to raise the floor
 Installation of floor joists
For lathing under a wooden floor, a smooth, well-dried timber is selected. The cross-section of the beam must correspond to the height to which the floor needs to be raised, minus the thickness of the floorboard. Further work is performed in the following order:
- Along the wall and at the edge of the balcony, two beams are laid parallel, one to one (this is preliminary preparation and does not require precise adjustment);
- The timber is cut into pieces equal to the distance between two parallel timbers. The number of segments is calculated so that the crossbars are spaced at intervals of at least 80 cm;
- The cut pieces are impregnated with a wood antiseptic, and after drying they are treated with drying oil;
- The bars are laid out on balcony slab and align in one horizontal plane using a building level. First, the long parts are placed (near the wall of the house and along the edge of the slab), and then the side parts from the two edges of the balcony. They are fastened together with corners and screws. If it is necessary to adjust the level, wooden wedges or metal plates are placed under the beam;
- Inside the resulting frame, the remaining transverse bars are mounted, which are also attached to the sheathing using corners and self-tapping screws.
The wooden frame can be left as is, or it can be secured to the floor using dowels. It should be noted that in a rigid position it will be difficult to dismantle it in order to check the condition of the insulation and dry the internal surfaces.
Great video on how to install logs correctly:
Insulation of floors with joists
Although the wooden floor itself is warm, it should be protected from freezing from below, from the side of the concrete slab. Insulation will be very helpful if the balcony is on the ground floor or the balcony below is not glazed. Roll materials based on mineral wool or rigid slabs are used as insulation.
Materials for floor insulation on the balcony:
- Basalt wool;
- Glass wool;
- Slag;
- Extruded polystyrene foam;
- Perlite cement slabs.
The selected insulation is cut into rectangles and placed tightly between the joists. The width and length of the cuts should be 2-3 cm larger the right size so that the material fits tightly to the bars and does not allow cold air to pass through.
 Penoplex insulation
 Important. If the balcony is open and precipitation freely penetrates it, it is natural that insulation should not be carried out. Firstly, it will have no effect, and secondly, moisture penetrating through the plank floor will accumulate in the insulation and contribute to the development of bacteria and rot.
To insulate the floor on joists, you can also use a loose type of insulation: expanded clay, vermiculite, ecowool, granulated polystyrene foam or sawdust. Bulk material is simply poured into the space between the joists and lightly compacted. If the material sag after compaction, more is added.
Plank flooring
Floorboard is the most acceptable material used as a covering for a wooden floor. It is made with locking fasteners cut out on the edges, so it can be easily adjusted during installation. Before laying, the board (just like timber) is hidden with an antiseptic, and especially careful treatment is carried out on the underside and on the ends, which will subsequently be inaccessible for maintenance.
 Installation of boards using wood screws
 Installation of floorboards on joists:
- The first board is laid with a groove against the wall, 1 cm away from it;
- The tenon of the next board is inserted into the groove of the first, and both elements are pressed tightly against each other, after which their fit is slightly weakened;
- The subsequent boards are laid in the same way;
- The last element is cut to size and mounted in place;
- If the floorboard is assembled from two pieces, the joint should be in the middle of the joist;
- All boards are nailed to the joists or screwed with self-tapping screws. Precast floorboards are also nailed to the joists at the joints. You should make sure that the heads of the fasteners are sunk into the wood, otherwise they will interfere when cleaning the floor, and shoes will get caught on them;
- A wooden plinth is installed along the entire perimeter of the floor, which will close the gap left for the thermal expansion of the wood. Since the room is small, it is also better to make the baseboard low.


