The window opening after the installation of plastic windows looks unpresentable. Pieces of plaster, polyurethane foam stick out, in some places the material of the walls is visible. To close all this, they use various methods. The most affordable and practical is the use of plastic slopes. It is better to equip them from sandwich panels, when expanded polypropylene is laid between two layers of plastic. They are durable, dense, made of quality material.
How to make slopes on plastic windows? In total, there are two key methods: with and without a start profile. Both of these methods are effective and give good results.
No start profile
 It is possible to use this method of installing window slopes when there is too little distance from the window frame to the wall. In this case, installation with a starting profile is either very difficult or, in principle, impossible. Arrangement of the slopes of plastic windows begins with the preparation of the opening. In this case, the fragments of the foam are cut off with a clerical knife. It doesn't take too much effort to remove it.
You should not cut the polyurethane foam, you must remove it evenly. In this case, it will cope with its function of fixing the frame. She will also insulate it, not letting in drafts from the street. It is also necessary to remove pieces of plaster, which interfere with the work and protrude, giving the window opening an unattractive appearance. If they hold up well, you can leave them alone. The foam will creep less.
A thin strip 10 x 40 mm is nailed along the perimeter of the window with the wide side to the slope. It is usually nailed as is, but it can be leveled by placing thin planks and pieces of plywood in the required places. Following this, the foam is cut along the perimeter of the frame so that the sandwich panels will also stand here. It should go 1 cm.
The foam must be cut carefully so that the plastic does not get damaged. After that, they begin to process the plastic panels. You can do the standard by making a stencil after all the necessary measurements. To do this, take a paper sheet. In size, it should be larger than the window slope. They attach it to it, squeeze it, remove the excess. Cut the paper along the folded edges, try it on, make adjustments as necessary. The top of the frame is the best place to start.
 After the formation of the paper stencil, outline it on the plastic. Approximately 1 cm will go into the foam groove. You need to cut it with a small margin, since it will be easier to cut it off than to cover it up later. Using a hacksaw for metal, they try on plastic, make adjustments so that it stands up straight without bending. Align so that the panel is flush with the plaster. The edges turn out to be almost even, where necessary, they carry out part-time work with a file.
After removing the strip of material along the outer edge, which will be nailed to the bar, drill a hole along the thickness of the nails, stepping back 6 cm from the edge. This will make it easier to fix the plastic without damaging it. The slope is then put back in place. They take a cylinder of polyurethane foam and gradually fill the entire lumen with foam. We must try to get as deep as possible, but a large consumption of material is undesirable. Foam can spill and shred plastic.
Working with polyurethane foam
 If there is a smooth plastic, the foam provides good adhesion to it. If it is necessary to process the surface directed towards the wall, it is necessary to apply a primer or sand it with a sandpaper for improved adhesion. Another caveat is that moisture is required for optimal foam polymerization. That is why, before installing the plastic, the slope must be sprayed with water from a spray bottle. There should be no dust on the wall. It is brushed or removed with a vacuum cleaner. If the solution is loose, the opening is pre-treated with a penetrating primer. It carries the function of binding concrete particles together.
In the future, the panel is lifted. Nails are inserted into the hole and the outer edge is fixed in the bar. The inner surfaces are fixed against the window frame.
The work is carried out according to the same algorithm:
- cut out a paper template, make a fitting;
- transfers it to plastic by cutting out the side of the plastic;
- process the edges with sandpaper so that there is a minimum of space between the upper slope and the panel.
Further actions include:

A slightly different approach requires working on the vertical parts of the slopes. Foam is applied here before the parts are installed. The panel located along the far edge is processed if it is already ready for installation. It is brought under the frame. Apply a strip of foam in a thin stream, stepping back a little from the edge. After inserting the plastic part, the cut groove is filled with the rest of the foam gap. Before doing this, be sure to wet the wall. After that, the slope is pressed, leveled and fixed in the bar with nails.
So that during polymerization the foam does not move the edges of the slope, the joints are glued with masking tape in the lower and upper parts. But even in the case of perfect execution of all manipulations, small gaps will remain. They are covered with acrylic. It is sold in tubes similar to packaging with polyurethane foam. The product is applied in the same way, through the assembly gun.
Further actions
 All excess gaps must be rubbed and leveled. Excess acrylic must be removed with a damp cloth or sponge. This must be done carefully until the surface is completely clean. The manipulation is carried out in small areas. Acrylic must not be allowed to harden, otherwise there will be problems with its removal. It is more convenient to seal the cracks right away. The horizontal slope panel is processed first. After that, there are joints, then they move down. First, the gaps are closed on one side, then on the opposite. Last but not least, processing of joints with a window sill.
Drying takes 12 to 24 hours, depending on the characteristics of the sealant. If the gaps are large, acrylic can be pulled into the seam. All these areas need to be reworked using the same technique. After the second layer has dried, in the presence of irregularities and roughness, these defects can be smoothed out with fine-grained emery paper, folding it in half. It is recommended to carefully level the materials while they are gray, otherwise the plastic may get mechanical damage.
Slopes can be considered established. They should be putty when the final polymerization of the foam occurs. Their surface should be flat relative to the plane of the walls. The protective blue film is then removed.
Panels are considered the most unreliable material for mounting plastic slopes. Even the wall ones are easily squeezed through, and their front layer is imperfect. It is enough to direct light on them, as the jumpers will be immediately visible. This is not observed in plastic window sills and sandwich panels.
Installation with starter profile
To install slopes on plastic windows with their own hands, first prepare a window opening. How it's done:
- cut polyurethane foam;
- remove all elements that are not secured well enough;
- clean the surface from dust;
- the working area is treated with a primer for improved adhesion.
 A wooden block is fixed along the perimeter of the opening, but already near the frame. The thickness is selected depending on the distance. It should almost fit into the frame. Correct one side of the bar with a plane, make a slight tilt. In this case, an angle is formed, which is comparable to the angle of installation of the slope. You can saw off, but it is rather difficult to do such work with precision. And in terms of labor costs, this is quite problematic, except if a circular saw with an adjustable angle is available.
After processing, the bar is screwed along the perimeter of the opening onto the walls. The method of fastening depends on what material it is made of. If the wall is brick, you can put the block on self-tapping screws. For concrete, you need to put a dowel. A start-up profile is purchased at the store. It is installed with the long side to the bar, fixed. Fixing the construction stapler with staples is more convenient in this case. If there is no such device nearby, self-tapping screws with flat heads or small nails can be used.
Setting up a start profile
Choosing a starting profile, you need to take dense modifications... They are more expensive, but they will also need less, only 3 m per window. The dense profile fixes the plastic well. A soft product bends and turns out to be ugly in appearance. Another important point is the need to firmly press the profile against the frame. Due to this, the absence of gaps will be possible, or they will be minimal. In the upper part, when joining the horizontal and vertical profiles, you need to be especially careful. They need to be cut at a 45 degree angle. If there are small gaps, it is necessary to seal them with acrylic.
It is most convenient to start working with this technology from the sidewalls. The starting profile is not fixed, after which the panel is inserted into it. But it is better if it is equipped with a thick layer of plastic and is made of dense and expensive modifications. If we take cheap ceiling models, then the front wall will turn out to be thin. In bright light, jumpers can be seen. Among other things, such plastic can be easily pressed through even with a finger.
The plastic panel should be wider than the slope. If the resulting area is not enough, two products are used for joining. But in this case, in the joint zone, it will be necessary to additionally equip a vertical bar on which the first strip is fixed. A panel inserted into a profile is usually longer than the opening. Supporting it with your hand, you should mark the line of the opening. Having removed, cut off the products along the marked line.
 The panel is reinstalled, at the same time they are pushed a little more away from the wall and filled with polyurethane foam, trying not to allow gaps, but also preventing excess from forming. Start from the far bottom corner. Near the nailed plank, they pass from bottom to top. Once it reaches the top, the foam expands slightly at the bottom.
Again they draw a line with polyurethane foam, but try to stick to the edges. The closer to the outer edge, the less foam consumption, since the panel is placed under a slope. Having reached the middle, a strip of foam is laid out on the remaining surfaces and the panel is pressed as it should be in the final version. Align and check. Fix it to the wall with masking tape. In the same way, part 2 is installed, and then the upper part. You can cut it out in the same way by cutting out the paper template, and sandpaper the edges to a perfect match.
Work after installation of parts
 As soon as all parts of the slope are installed and secured with masking tape, the object is left for complete polymerization. In the future, in order to avoid filling the gaps between the wall and the slope, a plastic corner is glued onto liquid nails. The main task is to ensure a flat plane in the corners. On both shelves of the corner, a thin strip of glue is applied and pressed. Run your hand along and hold for several minutes. Parts are installed around the entire perimeter. Until the glue dries, glue the corner shelves with masking tape and leave.
A day later, the tape is removed... You can consider the plastic slopes ready. If gaps are found anywhere, they must be closed with acrylic, as described earlier. Silicone is not recommended. In the light, it will acquire a yellow color. After a few years, the windows will not look quite solid. A white acrylic sealant is the best option. It is ideal for masking defects.
The owners of apartments or houses who have installed new windows, quite rightly, have a desire to clean up the surfaces around them. Very often it is simply necessary to do this also because when installing new window systems, old slopes are severely damaged and cannot be "restored", or they come close to the canopies of the window sash, and this makes it difficult to open it. In addition, the finishing of the slopes is also carried out in order to enhance the sound and thermal insulation of window openings by covering the mounting foam, which is used to fill the gaps between the wall and the window block during its installation. Very often for this, a layer of insulation is laid between the finishing material and the wall.
Do-it-yourself slopes on windows can be made neat and functional in several ways and using various finishing, insulation or combined materials that combine both qualities. To figure out which option will seem easier to install and more suitable for a particular case, you need to consider the most popular of them.
What materials are most often used for mounting slopes?
There are three most commonly used methods giving slopes of an aesthetic appearance, each of them is good in its own way, and can be used in combination with insulation material. So, PVC panels can be installed on the window slopes, gypsum board can be glued or fixed to the crate, or the surface can be leveled with plaster and putty mixture.
PVC panel slopes
For finishing using this technology, plastic lining and accessories are used. They help to hide the edges of the panels at the joints of horizontal and vertical surfaces, as well as on the lines of their abutment to the window frame and at the outer corners of the slopes.
In addition to the usual PVC lining, sandwich panels specially made for these purposes are used for cladding, which consist of layers of plastic and expanded polystyrene. This material will facilitate installation, since it does not have to separately adjust and install insulation material. In addition, this approach also often makes it possible to do without some of the accessories.

Like ordinary lining, sandwich panels are great for decorating slopes around plastic windows, especially since, if you wish, you can choose the desired PVC color, which will fully harmonize with the shade of the window frame.
Plastic slopes can be installed on their own without resorting to the help of masters - you just need to study the installation instructions and scrupulously adhere to it during work.
Plastered slopes
This finishing method can be called traditional. Qualitatively finished surfaces will last a long time without losing their neat appearance. However, it should be noted that without a layer of insulation material, plaster is not able to become an effective barrier to the cold coming from the window opening. The disadvantages of this method include the complexity and duration of the arrangement, since the solution is applied in several layers, each of which should dry well. In addition, plastering work requires a certain amount of experience in their implementation, and without it, it is quite possible to spoil the surface, wasting time and money in vain.

The process of finishing slopes with plaster mixtures is rather "dirty", and since it takes a lot of time (sometimes it takes from one and a half to two weeks), in a room where work is underway, it will be necessary to carry out cleaning daily or not use the room at all.
Prices for popular types of plaster
Plaster
Plasterboard slopes
Often, the owners of apartments and houses give preference to decorating window slopes with plasterboard. This material is easy to install, it can be used together with insulation, the sheathing is quite durable and perfectly levels the surfaces. In fact, it is dry plaster, but only its installation is much faster than the "wet" version. This method does not give much pollution in the room during work and does not require a lot of experience to perform them. It is enough to follow the already tested instructions in order to carry out the finishing accurately and correctly.

Today, several types of drywall are produced, and one of them (gypsum plasterboard, greenish) withstands high humidity - it should be preferred for the design of slopes. Difficulties in the installation process can be caused not by the installation of the material itself, but by its subsequent finishing for applying a decorative coating - this is a primer and putty. Without these works, "dry plaster" can quickly become unusable, since it has a rather fragile structural structure and can only be used for a long time when closing the sections and finishing the surfaces.
Would you like to make plasterboard window slopes?
The installation process is described in detail in the article of our portal "", which is easy to follow the link. There, in the publication, questions about the varieties and performance of this material are well covered.
Tools and materials for the installation of slopes
For work on bringing the slopes in order, depending on the option chosen, different materials will be required. The list of tools varies slightly - they will be needed not only for installation work, but also for preparatory activities.
Tools for the job
Construction tools are required for the installation of any of the selected materials.

A. If plastering work is coming, then it is necessary to prepare:
- Spatulas for applying and leveling mortars.
- Plastering trowel or trowel - These are also used to apply plaster or mortar filler to the wall.
- Corner Aligner - it will help you quickly and accurately correct the inner and outer corners, which are always the most difficult to pull out.
- Grater - used for leveling and smoothing plastered or putty surfaces.
- Falcon - it is convenient to use it to bring the solution to the surfaces to be trimmed during work.
- Plastering trowel - this professional tool is intended for the application and leveling of mixtures.
- An electric drill with a mixer attachment - required for mixing solutions.
- Mixing container.
- A metal profile or wooden lath is required to create guides.
B. To carry out the installation of PVC panels, you need to have at hand:
- Sharp construction knife.
- Corner, ruler and tape measure for measuring and fitting panel blanks.
- Construction syringe for working with sealant or a gun for polyurethane foam.
V. Several tools are required to mount any of the above materials:
- Wide brush for applying the primer.
- A building level that will help control the removal of surfaces ideally in the vertical and horizontal planes.
- Shears for metal for cutting reinforcing corners or profiles.
Separately, it must be said about the tools designed for preliminary preparation of surfaces of slopes:
A hatchet or a special nozzle-chisel for a perforator - these tools will be required in cases where the slopes are made inaccurately or located in such a way that they do not allow opening the window sash completely, and they will simply have to be beaten off.
Building hair dryer - in the event that you can limit yourself to removing the old paint coating.
Spatula - required if you only need to clean the surface of the slopes from old plaster, paint or wallpaper.
Necessary materials
A. If plastic slopes are selected for installation, you will need to purchase from the materials:
- Plastic panels (or lining), the number of which is calculated according to the parameters of the slope. The panels will be needed for installation on the sides and ceiling of the window opening, which means that in order to find out the exact amount of material, you need to measure the height, width of the slopes and the thickness of the walls. Typically, panels are purchased with a 10-15% reserve.
- A starting plastic rail with a U-shape.

- F-shaped rail (F-profile).

- Internal corner profiles installed at panel joints.

- Thermal insulating material - expanded polystyrene or mineral wool of the required thickness and size. If already insulated sandwich panels are used, then additional thermal insulation can be dispensed with.
- Wooden or plywood lath 100 ÷ 120 mm thick.
- Self-tapping screws of the required length.
- White silicone for sealing gaps between panels.
- Polyurethane foam - it is better to use "professional" foam in tubes, rather than cheap foam in aerosol cans.
- Staples.
- Priming compound.
For the installation of PVC sandwich panels, the same materials will be required, except for the U-shaped and corner rail. An F-shaped bar may be required to decorate the outer corner, but you can do without it by using a putty mixture to decorate it. Which corner finish option to choose depends entirely on the preference of the home owner.
B. For finishing the slopes with plaster, the following materials will be required:
- Putty and plaster mixture.

- Finishing putty.

- Antifungal priming compound.

- Perforated painting profile for reinforcing external corners.

- Finishing decorative material: water-based paint, wallpaper or even ceramic tiles - according to the preference of the owners.
Prices for popular types of antiseptics
Antiseptics
Preparing slope surfaces
After everything you need is purchased and prepared, you can proceed to the preparation of surfaces for the installation of finishing materials. This process can be carried out in a variety of ways.
- If the window is installed in such a way that there is enough space around it on the slopes for the installation of finishing with insulation, then it is often enough just to remove the old paint, whitewash or wallpaper from these surfaces.
Whitewashing or wallpaper from the walls around the window can be easily removed if you first soak them, soaking them several times with water.

Oil-based or organic paint is usually removed with a spatula, heating the surface with a construction hairdryer.
The cleaned slopes must be primed to avoid the appearance of mold stains under the finish, which can not only spoil the walls and decoration, but also introduce an unpleasant odor and a very unhealthy atmosphere into the living quarters. The fact is that the fungus can be dangerous to the health of residents, so this stage of work cannot be neglected.

The application of the primer is most often carried out in several layers, each time - after the previous one has completely dried. Not only flat surfaces are processed, but also hard-to-reach corners - for this you need to use a narrow brush.
- Another, more complex preparation option is the complete dismantling of the plaster layer applied to the slopes.

This method is used in cases where a very small distance is left between the window frame and the slope, which does not allow the window to be fully opened. Another situation when you cannot do without this drastic measure is the impossibility of installing insulation of slopes or even ordinary plastic panels.
To quickly remove a layer of plaster, a perforator with a special nozzle is used, which is called a chisel-blade. It pads well all layers applied to the wall, and they are removed in large enough pieces.
Further, dust and particles of the wall and plaster must be removed from the cleaned slopes - this process is carried out with a soft brush or a wide brush. Well, after that, the wall must be primed with the same antifungal composition.
Slope finishing
To make it easy to carry out installation on the slopes of this or that material, it is necessary to consider each of the options step by step.
They proceed to finishing work after the primer applied to the wall is well absorbed and completely dries out.
Finishing slopes with plaster without insulation
The process of plastering the surfaces around the window is as follows:
| Illustration | |
|---|---|
 | The first step is to install guides made of a metal profile or wooden lath around the window niche. It should be noted that a metal guide is preferable, since it has a lower adhesion than wood - it will be easier to remove. The guides are set at the building level and fixed to the wall with dowels. The profile should protrude beyond the corner of the window opening to the thickness of the future plaster layer. |
 | Another track from the perforated corner is positioned near the window frame. It is oriented towards the profile installed around the opening, since the sketched plaster will align along the plane specified by these two guides. The corner is installed on a gypsum-based putty, as it dries quickly enough. |
 | The next step is to throw a plaster mixture onto the wall. Sometimes it is replaced with ordinary cement mortar, which is kneaded from cement and well-sifted sand, that is, in no case should it be interspersed with small stones. The task of this stage is to make the outer corner even and create the necessary plaster layer. |
 | The same work is carried out on the ceiling of the slope. |
 | After the solution is thrown onto the slope, it must be leveled using a rule, a trowel or a flat rail. This layer is leveled, so to speak, roughly, the main thing is that the solution fills all the voids and the edge of the slope, approximately forming an even angle. Alignment should be carried out after the mortar has set. The process is carried out from below, from the windowsill. The rule is installed on the guides and carefully lifts upward, leveling the poured solution, the excess of which is immediately removed. Having completed this work, the slopes are left to dry completely. |
 | Further, external guides are removed from the dried slopes, and perforated painting corners are installed at the formed corners with the help of plaster putty, which will reliably strengthen the edges of the slopes. Having installed them along the entire height and width of the opening, you need to wait until the gypsum composition is completely dry - this process will take about half an hour. |
 | When the putty is dry and the corner will firmly adhere to the wall and slope, another layer of plaster is applied to their surface, which should have the height of the installed painting corner. It is aligned in the same way, starting from the window sill, using a rule that goes up to the ceiling plane. From the outside, the edge of the corner is compared with the wall with a mortar, which is applied with a spatula. Internal corners are formed by an angled spatula that captures two planes at once and the joint between them. The leveled slopes are left to dry completely, and then primed. |
 | The last layer consists of a finishing putty, and is applied with a thickness of no more than 1-1.5 mm. |
 | The work is carried out with a wide spatula, with light pressure on it, movements from the window frame towards the room. If marks from the edges of the tool remain on the surface, they must be carefully smoothed out. |
 | The last stage is the final smoothing of the surface using grout. The process is carried out in a circular motion counterclockwise. After such sanding, before painting, it is recommended to prime the slopes again. The primer will prevent the paint from absorbing into the filler, so the stain will be even. |
For clarity - detailed Video instruction for plastering window slopes.
Video: how to properly plaster window slopes
Finishing of slopes with plaster with insulation
In this finishing option, some of the stages are similar to the first method, but it also has its own characteristics, so it should be considered separately.
| Illustration | Brief description of the performed operation |
|---|---|
 | The insulation is mounted on a primed flat surface. Therefore, if, after chipping off the old plaster, chips and potholes are found, they will need to be leveled with a putty or plaster mixture using a wide spatula. After the repair layer and primer have dried, proceed to gluing polystyrene foam panels, which should have a thickness of no more than 15 mm. |
 | The material is fixed on polyurethane foam, which is better applied directly to the insulation, or on assembly glue like "liquid nails". The part smeared with strips of glue is tightly pressed against the slopes. Installation of polystyrene is first carried out on the side walls, and then on the ceiling of the slopes. If necessary, the joints between the foam sheets are additionally filled with foam. |
 | If the slopes are wide enough, then the insulation panels are additionally fixed to the wall with the help of fasteners - "fungi". To do this, holes are drilled in the wall with a perforator, right through the expanded polystyrene, into which the dowels - "fungi" are inserted. Then special spacer nails are installed and hammered into them. Using this mount, you need to take into account the thickness of the insulation, since the fungus should be deepened into the wall by 50 ÷ 60 mm, and its head should be level with the surface of the foam or be slightly, by 1 - 1.5 mm, recessed into it. |
 | Having glued the foam, which will even out the surfaces and corners, they proceed to reinforcing its surface - only in this case the finish will serve for a long time. On the outer corners, corners with a reinforcing fiberglass mesh are mounted on glue or gypsum-based putty. The glue is applied with a spatula to the edge of the slope, then a corner is pressed onto it, and the excess adhesive that protrudes through the holes is immediately removed. |
 | From the outside, the corner is also glued to glue or putty. You can use glue on a cement basis, but if you need the surface to be treated quickly, it is recommended to take a gypsum composition. The mesh is pressed into the applied composition with a spatula, and its excess is leveled or removed. |
 | Next, the mesh is fixed to all foam surfaces. It can be glued onto an already applied thin layer of putty or attached to buttons, and then the solution can be applied on top of the mesh, leveling it. This layer will be a preparatory layer for the finishing putty, which is applied to the dried surface. The finishing leveling layer and the rest of the work are performed in the same way as in the first version. |
Video: how to level the plastered slopes with putty
Find out several available ways how to do it from our new article.
Installation of plastic slopes
PVC panels can be divided into two types - ordinary and sandwich panels, which have insulation in their multilayer structure. Their installation is most often identical and is carried out with the use of fittings, however, sandwich panels can sometimes be joined with the help of a sealant, and glued to the walls - with polyurethane foam or "liquid nails".
| Illustration | Brief description of the performed operation |
|---|---|
 | Decorating slopes with plastic panels begins with fixing a wooden slat along the perimeter inside the window opening, on the slopes, excluding the window sill. This element will strengthen the corner and allow you to easily mount the fitting profiles on it. In the event that the window opening is wider than the frames to be installed, then a wooden beam can also be fixed between the frame and the slope. Usually it is installed during the foaming of the gaps between the wall and the frame during the installation of the window system itself. In this case, the thickness of the lath, fixed along the outer edge, is selected depending on the size of the section of the first bar. |
 | Next, the location of the start profile installation is determined. If a wooden beam is installed between the frame and the wall, then the profile is pressed against the frame, and is fixed with a stapler and staples to the wooden beam. This operation is shown in the photo. |
 | If the timber was not installed, then the profile is attached directly to the frame, along the line determined with the help of the building level, leaning on the outer rail. The profile is fixed on the side and top edges of the frame. At the junction of the walls and the ceiling of the slope, an angular profile is installed, in which there are two gaps for mounting plastic panels in them. The fixed starting and corner profiles are clearly visible in the photo. |
 | The next step is to fix the F-shaped profile on the outer side of the slopes, entering the wall surface, which will serve not only as a panel holder, but also as a casing. The profile is fixed to a wooden rail installed along the outer edge of the slopes. |
 | At the corners, the F-profile is cut at a 45 degree angle and joined at a right angle. In order for the cut to be perfect and the profile not to be damaged, it is necessary to use a miter box when cutting blanks. |
 | Next, measurements are taken from the slopes, and parts of the desired size are cut from the plastic panels. After that, they are installed in the grooves of the profile - for this they can be slightly bent. |
 | In some cases, after bending the flanges of the profiles, their edges "do not want" completely fall into their original place, and gaps are formed. To restore them to their original state, silicone sealant can be applied in these places, and then temporarily fix the assembly with masking tape, which is glued to the surface of the plastic panel. |

| Another option for installing conventional PVC panels on slopes can be a method using insulation, which is laid between the wall of the slope and the finishing material. Installation is carried out in the same way as described above, but in this case, a certain space is left for the insulation. 1 - fixing the starting U-shaped rail to the window frame or wooden beam; 2 - installation of a wooden lath on the outer edge of the slope; 3 - fixing the J-profile on a wooden lath - this profile will serve to fix the platband at the end of the work; 4 - installation of insulation material between the wall and the PVC panel; 5 - installation of a conventional or sandwich panel in the starting profile; 6 - installation of the CL-profile, which snaps onto the protruding part of the J-profile. Additionally, it can be glued to the wall and panel with white silicone or sealant. It should be noted that if sandwich panels are used in this option, then instead of insulation material, polyurethane foam can be used to fill the cavities between the finish and the wall. |

Video: installation of plastic window slopes
Sandwich panels can be installed on the surface of the slopes in another way without the use of fittings profiles, but with the use of foam, sealant or liquid nails. The gaps between the planes, in this case, are sealed with white silicone.
Installation of sandwich panels directly on the walls of the slopes is quite simple, but an important condition for it is a more or less flat surface, therefore, before installing the finishing material, it must be leveled and dried.
- Dimensions are removed from the slopes and sandwich panels are cut along them.

- Then one of the selected adhesives is applied to them, and the panel is pressed against the surface of the slope.
If foam is used for installation, then first the ceiling panel of the window opening is glued.
The ceiling plane is sprayed with water from a spray gun - this will increase the adhesion of the surfaces.
Then the foam is applied along the perimeter of the part to be glued with a thin strip, since it tends to expand quite strongly, and with a large amount of it, the foam is able to squeeze the finishing material from the wall.
- Having pressed the material to the surface, you need to hold it for 5 ÷ 7 minutes, and then install the props and leave until the foam completely dries and expands. The support can be built from a planed board, which is pressed against the panel, which is propped up with bars, placing them on the windowsill.
- After that, the side panels of the slopes are mounted in the same way.

- Then, if there are unfilled gaps between the wall of the slope and the trim, they are additionally foamed. When the foam dries and expands, the excess is cut off with a sharp utility knife.

- Further, the joints between the wall and the finishing material should be closed with a special profile, which is called a casing. It is made in the form of a corner and can have different widths, which allows them to cover the unsightly joint of even large widths. The platband is glued to the "liquid nails" and seized while they dry with the help of masking tape.
- If for some reason small gaps have formed between the panels, then they are carefully filled with white silicone, which, after drying, will be almost invisible.

It should be noted that there are other ways of performing work on finishing slopes, which are somewhat different from those described above, but the principle of their implementation is unchanged.
- First, you need to decide in advance on the choice of material, whether it will be insulated initially or this process will be carried out during the installation process.
- The second is to choose a material for insulation and for fixing all parts.
- Third, to decide which installation method is preferable: with or without fitting profiles.
Having decided on all the criteria, you can take measurements and purchase everything you need for work.
It is not so difficult to make the slopes on the windows on your own, if you approach this process with the utmost accuracy, make accurate measurements, and choose all the necessary components correctly.
Is it possible to install a plastic window with double-glazed windows yourself?
Installation of slopes is the final stage of installing a window system. In order for the windows to really be insulated according to all the rules, it is necessary to take into account many nuances even during the installation of frames.
- in the corresponding publication of our portal.
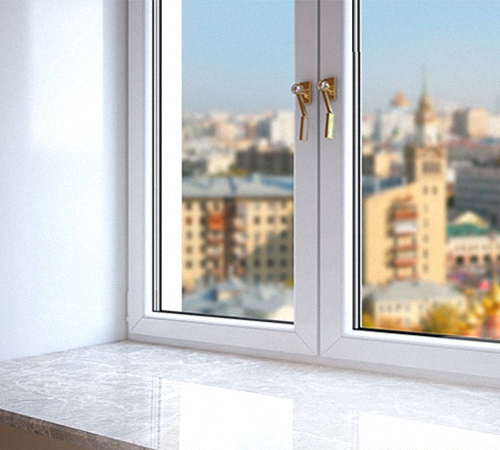
An important stage in the installation of plastic windows is the design of window openings. Slopes for plastic windows are made of the same material as the windows, or they are finished in a different way. However, nothing is in harmony with the look of white PVC windows as neatly installed plastic slopes that hide all defects in window openings, foam and fasteners. Well-designed slopes give the windows an aesthetic, complete look.
Why install plastic slopes?
Modern plastic windows can be considered ideally installed only if they have neatly designed slopes in compliance with the rules of sealing. Carefully made slopes are aesthetically pleasing, they bear part of the thermal insulation load, preventing the installation seams from fogging up. With an illiterate finish during the ventilation of windows, due to temperature changes, the structure of building materials is destroyed and the attractiveness of window openings is lost. It is important to install external and internal plastic slopes in stages, in accordance with all the rules, in compliance with the technology.

For those who are not very versed in the terminology, we recall that the slopes are the side surfaces of the walls along the perimeter of the window opening, adjacent directly to the window frame. They are internal, that is, installed on the windows inside the room, and external, overlooking the courtyard of the house. The lower horizontal is usually formed by a window sill. But the side parts of the walls and the upper plane near the window require careful finishing - plastic slopes.
More recently, the slopes were leveled and decorated with wood or plaster for whitewash. Modern PVC windows are in harmony with the same finish. Since a lot of attention is paid to the quality of finishing today, they prefer to put finishing made of thin plastic on internal slopes.
Old plaster slopes cannot fully provide sound insulation and sealing, and from the cracks near the frame and under the windowsill it often came through, especially in winter. Under the destructive influence of the external environment, the plaster and putty crumbled and fell into disrepair, so everything had to be redone. With the introduction of new technologies for the rapid installation of sealed PVC windows, it has become easier to do plastic slopes on windows with your own hands than to arrange window openings in the old way.

One of the additional complications of low-quality windows is condensation, which appears on the windows due to temperature differences. When the joint between the wall and the window frame is made illiterately, the glass unit is too cold, and the windows "cry", forming dampness on the windowsill. Competent finishing of slopes minimizes this factor.
Before the start of the production of plastic windows, it was possible to cope with the problem of condensation due to insufficient sealing with the help of plasterboard slopes and polyurethane foam. They were more effective than the old-fashioned white-painted plaster. This option lent itself better to the insulation of the window opening. However, their main drawback is low moisture resistance, and the installation of plastic slopes solves this problem today.
Today, plastic slopes on PVC windows with double glazing are a universal solution to many problems. For their insulation, mineral wool is usually used to provide the window with effective hydro, heat, and sound insulation.

The main advantages of plastic slopes
If we compare plastic, plastering or plasterboard slopes, then plastic has a lot of advantages:
- long-term operation;
- perfectly flat texture is in harmony with PVC windows;
- aesthetic appearance;
- the ability to effectively close all joint defects;
- there is a possibility of using flexible platbands;
- no need for additional finishing and painting of the window opening;
- moderate cost of finishing works;
- effective thermal insulation of the opening;
- the ability to complete the finishing of the window on the same day as the installation of PVC windows or postpone finishing to fulfill certain construction and design tasks;
- clean work with quick installation;
- if you have a tool, all the work can be done independently and quickly (in 2-3 hours);
- simple subsequent operation - the surface is easy to clean and clean;
- there is a choice of color palette for any stylistic solution;
- does not need additional alignment of the window opening after dismantling the old frame;
- relatively low thermal conductivity;
- high moisture resistance and the ability to easily remove liquid;
- frost protection.

Thermal insulation of plastic slopes
When replacing old wooden windows, dismantling can significantly destroy the window opening, therefore, all the resulting voids must be filled in order to eliminate the slightest gaps. Sometimes the cracks are not visible, but in the area of the window you feel cold and mold starts, which indicates a depressurization of the seams after installation or poorly performed installation of the window.
If you carry out the finishing and installation of plastic slopes according to all the rules, then they must be properly insulated so as not to transfer a portion of the low temperature into the room. Effective thermal insulation is achieved in a fairly simple way - insulation is mounted under the plastic layer up to the area where the frame adjoins the window opening.
Several schemes have been developed for insulating the plastic slopes themselves and the zone of adjoining the frame to the opening. Today, different types of heaters are used, and this range is enough to provide reliable window protection from negative external factors. The easiest way is to solve the problem of efficient window insulation in 2 ways:
- fill the space with mineral wool or foam in the inner side of the window;
- at the junction of the window opening and the PVC frame, fill the cracks with polyurethane foam and close them with finishing materials from the street side.
For insulation, materials are offered today:
- mineral wool;
- foam sheets;
- sandwich panels;
- extruded polystyrene foam;
- isover or fiberglass.

Attention: The choice of insulation should be dictated by the width of the gap and the features of the surface of the window opening and the joint with the PVC frame.
A small installation gap within 40-50 mm on a smooth surface is easier to insulate with sheet polystyrene, isover or expanded polystyrene up to 2-3 cm.With a small gap and some irregularities, mineral wool is used. Outside the window, the gaps are filled with ordinary foam, it is also used for gross defects in the window opening after dismantling the old frames.
Multilayer walls, which are equipped with an insulation approaching the window frame, provide sufficient protection from external factors. In this case, it is not necessary to insulate the plastic slopes themselves; it is enough to eliminate all the gaps with foam from the outside. If the building has cold single-layer walls without thermal insulation, then it is recommended to make effective insulation of the slopes with thermal inserts laid along the slopes.
A layer of insulation is fixed over the entire surface of the window opening, without getting out of the seams. When installing plastic slopes, the thermal insulation layer will be closed. Sometimes a layer of drywall is additionally mounted - to level the knocked down plaster. Sheets of extruded polystyrene foam do not require additional processing when installing plastic slopes with your own hands.
When insulating slopes with foam, the joint with the frame at the window opening is filled with cement mortar. Only after this all dries well, a layer of foam up to 5 mm can be glued onto a flat surface. Outside, the window is protected with extruded polystyrene foam or another method. Any kind of insulation should fit snugly to the surface. With external thermal insulation of window slopes, it is important to ensure the removal of moisture from the assembly seam.
Attention: Thermal insulation of slopes will not be effective if there is no thermal insulation around the perimeter of the window, and the insulation is installed fragmentarily, only in problem areas with surface defects.
To do this, you need a plastic sheet of 8 mm, about 6 m, as well as a starting U-shaped and F-shaped strip of plastic or "F-ka". It is convenient to mount them on a 10 - 15 mm wooden rail. From the tools you need a punch or drill, metal scissors, a building level, a square and a pencil for marking. Don't forget about self-tapping screws, white sealants, or silicone.

Self-assembly of plastic slopes
There are several ways to install external slopes of plastic windows and prepare the slopes themselves.
3 methods of making plastic slopes are common:
- from sandwich panels;
- from drywall, covered with strong plastic;
- made of foamed plastic.
Sandwich panels with a porous structure do not form condensation, are not afraid of moisture, retain heat and are quite durable. They are available in different types, including glossy and matte, as well as colored and laminated "wood". There are different ways of fixing external and internal slopes adjacent to PVC frames, and options for preparing a window opening with cutting parts for plastic slopes.
1. An electric saw or metal scissors are used to cut sandwich panels or thin plastic panels. The starting profile is mounted with dowels in the window opening during window installation. slopes are attached to this base. For installation, galvanized brackets and double-sided mounting tape are used. The brackets are fastened with self-tapping screws, and on their basis the slopes are fixed close to the windowsill. It is better to coat the corners with silicone sealant.
2. Plasterboard slopes lined with PVC sheets are mounted directly to the drywall with “liquid nails”. It is important to ensure that there are no defects or traces of deformation on the plastic. Their special glossy surface is susceptible to dirt, which is sometimes difficult to remove.
3. Alternatively, PVC foam with a smooth face is used. When cut, it can even be bent to the desired shape using frequent radial cuts, they must be fixed with mounting adhesive. Otherwise, it has general rules for installation with sandwich panels.

Installation of external slopes
Experts recommend making external slopes for PVC windows from a sandwich panel, the reliability of which has been tested. The material easily withstands the influence of the external environment and is a reliable barrier against cold, precipitation and temperature extremes.
Before starting the installation of external slopes, it is important to make accurate measurements in order to exclude gaps and crevices. The height, width and length of the window openings are measured in order to transfer to the sheet of plastic and hand over the cutting of the panel. After cutting 3 blanks with a circular saw or metal scissors, you can proceed to installation.
First, the upper horizontal part (slope) is fixed, while its base is recessed as deep as possible, and the space in this niche is filled with polyurethane foam. It should not be let in a lot, so as not to warp the plastic, which easily bends when the foam is bursting during hardening. The slope must be pressed to the upper part of the opening, fixing it with construction tape at the anchor points.
When the horizontal slope is checked, you can mount the side parts in the same way, checking the parallelism and compliance with the vertical. Extend the spacers. In the same way, plastic slopes are mounted in a wooden house, but it is better to fix them with self-tapping screws.
The structure must stand for a day or two so that the polyurethane foam finally hardens. But if the plastic is stained, it is better to immediately cut off the smudges with a knife and wipe the slope with a rag dipped in a solution of vinegar. After the foam has hardened, the mounting tape and spacers are removed. Next, the decorative corner is fixed with a sealant or transparent silicone.

Installation of internal slopes
Before installing plastic slopes inside the room, it is advisable to complete the wall decoration. The plastic is mounted on a solid solid surface. If a plastered window opening crumbles in an old house when replacing a wooden window with PVC, then it is better to knock it down to the base of the wall, and then level it and fill it with insulation. This is not necessary in new buildings.
Wooden slats are fastened along the perimeter of the installed window along the inner joint with self-tapping screws. They are convenient to use for leveling the walls adjacent to the opening. Plastic slopes will be attached to them. The most reliable fastening is on the starting plastic profile. An F-shaped profile is also mounted on wooden slats, fixed with staple brackets.
Internal plastic slopes are installed on the finished base, starting from the upper horizontal, under which it is recommended to lay mineral wool. Installation is in many ways similar to the described instructions for external slopes, and the gaps at the joints are also hidden with silicone or white sealant.

Attention: All work on the installation of plastic slopes is carried out on clean, dry surfaces with low or moderate humidity in the room!
The installation of plastic slopes with your own hands is not limited to the description of the above installation technologies, options are possible, for example, plastic slopes - video:
Replacing old frames with modern plastic windows is half the task. The next stage, which is often forgotten, is the installation of window slopes. The correct execution and finishing of the slopes plays no less important role in the insulation of the apartment than. You can invite a master to carry out the work or save a little on builders and make the slopes yourself.
In contact with
classmates
Slope types
The complexity of finishing the slopes depends on the quality of the walls, the accuracy of the craftsmen when working with windows and the material chosen for finishing. There are only three basic ways:
- followed by decor (painting or wallpapering);
- plastic framing;
- cover.
Slopes are also made of wood - coniferous (most often pine) or valuable species (beech, oak, mahogany). This is a rather laborious method that requires professional work with wood. Wooden slopes look stylish in expensive interiors, where the rest of the furnishings are also made using wood. Do-it-yourself repairs can be completed if you choose a simpler material for the slopes of plastic windows.
Plastic slopes
Plastering and painting of slopes
This method of handling slopes is the most economical and simpler. The ready-made dry mixture, based on gypsum or cement, is mixed with water in the proportion specified by the manufacturer, after which the material is ready for use.
Note!
Before applying the plaster, the surface around the window is cleaned of dust, dirt, sagging or polyurethane foam.
The seams of the corners and slopes are expanded so that the plaster adheres better to the base - a brick wall. The wall is plastered first, and only then they proceed to the slopes.

Installation of slopes
Sealing cracks
When performing slopes, they additionally check the tightness of the joints of the wall and window. The cracks found are sealed with polyurethane foam, you can use tow or felt. Fabric materials are treated with a plaster solution and fixed around the frame perimeter.
2-3 cm should remain to the side parts of the window opening - this gap will be filled with plaster. When the material is dry, work can be continued. Do-it-yourself window slopes do it yourself, although not very quickly, but you can be sure of the quality of each stage of work.
Slope plastering - final stage
A little solution is laid in the slope of the slope, leveled, wait for drying and go to the next layer. At one time, you can apply 5-7 mm of the solution, then you must wait for the material to dry completely. Equalize the layers from bottom to top.
Before applying the plaster, the upper part of the slope is fixed with a horizontal bar made of wood - its edge should be perfectly flat. Fix the rail to plaster or nails, exposing the guide along.

Slopes on windows
The advantages of plastic slopes
Installing plastic slopes will take much less time than working with plaster. This option for finishing windows will not cost much more, but there will be less dust and dirt after making the slopes, and the process will go faster.
The plastic panels are made of the same material as the window frames. With temperature drops, slopes and frames expand in the same way, no excess stress is created. It is not necessary to paint or additionally prepare PVC panels for installation. To eliminate the "consequences" of the repair, a damp cloth is enough, and the entire installation process will take no more than 2 hours.
For slopes, plastics are suitable that are not subject to the harmful effects of solar radiation and are strong enough, resistant to scratches and impacts. Usually, sandwich panels are chosen with a top layer of plastic, an intermediate layer of insulating material and a bottom layer of moisture-resistant PVC.
How to make slopes on windows with your own hands video:
Installation of plastic slopes
Previously, fragments are cut from the panels according to the size of the slopes. The panels are fixed to the cleaned surface using liquid nails. The plastic is fastened in the selected position with a snap-on rail. Instead of this design, you can use simple wooden slats, fixing them at the top and sides of the window opening. The panels are attached to the guides with a stapler.
The joints of the walls and slopes are made out with plastic corners. Their purpose is to keep the wallpaper intact on the walls adjacent to the window being designed. It is these parts that are most often damaged by children and pets.

Carrying out the slopes on the windows with your own hands, it is worth observing the technological nuances. It is better to select plastic panels to match the shade of the window, since they will not have to be painted. Before using the panels, the mounting spike is cut off from them. The panels should be cut with a special knife or jigsaw.
The polyurethane foam can be deformed during hardening. To prevent this from happening and the slopes remain flat, they select foam with a minimum expansion coefficient. The slopes must be additionally fixed for 5-10 minutes, until the foam "seizes".

Plasterboard slopes
Do-it-yourself slopes for plastic windows are quite easy to make from drywall. For work, choose a moisture-resistant material that will not suffer from accidental drops of rain and condensation that accumulates on the glass. An alternative option is to use ordinary drywall, which will be additionally covered with several layers of primer or a special protective compound.
When performing drywall slopes, a window block with profiles on the sides is sometimes placed - it will be the basis of the entire structure. Before installing the block, you need to fix the profile in the window grooves. Then the system will be more reliable and stiffer, and installation will be easier.

Installation of plasterboard slopes without a window block
You can do without ready-made frames by doing all the preparatory work yourself. In this case, you will need a profile in the shape of the letter "L" and fix it around the edges of the frame, creating a base for attaching sheets of drywall. The material is cut exactly to size, inconsistencies can later be masked and corrected with plaster. An acrylic-based sealant is applied to the profile, then a drywall sheet is inserted. The distance between the window and the slope is laid with a layer of mineral wool, a layer of glue is applied to the near edge, and using a level, the drywall sheet is gently pressed against the wall.

Alternative methods of installing drywall slopes
It is not necessary to use a profile when making slopes. You can fix drywall:
- on polyurethane foam;
- on the glue.
It is convenient to use metal frames in cases where the surface under the slopes was badly damaged during the installation of windows. Fastening plasterboard panels to glue or foam is performed in the same way as fastening to a profile. In this case, the sheets are installed end-to-end or behind the frame, the seams are filled with sealant. After completing the work, the surface is primed, covered with putty and two layers of paint.
Note!
The corners of the slopes can be covered with decorative corners.
Plasterboard slopes are not only beneficial and easy to install. The surface of the material can be additionally decorated, which allows you to decorate the windows in the style of the entire room. The slopes will not contrast with the design of the room and spoil the impression of the interior.
Please help us make the site better! Leave a message and your contacts in the comments - we will contact you and together we will make the publication better!After the window is installed, it remains to finish the slopes on the plastic windows. PVC elements perform not only decorative, but also important protective functions. You can install plastic slopes on the windows with your own hands. How to install plastic slopes will be described below.
What are they needed for
A plastic trim device is the most common way to ennoble the space of a window opening. PVC slopes have a pleasant glossy surface and are combined with the material of the window profile. Plastic panels protect the assembly seam from sunlight and moisture.
Finishing the slopes after installing the window is performed using plastic
Mounting foam, with which the window system is fixed in the opening, is a water-repellent material. But if it is not protected from exposure to direct sunlight, then it will begin to deteriorate and moisture will freely penetrate into its pores, destroying it from the inside. Therefore, the slopes for plastic windows must be installed as soon as possible after installing the window.... How to make slopes on plastic windows will be described in this article.
Properties of plastic slopes
Slopes for plastic windows can be made of two types of material - they can be window slopes from PVC panels or from sandwich panels.
 The slope protects the foam from destruction
 For both types of plastic panels, common positive qualities are characteristic:
- long operational life;
- plastic slopes for windows have a decorative appearance and are combined with the material from which the window system is made;
- finishing the window slopes inside with plastic allows you to reliably protect the foam from the effects of the environment;
- installation of plastic slopes is possible for finishing arched openings, since flexible PVC casing can be used;
- you can install PVC panels with your own hands, without professional skills and special expensive equipment;
- plastic panels for slopes can be cut with a hacksaw for metal, but this must be done carefully, without exerting effort, so that the PVC panel does not crack;
- do-it-yourself installation of plastic windows occurs quickly and without the formation of serious pollution and construction debris;
- it is easy to take care of the PVC panels - it is enough to wipe them sometimes with a rag soaked in soapy water;
- they have low thermal conductivity;
- the plastic window element is highly moisture resistant;
- finishing the slopes of plastic windows will reliably protect them from freezing.
Products from PVC panels
Before installing plastic slopes with your own hands, you need to familiarize yourself with the qualities of the material that is used to make them. One of them could be a PVC panel.
Material description
Another name for this material is ceiling panels. They are made from polyvinyl chloride.


They consist of two plastic plates with stiffening ribs inside. For some models, the presence of tool joints at the ends is provided.
The panels can be of different sizes, but during installation they will still have to be cut according to the required dimensions. While the panels can be 3 and 6 meters long, 6-meter products should be purchased. The thickness of the panels varies from 0.5 to 1.2 cm. The type of products can also be different: panels, strips or PVC sheets.
Components for plastic panels are also purchased. The kit should include fasteners and plastic elements. Their description is presented in the figure below.

One of the advantages of any plastic panels is their wide range of colors. Colored PVC slopes can be matched to any interior.
 The color of the finishing plastic can be matched to any interior
 The interior decoration will look original when covering window openings with plastic panels with an image or imitation of any natural and artificial material. When the windows are colored or brown, painted products can be used. It is important that in this case the window fittings are combined with them..
 PVC panels can imitate a wooden surface
 Panels can be monochromatic, laminated, varnished, have a printed pattern or an image applied by thermal printing on their surface. Installing plastic slopes will give the windows a neat decorative appearance. How to make plastic slopes will be described below.
Positive qualities of the material
Do-it-yourself high-quality finishing of slopes with plastic is obtained thanks to the properties of the ceiling panels.
- the material is not toxic;
- have high moisture resistance;
- they are easy to install and maintain;
- have a low weight, therefore they do not create a load on the base;
- plastic is non-combustible, but when melted it emits poisonous corrosive smoke;
products are resistant to temperature extremes; - have frost resistance;
- create an ideal flat, rigidly fixed surface;
- have a modern look and are suitable for any interiors;
- honeycomb structure provides reliable sound insulation;
- do not accumulate static electricity on their surface;
- panels are resistant to household chemicals.
Mounting
How to install plastic slopes on windows with your own hands in stages is shown below. Before you start finishing the slopes with panels, you need to make measurements. The inner sides are measured twice - at the window and at the wall.
- the installation of plastic slopes on windows begins with the removal of foam that has gone beyond the seam along the perimeter of the window frame. To do this, you need to use a sharp construction knife;
 Before installing the slopes, remove excess foam
 - along the perimeter of the window frame, it will be necessary to fasten a wooden block. When making a bar, you need to make a slope on one of its faces. This is done so that you can firmly fix the bar near the window frame;
 For fixing the slope, a wooden block with a slope is made
 - ready-made bars should be installed around the perimeter of the window frame in such a way as to go over it a little. Fastening can be done using self-tapping screws or dowels;
 The bar is fixed with self-tapping screws along the perimeter of the frame
 - a plastic strip, called a starter profile, is available from a hardware store. Using a construction stapler or self-tapping screws, attach it around the perimeter of the window to a wooden block;
 A starting profile is mounted to a wooden bar
 - we manufacture the necessary elements according to the previously obtained dimensions. We cut the plastic carefully so as not to damage;
 Cutting the PVC panel must be done without strong pressure
 - the panels must first be installed on the side walls of the window opening. The panels must be placed in the start profile;
 The panel is inserted into the start profile
 - the part must be separated from the wall and the space must be covered with polyurethane foam. Then put it in place and press down a little so that the foam grabs;
 The PVC panel is fixed with polyurethane foam
 - in this way it is necessary to finish the entire window opening;
- in order to correctly make plastic slopes, decorative corners are attached to the trimmed fragments. The finished product is fixed with masking tape until completely set.
 The slopes are fixed with masking tape until the foam is completely dry
Installing slopes on plastic windows, platbands can be fixed on their corners. How to make slopes with a platband, shows the step-by-step instructions below.
 Installation scheme of a slope with a platband
Sandwich panel products
Do-it-yourself installation of plastic slopes can be done using a multilayer material covered on both sides with decorative plastic. Installing plastic slopes with your own hands using sandwich panels, you do not need to produce additional thermal insulation.
 Sandwich panels have high thermal insulation properties
 The installation of PVC slopes when using this material is quick and with a minimum amount of waste. The use of slopes made of pvc panels of this type protects the window from freezing.
Sandwich panels have the following characteristics:
- PVC provides reliable heat and sound insulation;
- finishing window slopes with this material increases the energy efficiency of the window system as a whole;
- if you correctly make the slopes from the panels with your own hands, then the window opening will acquire a neat appearance;
- do-it-yourself plastic window decoration is done quickly and efficiently;
- even an unprepared person can make slopes of plastic with insulation.
Mounting
The sandwich panel can be attached in the same way as the PVC panel. How to properly make such a finish yourself is shown below.
 Slope device using sandwich panels
 How to trim window slopes with plastic without a starting profile step by step is shown below.