Creation beautiful interior in the house requires certain preparations. For each finishing material, the wall surface must be prepared in a special way. In this article we will look at how to prepare walls for decorative plaster, because this is the most popular finish.
Why prepare the wall
Decorative plaster gives the room an unusual and very aesthetic appearance. In order for the walls to shine and the coating itself to be durable, the surface must be prepared before starting work. Otherwise, the finishing layer will not adhere firmly and will soon require additional repair and restoration work, which will not be cheap. Therefore, before applying the final layer, the walls must be properly treated.
Video “How to prepare the base for decorative elements with your own hands”
In this video, the expert will show you how to prepare the foundation for decorative painting on one's own.
Advantages and disadvantages
The advantages of this finish include:
- durability, strength and practicality;
- resistance to various types of mechanical stress;
- masking irregularities and cracks;
- the material can be applied to any surface: concrete, wood, brick, metal, etc.;
- can be used for external or internal work;
- moisture resistance, frost resistance and sound insulation;
- Only natural ingredients are used for production.
Among the disadvantages of this finish, it is worth noting the following points:
- high price;
- difficulty of dismantling. Removing such a coating will require a lot of effort and time;
- Before installation, the surface must be properly treated.
Despite the disadvantages, this finish is becoming more and more popular every year.
Step-by-step instruction
Before applying decorative plaster, certain steps must be performed. Let's look at each stage of preparation in more detail.
Preparation for plastering

The work itself is not difficult. At this stage you should do the following:
- The surface must be cleaned of old coating: paint, wallpaper, etc. Do not leave areas that have begun to peel off or become loose.
- Next, remove all protruding elements (for example, screws).
- The walls are well washed from dust and any kind of dirt. Oily stains cleaned with soapy water.
- Mold must be removed. Next, the area affected by the fungus must be covered with antifungal compounds.
After this treatment, the area should dry well.
After the preparation has been completed, you can proceed to the next stage - applying leveling plaster.
Leveling plaster

Before applying decorative plaster, a leveling layer must be applied to the prepared surface. For these purposes, a regular gypsum putty. It is enough to cover the wall with one leveling layer of starting material.
If you plan to use Venetian decorative plaster, then you should apply 2 layers and finishing putty. The result should be a perfectly flat surface.
It is worth noting that plasterboard walls It also needs to be treated with putty to avoid the appearance of stripes and joints of the material. There is no need to level with putty just wooden surface. It can simply be treated with a special primer designed for woodworking.
Stripping the wall

After the leveling putty has been completed, the surface is cleaned. The fact is that without proper experience it is very difficult to apply such a layer perfectly to avoid the appearance of unevenness. Therefore, after the putty has completely dried, you should go over its surface with sandpaper (one). You can also use a sander.
This cleaning will remove all significant irregularities that could negatively affect the final finish. In this case, minor irregularities will be hidden by the decorative plaster itself without any negative consequences.
Primer

After finishing putty dried (at least 24 hours must pass), the walls must be primed. To complete this stage efficiently, you should stock up quality tools. To work, you will need a spatula with raised edges. It does not leave streaks or stains behind.
A primer must be carried out, since decorative plaster will be applied in the form of a solution that contains water. Applying a primer to the walls will avoid uneven distribution of the solution over work surface.
After application, the primer should dry on its own. For better adhesion, this solution should be applied in two layers. Each layer should dry for about 12 hours.
Putty

This step is skipped if a textured composition (for example, Leonardo) will be coated. In other cases, a thin layer of putty is applied, which after priming should lie perfectly, smoothing out any existing unevenness. After completing this step and completely dry Again, you need to sand it a little.
As you can see, preparing walls for applying decorative plaster to them is a simple process. However, for the entire finishing to be successful, all stages should be performed consistently and efficiently, allowing each layer to dry thoroughly.
It is very important to properly prepare the walls. The final type of coating will depend on the quality of this work. Decorative plaster is a multi-layer coating that is formed on the walls and allows you to get original invoice. The latter may have different type. It will depend on the size and shape of the mixture filler, as well as the tools used for application. The method of applying the composition is also important at this stage.
Why choose decorative plaster?
Decorative plaster today is quite popular in the formation original interiors, she is highly popular. The mixture is distinguished by an abundance of textures and colors, has a low cost, and allows for simple and quick application. After drying, the resulting surface is not subject to mechanical damage.
The described type of finish can also be used when decorating exteriors; it can be found on sale. Among other things, it can be cleaned of dirt during operation. Really beautiful and more practical material for decoration it is quite difficult to find.
Preparation for applying structural and textured plasters

You must prepare the walls for decorative plaster if you plan to use the latter for repairs. Structural and textured mixtures are excellent for application to any materials, including:
- concrete;
- brick;
- wood;
- metal.
Plaster allows you to create a surface that has the ability to breathe. After drying, the surface is not afraid of moisture, and its service life is measured in decades. Walls may not be prepared very carefully before applying these compounds. There is no need to level them to perfection, because the material during the application process will be able to hide small gaps, bulges and other minor flaws.
Step-by-step preparation of walls for decorative plaster involves cleaning the surface from old decoration. Oil stains are removed using a solvent, then the wall should be washed using a soap solution. Deep cracks, if any, should be repaired cement mortar. The walls must be treated with an antifungal agent. However, if the room is operated at low humidity levels, then this is not necessary.
Work methodology
On next stage you need to apply a primer. Preparing walls for decorative plaster involves treating the surface with putty. However, this work should be carried out only after the primer composition has completely dried. Putty will help level the surface. It acts as a base for application decorative composition. If the walls will be treated with a thick relief layer, then putty may not be used.
After 24 hours, the walls should be treated with an acrylic-based primer. This composition is necessary to improve adhesion qualities. Afterwards the walls are sanded using fine-grained sandpaper. At this point we can consider that the preliminary work is completed. Preparation should not cause any real difficulties.
Removing the old layer of plaster

Preparing walls for decorative plaster with your own hands necessarily involves removing the old plaster layer. The wall will also need to be cleaned of whitewash, wallpaper and old layers of paint. The surface is well sanded until you reach the base. The walls need to be vacuumed well, especially the cracks. They should be washed using any cleaning solution. This is required for several reasons. Otherwise, adhesion to an untreated surface will be very unreliable. If then the plaster layer will not stick. In addition, this will reveal defects that were previously hidden under the finishing material.
It is important to highlight one more factor that favors the need to clean the wall of old coatings. It consists of carrying out additional processing, the features of which will depend on the base material. If you have to work with the walls in a newly built house, then this point should be skipped.
Features of preparation before applying Venetian plaster

Preparation of walls for decorative plaster can be carried out according to different technologies, which will depend on the final composition. If we're talking about O Venetian plaster, That preliminary work you need to devote more time and effort. This is due to the fact that the decorative material has some features.
The walls should be carefully and efficiently cleaned of dirt. Old whitewash and paint paint are removed. The cleaned walls are then thoroughly sanded. Leveling is carried out with a putty compound. This stage must be approached with great responsibility. If the walls are not smooth, then the attractiveness of Venetian plaster will be invisible, because it has several transparent layers, the number of which can be up to three.

Preparing walls for decorative plaster requires sanding. These works must be carried out manually. From application grinding machine should be abandoned, because even the smallest sagging and irregularities need to be processed. A primer is applied to the leveled walls; a deep penetration solution should be selected.
It is necessary to bring the walls to perfect condition. All cracks and gaps must be repaired. Sometimes these works have to be repeated several times, so by and large manipulations during this type of work are quite labor-intensive. However, without them there is no point in applying Venetian plaster; in this case it will not be able to provide a stunning effect.

Preparation for decorative plaster of walls, the technology of which is described in the article, involves the application of primer. It needs to be chosen correctly. In this case, it is necessary to take into account the structure of the coating. On store shelves you can find a wide range of primer mixtures. In order to do right choice, you need to familiarize yourself with which primer is best for certain surfaces.
For example, alkyd compounds work well on wood that has not been pre-prepared. In this case, it is possible to achieve alignment of the structure and create flat surface for applying plaster. The advantages of this mixture include fairly rapid drying. You can also use a polystyrene primer; its application is permissible even on plastered surfaces. However, these products contain substances that can be harmful to health.
Before you prepare walls for decorative plaster, the standards must be considered. After reading them, you will be able to understand that a primer is excellent for metal surfaces special purpose. Usually this is a composition with zinc additives. It is possible to use an alkyd primer mixture with the addition of zinc; this composition provides anti-corrosion protection. It is better not to apply glyphthalic mixtures to metal surfaces, as they are characterized by a long drying period.
Secrets of the masters
If you are preparing walls for decorative plaster, then you must follow several rules. There is no need to purchase putty mixtures based on alabaster and oil-adhesive bases. You can prefer any other compositions. The thickness of the primer layer should be 2 mm or more.
It is recommended to apply the putty on serpyanka, which is a self-adhesive mesh. Distribute it along the wall. In this case, surface treatment should be carried out with a large-width spatula. Preparing walls for decorative plaster is carried out using a primer. It is recommended to purchase acrylic mixtures.
Conclusion
Quite often today home craftsmen carry out self-study walls under decorative plaster. The consumption of a given composition will depend on the type of mixture. If we are talking about Venetian plaster, then its consumption varies from 70 to 200 g per square meter. Approximately 3 kg of bark beetle will be consumed per square meter. Everything will depend on the base material and layer thickness.
Due to the fact that plaster is quite expensive, to reduce its consumption it is better to level the surfaces as thoroughly as possible. This is the preparation of walls for decorative plaster. Features of these works may include the application of cement-sand plaster or the installation of an insulating layer of foam plastic. The second option is very practical; if the house is decorated in this way, it will be warm and beautiful.
Decorative plaster is a truly unique finishing material that allows you to create interiors that are unique in their beauty.
It is no wonder that the popularity of such compositions is growing year after year. However, decorative mixtures can fully reveal all their aesthetic advantages only if the load-bearing base is properly prepared, so the preparation of walls for decorative plaster must be done with special care.
Types and features of material
 Decorative plaster must have aesthetic qualities and be sufficiently durable
 Decorative plaster coatings in their composition, technical specifications and the method of application are radically different from conventional plaster solutions.
The main purpose of base or finishing compositions is to level load-bearing surfaces, eliminate various technical defects, and prepare them for further finishing.
In contrast, decorative plaster is designed for use in interiors as a final wall covering. Due to the operational and technical features of this material, preparing walls for decorative plaster has its own nuances.
First of all, we should take a closer look at this coating from the technical side: its characteristics, pros and cons, varieties, application, etc.
Varieties
 All decorative plaster mixtures are divided into two main categories:
- Natural ingredients.
- Polymer.
The first group includes mixtures prepared on the basis of natural ingredients. These are the following compositions:
- mineral. Their basis consists of mineral fillers large fraction, often colored various colors. The connecting link in such mixtures is cement. The treated surface has a grainy texture that shimmers in different shades;
- calcareous. This solution is based on slaked lime with the addition of fine sand and cement;
- plaster. Gypsum solutions are easy to use and flexible. They have a number of operational restrictions - they can only be applied to interior walls rooms with natural humidity levels.
 Special texture rollers will help create an original surface
 Polymer compositions can be silicone or acrylic. Based on the technology for creating an aesthetic effect, mixtures are divided into textured and textured.
Texture mixtures have a three-dimensional pattern, applied using a trowel, texture roller, or stencils.
In textured mixtures, the external effect is achieved thanks to color scheme simulating expensive coatings- first of all, polished marble and granite slabs.

Advantages and disadvantages
 The wide popularity of such finishing mixtures is explained by a whole set of positive qualities, which distinguishes them favorably from most others wall coverings. Among the main advantages are:

 Only a professional can create a particularly complex texture
 Exclusive plaster coatings are not without some disadvantages. Of course, they are not so critical, otherwise these mixtures would not be so in demand among buyers. There are only two main disadvantages that may influence the choice:
- high price. The price of the material is quite comparable to the high aesthetic effect that can be achieved with its help. Usually it is several times higher than the cost of conventional base or finishing compositions;
- difficult application. Applying the mixture to the wall has whole line features, sometimes very complex from a technical point of view.
Therefore, before choosing this material, you need to soberly assess your skills in the finishing craft. Otherwise, you can waste expensive plaster mixture, or, as an option, spend extra money on the services of professional finishers.
If, after all, the choice is made in favor of this expensive exclusive coating, you should consider in more detail how to prepare the walls for decorative plaster so that it can last as long as possible. 
Preparation stages
 Clean the wall from debris and dust and cover it with primer.
 The entire procedure for preparing walls for decorative plaster can be divided into several stages.
- Surface cleaning.
- Leveling plastering.
- Primer.
- Putty.
Proper surface preparation implies stage-by-stage and high-quality completion of all the listed works. At the same time, walls can be prepared in a special way for each type of plaster.
 Application of decorative composition to walls in a new building always requires preliminary leveling with base and (or) finishing plaster. The fact is that new walls, whether they are made of brick, cast concrete or made of wood, always have some flaws.
It could just be small chips and cavities, or seams that are too deep. And there may be more serious defects in the form of crooked walls. Moreover, at first glance, the curvature of the walls may not be noticeable. But finishing in some cases, it can emphasize this drawback, making it so noticeable that it will cancel out the entire effect of expensive repairs.
Fix wall defects using decorative mixtures will not work because they are designed to be applied in a thin layer. No more than 1.5 - 2 mm. And this is clearly not enough to correct more or less significant defects in the load-bearing foundation.
 Therefore, all walls in a new home should be carefully inspected using a construction or laser level. In case of significant deviation in the vertical or horizontal direction, a leveling plaster layer should be applied.
Alternatively, preparing walls for decorative plaster may involve covering them plasterboard sheets- the so-called “dry plaster” technology. This method of leveling walls is simpler than “ wet technologies", and demands less costs energy and time. To learn how to apply the leveling mixture, watch this video:
However, it should be taken into account that gypsum board sheets together with the frame eat up a significant amount of room space - at least 50 mm for each wall.
Wall cleaning
 Thorough cleaning should be done before applying any type of plaster mixture to previously treated walls. During the work, you need to clean the surface from old wallpaper, paint and varnish compounds, putty, right down to the layer of leveling plaster. For cleaning you can use any suitable tools- spatulas, trowels, picks, grinders.
For more quick removal wallpaper, they should be moistened with soapy water or a special wallpaper remover. You can buy it in the same stores that sell wallpaper and wallpaper glue. Regular paper wallpaper simply moisten with the composition using a roller or brush.
 Soapy water treatment will help remove old wallpaper
 Waterproof vinyl sheets should first be perforated with a needle roller, “wallpaper tiger” or a regular knife so that the liquid has access to back side wallpaper and wall surfaces.
You can try to remove the paint with a spatula, starting from the bubbling and peeling fragments. If it holds too tightly, you should move on to more radical measures - resort to using a grinder or hammer drill. Lime whitewash You can simply wash it off with a damp cloth, passing it over the entire surface of the wall several times.
Removing the putty can take quite a long time, since it is applied in a thin layer, but at the same time it has good adhesion to the underlying base. To facilitate its removal, it is recommended to prepare a special composition from a mixture of starch and water in a ratio of 1 to 20 or 1 to 15 in particularly difficult cases. For more information on cleaning the base, watch this video:
The putty walls are moistened with this solution and left to soak for 15 - 20 minutes. After this, simply scrape off the layer of putty using a spatula.
Primer
 The soil will improve the adhesion of the wall with the mixture
 The primer allows you to create a strong adhesion between different finishing layers.
Primer compositions increase adhesion, significantly extending the service life of the coating, therefore the preparation of walls for decorative plaster necessarily includes treating their surface with primer mixtures.
For greater effectiveness, primers are applied in at least two layers. Each subsequent layer should be applied only after the previous one has completely dried.
 In today's market finishing materials There are a huge number of primer compositions that differ in their purpose and scope. If the walls are located in a room with a high level of humidity, they must be treated with antiseptic primers. These protect surfaces from the formation of mold and fungal infections.
A special primer for decorative plaster is also available for sale. It is used mainly under textured “Venetian plaster”, applied in a thin layer of less than 1 mm. The wall is first treated with a regular primer, after which it dries, a tinted acrylic primer is applied to the wall.
In some cases, instead of a special primer composition, a regular one is used as the underlying layer under the “Venetian” acrylic paint the desired shade. It allows you to add depth of color to Venetian plaster, which enhances the “marble” effect and gives the wall a more natural shade.
Putty
 Keep in mind that texture compositions are applied in a thicker layer than textured ones.
 Preliminary puttying of surfaces is carried out before applying textured and colored compounds. If you are going to treat the wall surface with textured plaster, then the puttying process can be omitted.
The fact is that textured compositions - “fur coat”, “rain”, “Leonardo” - are applied in a thicker layer than textured ones. After application, they are further processed with figured rollers or rubber stamps to give them a textured relief. Therefore, their layer can reach up to 3 - 5 mm, which is quite enough to mask minor wall imperfections.
 If you plan to treat the walls with thin-layer “Venetian” mortars, it is simply necessary to improve their surface with putty. To do this, you need to carefully examine the wall for cracks and crevices, which must be carefully sealed. Over time, any, even minor cracks tend to expand and increase, so defects left unattended can soon transfer to the decorative layer.
To seal cracks, they must be carefully expanded and cleared using a knife or thin spatula. After this, the gap is cleaned of dust and covered with putty along its entire length. Also, before applying the “Venetian”, the entire surface of the walls is puttied to give it a perfectly smooth appearance. After finishing the work and the putty layer has completely dried, the entire surface of the wall is primed again. For more information on how to prepare walls for the bark beetle, watch this video:
If the apartment owner has some experience finishing works, he may well independently prepare the walls for finishing with exclusive and expensive plaster mixtures. But if the slightest doubt arises about your competence, then it is best to entrust the work of preparing the surface and applying expensive decorative covering finishing professionals.
What complex and unusual things might involve preparing walls for decorative plaster? There are enough subtleties, so if you are not ready to learn and work on mistakes, then it is better to immediately turn to specialists. If you are serious, then let’s look at what points an ordinary citizen needs to take into account when undertaking such a complex procedure.
Responsible approach
If the site for applying decorative plaster has not been properly prepared, it will in no way be able to show its strengths, create houses sophisticated style or to show off the color, the unevenness of the previously prepared area makes such plaster ordinary; it may not only fail to make an impression, but even repel one. If you are careful and attentive, plaster will allow you to create a unique style in your home; if you don’t try, everything will go to waste. How can we remove surface defects?
If you are thinking about how to prepare walls for, then you need to understand, firstly, that using a decorative variation is the very last stage. Before this, we need to install windows, doors, flooring, remove all garbage from the room and go everywhere with a powerful vacuum cleaner.
Cleaning walls and premises
In addition, we must make sure that there is no dust or unevenness on the working surface itself. Experienced specialists, for example, they carry out the procedure of cleaning the room from dust 2-3 times in a row, they know very well that such a short procedure guarantees application without any defects.
Stages of work
So, the instructions, even if they initially seem complicated, will gradually be mastered by you, the main thing is to treat them carefully and responsibly. You need, as professionals do, to observe every small stage of work, even if it seems unimportant to you:


Squeeze the roller before applying primer
Doing the work yourself requires careful application of the primer. We described this procedure above and you must remember that for various features surfaces have their own types of primer. The stage itself is not that difficult, you have nothing to be afraid of. In some places, you may not be very careful about the procedure - then everything will be leveled, the primer is very flexible for various types of corrections, and initially it is impossible to apply the primer perfectly evenly.
If you find any cracks, you need to expand them using an angular grinder, which is equipped with the strongest diamond disc. Now that the gap has been widened and cleared of all excess, you can seal it with a high-quality repair compound. Try to look for professional versions of the composition, they are not much more expensive, but much better. If the gap is too deep, you will need to apply the compound in a couple of passes.
Now you need to apply base layer putties. It will serve to level the wall, as well as the basis for future decorative plaster. An important point is that only one parameter can save you from applying putty - you will apply a large layer of decorative plaster, which will hide some unevenness and not lose the quality of the color, which will be saturated. If you decide not to apply putty for no reason, then the result will be disastrous, since there will be no smooth surface, defects will appear, you will not get desired color plaster, and replacing the entire coating will again hit your pocket.
Remember that each layer of putty is dried for 24 hours, and so on until a perfectly flat area is obtained. The putty will not crack if you use a special plaster mesh, which is also called serpyanka. The putty is applied with a specialized spatula. Better adhesion of layers is achieved only by coating with an acrylic primer, which will improve the coating and will be the final stage of preparation.
Applying plaster
After all kinds preparatory work have been completed, it is necessary to start applying plaster, but there is no need to rush here either. To begin with, you can choose a place on the treated wall that will be close to one of the corners. Now we can cover it with a layer of plaster and carefully look at the resulting structure of the coating, as well as the shade.
If something is wrong, you need to re-treat the wall, trim something, or add a thin layer of plaster of a different composition, from a different manufacturer. Do not be upset, such mistakes happen and the most important thing is that you did not cover the entire wall with plaster, then you would have wasted a lot of working material and complicated further corrections.
Plastering can be done using smooth or textured techniques. You can use a special primer for this. To do this you need:
- Apply a fairly dense layer of primer of 20 mm, otherwise the decorative layer will not be uniform.
- Next, it will be necessary to apply pressure on the primer during the grouting process when it has not completely hardened in order to compact it.
- Then, we take a damp sponge and wet the soil, doing this 3-4 times a day for 7 days, which will allow us to apply texture plaster.

Applying plaster
As you already understand, there are a lot of options for applying plaster. You have plenty to choose from and they can help you in this regard finished projects, advice from professionals and home experimenters who were able to achieve success in the procedure. The application technology may involve combining two application styles, which will create a combined decorative plaster. This way, one stripe will be smooth and the other textured, which, if you choose different colors for these layers, will create chic style, but here, as you understand, great care and attention is needed. Although it will make life much easier masking tape, which will allow you to make some mistakes.
Simply put masking tape on the textured portion of the primer, then choose the color of stucco you want for the smooth lines and paint them all. Next, you will need to glue the smooth lines and paint the textured ones. There is no need to be afraid, masking tape is used by professional painters because it will not damage the already painted surface.
You can come up with ways to work with decorative plaster yourself, if you have enough imagination. You have already done the most important thing - you are working on a flat surface that does not distort colors, does not make smooth stripes uneven due to dust and some dimples on the wall. In addition, such decorative plaster will adhere to the surface incredibly firmly, and therefore will last for a very long time. In ten years, of course, it will lose its original external luster, but this is an excellent time for such an impressive decorative material, which opens up enormous opportunities for you.
The importance of preparatory work
Precisely for the reason that you can make mistakes in this procedure yourself, we pay close attention to each stage of the procedure. Defects can show up under the finish, making it very difficult to fix. This usually means that the work must start from scratch, which is a big investment in time and money.
A well-prepared site is a guarantee that the plaster will lay perfectly. Preparing walls for decorative plaster must be done slowly, and each stage of work must be checked repeatedly; it covers the wall with too thin a layer and cannot hide defects in the preparatory work.
Preparing walls for plastering is an intermediate procedure between leveling the walls and applying a decorative layer. This stage is considered one of the most important, since the quality of the work determines the future appearance of the surfaces, their service life, as well as strength and resistance to moisture, temperature changes, and so on. Most decorative plasters do not require perfectly smooth walls, but their surface must be clean.
It should be immediately noted that preparing walls for decorative plaster is practically no different from preparing for painting or wallpapering. With the clarification that such a plastic material as decorative plaster can smooth out some unevenness and close cracks or small potholes. Before you begin preparing the surface for plastering, you need to stock up necessary tools and materials.
Preparing walls for decorative plaster requires the following tools and Supplies:
 Tools necessary for preparing walls for decorative plaster
 - spatulas;
- building level and plumb line;
- sandpaper, sanding machine with polishing and cutting wheels;
- paint brush;
- drill with impact function (the hammer drill is too heavy and powerful for this work);
- plastic film, masking tape or tape;
- sponges and rags;
- screwdrivers;
- mixer attachment;
- mixing container;
- putty;
- solvent;
- primer.
A spray bottle may also be required. If the walls were previously covered with wallpaper, you may have to soak them with this product.
How the preparatory work is carried out
It should be said right away that this work should be one of the last to be carried out. That is, at the time of their start, double-glazed windows must be installed in the apartment and door frames, the flooring is laid and ready for use. In general, all work has been completed that may directly or indirectly appear on the surfaces of the walls.
 The room must be completely ready for decorative finishing
 Preparing walls for decorative plaster includes the following steps:
- The first step is to remove the remnants of the old coating, such as wallpaper, paint or putty. The wallpaper is removed with a spatula after preliminary soaking, the paint is washed off with a solvent, and the putty is beaten off with an impact drill. Then you should remove all fasteners from the wall. Self-tapping screws and dowels are removed with a screwdriver, nails with a nail puller. Also, after removing the old coating, reinforcement elements may appear; they must be cut off with a grinder.
 Removing old covering from a wall
 - After this, you should tap the wall with a hammer to identify weak points. If potholes and cracks appear, they are sealed with putty. If they are deep and wide, then they are sealed in several stages.
- The next step is to apply a primer with strengthening properties, after which you need to wait about 4 hours for it to dry. If we are talking about bathrooms, kitchens or other rooms with high humidity, you need to treat them with a special antifungal substance and wait again for about 4 hours.
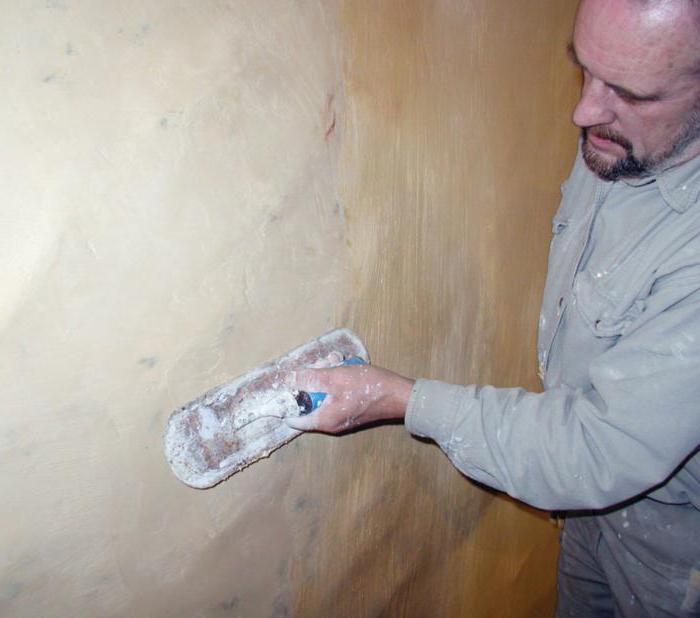
 Applying primer to the wall with a roller
 - After the primer has dried, they begin to putty the surface. This procedure is carried out using wide and narrow spatulas. After applying the putty, it is necessary to check the evenness of the surface. building level and a plumb line. The putty layer is the basis for decorative plaster, so it should be carefully leveled. At the end, it is necessary to sand the surface using sandpaper or a grinding machine, and its surface should be fine-grained.
 A layer of putty is the basis for applying decorative plaster
 - Next, you need to apply a layer of deep penetrating primer. A paint brush is used for this. Most decorative plasters are no different high level adhesion, so over time the material may simply fall off. To ensure tight contact, a primer is needed. It is required to apply 2 layers with an interval of 3-4 hours to allow them to dry.
Now that the preparation of the surface for plastering is complete, you can begin decorating the walls.
On a note! If you plan to apply a thick layer of textured or textured plaster, then finishing the surfaces with putty is optional. But for thin layers of the above types of finishing materials or for the “Venetian”, puttying is mandatory. The fact is that a small layer will not be able to fill cracks and potholes, which will appear after the decorative material dries, which will affect the appearance walls and their service life.
 Some types of decorative plaster require the walls to be puttied
Preparing walls for plastering should be carried out taking into account the following nuances.
Before starting work, it is recommended to close floor surface, windows and furniture plastic film. The ceiling area near the wall and baseboards must be sealed with masking tape. For each layer of putty, it is necessary to allow at least 48 hours for complete drying, and it is forbidden to use heaters or hair dryers to speed up the process. Otherwise, the surface may crack.
If we are talking about work on the facade or plinth, then it is necessary to first strengthen the wall with reinforcing mesh, and indoors with serpyanka. Ideally, the primer layer should be reinforced with a special liquid impregnation. If a decision has been made to use this composition, care must be taken to ensure that the surface being treated is capable of absorbing liquid. Therefore, you should not use materials based on alabaster or glue.
The primer layer, which is applied to the walls under decorative plaster, must be at least two centimeters thick. Otherwise, you will have to apply a larger layer of decorative coating to achieve a smooth and uniform surface, which leads to additional costs. After applying the primer, you must wait about 7 days, during which the layer is regularly moistened with water (an ordinary kitchen sponge is used for these purposes).
Test application of plaster
Professionals with many years of experience can skip this step, but inexperienced people are strongly advised to do a trial application. To do this you need to select small area walls closer to the corners or use a sheet of plasterboard that has been pre-finished in the same way as the surface of the walls. After the test layer has dried, you need to evaluate the quality of the resulting surface, its texture and color. If everything suits you, you can safely start plastering.
 Test application of decorative plaster allows you to evaluate its texture and color
 Preparation of material and its consumption
Modern construction market already offers customers ready-made mixtures V plastic containers and dry powdery substances that must be diluted with water. In the first case, it is enough to simply open the container and mix the composition with improvised means (a long screwdriver, a wooden plank, and so on). In the second, you must first study the instructions provided by the manufacturer, and then prepare the solution in the required proportions. To do this, you will need a mixing container and an electric drill with a mixer attachment.
 Preparing a solution of decorative plaster with a mixer
Consumption of main types of decorative plaster:
- Structural compositions - approximately 3 kg of material per square meter of surface.
- - on average 1.5 kg per square meter.
- Venetian plaster - about 150 g per square meter. meter for one layer, the total consumption must be calculated based on the number of layers.
The above data is approximate. Real consumption depends on the application method and the desired result.
Preparatory work is both a simple and important part of finishing. In order for the stage of preparing the surface for plastering to be successful, and for the coating to last for many years, it is necessary to follow the above instructions and the recommendations of the manufacturers.


