Eurolining is a durable and moisture-resistant material that has gained great popularity in construction. With its help, you can level the walls and visually expand the room. To perform it correctly, you will need the following tools and equipment:
Cladding is a popular type of interior decoration; this material is durable, strong, and easy to install.
- hammer;
- drill;
- jigsaw;
- perforator;
- level;
- ruler;
- mounting thread;
- slats with a section of 20*45, 30*45 mm;
- self-tapping screws, clamps.
Installation of eurolining: installation options
Profiles and sizes of eurolining.
To perform installation correctly, first prepare the material. To do this, leave it for 2-3 days at room temperature. Laying of eurolining is carried out at a temperature of no lower than 5 ° C and a humidity of no more than 60%.
Installation can be carried out in several ways.
Installation using self-tapping screws. With this method, installation can be carried out from above and below. From the side of the tenon, a hole is drilled in the panel for a self-tapping screw, approximately 10 mm. After screwing in the screws, mask the remaining holes with dowels. Afterwards they can be cut and sanded.
Fastening with staples. Installation is carried out from below, boards and eurolining are laid one by one. Using a construction stapler, the staples need to be driven under the tenon at an angle of 45 °. Make sure that the tenon of the subsequent board fits easily into the groove.

Methods for installing eurolining.
Use of nails. This method is similar to fastening with staples. It is advisable to use thin nails with zinc coating. The heads of the nails should not protrude above the surface, but be recessed into the board, otherwise difficulties may arise with fastening the next element. Use a hammer during your work.
Fixing eurolining with dowels. Installation is performed from bottom to top. The first board is fixed with self-tapping screws, their caps are covered with dowels. The self-tapping screw is screwed into the tenon, and the next element hides it. You can also do the job using a stapler. The last board is fixed in the same way as the first. The surface can then be sanded to level it out.
Fixation with clamps, special metal staples coated with zinc. TO this method most often resorted to when it is carried out interior decoration thin eurolining. The clamps are fixed on the back side of the tenon. The first element is secured with self-tapping screws, and the caps are hidden using dowels. First, the clamp is attached to the panel, comparing it with the previous one. The kleimer is secured using nails or self-tapping screws. If they do not match, a piece of lath is placed under the hammer. This way you will protect the tenon or groove from damage.
Installation of sheathing

Installation of sheathing under eurolining.
Eurolining is mounted on slats with a cross section of 20*45, 30*45 mm. The wood must be well dried. Keep a step of 40-80 cm between the slats. When installing the frame, use a level.
Please note that if you are going to lay the eurolining vertically, then the frame slats must be laid horizontally.
At horizontal version When installing eurolining, the slats in the frame must be directed in a vertical position.
When laying eurolining, do not forget to provide thermal insulation, which can be used as mineral wool.
To achieve a hydro- and vapor barrier effect, lay a moisture-repellent film. It is secured with a stapler over the mineral wool with the shiny surface facing inward.
Finally, treat the wood with an antiseptic to protect it from mold and rot. Installation of eurolining, if all technology is followed, should not cause any particular difficulties during the work process. In addition, the use of eurolining allows all finishing work to be carried out without unnecessary debris.
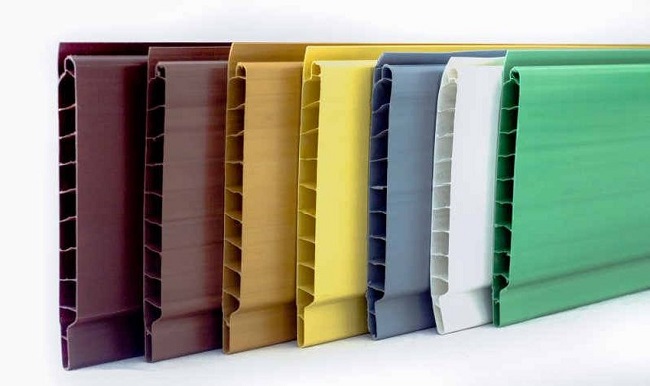
IN Lately Eurolining has established itself as an excellent finishing material. Her specifications fully satisfy the requirements of any room. In essence, it is a wooden lining made according to European standards. Changes in technology have led to the fact that the material has become more resistant to moisture than its predecessor, the service life and ease of installation have increased.
Lining- an environmentally friendly option that allows you to hide uneven walls, refine the surface and visually increase the space, which is especially important for balconies and loggias. In order for the finish to last as long as possible, it must be done correctly, without neglecting the advice on fastening and installation.
Preparation of lining and frame
The material purchased for cladding needs processing. To do this, the boards are coated with protective agents that prevent rotting, the development of microorganisms and mold. Often the processing tool is offered with a set of material depending on its class. After finishing the processing, the boards are dried and brought into the room where finishing will be carried out. The last action is performed to adapt the material to avoid shrinkage. Then install lathing.
The latter serves as a frame for fastening the eurolining. Lathing is done from wood slats, directing them in accordance with the chosen option for laying the lining. Vertical installation requires horizontal slats and vice versa.

Using screws or self-tapping screws, the boards are tightly attached to the wall in half-meter increments. When installing each board, measure the structure with a level. To increase the service life of the cladding, a gap is left between the back of the material and the wall, which serves either for ventilation or for a layer of insulation. Insulation is most often carried out with mineral wool. The gap is adjusted by the thickness of the board used for sheathing. Installed structure should be treated the same protective agent, as lining - this stage can be avoided by using instead wooden slats metal profiles . They are also fastened with self-tapping screws according to a similar pattern.
For reference!
For ceiling finishing with the help of lining they use the same frame method. The requirements for the ceiling are the strength of the roof so that there are no erosions or cracks on the surface. The presence of such will lead to rotting of even a protected board. The installation technology is similar to installation on the wall, the only difference being that the joint between the wall and the ceiling must be covered with a baguette upon completion of the work, giving it a finished look.

Types of fastening
Before you begin finishing work, you should choose the method in which the lining will be attached to the sheathing. There are several options, each of which involves use in different situations. The material looks like a board with a groove on one side and a tenon on the other, which fits into the groove of the next board. Fastening methods are divided into secret and external. When choosing any of the proposed methods, the main task– work carefully and do not damage the board, as there is a high probability of opening a gap or splitting a part.
Fastening with self-tapping screws. Self-tapping screws are often used when laying wood horizontally. Sheathing begins from the bottom or top of the wall, guided by the fact that the starting one should be the most Smooth surface. To secure it, you need to have a drill - they use it to make holes in the boards on the tenon side. The diameter is determined by the diameter of the screw. The hole depth is about 9 mm. This value was chosen based on further fast tightening of the self-tapping screw using a screwdriver.

Fastening is carried out according to the following scheme. The board is applied to the place where it needs to be secured, and the level is checked for correct position. Then they drill holes through the tenon into the sheathing and screw them along two edges. The rest - the central screws - are screwed in only halfway after the outer ones, ensuring an even fit of the board. Afterwards all the screws are screwed all the way. This installation method ensures even laying, making assembly easier.
For reference!
The disadvantage of self-tapping screws is the likelihood of splitting the board under the drill. Using this method on a balcony and loggia is not advisable, since the horizontal position of the masonry visually lowers the ceiling, which is not beneficial for limited space.
Fastening with staples. This option is more labor-intensive, requiring skills in handling a construction stapler and staples. Installation of the lining in the case of using brackets begins exclusively from the top. The process is as follows. The board is applied to the sheathing, measuring the position with a level. Having adjusted the lining according to the level, staples are driven into the tenon at an angle of 45 degrees from the wall. If you use the stapler correctly, the staples go into the wood as much as possible without causing difficulties in attaching the next board.
The disadvantages of this method include the presence of a construction stapler and work skills - such a tool is not available in every home. A definite plus - the fastening is hidden, the output is clean wood covering without a single foreign object.

Fastening with nails. To implement the method, galvanized nails are used. The installation algorithm does not differ from the previous one. The only caveat is that the use of nail fastening requires the presence of a hammer that will completely drown the nail head. Working without a finishing tool, it is difficult to drive the next board with a groove onto a nailed tenon.
The advantage of this method is that the fastening is as secret as possible, allowing you to create a beautiful wooden surface. In some cases, the nails are not driven into the tenon, but on top of the board in a random order. This option is only suitable for utility rooms, is external and less aesthetically pleasing.

Fastening with dowels. Using a dowel, cladding begins exclusively from the floor. This wooden parts cylindrical, often used to hide various technical finishing details. In this case, the screws that secure the first, lower plank from the floor are covered with a dowel. The starting panel should be installed with the tenon facing up. The tenon is secured with staples or self-tapping screws so that the visible fastening is covered by the groove of the next board. The last, top board is also fixed and covered with a dowel. At the end of the work, the dowel can be cut or sanded.
For reference!
The disadvantage of finishing is the need to process the dowel after facing, which is not required by other methods. The advantage is to obtain a surface without metal inclusions, as well as ease of work - experts consider finishing from below to be the most practical.
Fastening with clamps. This method is only suitable for eurolining with a small thickness, since the clamp cannot withstand heavy loads. It is essentially an advanced, galvanized steel shackle.
Installation starts from the ceiling. The first board is nailed with self-tapping screws and closed with a dowel. The clamps should be on the underside of the tenon - to secure the board in the desired position, they are screwed to the wall. Then a new board is driven into the groove to the first one and the process is repeated again, nailing or screwing the clamps.
The advantage of such fastening can be seen only for materials with low weight and thickness. In this case, you can save on your purchase large quantity nails and screws. This option is not used for durable high-quality lining.

The choice of fastening directly depends on what type of material is chosen for the work and what surface is covered. If the sheathing is made of wood, it is preferable to use nails. Metal sheathing holds the boards better with self-tapping screws. The most popular are secret methods - dowels, nails and staples. However, the latter requires a specific tool, therefore it is used in self-finishing less often.
On the video you can take a closer look at how and with what you need to fasten the eurolining.
This stage is only needed if wooden lining () is used. Then, before you start working with the material, you need to let it stand in the room for at least a day - the wood should dry out and reach room temperature. Only after this can you cut the lining required length. If this time is not maintained, the boards may not fit tightly to each other.
For this purpose, take a film made of polyethylene, foil or roofing felt. The installation of this material is carried out on slats, which must first be nailed to the wall. The width of the slats is taken less than 3 cm, and they are nailed to the wall in increments of 1 meter. Small holes are punched at the bottom and top of the vapor barrier to improve ventilation.
Important! This stage is not strictly necessary, but is highly desirable for rooms exposed to high humidity from the street.
How to make sheathing for lining
Using a screwdriver, we install slats with a cross section of 20×40 mm horizontally in increments of 40-50 cm, regularly checking with a level whether they are installed correctly. Using slats allows you to level the wall (so that the boards fit comfortably), as well as create a gap between the wall and the lining, which is needed to create ventilation.
If the wall is uneven, then you need to put something under the sheathing (or take a thicker sheathing). The mounting wedge, a piece of wooden beam or plywood. The sheathing is secured with long-length self-tapping screws and dowel nails. The bottom slats are 5 cm from the floor, since the bottom will be attached floor plinth, and the top ones - the same amount from the ceiling.
![]() .
.
Installation of the sheathing should also be done around openings, windows and doors. It is worth noting that the battens are made of plastic and metal. More information about installing the sheathing can be found here:
Combination of sheathing and vapor barrier
If a vapor barrier was not used, then the sheathing is installed directly to the wall.
If it was used, then the fastening of the sheathing slats depends on how exactly the vapor barrier was attached: if the slats on which the vapor barrier was attached were vertically fixed, then the sheathing slats should be fastened horizontally and vice versa. The sheathing is fastened to the slats on which the vapor barrier is located using long self-tapping screws.


Insulation is placed in the resulting space. Mineral wool is usually used as insulation. To prevent the insulation from sagging over time under the influence of moisture, it is advisable to secure it with polypropylene twine, which is usually secured using construction stapler to wooden slats.


You can also install another layer of vapor barrier on top of the insulation, which should be secured rough side to the insulation. This is not necessary, but it is highly advisable for a room whose walls may be exposed to moisture. Sometimes (especially when covering the outer part of buildings with clapboard), another sheathing is installed on top of the insulation.
The sheathing should be located both around window and doorways. You can also use plastic or metal sheathing.
Advice! If the room is warm enough, then installing insulation is not necessary. When using MDF or plastic lining Often, insulation is not taken at all; communications are placed in the space between the sheathing and the lining.
Installation of the first wooden lining
The first lining is fastened to the wall vertically from the corner of the room: first, a hole is made with a thin drill, and then secured with self-tapping screws along the entire height.
Info! If a wooden block-house lining is attached, then the installation of the first lining begins horizontally from the top of the room, and such lining must be constantly leveled to a stretched line or a horizontal level.

If a plastic lining is attached, then the first lining is fastened together with the molding (plastic strip).
It is worth noting that plastic PVC The lining differs from the well-known PVC panels in the absence of a seam when connecting (PVC panels are sometimes called seamless polymer lining). That's why, PVC lining They are attached to the wall in almost the same way as PVC panels are attached, except that each plastic piece is stapled to the sheathing.

Methods of fastening and how to fasten the lining
There are several options for how to properly fasten the lining: using clamps, self-tapping screws or nails. Best option(albeit longer and more expensive) - installation using clamps. Because in this case, the surface of the lining does not deteriorate, and, if necessary, it can be dismantled without damage.
How to attach lining to clamps
A clamp is installed in the groove of the installed lining. It is pushed into the groove of the lining with a hammer and then nails are driven into the holes of the clamp.


This clamp fastening of the lining is quite strong. Installation of the next one will be carried out in the same way: a new one is inserted into the groove of the fixed lining, carefully hammered in (so that there are no gaps between the boards) and again secured with clamps.
How to nail lining with nails or self-tapping screws
The fastening method using nails or self-tapping screws, unlike the previous one, “injures” the material.
Nailing of the lining with the help of finishing nails (with a small head) can go from the front part of the board obliquely from the longitudinal tongue (but not in the middle, otherwise cracking may occur).
This method has one more disadvantage - nails or screws will be visible on the front surface.

![]()
You can nail the ridge of the lining board if it comes with an offset profile. In this case, each subsequent board will cover the attachment point and it will not be visible.

Important! Regularly check with a level that the lining is installed level. There is no need to fit the boards very tightly together, otherwise they may swell when exposed to moisture and move away from the wall.
Installation of fittings
After the lining is installed, you need to close the edges. A plinth or fillet is best suited for this. This element is fastened to the wall using small nails.
If plastic lining was used, then the fittings sit on glue.
Lining surface treatment
This stage only concerns wooden lining since it must be coated with a special compound that protects against insects and moisture. For this purpose, antiseptics, bio-moisture protective compounds are used, and sometimes flame retardants are used - a composition that reduces the likelihood of ignition. With the help of the coating you can give different shades (varnish is used for this), and it must be updated every few years.
Features of fixing lining to the ceiling
If the frame on which the lining will be attached is wooden, then creating such a frame is almost the same as lathing on a wall. In this case, the distance between the slats of such a frame can be made slightly larger.
If the frame is metal, then instead of lathing, more a complex system hangers on which the guide profile will be attached. Weight Limit In this case, the design of such a ceiling can be increased by a large number of suspensions.
As you have already seen, installing the lining with your own hands is a completely feasible task, which can be completed with competent preparation and ours step by step instructions every. To conclude the review, watch the video. Good luck!
Differences between lining and eurolining

- Eurolining has the best quality wood
- Has a more complex profile
- Eurolining has a deeper tongue-and-groove fastening
- Has ventilation channels
- More expensive than regular lining
The process of attaching eurolining does not differ from covering it with ordinary lining, even though eurolining has higher requirements for board moisture and the quality of surface treatment, so pay special attention to this.
How to attach lining video
Wall decoration with clapboard
Do-it-yourself installation of plastic lining - video
How to properly attach the lining in a bathhouse
Wall decoration with clapboard is possible as standard in wooden house, V ordinary apartment, on the balcony, as well as in the bathhouse. Covering the steam room with clapboard is perhaps the best and affordable solution. The installation of lining in a bathhouse has its own distinctive features. The best wood for a steam room is ash, oak, birch, aspen, pine, spruce, cedar or larch. Before covering the bathhouse with clapboard, you need to treat it with special antifungal agents (antiseptics) twice.
The process of attaching the lining to the walls and ceiling of the bathhouse does not differ from the standard one; you can nail the lining to nails or self-tapping screws, or attach it to clamps.
Important! After laying in a bathhouse, the lining cannot be coated with varnishes and paints.
You will find useful tips for laying lining in a steam room in this video:
 The structure of the lining
Lining– popular type decorative design walls and ceilings of balconies, loggias, bathrooms, residential and office premises. This type of finish is characterized by durability, ease of installation, variety color solutions, attractive appearance. To get the expected result, it is important not only to choose quality material, but also follow the fastening technology.
Features of lining installation
In most cases, lining panels are not attached directly to the wall, but to the sheathing, which eliminates the occurrence of deformations and premature destruction of the finish.
 The distance between the bars should not exceed 60 cm
Between the beams of the sheathing, as a rule, heat and waterproofing material is laid.
 The thickness of the bars depends on the thickness of the insulation
Several lamella layouts are used:

Fastening elements must not only securely fix the parts, but also be as inconspicuous as possible so as not to damage appearance decorative covering. In practice, several types of fixing the lining to the sheathing are used.
Fastening with finishing nails
 Finishing studs– these are special nails of small thickness. They easily enter the material without causing cracking. Their distinctive feature– a reduced cap that is easily recessed into the thickness of the part. Unlike construction nails, finishing nails cannot withstand increased loads and are used only for hidden fastening finishing materials in structures that will not be subject to shrinkage, tearing and bending. This installation method is not suitable for installing temporary coverings, since it is almost impossible to remove a thin nail from the panel.
Finishing studs are available with different types coatings and are selected depending on the location and type of finish:
- black– steel fasteners without an additional anti-corrosion layer for work in absolutely dry rooms;
- galvanized- inexpensive and most popular variety, a layer of zinc gives reliable protection, the products are suitable for use in all types of structures that do not have direct contact with water;
- with copper, brass, chrome or bronze plating– more expensive types of fasteners that can be used in rooms with high humidity and in open spaces, with increased requirements for aesthetic finishing, when working with expensive types of wooden lining.
Any novice craftsman who knows how to use a hammer can handle the job. Also during the installation process, a hammer is used - the device allows you to drown the head of the nail without damaging the material.

When the panels are positioned vertically (the sheathing must be horizontal), installation is carried out in the following sequence:

Fastening in a horizontal position is carried out using a similar technology.
Mounting on clamps
 Kleimers– special stamped brackets with a hook and holes designed for fastening finishing panels. Products are available in several sizes for various types lining and finishing panels.
This type of installation is more labor-intensive and expensive, but has a number of advantages:

The work is performed in the following sequence:

Useful video on choosing clamps and attaching them to self-tapping screws:
Current prices for your city:
Self-tapping installation

Through fastening with self-tapping screws across the entire board, and not through a groove, is the simplest, quite reliable, but not The best decision for wooden lining. With this method, the integrity of the material is compromised, so the holes must be regularly treated with special protective mastics to prevent destruction and rotting of the wood. Despite all efforts, over time, fastener installation locations may become visible, significantly impairing aesthetics. decorative finishing. Usually the first and last panels are mounted this way for reliability, and for the rest they use fastening with finishing nails or clamps.
How to attach plastic lining
Plastic slats– a more popular type of material for finishing balconies and bathrooms than wooden analogues for a number of reasons:
- lighter weight, which reduces the load on the base plate;
- affordable cost;
- ease of installation;
- resistance to temperature and humidity changes.
Since PVC panels are not subject to rotting, any methods can be used to fasten the lining fasteners. Plastic does not require impregnation and processing, unlike wooden planks. Lightweight PVC panels can be mounted with glue without constructing a sheathing, provided the surface is level.
 Fastening plastic lining with self-tapping screws
With the help of lining, you can relatively easily and quickly give an auxiliary room an attractive residential look. Knowing the installation features will help you do right choice method of fastening depending on the type of material of the panels and the purpose of the room.
The so-called “eurolining”, unlike ordinary wooden lining, is produced according to the European standard DIN 68126. Modern technologies wood processing gives this natural and environmentally friendly material increased moisture resistance, extends its service life and greatly facilitates installation.
Required Tools
In order to correctly fasten the eurolining without the help of professionals, you will need:
- hammer drill,
- electric jigsaw,
- drill,
- hammer,
- ruler with level,
- mounting thread,
- wood screws,
- clampers.
How to calculate area and volume
The coverage area is calculated based on the working width of the panel, equal to 88 mm. And if, as a rule, there are no difficulties with the ceiling area, then the surface of the walls, for ease of calculation, is divided into separate rectangles.
One of the sides of the resulting sectors must correspond to the length of the board. The other will have an arbitrary value, depending on the location of the window or doorway.
Attention: if you use in the calculations not the working, but the actual width of the board, equal to 96 mm, the error will be as much as 7%.

Installation of eurolining
There is a simple and does not require home handyman special qualification instructions. It outlines step by step how to properly attach eurolining. The manual includes several points - from preparing the walls to finishing.
You can look at the process in detail using the video tutorial:
Preparation
Before installation wood paneling with your own hands must be placed in the room in advance optimal scheme electrical wiring. Wires that after completion finishing works will be hidden under panels, placed in special channels (corrugated) made of non-flammable material.
Packages with boards should be opened and kept at room temperature from 24 to 72 hours. Such acclimatization is necessary for “getting used to” natural material to the microclimate of the room, humidity and temperature.
Subsequently, seasoning the wood will help to avoid shrinkage or, conversely, expansion of the panels at the joints. How much the appearance of the cladding will change over time also depends on what you use to fasten the eurolining.
Since the panels are made from solid wood, they differ noticeably from each other in color and texture. Therefore, even before installation, it is recommended to select the most effective sequence of boards, depending on the chosen laying direction.
The direction, as is known, can be:
- horizontal,
- vertical,
- diagonal
- or combined.
Attention: when finishing the ceiling, placing the panels along the rays of light falling from the window allows you to visually increase the volume of the room. A transverse arrangement will visually shorten the room.

Installation of sheathing
- Sheathing boards are attached to supporting rails with a cross-section 20X45 or 30X45 mm.
- The type of wood is not decisive for the manufacture of sheathing. The main thing is that it is artificially dried material.
- The recommended distance between slats is 0.4-0.8 m.
- Correct installation is checked using a level, as in the photo:

The direction of the lathing depends on how the eurolining is attached:
- with vertical cladding, the slats must be installed horizontally - from wall to wall. It is better to start from the top, gradually moving down;
- When the panels are horizontal or diagonal, the slats are attached to the floor and ceiling.
Thermal insulation
You can use mineral wool as insulation when covering a room with your own hands. It perfectly fills the space between the wall and the lining.
If additional vapor or waterproofing is necessary, a water-repellent film is stapled over the cotton wool - with the silver side facing inward. As you can see in the photo, this can be Izospan, Tyvek or similar waterproofing materials.

Laying heat and waterproofing layers
Kleimers
Eurolining is fastened using hidden clamps - clamps. Such fasteners are not noticeable from outside, it does not interfere with the expansion or shrinkage of the tree, and helps to avoid splitting of the panels. Galvanized steel, from which fasteners for eurolining are made, is reliably protected from corrosion.
Clamps are sold in sets of 100 or 200 pieces along with self-tapping screws or galvanized nails. On square meter eurolining will need approximately 20 clamps.
The price of packaging depends on the completeness. When purchasing, pay attention to the thickness of the plate, the presence of coating and the elasticity of the retainer.

Clamps for eurolining
Particular attention is paid to securely fastening the first panel with self-tapping screws. Next, the protruding part of the clamp is inserted into the groove of the board, and its base is nailed or screwed to the supporting rails.
Each successive strip with its tenon fits into the groove pressed by the clamp, covering the fastener. Last board trimmed and adjusted to the required size.
Attention: if the fastening of the eurolining is horizontal, the planks are placed with the tenon facing upward to avoid the accumulation of moisture in the grooves.

Finishing
Upon completion of the sheathing, it is recommended to treat the surface with an antiseptic, which will protect the wood from rotting and fungus. If desired, you can use stain or wax to brighten the wood texture. A coating made with matte varnish looks good in the interior.
Conclusion
As you can see, it won’t be difficult for a home craftsman to figure out on his own how the eurolining is attached. The advantages of the workflow include ease and speed of installation. In addition, after completion of work, a minimal amount of garbage and waste remains in the room.


