Repairing old wooden windows in a bathhouse allows you to restore their functionality and return to their original decorative properties. This can be a point-by-point repair, consisting of eliminating individual structural defects, or a complete restoration.
If you plan to repair wooden windows, you first need to inspect them for defects. All detected defects must be corrected. Below are possible problems that may be identified during repair work.

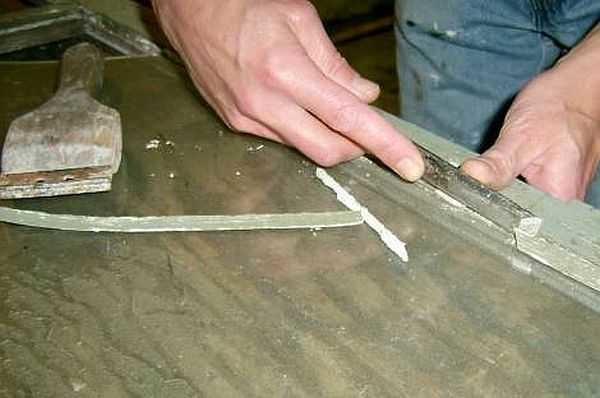
Defect #1. A gap has formed between the frame and the box
Most often, insufficient tightness of the window structure occurs, which is why drafts appear in the bathhouse. The gap that appears between the frame and the frame is often a consequence of insufficient sealing of the sashes.

This defect is eliminated by placing sealing material in the flaps. It could be:
- rubber;
- foam;

This will not only improve the old wooden windows, but also additionally insulate the room.

Note! Often you can get rid of such a gap without using a seal - you just need to bend the hinges in the direction opposite to the half-tenons of the sash.
If a gap appears around the entire perimeter, then all the loops are bent, and if it has formed in a specific area, then only the loop that is located at the place where it (the defect) formed can be bent.
Prices for seals for wooden windows
seal for wooden windows
Defect No. 2. The paint is peeling and cracked

Often renovations involve updating the paint. Let us immediately make a reservation that you should not apply paint to the previous dilapidated layer, since this will not improve the aesthetic characteristics of the structure, but will only protect the wood from rotting. The algorithm of actions should be as follows.

Step 1. First, the window is removed from its hinges, all metal elements are removed and the glass is removed. If this is not done, then painting will require more time and effort.


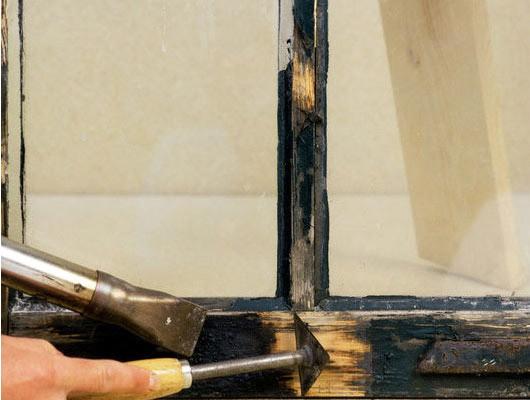
Step 2. The old paintwork is removed. This can be done in one of two possible ways.
- You can use a hair dryer to remove paint. When exposed high temperature the coating will begin to bubble and peel off, making it easy to clean off with a spatula.
- Other no less effective method consists of treating surfaces with a paint remover (for example, a special Docker S5 Wood gel remover).
Both methods make it possible to quickly remove paint, but they have a common drawback: the work must be carried out outdoors, since harmful gases are released during processing. And if outdoor treatment is not possible for some reason, then you can clean the windows mechanically- using metal brush or a spatula. Of course, such cleaning requires more time and effort, so it is resorted to mainly when the coating is so dilapidated that it falls off on its own.

Cleaning the frame with a spatula - photo
Step 3. Then all cracks found on the structure are puttied, after which the window is cleaned grinder or sandpaper.


Example of applied and leveled putty
Step 4. The wood primer mixture is applied in two layers. Once the primer has dried, you can begin painting directly.
Step 5. To achieve a more effective result, it is advisable to apply the paint in two or three layers.

Note! When applying the first layer, paint is used, which is diluted with a solvent. This liquid mixture will saturate the wood and, in tandem with other layers, forms a dense and uniform coating.
It is easier to paint with a spray gun, and the result in this case will be as effective as possible. If a brush is used, then the work must be done with special care, since the risk of uneven application and the formation of sagging is greater. After the paint has dried, the window is assembled and installed in place.

Wood paint prices
wood paint
Video – Painting windows
Defect No. 3. Tight closure of the valves
Another common problem is a skewed frame, as a result of which the sashes are difficult to close or cannot be closed at all. In this case, you should start by inspecting the hinges - as you know, they can settle over time. If the loops have really settled, then you can:
- put them in other places on the window frame;
- wrap steel wire around the hinge rods and thus adjust the position of the sashes.

Sometimes misalignment occurs due to changes in the shape of the frame as a result of swelling of the wood. To eliminate this defect, all excess is planed off with a plane, and the frame is adjusted to the box. It happens that it is impossible to determine the location of the pinching by eye. In this case, when closing/opening the doors, it is necessary to stretch a carbon copy between them and the box. The places where marks appear should be planed.
Note! Also, the frame may not close due to the fact that the coating layer is too thick. If so, then it is cleaned off with coarse sandpaper.
Defect No. 4. Section of the structure is rotten
If fragments of rotten wood were found on the window, they must be replaced. Defective elements are cut out with a chisel, and it is advisable to cut off intact tissue in order to prevent the spread of rot.

The recess formed after this is treated with wood glue, after which a pre-cut piece of wood is placed there. Once the glue has dried, the area is sanded with sandpaper.

Prices for wood glue
wood glue
Defect No. 5. Window sashes are warped
Such distortions appear due to loosening of the corner joints of the frame.

There are several ways to eliminate such a defect, but the most effective and at the same time simplest to implement is the installation of metal corners in the corners. To install the corners, you need to cut out the mounting sockets with a chisel in advance. Corners are installed in them, but so that the latter are located slightly above the surface of the window frame. Screws are used to secure the corners.

After this, a layer of putty is applied to the updated area, and sanding is also carried out.
Prices for window corner
window corner
Complete window restoration
If old window design is no longer subject to spot repairs, you can either replace it (windows are sold today made of modified wood that do not require painting) or begin its restoration. The second option is preferable, since the cost of products made from modified wood is quite high.

The restoration technology described below will improve appearance even a rotten window and add another 30-40 years to its (window) service life.
Stage one. Preparing everything you need
To work you will need the following equipment:

As for the necessary materials, there are quite a lot of them. For convenience, they are presented in table form.
Table. Consumables for restoration
| Name | Description | Quantity |
|---|---|---|
| Special assembly adhesive for wood | About 300 g | |
| Must be silicone based | 15-20 ml | |
| Made from sawdust | 500 g | |
| Minimum thickness – 1.5 mm | - | |
| Can be purchased at all hardware stores | 3 kg for all windows of a medium-sized bath | |
| Pigment with filler, which is diluted by hand | 2 kg for all windows | |
| Dimensions must exceed the dimensions of the window frame | 1 PC. | |
| At 4 cm and 8 cm | 2 pcs. | |
| Width 50 cm, depth 170 cm (holes are sealed with tape) | 1 PC. | |
| - | 2 l | |
| No. 80 or at least No. 60 | 70 cm | |
| - | 500 g | |
| 6-8 cm | 500 g |
Note! It is undesirable to use water-based deep penetration putties - they significantly increase the thermal conductivity of wood.
You may also need acrylic lacquer or stain of the appropriate shade (it all depends on the design of the structure). If it is possible to use an industrial hair dryer, then a bag and kerosene will not be required. After preparing everything necessary, you can begin restoration.

Construction hair dryer
Prices for a hair dryer
construction hair dryer
Stage two. Dismantling and revision
The main elements of any wooden window are dowels (they are also called “chopics”), connecting the structure at the corners. And reconstruction should begin exclusively with dowels.

Window frame elements, position 4 – dowel
Step 1. First, the sashes are removed, the putty is picked out with a chisel, or the glazing beads are removed. After this, the glass is removed.
Step 2. All fittings are removed (they must be replaced in any case); wooden ebbs are removed from the outer sashes (they are called teardrops): they - ebbs - are secured with nails, which are probably already rusty. All remaining nails and squares are removed - subsequent actions will be performed exclusively with wood.

Step 3. The doors and frame are placed one by one on the panel and aligned rectangularly. To do this, the diagonals are measured: they must be equal to the length. In this case, you need to work especially carefully with the window sashes. They are small, and a millimeter of deviation will lead to the formation of a gap of 0.5-0.7 mm.

As an example: let's assume that there was an error of 3 mm on the sash and about the same amount in the other direction on the window frame. In this case, a 4-mm gap will form, from which there will be a noticeable pull.
Step 4. The aligned elements are fastened with nails driven into the panel close to the sash, and the previous pins are checked.

 Pins in the sash - diagram
If everything is normal, then approximately in the middle of the corner they are drilled with a drill, the diameter of which should not exceed 0.6 of the width solid wood rectangular shape. This does not take into account quarters, as well as grooves with bevels (see the bottom of the figure).
If one of the dowels has “left” (see the same figure, top part), then the following actions are performed.

Step 5. When the holes in each structural element are ready, the frame is disassembled and cleaned of the old paintwork.
Stage three. Removing paint
As noted above, the old coating can be removed by heat treatment or chemical treatment. For the first cleaning method, you will need an industrial hair dryer. You should not use a household appliance: it will still not provide the required temperature (and this is about 250°C). Also, do not heat the wood. blowtorch or a gas burner.
The procedure is as follows: the element to be cleaned is placed on the butt and heated in 30-35 cm sections. When the coating begins to bubble, it is cleaned off using a palette knife or a regular shoe knife.

Note! If you use a spatula with a straight blade for this, it will either slide across the paint or cut into the material.
Video - Cleaning a window from old paint
You can also use special chemicals. In the absence of these, you will need available materials - kerosene (in no case nitro solvent or solvent - these products will ruin the wood) and a plastic bag.
Step 1. All elements are wrapped in old rags.
Step 2. Then they are placed in a bag, and do not forget about a small margin for tying.
Step 3. The elements are watered with kerosene (500 ml).
Step 4. The bag is tied and left for 1-2 days so that the paint softens.
Step 5. The parts are removed one by one and cleaned with the same tools.
Note! If you pull all the elements out of the bag at once, the kerosene will quickly evaporate, and the paint, as a result, will harden back.
Stage four. Impregnation
All wooden elements must be soaked in drying oil. This is required not only to restore the structure of the old material, but also to ensure that the germs of rot, destroyed by chemicals or heat treatment, do not develop again.

You can apply drying oil with a brush, but for high-quality impregnation you will need steel pipe with a diameter of 10-12 cm. The pipe is installed at an angle of 30°, for which it is most convenient to use small sawhorses. The entire procedure is carried out outdoors as far as possible from residential buildings. In addition to the pipe, you will need a fiberglass mat for work, because drying oil can catch fire when heated. If this happens, the felt should be placed over the neck of the pipe. Once the fire goes out, the operation will continue.

Step 1. The pipe is filled ¾ of the way with drying oil and heated from below with an industrial hair dryer. The drying oil will bubble when heated - this is evidence that air is escaping from it. If the odor suddenly intensifies, you should move it away. heating device, wait a little and continue heating. As soon as the bubbles disappear, you can proceed directly to impregnation.
Note! Under no circumstances should you lean over the neck! You can only observe drying oil from the side.
Step 2. For further work, you will need a hook made of steel wire with a diameter of 5 mm (one end must be pointed). The first element is placed in the pipe and pressed down using this hook for 4-5 minutes, after which it is hooked with it, removed and laid to dry. You should not take the parts with your hands, even with mittens - the temperature of the drying oil will be about 130°C.
Step 3. The remaining elements are impregnated in the same way. Ordinary pine, for example, treated with drying oil and dried outdoors, will last more than 150 years, and if it is treated with oil paint, then repainting will be done no more than every 15 years.
Stage five. Recovery
The procedure begins with the creation of new wedges and dowels.
Wedges, pins
Pins are drilled from any straight-grain wood using a core drill. It is important that drilling is done across the grain. For each dowel, a wedge is pre-prepared with a width of 0.5-0.6 cm, a thickness of 0.1-0.15 cm and a length equal to its (dowel) diameter. It is advisable to make wedges from rowan or oak.

Window frame dowel
The diameter of the dowels themselves should be 0.5-0.6 cm greater than the diameter of the holes made for them.
External alignment
The frame, not yet secured by anything, is assembled on a board covered with plastic film. The algorithm for further actions is given below.
Step 1. The frame is leveled diagonally and fixed with nails in the same way as described above. You need to go through the mounting holes again with a drill.
Step 2. After this, the frame is disassembled, the grooves and whiskers of the connections are coated " liquid nails" Next, the frame is quickly assembled and just as quickly checked diagonally. If necessary, adjustments are made.
Step 3. As soon as the glue dries, you can begin fixing the dowels. This must be done immediately after assembly, while the adhesive joint is still plastic. Each of the dowels is lubricated with “liquid nails” and driven into the corresponding hole with a mallet.
Note! The wood fibers should be positioned perpendicular to the fibers of the dowels - this way the connection will be as reliable as possible.
After this, the dowels are finally secured with wedges driven parallel to their (dowels) fibers.
Fit
External rectangularity does not guarantee that the installation openings are also rectangular. The fact is that wood can dry unevenly. For this reason, after leveling, it is necessary to begin adjusting the quarters.
Step 1. The sash is placed on the butt, after which the quarters are checked one by one using a plumb line. If there is at least one exactly perpendicular flap, then you need to focus on it; in its absence, the most “left” of the corners is determined by the gauge and the square. From this corner to the rest, the features of the new opening are cut off, after which the excess is removed using a chisel.

Step 2. In the same way, the sashes are checked and aligned on the outside.
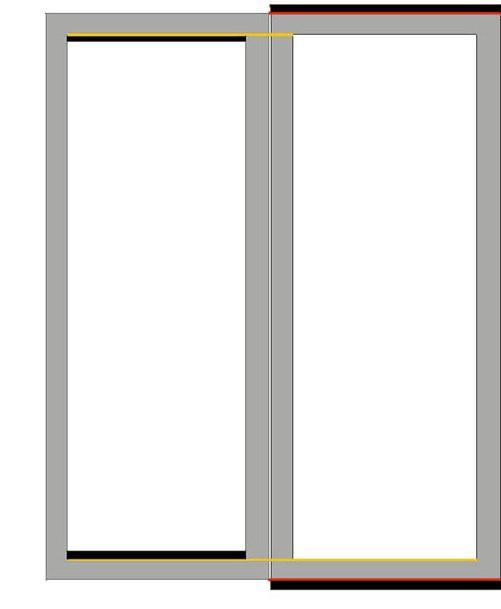
Step 3. After this, the sashes are laid in a row and aligned in width/height (see figure below). In this case, you can not touch the quarters at all, since their slight distortion does not play a special role. But if you wish, you can even them out.
Step 4. At the end of the procedure, the sashes will be smaller than the opening of the window frame. To fit them, you need to place strips of plywood on the “liquid nails” in quarters. When the glue has hardened, the frame is brought to precision with a chisel, after which recesses are made for the fittings.
Step 5. The sashes are secured with small nails hammered in increments of 20-25 cm.
Puttying, sanding
Preparing putty is not difficult: you need to mix “liquid nails” with sawdust in a ratio of 1:3, focusing on volume, not weight. The mixture is mixed quickly, in small portions, and applied within a few minutes (the glue dries quickly). After this, the frame is sanded.

Note! Before applying the putty, the ebbs are installed in place: first with “liquid nails”, and then with regular nails.
Applying paint
For painting, as already noted, it is preferable to use oil paints. Ideally, this should be thickly rubbed paint mixed with your own hands. linseed oil(that’s what artists do, by the way). And here ready-made paints products marketed as “natural” are actually made from mineral-based or synthetic thinners that are significantly inferior in durability. Penta- and glypthal enamel paints are also not suitable: after five years, repainting will be required, and unnecessary layers will only spoil the attractiveness of the bathhouse.
Note! In general, paint consists of three main components - thinner, filler and pigment. In order for painted windows to shine for a long time, you need to buy paint whose filler is made of marble flour.
Oil paint is mixed in a wide container as follows: a small pile is poured, at the top of the latter a hole is created, into which the paint itself is poured. Next, the mixture is kneaded, and the oil is added in small portions until the required consistency is reached (it should resemble liquid sour cream). The painting procedure itself is performed traditionally.

Finishing
After the paint has dried, the windows are covered with stain, which changes the shade and emphasizes the texture of the wood. Moreover, the stain is absorbed into the material, so even after sanding during repair work, the windows do not have to be additionally tinted.

The final stage of finishing is varnishing the window with tinted or clear acrylic-based varnish, installing fittings and glass.


Glazing
Before installing the glass, aquarium glue is squeezed out in strips onto the inner lower corners of the quarters. Next, the glass is secured with small nails, and glue drips are removed with a rag soaked in vinegar. The nails themselves do not need to be cleaned of silicone - it will protect them from rusting.
As soon as the glue hardens (its hardening speed is 2 mm/day), the glass is sealed with ordinary putty - chalk mixed with drying oil.

Note! If the glass will be fastened with glazing beads, then they should be pre-treated in the same way as other wooden structural elements.
Summing up
The ancient technique of window restoration, improved with modern materials, really works wonders. Even the oldest, unsightly and rotten windows restored using this method will look no worse than their plastic counterparts, and beneficial features the wood is completely preserved.

If you bought for a dacha an old house If you have wooden windows that look unattractive, don’t rush to throw them away and buy new ones. You can restore old frames with your own hands and with the help of our tips and modern finishing materials turn a frog into a princess. Restoring wooden windows is a labor-intensive process. But it is much cheaper than installing new windows. We will tell you how to restore a wooden window with your own hands.
Do-it-yourself restoration of wooden windows. Dismantling
The first step is dismantling. Often in old private houses, window frames are simply inserted into the opening and can be removed using a pry bar. The main thing is to apply force evenly, moving the mount along the entire height of the window and on both sides, so that the window does not warp.

If you need to remove painted hinges, you can remove the paint from the screws by tapping the screwdriver with a hammer. After this it will be much easier to unscrew them.

Advice! Old caulk will come off easier if you heat it up with a hairdryer.

How to repair an old window
Once all the glass has been removed, you can begin cleaning and restoring the wood surfaces. You can use a hair dryer to remove paint.

Or a special aggressive paint remover. It is applied to the surface and it destroys the paint. But when working with it you need to be careful - it is dangerous for the skin. Be sure to use gloves.

Now that the paint has been removed, you can fully assess the extent of the damage to the window frame. Further actions depend on what picture opens up to you.

If there are rotten areas on the tree, then the rotten wood must be removed. Further depending on the circumstances: if the potholes are small and can be filled with putty, then proceed to putty. Sometimes putty can be carried out in several stages - it depends on the degree of damage.

For medium-sized damage that putty cannot cope with, you can prepare a filler from sawdust and PVA glue.

Fill the damaged areas with this mixture.

After the sawdust glue has dried, fill any small gouges that remain.

If the rotted area is too large for putty and filler, then you will have to fill it with blocks cut to size. They should be placed on glue and - if possible - additionally nailed or screwed with self-tapping screws.

After the glue has dried, the area should be filled with regular wood putty.

The next stage is cleaning. The frame needs to be sanded thoroughly.

Special attention pay attention to putty areas.

Restoration of wooden windows. Finishing
Before finishing, the surface of the frame must be degreased with white spirit or a similar solvent. Alcohol is not suitable for this!


Now the frames are ready for painting. If you are lucky and your windows are not damaged, then you can use clear paints.

The tree is very beautiful material, and wooden windows painted with transparent paint look incredibly attractive. But even if you have to paint your windows with regular opaque wood paint to hide putty and repair marks, plastic windows still can't compare.
 After painting, the frame is ready to be glazed and returned to its place, where it will serve for many more years. Restoring wooden windows requires a lot of time and labor, but don't let that scare you. All the efforts spent will be returned a hundredfold, because such windows are much more environmentally friendly and attractive than modern plastic ones. In addition, restoration will cost much less than purchasing and installing new windows.
Nobody likes scary old wooden windows, disfigured by time. But can they be restored? After all, the appearance of wooden windows is better than plastic ones.
In practice, restoration of wooden windows is not common, since the restoration process is very labor-intensive and payment for the work is usually comparable to the cost of a new one plastic window. Therefore, if you want to provide your apartment with decent-looking wooden windows on a budget, it is better to be patient, have minimally sufficient tools, and carry out the restoration work yourself.
Tools and materials for restoration of wooden windows
- hot air gun (construction hair dryer);
- hard spatula 25-40mm wide;
- a small hacksaw with a fine tooth (for cross-cutting wood);
- small carpenter's miter box;
- screwdriver or drill;
- square;
- bubble level;
- drill for metal or wood with a diameter of 8mm;
- beech dowels with a diameter of 8mm;
- waterproof PVA wood glue;
- carpentry clamps (the length of the clamp should allow you to clamp the transom or its fragment on the work table) in an amount of at least two;
- hammer or mallet;
- antiseptic;
- deep penetration acrylic primer and acrylic paint, or drying oil and oil paint;
- foam rollers 5.5 cm wide with a handle holder and a small bath;
- a small sander or a piece of smooth wooden block and sandpaper of different grits - P40 (60), P100 (120);
- carpentry (countersunk head) galvanized nails 20mm long;
- wood screws 35-45mm long;
- grinder with petal wheels, grit P40(60), P100(120);
- wood putty;
- glazing beads;
- self-tapping screws 2.5x25 (head PZ1);
- safety glasses, gloves, respirator.
You may need (depending on the required depth of restoration): a plane, another miter box (of a size that allows you to place the transom frame inside it), and carpenter's chisels.
Simple - if you don't have necessary tools and time, will help improve your window
It is highly advisable to have unnecessary transoms of the same size in stock. If you are potentially considering the option of restoring wooden windows, and at the same time one of your neighbors is installing plastic windows, do not hesitate to select a few transoms in the most decent condition for yourself. Particular attention should be paid to external transoms; they are most susceptible to the aging process.
Initial stage of work
On initial stage restoration of wooden windows requires a thorough inspection of the transoms, window sills and frames. Some windows are better not to mess with. The easiest windows to restore are those made of hardwood boiled in drying oil. Most often, such windows are found in old houses. IN apartment buildings From the times of the USSR, wood is usually of lower quality, but such windows are significantly younger.

A typical view of an old wooden window in need of restoration.
Main problems
The main problems with old wooden windows are:
- a large number of layers of paint, which causes a sloppy appearance;
- loose fit of the transoms to the frame and to each other, the result is relatively free air circulation and very low thermal insulation qualities;
- rotten sections of transoms and window frames;
- window distortion;
- difficult closing.
Refusal to restore old wooden windows is advisable if the windows are severely skewed, rotten areas are common, the wood is severely cracked in many places, etc. Most often, significant problems arise with the lower crossbars of external transoms, as well as in the places where the lower latches are installed. That is why it is highly advisable to have spare, unnecessary transoms of the same size in stock - you can get “spare parts” from them.
First of all, we determine how the glass is fixed. Most often these are glazing beads, sometimes putty is simply applied. The beads are attached with small nails, so they can be easily undermined with a strong knife, chisel or regular slotted screwdriver. When removing them, do not forget to hold the glass. We work carefully so that the glass does not crack.
Remove window putty with a knife or chisel. From time to time there will be small nails that keep the glass from falling out. They are easy to remove with pliers.
After removing all the glass, we proceed to removing the paint.
Removing old paint
When restoring, old paint from wooden windows should be completely removed. This is best done with a heat gun (heat gun). Heat the paint with a hairdryer until bubbles appear. Without allowing it to cool, immediately remove the paint with a spatula. The use of special paint removers is not advisable. Removers emit a strong toxic odor and require a certain exposure time. After its application, the time required for softening is determined experimentally. old paint. Usually this is 5-25 minutes. If you start removing the paint earlier, it will not soften yet. If you are late, it will dry out again. In addition, removers remove paint layer by layer. That is, you will have to go through the same section several times. You can use a hairdryer to remove it right down to the wood (with a “reasonable” number of layers).


The process of removing old paint with a hot air gun.
Antique windows often have curved edges. A flat spatula is not suitable for cleaning them. If there are a lot of windows, it’s worth making a special stripping tool from a piece of sheet steel (the blade of the same spatula) to suit the configuration of your windows.
After the transoms, we peel off the paint from the frame and shutters (if any).
Assessing the suitability of transoms and frames, removing and repairing problem areas
Removing the paint down to the wood will reveal all hidden defects. There is no need to be afraid of them. Local cracking and small rotten areas can be repaired. The worst thing is if the wood has become completely (throughout its entire thickness) loose. Loose fragments must be replaced. It often happens that the bottom corners become the most problematic places - moisture accumulates in them. In very old windows in such places, entire pieces are sometimes completely “eaten away.” Repairing these particular areas of wooden windows is the most difficult.

https://rems-info.ru/images/stories/okna/restavratsiya-derevyannykh-okon/restavratsiya-derevyannykh-okon06.jpg" alt=" Severely dried out and cracked fragments.">!}
You should carefully inspect the bottom of the window frame. Especially at the edges (in the corners) and in the center. Usually you have to either cut out the rotten areas or dismantle the entire lower part. If there are no problems, you are lucky.

For high-quality restoration of transoms, it is advisable to disassemble them into separate parts. In the future they will have to be sanded; in the corners this is almost impossible to do if the transom is assembled. Disassembly is carried out by removing the metal corners attached to screws and drilling out the dowels with an 8mm drill.

A dowel is a wooden round rod glued to the corners of the joints.


After drilling out the dowels, the transom can be easily disassembled.
If the corners of the transoms are in order, there are no rotten areas, you don’t have to disassemble them.
We remove rotten areas with chisels and a hammer (mallet).

Removing the rotten area.
After removal, a section of the correct geometric shape should be obtained.

We prepare the area for gluing the liner.
We fill it by making an insert of the required size and shape. It is highly desirable that the liner be made of identical wood and have an overlap - a size with a margin in the direction in which it can be sanded (at least in the direction from the front plane of the transom). If there is a “donor” transom (or parts thereof), you should use it as a raw material.

Preparing the insert for gluing.
We install the liner with glue. Clamp with clamps.


We hold the tab under the pressure of the clamps until the glue dries.
After drying, drill through the liner and the transom with an 8mm drill, install the beech dowels with the same glue. The number of dowels must correspond to the size of the liner.


Long dowels are sold in construction hypermarkets in the form of round timber 8mm in diameter with longitudinal notches. The length is usually up to 900mm, they can simply be cut to the desired length.
After repairing problem areas of wooden windows, we sand these areas, removing the overlap. In this case, the liner will lie strictly flush (at the same level) with the surface of the transom.


Sand the tabs.
Sanding is best done with a grinder with adjustable rotation speed at about 3000 rpm using a flap wheel with grit P40 or P60. Coarse grain size is caused by paint residues and impregnation with drying oil, which is why the circle with finer grains becomes clogged very quickly.
Assembly, filling and sanding
After repairing problem areas of wooden windows, we antisepticize the cavities of the tongue-and-groove joints and dry them. Next, we connect the parts by applying moisture-resistant wood glue. Using a carpenter's square, we make sure that the angles are right. For better contact tenon with groove, clamp them with clamps. Let it dry. We strengthen the connection with wooden dowels, installing them with glue in place of the previously drilled ones.
Small irregularities can be smoothed out with wood putty. First, we clean the areas to be puttied with sandpaper, saturate them with primer, and dry them. Apply putty with a small spatula, pressing it intensively into the irregularities to be filled.

Puttying small irregularities.
The gaps at the ends of the parts and in the area of the liner (if its size turns out to be inaccurate) are best sealed as follows. We generously fill the gap with wood glue, then rub sawdust into it. After drying, we begin finishing sanding.

Transoms after polishing.
The fineness of the grinding abrasive depends on the condition of the transom. If there are paint residues or a weathered (darkened) layer, it is advisable to use a coarse P60 abrasive. It will ensure that the desired layer is removed. Next we use P100(120). If in the end you want to get a surface close to glossy, we additionally grind it with a finer abrasive P180 (240).
The process of sanding wooden windows, especially removing the layer, is very dusty. It is impossible to perform it in a residential area. To some extent, the process of dust formation can be leveled out by using a construction vacuum cleaner, working in tandem with a power tool that has a dust removal pipe.

Sanding is best done in non-residential premises. For example, in a workshop or garage.
Frame and window sill
If the lower part of the wooden window frame is very rotten, it must be removed. To do this, we make a cut in the middle of the dismantled section of the frame and pry it with a small crowbar. A piece weakened by time can usually be dismantled easily. We remove all debris with a vacuum cleaner and soak it generously with a deeply penetrating primer.

We tidy up the section of the wall under the frame.
We examine the longitudinal edge of the window sill that is revealed to our eyes. If a void is visible underneath, blow it out with foam.
When restoring wooden windows, it is easiest to make a new section of the frame from two separate parts - the main one and an additional lining on top. For the first one, we take a 50mm thick board, plan it, cut it to size, and generously antiseptic it. The installation is carried out using an adhesive composition. For example, Knauf Perlfix. The composition should be thick. We fill the installation site, place the workpiece on top and tap it with a mallet so that the new section of the frame is at the level we require.
After the glue hardens, we make holes with a diameter of 12-16mm and a depth of 5-10mm in several places along the length of the workpiece. Their location should be such that they are subsequently covered with an overlay on top. Then use a 10mm drill to drill them to the full depth. Using a 10mm drill bit, we make a hole through the glue into the body of the window sill part of the wall. We remove the sludge with a vacuum cleaner. We press the replaced part of the slave with window anchors with a diameter of 10 mm and the length required in your case (usually 130-160 mm).
It is convenient to make the top lining from a piece of lining, platband, thicknessing board up to 20mm thick. We close the outer transoms, press the outer longitudinal end (edge) of the lining against the transoms and fix the latter either with glue or with carpentry nails with a countersunk head.

Replaced lower frame section.
We peel off the old paint from the window sill. Most often, a longitudinal gap appears; it is best to embroider it and fill it with a glued wooden plank of the required thickness, driven with a mallet into this gap to the full depth.
If the window sills are in very poor condition, they will have to be replaced. The easiest way to make a new window sill for restored wooden windows is from furniture board thickness of at least 28mm. The ends of the window sill must be cut into the walls to a depth of at least 50mm. Therefore, you don’t have to worry about the quality of the cut in these places. In order to ensure a neat longitudinal cut, pick up a board of the required width in a construction hypermarket. We also install the window sill using an adhesive compound, but thanks to the cutting into the walls, window anchors will no longer be needed.
Geometry correction
Geometry correction is one of the most complex species restoration works of wooden windows. Changing the geometry of one transom will require adjustments to the dimensions of adjacent transoms and addressing the issue of fit to the frame. Let's go back to the first photo of this article:
The window has a pronounced skew in right side. This can be clearly seen from the middle horizontal cross member. The difference was 3 cm - it is clearly visible to the naked eye.
Correction of the geometry in this case was carried out by shortening the right vertical of the upper transom by 3 cm. To do this, the transom needs to be disassembled, cut, then the tenon must be made again. corner connection tongue and groove Precision Manufacturing Such a connection is the subject of a separate article. In the simplest case, we make cuts with a hacksaw, then use a chisel and a hammer (mallet) to remove the excess, constantly trying the tenon to the groove. Then we antisepticize, dry, apply glue, connect, and reinforce with a dowel.
We drill out dowels in the lower transoms, correct their shape in the form of a parallelogram into rectangles (using a square), and install new dowels. It is advisable to strengthen all transoms metal corners, secured with small self-tapping screws. They need to be installed on the invisible side of the transoms.

After correcting the geometry, there is no more skew.
It is not uncommon, as in this case, that when the lower part of the frame is replaced, a gap appears under the lower transoms. It cannot always be eliminated when replacing the lower part of the frame. We are increasing the height of the transom.

Transom extension.
Extending the transom is done by gluing a block of slightly greater thickness and width (so that there is an overlap) than the gap. We attach the block with self-tapping screws to the glue. After drying, we turn out the screws, drill out the holes from under them with an 8mm drill and install dowels on the glue. Then we sand off the overlap.

After building up, we sand it so that everything is level.
The final adjustment of the height of the transom is done with a plane, constantly trying the transom in its place. In the same way (if necessary), you can increase the width and also eliminate the rather wide oblique gap.
After fitting, we check with a small bubble level correct installation.

Transoms with corrected geometry are installed level.
Cleaning the fittings, preparing for painting
When restoring antique windows, trying to replace the fittings will most likely fail. The hinges, latches and handles of those times are very different from what is now on store shelves. To some extent, this also applies to windows from the times of the USSR.

On the left is a restored 19th-century latch, on the right is a modern one.
Problems can also arise due to missing locks on the shutters - they have not been produced for a long time. In this case, you can combine the overlay under the padlock with a hook.

For shutters, it is not advisable to use just hooks or latches - they are not reliable enough. The locking mechanism must be such that it cannot be pryed open with a knife from the outside.
To remove paint from the fittings, place it on a lit gas burner.

Burning metal fittings to remove old paint.
Heating old paint with an open flame will eventually lead to a moderate ignition - this process must be carried out under constant supervision!

Old paint ignites when heated.
We carry out firing until the paint is completely charred, after which we remove the fittings with pliers or pliers and throw them into a metal container with cold water. After cooling, charred paint residues can be easily removed with a steel wool dishwasher.
After washing, immediately dry the fittings with a hairdryer; it is advisable to rinse them with a solvent (to avoid rusting).
Preparing fittings for painting involves priming all metal elements acrylic enamel acetone based from a spray can.

If metal elements are not coated with non-water-based enamel, then when painting with water-soluble paints, rust will appear very soon.
We prime wooden surfaces with a deep penetration acrylic primer - under acrylic paint, or oil-based drying oil. It should be noted here that drying oil priming and oil paint coating require a long drying time. Therefore, it is more expedient to stop at acrylic version. Dries quickly and has water base(non-toxic), odorless.
Glazing
We clean the glass from traces of putty and other contaminants. We carry out all work wearing strong gloves to avoid cuts. When dismantling and washing, it is likely that it will not be possible to keep all the glass intact. It is better not to throw away large fragments right away; they can be useful for cutting out glass in window vents.

Glass cutting.
We will install the glass using glazing beads and galvanized carpentry nails 20mm long. Using a miter box and a fine-toothed hacksaw, we cut pre-antiseptic, primed and painted glazing beads in two layers.

Cutting glazing beads in a miter box.
Apply to the transom along the perimeter of the adjacent glass acrylic sealant. We apply the glass, carefully pressing it along the perimeter, making sure that the pressure on the sealant is uniform along the entire perimeter. This will ensure a tight seal. Then we nail the glazing beads. If they crack at the same time, you will have to do preliminary drilling with a 1.5mm drill bit. The pitch of the nails is 10-15cm. We fill the cracks in the corners of the beads with sealant. After drying, cut off the excess that appears with a wet knife.

We install glass.
The nail heads, if desired, can be tinted with a cotton swab.
Final stage
At the final stage of restoration of wooden windows, we paint in at least two layers (usually three) using a foam roller. IN hard to reach places(corners) you can use a small brush. After drying, install the handles and latches on small screws.
Sealing of transom junctions is carried out by gluing elastic self-adhesive seals to the window frame and window frames. The thickness of the seal is selected according to location.

All connections must be sealed.
It is advisable to pay attention (if necessary) to slopes.

We putty the slopes.
We return the shutters (if there were any) to their place.


Ancient windows were often equipped with shutters. They look interesting in the interior. Restoring shutters is similar to the process described above.
All that remains is to wipe the glass, and your restored wooden window has found a second life.
Even the highest quality synthetic material cannot replace natural wood. It is safe and attractive in appearance. Wooden windows in many apartments have been standing for many years and their owners are in no hurry to replace them with PVC frames and double-glazed windows. Why? Because wooden windows do not interfere with air exchange, thanks to this a comfortable microclimate is maintained in the room, which not everyone is ready to give up in favor of sealed plastic. In addition, replacing windows involves large-scale renovation work, which include installation of new frames and window sills, improvement of external and internal slopes, and this is a large financial expense.
To save time and money, you can donate new life old windows. Wood lends itself well to repair. You can restore both appearance and functionality with your own hands.
Unfortunately, repairs are not always possible. If the window has completely become unusable, then replacing it is only decision Problems.
In what cases will the window have to be dismantled and thrown away:
- The frame is literally falling apart. Most often this happens at the bottom of the window, where condensation accumulates;
- The geometry of the window is severely distorted. If it cannot be fixed without dismantling the box, then it is better to replace the frames;
- The window is too fragile. Thin frames between glasses may not withstand mechanical stress. Considering that you will need to remove layers of paint from the frame, which means using force, you should not waste time on restoration, but immediately dispose of the window.
You can replace the window not only with a popular plastic one, but also with a wooden one. Such products cost a little more and functionally are practically no different from PVC windows, as they are equipped with modern fittings and double-glazed windows.
What can be repaired:
- Appearance of frames;
- Broken glass;
- Crevices;
- Minor distortions;
- Local rotten areas;
- Sagging sashes.
To carry out the repair, you will need a set of tools and materials: chisels, plane, spatula, drill, level, sealant, sealant, drying oil, putty and paint coating.
It is better to carry out restoration in the summer when the weather is warm and dry. You need to start with inspection and identification of defects. In order not to miss anything, the frames can be removed from the box, check the integrity and reliability of the connections, as well as the level of the sides of the box.
What to do if it's blowing from the window
Most common problem problem that owners of wooden windows face is blowing, as a result of ice freezing in winter. 
The following defects may be the cause:
- Drying of wood and formation of gaps between the frame and frame;
- Depressurization of seams and joints between glass and frame elements.
Previously, ordinary cotton wool was used to seal cracks, but today you can purchase high-quality and easy-to-install sealants made of foam rubber and rubber. They have a self-adhesive base covered protective film or paper. 
To close the cracks with sealants, you need to remove the frames from the boxes and glue the contact areas along the entire contour. If the gap is large, then a strip of material must be glued to the frame. Opening doors are glued in the same way. 
The gaps formed between the glass and the frame can be sealed with silicone sealant. To avoid glass rattling, it must be placed on aquarium glue.
How to repair a sash that doesn't close well
Over time, the opening parts of the window sag under their own weight or swell when saturated with moisture. Because of this, the sashes may be difficult to fit into the frame or may stop closing altogether. There can be two ways out of the situation:
- Trim the top layers of wood;
- Tighten or move loops.
The first option is suitable if there are no gaps and the sash fits tightly to the frame around the entire perimeter. You can detect an area that interferes with functionality visually; in this place the paint on the frame will be erased. You need to cut the wood from the sash in thin layers, checking how easily it fits into the opening during the process.
The second option is used if a gap has formed. To correct large sagging, the hinges need to be removed and installed a few millimeters higher. It is also possible that the fastening of the hinges has simply become loose; in this case, you can tighten or replace the screws. If the gap is small, then you can try winding a thin wire around the hinge rods and hanging the sash.
Other reasons can also impair the functionality of the sash, for example, frame misalignment or multiple layers of paint.
What to do if a misalignment occurs
This problem is one of the most serious and requires major restoration. As a result of distortions, the functions of the window are disrupted, cracks are formed and the appearance deteriorates.
The distortion may be noticeable visually. If it is not visible from the outside, you can use a level. Even a small difference can affect the quality of the window - a gap of 2-3 mm will become a source of cold air and cause ice to freeze.
 The solution to the problem must be radical - the frames must be dismantled and returned to the correct geometry. A simple and reliable way is to attach metal reinforcements to the corners. To do this, it is necessary to make landing grooves in the frame so that the corner does not protrude beyond the frame after installation. The same corners can be mounted on sashes and vents. To achieve the correct geometry, the frame without glass must be laid on a flat panel and the diagonals aligned.
If the dowels or “chops” become loose ( wooden nails at the junctions of the frame parts) they can be filled with glue, before this you also need to adjust the diagonals to equal values.
Sometimes the dowels dry out and are freely removed from the groove; in this situation, it is better to make new ones of a larger diameter, and lubricate them with liquid nails before installation. To make “chops” you will need a core drill and a piece of solid wood.
The dowels must be cut strictly across the grain. And hammer it into the holes with a mallet. After installation, drive wedges into the “chops” on both sides.
Correcting the geometry of the frame is not enough; it is possible that the box is also lopsided. You can change its position without dismantling, but only if the difference does not exceed 2 cm. To do this, you need to determine the lowest point in the bottom plane of the box and the highest in the top. Focusing on them, cut down the “extra” in terms of level. The same should be done with the sides of the box. To control the shape of the opening, you need to measure the diagonals, as well as the height and width at several points.
Inevitably the frame will become smaller than the opening. To adjust the dimensions, you need to install wooden slats of appropriate thickness around the perimeter.
How to eliminate rotten areas
Moisture is the first enemy of wood. If the windows “cry”, rotting is inevitable. It is important to detect the defect in time so that it can be eliminated without replacing the window.
To work, you will need to dismantle the frame or sash with the damaged area, remove the glass and lay the product on a flat panel. A damaged piece of wood needs to be hewn or cut off, and a new piece should be planted in its place. It must be carefully adjusted to size and secured with liquid nails or wood glue. Level the surface, cover with putty, sand and paint. If everything is done carefully, then there will be no trace of the defect.
Minor damage can be corrected with putty. To do this, it must be applied liberally to the damaged area until the lost volume is restored. The composition must be kept until completely dry and give it the correct shape. 
How to restore an attractive appearance
Old wooden windows, as a rule, are covered with more than one layer of paint, which has begun to peel off and has smudges. Of course, you don’t have to waste a lot of time, clean up what is falling off and apply another layer, but in order for the window to look like new, the old coating must be completely removed.
Removing paint
Before starting work, it is necessary to remove the frames from the box, remove the glass and remove all metal elements of the mechanisms.
There are three methods for removing old paint:
- Mechanical;
- Thermal;
- Chemical.
The first is the most complex and time-consuming, but does not require special tools and materials. The paint can be removed manually with a spatula, sandpaper or scraper. The method is not always effective; it is appropriate if there is a thick layer of paint on the frames, which is easily removed. Faster work will go with grinder.
For thermal cleaning, a hair dryer is required. It needs to be directed to a section of the frame, heated for several minutes and immediately removed the paint with a spatula. Warm cover Easy to remove with virtually no residue. Areas where the paint sticks tightly can be cleaned with sandpaper. 
At chemical cleaning a special liquid is used to remove paint; you can also use what is at hand, for example, kerosene. 
For this method, the frames need to be wrapped in rags, moistened generously with solvent and packed in a plastic bag. Leave for a couple of days, after which you can clean the surface with a spatula to remove the softened paint. The wood after such treatment will not be perfectly clean; you will need to remove the remaining coating with a grinding machine or sandpaper. 
Preparation
The next stage is puttying. This type of processing is necessary to level out minor defects: cracks and irregularities. Before this procedure, it is recommended to remove burrs, trim off protruding parts and clean the surface of dust. The composition must be applied in as thin a layer as possible. Then dry well and sand. 
Before painting, the wood must be protected from damage. Such a coating can be drying oil or an antiseptic. Frames should be impregnated with them in several layers.
The “old-fashioned” way of dipping wood into hot drying oil is dangerous to life and health.
You can begin applying paint after the protective coating has dried. You can check the readiness of the drying oil by touching the frame; if your hand does not stick, then the surface can be painted.
Coloring
Applying fresh paint is the most important stage. Here a lot depends on the choice of material. Oil paint is best for windows. The samples presented on store shelves are made of synthetic components and have a short service life.
To keep windows looking good for 10 years, you need natural paint. It can be prepared from thickly ground paint based on mineral pigment, mixed with linseed or nut oil.
It is more convenient to apply the coating with a thin brush. It is better to remove the glass so as not to accidentally stain it. You can put the frames in place when the second coat of paint has dried. It can also be used to cover drainage, window sills and internal slopes.
How to restore wooden window frames, including installation of seals, removal of old coating, puttying and painting, is clearly presented in the video:
How to care for wooden windows
At proper care, a window restored with your own hands will live for another year and will delight you with its functionality and aesthetics. 
In order not to bring the source of natural light in the apartment to a deplorable state, you need to monitor the windows, namely:

Don't rush to get rid of old ones wooden frames. If their basic properties and integrity are preserved, minor flaws can be eliminated and visual appeal restored. Wherein family budget will be a good saving.
Special window restoration technology allows you to preserve their appearance and performance characteristics for many years. Next, we’ll talk in detail about the available methods and their nuances.
Before you update old windows yourself, you need to assess their condition. Required to identify problem areas. Remember a few useful tips.
- If the wood is severely damaged (through cracks, cracks more than 5 cm in length, etc.), then the windows need to be replaced. An attempt to repair such defects will not be successful - the technical specifications will be violated.
- Serious damage may be hidden under a layer of paint. Therefore, first it should be completely removed (with a solvent, spatula or torch).
- Small potholes can be filled with putty. Therefore, do not rush to throw away old frames.
For do-it-yourself window restoration to be effective, it must be carried out completely. In other words, cracks need to be sealed along the entire perimeter. There is no point in repairing only part of the window, because cold air will begin to enter even the smallest cracks.
Basics of sealing and insulation
Repair of wooden windows should be carried out at least once every 2 years. Wood is a rather fragile material that will deform over time. As a result, the level of sealing is significantly reduced, which allows cold air to penetrate into the room. There are several ways to correct this situation.
Tip: to check where the cold air is coming from, bring a flame (from a match or lighter) to the window and start moving it around the perimeter. Where the light begins to “attract” there is a leak.
The most popular technique is the use of sealing tapes.

Strips of material are nailed or glued (if there is an adhesive base) around the perimeter of the box. This is a very affordable option, although not the most durable. There are the following types of tapes:
- Felt with plastic coating. It is fixed at the bottom of the sashes. It is characterized by increased strength.
- Pad. Allows you to completely get rid of drafts.
- Tubular rubber compressor with adhesive base. The most popular option today. It can be used for any designs. Characterized by ease of installation and high technical characteristics. There is one important disadvantage - the adhesive base quickly loses its properties, and the tape begins to fall off. Therefore, it will have to be glued regularly.
- Foam. The cheapest option, which is very short-lived. There are models with a special coating. They are more effective, but in most cases they are not thick enough.
Restoring wooden windows using tapes is not a very durable option. They need to be replaced every few years (especially in cold regions). There is a more practical method - the use of special sealants. During the drying process, this substance takes on the consistency of rubber, which allows it to completely fill all seams and crevices.
The procedure for applying sealant is simple and anyone can handle it. It is produced in the following sequence:
- We prepare the original surface: go over it with fine sandpaper, and then clean it from dust.
- Degrease (solvent or White Spirit is suitable for this).
- Fill the grooves with sealant. At the same time, do not fill gutters and grooves (if these elements are present).
- Immediately place any non-adhesive tape on top of the sealant (cling film is suitable for this).
- After waiting several hours (the drying time is indicated on the packaging), remove the tape. If there are smudges, cut them off with a knife.
The sealant must be highest quality(resistant to moisture, temperature changes and UV rays). If you save on this aspect, you will have to carry out the procedure described above much more often. Therefore, the use of high-quality compounds is completely justified.

Bringing frames back to their former beauty
Another aspect is appearance. Painting wooden windows allows you to give them their former beauty. Let's consider this procedure step by step.
Removing old paint
To remove the remains of the previous paint and varnish material, you can use one of three possible methods:
- Solvents (preferably designed specifically for these purposes). These compounds are applied to the surface, as a result the old coating dissolves and can be easily removed with a spatula or knife. This method is the simplest, but it does not always help. If the paint is very old, the solvent will be powerless.
- Physical impact - just scrape the frame. This technique is very labor-intensive, and there is a risk of damaging the wood.
- Warming followed by removal. This method is the most effective and very fast - we heat the doors using special devices (burner, hair dryer). The second device is more practical - it allows you to regulate the degree of heating and does not damage the wood. A gas burner can burn wood, which will negatively affect its quality.

Preparing the original surface
By deleting old enamel, you will need to carefully prepare the surface - sand it with sandpaper. You can use a grinding machine - this will significantly save time. After sanding, we check our surface for defects (tips given above). If there are small defects, we fill them with putty.
Tip: add to plaster mixture PVA glue (1 to 5) - this will give it moisture resistance.
We use only special putty - for wood. In this case, it must be applied in several thin layers. Otherwise, it will simply fall off. Having achieved good evenness, we go over the completely dry (time indicated on the package) putty with fine sandpaper - this will give it smoothness.
The final touch is painting
It's here final stage- painting of frames.

Probably every person is familiar with working with a brush. Therefore, we will give only a few useful recommendations:
- First, we coat the surface with a primer - this improves adhesion and also improves performance characteristics.
- The use of wood impregnations increases its moisture resistance. As a result, it does not dry out much longer.
- We paint from top to bottom. Otherwise, leaks cannot be avoided.
- The best option is to apply paint in several (3-4) thin layers.
As you can see, updating an old wooden window is not difficult. Therefore, do not rush to replace it, because it can be given a second life.


