I haven't personally tried it in practice. this method, but cited an article by a friend of mine who does this for money.
I think this will be interesting to you, and I personally will try this method in the summer. Might come in handy in the future. The principle is quite simple. I made an animated picture showing how this should happen. Now let's see: first you need to buy 2 pumps, two barrels, hoses and pipes. Several 6-meter bars and of course pipe couplings. Using a shovel, dig a hole approximately 1 meter x 1 meter and 60 cm deep. The pipes should be approximately 2 meters long (longer is possible). Threads must be cut at both ends of the pipes. Later, when the pipe goes into the ground, a second pipe is screwed to it using a sleeve, and so on until you go deep to the desired depth.
The first pipe has teeth on one side that can be made with a grinder, and the second side of the pipe has a thread. First, you screw an adapter onto it with an end part for your hose. I was recommended to cut pipes 4-6 meters long. This way there is less hassle with unscrewing the adapter, and the weight of the structure becomes greater, which allows the pipe to cut into the ground more quickly. So, first things first. First, we make a tripod out of timber and place it over the dug hole. At the top of the tripod we attach a roller through which we pass the rope. It is better to secure the tripod by connecting the three legs at the bottom and in the middle with the same beam. A little further from the tripod we drive a wooden or metal pin into the ground. It’s even better to make a drum like for raising water from a well. We attach one end of the rope to it. We tie the other one to the pipe.
We insert the pipe with the connected fitting into the hole. Next we move on to the barrels. Next to the pit, one barrel is placed on the ground, the second on a platform made from available materials at the height of the upper level of the first barrel. We drill a hole at the bottom of the upper barrel and insert a pipe with a tap there. We fill the top barrel with dry grass, which serves as a kind of filter, and place a mesh on top obliquely. The mesh will clean out large fractions of soil that got in with the water, then this soil will simply fall down. The grass filters small parts of the soil and flows from the upper barrel to the lower one.
There is a pump in the bottom barrel that takes water and delivers it under pressure into your pipe. The water comes out from the bottom of the pipe and washes away the soil. This cloudy suspension ends up in your hole. The second soil pump pumps muddy water into the upper barrel. In this case, a small part of the soil gets into the barrel with water. The main part of it begins to grow out of the hole before our eyes. After some time, you remove it with a shovel.
Thus, the pipe itself is buried, and the soil is thrown up like a geyser. You just need to throw away the soil and watch the level of the washed-out soil.
THE FOLLOWING METHOD IS PERSONALLY TESTED BY ME.
I don’t use a casing pipe, drill, headstock, bailer, etc. for this... The pipe for such a well, in my opinion, is needed 5-10 cm, and no more: it completely ensures an uninterrupted supply of water using a household high-performance pump. The method is as simple as twice two. At the same time, you do not pay the drillers, and at the beginning of 2007 this costs approximately 30-45 thousand rubles. Digging a well also costs a lot. Without the cost of the rings, you will pay approximately a thousand American tugriks. And if you are not a rich person and the few bucks you saved is a significant amount for you family budget, then this topic is definitely yours.
First you need to stock up on pipes. I recommend pipes with a diameter of approximately 5 cm. The length of the pipes should be approximately 1.5 - 2 meters. Take 8 pieces just in case. Cut threads at the ends of the pipes and buy bushings so that you can connect the pipes with bushings. Buy also a steel rod. Its length should be 2-2.5 meters. The rod also has threads at the ends and connecting sleeves of its own diameter. You will also need to make a steel cone, the diameter of which is larger than the diameter of the pipe. We weld a piece of pipe with cut longitudinal slots to it. These cracks should subsequently be wrapped with mesh. They are a filter. You can weld strips of hard steel to the cone (for example, pieces of a sharpened flat file), but only so that upon impact, these strips create a slight rotation in the direction of twisting the pipes. Next we do the following:
The pipe is clogged (and thereby a well is formed) using your composite rod, consisting of two pieces of steel rod dia. 20-30 mm. and 2.5 m long, with threads at the ends. This rod is lowered inside the pipe (filter) and rests against a cone welded to the filter. Together with a partner, having installed the filter vertically along a plumb line, we take the bar with our hands, lift it up and sharply lower it - in short, we hit it. The impact of the rod falls on the cone. When the filter is deep, tow soaked in paint is wound onto its threaded part, then a coupling is screwed in, and the next piece of pipe 2 ... 2.5 m long is screwed into it. If the rod is short, extend it and hit it again. Having driven to a depth of 3-6 meters, we check whether there is water in the well. We take a bucket of water and pour it into the pipe (do not pull out the rod). If the water is standing in the pipe; does not go away, which means we have not reached the aquifer. We beat another meter, check again by pouring water. Aquifers come in layers, so, in my opinion, it is more rational to drill a well into the second aquifer, or at least to the bottom of the first layer. And the layer can be up to 10 meters thick.
It is not always reasonable to test the aquifer by pouring water into a pipe. In some cases, the water goes into the sand layer. After all, I can’t check which layer I’ve reached. If the water is slowly leaving, then we are theoretically at the beginning of the aquifer; we break through another 0.5-1 m, fill with water. Now the water should quickly go into the pipe - we have reached the aquifer. We start to pull out the bar, but it doesn’t move, it’s jammed. Don’t be upset, take a hammer and hit the bar, but not from above, but from the side from the top. With these impacts you create vibration, and the soil that has entered the pipe through the filter mesh is “liquefied” and the rod is released. Having pulled out the rod, we screw the fitting with the pump onto the well. Can be manual or electric. After pumping out two or three buckets of muddy water, clear water usually comes out.
It is advisable to pump out a couple of two hundred liter barrels. You will be convinced of the quantity of water and its quality. Then pour it into the pan clean water and boil it, and then taste it to see what quality it is. If it is bad, then after boiling it becomes reddish or cloudy, and sediment will fall to the bottom. Then you will have to deepen the well another meter. Not to be confused with limewater sediment if it comes through limestone rock.
It also happens: after a few years, the water in the well disappears (the electric pump does not “take” it, but the manual pump pumps very slowly). This is a sign of a clogged filter. Many people flush wells with various solutions. I argue that this has little effect in practice; such flushing only poisons the aquifer. It is easier and more reliable to pull the filter out of the ground, but this is not always possible. This happens quite rarely with a competent approach to the matter, and in this case you have to use a truck crane or a jack. In this case, you need to lower the rod into the well and hit the cone a dozen times, then apply the listed mechanisms. After 10-20 cm, the rise stops again; you need to hit it again, and after 2 hours you will pull out the filter. As a rule, it turns out to be covered with a black oily coating. Fill up with water, pour the filter on top and wire brush rub along the mesh. For better cleaning pour in “silite”, which will remove rust from everything. Gradually the plaque is washed off.
Check the pipes too: sometimes rust makes small fistulas in them. Because of this, the integrity is compromised and the well may not work (due to air leaks or soil getting into fistulas). It is better, of course, to replace the pipes with new ones. And again you can drive them in the same place where the well was before.
This method has been tested in practice. Hundreds of wells have been drilled using this method. All are still working today. Some were driven to a depth of more than 20 meters, into artesian layers of water.
You can drill a water well on your property, despite the seeming enormity of this process, on your own, i.e. manually. To do this, you will need a metal auger, the so-called coil, for which a fishing ice ax is quite suitable. This method of drilling a water well is the cheapest possible.
Required Tools and materials for drilling a water well:
The main tool that will be used is an auger with extension arms; in the absence of a special one, you can safely use a fishing drill. For better efficiency process, it is recommended to weld reinforced cutters onto the cutting edges of the drill. For this purpose, you can use a couple of files, which can be sharpened with an ordinary grinder. And of course the pipes for the elbows, the diameter of which is 25 mm.
You will also need a shovel, a cart for removing the selected soil, a pump and a hose for “swinging” the well, a barrel or a high table on which you will need to stand and sift out the gravel.
Preparing the pipe for lowering into the well
Before lowering pipes into a well, they must be properly prepared. This important point, because the drilled section tightens very quickly and the pipes must be lowered immediately after removing the drill. Pipes can be purchased at specialized construction stores; thick-walled polyethylene pipes are best suited.
Preparation of the pipe consists of drilling perforating holes, approximately at a distance of 0.5-1.0 meters from the bottom end and over a distance of 1.5-2 meters. It is enough to make the holes with a 6 mm drill; if you make them wider, you will need a filter mesh.
Then guide bars are prepared, which are attached to the surface of the pipe. The bars are necessary to center the pipe in the well and provide equal clearance in order to evenly distribute the filter gravel screenings.
Technology for drilling a well manually using an auger
The place where the well will be installed must first be leveled. To begin with, a guide recess for the drill is dug to a depth of 2 shovel bayonets. Having assembled the tool, you can proceed directly to the drilling process itself.
On initial stage it is quite possible for one person to rotate the drill, but as you go deeper it will be necessary additional help. The deeper the drill goes, the harder it will be to rotate it, so you can use water to soften the soil. Making two or three full turns, the drill is pulled out and freed from the soil, dumping it into the cart. The sludge is poured away from the work site so that it does not create additional interference.
Thus, they drill until the tool handle drops to the ground. After this, the drill is extended with an additional elbow.
After the handle has been lengthened, naturally the size of the tool no longer allows working with it while standing on the ground. Just for this case it is needed metal barrel or another pedestal, standing on which you can rotate the drill by the handle. Or they use gas pipe wrenches for the handle.
Increasing the bends, drilling continues until entering the aquifer. This moment will be very clearly visible from the condition of the soil being removed. At this phase, it is possible for the tool to be tightened, so you should remove the cuttings in small portions, otherwise it will not be possible to pull out the drill manually. If, nevertheless, the drill is “sucked in”, so that it can no longer be pulled out by hand, you will have to resort to an Archimedean lever, using two logs and a barrel for this, or buy a lever chain winch.
To prevent high water from entering the well, its depth must be greater than the first clay layer. Before lowering the pipe, it is necessary to raise and lower the drilling tool several times, like a piston. This will remove possible obstacles in the way of the pipe and make its descent much easier. After the pipe is completely lowered, the gap should be filled with screenings of gravel - this is usually screening from sand Sand and gravel. Without sand, as sand can penetrate inside the well.
How to pump a well
In order to quickly pump up the well, it is better to use a powerful centrifugal pump. Such a pump is capable of handling very dense media. Although you can get by with the usual household pump. In order for the vibration pump to work more efficiently, you should periodically lift it and shake the water with the assembled knees to lift heavy particles from the bottom, and then continue pumping water again with a pump with a lower water intake, otherwise the pump with an upper water intake will contribute to silting of the well.
When the well is rocked, the filter gravel screenings will shrink, so it should be added periodically.
The process of rocking the well is quite time-consuming, so you should worry about the drainage channels or try to reach the drainage ditch with a hose.
Once the well is fully pumped, it should be equipped with a pump for everyday use.
Advantages and disadvantages of manual water well drilling
The advantage of manual drilling of wells, in addition to the low cost already mentioned above, is the fact that there is no need for bulky special equipment to enter the site, therefore, your green spaces or landscape design will not be harmed.
Having a relatively shallow depth, such wells are pumped much faster and are less susceptible to tightening.
If there is no electricity, water can be obtained using a hand suction pump.
The main disadvantage of manual drilling is the limited depth. Disadvantages include criticality to soil density and a shortage of specialists ready to undertake repairs if necessary, although this has a lower probability of occurrence than with deep machine wells.
Video on how to drill a well manually with your own hands:
Any summer cottage, private or country house must be provided with water. Most agricultural plants cannot grow without water. In the absence of moisture, the plant will simply dry out, not pleasing the owners with juicy and delicious harvest. Therefore, the well is summer cottage must be present. On this moment exist simple ways drilling operations that do not require the use of expensive drilling equipment.
Manual well drilling - real opportunity obtain the water necessary for life without the use of heavy drilling rigs. As a rule, situations arise when creating a well in a summer cottage using special equipment impossible.
This can happen due to a number of reasons. For example, narrow space, which can arise due to dense buildings, as well as unfavorable terrain and other circumstances. If one of the above cases occurs, then you need to use the construction of a well manual method.
Many people ask the question: how to cut a water well with your own hands? It's pretty heavy physical work, and it is unlikely that one person can cope with it. Therefore, it is necessary to take care in advance about help, which you can ask from friends or neighbors in your summer cottage.
Manual water well
It is used for construction various technologies. In turn, the life-giving source is divided into types:
- Construction of a well. This method is suitable when there is a good spring near the summer cottage. Thanks to the pressure, the well can hold 2 cubic meters of life-giving moisture.
- Filter well. To create it, it is necessary to immerse a pipe with a diameter of 100 mm to a depth of 30 m. This immersion is carried out using a screw. A stainless mesh is installed at the end of such a pipe, which serves to retain small and large fractions of sand when immersed to a depth, usually from 10 to 50 meters. If done correctly, a well can last more than 10 years.
- Without filter. To get water, you need to dive down to porous limestone rocks, which can lie at a depth of 50-100 meters. At correct installation the well will last more than 45 years. It is quite difficult to determine at what depth the limestone rocks lie. The well will be located at the same depth as the wells in neighboring dacha plots. However, such indicators may differ from each other due to the uneven occurrence of the soil. Casing pipes can come to the rescue. They are purchased based on already known parameters from other land plots, but with one difference: they will need to be adjusted to their own soil layer.
What tools are needed?
So, to perform well drilling work you need the following tools:

Characteristics of devices
The first on the list of devices for creating a well is a drilling rig. It is used for digging soil for deep wells. With this design, it became possible to immerse the drill to great depths. You can also lift it together with barbells. If you immerse the device over short distances, you can remove it manually, without using a tower.
What are drill rods? They are made from ordinary pipes, which are connected to each other using threads or, in rare cases, keys. For the manufacture of cutting attachments, sheet steel with a thickness of 3 mm or more is used. After their manufacture, it is necessary to sharpen the edges of the nozzles. It should be taken into account that during the rotational movements of the drill mechanism, they must crash into the ground clockwise.
Start of the drilling process
Setting up a well does not take much time and effort. First you need to install the tower. It is located where the future water well will be located. Its height should be several times greater than the length of the drill rod.

This is done to make it convenient to remove the rod when lifting the drill. How to construct a well? Let's take it bayonet shovel and we don't dig a large number of land to determine the direction of the drilling process. At the first stage, creating a well with a drill is quite simple. The first steps of rotation can be performed by one person, but later, when the pipe is immersed to a greater depth, assistance will be needed. To pull the drill out of the soil, you need to perform counterclockwise movements. If it cannot be removed, you should repeat the procedure again.
How to drill a water well with your own hands?
The more the drill is immersed in the soil, the harder it is to perform. To facilitate the work process, water is used, thanks to which the soil will become soft and advancement will be easy. During the work, it is necessary to bring the drilling structure to the surface. This is done every half meter of advancement and serves to clear the ground. Further drilling occurs according to the same principle. It takes a lot of time to immerse and raise the drill. Therefore, you should try to extract as much soil as possible.
The drilling process continues until the structure reaches the aquifer. It can be determined by the condition of the excavated soil. Next, you need to reach the next layer - the water-resistant layer, which comes after the aquifer. To do this, the device is immersed even lower. Manual drilling of the well reaches the level of 20 meters. This process will ensure maximum water flow into it. It is worth noting that a do-it-yourself well without equipment will only work when immersed to the first aquifer. Another important point is pumping out dirty water. For these purposes, as a rule, two types are used and submersible.
Features of submersible pumps
Such devices are intended for partial or total immersion in water.

To ensure that the device can operate uninterruptedly for a long time, its body is made of of stainless steel. Deep ones have small dimensions, which is very important when installed in narrow wells. In addition, they have impressive power. Externally, the pump resembles a long cylinder, usually from 0.5 to 3 m. It is specially designed for a specific well diameter. To install it you must have
After several buckets of dirty water have been pumped out, it is necessary to rinse the location of the water. After this it will become clean. If this does not happen, then you need to use a drill and dive a few more meters. Without equipment, it can also be equipped - using a hydraulic pump or drill.
Percussion-rope drilling
To create a well with your own hands without equipment, you need to mark out the rock using a driving glass. It is a heavy device that falls into the ground with high altitude(height of the drilling structure). To implement this method, it is necessary to build a drilling rig, as well as purchase tools for extracting earth from the well and shock-rope equipment. So, an ordinary three-legged structure, which can be made not only from steel elements, but also from wooden logs, can serve as a tower. Its height should be proportional to the size of the impact element.
Let's talk about technology percussion-rope drilling. As mentioned earlier, the process is based on lowering the driving glass from the height of the drilling tool. In this case, the driving tool breaks up part of the rock and captures it. With its volume, the soil is extracted from the site of the future well. Used for drilling rig equipment steel pipe. At its end there is a cutting element that resembles half a turn of an auger.

Will be in direct contact with the soil. There is a hole at a distance of 0.5 meters from the end of the steel pipe. It serves to remove the mined earth and, as a result, clean the drill bit. A cable is attached to its upper part, which is necessary for lowering the mill to a depth, as well as extracting it to the surface along with the contents. The glass must be constantly freed from the ground. It fills every 0.5 m.
Features of laying casing pipes
A do-it-yourself well dug without equipment requires the necessary casing. It is performed using special whole asbestos-cement pipes or individual pieces. If you work with segments, you should pay attention to their diameter. They must be identical so that in the future the immersion of the structure is easy and does not amount to additional problems. The pipe connections must be secured with staples that will be invisible under the strips of steel. They prevent individual elements from slipping.
Why is casing needed?
It serves to prevent the walls from shedding during the rotational movement of the auger, and also prevents clogging of the well. Casing pipes cover the layer where the bad dirty water, and prevent it from entering a clean source.
Shutdown
When the well is ready, a steel pipe with a filter is lowered to its bottom, which is a fine grid that does not allow small and large fractions to pass through, and also ensures water purification. After this, it is secured with a clamp. At this stage, the question of how to drill a water well with your own hands can be considered closed.
The last step is to cover the structure using a caisson. It resembles a cap that serves to protect any contaminants from entering the well. After some time, you can notice the pipe rising. There is no need to worry about this, as this is a natural process that does not require any intervention. Serious changes must be made when the water begins to become contaminated with sand or other rocks.

Positive and negative sides
Advantage manual method is that you can drill a water well with your own hands absolutely anywhere. This repents not only land plot, but also some premises, such as a garage or barn. If you install a water source in any room, the owner of a summer cottage will not have to spend extra money on insulation, or purchase heating equipment. In addition, there is no need to use massive expensive drilling rigs. A well that was built manually can last different quantities time. The service life depends on the depth and frequency of use. Therefore, such a source can last for several months or a couple of years. To increase this period, high-quality maintenance is necessary.
The main disadvantages of such a system are the shallow depth and, in some cases, the cost of the work.

The manual method can be several times higher than the mechanical process. In addition, such wells can quickly become clogged, which is a significant problem.
Bottom line
Of course, manual drilling of wells is difficult process. But there is also a significant advantage - low cost of work. Since it is used own strength, and not special drilling equipment. Therefore, we can conclude that this method of drilling wells is the most popular precisely because of its acceptable economic indicators.

So, we figured out how to make a well.
No country house can exist without normal water supply. Carry water with you when visiting a dacha in weekend days? This option is not even considered, since it is unlikely to be enough even for household needs. Constantly annoying your neighbors with requests to replenish their water supply? This is possible only for the time being - there is a limit to every human patience... A source of water will be all the more necessary if country house is planned for a long time or even permanent residence, and on the adjacent plot there is a desire to grow some flowers or crops. Outputs – connect to the system centralized water supply(in most cases this is simply impossible or is associated with too large financial costs), or equip a source of autonomous water supply on your territory.
Video: surface well development
All these issues will definitely be discussed in a separate publication on our construction portal.
Having your own source of uninterrupted water supply is the dream of everyone who lives in their own home!
This desire is quite feasible; it is enough to drill a high-quality well on your site.
This can be done both on your own and with the help of professional specialists!
 There are several types of wells, differing from each other in depth, and therefore in the quality of the water supplied. Shallow or sandy wells are drilled to a depth of 10 to 50 meters.
If the source is more than 50 meters deep, then it is considered artesian. It is characterized by a limestone layer, and it can only be broken through with special equipment.
Each type has its own drilling method. There are several technology options - rope-impact, perforated, rotary.
If you plan to break through the water source yourself, then isolate and manual technology drilling What you choose depends on the size of the planned burial, the type of soil, and the purpose of using water.
The most common types of water sources are a well, a sand well and an artesian well. They are characterized by their own depth, quality and volume of supplied water. They also differ in the type of soil in which they break through and in their service life.
Main types:
- well;
- on the sand;
- artesian
Well or Abyssinian well does not require special equipment for operation, and can be done independently. A metal pipe with a sharp tip and holes in the walls is used.
 The tube is driven into the ground to a depth of 8-10 meters. Thanks to the holes on the walls, the pipe is siege-proof and at the same time serves as a filter for the well. The soil type should not be hard.
The advantages of such a well include accessibility of manufacturing on your own and simplicity of design. However has its downsides- it is impossible to install an in-depth pump, but only a surface one, due to the small diameter of the pipe.
As a result, it is not possible to provide sufficient water supply pressure. Another disadvantage is the relatively small service life is about 5 years.
Drilling into sand occurs up to a level of 15-30 meters. A pipe is installed in the drilled hole, at the end of which a metal grid made of stainless steel. The mesh is designed to filter pebbles, which are rich in coarse-grained sands.
It is in these layers that the filtration pipe is installed. Such a water source can meet the needs country house.With constant use it will last 15 years.
Of course, to cover all water needs and provide the house with crystal clean water is only capable of artesian well. Drilling occurs to the level of calcareous rocks.
Therefore, the depth of artesian water can reach 200 meters. Such a source can provide more than 10 cubic meters of water per hour. Its service life is 50 years.
Drilling methods and technology
The choice of drilling method depends on several factors. Basically, this is the depth level and type of soil that needs to be penetrated. In this regard, there are several types of drilling:

Do-it-yourself water well drilling
Define right place Nature itself will help you with your location. Where plants grow more intensively, there is a possibility that the water horizon is shallow.
The main criterion for a water source is purity, so you need to move it away from potential pollutants by at least 25 m ( drainage pits, toilet). Also You should keep a distance from home - no closer than 5 m. The well must not be placed in depressions of the terrain. so that it does not become a sink for surface contaminants.
Drilling work. Drive well

Without tripods it will be impossible to carry out the drilling process. You can make them yourself. You need to take 3 pipes 5 meters long. They need to be laid out on the ground so that the two sides at the top converge with each other, and at the bottom their edges diverge. Place a third one between them, in the middle.
Schematically, you should get a triangle divided in half. Then, through the joined edges, drill a hole into which to insert the fastening pin. Secure the edges of the pin so that the tripod does not move apart. The winch with a cable is attached to two side legs.
If you plan to use not impact technology, but to break through the soil with a drill, then you can also make it yourself. To do this, you will need a metal rod with a sharp end, to which the knives will be welded.
To make knives, you need to take metal disks 10-15 mm thick and cut them in half. Weld the first two halves at a height of 20 cm from the point of the rod.
When the shaft is positioned vertically, knives are welded to it at an angle of 200 from the imaginary horizontal. The opposite knife is welded crosswise to the first one at the same angle. The half-discs must be very well sharpened so that the drilling process takes place quickly and with minimal physical effort.
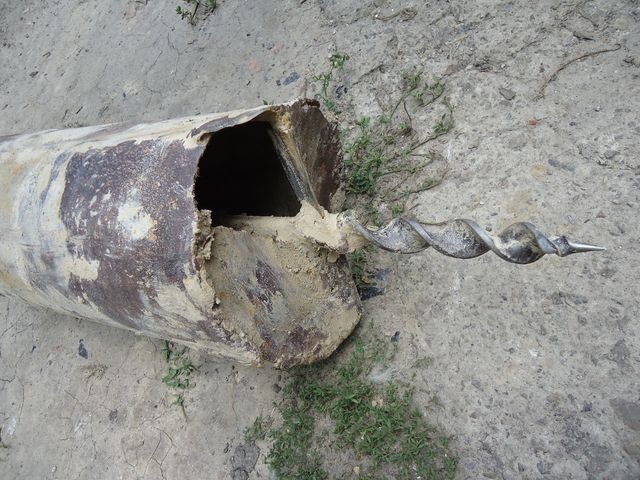
For drilling Abyssinian well It is necessary to prepare the pipes for driving in advance. They should be galvanized or stainless steel, one inch or three-quarters in size. Pre-cut threads for connection on each section.
Also in the initial section you need to weld the impact cone. From the tip to a height of up to 500 mm, 5-8 mm holes are drilled for the flow of water into the pipe, which are closed with a filtration mesh (P52 stainless steel).
 A steel headstock is required to drive the pipe into the ground., With round hole in the middle, and with two fasteners on the sides. The load must be heavy, more than 30 kg. The hole in the plate is placed on the pipe, and ropes are attached to its side fasteners.
To create a collision point on the pipe, a clamp is securely attached to it. Ropes are needed to lift the headstock. It is best to attach rollers on top of the tripods, through which you throw ropes. This will greatly facilitate the process of lifting the metal plate.
The metal plate hits the clamp with acceleration, thereby driving the pipe into the ground. As you deepen, the clamp must be moved upward and new pipe sections must be secured tightly to the threaded connection.
Video on how to drill a well with your own hands:
Another video on how to make a drill with your own hands:
If after the next blow the pipe goes into the ground unhindered, then the water horizon has been reached. It’s worth going deeper another half a meter and stopping.
After completing the drilling work, you need to cut off the excess piece of pipe and fix it on it check valve with pump.
Well pump
In order for your water supply system to work as efficiently as possible, you need to choose the right pump for it. You can choose it based on several parameters:
- water level and depth;
- debit;
- diameter;
- need for water.
In order to reliably know the depth of the well and the water level in it, you can take a simple measurement. To do this, a load is suspended from a rope and lowered to the very bottom. The distance from the load to the wet edge of the rope will indicate what the water level is. And the total length of the rope immersion will be equal to the depth of the well.
These readings are important because they are stated in the pump passport, and are one of the main characteristics under which the drilling equipment will operate.
Well production represents the volume of water released by a source over a certain time. It is necessary to select optimally the right pump. You also need to decide on its size, because most equipment is made to fit 4 inches. If the well diameter is smaller, finding a pump will be much more problematic.
The motor, pumping 50 liters per minute, is capable of covering all the needs of an average family of up to 4 people. If your plans include watering large areas, then it makes sense to buy a pump with a capacity several times higher. Although the price will be higher, all water needs will be covered.
Well construction and casing
 To prevent the walls of the source from crumbling and the water to remain clean, casing pipes are used. The material used can be different - steel, asbestos cement, plastic. Which pipe to choose depends on the type of drilling, depth, hole diameter, and soil type.
Steel are the most expensive in terms of cost, and it is most advisable to use them in artesian well on limestone. Another advantage of this use is that the service life of the metal casing pipes and the well itself are the same.
Asbestos-cement have a number of advantages. These include chemical neutrality, lack of corrosion and unlimited shelf life. However, there is a significant disadvantage - fragility, and as a result, increased wall thickness.
This leads to the fact that for the same internal diameter, you will have to punch a larger outer diameter under the asbestos-cement pipe. And this leads to higher costs of work. Most often, these pipes are used on limestone artesian wells.
Plastic(there are PVC and HDPE) it is advisable to use for wells with shallow depths (up to 50 meters), provided that there are no quicksands in the ground. Since the main disadvantage pvc pipes is low strength, it is better to use them on simple soils. The advantages include the absence of corrosion and the impossibility of foreign components getting into the water due to the quality of the material.
Cost of hydraulic drilling work
Price for drilling 1 linear meter costs 2000-3000 rubles, depending on the region. Also, a number of factors will influence price formation, such as:
- type of drilling;
- materials used;
- distance from the contractor to the customer.
If you make calculations for a small well, 10 meters deep, then specialists will make it turnkey for about 20,000-30,000 rubles. This includes the cost of work and prices for materials.
 If you break through the source yourself, then you need to purchase:
- steel pipes - 10 m (if you use perforating equipment);
- material for making tripods;
- headstock, ropes, rollers;
- pump.
In addition to this you will need Additional materials- self-tapping screws, stainless steel mesh, seal on threaded connections. Even a preliminary price calculation shows that it is more economical to drill a shallow well and do it yourself.
But if there is a need for a large debit or artesian water, then you will have to turn to specialists, since this can only be done with special equipment!
How to drill a well with your own hands? Review of three drilling methods
If you have made a deliberate decision to secure your suburban area water, it is best to use wells. You can drill wells on your own, and if you intend to do this, then this article will be useful to you. But better installation Water supply systems should be entrusted to specialists, because it requires considerable experience and knowledge.
Choosing a location for a well
To begin with, we must choose the right location for the future well, as well as so that it is as efficient as possible. We need to determine whether there is a shallow aquifer on the site, for which there are certain signs.
Signs of a shallow aquifer present on the site
- In a specific area of the site, many plants that prefer high humidity have accumulated.
- In the evening, in areas with an increased amount of vegetation, fog and dew accumulate, and in winter time thawed patches form in the snow.
- A large number of mosquitoes and other insects gather. It is also believed that cats prefer to rest in places located above deep waters.
If at least one of these signs is noticed, then you can safely start drilling a well. These are all, of course, signs that are largely folk, more effective way identifying deep waters is geological research.

Folk" method of detecting deep waters
Tools that will be required during the drilling process
Let’s immediately make a reservation that not all tools can be made with your own hands; some of them will have to be purchased. If we manage to make, for example, a drill, its quality will be questionable, because standard factory drills are made of high-strength hardened steel.
For work we will need:
- Derrick;
- Drill column to which couplings are attached for connection;
- Drill head;
- Boards;
- Rope;
- Filter.

A drilling derrick is a kind of tripod that you can assemble with your own hands from thick logs Ø15 centimeters. Between two of them we attach a winch, to which we suspend the drill column using a rope. The column is a structure of rods connected to each other by couplings and threads. There should be 6 rods in total, their length should be from 1.5 to 3 meters.

The boards will be useful to us so that the walls of the pit do not crumble (we will talk later what this is). Drill heads are various types and are used depending on the type of soil. Much depends on this type, including the method of drilling the well.
Types of drill heads
Drill heads come in the following types:
- a chisel used to split hard rocks;
- bailer - it removes the soil remaining after the bit has worked (you can also drill loose soil using a bailer);
- a spoon used for sand and clay;
- a coil will be needed if there is gravel in the soil;
- spoon with a coil.
We have selected the tools and proceed directly to drilling.

Well drilling technology using the cable method
The percussion-rope drilling method consists of the following stages.
Stage 1. Preliminary “instruction”. Before starting work, we must understand that the optimal well depth is 7-10 meters. You can drill no more than 20 meters on your own; if the groundwater is at a greater depth, then specialists must do the drilling.
Important! It is impossible to drill a well on your own in any case, since this will require at least two assistants.
Stage 2. We align the pit (rectangular “box”) in the place where the well will be located. The dimensions of the pit should be 2x1.5x1.5 m, and it is needed so that the unstable upper layers of soil do not crumble. We take boards and line the walls of the pit.

Stage 3. We mount the tripod at the drilling site. We securely fasten it, then place the drill column in the hole and turn the rod. The drilling process has begun. Every 60-70 centimeters we clean the column from adhering earth.
Stage 4. When we reach the aquifer, the drill column should be pulled out and the filter lowered in its place. We will definitely use a filter, otherwise the water pump will quickly become unusable. The voids formed between the walls of the well and the filter are filled with sand. Then we install pipes through which the water will rise and dismantle the walls of the pit. We fill in the well.
Stage 5. We install a water pump, which will be the “core” of the entire well. Outwardly, it will not look very attractive, so it is advisable to decorate it with some decorative element, for example, a canopy.

In this way we can drill a well up to 20 meters. Water located at such a depth has repeatedly undergone natural filtration, it will be clean and soft.
Well pipes and filter
A filter for a well is the same important detail like a pump. The following types of filters are distinguished:
- Gravel;
- Wire;
- Reticulate.
During operation, it is advisable to fill the filter with gravel, which will prevent dirt from entering the pipeline. When choosing a filter, we must pay attention to the following parameters:

Options for arranging pipes for water lifting
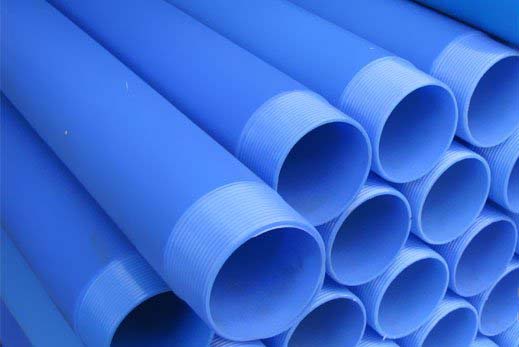
- If the water is planned to be consumed as food, then plastic water should be used, which does not corrode. If finances allow, you can buy more expensive enameled steel pipes.
- If the well is intended for economic purposes, then we can use socketed, thin-walled or threaded pipes.
Drilling a well using a pump
This method is perfect if the depth groundwater does not exceed 10 meters. It is no less effective than the previous one.
Stage 1. We dig a hole 1.5 meters deep in order to remove loose and unstable upper layers of soil. The area of such a pit should be approximately 1 square meter. We line its walls with boards to make it convenient to work.
Stage 2. We take a steel pipe and cut one end of it into teeth, like on a hacksaw. We bend the teeth into different sides. At the other end we make a thread for connecting to the pipes. Next, using clamps, we equip the pipe with handles so that it can be held vertically. We also make threads on the remaining pipes, but on both sides. Each pipe should be approximately 3 meters long.
Stage 3. We take a pre-prepared container of at least two hundred liters filled with water, a medium-power water pump, and a hose that will reach the bottom of the pit. All pipes must have a diameter of 12 cm, more is possible.
Important! This procedure cannot be completed by yourself either; you must have at least one assistant.
Stage 4. We insert the pipe into the hole to the maximum possible depth. Turn on the pump. The water pressure will erode the soil under the pipe, and it will gradually sink. It is advisable to constantly rotate the pipe.
Stage 5. The water will come out of the pipe, but can be reused by straining it through a sieve. When the pipe is completely deepened, we attach the next one to it and continue working until the aquifer is reached. Then we remove the boards and dig a hole, and attach a lid to the end of the pipe, which will prevent debris from entering the system.

This is the simplest way to drill a well, but there are others.
Shallow well for economic purposes
If water is needed, for example, to water a garden, then a well for this can be made using a conventional hand drill. The only condition is that the upper groundwater level must be a maximum of three meters from the surface. If the length of the hand drill is not enough, then we increase it with reinforcing bars or small metal pipes. How to install f , You can read in our article.
We go through the hardest layers of the earth with an additional load that clings to the handle of the drill. This way the load on your hands will be less.
Important! Water extracted from such wells is not suitable for drinking, since it has not undergone natural filtration!
If branches or roots come across while drilling, we cut them out with an ax pre-attached to a long iron rod. After about two meters it will start to come across wet sand, so every 10 centimeters the drill will have to be pulled out for cleaning, otherwise we may break the device.

When the sand acquires a bluish tint, it will mean that we are almost there. When the first water appears, you can no longer use the drill, because it will no longer give anything - the liquid soil will not stick to the blades. All we have to do is insert casing pipe– the shallow well is ready!
To lift the water we will use a conventional electric pump.

As a conclusion
Production drills are amazing in their scale, which is why the very idea of drilling a well with our own hands seems stupid and unfeasible to us. But those of you who have read the article already know that this is, to put it mildly, an exaggeration. All we need is a drilling tool, additional materials, a bit of skill and, of course, patience.


