When screeding floors, you can not only perfectly level the surface, but also improve the heat and sound insulation properties of the coating. One of the options for this integrated approach may be leveling the floor using expanded clay. Due to its low cost, simple application technology and high performance characteristics, this material is in demand by developers and owners of new apartments.
Expanded clay, used as insulation and sound insulation, is oval granules ranging in size from 1 to 20 mm. Larger expanded clay stones must be crushed in special mill drums before being used for insulation. Like any building material, expanded clay has a number of advantages and certain disadvantages. TO positive qualities of expanded clay should include:
- high mechanical strength of the granules, allowing the use of this bulk material as the main filler for concrete mixtures;
- low thermal conductivity and ability to absorb sound vibrations;
- chemical inertness and resistance to acidic and alkaline environments;
- small specific gravity;
- frost resistance;
- non-flammability;
- affordable price;
- the ability to perform dry or expanded clay concrete floor screed with your own hands.
In that building material rodents and insects do not settle in, mold and mildew do not grow.
At the same time, one cannot help but mention such significant disadvantages as the ability to absorb moisture and float to the surface of the concrete mixture with an increased water content in its composition. The latter factor leads to the formation of a corrugated surface. As a result, it has to be leveled with an additional layer of cement mortar or mechanical grinding of the surface.
Installing a floor screed with expanded clay is not always advisable. Moreover, there are options when the use of this material is impossible due to the technical conditions of the work. However, its use will be effective if:
- creating a support cushion on the ground in the absence of a cellar and basements;
- the need to compensate for large differences in heights on the floor surface and reduce material costs for the purchase of materials;
- weak overlap or wooden planks as a basis;
- hidden laying of utility networks or heated floors in the screed layer.
The use of expanded clay, first of all, allows us to provide a screed option with the lowest possible costs for insulation, sound insulation and layer creation large thickness.
Types of screeds using expanded clay and their features
When leveling and insulating floors, three technologies for floor screed with expanded clay are used:
- wet pouring with expanded clay concrete;
- dry screed;
- combined (semi-dry) option with a backfill layer.
Each method has pros and cons of screeding floors with expanded clay. The choice depends on the specific conditions and condition of the surface to be coated.
Wet screed
Monolithic filling of floors with expanded clay concrete is used only in the most extreme cases, when creating a bulk layer of insulation or using a dry screed will be impossible for some important reason. The preparation of the concrete mixture is carried out in the following sequence:
- Initially, expanded clay granules must be poured into a tray and filled with water for soaking;
- to mix the working mixture, load cement, sand and expanded clay into a concrete mixer in a ratio of 1:3:4;
- install metal profile beacons on the floor surface at a distance of 1.2-1.5 meters from each other;
- When pouring concrete, level the layer using a plaster rule or a flat metal lath;
- During the setting period of the concrete mixture, the surface must be periodically moistened with water to avoid the formation of cracks.
If floating granules are visible on top of the floor, then after the concrete has hardened, they must be sanded down or the floors must be additionally filled with a thin layer of self-leveling mixture.
Dry screed
This is the simplest and efficient technology screed devices using expanded clay. Insulation granules are simply poured onto the floor and leveled. After this, sheets of fiberboard, plywood or gypsum fiber board are laid on the backfill and poured mortar from a mixture of sand and cement with the addition of a plasticizer or liquid soap.
The thickness of the poured dry expanded clay layer is equal to the difference in which 25 mm of the cement mortar layer and the thickness of the screed should be subtracted from the total thickness of the screed. sheet material. This method is quite accessible even to a novice builder.
Combined method
This technology is similar to dry screeding, but without the use of sheet materials for the intermediate coating. The dry method can significantly reduce financial costs, but requires certain construction skills and experience in performing the work.
Its essence lies in the fact that the surface of the bulk expanded clay layer is leveled, but not covered with sheets, but rather spilled with cement “milk” - a liquid mixture of cement and sand in a 1:2 ratio.

After the filling has set, expanded clay forms a hard layer of 2-4 cm, which allows for final leveling with conventional mortar along the beacons. Instead of a cement mixture, it is allowed to fill with sand concrete if its thickness is 30-50 mm.

Requirements for expanded clay for screed installation
Concrete mixture, dry fill or material for combined technology can be of any faction. However, it should be understood that small granules or crushed expanded clay will provide a denser backfill and better thermal insulation. Therefore, deciding which expanded clay to use for floor screed depends on the problems that you want to solve by leveling and insulating floors.
Based on the size of the fractions, expanded clay is divided into:
- expanded clay sand with particles up to 5 mm;
- sand-crushed stone mixture up to 10 mm;
- crushed stone with granules 5-10 mm;
- gravel of two categories 10-20 and 20-40 mm.
In addition, what fraction of expanded clay is needed for floor screeding, you need to take into account the bulk density category in the range of 450-600 kg/m 3 and the strength grade from P75 to P125 MPa according to the results of mechanical pressure tests.

Determining the amount of expanded clay for screed
Calculation required material depends on the adopted technology for performing the work, the size of the granules, requirements for the strength of the coating and the brand of cement used. The brand of expanded clay concrete is determined by the volumetric ratios of M400 cement, sand and expanded clay, which should be:
- for concrete M150 – 1.0: 3.2: 5.0;
- M200 – 1.0: 2.5:4.2;
- M250 – 1.0: 1.9: 3.4;
- M300 – 1.0: 1.7: 3.2;
- M400 – 1.0: 1.1: 2.4.
To determine how much expanded clay you need for a dry screed, simply calculate the volume of the bulk layer and multiply its thickness by the area of the room.
In the case of height differences, you can take the average between the minimum and maximum values or summarize several volumes in individual areas.
When preparing a solution or concrete mixture with expanded clay as one of the fillers, it is necessary to take into account the grade of insulation based on bulk density from M250 to M800 kg/m 3 . At the minimum value, the test strength of the frozen layer will be at least 0.6 MPa, and at the maximum value - more than 4.5 MPa.
Tools and equipment for work
Work on screeding floors using expanded clay is carried out in several stages. Each of them will require a specific set of construction tools and equipment.
To prepare the base for laying layers you must have:
- hammer drill or impact drill;
- shovel or large scoop;
- construction mixer;
- buckets and spatula.
In addition to this, installing beacons will require;
- strong cord or matte fishing line;
- bubble, hydraulic or laser level;
- plastering rule and tape measure;
- construction trowel;
- pencil or marker;
- grinder for cutting profiles.
When performing a dry screed, additionally prepare a screwdriver and a tool for cutting sheets. To prepare expanded clay concrete, you will also need a concrete mixer, a mixing tray, a shovel and a bayonet shovel. In the case of combined technology, the possibility of working with reinforcing mesh should be taken into account.
Preparatory work
The quality of preparation of the base surface for the installation of expanded clay screed directly determines its quality, strength and durability.

The full range of preparatory work may include the following stages:
- cleaning of debris and remnants of old materials;
- device of hydraulic and thermal insulation;
- installation of beacons;
- securing damper tape around the perimeter of the walls.
 Damper tape.
 After removing debris, weak boards need to be fixed on wooden floors and rotten ones must be replaced. Level and compact the soil if there is no old coating. In concrete floors, repair holes and large cracks with cement mortar and only then proceed to the next stage of work.
Hydraulic insulation and additional insulation
Due to the hydrophobic properties of expanded clay, waterproofing is a prerequisite for any screed technology. A waterproofing layer made of rolled material can be laid under a layer of expanded clay, on top of it, or simultaneously on both sides.
Roofing felt, waterproofing, liquid rubber or bituminous soils are used as insulation. The choice of material depends on the requirements for the moisture protection device and financial capabilities.
 Waterproofing film.
 It is recommended to use additional thermal insulation for rooms on the ground floor or when performing expanded clay screed on the ground. Floor insulation will reduce heat losses and will save you money on heating your home. The best materials for this purpose are sheet foam and polystyrene foam. Their use simplifies the work and provides effective protection.
Installation of beacons and fastening of damper tape
The presence of correctly installed beacons greatly simplifies the process of leveling the screed to obtain a perfectly flat horizontal surface. When doing this job:
- by measuring, the design level of the floor is determined, which is drawn on the wall in the form of a solid line;
- depending on the width of the strips being poured, calculated required amount lighthouses;
- The profile slats are fixed in the required position.

With a dry screed, the beacons must be removed after the mortar begins to set; in other cases, they can remain inside the poured layer.
The damper tape is fixed in such a way that a strip of 15-20 mm peeks out above the field level. It is necessary to compensate for temperature expansion of the self-leveling layer and prevent the formation of cracks.
 Scheme for determining the zero level.
 Device instructions
Combined screed with expanded clay  Scheme of a combined screed.
As mentioned above, this technology involves the presence of a dry layer of bulk material at the bottom and a wet cement pour at the top. Installing a semi-dry floor screed with expanded clay with your own hands must be done in the following order:
- cover the clean prepared surface roll waterproofing or cover with a layer of bitumen primer;
- fill in a layer of expanded clay with a fraction size of 5-20 mm, 30-40 mm below the future level of the screed;
- compact the bulk material well and level with the rule;
- prepare cement laitance and pour it over the surface;
- after setting, which will occur in a day, install beacons corresponding to the level of the screed on the frozen surface;
- prepare cement mortar in a ratio of 1:3 or 1:4 to sand;
- pour the solution between the beacons in strips and level it with a plaster rule;
- the top layer of the screed must be pierced with a thin rod with a pitch between holes of no more than 100 mm;
- Over the next two days, the surface must be periodically moistened with water.

The complete readiness of the screed is determined at the rate of 5-7 days for each centimeter of the cement layer. After this, you can proceed to laying the finishing floor coverings.
Wet screeds with expanded clay
“Wet” screed - pouring the base with expanded clay concrete and then leveling the surface. Laying the concrete layer is carried out in the following sequence:
- pour dry expanded clay into a tray or other container and fill it with water for 10-12 hours to soak;
- install beacons on the surface of the base that will determine the horizontal level of the future floor;
- pour wet expanded clay (4 parts) into a concrete mixer, then add a little water and cement (1 part);
- After stirring for a short time, add sand (3 parts). Stir the mixture until ready - at least 4 minutes. If necessary, add water during mixing (the consistency of thick sour cream is required);
- To level the surface, use a plaster rule, which must be pulled along the beacons with transverse movements of the tool.
If, after the screed has set, floating expanded clay granules are visible on the surface, they must be sanded using a power tool. If there are a large number of such granules, you will have to lay an additional layer of self-leveling mixture on top. The complete drying time is 28 days.

Dry screeds with expanded clay
To install a dry screed, you need to purchase fine expanded clay or crushed granules, sheet material such as chipboard or plywood, sand, cement and a plasticizer. The order of work is as follows:
- Cover the surface of the base with dry expanded clay and level the surface using a level lath. When laying a construction bubble level on the slats, periodically check the level of the layer;
- remove beacons;
- lay sheet material on the expanded clay so that it covers the entire surface;
 Scheme laying GVL.
 - check the horizontal position of the sheets using a level;
- cover the second row of sheet material in the same way. The only thing that needs to be provided is that the shift of the seams of the second layer relative to the first should not be less than 20 cm.

After this you can begin installation finishing coating.
You can see the construction of expanded clay screed clearly and in more detail in the presented video.
Video on the topic
Expanded clay, due to its many positive characteristics, is universal material. Due to its high degree of sound insulation and heat conservation, it is used to insulate floors, walls and even ceilings. Most often it is used as a component for screed, when it is necessary to create warm and strong foundation. This article will tell you what advantages and disadvantages the material has, how to use it and how to screed a floor with expanded clay.
Replacing an old floor or installing a new one in a newly built house is a very important and time-consuming stage of renovation work. After all, it depends on how it will look flooring, largely depends general form housing, comfort and coziness. It is very important that the surface is level. Therefore, before laying any type of floor covering, it is advisable to screed.

There are two traditional type screeds – wet and dry. The first option involves a relatively large amount of work. The process is long, labor-intensive and messy. In this regard, recently builders have given preference to dry screed technology with expanded clay. This installation is relatively simple and consists of pouring special granular material into the joists or between the walls of the ceiling. Next, special sheets are laid.
When choosing a screed option, you should take into account the condition of the surface and the characteristics of a particular room. Self-installation requires precise adherence to technology to make the floor as strong and durable as possible. One of the most effective and common ways to level the surface is to screed the floor with expanded clay. The technology is not easy, even if ready-made mixtures are used.
Expanded clay production technology
Expanded clay is a material that is lightweight, practical and environmentally friendly. Positive qualities include a high level of heat and sound insulation. It is made by firing clay at a very high temperature, so in translation from Greek the word “expanded clay” sounds like baked clay.

The production technology itself involves exposing the prepared clay to intense heat. As a result, the raw material swells and becomes porous. In this case, the outer part of the shell is melted, which leads to sealing and high strength of the material.
Sedimentary clayey rocks are most often used as raw materials, and metamorphic rocks are less commonly used. They have a complex composition, which includes hydromica or kaolin, as well as feldspar, carbonates and other impurities. The clay most suitable for expanded clay contains no more than a third of quartz. Special additives are added to the raw material, which ensure better expansion of expanded clay. For this purpose, diesel fuel, fuel oil, ferrous substances, perlites and similar materials are used.
Helpful advice! When choosing expanded clay, you should give preference to certified products. Special GOST 9759-76 includes parameters of granules, requirements for the weight and strength of expanded clay. Strength is the main indicator on the basis of which a material is allowed for use.
Raw granules of a certain size are subjected to special processing, including drying, firing and cooling. Next, the expanded clay is sorted and, if necessary, crushed into smaller fractions. After this, the material is packaged and prepared for transportation.

Floor screed with expanded clay: pros and cons
Expanded clay floor screed is resistant to high temperatures and frost resistance at the same time. This feature allows its use in different temperature conditions. In addition, it is resistant to fire, putrefactive bacteria and mold do not develop in it. One of the most important advantages is low specific gravity. The lightness of the material makes it easy to transport. In addition, leveling the floor with expanded clay will help eliminate any flaws that other materials cannot cope with (or their use is simply unprofitable).
The material has the following positive characteristics:
- high degree of thermal insulation;
- good level of sound insulation;
- sufficient strength;
- low cost compared to other materials;
- it is durable;
- Convenient to transport.
Among the disadvantages, it should be noted the poor moisture resistance when using the dry screed method, so in some cases it is better not to use expanded clay. The material will not be damaged directly, but moisture will linger under the concrete. Subsequently this will lead to high humidity in room. This factor is favorable for the development of fungi and mold. The disadvantages of the material also include the fact that for insulation you will need to make a thick screed. A layer less than 10 cm will be ineffective.

Expanded clay concrete screed outperforms other fillers in many ways. In addition to the maximum level of heat and noise insulation, it has good breathability and is durable. The material will suit under any floor covering. Maximum effect from all of the above positive qualities can be achieved only if all requirements of the expanded clay laying technology are met.
Expanded clay or mineral wool: which is better to choose as insulation
For insulation of floors, walls and ceilings of buildings they use various materials. In addition to expanded clay, the most popular materials also include polystyrene foam, polystyrene foam and mineral wool. They are characterized by such qualities as lightness, high thermal insulation and low price. However, due to their versatility, expanded clay or mineral wool are most often used. Floor insulation with these materials is most effective.
Expanded clay, as an environmentally friendly material, does not pose a threat to health and lasts for several decades. It is inexpensive, multifunctional and resistant to fire, moisture and rodents. However, its use requires a number of preparatory works, so it is not suitable for creating “warm floors”.

Helpful advice! Mineral wool is more effective as a thermal insulation material, but it is not as durable and strong as expanded clay. Therefore, it is advisable to use it for wall insulation. While expanded clay is more suitable for flooring.
Insulating walls with expanded clay outside the house is a rather labor-intensive and inconvenient process. This is where expanded clay is inferior to mineral wool, which is suitable for insulating facades, roofs and pipes in hard-to-reach places. It is easy to cut out the required shape using a knife.
It is impossible to say unequivocally which material is better, much less make a categorical choice in favor of one of them. The choice of insulation should be based on the specific construction conditions and material capabilities. Most often, experienced builders combine mineral wool with expanded clay, which has a positive effect on the cost of work and increases the degree of thermal insulation. Both insulation materials are distinguished by their simple installation process and low cost, giving excellent results.

Types of expanded clay backfill for floors
For expanded clay screeds use Various types factions. On modern construction market material with different levels of density is presented. The weight of a cube of expanded clay ranges from 260 to 600 kg/m³. The specific gravity of expanded clay is the weight of a cube of material. It depends on the grain size: the larger the grain, the lower the specific gravity. It is the mass of 1 m³ of expanded clay and its density that underlie the classification of the material given below:
- Expanded clay crushed stone has a size of 10-14 mm. This material is used to make concrete.
- Expanded clay gravel is used in the installation of floors of varying degrees of strength. Most often used for thin but durable flooring. This is expanded clay of fractions 5-10 mm, 10-20 mm and 20-40 mm.
- Expanded clay sand is the finest material. The maximum fraction of expanded clay is 0.5 mm; it is used in the process of creating thin screeds.
The table will help to clearly demonstrate the specific and volumetric gravity of expanded clay, depending on the type and fraction:
| View | Fraction, mm | Specific gravity (g/cm³) | Expanded clay weight per 1 m3, (kg) |
| expanded clay sand | 0-5 | 0,5-0,6 | 500-600 |
| expanded clay gravel | 5-10 | 0,4-0,45 | 400-450 |
| expanded clay gravel | 10-20 | 0,3-0,4 | 300-400 |
| expanded clay crushed stone | 20-40 | 0,2-0,35 | 200-350 |
In accordance with the table, the approximate weight of 1 m3 of expanded clay with a fraction of 10-20 is 350-400 kg.
The specific gravity also depends on the brand of density. According to existing GOST, the higher the density of expanded clay, the greater the weight of the material.
It is impossible to accurately determine the specific gravity of expanded clay, but the average value is quite easy to establish. The average value is 400 kg/m³ (0.4 g/cm³). Moreover, each faction has its own specific indicator. For example, expanded clay 10-20 in bags weighs approximately 16.8 kg.
What determines the price of expanded clay for floor screed
It should be noted that loose clay granules are widely used not only in construction, but also in public utilities and agriculture. Therefore, the price range for this material is quite wide and ranges from 1000 to 2000 rubles per cubic meter.
Helpful advice! In order to save money, you can purchase used expanded clay. This material has almost not lost its positive properties, but at the same time it costs two or even three times less.

Expanded clay producers also dictate the pricing policy on the market. When setting prices, they are guided by the following criteria:
- indicators of the condition of clay raw materials;
- features of production technology;
- volumes and production capacity;
- storage features;
- energy consumption;
- speed of trade turnover.
Enterprises selling expanded clay also take other factors into account when setting prices. For example, packaging, size of granules and their porosity. The first criterion includes a list of additional acquisition costs additional equipment and hiring workers to dispense, weigh and package the material.
The size and porosity of the material determine such qualities of expanded clay as thermal insulation, strength, and moisture absorption. All these criteria respectively influence the formation of prices. For example, the size of the granules determines the price in inverse proportion: the finer the grain, the higher the cost. The price of small expanded clay in bags is much higher, since the material itself is much heavier compared to the weight of large fractions of expanded clay of the same volume.

Cost of expanded clay per 1 m3 or per bag: which is more profitable
Sales agents on the construction market offer the purchase of expanded clay wholesale and retail, packaged or in bulk. Buying material by weight or per cubic meter is much more profitable, since when packaging, labor costs and the cost of packaging influence the formation of the price. If the question is about purchasing expanded clay for floor insulation, and not for backfilling an area as a decorative element in landscape design, then it is enough to purchase just a couple of cubes of material.
Packaged expanded clay is of higher quality, as it undergoes special cleaning. In addition, the packaging is more convenient to transport and protects the material from moisture, maintaining its quality characteristics.
When buying expanded clay, you should take into account another important factor - seasonality. Usually after the end of the season construction work the price of the material drops by about a quarter. Thus, granular building materials can be purchased much cheaper in winter.
If it is important to purchase high-quality, clean, hard and certified material, you should give preference to expanded clay in packaging. Since it has been certified, it will be free of impurities, debris and foreign matter. The strength of the granules can be checked by simple compression, and porosity is determined by breaking the grains.

Price of expanded clay for floor screed using dry and self-leveling methods: what is the difference
Floor screed carried out using the dry method is more advantageous compared to other technologies. First of all, the cost savings lies in the absence of the need to involve professionals, because most dry screeds can be made with your own hands.
Helpful advice! If quality is more important than price, then it is worth buying expanded clay for dry floor screed in the form of a special mixture “Kompevit” - this is a backfill used in Knauf technologies. It was developed as insulation, but in combination with gypsum fiber sheets, excellent horizontal surface quality was noted. Compavit contains various granules (up to 5 mm) of high quality. The only drawback of this material is its high cost.
When it comes to expanded clay, the overall cost is also affected by the method of its use. For dry screed, material of different fractions is taken - and its price can be low. While the pouring method requires fine-grained expanded clay, which costs an order of magnitude more.
Related article:
Types of floor screeds. Which screed should be given priority in this or that case. Installation of various types of floor screeds.

The best price for products can be found from the direct manufacturers of the material. Intermediaries, as a rule, set a markup of 15 to 30%, which includes the costs of delivery and storage. Therefore, to purchase large volumes, it is better to spend time on the road and bring expanded clay from the manufacturing plant yourself.

If we are talking about small quantities of goods, then it is better to refuse pickup and buy the material in specialized stores with delivery. The seller guarantees timely transportation, safety and quality of products. In any case, to avoid extra costs, you should correctly calculate the required amount of material.
Selection of expanded clay for floor screed: fraction, type and volumes
When choosing which fraction of expanded clay is needed for floor screed, they are guided by the room in which the material is planned to be used. The choice also depends on the technology used to backfill. According to the traditional method, which involves subsequent pouring of concrete, the size of the material does not matter much. Any type will do, including fine-grained expanded clay.
Helpful advice! Fine sand is ideal for leveling floors with large level differences. It is advisable to use such material in areas with significant surface damage and for installing block parquet.

At the same time, the opinion regarding the choice of a 0.5 mm fraction with a minimum weight for the base of expanded clay is erroneous. After all, such a filler has a higher density, so it fills the space better, thereby making the screed layer heavier.
Experienced builders recommend using expanded clay for screeding different fractions - from 5 mm to 20 mm in appropriate proportions. The recommendation is based on the fact that when laying a layer of expanded clay, grains of different sizes fit well together. This feature has a positive effect on the further use of the floor, which will not shrink or deform.
Calculation of expanded clay for floor screed: online calculator
Expanded clay is a very ergonomic and economical material. Its use reduces financial costs, minimizes loads on concrete floors and increases the level of thermal conductivity. In order for the result to be as effective as possible, it is necessary to accurately calculate the required amount of expanded clay for the job.

Builders use traditional methods when calculating how much expanded clay is needed for floor screed. If the layer thickness is 1 cm, then 0.01 m³ of material will be needed per 1 m². The weight of a cube of expanded clay is generally not taken into account, since the density of expanded clay calculated in kg/m3 varies for different types of material. Therefore, for convenience, sales are carried out in liters, based on calculations: for 1 m² of screed 1 cm thick you will need 10 liters.
To accurately calculate the consumption of expanded clay, you should measure the thickness of the insulating layer. In dwellings located on the lower floors or above unheated rooms, the thickness of the screed made of this material must be at least 10 cm. For the purpose of maximum thermal insulation in residential premises, expanded clay is laid in a layer averaging 4 cm.
Based on the calculations given above, we come to the conclusion that for installing the screed in standard apartment you will need at least 0.04 m³ (or 40 liters per m²) of material. As a result of multiplying this indicator by the size of the room area, you get the total volume of expanded clay required for the screed.

For example, you should calculate how much expanded clay is needed to insulate a floor with a layer thickness of 4 cm in a room of 15 m². The calculation will look like this:
15 m² * 0.04 m³ = 0.6 m³ (in cubic meters)
or 15 m² * 40 l = 600 l (in liters).
The equivalent is 16 bags of 50 liters each. That is, one bag of expanded clay is consumed per 1 m² of screed. You can calculate exactly how much expanded clay you need for floor insulation using a special online calculator.
Insulation of floors, ceilings and walls with expanded clay: versatility of the material
This material has been used as a reliable insulation material for quite some time. The heat-insulating effect of expanded clay granules is ensured by their porous structure.
Important! The process of insulating walls with expanded clay is more labor-intensive and takes more time, since it involves the construction of a special high frame or assembling the material into portable containers.

Expanded clay grains are similar in structure to expanded polystyrene. But there is also a significant difference: expanded polystyrene is made from polymers and is used mainly for wall decoration. Expanded clay is a natural material, the raw material for which is organic clay.
Due to the high degree of thermal insulation, the use of expanded clay for insulation of floors, walls, ceilings and load-bearing structures very effective. The material is often used for attic insulation due to its increased fire resistance (compared to expanded polystyrene). This advantage of the material allows its use in fire-hazardous objects: in a bathhouse, on the roof and on wooden floors.
However, using expanded clay on a horizontal base is more convenient than on flat or vertical surfaces, since it is a bulk material. To level and insulate the floor with expanded clay under the screed, it is enough to simply pour and level the material, but insulating the walls and ceiling will require more time and effort.

Insulation of a frame house with expanded clay
For insulation of floors, ceilings and walls wooden houses Expanded clay is usually used. Its use in brick and concrete buildings is very advisable. The most commonly used technology is to insulate the floor of a frame house with expanded clay. This is due to the fact that it is one of the most affordable, convenient and effective materials on the construction market.
Insulating the walls of a frame house with expanded clay is a labor-intensive and rather problematic process, so the use of this material for this task is less advisable. Although, due to its thermal insulation characteristics, expanded clay will well protect any wall - both brick and block. But the main condition for use is a three-layer structure, which will ensure the possibility of filling material between the rows.
In aerated concrete blocks, the distance from the inner to the front layer must be at least 10 cm. The material is filled in as the masonry is built. It is carefully compacted and filled with cement laitance. The consumption per 1 m3 of expanded clay binder M 300 will be 260-300 kg. It should be noted that in this case you will need about three times more water than cement.

Insulation of frame walls with expanded clay: expanded clay blocks in construction
Provided the thickness of the side surfaces of the sandwich panels is correctly selected, additional insulation with expanded clay is possible even frame walls, since during compaction the load on them increases significantly. To insulate the walls of a wooden house, it is necessary to prepare a thermal insulation layer of at least 20 cm. For this purpose, special canopies will have to be built for backfill.
Helpful advice! Insulating walls with expanded clay is no worse in terms of thermal efficiency than using modern materials. The main condition for success is the choice of high-quality material and its careful compaction.
Special expanded clay blocks used for the construction of walls have the necessary thermal insulation qualities. These are hollow structures containing expanded clay, sand and cement. Such buildings are warm in winter and cool in summer. This material is characterized by low strength, so it is suitable for the construction one-story buildings and partitions between rooms.

Slotted blocks have good plasticity, which allows you to create different shapes. They are laid empty-sided down on a sand-cement mortar to save heat. Structural and thermal insulation blocks are hollow material, used for thermal insulation during the construction of walls. Depending on the size of expanded clay blocks, they are divided into wall, partition and facing.
Ceiling insulation with expanded clay: technology features
Due to poor insulation, about 15% of the heat escapes through the ceiling, so during construction you need to take this factor into account and take care of insulating the ceiling or floor in the attic. For this purpose, mineral wool and polystyrene foam are often used, but expanded clay is deservedly considered the most popular material.
Insulation work begins with laying layers of vapor and waterproofing. A layer of vapor barrier film is attached to the finished ceiling. To do this, you can use self-adhesive roofing felt and foil, but if you don’t have enough money, a simple plastic film will do just fine. The technology is simple: a roll of the selected material is rolled out on the floor, marked and cut. The strips should be approximately 10 cm wider than the distance between the beams.

If the ceiling area is large, it is advisable to lay the canvases with an overlap of 8-10 cm.
The seams are taped with special tape or construction tape. When insulating the ceiling in a bathhouse with expanded clay, a vapor barrier should be provided for the beams and chimney pipe. The canvases are fixed above the expanded clay layer masking tape or a construction stapler.
To insulate a roof with expanded clay, it is better to use a combined method, that is, take large and small granules. This will increase the density of the coating, and the level of subsidence of the granules will decrease, which will facilitate uniform filling of the material over the entire surface that needs to be insulated.
Expanded clay as floor insulation: various options for use
Expanded clay is most often used for floor insulation in different rooms. If you strictly follow the technology of using the material, you can achieve a positive effect even in a house with a very cold floor. It should also be noted that the floor bears the heaviest load, so a lot depends on what layer of expanded clay is needed to insulate the floor.

Helpful advice! When choosing expanded clay for the floor, it is advisable to take a mixture of three fractions of this material. Using exclusively expanded clay crushed stone can ultimately lead to subsidence of the floor, and the fine material weighs down the entire insulating layer.
Correct calculation of the insulation thickness will help avoid subsequent subsidence and surface deformation. It is also important to consider what expanded clay to use for floor screed. The most effective is the use of granules of different fractions. Then smaller grains will fall into the space formed by large grains, uniformly filling the entire surface.
Expanded clay screed plays a very important role. There are several technologies for its application. The screed provides fixation of the material and serves as an upper waterproofing layer. Usually a two-level method of applying the solution is used. First, a layer of material is poured in order to fill empty spaces and displace air. Expanded clay under the screed is reliably protected from moisture and physical stress. The final screed is done to completely level the floor, which will be an ideal base for installing any type of floor covering.
Despite the fact that insulation with expanded clay (no matter the floor or ceiling of a house) is several times simpler than using the same polystyrene foam or mineral wool, the technology has a number of features. It is important to follow them, otherwise the insulation layer may become saturated with moisture.

Floor insulation with expanded clay in a wooden house
There are many technologies for insulating wooden houses using this material. We have already figured out how to insulate the ceiling and walls, but the most common use of expanded clay is to insulate floors in a private home. There are many technologies and methods. This includes simple backfilling, pouring an expanded clay layer, and covering the material with a concrete screed.
In any case, first prepare the surface. To do this, dismantle the old coating, clean the surface of dirt, debris and dust. Next, they begin the process itself. The most popular method of insulating a wooden floor with expanded clay is to backfill it directly onto the ground, between the laid joists. This technology is most often used in construction country houses, but also in the arrangement residential cottages it is also acceptable.
The sequence of such work includes several stages:
- Compact the soil if necessary.
- The logs are laid.
- Lay directly on the ground between the joists waterproofing material. This can be ordinary roofing felt, preferably laid in several layers with overlaps and overlapping the walls.
- Adding expanded clay - take a mixture of three fractions.
- Laying a vapor barrier layer. The use of polyethylene film is acceptable here.
- Laying plank floors and finishing work.

This is the easiest way to insulate a floor wooden house from below with expanded clay. This method is also used to insulate the ceiling from the attic side.
Helpful advice! The optimal thickness of expanded clay for floor insulation on the first floor is from 10 to 16 cm. A lower value does not guarantee complete thermal insulation, and a thicker layer will be unnecessary.
Floor insulation with expanded clay on the balcony
Often in multi-storey buildings the initial project assumes the presence of an open balcony or loggia, but most owners produce self-insulation structures by installing reliable heat-insulating double-glazed windows. Then the question arises about the need to insulate the floor in this room. There are a number of methods, in particular using expanded clay screed.
Considering how much expanded clay weighs, it is suitable as an insulating material for floors on balconies and loggias. The process itself is quite simple. First they knead cement-sand mortar, then the entire surface concrete base they are covered with an even layer of expanded clay 3-5 cm thick. After this, beacons are installed and, guided by them, the expanded clay layer is filled with concrete mortar.

It is important that the cement mixture is thick to prevent light clay granules from floating, thereby compromising the thermal insulation effect. In addition, such a screed will be quite problematic to level.
It is important to take into account the fact that the usual balcony slab installed with a slight slope to the outside. This is done so that rain and melt water flows freely from the balcony. Therefore, before insulating the floor with expanded clay, you need to take care of leveling the surface. The easiest way is with a concrete screed.
Features of insulating expanded clay floors in a bathhouse
Quite often, expanded clay is used as a reliable material for thermal insulation of bathhouse floors. The required layer thickness is calculated taking into account the expected loads. Here they use technology using beacon filling. The simple method of falling asleep in logs is not suitable, since there is an increased level of humidity in the bathhouse.

When insulating the floor in a bathhouse, a number of features should be taken into account:
- it is necessary to avoid slopes and unevenness on the floor, otherwise insulation will lose its meaning;
- in order to maximize the compaction of the thermal insulation layer, expanded clay is poured with thick cement mortar;
- reinforced mesh will help give the structure stability;
- The floor acquires maximum strength after a month, so earlier use of the bathhouse is not recommended.
Floor insulation using expanded clay in buildings on stilts significantly extends the service life of the room and makes the bathhouse warm, reliable and comfortable. The main condition is compliance with all technological requirements during repairs. We will describe each type of screed with expanded clay in more detail below.
Helpful advice! When buying expanded clay, it is better to purchase a little more material than planned, since during transportation and backfilling, individual granules may crumble.

Types of screeds with expanded clay and their features
The versatility of the material allows its use different ways. The main criteria for choosing installation technology are the type of room and the relevant circumstances. At the moment, there are three main installations of expanded clay screed:
- Pouring technology (or expanded clay concrete) includes the use of various pour-type mixtures. This method is used to achieve the maximum level of leveling of a layer of small thickness. This method is practiced in apartment buildings.
- The dry method is used for installing communications at the floor level when the screed completion time is running out (in this case, it is permissible to apply the finishing coating after a day) or if a screed with minimal weight is required (over thin floors). In addition, this method is as clean as possible and is suitable for achieving a high level of thermal insulation of the floor.
- The stacking technology involves covering an expanded clay layer with concrete. It is characterized by a thick leveling layer. This option is ideal for areas subject to heavy loads. In addition, this method does not require large material costs.

Regardless of the type of screed application technology chosen, the base should be prepared in advance. This is a separate stage that requires special attention.
Helpful advice! To prevent damage to the expanded clay layer, it is necessary to apply a cement-sand screed on top.
Expanded clay screed: choosing tools
The list of necessary tools depends on the choice of type of screed. It should be noted that in any case you will need:
- expanded clay of the corresponding or different fraction;
- volumetric container for mixing the solution;
- polyethylene film for waterproofing;
- any level (water can be used, but laser is better);
- an aluminum rule at least two meters long to level the mixture along the beacons;
- construction mixer or concrete mixer;
- net;
- beacons;
- Master OK;
- ordinary shovel;
- scotch;
- large roller with needles;
- cement and sand or a special mixture for pouring;
- alabaster or gypsum mortar.

A sufficient amount of water should also be provided, especially for the implementation of bulk and typesetting technology. You may need self-tapping screws for setting the beacons and, accordingly, a screwdriver or screwdriver. Ordinary mastic is suitable for smoothing seams. We should not forget about the presence of a construction tape for calculating the material and marking the beacons.
This kind of construction work is quite labor-intensive and dirty. Therefore, you should take care of appropriate clothing, footwear and personal protective equipment in advance.
Expanded clay screed: calculation of sand-concrete mixture
When starting work on floor insulation with expanded clay, you should calculate not only the mass of the required material, but also the expected load on the screed. To do this, calculate the height of the expanded clay layer and the thickness of the cement-sand floor screed. For example, for effective insulation floor on the first floor, the layer thickness should be at least 10 cm.

To prepare the solution, it is better to take a ready-made sand concrete mixture, where the proportions are clearly calculated. It contains plasticizers that prevent the screed from spreading and make the solution more plastic. The amount of material for sand-concrete screed is calculated using the formula:
AhBxS/D=K
- A is the area of the room;
- B – the amount of solution (in kilograms) that will be required per 1 m²;
- C – floor screed width in mm;
- D – weight in kg of one bag of mixture;
- K – number of bags.
For example, the estimated area is 20 m², for screed you need 2 kg of ready-made mortar per 1 m². The thickness of the tie is 10 cm, and the weight of one bag is 25 kg.
As a result, we get the following material calculation: 20 × 2 × 100/25 = 80 bags of dry mixture. Accordingly, with a smaller layer of concrete and in small room Significantly less material will be required.
Important! Expanded clay concrete screed, in comparison with cement and crushed stone screed, has higher thermal insulation qualities.

Floor screed using beacons: technology and features
Before starting work, reinforcement or masonry mesh is laid on the floor. Next, beacons are installed at a distance of one and a half meters, fixing them in level with alabaster. You can make smaller indents, but this will cause difficulties when working with the rule. The floor is marked using a level. It is better to take water or laser. First, marks are made at the required height along the perimeter of the room, and then the required distance is measured from them.
The base for the screed should first be prepared by leveling the surface, and then waterproofed. An ordinary polyethylene film is suitable for this. It is placed with an overlap of at least 10 cm if laid in strips. The allowances on the walls should be slightly higher than the height of the screed. It is necessary to take into account such points as the thickness of the film, and the overlap of the strips should reach 50 cm.
Waterproofing can be achieved using hydrosol or bitumen-polymer liquid mastic. The material is applied with a brush to the floor and the lower part of the wall just above the border of the screed. The surface is covered with mastic twice at three-hour intervals.
As part of the preparatory work, it may be necessary to install fittings. Its installation is simplified by multi-layer filling. Installation is carried out before applying the leveling layer.

Next, beacons are installed along the filling levels. They are made from any available material, for example, from straight profiles for drywall. The installation of beacons is carried out on the base in a solution. The fastest and most effective solution is gypsum. The rule is also easy to make yourself from a piece of board.
An edge damper tape is fixed along the perimeter of the walls, which compensates for temperature fluctuations. It is better to take a product with a self-adhesive side. A simple tape can be attached in any other way. Reliable fixation is not needed - the tape will only be needed during pouring.
Filling the floor with expanded clay: using expanded clay concrete
To prepare the solution, take expanded clay of the appropriate fraction. For this purpose, the following proportions are used:
- one part of cement (Mark 400);
- three parts sand;
- four parts of expanded clay.
Before preparing the solution, expanded clay is soaked in water. Dry and poorly soaked granules may simply float to the surface of the mixture. Next, fill and level the solution along the beacons.

If the floor with expanded clay is poured in multiple layers, then in order to obtain a uniform screed, the leveling layer must be poured immediately after the first layer. Thus, the process of laying an expanded clay concrete screed is identical to the process of laying a conventional screed. The differences lie only in the preparation of the mixture.
The thickness of the screed itself is of great importance. If it exceeds 6 cm, then it is poured in two layers. Moreover, the first of them is about 4 cm, the second is thinner. It is applied to the required floor level. The finishing layer solution itself is thicker; it is poured in small batches. If you plan to insulate with expanded clay under a ceramic tile floor, then this method is the most acceptable.
Note! Align big differences in the lower layer of expanded clay it is difficult, so you need to worry about a level base in advance. Even before work begins, the surface is checked with a level. If there are holes and depressions, they are leveled with concrete.

DIY dry floor screed with expanded clay
Dry screed technology is relatively simple, and therefore it is very popular. Its essence is that plastic film Expanded clay is poured in, the surface is leveled, and boards or gypsum fiber sheets are laid on top. However, the procedure itself includes a lot of nuances. To do everything correctly, you must follow the instructions and carry out the work in stages. The screeding process includes the following steps:
- Waterproofing. It is carried out by laying polyethylene film. The material is taken with a margin of 20 cm on both sides for overlap and another 10 cm on the sides. The joints are connected with construction tape.
- The damper tape is fastened around the entire perimeter.
- Installation of beacons. A construction laser level is best suited for this purpose. It is mounted in the center of the room and guided by a self-tapping screw screwed in at a distance of half a centimeter from the corner opposite the door. To do this, we set a rule and fix the place of intersection with the level. Having retreated 20 cm, screw in the second screw so that it clearly follows the sketched line. We perform such actions around the entire perimeter of the room. Parallel lines must be spaced at a distance no greater than the length of the rule.
- A cement mixture is applied to the screws, followed by a profile. The remaining solution is removed with a spatula.
- After the mixture has completely dried, part of the expanded clay is poured under the beacons. The surface is carefully leveled. Profiles are checked by rule. There should be no deflections.
- To better compact the material, add a polyurethane foam float to the backfill. After leveling the first section, you can begin laying gypsum fiber boards. It is better to place them in two layers, fastening them with glue and screws.
- Sealing seams with putty.
- Trimming the remaining film and tape.

Advantages of dry backfilling of the floor with expanded clay
The dry method of applying expanded clay screed has its advantages compared to other methods, in particular:
- the ability to obtain a perfectly flat floor base that can withstand a load of up to 500 kg per 1 m²;
- hypoallergenic insulation without harmful volatile substances in the air;
- absence of cracks, breaks and chips, which often form with an ordinary screed;
- the surface does not require prolonged drying, but is immediately ready for use;
- there is good sound insulation of the floor with expanded clay under the screed using the dry method;
- not required additional ways insulation. This floor already has maximum thermal insulation;
- dry screed is the fastest in comparison with other methods. To completely fill a room of 20 square meters, it will take about 3 hours;
- Any covering can be laid on the mounted base, from parquet to linoleum. Covering is also possible ceramic tiles provided that a thin screed is created over the base slabs.
The value of such a screed lies in the fact that it puts virtually no pressure on the floor slabs, since the expanded clay is not weighted with concrete mortar.

Features of choosing expanded clay for dry screed and craftsmen for work
As with any other type of screed, for the dry method it is better to take expanded clay of different fractions in different proportions. The main disadvantage of a dry screed is that only electric or film heated floors can be installed on it. Mount water system heating under such a screed is impossible.
Helpful advice! In rooms with a large area, it is recommended to backfill the floor by dividing the room into several individual parts, and you also need to consistently perform screeding in the frames.
You should not trust the screed to inexperienced craftsmen, because the slightest violation of technology can lead to irreversible consequences. At best, the floor will simply make sounds when walking, at worst, it will lead to subsidence and deformation of the coating. Unscrupulous workers resort to a number of tricks, for example, they use crushed expanded clay, and instead of gypsum fiber sheets they use other slabs that are unsuitable for such work.
Also, owners should be wary if there is a noticeable gap between the sheets and the wall or if the folds at the point of contact are not cut. The sheets are connected and fixed using polyurethane foam, and not using glue.

There are also cases when unprofessional use of even very high-quality materials leads to rapid deformation of the floor, and it sag under the weight of people. Such actions by amateurs discredit the dry screed method itself, making the semi-dry method or pouring the leaders. In fact, a successful outcome depends on the right approach to the job and experience in this field of construction.
How to properly screed a floor with your own hands in an apartment: typesetting technology
The backfill or stacking method is a middle option between dry technology and pouring expanded clay concrete. Based on the intended purpose, different fractions of the material and their combinations are used. To achieve the maximum thermal insulation effect, the expanded clay layer must be at least 10 cm, the granule fraction must be 20 mm. To prepare the filling, use finer-grained material with a fraction of 5-10 mm.
The stacking technology is not suitable for rooms where water ingress is possible. Therefore, it is imperative to carry out moisture-proofing measures on the first and basement floors.

The technology itself consists of filling expanded clay under a floor screed and includes the following steps:
- level marking of the floor;
- preparatory work, consisting of leveling the base base;
- fixation of beacons at the pouring level;
- pouring expanded clay and leveling it. In order to increase the thermal insulation effect, it is possible to lay an additional waterproofing layer between the expanded clay and the mortar. Regular polyethylene film will do. It will also prevent the granules from floating when poured with a liquid solution;
- installation of fittings. This stage is not at all mandatory, but desirable in rooms with a large area;
- pouring expanded clay on top with a concrete screed. To prevent the first layer from floating, the solution, which includes small expanded clay granules, must have a maximum level of density, so it must be prepared in small batches.
Helpful advice! If there are wires under the screed, they need to be wrapped in plastic wrap and secured with tape.

This “average” technology between dry and wet method laying of expanded clay makes it universal in use both as an independent screed and as part of “pies” of several layers.
Alternative methods of filling expanded clay on the floor: Knauf technology
Lately it has become especially popular the new kind dry backfill "Compevit". This material is used during the installation of dry screed using the Knauf method. Initially, the material was developed as floor insulation, but its further use showed that it is excellent for leveling surfaces.
The “Compevit” mixture is very small grains of expanded clay (up to 5 mm), which are easily distributed on any surface. The main requirements for such granules: they must be finely crushed and round. If they do not meet these requirements, then they should not be used. Otherwise, after laying the base with GVL slabs, the expanded clay chips will shrink, and the floor covering itself will be deformed.
The oval and asymmetrical shape of the granules also negatively affects the degree of shrinkage of the material.

The Knauf method using Compavit has a number of advantages, namely:
- due to their lightness, expanded clay granules do not put extra load on the floor, which is important when insulating floors in high-rise buildings;
- the low price of the material allows it to be used in large quantities and, accordingly, to be used over large areas;
- Compavit can be used for installation of heated floors, since when heated it does not lose its qualities and dimensions.
The main advantage of such a floor is its ability to withstand high loads without deformation - up to 900 kg per 1 m². Thus, an affordable price combined with high quality and ease of installation will ensure a long service life of the floor.
Floor insulation with expanded clay: reviews from users and experts
The scope of use of expanded clay is quite wide. But the main direction is its use as insulation. At the same time, most of the positive consumer reviews concern precisely such an area of application as floor screed. While people encounter certain difficulties when insulating ceilings and walls, they practically never arise when pouring floors.

A special place is given to filling attic spaces with this method, as well as the floor between joists during the construction of private houses and country houses. In addition, they point out such a positive quality of the material as its low cost. In practice, floor insulation with expanded clay is 4 times cheaper than using other materials, and the result will be no worse.
Important! Expanded clay, at a relatively low price, has a number of positive qualities that make it a popular material in construction. It is used not only as insulation, but also for leveling foundations and soundproofing walls and floors.
Expanded clay receives negative reviews mainly due to the fact that a large amount of material is required to carry out the work. To achieve the maximum insulation effect, you need to use a fairly thick expanded clay layer, which occupies a significant part of the space.
Experts advise using the material in accordance with technology in private homes, utility rooms and garages. Expanded clay is not suitable for high-rise buildings due to its heavy weight. The exception is the first and basement floors.

- Before you start screeding, it is advisable to take care of waterproofing. This layer will not be superfluous, but after pouring the floor it will no longer be possible to complete it. For waterproofing, you can use liquid mastic, dense polyethylene or waterproofing;
- an ordinary metal profile or thin slats are used as beacons;
- The finished screed made using the wet method must be given time to dry. You can use the premises after a month;
- to prevent cracks from forming during pouring, it is advisable to constantly moisten the surface with water;
- A special plasticizer prevents the appearance of cracks. It is recommended to add it to the finishing solution;
- when buying gypsum fiber board, it is better to take sheets that have a water-repellent treatment;
- the price of expanded clay does not necessarily indicate quality. You should trust products from well-known manufacturers;

- granules are very large sizes are subject to faster destruction and threaten the foundation with rapid deformation;
- To fix gypsum fiber boards, it is better to take self-tapping screws with “recessed” heads.
If you follow all the rules and technologies, it is quite possible to make a floor screed with expanded clay with your own hands. Video materials, of which there are many on the Internet, will help facilitate the process. As a result, you can not think about repairing the floors of your home for a long time, while ensuring maximum heat and sound insulation. In addition, you can easily eliminate all floor unevenness using expanded clay. The photos clearly demonstrate both the installation process and the positive result obtained.
Updated: 09/01/2019
Of course, there are other technologies, but in some cases expanded clay is recommended:
- the height difference of the base is more than 10 cm. If you place a traditional concrete screed on such a floor, its weight will create an impressive load on the load-bearing floors. Expanded clay is a lightweight filler that does not overload the structure;
- The base is reinforced concrete slabs. This cold material, which is especially noticeable on the first floor, and expanded clay insulates the floor;
- the presence of additional communications and an electric heating system below the floor level;
- limited renovation budget. Expanded clay screed is cheaper than concrete screed.
The raw material for the production of this material is a special clay, which foams under the influence of high temperatures. The result is light, round pebbles, porous inside. They are different sizes, depending on which it is customary to distinguish three main fractions: gravel, pebbles and crushed stone. From useful properties the following can be distinguished:
- environmental friendliness;
- durability;
- strength;
- thermal insulation;
- sound insulation;
- fire resistance;
- chemical inertness;
- resistance to moisture, heat, frost;
- expanded clay does not rot, mold or mildew does not grow on it;
- low price with excellent quality;
- availability.
It follows from this that the use of expanded clay can not only save the most hopeless floors with holes or a slope of more than 10 cm, but at the same time insulate and soundproof them.
Preparatory work
There are several types of screed using expanded clay, but regardless of the one you choose, you should follow some general steps.
Cleaning and preparing the base
The base must be cleaned of dust and debris, and if possible, remove the old coating, if any. If there are gaps in the floor, they need to be sealed. Wrap the wires laid along the base with polyethylene and seal with tape at the joints.
Base waterproofing
The purpose of this action is to prevent leaks and damage to the screed. Nowadays you can use bitumen for waterproofing, purchase ready-made mixtures or roll materials, which are overlapped with a large margin, approximately 15 cm, and are additionally fixed with adhesive tape.
waterproofing
It is also possible to use film with a thickness of at least 100 microns, preferably in one piece for the entire room. Film or other insulating materials are applied to the wall with a height margin of 10 centimeters, and cut off after completion of the work.
Laying damper tape
It is attached along the walls, directly onto the moisture insulation. The purpose of the tape is to compensate for possible expansion of materials due to sudden changes in temperature, and in the case of a dry screed, the damper will prevent possible squeaks and other sounds arising from the coating touching the walls.
In order for the floor to be truly level, it is necessary to determine and maintain the screed level throughout the entire work process. For this purpose, so-called beacons are used.
Using a laser level, the plane of the future floor surface is projected onto the walls of the room, and marks are made at the intersection points, which are then connected by a horizontal line. Beacons must be placed along them, taking into account the fact that for expanded clay dry screed a significant distance from the floor to the profiles should be taken.
Typically, slats or metal profiles are used as beacons. Pre-prepared wood or plywood dies are placed under them to match the level. When the rows of beacons are installed and verified, you need to fix them with a solution.
This porous aggregate differs in the size of the fractions, so it is best to mix several. Small ones will provide density, and medium ones will not allow the screed to gain weight.
It is important to know that the density of identical fractions may be different, and therefore there are 10 brands of filler. This property of the material should be taken into account when purchasing.
Denser expanded clay is heavier, but stronger. When all the preparatory work is completed, it is time to start leveling the floor. This can be done in different ways.
Expanded clay is poured onto the prepared base, leveled and compacted. It is necessary that the filler layer does not reach the top of the lighthouse by approximately 2.5 cm.
Then the evenness of the “pillow” is checked with a level and, if everything is good, the solution is carefully laid on the insulation. To avoid shifts and deformation of the base, you can put a mesh on top of the expanded clay, or fill it with cement laitance so that the granules set and the “cushion” itself does not sag over time.
Laitance is cement diluted with water to the consistency of thick cream. Expanded clay filled with such a mixture should be left for a day to harden. When the pillow is finally ready, you need to lay the solution on it using leveling movements, the layer of which will not be very thick, and therefore relatively light.
To prepare such a solution, the easiest way is to buy a ready-made mixture at a hardware store and dilute it according to the instructions. This will help avoid mistakes. If you have experience working with concrete and cement, you can prepare the solution yourself.
The floor made in this way will harden in a few days. After this time, the beacons should be removed and dents from them should be repaired, as well as possible irregularities should be sanded. The floor will gain full strength only after 4 weeks, and during this time it is covered with film to slow down the evaporation of moisture from the surface. You can do without film if you moisten the screed with water.
expanded clay
The main advantage of this alignment is the solidity of the screed. The solution will require expanded clay, sand and cement in a ratio of 3:2:1. Water will require approximately two-thirds of the total volume of remaining materials.
First, water is poured into the mixing container and expanded clay is poured in so that it has time to soak. Expanded clay is followed by sand, and only then cement. The mixture must be mixed until smooth with a construction mixer or a drill with an attachment.
The finished solution must be carefully laid out, leveling as a rule, along the beacons from the corner of the room towards the threshold. The distance of the expanded clay concrete to the top mark of the lighthouse remains about 2 cm, since a concrete screed will be laid on top of it. This can be done immediately, without waiting for the first layer to dry. The entire structure will take as long to dry as the previous one.
Expanded clay + self-leveling floors
A self-leveling floor, provided it has a suitable base, is the easiest way to get a beautiful, even and perfectly smooth surface. A liquid mixture based on various resins spreads over the surface and levels itself.
This type of floor hardens quite quickly, while being temperature resistant, chemically inert, and abrasion resistant. Expanded clay levels the floor and creates the very foundation that is necessary to obtain an even coating. It needs to be poured onto the prepared surface, compacted and leveled, focusing on the beacons. Then lay a film over the insulation and pour the solution onto it. Roll the liquid mass with a needle roller to get rid of air bubbles and let the floor dry.
This is perhaps the easiest and cheapest way to level floors using expanded clay. Compared to the previous ones, when all the work had to be done quickly, in this case you can interrupt as much as you like, make corrections, and you won’t have to wait for the screed to dry.
The floor is suitable for full use almost immediately. It is necessary to note one more advantage of the method. The finished structure does not contain cement or sand at all, and therefore has the least weight. This leveling is ideal for old houses with wooden floors, in which the weight of the screed is critical.
A layer of unfixed expanded clay makes it possible to lay telephone and electric wires, systems " warm floors"and any kind of communications. There are two more advantages to this floor leveling method: better sound insulation and heat retention, and the only negative is the moisture resistance of the coating sheets.
The execution steps are very simple. The dry expanded clay mixture is scattered on the floor, compacted and... You can not level the entire floor at once, but in fragments, since you will still have to walk on the backfill. As for thickness, it is determined specific situation. Already 3-4 centimeters of filler allows you to create a fairly dense and stable coating, but you should not make it less thick.
Sheets of flooring material are laid on the compacted cushion. It can be gypsum fiber board, OSB, fibreboard, chipboard or just plywood. The sheets are placed relative to each other according to the principle brickwork, that is, the side of each sheet is in contact with the halves of the sides of the other two.
GVL sheets
The folds of the slabs are usually glued together, and a second layer is laid on top, attached to the first with self-tapping screws. The resulting coating should not reach the wall by about a centimeter; these gaps will be hidden later by baseboards. All joints of the resulting structure are puttied, and the finishing coating is laid on top of the finished floor.
So, leveling the floor with expanded clay can rightfully be considered an economically correct choice, which has a lot of advantages. The method also has alternatives, but it does not lose popularity, as it allows you to achieve your goal without many problems. Properly carried out work allows you to get a truly smooth and durable floor that will not require repairs for a long time.
Video - Leveling the floor with expanded clay
When they begin to consider the issue of floor insulation, experts from the very beginning discourage the implementation of complex systems, since the most common ones are quite capable of coping with this task.
Therefore, you should not waste money and effort on the device complex structures, but it makes sense to learn how to make a floor screed with expanded clay with your own hands.
This material is so easy to work with that anyone can handle the screed device; no special equipment or tools are needed.
The only thing you have to pay attention to is the thickness of the layer being laid. It must be at least three centimeters. As a rule, expanded clay is used when it is necessary to level the floors in all rooms.
Such problems often have to be solved, and the material is often used to insulate floors in private houses, apartments and other premises. Its low weight makes expanded clay even more popular when constructing insulating screeds, since the entire structure does not weigh down the floor slabs, which have an individual safety margin. If you need to organize a screed with a thickness of more than 10 cm, then it should be made not just from pure mixture sand and cement, and with the addition of light filler - expanded clay. Foam chips or gypsum fiber sheets are also often used.
If they do not inspire confidence, and you decide to insulate the floor yourself, a floor screed with expanded clay is what you need. Is it difficult to do it yourself?
Screed using expanded clay
Let's look at how to screed a floor with expanded clay with your own hands. The process is not complicated, but it will require attention and effort. Expanded clay is ordinary clay balls that have been subjected to heat treatment. In other words, baked clay.

Future floor level
First, you should determine the line along which it will be necessary to level the floor. It is convenient to use a laser or As a result, horizontal lines, along which the surface will be leveled.
Elimination of defects in the subfloor
After the level of the future floor is applied to the walls, it is necessary to get rid of various defects. You should not hope that the screed itself will fill all the unevenness, recesses and chips, since the floor will have to be covered with expanded clay, and therefore there is a possibility that it will not be possible to get rid of all the flaws. Therefore, it is better not to waste time and money and seal them with a liquid solution similar to the one that will be prepared for the screed.

Installation of beacons
The next important stage of the screed installation is the installation of leveling beacons. To do this, you will have to determine where the highest point of the floor base is. The first of the beacons should be installed exactly in this place. This is the most important moment when screeding a floor with expanded clay with your own hands.
Beacons are ordinary guides made of metal, sometimes plastic. They are laid along or across the room, thus dividing it into sections. Expanded clay is poured between the beacons.
In order for all the guides to be in the same plane, wooden wedges or simply pieces of boards or plywood are placed under them. However, you can do it even simpler: dilute the plaster with water and place this dough-like mass in a heap along the intended installation location of the guide. Place the lighthouse on a slide and distribute the solution evenly using a level.
To level long beacons, it is convenient to use a rule or level of two meters in length. When determining the distance between the guides, they proceed precisely from the size of the rule: the beacons are positioned so that it is convenient to place the tool on two adjacent guides or on three. If, for example, the width of the room is four meters, then the beacons should be placed at a distance of no more than 70 cm, because then the level will cover not two, but three guides, which will have a positive effect on the speed and quality of the work performed.
Filling the base with expanded clay
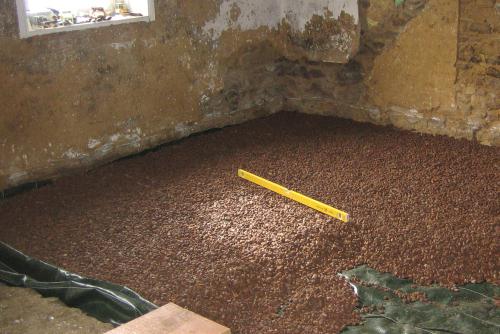
After the beacons are set and leveled, it is necessary to fill the floor with expanded clay. We can consider it almost completed. Expanded clay is poured strictly in marked areas that limit the lighthouses. Backfilling is considered the simplest step in constructing a screed. The main thing is to monitor the height of the expanded clay layer. It should be evenly distributed so that there is still enough space for the screed itself, that is, for a mixture of cement and sand. In other words, the expanded clay layer should be such that there is still 25-20 mm left to the top level of the beacons. After the expanded clay is evenly poured between the beacons, we prepare “milk” from cement. This is what we use to fill our insulation.
The role of laitance
This solution is a material designed to hold the insulation together. As a result, it will be possible to walk on the expanded clay layer without fear. In addition, the solution covers the granules with a special film, which will reliably protect them from moisture, otherwise moisture from the liquid will be absorbed into the expanded clay. This is also necessary because if the screed loses moisture, the quality of the cement mortar will inevitably decrease. Subsequently, cracks, chips and other defects will appear. In other words, a do-it-yourself floor screed with expanded clay made in this way will lose strength.
Proportions for preparing cement laitance
It should be understood that this is the same cement-sand mortar, only in liquid form. You can't do without experimentation here. You need to pour three times more water into the mixture of cement and sand than for a regular screed. Then fill a separate small area with expanded clay and look at the behavior of the mixture. If it spills through the expanded clay and not a trace remains on the granules, then too much water was added. If there is a residual layer of milk on top of the insulation, we can conclude that there is not enough water. A compromise must be found.
After the entire surface has been filled with cement laitance, it must be allowed to dry completely. This takes at least a day. Only then can you begin the next stage of work, which will be actually screeding the floor with expanded clay with your own hands.
Preparation of mortar for screed

To prepare the mortar for the screed, use cement of a grade not lower than M400 and construction sand, which are mixed in a ratio of 1:3, respectively. In this case, it is better to use a special shovel rather than a regular one.

Remember that usually add two liters of water per ten kilograms of mixture. It is much more convenient to pour the solution into water, and not vice versa, although the instructions supplied with the cement often indicate the “wrong” method.
Using a mixer, mix the mixture thoroughly for 5-10 minutes. Then leave for 5 minutes to settle, and after five minutes mix again for about 2-3 minutes. Now the solution can be used.
Pouring mortar onto the floor

When pouring the solution onto the floor, it is leveled with a trowel, using, if necessary, a rule to distribute the composition evenly over the entire floor. The rule is placed on the beacons and the cement mass is stretched over the entire area, trying to ensure that the surface assumes a strictly horizontal position and there are no bumps or depressions. This is exactly how to screed a floor with expanded clay with your own hands.
How to quickly prepare a solution
There is an easier way to lay expanded clay insulation under the screed. Preparing the base is done in exactly the same way as described above. Only the solution is prepared differently. Water is poured into the container and expanded clay is added. After this, they pour in, which is thoroughly and quickly mixed and placed between the beacons.
In this way, you can screed the floor with your own hands even faster: expanded clay is a material that will help speed up the process. However, when choosing this option, it is extremely difficult to guess the proportions of its components. In this case, it is recommended to use ready-made mixtures, which are sold in construction stores and markets. They are poured into a container where water has already been poured and expanded clay has been added. In another way, this method is also called “wet”.
There is a “dry” option, and this is also a floor screed with expanded clay. The peculiarities of the technology are that much less water is added. If you take such a solution in your palm and squeeze it into a fist, then no liquid should drip from it. But the disintegration of the mixture is also unacceptable. After such a solution is distributed between the beacons, it must be compacted. It dries quickly enough, and this allows you to begin the next stages of construction work without wasting time on drying.
This is how you do a standard floor screed with expanded clay with your own hands. The instructions may vary depending on specific conditions, but the principle of its creation is the same for most rooms in which there is a need to level the floors.
Saving money is the main trump card in our difficult times. Don’t be afraid that you won’t be able to screed a floor with expanded clay: installing a screed yourself is a simple process, the most important thing is to follow the technology and not forget about some important points. Then it will serve you faithfully for a long time, and you will not have to constantly repair the floors.
Installation of beacons photo
Floor screed with expanded clay is one of the most simple options leveling the floor. In any case, this task is not easy, even when using ready-made mixtures. The choice of type depends on the surface of the base and the characteristics of the room. When performing it, it is imperative to adhere to precise technologies so that after some time the floor does not become unusable.
Expanded clay is an environmentally friendly material, very light and practical, as well as very durable, with a high level of heat and sound insulation. It is obtained by firing clay at high temperatures.
It is especially often used in cases where it is necessary to significantly raise the floor level. A screed with expanded clay is stronger than a screed made of cement and sand, and it does not lose its ability to pass air and steam.
Expanded clay floor screed is very resistant to frost and extreme heat, so it is used in rooms with any conditions. It does not burn, does not rot, does not rust, and the lightness of expanded clay greatly simplifies the task of delivering it to an apartment or house. With its help, it is easy to even out even very sharp differences in the base, with which simple mixtures will not help or will simply be unprofitable.
Its implementation is quite accessible at home without vocational training. Still, there is something you need to know about it. For example, you can watch video materials about laying expanded clay screed.
In what cases is a screed with expanded clay necessary?
The use of expanded clay screed for the base is simply necessary in many cases. There are times when other options are not suitable.

For example, when the space being filled is higher than 10-15 centimeters. In this case, you cannot use only cement mortar or special ready-made mixtures for the entire depth of the screed. Any floor slabs have a certain safety margin that is not designed for such additional loads.
When it is necessary to significantly reduce the weight of a concrete screed. For example, if the floors are wooden. In this case, not only screed with expanded clay can be used, but also with foam and other materials that lighten the weight of structures.
In cases where it is necessary to save on cement or other heavy materials.
Let's look at how to fill a floor screed using beacons. The first stage is marking the floor and installing beacons for the floor screed. It all starts with marking the base of the floor; if expanded clay screed is being carried out simultaneously in several adjacent rooms, it is better to immediately set the beacons to the same level in all rooms.
To determine the top point of the existing base and level the height of the beacons, it is better to use a laser level. It is most convenient to work with him. If this tool is not available, you can use a regular water level, but you will also need other devices in the form of ropes, etc.
They begin to place beacons from the highest point of the surface. Minimum height the screeds in these places will be 6 millimeters. At all other points the thickness will be greater.
Beacons are fixed with cement mortar or alabaster (plaster), which must be worked with very quickly.

Expanded clay is leveled before pouring concrete
First way
We'll tell you about expanded clay. Choose which one is most convenient for you. So, method one.
After preparing the coating and installing the beacons, dry fine-grained expanded clay is scattered over the entire base. It is leveled at a distance of about 20 - 25 millimeters from the surface of the screed. In this case, in different places you will get an unequal layer of expanded clay, but its surface should be smooth. Before screeding the floor, determine the evenness of the expanded clay by level.
Next, a layer of expanded clay is poured with cement “milk” so that it sets well and can be walked on. A film is formed on the surface, which is necessary to prevent moisture from leaving and the expanded clay “cushion” from sagging. Leave the surface to dry for a day.
How to make cement laitance? Typically, the proportions of water used are twice as large as when making screed mortar. But you may have to add water or cement based on the result. Often, for floor screed with expanded clay, the proportions are adjusted according to the place of application.
Let's proceed directly to the screed. Now you will need much less cement or other mixture for pouring. And the layer of screed will be small, therefore not too heavy.
Mix the solution in small quantities, apply it to the prepared expanded clay base and level it.
After a couple of days, you can pull out the beacons and fill the remaining grooves with cement.
The second method of screeding with expanded clay
We will tell you about installing a screed with expanded clay using the second method. It is also done in two layers. But the work goes a little faster.
For the first layer, you need to mix expanded clay with mortar. To do this, expanded clay is poured into a prepared container and filled with water, which will be enough to keep all the expanded clay wet. Mix with a mixer. Then cement with sand or a ready-made mixture from bags is added. Mix again.
It is difficult to say exactly the proportions of the solution for floor screed: all expanded clay should become gray and wet. The result is a homogeneous and thick mixture without lumps. It shouldn't be too dry. We level the finished solution with expanded clay to a level of 20-25 millimeters to the floor level. Before screeding the floor using this method, you do not have to wait for the first layer to dry.

The peculiarity of this method is that immediately after pouring the first layer (a small strip of about 60-70 centimeters), the top layer can be laid on top. This is much more convenient: there is no need to wait for drying or walk on a liquid base.
When pouring the finishing layer, do not reach a few centimeters to the edge of the bottom one. Then we continue in the same order: a layer of lower solution, a layer of upper solution, etc.
The finishing layer is leveled very carefully. You may have to return to some places several times. It is important that no bubbles, holes, puddles, bumps, etc. remain.
- if wires pass through, wrap them with polyethylene and secure with tape;
- Before screeding, it may be necessary to waterproof the base. Use liquid mastic, thick plastic film or waterproofing;
- It is convenient to use metal profiles or slats as beacons;
- the finished screed should be left to dry for a month;
- regularly moisten the surface with water to prevent cracks from forming;
- You can add a plasticizer to the finishing solution, which prevents the formation of cracks in concrete;
Look at this page: floor screed with expanded clay: video - instructions on the order of performing all the work


