Venetian plaster for interior wall decoration can be a wonderful decoration for any interior. Walls or surface areas with such a coating look great, especially in classic interiors. You don't even need a lot of money for this, because... The main thing is to properly prepare the base, use the right tools and follow the technology exactly.
Composition and history of appearance
How did the Venetian one appear? decorative plaster?
Start of using coatings with mixtures based on natural binding materials lost in millennia. Theophrastus, who lived in the 2nd-4th centuries. BC. describes the mineral gypsos, remarkable for its stickiness and warmth released during mixing. It was crushed and moistened, and then stones were connected with it. The word "gypsos" was used for gypsum and lime. In the 1st century BC. Vitruvius describes the manufacture of a six-layer finishing coating that strengthens the wall - marbled plaster, which is as durable as natural material. The ancient technique differed from the techniques for creating stucco (stucco - the highest grade of plaster) of the Venetian of our time.
In archaic Greece VII-VI centuries. BC. marble stucco or stucco/stucco was used to decorate temple walls. The finish imitated white marble and consisted of gypsum, crushed marble and lime. The Greeks spread this technique during the Hellenization era. Stuccos with a shiny, glossy white surface appeared among the Etruscans on the Italian Peninsula before the formation of the Roman Empire. The Venetians of ancient Rome had a thickness of 1.6 mm inside buildings, and up to 76 mm outside. Their main advantage was specularity, high strength, and resistance to weather changes. Often their surface was decorated with fresco paintings. Later, the baton was taken up by the Venetians, who were the fashion trendsetters of their time.
Since then, the composition of the Venetian has changed little; the components of the solution are:
- marble dust,
- fine-grained stone chips,
- lime dough,
- water.
In addition to classical components, the composition may include natural or artificial dyes, marble chips can be replaced with chips of other types, and the solution can be mixed with latex emulsion. There is also one consisting exclusively of calibrated marble.
😀 They say that such coatings were invented by “armless” plasterers to hide the shortcomings of their work.
Venetian plaster decorating a wall always looks luxurious, a little magical. Therefore, from century to century it decorates the homes of wealthy people. Venetian plaster in the interior is always a unique design for any room, because it is unique. Various ones give designers a free hand. Nowadays it can be seen in the apartments of people of all incomes, because the composition can be prepared with your own hands, and knowing what it consists of, how to apply it correctly, and having practiced, you can make this coating yourself, improving the wall.

Advantages and disadvantages
Let's look at the main pros and cons. The initial advantages are high strength, longevity and beauty.
In addition to them, the decorative Venetian has the following advantages:
- unique decorative effect: the surface is given the appearance of natural polished marble or other semi-precious stones, valuable mahogany, metals, silk (this material best imitates),
- environmental friendliness,
- possibility of application on various substrates (the main thing is that they are leveled),
- easy to restore,
- resistance to various influences (temperature changes, high humidity, which can be withstood by the stucco allow it to be used for facades),
- crack resistance,
- fire safety,
- quick drying,
- provides a healthy microclimate (the walls under the coating breathe),
- If desired, you can easily repaint it in a different color.
The multi-layering and structure of the coating when the light falls at an angle creates a fascinating effect of internal glow, natural gems. Glossy Venetian marbled plaster does not tire the eyes, but serves as a rest for them.
The disadvantages are:
- high cost of work and finished compositions,
- labor intensity (for careful, painstaking work physical strength required)
- the need to master the application technique,
- emphasizes unevenness and other defects in the base.
Preparing the wall plane
Finishing does not require haste, but diligence - careful work with each layer, and especially careful.

The base should be:
- impeccably leveled - align according to the beacons and do not forget about putty,
- reinforced with reinforcing mesh if necessary (if the base is weak),
- degreased - for this you can use a soap solution,
- free from stains
- primed (often an acrylic primer is used for work),
- processed with sandpaper and then removed the resulting dust - remove the dust using a clean broom or vacuum cleaner,
- dried (at least 6 hours).
When installing the mesh, do not forget that the glue is applied before and after installing the mesh, and not just on top of it.
It is advisable to prime the wall twice before finishing to ensure good adhesion of the finish to the wall.
The tool and its features
Metal tools - trowels and spatulas, must be made of stainless steel and have rounded edges, and the working surfaces must be polished. To do this, the corners on new spatulas are cut with metal scissors, the edges are processed with a needle file and fine sandpaper, or special ones are purchased. tool.

The trowel and spatula for work (in any of the techniques) should not have any nicks. The spatula must be sharpened. When working, the surface of the spatula/trowel is regularly cleaned with a damp cloth so that when the mixture dries out, the remaining mixture does not interfere with the quality application of the solution to the wall.
Buy quality tools from reputable manufacturers. This way you will save yourself from a lot of troubles
The necessary tools for working in the Venetian technique:
- narrow (60 mm), wide (200 mm) spatulas,
- 2 Venetian trowels,
- construction mixer,
- containers,
- roller,
- masking tape,
- skins No. 220, No. 120,
- ruler,
- flute brushes, maklovitsa,
- clean rags
- sponge,
- thin brush to apply cracks.

Secrets of application technology
Applying Venetian plaster with your own hands is both artisanal and creative work. Each stage of work is special, as the technique of applying Venetian plaster dictates to us. There are several in various ways: achieving the effect of marble, cork, textured surface, classic Venetian, and others. In most techniques, all layers except the base layer are, in their own way, finishing layers. Read more about how to apply Venetian plaster correctly.
A very detailed and understandable video on marble imitation
Coloring the mixture
The mixtures themselves for the Venetian have White color. Therefore, to obtain the desired tone or shade, the desired color (natural or synthetic) is added to them before application to the wall. It is necessary to take into account that the solution, as it dries, brightens: without wax, by two tones, by one tone. It is best to purchase a color before work desired color and a ready-made mixture from one manufacturer.
In order not to make a mistake with the color scheme, professionals use fans of colors, selecting the desired shade when daylight at the site of future work.
The colors for this type of finish can be very varied. It depends on the design. Most often, natural stones are imitated. In this case, the main colors are gray, brown, yellow or emerald. Wood or silk paint has its own palette. It must be remembered that natural colors are always muted. Therefore, to bring the color of the mixture closer to natural, the brightness of the color is muted by adding a drop of black tint. The color is checked by applying a smear of paste to a sheet of white paper.
Applying the base layer
The base layer is applied the same way for all Venetian techniques. The mixture is applied to the edge of the trowel with a spatula. The trowel is pressed against the wall under small angle(the edge of the trowel is raised to the thickness of a finger). The mixture is transferred to the wall with arcuate movements of the trowel in thin strokes, overlapping adjacent strokes by 5-10 mm.
A single rule for all layers: the mixture is applied in the direction from dry to wet. This way, no traces of the initial contact of the trowel with the wall are left on the surface.
When applying a coating with the effect of natural marble, it is better to treat the walls diagonally, starting from one top corner walls, ending at the opposite bottom corner. The resulting work platforms are in the form of wide diagonal stripes with winding edges. If you make some thickenings on the edges of the grips at the junction, after finishing they create the desired effect of the inclined folding of natural marble.
They work by filling sections of walls with an area of about 1 m2 with solution. In the corners, the direction of movement of the trowel is from their top to the center. On basic stage the solution forms the future pattern. Therefore, strokes of the composition are applied more or less chaotically. You can use the “put and remove” technique, when the mixture is applied with the first movement, and its excess is removed with the second (in the transverse direction).
The plastered wall is dried for about 6-8 hours (or left overnight).
Subsequent layers
The technique of applying them may vary, depending on the desired finishing effect.
Classic Venetian plaster is made in three layers using a mixture of one color (different shades are possible). The finishing effect is created due to the layer-by-layer transmission of the texture. The shorter and more chaotic the strokes with a spatula, the richer the finishing pattern.
Similarly, a coating is made from mixtures of different colors. Moreover, colors can be applied one for each layer, or two or three in each.
A different technique for applying Venetian plaster is used for craquelure. The peculiarity of the base layer is that it is made thicker (up to 2 mm). Where there are cracks, it is dried with a hairdryer. The depth and width of the cracks depends on the temperature, coating thickness and drying time. The second coating is applied with a mixture of a different color (needed to fill cracks), the third - as in the classical technology.
Venetian wood plaster combines two techniques: craquelure and color mixing. Ordinary boards are imitated by another.
Finish « Cork tree» step by step:
- solutions of several colors are placed on the surface of the trowel with a small spatula,
- lightly mix them with a spatula right there on the trowel,
- transferred in a thick layer from the trowel to the wall, creating a spotted pattern,
- immediately dry with a hairdryer until cracks form,
- a day later, the resulting texture is covered with a second layer of Venetian of the desired color for contrast, pearlescent “metallic” or other water-dispersed compositions,
- processed with a grinding machine, changing the wheels to increasingly fine-grained ones.
Finishing layer and rendering of marble veins
Imitation marble or Venetian malachite is performed in the following way. Using a small spatula, apply small portions of the solution next to each other on the edge of the trowel. different colors. When they are transferred to the wall with smooth, sinuous long strokes, beautiful stains are obtained, similar to the shimmering colors of natural marble or malachite. Decorative plaster of young marble with veins is also obtained. Between two masses of solution of different colors close to natural, a drop of black is placed on a trowel. The trowel is moved along the surface of the wall slowly, with a slight rocking.

Applying the pattern of cracks is done with a thin brush using black water-soluble coloring. Lines are drawn randomly in the desired directions. While the paint has not yet dried, use a small piece of a clean, damp sponge to carefully shade the crack line on one of its sides, leaving a narrow black stripe in places. If you don’t like the line, you can correct it by “removing” it with a damp, clean sponge.
Polishing and ironing
Each layer (except the first) is ironed with a spatula, this gives it a mirror shine. Having processed approximately 1-1.5 m2 of the wall surface, they go back and use a trowel or spatula, almost flat, pressing with force, to drag it along the wall several times. With each movement of the tool, a glass sheen appears and intensifies on the wall surface. The trowel/trowel should be wiped with a damp cloth. Masters advise ironing each layer. The marbled Venetian only benefits from this.
The final layer of finishing is polished with horizontal and vertical movements. Polishing the top layer is done with a suede cloth in a circular motion and resembles rubbing.
Advice for beginners! Before realizing your desires on the walls of the room, practice on pieces of drywall, fiberboard or plywood.

Waxing
To protect the surface of the coating, it is coated with wax. Wax protects the surface of the coating from moisture and dust. Venetian waxing is done using a spatula or sponge. Cover the wall evenly, without thickening the wax layer, so that the color of the surface does not fade. After application, the surface of the wall is rubbed until shiny.
Can this finish be washed? Can. It is wiped with a damp cloth. If the walls are heavily soiled, wash them with mild soap solutions. Do not use solvents or abrasives.
Consumption and restoration
The manufacturer lists the consumption per 1 m2 in the catalog or on the packaging. You can use a calculator to calculate required quantity composition. The consumption of Venetian plaster depends on the type of application technology used, the level of skill, and the composition of the solution.
The consumption per m2 layer by layer looks like this:
1st – 500-600g/m2 (maximum quantity),
2nd – 220-250 g/m2,
3rd – 80-100 g/m2 (minimum quantity).
Stucco Veneziano is a repairable coating. There is no need to redo the entire wall, and minor defects or minor damage can be restored. In case of chips, scratches, large areas of contamination, or peeling, Venetian plaster is repaired. In this case, it is not necessary to remove the entire coating; it is enough to restore the suitability of the desired area.
Restoration of marble finish step by step:
- When there are cracks, tap the area to determine whether there is peeling of the coating from the base. Anything that comes off the wall is removed.
- The vacated area is cleaned with a brush to remove any remnants of the previous finishing composition and dust.
- The base is primed with a brush the right primer or a composition of PVA and water 1:5.
- Plaster mortar or gypsum putty(if the base is made of plasterboard) is applied to the base of the area being repaired. The surface of the putty/mortar is rubbed to the desired smoothness.
- Select a decorative solution of the same brand or use a white acrylic composition. Select a color and paint the composition to match the color of the wall finish.
- Apply the solution with a soft spatula (if the repair area is large, try to repeat the pattern of strokes).
- Remove excess solution that has fallen on undamaged surfaces with a damp cloth.
- After drying, apply wax or glaze. Polished to a shine.
Venetian made from putty – is it possible?
Ready-made mixtures are expensive. To reduce the cost of work, craftsmen came up with a Venetian ordinary putty. The main thing for an analogue is the presence of a smooth texture and the desired consistency. How to make Venetian plaster with your own hands? The recipe is simple - mix regular gypsum putty with acrylic varnish. To make Venezian stucco from putty with your own hands, take:
- acrylic varnish for interior work with a water base,
- gypsum or polymer dry mixture with microcalcite or marble flour as a filler (putty with white cement can be used),
- color.
Varnish is poured into a clean vessel and water is added - 10-15% of its volume. After stirring, add 2.5 kg of dry putty. Everything is mixed with a mixer, tinted, mixed again. Venetian putty plaster is painted with colors for water-dispersed paints. Ultimately Venetian putty its qualities can be no worse than store-bought, and can be used not only in the apartment, but also for outdoor work. You can slow down the hardening time by adding a plasticizer - diluted PVA glue in an amount of 1% of the volume of the mixture.
And yet, the purchased mixture will look much better, because... It will not be possible to completely replicate the plant technology at home.
You can do without putty. For example, a simple composition of Venetian in the following proportions: 1 part white cement, 1.5 parts lime, 2 parts marble flour, 10 parts marble sand.
Stucco Veneziano, which began as an imitation of natural marble, became an object of imitation itself. They produce wallpaper on various bases that imitate your favorite finish. Wallpaper that can be painted with Venetian wallpaper is cheaper and has its pros and cons. The work of wallpapering and the technique of such decoration is simpler and easier. However, they cannot fully replace the Venetian, and therefore it will appear again and again among the leaders of interior tops.
Venetian plaster is developing and enriching, the application technology of which, with the advent of new finishing compositions, is acquiring more and more new ways of development. Finishing compositions and new techniques are being invented. A new finishing material has appeared on the market - super glossy decorative Pietra Lucida. The manufacturers themselves refer to this killer of the classic Italian technique of imitation marble not as a Venetian, but as a polishing compound. The work is more drawing, the technique of imitation is also simple. Using colors of natural tones, a mirror-smooth texture is obtained, similar to polished natural stone.
Today modern Construction Materials help you get a luxurious interior space. A variety of color palettes allows you to choose a shade suitable for any room. Each of them has characteristic differences and method of application. Detailed instructions for use, greatly facilitate the task.
In our material, we will talk about decorative Venetian plaster. Here are the tips of experienced professionals who know all the intricacies of this finishing material.

Preparatory work
IN construction stores A detailed catalog of Venetian plaster is presented. This manual includes several types of textures that add a unique twist to the interior space.

Before you buy this finishing material, it is necessary to carefully prepare the room. First of all, it is recommended to clean the wall surfaces from the old coating. These are mainly wallpaper, paint and plaster components.


All irregularities are carefully covered with a special putty composition. Some mixtures contain antifungal substances. They prevent the growth of pathogenic mold in rooms with high humidity and poor ventilation.

The dry solution is diluted in an even proportion of water until a thick consistency is obtained. Next, it is applied to the defective areas of the wall using a long spatula.
After each layer of putty mortar, the wall is left until completely dry. This will prevent new chips from appearing during the application of Venetian plaster.

When all the irregularities are eliminated, they proceed to applying a special impregnation. It promotes good fixation of materials to each other. The main advantage of this finishing material is its ability to mask small wall defects.

The only requirement preparatory work, is the absence of any foreign particles on the prepared wall surface. In the future, this can provoke the appearance of cracks and splinters, which significantly affects the appearance of the finish.

When all layers of the primer composition are completely dry, you can proceed to the process of applying Venetian plaster with your own hands.

Layering
Modern types of such compositions contain: natural marble, fine gypsum, various pigments. The colors of Venetian plaster can be mixed with each other and the most suitable one can be selected based on the basic tone of the interior space. Mother-of-pearl components in the mixtures add solemnity to the surrounding environment. They make the room look brighter and more spacious.

The workflow for applying Venetian marbled plaster involves several layers. First of all, make a leveling layer. Then, gradually, the surface of the wall begins to be decorated with decorative mortar.

There are types that require 6 times application. Each subsequent layer must dry well. If you neglect this requirement, then the risk of cracks appearing on the wall surface increases.

The drawing for this design is selected individually. Some consumers prefer to use a special brush to correct application. Experienced professionals recommend creating textured lines on the surface of the decorative mortar.


Venetian plaster for walls Stucco Veneziano was created by Decorazza specialists for connoisseurs of luxurious interiors. Venetian plaster applied to the surface of walls, ceilings or columns takes us into the atmosphere of the Renaissance. In the manufacturer's catalog, the material is presented in more than 80 different shades. Including classic white, gray and black colors.
Features of Venetian plaster Decorazza
Stucco Veneziano is also used to create a variety of decorative effects: - polished stone (onyx, marble, malachite);
- crinkled fabric;
- art deco and others
Due to the difficulty of application to create a truly exquisite decor It is recommended to hire professionals and quality tools. And to protect the created effect, use Cera di Veneziano protective wax. Stucco Veneziano plaster from Decorazza is environmentally friendly and durable if the application technology is followed.
How much does Venetian plaster cost?
The calculator on our website will help you calculate the cost square meter Venetian plaster and the price per m2 of other materials needed to create a specific effect. You can buy Venetian plaster on our website and pick up the products yourself in one of our stores in Moscow or order delivery. You can find out how much delivery to your address costs from the manager.
Venetian plaster has an unsurpassedly beautiful appearance, due to which the interior of an apartment or country house, is filled with special sophistication and solemnity. This decorative coating has an unusual iridescence and is distinguished not only by its aesthetics, but also by its strength and stability.
What is Venetian plaster?
Venetian plaster is seamless interior decoration, externally resembling marble. It can have a glossy or semi-glossy texture, a smooth or embossed surface, or be an analogue of various stones, such as amber or malachite.
The photo shows what Venetian decorative plaster looks like on a wall in an interior.
Pros and cons of finishing
Advantages and disadvantages of this decorative finishing.
Types of Venetian
There are several varieties of Venetian, differing in appearance, composition and method of application.
Craquelure
It has an antique effect and features intricate patterns with cracks. This decorative technique is achieved through a special craquelure varnish, which, when dried, tightens the plaster layer and forms fractures.

Carrara marble
To achieve an imitation of Carrara marble, several layers of plaster are applied, differing from each other by half a tone. The result is a rather expensive finish that plays with a variety of tints.

The photo shows walls decorated with Venetian plaster with the effect of Carrara marble.
Veneto
It has a semi-matte surface with the effect of polished marble. This design option will undoubtedly give the room nobility and aristocracy.

Marseille wax
This unusual visual effect is obtained due to the addition of wax, which not only transforms the appearance of the entire coating and adds additional chic to it, but also improves it specifications, for example, this finish can be used in rooms with high humidity levels.

Trevignano
Thanks to layers of different colors, this surface has iridescence and a special play of light. Using a polymer mixture and a certain application technique, an imitation resembling the travertine rock is obtained.

The photo shows Venetian Trevignano plaster on the wall in the dining room.
Marbello
This texture looks very elegant and expensive; in appearance it looks like velvet with streaks of gloss. Marbello can also change shade depending on the lighting angle.

Encausto
Dark matte surface that resembles granite. Using a finishing wax coating can further enhance this effect.

Types of decorative coatings
The main types of Venetian coating.
Natural (classic)
This variety is applied using the traditional multi-layer method. Classic Venetian plaster contains marble chips, binders and various additives that provide good strength properties.


The photo shows a modern living room with classic plaster gray on the wall.
Imitation or what to replace
Plaster imitation options.
Wallpaper
They perfectly imitate the Venetian and allow you to extra costs and complex application, get an equally attractive result.

Tension fabrics (for ceilings)
Tension products with such imitation are particularly beautiful and sophisticated, but they are a rather unusual and not yet very common interior solution.


Panels
Lightweight panels are easy to install, perfectly hide surface unevenness and are in no way inferior to the original in appearance.

On the picture Wall panels with imitation of a plastered surface.
Tile
It combines well with a variety of materials and is resistant to mechanical stress and temperature changes. The tiles perfectly imitate stones, such as pink or amber onyx, gray granite or deep green malachite.

Places of application of Venetian plaster
Venetian finishing has an unlimited number of uses; it looks equally good on walls, ceilings or in the design of other interior elements, such as a fireplace, columns or various niches.
- On the wall. A more preferable type of decoration, which is absolutely safe for health. Thanks to the huge selection decorative design, you can choose the most suitable option for any style direction.
- On the ceiling. With the help of a Venetian, you can give the ceiling an unusual texture or relief that cannot be achieved using other materials.

The photo shows a bathroom with brightly decorated walls in the form of Venetian decorative plaster.


Photo of plaster in the interior of rooms
Photos using Venetian in various interiors.
Bedroom
Venetian decorative plaster is environmentally friendly and non-toxic and therefore is an almost universal option for the bedroom. Thanks to the wide color palette, this design will give the room airiness, individuality and chic.


Children's room
A safe and harmless Venetian will help you decorate the nursery, both in bright and rich colors, and in calm and delicate colors. The plaster mixture is considered a self-sufficient finishing element, which significantly transforms the room and makes it much more impressive.


Living room or hall
With such a unique wall decoration, which has a special structural character, you can get a variety of effects on the ceiling or walls. Suitable for living room classic plaster, silk, velvet, concrete or travertine surface.


In the kitchen
A plaster mixture with a special finishing coating allows you to create a luxurious design even for the kitchen or dining room. This coating is very easy to care for and is not susceptible to fungus and mold.


Hallway and corridor
The Venetian will be an excellent decoration for the corridor, and thanks to its expressive tints, highlights or matte touches it will give it a certain charm.


Bathroom
Here, the most even and smooth textures that will not accumulate dirt and dust will be more appropriate. A protective varnish layer, iron or wax enamel, will help reduce maintenance to a minimum.


Balcony
Such a durable and practical design will give the balcony space incredible expressiveness and volume. Various options colors and natural patterns will create an unusual play of light in this room.

Toilet
Venetian not only adds artistry and sophistication to the bathroom, but also perfectly withstands temperature changes, humidity and retains its decorative qualities for a long time.


Design options in various styles
Thanks to the huge assortment and many options for unusual and original design, this finish can be used in any style direction.
- Classic.
- Art Deco.
- Loft.
- High tech.

The photo shows dark Venetian decorative plaster on the wall in a high-tech kitchen.


Venetian plaster has a visually attractive appearance and easily allows you to decorate a wide variety of interiors, giving them an even more beautiful, harmonious and complete look. For example, for classic style this finish can be complemented with baguettes, moldings or stucco.

On the picture classic bedroom and walls decorated with glossy Venetian coating.
Examples of designs and drawings
Photo examples of the most interesting drawings and design.
Gloss
A fairly common decor option. Glossy surface created using a final layer of wax or polishing. This texture is very pleasant to the touch and has an incredibly amazing shine.


Nacre
By adding mother-of-pearl to the plaster mixture, an iridescent effect is created with a faint shimmer and a slight glow of pearls. This textured material allows you to create a truly exclusive and original interior.


Colored (two-color or more)
Various combinations of shades or color transitions in the form of a gradient will be perfect for decorating any style trends and will become a bright and expressive touch of the entire room.


Under gold
Using this exquisite golden decoration, it is possible to fill the atmosphere with luxury, wealth and grandeur without crossing aesthetic boundaries.


Under concrete
It has an unusual appearance and has high performance qualities. This unique slightly rough texture, which does not have a pronounced relief, is obtained by adding small pebbles and sand.


Silk
Wet silk has a rich texture with a unique signature. This decoration creates incomparably beautiful visual effects that turn the room into real palace apartments. The silky texture is obtained with the help of fibers and shiny elements.


Sand
Such multifaceted decor can have a different appearance, for example, create imitation of river sand, sandy wind or dunes.

World map
The scattered outlines of continents and islands made on the surface look exclusive and bring the spirit of travel to the environment.

What color is the Venetian?
The most popular colors.
White
Allows you to enhance, highlight and highlight other shades and decorative items in the interior. Using white, white-gray or color Ivory, you can form a perfect and fresh design.
Creates rich, bold and contrasting accents in the interior. A room decorated in black will look modern and noble, and will acquire a more expressive and clear appearance.


Green
Evokes associations with warmth, summer and fresh greenery. This color creates a comfortable environment and makes it interesting, unusual and very colorful.


Turquoise
It has special brightness and saturation. Turquoise color radically transforms the room and undoubtedly becomes its main accent.


Beige
Classic light beige shades in the interior they look restrained, calm and elegant. Thanks to their neutrality, it is possible to create an unobtrusive design and visually expand the space.

Blue
Incredibly delicate and sophisticated blue color creates a soulful and soft atmosphere.

The photo shows a children's room and walls with mother-of-pearl Venetian coating in blue.
Silver
Fills the room with mystery and lunar twinkle. Silver shades, thanks to alluring tints, create bold, shiny accents in the room.

Photo gallery
The Venetian makes the interior truly refined and unique. This coating can give any surface an elegant and respectable look.
Despite its antiquity, finishing residential and public premises with plaster is still very popular. This is explained by both the practical advantages of such wall design and the unusually attractive appearance. Do you want to make your home more beautiful without turning to third-party craftsmen? Then DIY Venetian plaster is one of the most preferable options for you.

Venetian plaster itself has been around for a couple of thousand years and predates its current name. Even in ancient Rome, builders noticed that quarry waste in the form of dust and small fragments can be used to prepare a finishing mixture, which, with a certain application technique, is in no way inferior in appearance to normal marble.
Subsequently, the recipe for such plaster became very popular in Venice during the Renaissance, and from there it bears its current name, which in the original sounds like stucco veneziano. Now let's figure out what kind of finishing material this is and what it consists of.

The main component of Venetian plaster is very fine stone chips. Moreover, it can be not only marble, but also onyx, malachite, granite, quartz and other minerals. These stone chips are bonded together using slaked lime. However, lime in Lately began to be replaced with a synthetic component - acrylic. Such Venetian plaster is in no way inferior in appearance to the “classic” composition, but at the same time it is much more convenient to work with. The mixture is complemented by various dyes, also called tints. They give Venetian plaster a certain shade required by the owner of the room being finished.
Important! If you wish and have time, you can not only apply Venetian plaster, but also prepare it yourself. To do this, you will need stone chips, which can be obtained from a workshop that works with marble and granite. Slaked lime can be found in a construction supermarket, and colors can be found in stores selling paints and plasters. But remember that factory formulations already have a mature recipe and certain properties.

Venetian plaster - pros and cons
It is also worth considering the advantages and disadvantages of Venetian plaster as a material for finishing premises. The advantages include the following.
- Texture that imitates many types natural stone(depends on the technique used by the master plasterer).

- The effect of “internal glow”, due to the high reflectivity of light from the material and the use of a wax coating.
- Long service life of at least 25 years (with the right technology applying plaster).
- Absence of seams and joints on the finishing of walls and other surfaces.
- Long-lasting color retention due to wax coating.
- Resistance to water - Venetian plaster can be used without fear in bathrooms or bathhouses.

As for the disadvantages of Venetian plaster, these include the high cost of the material, the complexity of finishing and high requirements for the base coat - it must be perfectly smooth and well puttied, without unevenness or defects. Without the last factor, you may encounter a problem when all the imperfections of the wall will be visible after finishing is completed.
A wall finished with plaster, depending on the type of material, can have a different texture, color, look modest and discreet, or, on the contrary, very expensive. - This is one of the types of decorative surface finishing. It is used for various purposes, including finishing facades.

Tools for working with Venetian plaster
Before we begin describing the techniques for applying Venetian plaster with our own hands, let’s familiarize ourselves with the list of tools needed for this work.
Table. DIY Venetian plaster - list of tools.
| Tool name | What is it used for? |
|---|---|
| Applying layers of textured plaster and drawing veins on the material |
| Basic tool for applying Venetian plaster and wax coating |
| Transferring the plaster mixture from the container to a wider spatula, mixing and tinting the material |
| Grinding and cleaning layers of plaster, removing excessively protruding elements |
| Storing and mixing white and colored plaster |
| Hand polishing of hard-to-reach or small areas treated with Venetian plaster |
| Machine polishing of a large area treated with Venetian plaster |
| Mixing large volumes of Venetian plaster |


Construction mixer price
Construction mixer
Video - Venetian plaster from A to Z
Do-it-yourself Venetian plaster application
From the description of Venetian plaster, its features, advantages and disadvantages, let's move on to considering the main application techniques. But before that, familiarize yourself with how to prepare walls for finishing works and how to independently obtain a composition of a certain color.
Important! As mentioned above, finishing walls and other surfaces with Venetian plaster is complex process, requiring some experience and skills. Therefore, before starting construction work, take no a large number of composition and practice on white and smooth MDF panels. It is advisable to try several different techniques applying plaster and experimenting with several colors.


Preparing the surface for Venetian plaster
All work related to plastering begins with preparing the walls. If there is any old finish(paint, wallpaper or anything else) - remove it completely and as thoroughly as possible. The walls are also cleaned of involuntary traces of repair in the form of stains and construction dust.

After removing the previous finish, begin correcting major wall defects. Seal cracks and potholes cement mixture, remove the protrusions with a grinder, sand the rough areas with sandpaper. As a result, you should get a relatively flat surface without any special imperfections, suitable for further finishing work.


Next, apply the primer, starting putty and finishing putty successively to the surface. After sanding with the last sandpaper, you should have a perfectly smooth wall, free of any flaws. Remember that all surface imperfections after finishing Venetian plaster will be very noticeable.

Finish preparing the wall for Venetian plaster by applying two (or in some cases three) coats of primer. In this case, its color should be either neutral white or close in shade to the future finish.
Tinting Venetian plaster
Before applying the finishing, the owner of the premises or the craftsman performing the work for him must select the color of the future Venetian plaster and “cook” it using a basic white mixture and several different dyes. This process is called tinting, and from step by step instructions given in this subsection, you can familiarize yourself with how it happens.
Step 1. Choose a suitable shade of Venetian plaster. When doing this, use a tinting fan. It contains not only the primary colors, but also their shades, the total number of which can reach several tens or even hundreds.

Tint fan
Step 2. Prepare tools for tinting - a clean sheet of thick paper on which you can see whether the prepared Venetian plaster matches the chosen shade, a small container for mixing the composition, a narrow spatula and a set of dyes.

Step 3. Prepare a small amount of Venetian plaster in a neutral white color. Choose suitable dyes. In this case, the master will achieve a dark red shade with a shift towards brown. For this, basic red, red-brown, brown and black dyes are used. The latter is necessary to reduce the brightness of Venetian plaster and make it more similar to natural marble.

Step 4. Select a container of base dye (in this case red), shake it and add a generous amount to the white plaster.

Step 5. Using a narrow spatula, stir the plaster and dye until the mixture reaches a uniform color.

Step 6. Using a narrow spatula, apply a small strip of plaster mixed with the base color onto a white sheet of paper. Compare it with the required shade on the color fan and determine which dyes need to be added and in what quantity. In total, several such checks will be made during the tinting process, with the help of which you can gradually achieve the color that you originally intended.

Step 7 Add a second color to the plaster, which will shift its shade to the previously selected one. In this case we are talking about red-brown color. As before, stir the plaster until smooth, apply a small strip of the mixture to the paper and match the color with the selected shade on the fan.

Important! When giving color to the plaster, keep in mind that after drying it will be lighter than in this moment, by one, and sometimes two tones.
Step 8 Add literally a few drops of black color to the plaster to make it more consistent with natural stone and slightly reduce the brightness, which would be unnecessary for this finish.

Step 9 Apply a strip of plaster to the paper and match it to the chosen shade. Adjust the mixture with dyes until it reaches the desired level appearance. After this, the tinting can be considered complete - then you will prepare Venetian plaster according to the same principle, but on a larger scale, for application to the wall.

Price for powder paints
Powder paints
Application of classic Venetian plaster
Let's start by looking at the basic technique for applying Venetian plaster. It is called classic and requires a mixture of only one shade. In this case, Venetian plaster the color of milk chocolate will be applied.
Step 1. Using tinting, prepare a certain amount of plaster of a certain shade and select the place where it will be applied. Please note that Venetian dries quickly, so work with in small areas area about 1 m2. Different places should overlap each other slightly.

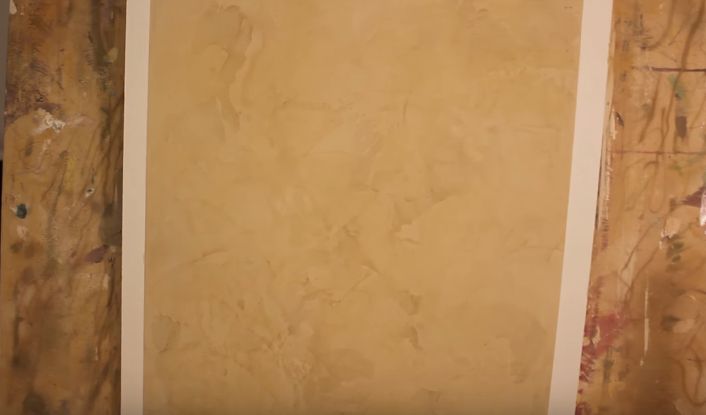
The example uses a training canvas
Important! If Venetian plaster is applied by two different people, then they should periodically change places - each has their own style of work, but at the same time it is necessary to achieve approximately the same appearance of the walls and their individual parts.
Step 2. Using a spatula, apply the first layer of Venetian plaster using smooth, rounded movements. It eliminates invisible wall defects, levels it and is link for subsequent finishing layers. Remember that you only need to apply a small amount of plaster and thin layer. At this stage, the presence of small bald spots is acceptable.

Step 3. Wait 60 minutes for the first coat of Venetian plaster to dry.

Step 4. Using a trowel, apply a second coat of Venetian plaster. It should be as thin as the previous one, but at the same time form veins and other elements here, which in the future will become a “pattern” on the wall, imitating natural marble or any other stone.

Step 5. Apply a third coat of Venetian plaster, which is called "rubbing" in the classical technique. For this work, use a Japanese spatula, and it must be pressed against the wall with considerable effort. Using this tool, apply a small amount of plaster on top of the second layer, and immediately make movements to remove the excess.


Step 6. Without waiting for complete drying (but not immediately after application), sand the third layer of Venetian plaster with an abrasive sponge or very fine sandpaper. Shake off any dust generated during this operation from the area of the wall being treated.

Step 7 After the final layer of plaster has dried, treat it with wax. A small amount of it is applied to spatulas according to the same principle as in the previous operation - first the composition is on the wall, then its excess is removed with pressure. Wax will make Venetian plaster one shade darker, give it shine and protect it from abrasion and moisture.

Step 8 20 minutes after applying the wax, the section of the wall to be finished with Venetian plaster is wiped with a dry and clean cloth. Before this, you can “sand” it again with a Japanese spatula, removing excess wax.


Application of Venetian plaster in two tones
Now let's look at a slightly more complex technique for applying Venetian plaster - here we work with mixtures of the same color, but different tones - one is lighter and the other is darker.
Step 1. Using tinting, prepare a certain amount of plaster of the same color, but in different containers and with different shades. As mentioned above, the first composition is lighter, the second is darker. Also determine an area of 1 m2 from which to begin applying Venetian plaster using this technique.

Step 2. As in the previous technique, apply the first layer of Venetian plaster with a Japanese trowel using rounded movements with medium pressure and without much removal of excess. In this case, use a light-colored mixture.

Step 3. Wait until the first coat dries and begin applying the second. He will be responsible for the texture of the wall finishing with Venetian plaster. Apply the main part of the second layer in a light tone, drawing out small veins and other elements. Then use a Japanese spatula to take a small amount of dark-colored plaster and leave small spots and stripes on the surface. Thus, create a specific pattern by copying a real stone.


Step 4. Apply a third coat of light-colored plaster. At the same time, work with a spatula with serious force, in semicircular movements, “scraping” the just applied plaster. Then polish these areas. The process is similar to what happens when describing the previous finishing technique.

Step 5. Wait until the third coat of plaster has dried and sand the area of the wall (or, in this case, the training canvas) with sandpaper or a sponge.

Step 6. Wipe off any dust remaining on the wall area to be plastered after using the sanding sponge and apply a coat of wax. As soon as it dries, wipe everything with a dry and clean cloth. After this, the section of the wall can be considered successfully plastered with “Venetian” in two tones.

Important! Use the technique of applying plaster in two tones, taking into account the size of the area to be finished. If it is large, then the difference between the shades should be minimal - otherwise the wall will be “dappled” and more likely to irritate than cause positive emotions. But for small areas it is allowed to use plaster with a difference of several tones.
Application of Venetian plaster with marble imitation
And finally, let's get acquainted with the third technique of applying Venetian plaster - imitation of real marble. Please note that this is quite difficult option finishing, which requires some experience in this field.
Step 1. Prepare the plaster of the base color (in this case it is the red one, which was discussed in the subsection on tinting), as well as black and white mixtures, with the help of which the imitation of marble will be performed. Apply the first layer of “Venetian” using the composition of the main shade. At the same time, lay the plaster on the surface diagonally from right to left, leaving characteristic stripes.


Step 2. Wait for the first layer to dry and apply a large amount of plaster of the main color to the spatula, add some white mixture to it and mix lightly. Then add a black composition. An example of applying plasters of three shades to a spatula can be seen in the photo below.

Step 3. Apply a mixture of three plasters different color second layer. At the same time, move the spatula diagonally from right to left, drawing a stripe with veins.

Step 4. Using the instructions from the previous step, continue applying different colored stucco mixtures until the second layer is completely formed. Let it dry.

Step 5. Sand the marbled Venetian plaster with fine-grit sandpaper. Wipe off any dust generated during work.

Step 6. Apply a layer of wax with a Japanese spatula, which will protect the plaster and give the coating shine.

Step 7 After the wax has dried, wipe the surface with a clean cloth or a special attachment for an angle grinder.


Prices for marble plaster
Marble plaster
Now you know about the basic methods of working with Venetian plaster. Try it this type finishing at the first opportunity - the difficulties associated with working with it will result in amazing results.


