Any, even the most expensive and high quality finish It will look completely ridiculous on crooked walls. And not any material will “lie” on an unprepared surface. In addition, curved walls cause a lot of problems when arranging or hanging furniture and other interior items. Therefore, the problem of carefully leveling all surfaces to be finished is relevant in the vast majority of cases of renovation in an apartment or house.
And you really can’t do without applying plaster if you have to deal with “ bare wall", for example, brick or block masonry. Here you have to apply a layer that will become both protective and leveling at the same time. And such cases are all too common both in modern new buildings and when building your own home.
The work of professional plasterers costs a lot. Therefore, many homeowners, wanting to save money, try to perform most of the finishing operations themselves. They need to be prepared for the fact that it may not start working out right away - this operation cannot be called simple, even if one wants to. And all the more important it will be for them to learn in advance how to properly plaster walls, so that they can soberly assess their own capabilities and make a decision in favor of one option or another.
How much work remains?
The owner of the apartment (house) must answer this question in advance. The complexity of its implementation and the amount of materials that will need to be purchased will depend on the assessment of the scale of the work.
- It is necessary to measure the dimensions of the room - this, by the way, will help to draw the diagram on paper. The requirement is optional, but still the graphic image very often becomes an excellent help when a novice master begins to estimate the thickness of future plaster layers on each wall.

- The initial parameters will be the lengths of the sides of all walls. In a rectangular room, ideally, opposite walls should be the same, but, alas, this does not always happen. Measuring and comparing the diagonals immediately shows how distorted the correct configuration of the room is - the diagonals of a rectangle must be strictly equal.
- The height of the walls is measured - this will allow us to determine the area of each of them. Naturally, window and door openings should be subtracted from this area. By known values area, you can estimate how much material will be needed for plastering.
To help those who have problems determining surface area.
Walls are not always rectangular in shape, and determining the area of more complex shapes can sometimes become difficult. For example, when finishing attic premises often there are areas in the form of trapezoids or even non-rectangular triangles. There may also be more complex ones, for example, arched configurations. Various cases are discussed in detail in a special publication dedicated to.
- It is clear that the task of plastering the walls in any case will be to bring them to vertical plane. Using a long rule and a building level, you should immediately assess how much the wall plane differs from the required vertical one. To do this, the rule is pressed against the point most protruding towards the room. These readings (direction of deviation and its magnitude) can also be plotted on the diagram with symbols that are understandable to you. In the illustration above, they are indicated by blue arrows as an example. That is, the distance from the vertical line to the wall surface is measured, for example, using a ruler or square.

If you don’t have a long rule for the entire height of the wall, then you can hang the plane with a regular plumb line. After hanging it, the distances from the wall surface to the thread at the maximum and minimum points are measured, compared, and their difference shows the magnitude of the level difference.
Plaster prices
plaster

The obtained difference values will also be useful for conducting preliminarycalculations required quantity materials for plastering.
- It was already mentioned above that the shape of the room may differ from a rectangle. Plastering can also eliminate such a drawback, if this is fundamentally important for the owners. Knowing the values of the measured diagonals and lengths of the sides of the room, it is easy to make a drawing diagram and try to fit a rectangle into it, assessing how much the thickness of the walls will have to be increased in different areas.

At the same time, they try to choose as a starting line the wall on which there is a doorway - the width of the walls of this opening (slopes) after plastering should be the same on both sides, otherwise it will look extremely unsightly. And if you start such an alignment from an arbitrary wall, then just at the level of the doors (or, in a variation, a window opening) a very significant distortion may well appear.
When choosing this alignment path, it must be borne in mind that it must be justified by practical considerations. It should be correctly understood that every extra centimeter of thickness of the plaster layer results in tens of kilograms of solution and a significant complication of the work. In addition, the area of the room is reduced. So it is often wiser to place the walls exactly vertical and accept slight deviations from rectangular shape rooms that will not be particularly noticeable, rather than being brought to perfection. However, it is up to the owners to decide. The diagram drawn up should help them make such a decision.
How to plaster walls
Today, consumers are offered a very wide range of different compositions for plastering walls. They differ basic component and, accordingly, the scope.
- Gypsum-based plasters (which often contain polymer additives) are the leaders in popularity when leveling walls indoors. They are very easy to use, have high plasticity, and provide a high-quality surface for further finishing.
 Knauf Rotband is a typical example of high-quality gypsum plaster for interior work
The disadvantage of such plasters is their instability to high humidity, due to the characteristics of gypsum. That is, they are suitable only for interior work and only for rooms with normal humidity. Sometimes, however, reservations are made that their use in bathrooms and kitchens is acceptable if a continuous coating is intended ceramic tiles with careful sealing of seams. But this is still a rather risky option - due to the fact that tile adhesives usually have a cement base, “conflicts” are possible.
- For rooms with high humidity and for external work, cement-based plasters are used. They create a reliable basis for any type of subsequent finishing.

True, working with cement plasters is much more difficult, although many of them are enriched special polymer plasticizing additives. Material consumption is also significantly higher. But at the same time, the cost of cement compositions is about a third lower than gypsum ones.
Prices for Knauf Rotband plaster
plaster "Knauf Rotband"
- Very a good decision is the use of combined cement-gypsum plasters, which combine the advantages of both of the above types. Such compositions are the most universal.

Such compositions are convenient to work with, as they have the plasticity of gypsum mixtures. And, at the same time, the plaster layer easily tolerates conditions of high humidity. And the only drawback is that their acquisition will cost more.
- There are also ready-made compositions polymer based. But we will not consider them, since their use for internal leveling of walls looks completely unprofitable - their prices are quite “impressive”. And on top of that, most often polymer-based plasters involve some kind of plastering, that is, they are usually used for facade finishing.
The table below shows, as an example, several popular brands of plasters that are well suited for leveling various types walls indoors. Please note that the manufacturer stipulates not only the scope of application, but also permissible thickness layer when applied once - this can also be very important when planning work.
| Image | Name, type of binder | Scope of application | Minimum and maximum thickness of a one-time applied layer, mm |
|---|---|---|---|
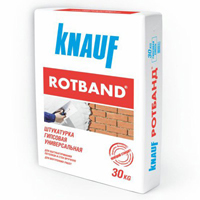 | Gypsum plaster"Knauf Rotband" bags 5 or 30 kg | For leveling ceilings and walls with a solid base made of concrete, brick, including those covered with cement plaster, polystyrene foam, cement particle boards. Used in rooms with normal level humidity, as well as in kitchens or bathrooms, if a waterproof finish is used (ceramic tiles with sealed seams). | from 5 to 50 mm, with the possibility of re-application after the first layer has dried. |
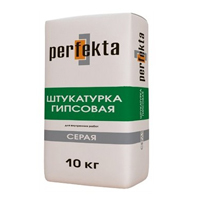 | Gypsum gray plaster "Perfecta" bags 10 or 30 kg | For plastering walls and ceilings made of concrete, gas and foam concrete, brick, stone and any gypsum surfaces in rooms with normal humidity levels. | from 5 to 50 mm |
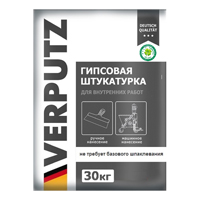 | Plaster white plaster"Verputz" 30 kg bags | For leveling the walls of rooms with normal humidity levels. Apply to any solid base made of concrete, brick, stone, including those covered with old cement or gypsum plaster. | from 5 to 50 mm |
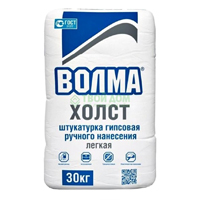 | Gypsum plaster "Volma-Canvas" 30 kg bags | For plastering indoors with normal humidity levels. Apply to any hard base. | from 5 to 30 mm |
 | Gypsum gray plaster “Agat TM Stone Flower” 30 kg bags | from 5 to 30 mm, It is recommended to apply once in a layer of up to 20 mm |
|
 | Gypsum gray plaster “Prospectors” 30 kg bags | For plastering walls and ceilings in rooms with normal humidity on any hard base. | from 5 to 50 mm, locally it is allowed to increase the thickness to 80 mm |
 | Gypsum white plaster "Perfecta" 30 kg bags | For plastering walls and ceilings in rooms with normal humidity. Can be used on all hard substrates made of concrete, brick, stone, aerated concrete and foam concrete. | from 5 to 60 mm |
 | Gypsum white plaster "Unis-Teplon" 30 kg bags | For plastering walls and ceilings in rooms with moderate humidity on any hard substrate. Has increased thermal insulation properties. | from 5 to 50 mm |
 | Gypsum-cement plaster “Prospectors Mixter” 30 kg bags | For plastering in rooms with normal and high humidity levels on all solid concrete bases, cellular concrete, brickwork, including old cement plaster. | from 5 to 60 mm local application up to 100 mm |
 | Base cement plaster “Knauf Sokelputz UP 310” 25 kg bags | For plastering plinths, as well as rooms with high levels of humidity and high dynamic loads. Suitable for use on hard concrete and brick substrates. | from 10 to 35 mm single application in a layer of up to 15 mm. If the total layer thickness is more than 15 mm, galvanized plaster mesh should be used. |
 | Leveling cement plaster “Knauf Unterputz UP 210” 25 kg bags | For plastering facades and hard surfaces made of concrete, brick in rooms with high humidity. | from 10 to 35 mm with a single application, a layer of up to 20 mm. |
 | Light cement-sand plaster “Starateli” 25 kg bags | For external and internal use. For plastering facades and surfaces in rooms with normal and high humidity. It is used on bases made of concrete, brick, cement plaster, cellular concrete. | from 10 to 20 mm, There is the possibility of repeated application with drying of intermediate layers. |
The cost of mixtures can vary significantly, and not only by specific brands, but also by sales regions - the location of production lines and logistics features affect. So it is better to clarify this parameter specifically by location.
One of the characteristics indicated by the manufacturer is always the estimated mixture consumption. Most often it is expressed in kilograms - it shows how much composition will be used to apply a plaster layer 10 mm thick over an area of 1 m².

This allows you to calculate the volume of material purchases in advance. In this case, of course, one should also take into account possible losses, which due to inexperience can be very significant. So, it would be useful to include a reserve of about 10%, and if plastering will be performed for the first time, then the entire 15%.
How to plaster the walls in an apartment is a question that worries those who want to make repairs or build a house.
The durability and reliability of the finish, its aesthetic appearance and the frequency of repairs in the future depend on the quality of this stage of work. Carrying out repairs yourself or trusting professionals is everyone’s business, but more and more often owners decide to do home improvement with their own hands.
How to properly plaster walls in an apartment and what type of mixture to choose is described in detail in the article.
Why is plastering done?
Plastering indoor surfaces is necessary to achieve several goals:
- alignment of walls and ceilings;
- sound and heat insulation;
- creating adhesion for finishing finishes;
- use as a decorative coating.
For housing, plaster can become both a decorative and functional finishing element.
Types of plasters
All types of plastering mixtures are divided into three groups: standard, special and decorative. Standard mixtures are sold in markets and specialized construction stores. This is the most popular type of plaster. In turn, standard formulations are divided into 4 types.
| Type | Compound | Properties |
|---|---|---|
| Universal | It is based on cement, gypsum or resins with the addition of polymer compounds. | This plaster protects the house from dampness and heat loss, and also has noise-absorbing properties. |
| Waterproofing | Base - cement with the addition of polymers | Reliably protects the room from moisture and mold. Perfect option for bathrooms and kitchens. |
| Soundproof | The basis of the plaster is gypsum or cement | Rarely used in residential areas. Popular for finishing cinema premises, concert halls, sports and industrial premises. |
| Heat-protective | The base is gypsum or cement. Foamed perlite, foam glass, vermiculite and granulated polystyrene foam are also added. | Retains heat very well. Used for thermal insulation of the entire room and utilities. It does not have soundproofing properties and requires the application of finishing plaster. |
Special solutions
When working with this group of plasters, you need to have documentation on hand with the design of the room and research on the chemical composition of the solution. Their use is quite expensive and labor-intensive, and also requires certain skills. There are two types of special mixtures:
- Solutions with protection against various types of hazardous radiation. These include the well-known barite plaster, which is used to decorate X-ray rooms and various laboratories. It is rarely used to protect residential buildings. Before plastering the walls in an apartment for painting with barite plaster, you need to take care of the reliable finishing of the material in order to avoid toxic fumes.
- Acid-resistant mixtures are used in industrial premises where chemical fumes are active and may cause harm to health. In everyday life they are used as a finishing touch. This plaster is not afraid chemical exposure, so it can be washed with any household products without harm.
Decorative plaster
How to plaster the walls in an apartment before painting? Decorative plaster is one of the most beautiful and original types of finishing materials. From simple patterns like bark beetles to elegant Venetian patterns, applying this mixture requires patience and skill. Only a professional can select the ideal decorative plaster for the interior and the base for application. You can try to decorate your home yourself using photos on the Internet, video tutorials and step-by-step instructions.
Types of plasters by composition
There are three main types of plaster in terms of composition. Cement is considered universal and is suitable for internal and external work. Gypsum - used for finishing concrete, wood and brick surfaces in rooms with moderate humidity. Polymer plasters - the last word in the field of finishing materials. They are used to decorate an already flat surface.
Cement mixtures
How to plaster the walls in an apartment with a rough finish? Cement compositions are suitable for this type of coating and have a number of advantages:
- resistance to temperature changes;
- the plasticity of the material allows you to work with it even several hours after application;
- vapor permeability and frost resistance;
- low cost;
- durability;
- strength.
Despite all the advantages, cement plaster also has disadvantages. For example, a long drying period and complex technology for working with the composition.
Tip: If you need a layer thicker than 20 mm, you must use a reinforcing mesh.
Gypsum compositions
How to plaster the walls in an apartment under wallpaper? Gypsum plaster - best option for working indoors with normal humidity. Among its advantages it is worth highlighting:
- high speed of work;
- drying period - several hours;
- layer strength gains range from 2 days to a week;
- The plaster does not require additional leveling with putty; after applying it and gaining strength, you can begin painting or wallpapering.
The main disadvantage of the gypsum mixture is its instability to moisture. With high humidity, the plaster quickly deforms and cracks.
Polymer compositions
Plaster mixtures based on polymers are applied in a thin layer and are able to hide small cracks or irregularities on the surface. They can be used on a base of plasterboard, concrete or brick.
Benefits of use decorative plaster in the interior of the apartment:
- antiseptic properties;
- suitable for use in rooms with high humidity levels;
- It has decorative properties and gives an aesthetic appearance to the room;
- suitable for both external and internal work;
- has waterproofing properties.
The main disadvantage of polymer compositions is that they need to be applied to a perfectly flat surface.
Which plaster should I choose?
The base surface plays a significant role when choosing the right type plaster.
- What is the best way to plaster a brick wall in an apartment? Cement mortar is perfect for a brick wall. A thicker layer can be applied to such a surface. Before applying the plaster, the wall must be wetted with water or primed to improve adhesion to the mixture. Then the solution is thrown onto the surface and leveled using the rule. Further, depending on the finishing finishing works, the plaster is rubbed and sanded, minor flaws are eliminated (preparation for painting or wallpapering). If facing material There will be tiles, then there is no need to sand the surface. For better adhesion to the tiles, the wall should be rough.
- The foam concrete base is plastered mainly with gypsum mixtures, but cement mortar can also be used.
Important! Before starting work, the wall is treated with a special primer deep penetration for porous and weak surfaces.
- The better to plaster concrete walls in the apartment? For a smooth concrete surface, it is best to choose gypsum mixtures of the “Rotband” type. Before work, the wall must be treated with a special primer - concrete contact. It differs from the classic primer in the presence of quartz sand, which forms a rough layer on a smooth concrete surface. This improves the adhesion of the base to the mixture and provides reliable fastening. Unlike cement mortars, gypsum is reinforced with a polymer mesh with cells of approximately 5 by 5 mm.
- If there are significant unevennesses in the walls or ceiling, you need to use beacons; they will help achieve a perfectly even layer.
- The evenness of the layer must be monitored throughout the entire work. A rule is used for this.
- The choice of plaster should be made based on financial situation, timing of work, experience and type of surface to be treated.
- Each subsequent ball of plaster can be applied only after completely dry previous one.
- Plastering work requires certain temperature regime in room. So, for cement mortars the temperature should be from 5 to 30 ℃.
- When choosing a mixture, you need to carefully read the instructions for use and expiration date. For best result The solution must be mixed according to the proportions indicated on the package.
- Ready-made mixtures from trusted manufacturers are the best option for small and medium-sized jobs, as well as for beginners who want to do the repairs themselves.
Plastering walls allows you to level their surface for further finishing of the area with putty or ceramic tiles. If you try and plaster correctly, following the technology, then in the future you get an ideal surface that allows you to complete the finishing without problems and the cost of additional labor.
The quality of the final finish is half dependent on the evenness of the surface on which it is performed. In addition, an important role is played by the overconsumption of an expensive finishing component, which will be used instead of an inexpensive starting mixture for plastering work.
Various formulations for application
Plastering can be done with various compositions and components, depending on material wealth and expectations of the final effect.
Wet plaster
Prepared from original natural ingredients, mixed by hand or in electric mortar mixers:

Application of dry mixtures
IN modern conditions construction production plastered with dry ready-made mixtures, which are carefully crushed and modernized during the manufacturing process in a factory. The mixture contains gypsum components. Such dry mixtures should only be mixed with water in sufficient quantity and can be applied to the walls.
They are very convenient to work with, since gypsum makes them plastic and increases adhesion to various substrates. A small drawback is that ready-made aqueous solutions They harden quite quickly, but for craftsmen this is not a burdening factor - they manage to work out the solution long before it sets. Dry mixtures are divided into:
- for plastering interior spaces, gypsum-sand compositions with the addition of modernized components are used;
- plastering of external walls is done with cement-gypsum mixtures with plastic additives.
Plastering technology
Perform plastering walls can be done in two ways:

Acceptance tolerances for plastered surfaces
Requirements for the quality of work are specified in SNiP III-21–1973 and are classified by difficulty for high quality, advanced and simple plaster.
Simple plaster is used in rooms with small quality requirements; deviations from the vertical are allowed within 0.3 cm per 1 linear meter, provided that the total vertical deviation is within standard room height of 2.5 m does not exceed 0.75 cm. Smooth depressions and protrusions are allowed in the amount of 3 pieces for every 4 m2, provided that they are no more than 5 mm. Horizontal deviation is allowed no more than 3 mm per linear meter.
The requirements set out in SNiP for improved plaster allow for fewer irregularities. The wall can deviate vertically by no more than 0.2 cm per linear meter; the total deviation allows an error of no more than 1 cm over the entire height of the room. For the same 4 meters, no more than two depressions are allowed or bulges 0.3 cm deep. Along a horizontal straight line, a deviation of no more than 0.2 cm is allowed.
High-quality plaster must be taken even more strictly. Characteristic for her permissible deviations are 0.1 cm per vertical meter. At four meters, as in the previous category, two irregularities are allowed, but their permissible depth is reduced to 0.2 cm. On the horizontal plane, a difference of only 0.1 cm is allowed on each meter.
Tools and materials for plastering walls with your own hands
 Beacons are narrow strips of metal with a rigid central guide, equipped with a large number of holes on the side surfaces. Lighthouse slats will play the role of leveled and fixed longitudinal supports for running along them as a rule when leveling the applied solution. Lighthouses are divided into types 0.6 cm and 1 cm, their length is 3 m.
The rule is a flat and strong lath with a sharp plane on one side. It is designed to pull off excess mortar from the surface, resting on a frame of beacons. To check verticality and horizontality, a level is inserted into some rules. Also, for plastering with your own hands you will need such tools and materials:
- drill with mixer for mixing the solution;
- hammer drill with drills for attaching beacons;
- dowels, black wood screws;
- rule with level or separately building level two or more meters long;
- metal scissors for cutting lighthouse slats;
- hammer, chisel, plumb line;
- large spatula, from 40 to 60 cm;
- ironed, grater;
- buckets for mixing solution and water;
- wide brush for priming the surface;
- tape measure and gloves with a rubberized surface;
- bags with dry mixture;
- deep penetration soil.
When all materials and tools are prepared, plastering of the walls begins.
Preparation, priming of walls and fastening of beacons with your own hands
 To begin installing beacons, the walls are examined for deviations from the vertical and horizontal. All protrusions and depressions mark with pencil or chalk. Sometimes large protruding parts are easier to knock off with a chisel or ax so as not to put a lot of mortar around them. All this is objectively assessed and accepted correct solution. For the correct concept of a preparatory inspection, there is a video in which all stages are shown in detail.
After this, they begin marking the surface for installing the lighthouse slats. The outermost beacons on both sides are installed first, retreating from the edge by 0.3 m. The distance from the first to the second beacon is determined by the length of the rule. If the rule is two meters, then the distance take about 1.6 m. In this case, you need to follow a straight line laid at the level of the floor and ceiling from the first to the last beacon on one wall. The top and bottom of all intermediate slats must be on it. To make the position of the straight line clear, the threads should be tightened.
When installing beacons with your own hands, you should achieve such alignment that all angles are 90º. Before installing the beacons, be sure to treat the wall with soil, and follow the instructions on the package to dilute the solution. Loose surfaces are primed twice, the first layer is applied with a weak solution, and the second in the proportion on the package. After complete drying, marking work continues.
The installation of all intermediate beacons is carried out only along the boundaries of the threads, stretched diagonally and horizontally in several places. The beacon slats should touch them from the inside, but not protrude beyond their boundaries and do not strain them.
At first, the beacons are not attached, but only applied to exposed screws, checking them with a level. They are fastened with a mixture for plaster, diluted specifically for this operation. The mixture is applied in an even line along the screws so that it protrudes beyond their plane.
The lighthouse is brought to the line of screws and pressed down until it touches the caps. It is convenient to do this with two people from below and from above. The process of installing beacons is perfectly shown in the video. After the initial setting of the solution, they proceed to installing the next beacon. The rules and levels involved in the work process must be cleared of adhering solution.
The process of applying plaster mortar
 To prepare the solution, pour water into a bucket and only then add the dry mixture. If you do the opposite, the resulting solution will set during the kneading process and it will not be possible to thoroughly stir the mixture until smooth. To apply a thick layer, make a thick solution, which will stay on the spatula. It is not possible to apply a large layer with a liquid solution.
The solution is applied with a spatula into the spaces between the beacons. If you do this kind of work with your own hands several times and watch the corresponding video, you can get used to applying just enough plaster to properly cover all the voids. You need to apply the solution from the bottom up, gradually removing the excess solution with a rule, progressively lifting it in a zigzag motion. The solution remaining on the rule is carefully removed into a bucket with a spatula or placed on the wall above for further use.
It is not recommended to add mortar particles that have fallen to the floor to the total mass, since dried particles in the mixture will be left on the wall surface long and deep furrows, which will additionally have to be filled with plaster. In the resulting voids, where the solution was not laid down sufficiently, you need to add the mixture and re-use the rule.
After completely applying plaster to the entire strip between adjacent lighthouse slats, you need to carry out control draggings using the rule along the beacons several times. As a rule, there are unfinished areas at the very bottom and top, which are additionally applied.
After plastering, check the surface using the rule under different angles. If there are lumps that do not fit into the overall picture, they can be scraped off with a spatula while the solution has just hardened. Cracks and deep scratches cover with liquid solution and smooth.
After setting and hardening, the mixture is removed metal beacons, which can rust and will appear brown spots on finishing. After removing the slats, grooves will remain, which are filled with mortar and smoothed to obtain the correct surface.
There are times when it is necessary to apply a layer of plaster more than five centimeters, then it is recommended to apply the solution in two stages.
 For this procedure, dilute the mixture in small portions or more liquid composition. Before grouting, treat the work area of about a meter with water. The solution is applied to a grater and evenly applied to the surface. They continue to do this repeatedly, strongly pressing on the rule. If everything is done correctly, the result will be an even and smooth section of the wall, and there will be no liquid solution left on the grater.
This is how the following neighboring areas are processed; the work process can be viewed on video to make it more clear. The grouting process should take place without interruptions and you can only be distracted by preparing the solution.
If plastering and leveling the walls is carried out as a basis for finishing tiles, then the correct thing to do would be not to rub down the walls. The smallest irregularities on the surface, on the contrary, will help grip adhesive solution with the surface.
Mechanical methods of applying plaster mortar
 They are used for finishing walls in large areas and lengths, both indoors and outdoors. For such a process, which can be seen on video, we use special plastering machine
, equipped with a water supply and a container for receiving dry mixture. After mixing the solution, it is supplied to the wall through a special hose with nozzles.
They are used for finishing walls in large areas and lengths, both indoors and outdoors. For such a process, which can be seen on video, we use special plastering machine
, equipped with a water supply and a container for receiving dry mixture. After mixing the solution, it is supplied to the wall through a special hose with nozzles.
When applied mechanically, the beacons are set in a standard way, and the solution is leveled using a rule. The mechanical method is characterized by a reduction in labor intensity by eliminating the operation of preparing a solution from manual labor. Due to this application it is possible to process much more area for the same period of time.
Alignment of walls plaster mortar is an integral part of any room decoration in modern conditions; the amount of basic finishing material spent depends on its correct implementation.
Plastering walls | photos, videos, step-by-step instructions. During construction or repair work You always have to deal with the need to finish walls with plaster. This process cannot be called creative, so most people don’t like it. At the same time, correctly and accurately applied plaster guarantees a problem-free finishing of the walls. But how to do everything yourself and without flaws? Video of plastering walls with your own hands cement mortar designed to teach this.
Plastering walls with your own hands is quite possible
Main types of plaster mixtures and their preparation
There are three main types cement plaster, used both in new construction and in renovation work. They differ in the composition of the plaster mixture:
- Plaster based on a cement-lime mixture. It is prepared by mixing in equal parts lime and cement. Add 10 parts of sand to this and dilute with water to the desired consistency. Rooms with high humidity are ideal for plastering with this solution. These include kitchens and bathrooms, basements and garages. This type of plaster is indispensable for working on wooden walls, since lime has good adhesion to wood.

Proportions for preparing cement mixtures for plastering walls
- If the main component of the solution is sand, and the binder is cement, then such plaster is called cement-sand plaster. This composition is convenient for leveling both internal and external walls. Just be aware that sand does not like moisture. For this reason, this type plasters are not recommended for use in areas of excessive humidity. You can prepare a mortar for brickwork in a ratio of 1:5 for plastering walls with your own hands. A video of mixing a cement-sand mixture will help with this.

Dry plaster mixture is added to water and mixed using a construction mixer
- Gypsum predominates in the composition of gypsum plaster. The ability of this mineral substance to set quickly allows this type of plaster to be used on ceilings and other places with difficult access.
Mortar for plastering walls, proportions: video instructions Today, few people independently prepare plaster mixtures from individual ingredients. Ready-made dry formulations are available for sale, which simply need to be diluted with water according to the instructions and mixed thoroughly. Mixing can be done with a drill with an attachment.
Helpful advice! When preparing your own plaster mixture, you need to take into account the brand of cement. The higher it is, the more sand will be required. Better adhesion will be ensured by PVA glue, which can be added to the solution.

Tools that you may need to independently plaster walls with cement mortar
Plastering walls with cement mortar: preparatory work
Plastering walls with your own hands with cement mortar necessarily includes preparatory work. If this is a new construction, and there are walls made of ordinary ordinary bricks, then there is no great need to prepare them for applying the plaster mixture. You just need to cut down the protruding bricks with an ax, if any. This will help you avoid applying too thick a layer unnecessarily.

The cement mortar is first spread onto the wall using a trowel, then the mixture is evenly distributed using the following rule:
If the wall is made of facing bricks, then you need to drive nails between the rows and tie everything together with aluminum wire. It would be even better to secure plaster mesh. The wall itself must be primed and tile adhesive applied to it using a notched trowel. Only after this can the mixture be applied. Concrete and foam concrete blocks also require preliminary priming and application of glue. A special plaster mesh will help to make high-quality plaster on these walls. Otherwise plaster mixture will bounce off them.

Applying plaster cement mixture to the wall
Wooden walls are much more difficult to plaster. To do this, you definitely need to attach a sheathing of slats or a ready-made mesh sold in stores to them. You should also prime it.

For plastering walls, a rule of 1.5 - 2 meters in length is used
In the case of repair work, before preparatory work, it is necessary to completely dismantle the old coating to the very base. If there are pieces left on the walls old plaster, then the quality of new work cannot be guaranteed. Do-it-yourself wall plaster shown in any video , always starts with preparatory work, on the quality of which the success of the entire repair depends.
Helpful advice! Walls that are too dry do not allow the mixture to stick. Therefore, before plastering, it is necessary to wet the bricks well.
Algorithm for plastering walls
As in any construction process, plastering walls has its own specific rules and sequence of actions. To apply plaster to a prepared brick wall, you must:
- Attach the plaster mesh to the wall using dowels driven in in a checkerboard pattern. The mesh must have an anti-corrosion coating. Otherwise, traces of rust will appear on the wall before the plaster has completely dried. The dowels are connected to each other with Z-shaped patterns using knitting wire.

Plastering a wall using reinforcing stacks
- Guiding beacons are installed. Smooth surface can only be created by plastering walls along beacons with your own hands. A video of such a process is proof of this statement. Can be used as beacons wooden slats, but professionals use perforated slats sold in stores. Beacons are installed strictly according to level.

Scheme optimal placement wall beacons
- The plaster mixture is applied and leveled along the beacons.
- The plaster is being grouted.
The process of applying the mixture is the longest and most labor-intensive. The mortar is thrown onto the wall using a trowel or ladle, whichever is convenient for you. Throwing movements must be made from bottom to top. It is necessary to fill all the space between two adjacent beacons. Then, using a special rule, we level the applied mixture. In this case, the ends of the tool should slide from bottom to top along the surface of the profiles.

One of complex processes in plastering walls with your own hands - designing internal corners. To make the task easier, you can use a homemade corner level from a building profile
During this movement, the rule must be moved sharply to the right and left. This allows the solution to be evenly distributed over the wall, compacting it. The result is a smooth wall. Having completed the first segment, we move on to the next. We repeat all movements again. In the video of plastering walls using beacons with your own hands, you can see in detail what movements are made by the rule.

An example of attaching a construction beacon to a wall
When the walls dry out a little, they need to be rubbed down. For this purpose, a floor or grout board is used. These tools move across the surface in a circular motion. The process continues until the surface becomes smooth. If the plaster has dried out too much before grouting, it can be moistened.

Grouting of dried plaster is done using a polisher
To obtain a smooth surface without cracks, it is necessary to strictly control the drying process. Firstly, high indoor temperatures are unacceptable. Secondly, the walls need to be periodically moistened with water. Thirdly, you should always immediately repair any cracks that appear. Correct drying control guarantees high quality plaster.

The solution does not stick to the tool soaked in water, which makes plastering work easier.
Helpful advice! During all work, the tool must be moistened with water. This will prevent the solution from sticking, which will allow you to carefully and competently plaster the surface.

When the plastered walls are dry, you can begin to putty them.
Although the procedure for applying plaster to walls is labor-intensive and unpleasant, the quality of its execution should not be in doubt. Unevenness on the walls will not allow you to create a beautiful finish or will force you to take additional leveling measures, which will entail additional costs.
Plastering walls with your own hands: video instructions
How and with what to plaster walls?
When performing activities on major renovation residential or production premises inevitably there is a need to eliminate irregularities and ensure flatness. Knowing how to plaster walls, you can do the work yourself, saving financial resources. It is important to choose correctly optimal view mixtures, deal with technological subtleties, learn how to use the tool. The recommendations given in the article will help you perform the work correctly, ensure surface quality and avoid unexpected mistakes.
Which plaster is better for plastering walls?
Carrying out finishing activities requires vocational training and requires qualified selection of materials. It is advisable to entrust the selection plaster composition and finishing by specialists. At independent execution It is important to study the activities before mixing the components and plastering the walls, the better to carry out the finishing work.

Depending on the specifics of the work, they are used for plastering. different kinds working mixtures. Let's consider the types of compositions used:
- sand-cement. It is used when it is necessary to apply plaster in a thick layer on the external or inside buildings. The mixture is prepared from available ingredients, which when affordable price provide increased reliability of the finishing coating. The preparation process is quite simple. It involves mixing Portland cement with river sand, with the gradual introduction of water to the required consistency. Depending on the brand of cement, its ratio with sand ranges from 1:2 to 1:5. A special feature of the cement-sand composition is its long hardening period, due to which the mixture can be prepared in increased quantities. This makes finishing work on larger areas easier. Ready mixture can be purchased in specialized stores, then mixed independently according to the recipe indicated on the package;
- gypsum-lime, as well as gypsum-clay with the addition of lime. Used to ensure flatness wooden walls, as well as performing finishing activities on the interior of the premises. The preparation technology involves mixing gypsum and lime in a 1:3 ratio with the addition of clay to improve bonding. The gypsum composition is prepared in a separate container with water, into which the gypsum is quickly poured and mixed thoroughly. All that remains is to add dissolved lime - the plaster composition is ready. A feature of the gypsum composition is rapid hardening, reduced thermal conductivity, and increased adhesion. Disadvantages include susceptibility to high moisture concentrations and the need to prepare small portions due to accelerated hardening. Gypsum plaster hardens within 7 days with a layer thickness of up to 5 cm;

The best way to plaster walls depends on the home owner’s wallet, as well as on the characteristics of the room in which repairs are required.
- calcareous. Lime-cement is prepared from cement, lime paste and sand in a ratio of 1:2:7. Sand is mixed with dry cement with the introduction of lime “milk” and the addition of water. Clay-lime is prepared by combining lime paste with clay and gradually adding sand. Clay dough in a liquid consistency, lime mortar and sand are mixed in a ratio of 1:3:5. Sand and lime based plaster involves adding from 1 to 5 parts sand to one part lime. The consistency of the sand-lime mixture should be doughy. The mixture should slightly stick to the working tool. Using lime-based plastering compositions, you can significantly reduce the concentration of moisture in the room, which contributes to the formation of dampness, and also insulate the walls.
Developers make the final decision on the best way to plaster walls when performing finishing activities individually, depending on the following factors:
- building material;
- humidity levels;
- availability of ingredients;
- financial capabilities;
- timing of activities;
- assigned tasks.
Each of the presented finishing compositions has its own advantages and disadvantages, which you should pay attention to when solving the problem of choice.

Cement-sand mortar. Can be used to level internal and external surfaces
How to plaster walls - tools and application rules
Every homeowner wants the premises to have high-quality plastered walls after completing finishing work. This is achieved by using professional tool, compliance with technology.
Initially, you need to prepare a tool to perform the work:
- a medium-hard steel wire brush used to ensure surface cleanliness;
- teeth, reminiscent of a chisel with a toothed working part, facilitating the application of grooves to improve adhesion;
- falcon, which is a square shield with a handle, which is used as a platform for the plaster composition;
- a spatula designed for mixing the plaster composition and applying it to the surface, followed by rubbing;
- a trowel, which is a platform up to 1 m long with a handle, facilitating the leveling of the plaster composition;
- a grater used when performing finishing operations, facilitating grinding and final finishing;
- usually in the form of a strip made of wood or metal up to 2 m long, designed to ensure the flatness of the applied layer;
- a plumb line or building level that facilitates control of work in the horizontal and vertical plane.

Anyone can learn how to plaster walls, although it will be more difficult for a beginner to do it than for a professional plasterer
After preparing the tools necessary to perform the job, you should study technological sequence operations. Standard finishing technology includes the following steps:
- Preparatory work to ensure the cleanliness of the treated surface and improve adhesion.
- Installation of guides (beacons), which are a guideline for ensuring flatness.
- Application of plaster composition and pre-finishing, forming a finishing surface.
- Removing the guide elements, filling the cavities with cement and preliminary grouting the surface.
- Finishing, which is carried out on a hardening mass and is carried out cyclically with radial movements.
Each construction project has its own characteristics, according to which the developer determines the feasibility of performing certain stages. Let's dwell on the main technological points.
Getting ready to plaster the walls: how to ensure adhesion
Carry out measures to prepare the surface for plastering according to the following algorithm:
- Inspect and clean the walls with the obligatory removal of remnants of plaster, sagging, greasy stains, fasteners and dirt.

If you find significant cracks or any other mechanical damage on the wall, they need to be widened and then cleaned of the existing sand.
- Seal the cracks in brick surface and cracks that impair sound insulation and increase heat loss.
- Treat the work area with a deeply penetrating primer, which makes it difficult to absorb moisture, providing improved adhesion.
- Execute shock method, using a toothed tooth, make three-millimeter notches on a smooth surface, followed by cleaning the wall and moistening it.
- Place diagonal sheathing or chain-link mesh on a wooden base, and, if necessary, reinforce with plastic mesh.
- Prepare the working composition for plastering work in the required volume by selecting the appropriate recipe.
Having completed the surface preparation, you can begin applying the mixture.
Learning to plaster: how to apply the solution correctly
Carry out operations for applying the plaster composition, following the given sequence:
- Check the readiness of the instrument and the consistency of the solution.
- Lightly dampen the base until the moisture is absorbed.
- Take a portion of the mixture that is placed on the surface of the falcon.
- Take the mortar using a plaster spatula and apply it.


