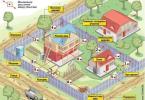
Lighting a site in a country or private house is important element a comfortable stay for the owners here. With a thoughtful arrangement and choice of lamps, it becomes comfortable to move around your property at night. In addition to its important functional role, illumination of the area allows you to create an indescribable atmosphere and emphasize the beauty of plants. The owners and their guests will feel comfortable staying here.
By creating, residents of a private house can save significantly. In stores, ready-made devices are quite expensive. Therefore, having certain skills in working with electricity, as well as having enough free time, the owners will be able to install lighting on their site themselves.
Basic principles
Studying the question of how to make a street lamp with your own hands, property owners should start with the basic principles of this process. This will help you complete all the steps correctly.
Lighting must meet certain generally accepted requirements. During the day, lamps should not disturb natural look plot. Required at night quality lighting, which will avoid dark areas.
In addition to functionality, lighting plays a decorative role. The overall impression of the site depends on the correct choice of all elements of the system, as well as their proper arrangement. Popular today are lamps made of natural materials. Also, natural lines and plots when creating such products allow you to maintain the overall aesthetics of the site.
Types and location of lamps
Having decided to illuminate your area with homemade devices, it is necessary to consider their main types. Depending on the location area, there are several main types of devices. There are devices that illuminate the house itself, paths and stairs. There is also accent and festive lighting, security lighting.
For each light source apply different types devices. Most often they are mounted on the veranda. They can also be mounted on trees. This is a long chain of high strength class. It ends with a decorative lampshade.
Wall lanterns are used to illuminate the entrance to the house and the area in front of it.

Also, such devices are installed next to the wicket or gate.
Floor lamps are installed on the ground or on the veranda. In the classic version, this device has a flat stand with a round lampshade on top. Ground lamps differ from floor lamps in height. They are also installed in the ground, but such devices are designed to illuminate paths or individual plants and flower beds.
Light source
There are several common options you can choose from for lighting fixtures. The source of light at night can be ordinary incandescent lamps. These are the simplest and most inexpensive devices. Their disadvantage is their high energy consumption.

One of the most popular devices are LED lamps. They are economical to operate. made with your own hands, will be able to illuminate the area with high quality. At the same time, its service life is as long as possible. These lamps are difficult to break. You can choose any shade of glow.
Halogen lamps are rarely used. They are too sensitive to voltage fluctuations and contamination of the bulb.
Lanterns on solar powered are gaining popularity today. They can be installed even in areas where it is difficult to install electrical wires. During the day, the battery is charged using solar energy. The lantern then emits a glow that can last up to 12 hours. The only requirement for such devices is sufficient quantity sunlight during the day. Otherwise the battery will not be able to charge.
Decorative effects
Creating DIY street lamp from scrap materials, the master can be creative in his work. The choice of lampshade design depends on the imagination of the owners of a private house.

Natural motifs are considered popular. For example, a lawn decorated with dragonflies will look harmonious during the day. At night, such luminous elements can illuminate the lawn, giving the entire area a unique beauty. Dwarfs peeking out from the bushes with lanterns in their hands will look fabulous and interesting.
You can also choose any shape for the lampshade. Various old floor lamps, kitchen utensils and other things that are currently lying idle will be used. With help various materials You can bring any fantasy to life by decorating your site in an original way.
Materials
Can be created from different materials. Many owners choose plastic for these purposes. It's easier to work with him. However, this material is known to be fragile. He will not be able to stay outside the house for a long time, exposed to natural conditions.
It is better to use metal products. Moreover, brass in this case is considered one of the best materials. It does not darken or oxidize. Copper and bronze are not recommended for use in this case.
Any glass or ceramic containers or dishes are also suitable.

Natural materials, such as wood, when correct processing will last long enough. In this case, creating a lamp will be easier than processing metal blanks. Wooden lanterns will fit into almost any decor style.
Wiring Requirements
Creating DIY street lamps, it is necessary to take a responsible approach to electrical safety requirements. The posting will be created on outdoors. To avoid unforeseen troubles, it is necessary to provide high-quality protection for all elements of the system from various adverse influences.

To create lighting in the area, you will need a VVG cable. used to secure connections. To protect the wire, it is necessary to use a corrugated pipe (metal hose).
You will need to purchase a two-wire copper wire with a cross section of at least 1.5 mm. The cable length should be calculated based on the area of the site. Typically at least 100 m of wire is required. The diameter of the corrugated pipe should be 18-20 mm. This will protect the wire in the ground from attacks on its integrity by rodents or accidental mechanical shock (for example, with a shovel).
Wiring installation
To connect lamps for street lighting with your own hands, you will need to install the wiring correctly. First, trenches are dug for the cable. Their depth should be about 70 cm. Their distance to the house should not be less than 60 cm.
If you plan to install floor lamps, first pull the cable through their legs. The structure is installed in the ground. The cable in the trench runs through a corrugated pipe. The wire is pulled through all elements of the system. Then it is cut off, leaving a tail about 15 cm long. The second piece of cable is pulled through the lamp in the same way. They are connected at the top of the lantern using terminals.
If the lampshades are on the wall, their junction boxes should be properly insulated. It is best to connect the wires with clamping nuts. In this case, it is not recommended to twist the contacts.
Connecting the electrical circuit
After installing the conductors, you need to connect the street lamps with your own hands to the electrical circuit. As you know, it has two wires (“phase” and “zero”). The switch must open the phase wire. A special device will help you find it.
You can plug the lamp directly into an outlet. A plug is mounted at the end of the wire. This option will do for connecting one small lamp to the network. If the system consists of several lights, it is better to connect the cables to the terminals in the electrical panel. In the event of an accident, a special fuse will automatically open the circuit. The total load of the lighting system must be consistent with the wiring capabilities.
Before digging trenches, you need to check the functionality of the system. It is recommended to strengthen floor lamps by adding crushed stone to the base or pouring clay or concrete into it.
Wood lanterns
Made by hand, it will fit harmoniously into the exterior. To create it, you can use various twigs, planks, bark and other similar materials.
First you need to inflate balloon. Then you need to collect a sufficient number of dry twigs. In a chaotic order they are glued onto the ball with an overlap. When the structure dries a little, you need to detach it from the surface of the sphere. The ball deflates. A light bulb is installed inside.
Using imagination and the simplest materials at hand, you can create any version of wooden lampshades. It is not necessary to have the skills to work with such material. By twisting, for example, birch bark, you can get an original lampshade. It will look elegant and stylish.
By applying luminescent paints to stumps, you can create very beautiful lighting. There are many options for wooden lamps.
Glass lanterns
Can be made from glass. Bottles, cans and other containers are suitable for this. You can pour various glass balls, pieces of glass, and decorative sand on the bottom. The light bulb is inserted through the neck and fixed with silicone.
You can hang several of these bottles or cans at once from the ceiling of a gazebo or veranda. They will be able to fully illuminate the space. Instead of one light bulb, you can place it inside glass containers the whole garland. Such a flashlight will look very impressive.

Jars and bottles can be decorated with paints, rope, lace, wire and other available materials. In this case, the bulb will not be as transparent, the light will be better scattered. If applied to inner surface jars of luminescent paints in the form of uneven spots, the lamp will turn out to be very original. Imagination and creativity will help you create the best lampshade or flashlight.
Having considered the options for creating lighting on the site of a private house, you can do all the work yourself.
If you want to decorate the area near your house or cottage unusual lamps, but finances do not allow purchasing expensive lighting, then you can do it yourself. How to make a street lamp with your own hands? You need to be patient and willing, then a homemade light source for the street will be pleasing to the eye. Next we will provide simple instructions for making a lamp at home.
Selecting a location and preparing materials
Before you start making a lighting fixture with your own hands, you need to think about where the street lamp will be located. Depending on the location, the method of fastening the structure will be chosen. Homemade lamp will become great solution at, verandas or the perimeter of the entire house.
The method of fastening may also be different. The street light can be mounted on a pole or attached to a wall or simply hanging. The most difficult thing is to make a lantern on a support, since this requires finding the necessary pole. If you make lighting fixtures yourself, then it is best to choose simpler options, as in the photo below:
You can use any available materials to make a lighting fixture. It can be wood, plastic, metal or glass. If you want to make a device that will serve for many years, then the best solution there will be a lamp made of metal.
To work, you need to stock up on metal (sheets and rods) and welding machine. If this is not the case, then you can use improvised fasteners.
Step-by-step assembly instructions
To assemble a metal street lamp, you must first select its model. It can be retro style (antique) or minimalism. A homemade forged lamp is considered popular, which is what we propose to make.
The first stage of work is creating a sketch of the future street lamp. The picture below shows a common option:

To make such a product strong and durable, you need to start with drawing up a drawing. The structure consists of the following elements:
- side walls (4 pieces);
- top cover;
- bottom cover (bottom);
- decorative finishing.
Example drawing:

When making a homemade street lantern, use cold forging. If you have welding equipment, then connecting all the parts will be easy and simple, this will greatly simplify the task. If such a device is not available, then it will be necessary to prepare fastening elements in advance. These can be bent corners of the product walls. Don't forget about glass. Before assembling the structure, you must first install the glass. You also need to figure out in advance how to secure the electric socket in the flashlight, if this is provided for by the design.
Installation and connection
To connect a street lamp to the electrical network (it can be a regular or diode lamp), you need to stock up on the following elements:
- Cable production (). It is recommended to use a two-core cable for connection.
- . With their help, reliable fastening of the wire connections is carried out. Their type depends on the number of connections. The pads are designed for currents up to 10 A.
- Corrugated pipe. It is better to take the diameter up to 25 mm. The corrugation provides protection from various rodents and mechanical damage.
Typically, a street light that is installed near the house is connected to a power source through cable wiring. To arrange all the wires, it is necessary to prepare a special trench for them in advance. The average and optimal trench depth should not exceed 80 centimeters. It is not recommended to fly the cable through the air for safety reasons. We talked about this in the corresponding article.

Also, in order to assemble a safe lantern for the street, it is recommended to use a corrugated cable. The wiring should be threaded into such a sleeve before laying it in the ground. Read about how quickly and correctly in our publication.
When installing a lighting device on a wall or facade, the connection to the electrical network occurs as follows: the first thing to do is to isolate the contacts. Then we connect the wires to the junction box. It is also advisable to do the following: solder the contacts together and wrap them with electrical tape. The connection point in this case can be a regular outlet. But there is also an option such as connecting the cable directly to the terminals in the panel. Last step— installation of the lamp. It is most advisable to use for street lighting, because They shine brightly and are also the most economical.
To pay less for light, you can additionally equip your homemade street lamp with a motion sensor and photo relay. In fact, we talked about, as well as about, in separate articles, which we strongly recommend that you read.

As you can see, making a street lamp with your own hands is quick and easy. The main thing is to have great desire, desire and, of course, the material necessary for the work. This type of outdoor lighting is considered safer, since its body is completely enclosed.
Master classes
Well, the last thing I would like to provide you with is visual videos instructions on how to make a street lamp out of metal, wood and even a glass jar. You can watch all the simplest master classes below:
That's all I wanted to tell you about how to make a street lamp with your own hands. We hope you found our instructions interesting and helped you in assembling your own garden lamp!
Any landowner can make a street lamp for his dacha with his own hands. To do this, you do not need to have special knowledge or purchase expensive equipment. A homemade street lamp can be made from any material you have on hand. Well-designed lighting will transform ordinary garden plot to a fairy forest or a fantastic landscape. Having made a lamp for your dacha with your own hands, you can use it to perform a number of tasks in terms of practical landscaping of the territory. Let's look at what types of garden lamps there are, what they are made of, how they are installed and used for various purposes.
Types of country lamps
Street lights are divided into several categories, based on the characteristics of their design, installation location and tasks performed.
A DIY garden lamp is made from the following materials:
- metal;
- glass;
- plastic;
- tree;
- ceramics.
When choosing a material, it should be taken into account that the strength of the street lamp must be sufficient to withstand strong gusts of wind, temperature changes, precipitation and exposure to solar radiation.
In addition, when making a street lamp with your own hands, you need to remember that it should fit organically into the landscape even during daylight hours, without disturbing the created harmony. To achieve this, it is necessary to electrify the territory based on a well-thought-out design and strictly according to the wiring diagram.
DIY lanterns are used to illuminate the following areas:
- facade of the house;
- entrance gates and gates;
- external fencing;
- garages, warehouses and sheds (security function);
- several objects and trees (decorative and festive illumination);
- recreation areas (romantic lighting);
- garden paths, streets and paths.

When making lanterns yourself, you need to provide various ways fastenings and use all possible places to place them. As a rule, there are plenty of opportunities for this in any area.
Having done garden lantern, it can be installed as follows:
- on a pole made of metal, wood or composite material;
- on the wall of a house, garage or barn;
- in the form of a floor lamp next to a gazebo, canopy and bench;
- under the garden figure;
- on arches;
- hang from a tensioned rope.
When making country lanterns, you can give free rein to your imagination. They are made in classic and modern style. An antique lantern made of non-ferrous metal or wood will perfectly decorate a patio area or covered barbecue. To do this, you can use an old copper kettle or samovar. What will it take to make a garden lamp with your own hands?
Tools and materials
In order for lighting to fulfill its full role, you need a good plan. Before you make a street lamp with your own hands, you need to walk through the area and mark the installation locations of the lighting fixtures. After this, make a drawing detailing the locations of the wires, mounting boxes, sockets and switches. The project will be the basis for calculations and subsequent purchases.
In order to make a garden lantern, you need to have the following tools and materials:
- roulette;
- shovel;
- level;
- Bulgarian;
- hammer;
- screwdriver;
- mounting knife;
- soldering iron;
- insulating tape;
- fasteners (screws, staples, nails, couplings).
Regardless of what type of lamps is chosen for arranging the garden, you need to connect a source of electricity to them. This can be a 220 V industrial network or a battery.
Wires can be pulled through the air or laid in the ground. When a decision is made in favor air version, you will need a strong cable stretched between poles, buildings and trees. Cables are attached to it; it is forbidden to pull them tightly; the connection must be floating with a small allowance.
To lay wiring in the ground, you must use plastic pipes. It is best to choose products made from reinforced polypropylene. Such pipes will reliably protect the cable from moisture and mechanical influences. The pipeline is assembled using a special soldering iron.

A battery-powered chandelier is hung in places where it is impossible or unprofitable to connect an industrial network. Power is provided by reusable batteries, disposable or.
Making glass lanterns
It is difficult to imagine a dacha without family and friendly feasts. After such events, a lot of glass containers remain various sizes, shapes and colors. Do not rush to throw away these containers; they can be used to make original and beautiful garden lanterns.
There are the following options for making glass lamps:
- Single lights. For work, dark glass bottles are used. They are filled up to half with colored pebbles and turns of wire. A small light bulb in a socket is inserted into the neck. All cracks and contacts are filled with sealant. Immediately after it hardens, the flashlight can be used for its intended purpose.
- Chandeliers. Several identical bottles are prepared, their necks are plugged with stoppers made of any waterproof material. After this, a circle or square is cut out of a plastic or metal plate. Holes for necks are drilled in the base and electric wire. Bottles are inserted into the holes, connected LED lamp, a chain or cable is attached to hang the created chandelier.
- Volumetric lamps. To make them you will need three-liter jars. Since they are absolutely transparent, they need to be decorated. This is done using stained glass paints, adhesive films or strips of copper foil. The lamp socket is attached directly to the plastic or iron cover. After this, it is put on the neck or rolled up with a special key.

A good visual effect is achieved by combining or alternating glass vessels in one product or along the path.
Metal lamps
In any dacha farm there is always a variety of tin cans or old kitchen utensils. Having shown creativity, from these items you can make bright and original lamp. A metal lantern is a durable object that is resistant to mechanical stress, moisture and ultraviolet radiation.
Manufacturing options may be:
- From beer cans or canned food. They must be wrapped in carbon paper and plain paper. A drawing of any content is applied to the workpiece - stars, insects, animals. After this, holes are made along the contour of the pattern using a drill with a drill bit or a hammer with a nail. The can is coated with paint, a light source is inserted into it - and the lampshade is ready.
- From old dishes. A sieve, colander and graters are best suited for this. The presence of holes in them makes the work much easier. The handles of the colander are cut off, and the remaining hemisphere is fixed on a rigid base. Rust is masked acrylic paint, resistant to weather conditions. Such lampshades are decorated with tea, coffee mugs and bowls glued to silicone.
Even old saucepan or you can turn it into a lamp by perforating it with a small diameter drill. The product is decorated with silver or bronze paint.

Wooden and twine lamps
At any time of the year, especially in autumn, you can find a lot of branches at the dacha various configurations. Finding a rope or cord won't be a big problem either.
The lampshade is made from scrap materials in the following sequence:
- A rubber ball left over from one of the holidays is inflated. Then its surface is lubricated with Vaseline or vegetable oil.
- Preparations are underway facing material. The branches and cord are treated with an antiseptic and impregnated with a primer to protect against dampness and ultraviolet radiation.
- Epoxy glue is diluted in a saucepan or bowl. The cord is immersed in it. It is advisable to crush it a little so that it is completely saturated with epoxy resin.
- A cord soaked in glue is wound around the ball, and twigs are immediately placed on top of it. After a day, the ball is deflated and removed from the created rigid frame.
The created lampshade can be used in its original form, painted, varnished and covered with glitter. If necessary, it can be cut into 2 hemispheres.
Lighting summer cottage or country house especially important at night. That’s why it’s worth thinking through all the details and making the lighting yourself. To do this, you will need minimal knowledge of electricity and wiring, and you must also adhere to all basic safety rules.
DIY street lighting 


First of all, you need to understand the functions of lamps. Their main task will be lighting local area And harmonious combination with general decoration and design of the house.
Lamps for summer cottages are divided into several types, from which you need to choose the most suitable one.
Wall lanterns
This option is best suited for lighting at the entrance to the house, as well as the area in front of it. Alternatively, you can also hang them near the gate or gate. They are completely different in appearance and shape. The most popular options are the “antique” ones.
 Beautiful lanterns made by hand
Floor lamps
This type of lamps is installed directly in the ground, or on the veranda. The classic version of a floor lamp is a flat stand with a round ball on top. But there are various modified models that are made in a modern style. Basically, floor lamps differ from each other in the height and shape of the shade.
 DIY floor lamp in the country
Ground lamps
They are mounted directly into the ground itself and serve to illuminate green spaces and illuminate country alleys on the site. Swings, gazebos, summer pavilions and other buildings complement the area very nicely. Typically, lamps of this type have a round or rectangular shape.
 Ground lamps in the interior of the territory
Hanging lanterns
Mainly attached to ceiling beams on the verandas. With their help you can decorate trees or bushes. Pendant lights are a long, strong chain that ends with a shade.
Ideas for garden lamps
If you want to decorate and illuminate the territory of your summer cottage in a beautiful and unusual way, here are a few ideas that you can turn into reality with your own hands.
Fairy lights
This item can be bought in absolutely all hypermarkets for the home. The pricing policy is affordable, and the beauty of the design is simply indescribable.
You can improve it a little and make garlands with your own hands. Create your own unusual option from beautiful lampshade balls made of thread, white rope and twine.
 Garlands in the design of a gazebo
  A variety of shapes of garlands in the interior
The process is quite simple:
- First we inflate the balloons required sizes and wrap them with rope, which we first lubricate with PVA glue.
- After the glue has completely dried, you need to burst the ball and carefully remove it.
- The final touch is to thread the wire with the light bulb and hang the lanterns in your area.


An alternative to this option would be glass shades made from jars. They are especially good for garlands that have large bulbs.
 The process of working with a garland with your own hands


Candles
This option is not capable of providing a lot of light, but its highlight will be the creation of a romantic atmosphere.
 Decorating the area with candles to create a romantic atmosphere
Making such lanterns with your own hands will not be any problem. Just take some rope or wire and glass jars. You can optionally add pebbles or sand to the bottom of the jar, which will make the process of changing candles much easier, and the wax will not stain the bottom itself.


Lanterns
Lanterns of this type will already require some financial investments, but at the same time they will look colorful and unsurpassed on the site.
 Making your own lanterns
  Beautiful lanterns with a forged base
Bottle lamp
Another creative idea would be a kerosene lamp from a bottle. It will take a little more time and effort to create, but it will be cheap and look incredibly impressive.
 Unusual lamp made from bottles in the interior of the site
Lamps on trees
This is a combination of simple objects, namely a lampshade from an old chandelier and an ordinary street light bulb.
 DIY tree lamp
  Beautiful lampshade in the interior of a plot with a tree
  Beautiful combination trees and lighting
LED lights
Quite simple and practical option for accent lighting of a particular area of a summer cottage.
 LED lights in the design of the site
A big plus is that such a tape is waterproof; it can be used to illuminate steps, facades, benches and other elements.
 Home staircase lighting
There is backlighting with different colors and operating modes.
Creative fountain lighting
To achieve the most beautiful and colorful fountain lighting professional designers It is recommended to use both surface and underwater lighting.
 Creative lighting for a country fountain
Use solar-powered lamps as general lighting to highlight the contours of the fountain. They are not only able to illuminate the structure with a pleasant soft light, but will also save you significant energy costs.
In order to illuminate the jets in the fountain, you can use lamps made of fiber optics.
To change the illumination zone of the fountain, you will need to install mobile underwater lamps that can move chaotically across the entire area of the water.
 Fountain jet illumination
If you plan to use surface floodlights, it is best to install them on a rotating platform. Then the lighting area of the fountain can be changed without any problems.
The most creative way to achieve unusual lighting is to install an underwater lamp. It is best to place it near the water supply nozzle, then the spraying streams of the fountain will look very unusual and fascinating.
 Underwater fountain lighting
Installing fountain lighting yourself
If you have basic electrical knowledge, you can easily install the lighting yourself.
Here is a short plan of action to follow:
- First, draw up a diagram of the lamps and think about options for arranging the lighting fixtures themselves. At this point you should think about how powerful they will be, their quantity and the desired effect.
It is also worth deciding whether they will be multi-colored or monochromatic, underwater or surface, and possibly combined. The end result should be a fountain project with all its details. - After that, purchase necessary materials for work. You can buy everything in a hypermarket or specialty store. Remember that the cable must have a protective corrugation. Pay attention to the tightness of the wire and other items.
- Additionally, you will need a transformer, screws for fastening, cable fixing brackets, a screwdriver, pliers and electrical tape.


Progress:
- It is recommended to install underwater lighting first, and only then move on to surface lighting.
- If you think that you do not have enough knowledge in the electrical field, during the period of underwater lighting installation, it is best to contact a specialist in this field.
- Create a chain of lamps that will surround the fountain area and illuminate it from the side.
- We make markings in the places where our lamps should be.
- We fix underwater lighting if it requires installation. In the version of floating lamps, we simply lower them into the water and attach a small weight.


- For surface lighting, we will need to dig a shallow trench into which the cable is carefully laid and at the end everything is covered with earth (except for the fastening points).
- When the work is done, we must connect everything to a transformer, which is ultimately connected to the electrical network. To do this, we use wire cutters to expose the ends of the cable and securely fasten them to the input bolts on the transformer.
- The transformer will need to be mounted on a wooden pole that will be stuck into the ground. Alternatively, it can also be mounted on slats to the wall of the house. Be sure to make a grounded outlet nearby that connects to the transformer.
Simple DIY lantern
It is not at all necessary to have any special knowledge to make a lantern with your own hands.
 DIY lantern for home
For work, use the usual available materials:
- Drill.
- Drill.
- Screw.
- Wooden chips.
- Glass or tin jar.
- Clay.
- Plastic cups or a bottle that can be used instead of lampshades.
- Old kitchen utensils.


Such crafts will undoubtedly be different original idea and colorful appearance, but usually their service life is not very durable. In any case, the work process is quite interesting, and the products come out very original.
Nowadays, garden lanterns are widely represented in the assortment of any hardware store, but their prices are not encouraging with their availability. Therefore, making such lamps with your own hands is becoming increasingly popular.
What types of street lamps are there for a dacha?
Such lights must perform two main functions:
- Illuminate the area around the house so that its inhabitants can safely move around it in the evening and at night without the fear of stumbling or falling.
- Serve as a decorative element, organically fitting into the concept of landscaping a summer cottage.

At the moment, the main types of street lamps for private households are divided into the following categories:
- Wall lights are ideal for illuminating the entrance to the house and small area in front of it (and are also installed near the entrance gate or gate). They can be very diverse in shape and decoration, but most often there are so-called “antique” lanterns, distinguished by their elegance and harmonious shapes.
- Floor lamp type lamps are installed directly on the ground or on the floor of the veranda. Classic version assumes a flat stand with a round ball at the end, but modern models often deviate significantly from this pattern, differing in the variety of shapes, number of shades and height. The latter is usually from 0.3 to 0.5 m. Such improvised “floor lamps” usually provide a very soft, pleasant and subdued light, while at the same time allowing you to see everything that is happening on the site.
- Ground lamps are mounted directly into the soil, which opens unlimited possibilities For beautiful lighting trees, bushes and flowers, and along pedestrian alleys for the convenience of moving along them. These lights are suitable for installation near small architectural forms(summer pavilions, swings, utility rooms etc.). They provide a beam of light directed strictly from bottom to top, and in some models its angle of inclination can even be changed. Typically, ground lamps have a strict round or rectangular shape.
- Pendant lights are traditionally attached to ceiling beams on open verandas, sometimes to tree branches, but this is quite difficult due to the technical difficulties of connecting to the power grid. Such lanterns in the country, photos of which are presented below, usually represent a long and strong chain ending with a lampshade of any type and size.

Light sources in garden lanterns
Outdoor lamps for a country house use a variety of light sources. It can be:
- Regular incandescent light bulbs. Their advantage is their low cost, but the possibility of using such lamps for outdoor lighting remains questionable. They consume too much energy, and excessive brightness does not allow you to fully enjoy the beauty of the evening garden.
- Halogen lamps are more economical and will last much longer than incandescent lamps, providing good color rendering and light intensity, but at the same time they get very hot and are sensitive to sharp jumps voltage in the network and contamination of the flask.

- LED lamps can save up to 95% of energy compared to conventional lighting sources. This is not the cheapest option, but they have a long service life and do not contain harmful substances. human body substances such as mercury. Also any LED flashlight for the dacha, it is equipped with a very durable body, which, unlike a glass flask, is not so easy to break.
- Solar panels. Lanterns with such lighting elements are perfect for installation in areas where laying conventional wiring is problematic. Their main part is a battery that absorbs solar energy. After dark, this lamp turns on automatically. When the battery is fully charged, the flashlight can work without interruption for 10-12 hours. It should be placed only in those areas of the site where the sun heats most of the day.
Materials for making lanterns
The worst material for making street lamps for a personal plot is plastic, which is easy to break or break. The most durable lamps will be those made of steel, bronze, copper or brass. Steel models resistant to impacts environment, but often look a little boring.
Copper lamps will fit perfectly into the interior of a retro-style area, but do not forget that copper in the air oxidizes over time and acquires a not very pleasant greenish tint. Bronze also darkens over time and requires constant cleaning. Lanterns made of brass, which combines high strength with aesthetic appeal, are also practical.

However, to make lamps from such materials, a number of tools are required (drills, drill bits, sets of screws, etc.), so lamps made from scrap materials are also popular: glass and tin cans, clay and even wood chips. They make an original impression, and in order to make them, no special skills are required. The only drawback of such lighting devices is their fragility and short service life.
Features of installing electrical wiring in street lamps
When making lanterns for a personal plot, it is necessary to especially carefully approach the issue of installing electrical wiring. To connect lighting devices to the network you will need:
- Electric cable type VVG.
- Terminal blocks for reliable fixation of connections.
- Metal hose (corrugated pipe) to protect the wire.

In order to make lanterns for a summer house with your own hands, you usually take a two-core cable, the thickness of the core is 1.5 mm. In order not to return to the store later, it is best to immediately buy a whole bay, in which the length of the wire is 100 meters. There you also need to purchase a corrugated pipe with a diameter of 18 to 25 mm, which will protect the electrical cable in the ground from rodents or accidental damage when digging the ground.
The diameter of the holes in terminal blocks usually ranges from 2.5 to 4 mm. They consist of one or two strips: which type to choose is determined by the number of connections and shades in the lamp. The pads must be designed for a current of 5-10 A.
At the installation stage itself, the following operations must be performed:
- We dig trenches into which the cable will be laid. The optimal depth for them is 70-80 cm, and the distance from the ditches to the house should not be less than 60 cm.
- In the case of “floor lamp” type lamps, we first install metal legs and pull the cable through them one by one. Where it will be located in the trench, be sure to place it in a corrugated sleeve. After passing through all the planned lighting fixtures, we cut the cable so that the length of the tail is at least 10-15 cm.
- After this, we prepare the second section of the electrical wire, also passing it through corrugated pipe and at the top of the lamp we connect both cables with terminals.
- If the lights are located on the facade or wall, the junction boxes should be securely insulated. The best option is boxes in which the wires are connected with clamping nuts. Sometimes the wires are simply connected with pliers, but then it is better to be sure to solder each connection. The twisted areas are carefully wrapped with electrical tape.

- Now let's start installing the electrical circuit. Since it has two wires - “zero” and “phase”, it is necessary to ensure that the switch opens the phase wire. Then, with the switch in the “off” position when replacing a burnt-out lamp, there is absolutely no risk of getting hit electric shock. The phase wire is determined using a special indicator.
- A regular outlet is quite suitable as a connection point. In this case, de-energizing the entire system can be done quickly by simply pulling out the plug. But the method of connecting cables directly to the terminals on the electrical panel, which is usually equipped with a special automatic fuse that cuts off the power supply in the event of an accident, also has the right to life.
- When installing a circuit breaker, be sure to check whether its rated power matches the load in the given network.
- Before digging trenches, make sure that all lights in the area are working and strengthen the poles by compacting small crushed stone or clay around them. In light soils, it is recommended to fill the lamp supports with concrete.
The most popular types of homemade lanterns
More and more owners of dachas and cottages are trying to make decorative lanterns for their dachas themselves. In the areas you can find a wide variety of modifications of such lighting devices:
- in the form of garlands, where lampshades serve as plastic bottles and cups.
- from PVC pipe,
- from glass and tin cans and milk cartons,
- building materials,
- plastic,
- metal,
- wood
- old kitchen utensils.

Very often the material for lanterns is personal plot glass jars or bottles serve. Such a lampshade is made very quickly, and the transparency of the glass allows light to pass freely through its walls, creating special effects of amazing beauty. To make such a lamp you will need Glass bottle, cartridge, pliers, electrical tape, indicator and knife for stripping insulation at the junction of the electrical circuit, as well as decorative elements. Now you need to perform the following operations:
- Install the electrical wiring, connect the wires in the socket and screw the light bulb into it.
- Take a bottle with a narrow neck, preferably for alcoholic drinks, of an unusual shape or color scheme, and place a variety of small beads, light-reflecting transparent balls, and ground glass on the bottom.
- Wind a thin multi-colored wire around your finger so that it forms a spiral, and also place it in the bottle.
- Then lower the socket with the lamp into the improvised lampshade and securely fix it with silicone.
A more durable option is a forged lantern. To make it you will need steel rods, strips, a corner and a welding machine. Forged lamps are made as follows:
- The body is made of 4 steel frames, having a trapezoidal or rectangular shape. To do this, use a corner whose cross-section should be 15x15x2 mm.
- The outside of the frames is covered with grilles, which are either simple or contain volutes and curls. They are welded from a steel rod with a diameter of 05 mm. The entire body is covered from above with an iron cap.
- The bracket responsible for fastening to the wall is made of a square steel bar, the cross-section of which is 12-14 mm. The material for making the lower curls will be a thin steel strip. The ends of the curls are connected using the electric welding method and by means of interceptions.
Garden lamps as decorative elements
In order to add new notes to the interior of the site, you should pay attention to various shapes lanterns for country houses that will help the area sparkle with new colors. So, along the paths you can place mushroom-shaped lamps, at the very top of which there is a nice shade-cap. In this case, the light is reflected downwards, which creates a unique atmosphere of magic.

Floor lamps in the form of a cylinder or in the form of floating waterproof balls (if the house has a swimming pool) also look unusual. Special luminous benches, vases, sculptures or flower pots in which flowers grow are often used as light sources. This effect is achieved through the use of special halogen paint, which gives fluorescent light. As you can see, the ideas for making your own lighting sources are simply inexhaustible.