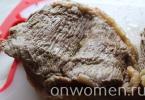
Pita is a fluffy and very tasty white flatbread or bread that is used in recipes for preparing various snacks. The main distinguishing feature of Mediterranean pita is the natural “pocket” inside, formed by steam accumulated in a small bubble in the core of the bread. A variety of fillings are placed in such a pocket - vegetable, meat or fruit.
The result is a very tasty and nutritious dish, somewhat similar to the usual shawarma, but much safer for the human body. Today I will present to you recipes with photos of pita bread and its fillings, which can be easily implemented at home.
Basic pita recipe
Kitchen tools: several large bowls; cutlery (spoons, knives); spacious baking tray; the frying pan is spacious; oven mitts; wooden spatula; a piece of parchment paper; Kitchen Scales; sieve.
Ingredients
How to choose the necessary ingredients
- Try to choose only the best ingredients for your pita bread. This is especially true for flour: it must be of the highest grade and fairly finely ground. Also, do not forget that various debris should not be visible in the bag of flour: blackened grains, polyethylene residues or grain husks. Remember that only fresh and high-quality flour will allow you to make truly delicious pita.
- If you don't like yeast baked goods, make pita without yeast– this recipe allows the use of a teaspoon of soda, quenched with table vinegar.
- Olive oil, recommended for use in the recipe, is an integral element of Greek cuisine; without it, pita will not turn out the way you expect it to be. Sunflower oil, which is often used in the absence of olive oil, makes the flatbread less fluffy and tender, and the dough itself can taste bitter.
- Pour 70-75 g of dry yeast into a small bowl, add about 250 ml of water to it. Stir the mixture thoroughly with a spatula until the yeast is completely dissolved. Leave the mixture for a few minutes in a warm place. Mix the remaining water with 20-25 g of table salt and 7-10 g of granulated sugar, trying to dissolve all the grains.
- Sift 750 g of wheat flour through a sieve and make a small depression in it.

- Pour the infused yeast into the niche, as well as water with salt and granulated sugar. Then add 80-100 ml of olive oil and mix the mass thoroughly.

- Once the dough has become too stiff, transfer it to a floured kitchen counter and knead by hand for about ten minutes.

- Then leave the dough in a warm place for an hour, during which time it should swell well. Punch down the risen dough and divide it into twenty equal pieces.

- We form a ball from each piece, then leave the products to infuse for about half an hour. To prevent the workpieces from becoming covered with a dry crust, cover them with a towel.

- Roll each ball into a flat cake with a diameter of approximately 12 centimeters.

- Again, leave the pieces in a warm place for proofing, this time it will take about ten minutes. Line a baking tray with baking paper and transfer the prepared cakes onto it. In total we need to bake 10 cakes in the oven.

- Bake the products for about 10 minutes at 200 degrees in the oven. We bake the remaining ten pieces on both sides in a dry frying pan preheated over medium heat. In this case, under no circumstances cover the frying pan with a lid.

Basic pita recipe video
The video we offer for viewing shows the complete process of preparing and baking delicious pita in the oven and in a frying pan.
Recipe for shawarma in pita at home
Cooking time: 35-40 minutes.
Number of servings: 4-5.
Calorie content per 100 grams: 180-265 kcal.
Kitchen tools: several large bowls; cutlery (spoons, knives); Grill pan; oven mitts; wooden spatula; a piece of parchment paper; Kitchen Scales.
Ingredients
| Eggplant | 1 PC. |
| Red onion | 1 PC. |
| Suluguni Umalat | 150 g |
| Pita is ready | 3 pcs. |
| Ham | 100 g |
| Fresh cucumber | 1 PC. |
| Cachoricotta | 20-30 g |
| Fresh radish | 2 pcs. |
| Avocado | 1 PC. |
| Lemon juice | taste |
| Caciocallo | 50 g |
| Salad mix | taste |
Step-by-step cooking process

Video recipe for shawarma in pita at home
The video offered for viewing covers in detail the step-by-step process of preparing delicious snacks with pita bread.
- To prevent the pita from burning, try to monitor the intensity of the stove fire when baking the product in a frying pan. Don't make the heat too high, as this will simply burn your cake on the outside and remain raw on the inside. In addition, it is best to bake a raw flatbread in the oven at 200 degrees, constantly monitoring the level of rise of the dough: if the product has swollen too much, immediately open the oven door to prevent tears from appearing on the delicate surface of the pita.
- To prepare pita shawarma, you can also use a wide variety of fillings, for example, meat. For example, you need to grind the chicken through a meat grinder, add finely chopped onion and salt. Then simmer the meat in a frying pan for about seven minutes, stirring constantly, and then put the resulting filling into the pita.
- In addition, this product can be made sweet by filling it with jam, marmalade or slices of canned fruit.
- Filled pita bread can dry out quickly if left outdoors for a long time. To avoid this, you can wrap the snack in plastic wrap and leave it at room temperature.

How and with what to serve the product
- Pita is a universal snack that perfectly serves as a hearty breakfast, nutritious lunch or early dinner. If you are watching your figure, I do not recommend consuming the product late in the evening, since the calorie content of the snack is quite high.
- Don't forget to serve appropriate drinks with your pita. In my opinion, milk, kefir or yogurt are best suited to a product without filling. As for pita shawarma, vegetable juices, tea or unsweetened coffee are perfect for this snack.
- Many gourmets believe that filled pita will become much tastier if it is topped with a suitable sauce. The most popular sauces for this appetizer are ketchup, mayonnaise or sour cream. It is also worth noting that pita with sweet and sour Chinese sauce turns out incredibly tasty.
- It is customary to eat pita with your hands, without using cutlery. However, if your snacks are going to be eaten by children, cut the product into small pieces with a sharp knife and serve on a spacious plate with a fork.

Helpful information
Now that you know how to make pita, I recommend paying attention to other, no less reliable and quick recipes for delicious snacks that can be easily prepared at home.
- Try to take on a very appetizing homemade one, famous for its amazing taste and incomparable, memorable aroma.
- Also, don’t forget about the delicious one, which is rightfully considered one of the most attractive snacks. Even the most notorious picky eaters are unable to refuse such a delicacy.
- Also, try low-calorie. This light and satisfying dish will attract the attention of those gourmets who would not like to gain extra pounds.
- Surprisingly tender - a worthy decoration for the holiday table. A nutritious and aromatic dish will not leave indifferent even those who do not like fish-based products.
- If you want to experiment, check out these great recipes with different toppings. Maybe among them you will find the best one, ideal for your family.
Thanks everyone for your attention to the recipes! I look forward to your comments on the recipes just described. In addition, share your own findings and experiences in preparing pita and its filling. Maybe you use different ingredients or prepare the dough in a different way? Tell us about it, let's develop the perfect recipes together! Bon appetit everyone and more exciting discoveries in cooking!
To knead the pita dough, pour flour into a bowl. Dissolve salt in hot water (water temperature approximately 80 degrees).
 Pour water and salt into flour.
 Add vegetable oil.

 Next, continue kneading with your hands and knead the dough for about 7 minutes. It should turn out smooth, uniform, not dense, but holding its shape well.
 Place the resulting dough in a plastic bag and leave to rest at room temperature for 20 minutes.
 The finished dough is soft and pliable and easy to work with.
 Roll the dough into a sausage.
 Cut the sausage into 8 equal parts.
 Roll each part into a ball, cover the balls with film so that they do not dry out.
 Next, grease the work surface (required!) with vegetable oil or sprinkle with flour (if you roll out the dough on a bare table, it may stick to the surface a little and, when transferred to a frying pan, the lower surface of the dough will be damaged, and this cannot be allowed - the pita will not be able to to swell, which means there is no “pocket” formed, which is a characteristic feature of this flatbread). On a prepared work surface, first roll out one ball of dough into a flat cake with a diameter of 15-16 cm. When rolling, try to make the flat cake as round as possible, it depends on how fluffy you get it (it is with the round shape of the flat cake that the steam rises correctly, thereby the characteristic shape of pita is formed).
 Place the prepared workpiece in a well-heated dry frying pan (no need to grease the frying pan with oil).
 Fry the pita on both sides (about 4-5 minutes on each side) over medium-high heat (I periodically added or reduced the heat, trying to keep the pan well heated). At this stage the pita will still be flat, don’t let that scare you.
 Next, we turn the pita over again to the side on which we started baking the flatbread, and then the most interesting thing begins - after 2 minutes the pita will begin to become covered with bubbles and inflate.
 Cover the finished cakes with a clean towel and let rest for 30 minutes.


Bon appetit everyone!
Pita is one of the simplest types of bread, along with a variety of pita breads, focaccia, and tortillas. This representative of the cuisine of the Arab peoples is very easy to prepare at home, and there are so many recipes with it that it is difficult to count.
Pita is ideal for picnics and food to go. The thing is that its distinctive feature is that this cake is hollow inside. Most often it is cut and meat, herbs, vegetables, and cheese are placed inside.
However, you can stuff pita with absolutely any ingredients you like. So, you can prepare not only the usual sandwich with it, but also a dessert with fruit and sweet sauce, and also bake already stuffed pita bread in the oven. In a word, this bread will give truly wide scope to any cooking lover.
You shouldn’t cook a lot of pitas at once, because they turn out very thin and tender, and therefore dry out quite quickly. Because of this, they are stored in film or a tightly tied bag so that air access is minimal.
And even slightly dried out pita can be revived: to do this, you need to hold it in a colander over boiling water in a pan for several minutes. After this procedure, it will look like freshly baked!
Ingredients for 8-10 pitas
- 250 grams of wheat flour
- 150 grams of water at room temperature
- 1.5 tbsp. spoons of vegetable oil
- 4 grams dry yeast
- 4 grams salt
How to cook pita
Pita dough can be kneaded either by hand or using a food processor or bread machine. To prepare the dough, mix flour, salt and yeast.

Then add the oil and water to the dry ingredients.

Knead the dough for 5-10 minutes. It should be slightly lumpy and fairly tight. If you use a bread machine, knead the dough in the “Pizza Dough” mode (Binatone BM-2068) or in a similar mode on your model, which involves a short one-time kneading with fermentation.

After kneading, let the dough rise for an hour. It will become smooth and very fluffy.

Divide the finished dough into 8-10 parts.

Roll the dough pieces into small balls and let them rest for 10 minutes.

Then roll each part into a cake with a diameter of 15-20 cm and a thickness of 3-4 mm, place on a sheet of parchment and leave for another 15 minutes, covered with a clean towel.

Heat the oven to 220 degrees along with the baking sheet. Carefully place the pita sheet onto a hot baking sheet and bake for 8-10 minutes without opening the oven door.
During baking, the pitas will inflate and a cavity will form inside.
Wrap the finished pitas while still hot in a damp towel and let them cool in this form, then transfer them to a bag. And you can easily come up with something to stuff this wonderful bread yourself - there is no doubt about it!

Some people have tried flat cakes baked from wheat or wallpaper flour. In the Middle East it has a special name - pita. The recipe for making this pastry came to us from time immemorial. The first mentions of such bread can be found in the Old Testament. In Hebrew, the name of the flatbread is “pat of bread,” which means “large bread pita.”
Flatbread with a "pocket"
A distinctive feature of traditional Arabic pita bread is the water vapor that is created in the dough when making the flatbread. It accumulates in the center of the baked goods in a bubble, separating the layers of dough. Thus, a large cavity is formed inside the baked goods, which chefs call a “pocket.” It can be opened with a sharp knife by cutting the edge of the cake. Meat, salads and other delicious fillings are placed in the “pocket”.
The average Arab pita has a diameter of approximately twenty centimeters. The recipe for making this flatbread will be outlined below. In the meantime, we’ll talk about analogues of this delicious bread. There are many varieties of pita in the world. For example, in Georgia they bake lavash, which is a large fluffy loaf without a “pocket”. In Iraq they make a very thin flatbread - lafa, and in India they prepare chapatis. In our article we will talk about how traditional Arabic pita is baked. A cooking recipe with a photo will help you master the technology of making this dish in a matter of minutes.

Pita without yeast. Ingredients
It’s quite easy to bake healthy and tasty pita. The cooking recipe (without yeast) states that the following products are needed to create this flatbread:
- wheat flour - 550 grams;
- milk (sour) - 50 milliliters;
- water - 225 milliliters;
- salt - 1 teaspoon.
Pita without yeast. Preparing sourdough
First of all, you should prepare the starter. To do this, you need to knead the dough from 200 grams of flour, 50 milliliters of milk and 50 milliliters of water. After this, it must be placed in a warm place for three days. By this time, bubbles will form on the surface of the dough. In addition, the product will have a sour odor, characteristic of the fermentation process. This means that the starter is ready for use, it can be stored in the refrigerator, and then reused as needed.
The product must be refreshed before use. To do this, you need to take 100 grams of starter from the refrigerator, mix it with 100 grams of flour and 50 milliliters of water and put it back in a warm place. After a couple of hours, the dough should have increased by half. It happens that fermentation takes longer than the specified time. If the process is delayed, then the starter should be refreshed again.
The main microorganisms of this product are acetic acid and Bread baked with such leaven does not spoil for a long time. In addition, when it is regularly consumed as food, a favorable environment is created in the human body for the development of beneficial microflora and the destruction of pathogenic ones. From time immemorial, our ancestors baked bread not with yeast, but with sourdough. This time-tested product will come in very handy today.

Pita without yeast. Cooking method
- Now you can start making the cakes. First of all, you need to take 125 grams of starter, 125 milliliters of water and 250 grams of flour. Often different varieties are used when preparing pita. The cooking recipe allows for mixing ¾ white flour and ¼ rye flour. To knead the dough, you must first add warm water to the starter and stir everything thoroughly. Next, you need to dissolve the salt in the liquid and only then add flour to it.
- Then you should knead the dough and set it aside for an hour and a half so that it has time to rise.
- After this, you need to turn on the oven and leave it to warm up to 250-270 degrees.
- Now the finished dough can be placed on a floured cutting board. Then you need to divide it into several small balls.
- Then you need to form the pieces into round cakes and carefully place them on the wire rack.
- It only takes three minutes to prepare the pita. As soon as the cakes puff up and rise, they need to be removed from the oven and wrapped in a towel to absorb excess moisture.
- The bread should not be kept on the fire for a long time, otherwise it will brown and become crispy. If you bake the cake at too low a temperature, it will turn out pale and too dry. So the correct temperature is of great importance.

Now the Arabic pita is ready. The recipe for making it at home is very simple. All family members will be glad that a new unusual dish has appeared on the table. However, in the Middle East this flatbread is not perceived as a separate dish. It is more of a “packaging” for a variety of fillings. We’ll talk about what you can put in the pita “pocket” below.
Filling
Juicy falafel balls, smeared with a mixture of shredded lettuce, hummus and tahini, with hot sauce and unleavened flatbread dough create the perfect Mediterranean flavor ensemble that many tourists love. It is quite difficult to recreate this culinary masterpiece at home. However, you can make a lot of delicious dishes in which the main ingredient is pita. The filling recipe involves the use of simple and affordable products.
For example, you can make pita fried bread. To do this, you need to cut the flatbread into two circles, place one of them in a frying pan with butter, break an egg on top so that the yolk is not damaged, and bake like an ordinary scrambled egg. Or you can create pita toast. Everything is very simple here too. You need to cut the edge of the flatbread, place slices of tomatoes and pieces of cheese in it, place it in a toaster with a grooved surface and keep it until done. The end result should be crispy fried bread with melted cheese inside. This is how you prepare a simple and very tasty pita. The recipe and filling of this dish will not cause any difficulties even for a novice cook.

Pita with yeast
Arabic flatbread can also be made in a frying pan. True, then it is better to cook pita with the addition of yeast. The ingredients are as follows:
- water - 1 glass;
- white flour - 500 grams;
- vegetable (preferably olive) oil - 2 tablespoons;
- dry yeast - 10 grams;
- salt - 1 teaspoon.
Cooking method

This is how Arabic pita is made with the addition of yeast. The recipe for cooking in a frying pan does not require much time.
Garlic bread
This delicacy is now served in many restaurants, but you can also make it at home. To do this, the finished pita must be cut in half lengthwise and thoroughly rubbed inside with garlic. Then drizzle with olive oil and sprinkle with za'atar (a Middle Eastern spice blend). After this, the bread should be placed in the oven for about five to seven minutes. The garlic pita is no worse than in any restaurant. A recipe for cooking a dish can take pride of place in a cookbook.

Now you know the secrets of making flavorful Arabic flatbread. This pastry will be an excellent alternative to traditional bread. Bon appetit!
Pita is a flatbread-shaped bread that is baked in Greece and Arab countries. Flatbreads are interesting because when baked, they form a cavity or pocket into which you can put a variety of fillings.
Ingredients
- wheat flour 2 tbsp;
- vegetable oil 4 tbsp. l.;
- salt 1 tsp;
- water.
Recipe
- Sift flour into a bowl, pour in vegetable oil, add salt. Rub the flour into the butter with your fingers.
- Add cold boiled water gradually, as much as the dough takes. It should turn out elastic and elastic.
- Cover the dough with cling film and let it rest for 10 minutes.
- Pinch off small pieces the size of a chicken egg from the dough, and roll out thin flat cakes on a table sprinkled with flour.
- Grill in the oven on a grill rack.
The resulting tortillas can be cut into two parts and filled with vegetables, fried meat or cheese.
Apple juice pitas

Ingredients
- salt 1 tsp;
- apple juice 700 ml;
- whole grain wheat flour 1 kg;
- yeast 1 tbsp. l.;
- baking powder or soda 1 tsp.
Recipe
- Flour must be mixed with yeast, baking powder and salt. It is convenient to knead using a mixer.
- Pour in the apple juice and knead the pita dough. It should turn out soft and elastic.
- Place the dough in a warm place for two hours. When it comes up, knead well. Pinch off 180 g pieces from the dough. Roll out round or square cakes on a table sprinkled with flour. The thickness of the cakes should be about 4 mm. You should get 10 cakes.
- You can fry pita according to this recipe in the oven or in a dry frying pan with a non-stick coating.
- You can take the finished dough with you on a picnic and fry pita in nature. Or take ready-made flatbreads and fill them with kebab fried over a fire.
Arabian pitas

Ingredients
- vegetable oil 75 ml;
- salt 1 tsp;
- dry yeast 11 g;
- water 650 ml;
- flour 1 kg.
Recipe
- Dissolve yeast in warm water. Let them sit for 10 minutes.
- Sift flour onto a board, mix with salt, make a mound. Pour vegetable oil and water with diluted yeast into the flour. Knead the dough so that it does not stick to your hands. If necessary, add a little flour.
- Place the dough in a tall container and place in a warm place until it doubles in size. After about an hour and a half, take out the dough, knead, divide into small pieces weighing 80 g.
Roll out the dough into flat cakes about 5 mm thick and bake in the oven at maximum temperature for several minutes.
Features of the pita recipe
The secret to making pita at home is frying. These flatbreads must be fried on a dry, hot surface. Then the water vapor that is in the dough will lift it, forming an air pocket in the middle. Place pita in a hot oven, on a hot baking sheet, and bake at maximum temperature. Then you will be surprised and delighted at the unusual result, using even ordinary yeast dough for buns.
Pita filling recipes can be very varied. The dish turns out similar to a sandwich, but differs in that the contents, placed in the pita pocket, can be generously seasoned with liquid sauce.
The filling is made at home from three components: meat, vegetables and sauce.
Instead of meat, you can use fish, shrimp or cheese. For guests, various types of fillings in different containers, sauces and chopped vegetables are placed on the festive table next to a plate of flatbreads. Let the guests choose for themselves which filling the pita tastes better with.
We wish you health, prosperity, and happy family holidays!