Self-leveling polymer floors They have now become a promising and fashionable type of floor covering and are increasingly installed in apartments (houses). Because they very well combine many of the requirements for floor coverings. Their qualities such as durability, hygiene, resistance to mechanical and chemical damage, the ability to decorate, as well as their electrical properties put polymer floors in the forefront. In addition, this floor can have any color, thereby giving a flight of fancy for design.
Self-leveling polymer floors
And what is important for home handyman, you can make such a floor yourself. You just need to have some experience in carrying out repair work in your apartment, a set of tools and accessories. And before you start installing the floor, carefully study the instructions that come with the set of materials for self-leveling floor. Scrupulously observe proportions when mixing components, observe time ranges, strictly adhere to the temperature and humidity recommended in the instructions, so as not to disturb technological cycle and not let all the work go down the drain. If you are not afraid of such conditions, then you can get to work.
The process of installing polymer floors is carried out in stages:
- Preparation necessary materials, tools, devices, workwear and protective equipment;
— preparation of the floor base;
- treating the base of the floor with a primer;
— applying the main layer of polymer flooring;
— applying the top (finishing) layer.
If you are taking on this work for the first time, then it is best to start installing a polymer floor with a bathroom. Because there as a rule small area floor and, in case of any flaws, they will not be so noticeable, but after gaining experience, you can continue in other rooms of your apartment.
Preparation of materials and tools.
Once on the building materials market, you will see a fairly large selection of materials for the device. self-leveling polymer floor. They differ in their characteristics and properties. Consult the seller to choose the right one for your particular case, depending on the quality of the base of your future floor, its levelness and humidity.
 Tools for self-leveling floors
 Among the tools you will need: an electric drill with a stirring attachment, it’s nice to have a surface grinder, a vacuum cleaner, a regular paint roller, a needle roller, spatulas - regular and serrated, special needle paint mortars for moving on wet surfaces. polymer floor, and of course the means personal protection. Provide good lighting floor surface during work.
Preparing the base of the self-leveling floor.
If you are installing a polymer floor in the bathroom without dismantling the old one floor tiles, then you still need to prepare the floor. Carry out jointing, sanding, cleaning all seams and cracks, and check its horizontalness. If a deviation of the floor from the horizon is detected, a screed will have to be made to level it. After completing the preparation of the base, it is necessary to remove all dust in the room with a vacuum cleaner and cover the cracks with putty.
Treating the base of the self-leveling floor with a primer.
The primer is simple, but very important detail and it must be carried out with great responsibility. The primer is made using the usual paint roller in two layers with each layer drying for at least a day. To ensure better adhesion of the polymer floor to the base, the freshly laid primer is sprinkled with clean quartz sand. The quality of the completed primer is determined visually after its final drying by the gloss and saturation of the surface where it is applied.
Application of the main layer of polymer self-leveling floor.
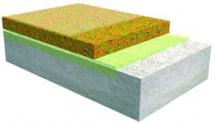
Polymer self-leveling floors are divided into several systems and each has differences in the technology for applying the base layer of the floor. The main ones are: painting, self-leveling and high filling.
 Paintable polymer floors
 The easiest system to produce is the painting system.. This is a thin-layer system about one millimeter thick, it can be applied to both new concrete, same as before existing coverage floor. Polyurethane paint systems are most often used, and it is recommended to apply up to 150 g/m2 on each floor layer. A floor constructed using this system is relatively inexpensive, but due to its small thickness it is not durable and requires good preparation grounds.
 Self leveling system
 Self leveling system and is the so-called self-leveling floor, their thickness reaches 5 mm. There are many varieties of self-leveling coating compositions. Such compositions are prepared from two components immediately before use and poured onto the prepared base.

Then spread evenly over the surface of the future floor using a notched trowel. The hardening of the polymer mixture begins after 15 minutes, so you need to hurry to level the material and roll it with a needle roller in different directions to remove
air bubbles and its uniform distribution over the floor surface. There is no need to remove the roller from liquid material until the end of rolling.
If you need to move on a freshly poured floor, then special paint mortars with needle soles.
Highly filled systems, their thickness is about 10 mm, the most complex in technology and labor-intensive work, and therefore require highly qualified performers. They hide all defects in the subfloor.
 Highly filled systems
 Applying the top (finishing) layer.
On final stage polymer self-leveling floor devices apply a so-called finishing layer on top of the main layer to make the floor surface more resistant to different influences and improvements appearance. Various varnishes are used as such a layer and are applied with a roller. After completion of work, access to the room is stopped until completely dry floor.
Video instructions for installing a polymer self-leveling floor.
IN Lately New types of floor coverings are appearing on store shelves. An innovative discovery was the appearance of polymer self-leveling flooring, which appeared relatively recently on the market of construction and finishing materials.
His journey began with the application, in production premises, where increased dynamic loads are used.
But it is also often used where aesthetic appearance and environmental friendliness are required, this is the sector food production, sanatorium medical institutions and so on. This type of flooring is poured, after hardening it becomes an absolutely flat surface and has no seams.
It looks like linoleum, which is why sometimes self-leveling polymer flooring is called “liquid linoleum”. Thanks to its phenomenal properties, beauty and practicality, it has become widespread not only in industry, but also in general household consumption.
Types and classification of self-leveling floors
The most basic classification is by composition, and so they are divided into:

One of the advantages is that work can be carried out in cold weather and is not susceptible to low temperatures. There are also disadvantages, poor resistance to chemically active substances, and high cost.
- Polyurethane floors– shows resistance to everyday household damage. They are used in unusual cases when flexibility and elasticity with a combination of strength come first.
Due to its elasticity, it can withstand any dynamic impacts without cracking or deformation. Also resistant to damage by chemicals.

In industrial buildings, the first types of self-leveling floors are usually used. The following types of polymer self-leveling flooring are widely used for finishing residential premises.
The following type of classification according to layer thickness:

There is also a classification, depending on the properties:

Advantages and disadvantages of self-leveling floor
Like all Construction Materials, self-leveling floor has its advantages:

But, like all materials, they have their drawbacks:
- Very high cost
- Due to all its positive properties, it is very difficult to dismantle a self-leveling finished polymer floor; the use of specialized equipment will be required.
Preparation for pouring a polymer self-leveling floor
As when working with any floor covering, surface preparation, tool preparation, and ready-mix preparation are required.
We start with surface preparation. We remove garbage and vacuum. We carry out a visual inspection for defects, chips, cracks, and height differences.
We eliminate defects; if there are minor defects, we use putty; if there are rough irregularities, we use floor screed. We are waiting for everything to dry.
During the mixing process, an endothermic reaction occurs, you should be careful and careful. Take a mixer or a drill attachment and mix the components, then pour ready mixture onto the prepared surface.
Polymer floor pouring technology
The pouring process consists of three stages:
- Stage – Preliminary or base layer.
- Stage – Finishing layer.
- Stage – Varnish coating.
And so we start by pouring the preliminary layer. The pouring process is best done by two people: one prepares the polymer mixture, the second smoothes it, and removes the air from the finished solution.
In most cases, an epoxy polymer mixture is used as a subfloor, with the addition of quartz sand or granite sand. Pouring the solution usually starts from the far corner; pouring in stripes is recommended.
 For a perfectly flat surface, it is possible to use beacons, which are pre-set using a level. Ready solution pour onto the prepared surface, spread evenly with a rule or a metal spatula.
Afterwards, an aeration roller removes air bubbles that form when mixing the components. Filling along a rope is also possible. The thickness of this layer should not exceed 1-2 mm. Drying time is approximately one day.
After rough coating When completely dry, you can begin finishing pouring. It is important to wash the instrument thoroughly after each use to avoid mixing.
At your discretion, you can use decorative elements. The elements can be coins of different denominations, buttons different forms and sizes, small river pebbles, seashells and much more.
 It is also possible to use stencils, landscapes and drawings painted with paints. And recently the use of 3D films. The process of pouring the final layer is no different from the process of pouring the preliminary layer.
After the final coating has completely dried, a special varnish is applied.. That's it, the floor is ready after the varnish has dried. Professionals warn that drafts and direct sunlight do not have a beneficial effect on the drying process of the poured floor.
It is also necessary to strictly maintain the time between pouring each layer. When pouring a floor with your own hands, we recommend that you watch video lessons on how to properly install a polymer self-leveling floor.
Prices for polymer self-leveling floors
The price will depend on the manufacturer, brand, region and place of purchase.
Now we will look at the average cost of one kilogram of the mixture:
- Polyurethane mixture – 230-260 rubles.
- Epoxy mixture – 250-280 rub.
- Methyl methacrylate mixture – 340-380 rubles.
- Blend on cement based– 310-340 rub.
It is important to know what the price is for square meter polymer self-leveling floor, consists of the price of the primer, preliminary layer, finishing layer, and if required, price decorative elements and varnish. The thickness of the layer also affects the cost.
On average the price is per 1 sq.m. and layer thickness 1-2 mm. material is:

Depending on the complexity, the number of decorative elements, the volume of work, the use of 3D films - the price of work per 1 sq.m. varies.
Currently, construction is an important sector of the national economy. A special place in this section is given to work on the manufacture of floors in a particular room. Today, a wide variety of materials can be used to build floors: wooden boards, plywood, linoleum, concrete covering. IN last years The so-called liquid polymer floor is gaining increasing popularity. It is also called bulk. Unlike conventional materials, it has a number of advantages.
Polymer floors are divided into such types as: epoxy, polyurethane, methyl ethacrylate.
Polymer self-leveling floors are a synthetic coating. Most often it is used in large retail premises, garages, exhibition halls, etc. Very often, polymer self-leveling floors are used in production due to their strength and durability. It is not difficult to make such floors with your own hands. In addition, there are 3D floors. They differ from the previous coating by the presence complex drawings, which not everyone can do with their own hands. Let's take a closer look at how to pour polymer floors, the main stages of work, positive and negative sides of this coating.
Read also:
: preparation, process and features.
About, how to glue non-woven fabrics meter wallpaper, read .
Advantages and disadvantages of self-leveling floor
Polymer self-leveling floors have a number of positive qualities, due to which they are in great demand.
Firstly, polymer floors are different types(epoxy, polyurethane, methyl ethacrylate), depending on this, they can withstand high temperatures and do not allow water to pass through.
Secondly, despite the use polymer base, they are hygienic, easy to handle and wash. Thirdly, this coating is resistant to various chemical agents.
Fourthly, polymer floors can be glossy or matte, so you can choose the desired design in accordance with the interior of the room. Fifthly, polymer floors contain a liquid component that quickly hardens. This promotes better adhesion of the liquid to any surface, be it wood or concrete. Unlike wooden and concrete base This coating is done quickly and without much effort.
Return to contents
Preparatory work
The difficulty of constructing self-leveling floors is that they require ideal Smooth surface. If the base is made of tiles or tiles, you will have to create some roughness. This can be done using sandpaper or sandpaper. Problems often arise when leveling the base if it is made of wooden planks. To do this, first seal all the irregularities. The unevenness of the subfloor can be clearly seen when dismantling the joists and removing the old covering.
The permissible difference in height of the surface of the self-leveling floor is 4 mm. If possible, you can make a screed from concrete. If you don’t do it, then unevenness and defects can be removed using grinder or whetstone. To determine the evenness of the coating, it is recommended to use water or building level. It is also advisable to prime the surface. The primer prevents the penetration of moisture and increases the adhesion of the self-leveling floor to the base. After the base is made, slats need to be nailed around the perimeter of the room like a plinth. This is necessary so that the liquid polymer mixture does not spread into the voids between the floor and the wall. The slats are fixed using self-tapping screws, nails (if the wall is wooden) or dowels (if the wall is concrete).
Return to contents
Mixture preparation and pouring technology
In order to make polymer floors with your own hands, you will need to prepare a working solution. You can purchase the polymer mixture at any hardware store. After this, it must be diluted in water. This is one of the most critical stages of the entire work, since the result of the pour largely depends on the quality of the solution. The mixture must be prepared only according to the instructions included with the product. Great importance has a mixing process. This should be done slowly so that not a single lump remains. In addition, there should be no air bubbles in the solution.
Mixing can be done using a special mixer or improvised means. Next stage repair - pouring mortar. The liquid polymer must be applied to the surface from the area of the room furthest from the door and gradually move towards the exit.
The optimal floor layer should be about 4 mm. If you make it thinner, it will not have high strength and reliability. This option is suitable as an addition to the main coating. It is best to pour the mixture together with an assistant. One person holds a container of polymer liquid and gradually applies it to the floor, while the second person levels the surface. A wooden strip can be used for leveling. self-leveling floor Not immediately, otherwise marks may remain on it.


Self-leveling polymer floors are also called " liquid linoleum" - they are so comfortable to use. This is a new word in interior design, and simply a godsend for industrial premises. They add additional visual volume to any interior thanks to their soft shine and seamless surface. Minimal shrinkage, high elasticity and modern aesthetics - these are the qualities thanks to which polymer floors are now gaining more and more popularity in the CIS countries, and abroad they have long been number one on the market.
Polymer flooring: fashion or practicality?
Today there are many types of polymer flooring: for every taste, style and idea. And according to their composition they are divided into:
- Polyurethane.
- The floor has good performance and can be laid independently both in a technical room and in a residential building. Epoxy-urethane.
- This coating is especially resistant to abrasion and is indispensable for significant pedestrian and traffic loads: workshops, corridors and warehouses. True, the price is quite high. Methyl methacrylate.
- When laying such a floor, it is necessary to strictly follow the process technology, but within 2 hours after drying you can walk on it. It is frost-resistant and can withstand any bad weather outdoors. Cement-polyurethane
coatings are used mainly to create floors with severe operating conditions: high temperatures, exposure to aggressive chemicals and live steam. It is this kind of floor that most effectively protects the concrete base from destruction, which is why they are most often ordered for car service centers.
Of course, epoxy and polyurethane floors are more popular today due to their coating thickness: from 0.5 mm to 6 mm. Let's compare these two types of flooring. So, epoxy ones are much harder, they are cheaper, but they are laid in a layer of up to 5 mm, while polyurethane ones are enough to 3 mm. And polyurethane floors are more scratch-resistant than epoxy floors.
Self-leveling floor: revealing the secrets of technology finishing coat, which may depend on the mixture itself and fillers.
The self-leveling polymer floor is manufactured modern manufacturers from epoxy resins or polyurethane. Initially, this beauty was used only in industrial workshops, but apartment residents also like the dustlessness, lack of seams of the floor covering and the possibility of unlimited decoration.
For a bathroom, a polymer floor is absolutely perfect option. Due to the absence of seams, moisture will not penetrate under it, and to the touch this coating is as pleasant and warm as linoleum, but not as soft. Another significant plus for the bathroom: polymer floors are not prone to mold or mildew.

Interestingly, even the most glossy self-leveling floors at first glance still have valuable anti-slip properties. That is why today even in swimming pools they are abandoning tiles, replacing them with colorful and fashionable polymer floors. And recently people want to see such floors in the bedroom, and in the nursery, and even in the office. After all, polymers have simply amazing qualities, and, due to the fact that they are the main components of self-leveling floors, any design idea now has the right to life.
Even stunning 3D effects, for which today airbrush artists are often invited, who just need to add a few additional touches to the same fish under water to make them seem bright and alive.
Technical characteristics of the coating
This floor is warmer to the touch than tiles and even softer than linoleum, and it can easily be combined with a heated floor system. Plus a lot of pleasant advantages:
- High wear resistance;
- No dangerous slipping;
- Resistance to aggressive household chemicals;
- Absolutely environmentally friendly - all components of the solution are non-toxic;
- Ideally smooth surface for any subsequent finishing;
- Hygienic and easy to clean;
- Possibility to apply any image;
- Fire safety and high level waterproofing;
- Complete absence of seams and joints where bacteria and dirt do not collect;
- And polymer floors are so resistant to low temperatures that they are even used as a base for large freezers.
The resistance of the self-leveling polymer floor to temperature is amazing: it will not lose its properties in the range from -60°C to +90°C. And even on the verge of these values, the floor will neither ignite, nor smoke, nor emit any toxins. And all because the polymers meet international standards.
And, unlike, these floors never emit dust or life-threatening compounds. In addition, interesting images are also applied to them: 3D pictures, small parts and much more. We can say that polymer floors are a real field for the imagination of modern designers.
But polymer floors also have some disadvantages that you should know:
- Quite a large amount of work and the time it takes to complete it
- High cost of materials used
- High price for the estimate if you hire a construction team
And keep this in mind in advance: if you ever want to change flooring, then it will be extremely difficult to tear off the self-leveling floor - it is much easier to fill it with a new layer or simply lay the same one or. In general, that's all the disadvantages.

What does the market offer?
Self-leveling floors have a wide range of colors and patterns - much wider than even tiles. Prices polymer coatings quite different: they depend on the design, the polymers used and the brand. Also with a strong mechanical impact on the floor in the room, preference is given to polyurethane version, since epoxy ones are less elastic. But for a constant static load - just right.
As for the brand, so far the most best reviews you can hear about the self-leveling floor Gipcreet Thermafloor. This is a lightweight polymer solution that never cracks. No less popular today is the Elakor PU self-leveling floor brand. This mixture contains a good hardener and color base that are mixed right before use. As a result, the floor is resistant to stress, dampness and the active use of chemicals.

You can also hear good reviews about Praspan and Proplan, SIKA and Hyperdesmo. And for the most complex projects more often they choose RINOL, an Italian company that today is considered the world leader in self-leveling coating systems. Such floors are irreplaceable for those rooms where special or increased requirements are imposed:
- Parking lots;
- Operating rooms;
- Supermarkets;
- Public premises;
- Transformer substations.
The environmental friendliness, durability and UV resistance of the final coating really depend on the quality of the materials used. If you hire a team to pour a polymer floor, it would be a good idea to ask them about their certificates.
It is not the polymer floor itself that is expensive, but its installation. Construction companies Indeed, they often inflate prices for such services, which they themselves often admit. That's why, if you learn how to fill such a coating yourself, then a modern self-leveling floor will not be a luxury for you, but an excellent option for updating your home. And over time, thanks to its impressive service life, a polymer floor will pay you back at least twice.
Do-it-yourself pouring - how realistic is it?
Absolutely real. After all, the self-leveling floor adheres tightly to any base: tiles, concrete and even wood. The only main thing is that it is clean, dried, smooth and grease-free. The total moisture content of the base should not exceed 5%.
So, after you put the mixture on the floor, it will spread on its own and take up perfectly. horizontal level. Your only task is to ensure that no air bubbles appear anywhere - and for this they use a studded roller.
And you can place any items to create right at the finishing stage: on thin layer We lay out the polymer varnish and fill it all again.
How to care for self-leveling floors?
And finally, it’s not difficult to care for self-leveling floors. Periodically, it needs to be updated by covering it with protective varnish, and the rest of the time, wet or dry cleaning is sufficient.
Polymer self-leveling floors are washed with a special household chemicals with a high acid content. It needs to be applied to the floor surface for five to ten minutes, then thoroughly remove the remaining polish and rinse the coating well, using as much water as possible. This is usually done using special equipment, but you can do it yourself. If there are tire stains or other complex stains on the floor, then these areas are covered with a deep cleaning detergent for five minutes, after which they are cleaned.
In industrial premises, where there is a particularly strong mechanical load on the floor, dirt gets clogged into microcracks invisible to the eye, and the coating becomes a little dull. Then modern high-pressure washing units are used, which easily knock out all the dirt and the renewed floor is varnished.
If the self-leveling polymer floor will be frequently washed with aggressive chemicals in the future (for example, in medical institutions), then it is protected from damage even at the pouring stage - by covering it with a special protective polish using monom. And this polish needs to be renewed every six months.
Also remember that polymer coatings are not designed for prolonged exposure to alkalis or high concentration acids - and therefore should be left on the surface for a long time detergents it is forbidden. And another tip: it is advisable to install rubber pads on the legs of furniture or work equipment - this will make the floor last longer.
So why, given the relative low cost of the material and quite understandable technology do they charge that much for styling work like this? It’s just that for our country such floors are to some extent still a novelty, and it’s always good to make money on new products. Try to do it yourself - the next step is to replace the floors in absolutely all other rooms!
And others wooden materials on a solid base, metal, after applying a special primer.
In this article we will talk about how to make self-leveling polymer floors in an apartment, as well as in a garage.
Types of polymer bases
At the core synthetic surface used in houses, apartments and offices is one of the polymers.
Epoxy resin - together with additional components creates a durable, abrasion-resistant and chemical exposure coating.

A smooth, elastic floor can withstand any deformation.

Methyl methacrylate floors are created by mixing acrylic resins and hardeners. They are highly resistant to ultraviolet radiation and moisture resistance; with the help of dyes, unique color combinations. The floor hardens in 2 hours, and its service life is up to 40 years. In front of everyone positive characteristics This type of self-leveling floor is rarely used, the reason for this is the high cost and harmful fumes generated during the pouring process.
Features and Benefits:
- Hygienic and easy to care for.
- Resistance to mechanical stress.
- Seamless filling technology.
- Possibility to make polymer floors yourself.
- Variety of colors.
- Immunity to chemical reagents.
- The high hardening speed of the self-leveling floor reduces repair time.
- Durability of use.
Preparing the base

The main requirements for preparing the base are correcting defects and cleaning the surface. If there is old coating, it must be completely removed. The entire area of the subfloor is thoroughly cleaned of debris and dust (you should use a vacuum cleaner). After cleaning, existing defects become clearly visible. Existing cracks and cracks are puttied, the protrusions are knocked down. In the best way surface treatment is considered an application grinding machine. If the polymer floor has to be poured onto ceramic tiles, its surface is deprived of smoothness with sandpaper or sandpaper.
It is necessary to measure the horizontal level of the base: if its difference does not exceed 4 mm, then you can start making a polymer floor. If there are significant level fluctuations, the surface will have to be leveled sand-cement screed and postpone further work until it dries.
In the vast majority of cases, poor-quality pouring of a self-leveling floor is caused by a poorly prepared base, which causes peeling.

After the screed has dried, a thorough primer is required, which increases adhesion between the base and the self-leveling floor, and also reduces the absorption of the polymer mixture, and, therefore, consumption expensive composition. It is better to apply the primer in two layers, leaving a break of at least 4 hours between them. The composition is applied with a roller. To prevent the liquid mixture of the self-leveling floor from leaking near the wall, this area is taped with damper tape. Also installed along the perimeter of the room wooden slats, which will save space for the expansion joint.
Preparation of the solution

To work you will need:
- Drill with attachment.
- Wide spatula.
- Roller with a needle insert on a long handle.
- Big bucket.

It's time to prepare the working solution. This process is described in the instructions on the package to obtain excellent result The manufacturer's recommendations should be strictly followed. To create a polymer floor you will need two components, one of which is a hardener. Mixing takes place in a large container. During the reaction, heat is generated, so it is recommended to lower the container where mixing is carried out in advance into a container with cold water to slow down the reaction somewhat.
Beginners can mix the composition in a bucket, pouring two components alternately. An attachment with spatulas is selected for the drill, and a low mixer speed is used when working. The mixing process takes about two minutes.
Installation
The floor should be poured at a temperature not lower than +10°C, at a lower temperature chemical processes will slow down, and the polymer will spread poorly over the surface of the base. Heat will cause the components to cure too quickly and will not allow for a quality pour.

During the hardening process, the floor should not be exposed to drafts or direct sunlight. Upper layer The polymer coating should not dry before the rest of the mass, otherwise cracks will appear.
The liquid polymer is poured in a corner far from the entrance and is helped to spread over the surface with a wooden leveler. The work is carried out in strips, without stopping, the composition quickly hardens in the container. It’s good to involve an assistant in this process, because it will be difficult for one person without experience to do everything. During the pouring process, the solution is rolled with a needle roller, which removes air bubbles. The work ends at the entrance to the room. You should not walk on fresh composition, otherwise shoe marks will remain.

After the composition has dried (the process, depending on the polymer, takes several hours or days), the wooden planks around the perimeter are removed, and the seams are filled with sealant and covered with plinth. Finishing layer The self-leveling floor is coated with two layers of varnish; it gives the surface shine and smoothness, and also increases wear resistance. Using different kinds varnish: matte, colorless, glossy or colored - you can achieve the desired effect.

- thin-layer polymer paint coatings;
- concrete impregnation;
- thick-layer polymer coatings with sand.
The most economical option for self-leveling flooring is polyurethane impregnation. This is one of the most reliable types of garage coatings. Externally it resembles varnished concrete. To obtain a more attractive floor covering, color markings can be applied to it.

The first step is to clean the rough surface. If the floor was wooden, then you need to dismantle it along with the logs. By clearing the base of debris and dust, you can evaluate the quality of the subfloor. If there are cracks and chips on it, then this is a bad signal indicating the destruction of the material. All damage to the screed must be repaired.
In some cases, before pouring the self-leveling floor in the garage, you need to perform cement screed. This is advisable if the floor is very broken, there are big differences in height or in the absence of a screed as such.

If you do need to make a screed, then pay special attention to the arrangement of waterproofing. In addition, to improve the strength characteristics of the floor in the garage, which is very important in this room, make reinforcement. To do this, you can use galvanized mesh laid in a solution.
After the screed has dried or the existing subfloor has been cleaned, it needs to be primed. For what?
- The primer will improve the strength of the base.
- This ensures adhesion of the screed to the polymer floor.
- Protecting the surface from the appearance/reproduction of microorganisms.
Apply damper tape around the perimeter of the garage, which will serve as a shock-absorbing layer. This is done to the height of pouring the polymer floor.

Now you need to install the beacons/guides. If you have small garage, then you can use corners, pipes or metal profiles as guides. Place them so that the top edges of the guides are in the same plane. For these purposes, you can use long self-tapping screws. Divide the floor into square/rectangular sections. Screw the screws into the tops of the rectangles/squares. To do this, you first need to drill out the tie and insert it into the dowel holes. The beacon should be raised as needed. Do this with a solution.
Now you should prepare the polymer mixture according to the instructions provided by the manufacturer. Mix it thoroughly. For this you can use electric drill with a special mixer attachment. It is important that the drill operates at low speeds, otherwise many air bubbles will form in the mixture. And this will negatively affect the quality of the polymer floor.

Pouring the polymer is quick because it dries quickly. That's why best method to complete this work - prepare the mixture based on a rectangle/square, aligned with the markers - fill it and level it.
After pouring is completed, you need to roll the mass with a spiked roller. In this way, air and excess moisture trapped in the polymer will be removed. The self-leveling floor can only be used when it is completely dry. The time it takes depends on the temperature in the garage.

There is no need to artificially dry the floor. When the room warms up, a crust forms on the polymer. In this case, the thickness of the self-leveling floor will remain viscous. As a result, the floor in the garage will simply sag over time under the weight of the car.
The work of installing a polymer floor has many complexities and nuances, but it is quite possible to do it yourself. Training videos will help you follow the technology.
Video
The process of pouring the self-leveling floor can be seen in the video below:
Photo