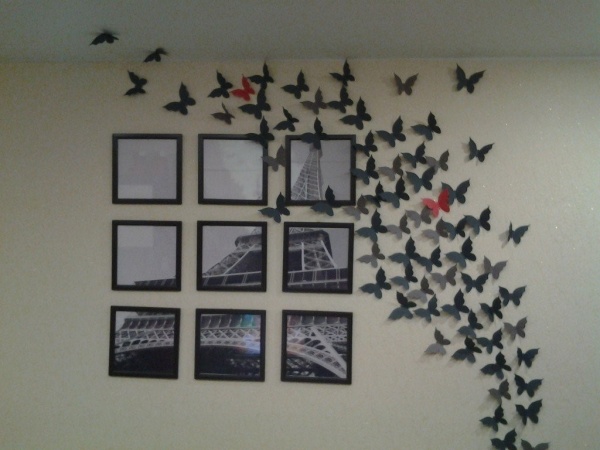
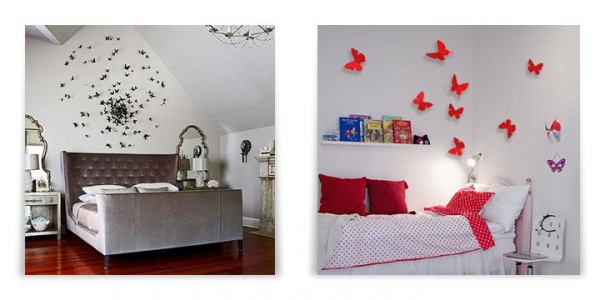
At the final stage repair work There is certainly a desire to add some zest to the updated interior. The opposite situation, when no fundamental changes are expected in the near future, also gives rise to the idea of reviving the situation original decor. In both cases, hand-made butterflies will help to decorate the wall in an interesting way. The creative process can captivate all family members; depending on the chosen concept, there is something for everyone.
Preparatory work
Decorating a wall with butterflies is a relatively new trend in the world. design solutions. Winged flowers will make the atmosphere refined, filled with romance, lightness and carefree dreams. Incarnation creative ideas reality is preceded by a preparatory stage:
- Choose the most suitable wall for the arrangement of butterflies. A wide view will allow you to admire the original decor more often.
- Calculate the shape and area of the image on the wall, whether it will occupy small area or will be scattered over the entire surface. In addition to direct mounting on the wall, butterflies can be made into a panel, framed, or hung from a sconce.
- Decide what material is best to make butterflies from. Take care of its compatibility with the interior of the room. The article presents traditional and extravagant ideas for creating moths.
- Consider the color, size and shape of the jewelry. Bright shades on light wall - optimal solution. Butterflies of different sizes look much more impressive than those made from one stencil. Butterflies made with asymmetry will help you get as close to the natural image as possible. You should not strictly observe specularity; in the end, small deviations will add volume and dynamism to the appearance of the application.
- Depending on the chosen direction, prepare the material and tools with which you will decorate the wall.
Advice ! The overly intricate shape of the butterflies will create difficulties when cutting. If there are time constraints, it is better to stick to simple figures.

Having basic artistic skills, you can make a stencil for future butterfly blanks yourself on plain paper or using available picture editing programs. In the absence of talent, they will come to the rescue ready-made templates butterflies on the wall, intended for cutting.

Paper moths
Most affordable way decoration - decorate the wall with paper butterflies. Making the moths monochromatic or combining two colors depends solely on the imagination of the novice designer. If the required shades are not available, acrylic paint and White paper will solve the problem. Butterflies on the wall made from bright sheets of glossy magazines look interesting. The variety of shades is difficult to create on your own, and bright printed designs without additional costs whimsically decorate the wall. A pre-arranged palette will allow you to make smooth transitions in the composition.

Selecting your favorite designs various sizes, are determined with the required number of butterflies. After this, the images are printed and stencils are made. Simple form It is most convenient to attach it to the cardboard and cut out the inside. Drawing complex structures Apply to a thick sheet and carefully cut out with a stationery knife. To speed up the process of preparing figures, just fold several sheets of paper and cut them out at the same time.
Cardboard version
Making cardboard butterflies on the wall is more difficult. However, the material allows for greater variation in shape design. To achieve the desired curves, just slightly moisten the product and, giving the desired bend, fix it with a weight. After drying, the butterfly will retain the required shape.
Next interesting option, how to make paper butterflies for the wall - make origami. This lesson Lately especially popular among children.

The idea of placing butterflies on the wall is initially drawn on paper. It is advisable to ensure compatibility with the wallpaper pattern and the overall theme of the room. A whirlwind of moths or a flock flying from one side of the wall to the other looks extravagant. To make a heart or a large butterfly from small parts - there are no limits to imagination. The sketch is transferred to the wall using chalk or a pencil, carefully marking the lines along which the figures will be located.
Mounting methods
Butterflies cut out of paper or cardboard are attached to the wall in several ways:
- PVA glue. If the goal is not to preserve the attractive appearance of the wall after removing the decor, PVA glue or wallpaper solution is quite suitable. Fully glued butterflies will not create a natural effect. Volumetric applications look much more interesting. To do this, the wings of the moths are slightly bent and only the middle is fixed. When the air conditioner is running or there is a summer breeze, the butterflies will come to life, fluttering with the air flow. The glue is applied to the base in small doses so as not to spoil the surface of the wall outside the template.
- Pieces of foam plastic are used to secure light moths. Initially, the material is glued to the product, then to the wall.
- Double-sided foam tape, cut into small squares, is attached to the butterflies, having previously removed protective film. Having completed all the details, we begin to decorate the wall.
- If there is a prospect of removing butterflies from the wall without subsequent repairs, it is better to mount them with pins. This is only acceptable for wallpaper; the option of plastered walls will not allow the proposed method to be applied. Having selected hairpins decorated with beads or stones, they are bent using pliers at an angle of 90 degrees. Having secured top part on the body of the butterfly using glue, the end is carefully placed behind the wallpaper. If necessary, the decor can be easily dismantled without leaving marks on the wall.
Note! When fixing cardboard products, take into account their large mass, unlike their paper counterparts.
Decorating with a stencil
Butterflies made using a stencil will add originality to the wall design. Having selected and printed the sketches, the design is applied to thick film or laminated with strips of tape, outlined with a permanent marker and cut out with a sharp stationery knife. Several blanks will make the work easier; it is advisable to make one copy for each color. Luminescent paints will add extravagance to the design. At night, with directional light, the spectacle looks breathtaking. Further work includes the following steps:
- Stencils with butterflies are attached to the wall using spray adhesive or construction tape.
- A sponge cut into several parts and equipped with a handle will allow you to make a suitable brush. Purchasing ready-made tools will shorten the preparatory period.
- Ordinary paints are applied regardless of the time of day; it is better to work with phosphor material in dim light. Remove excess dye from the sponge, ensuring minimal contact with the stencil.
- A blue outline made with a regular brush along the edges of the wings will allow you to highlight the image glowing on the wall. After drying, the stencil is removed.
Advice! To prevent regular paints from stretching, first draw along the contour with a blade or sharp knife.
In addition to paints, decorating the surface with butterflies is done with putty. To do this, after fixing the template on the wall, the building material is applied using a palette knife. Upon completion of the process, the stencil is removed and washed with water to remove putty residues. After the solution has dried on the wall, you can make an extraordinary coloring of the butterflies.
Vinyl and plastic
The times when every home had an impressive collection of vinyl records are gone. Butterflies on the wall made of vinyl can remind you of the past and put stale rarities to good use. The template you like is applied to the plate, and the outline is outlined with white chalk or a piece of soap. To make the material pliable, it is placed on a baking sheet lined with baking foil in the oven. The desired condition is achieved in a few minutes, this is indicated by the curling edges. Without wasting any time, start cutting butterflies from softened vinyl using sharp scissors. If you don’t have time to do it before it hardens, you will have to repeat the procedure of placing it in the oven, so don’t rush to turn it off. Sanding them with sandpaper will make the edges of the butterflies less sharp.
Advice ! While the vinyl is warm, make the products voluminous; fancy curves will add personality to the decor on the wall.

Double-sided tape will help secure the butterflies on the wall. Pieces cut along the length of the moth's abdomen are initially glued to the wall, then the figures are attached directly to them. Silicone glue is another way to securely fix the decor to the wall.
It’s enough to simply make a butterfly out of plastic and then decorate the wall country house. To work, you will need the middle part of the bottle and materials for decoration. Having selected the stencil you like, the design is transferred to plastic with a permanent marker and cut out. The butterfly is painted with varnishes bright colors, with sparkles, if available, you can use acrylic ones or those left over after repairs. Little needlewomen will be interested in making a butterfly for the wall, decorated with rhinestones and beads. Don't forget the wire antennae.

Fabric and metal design
On the walls with liquid wallpaper or decorated with draperies, butterflies made of fabric look appropriate. This creates an atmosphere of special warmth and homeliness. Cut and processed butterflies are attached to the wall with glue. Thin fabrics will allow you to create a three-dimensional image on the wall. To do this, the cut out moth is soaked in soapy or adhesive solution and dried in a certain form.
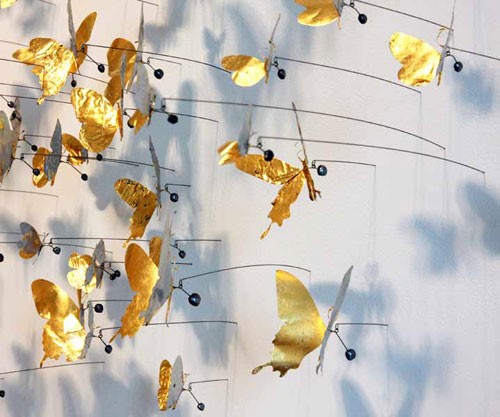
The butterflies on the wall, made from tin cans. Working with the material will require a lot of effort and accuracy. Golden spray paint can give the workpieces an attractive look. It is better to subsequently dilute the monotony with an additional pattern. The extravagant design on the wall will harmoniously fit into the interior designed for brutal men.
Regardless of which wall design option you choose, the decor you make will definitely add individuality to the room and emphasize refined taste and awareness in matters of design art.
Instructions for making butterflies with your own hands. Decor options with butterflies.
The butterfly is a cute insect that is associated with grace and sophistication. Butterfly hair clips are often used to decorate hair, clothes and bags. Also popular jewelry and jewelry. Brooches in the shape of a butterfly will complement the most formal outfit.
How to make a beautiful three-dimensional butterfly from origami paper: templates for printing and cutting, photos
Origami is the art of paper folding that dates back to ancient China. More recently, the origami technique has spread to European countries, that is, it has gone beyond China.
There is a certain set of symbols necessary to sketch the folding diagram of even the most complex product. Most of the conventional signs were introduced into practice in the mid-20th century by the famous Japanese master Akira Yoshizawa.
Classic origami requires the use of one square, evenly colored sheet of paper without glue or scissors. But now origami is closer to Ukrainian vytynanka, where beautiful figures are cut out of a piece of paper.
Below are diagrams for making an origami butterfly. To complete the work you will need small and very sharp scissors, as well as patience.

 templates for printing and cutting
 templates for printing and cutting
 templates for printing and cutting
Butterflies are often used in New Year's decor. They are tied to garlands, combined with cotton snowballs and artificial snow. In addition, such products are attached to the Christmas tree. Below you can find a butterfly stencil for decoration. New Year's room and Christmas trees.


How to make a flying butterfly out of paper?
A flying butterfly looks very interesting and harmonious. The main task is to produce an elegant insect that will be as close to the real thing as possible. After hanging it vertically on a thread, it should look like the insect is flying.
You can see how to make a flying butterfly in the video.
VIDEO: Flying paper butterfly
Basically, such applications are used to create paintings. Also, a paper butterfly will be an excellent option for developing fine motor skills in children’s hands. preschool age. Depending on the age of the baby, the complexity of the application is selected. For kindergarten children, it is better to cut out the templates yourself. Kids only have to glue the parts. Below are several options for applications for children. of different ages. Usually, voluminous appliqués made using the lace technique look beautiful. Such techniques should be performed by children from 4 years old.


VIDEO: Paper butterfly applique
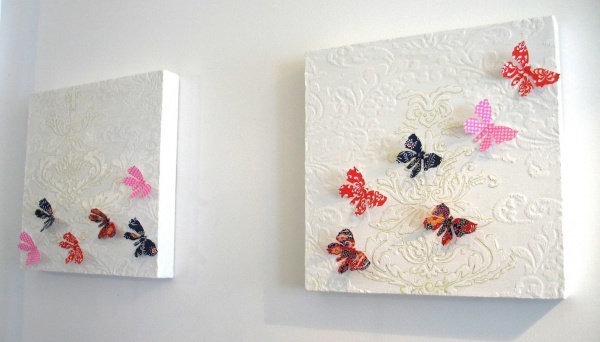
Butterflies are called winged flowers; they can add airiness and a certain frivolity to the room. Make a panel from paper butterflies very simple. The simplest option is a picture with glued paper butterflies.
Materials:
- Scissors
- Basis for panels
- Paper of the required color
Instructions:
- Decide on the size of the panel and the drawing itself. Also find out what kind of drawing you will create.
- After choosing a stencil, cut out butterflies from colored paper and glue them to the base canvas
- It is advisable to mark in advance with a pencil the line along which you should glue the butterflies


Such decorative elements are made of paper and can either be glued or hang over the wall. Such butterflies can be mounted on furniture, a wall, or hung on threads.
Butterfly decor options:
- Butterflies fluttering under the ceiling
- Butterflies on the wall or furniture
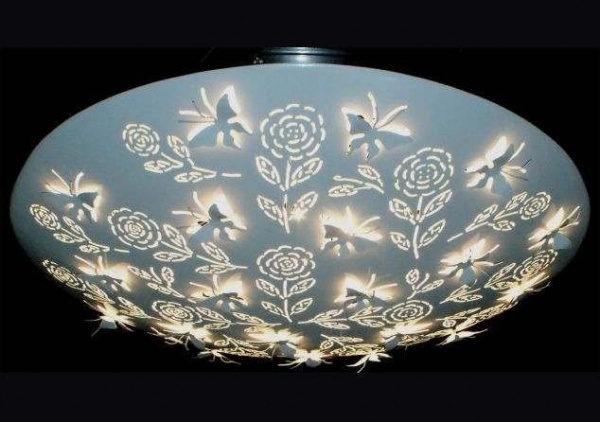
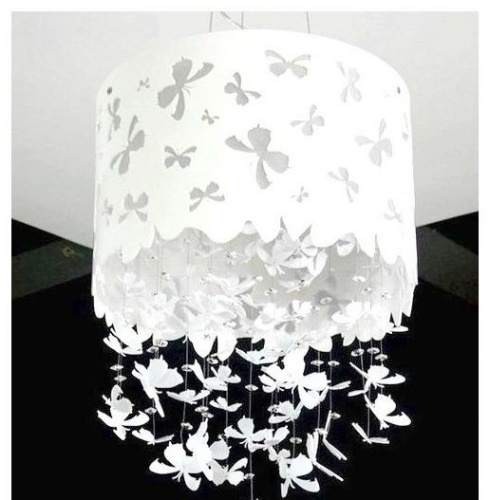
- Decoration of chandeliers and lamps with butterflies


Silhouettes on the wall can be either voluminous or flat. Initially, a base silhouette is selected. Most often, butterflies resemble a flock; sometimes small butterflies form a huge moth. It could be a cup with butterflies flying out or a watch. In this case, butterflies symbolize the transience of time. A whirlwind of butterflies also looks harmonious and interesting.


Butterflies made of colored paper will be an excellent addition to the interior. They are made using origami or quilling techniques. These are insects made by folding and gluing pieces of paper. The result is openwork butterflies. It looks very beautiful, especially if you combine colored paper. Below are templates and photos of butterflies made from colored paper.


This kind of figurines are used to decorate a child's room. They look very gentle and unusual. Such butterflies are hung on threads and decorated with them. play areas. Such butterflies combine very nicely with bright and colored lighting. This can be side lighting or direct rays.


Large butterflies are used for wedding or holiday decorations. Despite its cheapness and simplicity, such decor can significantly improve a room and make it festive. Usually thick paper is used that holds its shape well. This prevents the wings from bending. Such butterflies are suspended on ropes, fishing lines or threads. Large paper butterflies for hall decoration: templates, photos 

If you do not have such experience, then it is better to carry out such decoration on painted walls or non-woven wallpaper. In this case, if you don’t really like the result, you can remove the butterflies. It is best to attach the butterflies not with glue, but with double-sided tape. It comes off perfectly from wallpaper and painted walls. You should not use it in case of paper wallpaper.


Decorating a room with paper butterflies is quite simple. You need to stock up on patience and materials.
VIDEO: Paper butterflies
What to do if you are tired of decorating a room, but there is no money or energy for repairs? The fastest and least expensive way is to change textiles and decorative elements. Moreover, not all decor needs to be purchased. For example, decorative butterflies will help add an element of lightness. They are used to make panels and wall compositions. Larger and brighter ones “live” on curtains or flowers.
What are they made of?
Butterflies on the walls are made from different materials, sometimes even exotic. The spring appearance of the resulting decor depends on this choice. While you have no experience and you don’t really imagine the end result, you can make several different decorative butterflies for testing. They can be attached to the location of the planned decor. This will make it easier to evaluate the effect and choose the most suitable option.
Paper
Butterflies for decoration from paper are the easiest and cheapest to make. There are several different techniques. If the product is flat and is glued entirely to the wall/panel, only the front surface is important. If a three-dimensional composition is intended, the paper should be double-sided - both sides should be colored, because the white “wrong side” often spoils the impression.

Instead of regular colored paper, you can use corrugated paper. The effect will be different - it is lighter, airier, translucent, with its help it is easy to make the decor with butterflies three-dimensional.

Butterflies for decoration made from corrugated paper are airy and light
You can make butterflies from an old magazine, newspaper, postcards, colored napkins, wallpaper of a suitable color, or any other printed material.

As you can see, there are a lot of options just from paper. If you consider that they can still be slightly tinted, combined, made multi-layered, it is clear that there is huge scope for imagination...
Cardboard
Cardboard is not very dense. It's more like a very thick paper. It is also colored and double-sided. It is often used to create voluminous decor - you can easily bend the wings relative to the body. This material even holds its shape better. Just remember that you can’t make corrugated wings - the material is too hard to make a small fold.

It is also easier to make openwork butterflies from cardboard. Having a sufficiently sharp knife, cut out the “extra” leaving only the partitions. Such decorations require perseverance, great patience and accuracy.

Cardboard is also used to make templates for “mass” production of identical butterflies. With the help of such stencils you can make insects of the same type and size and spend a minimum of time on it.
Textile
Having a template, you can make butterflies for wall decoration or a fabric chandelier lampshade. The fabric will need to be given additional rigidity, but the rest of the process is not much different: the outline is applied, cut out, decorated if necessary, and mounted on the wall.

It is more difficult to work with fabric, although the results are very interesting. decorative crafts. This is an option for more advanced decorators and needle or sewing machine skills. With their help you can recreate the veins on the wings.
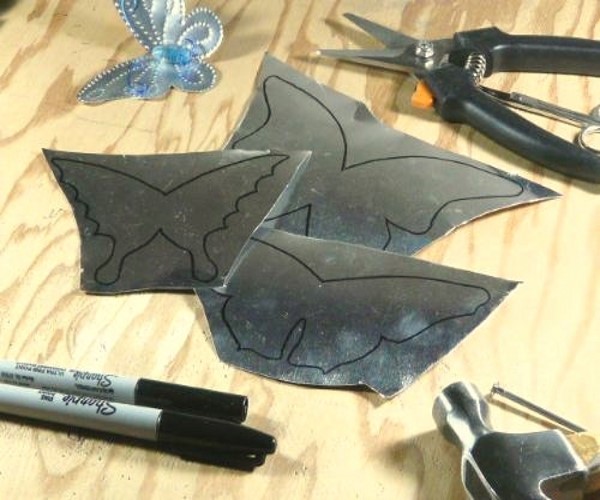
Exotic materials
Old vinyl records will also be an excellent raw material for making butterfly decor. Since vinyl is hard, you will have to heat it in the oven to cut a butterfly out of it. And in order not to spoil the baking sheet, you need to cover it with foil.

An outline is applied to the vinyl using chalk, the record is placed in a preheated oven, as soon as it begins to soften, it is taken out and quickly cut along the outline with scissors. Often the “workpiece” has to be heated several times. After cutting, heat it one last time and give it the desired shape.
Beer cans or any other relatively soft sheet metal also make excellent flying beauties. First you need to cut off the bottom and lid and level the piece of tin. Then, using an awl, transfer the contours from the template to the sheet metal, connect them with a marker and cut along the resulting contour.

Even beer cans can be used for “butterfly” wall decor.
You can decorate the back - the shiny part. To do this, you will need markers or felt-tip pens; you can try decorating with nail polish. The painted beauties are given the desired shape. One caveat: the edges are very sharp, you need to work carefully, otherwise cuts cannot be avoided.
How to make outline butterflies from paper
Let's start with the simplest, but most effective - contour butterflies. You will need colored paper or magazine pages, outline maps, etc. You can use old postcards or colored cardboard. You will also need regular cardboard to cut out the template.

These are contour butterflies for decoration - they are easy to make and look great
Preparing the template
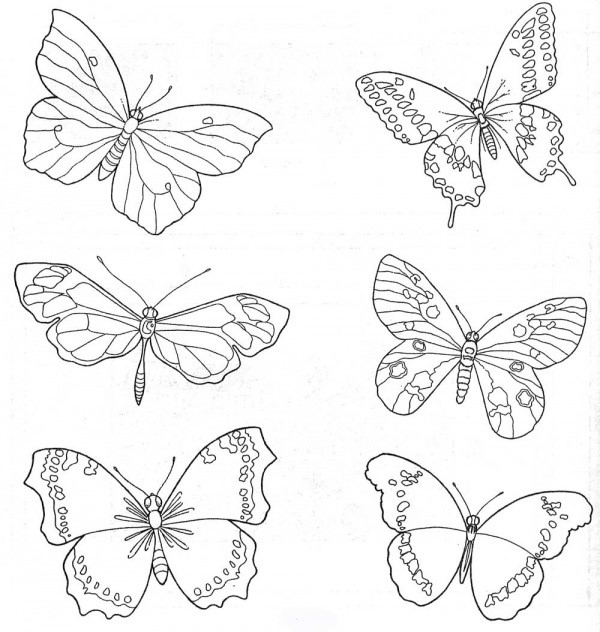
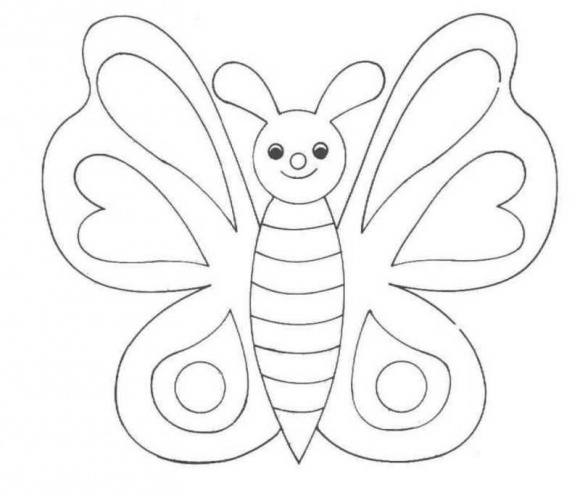
We take a piece of cardboard - any kind, you can even use some kind of packaging (tea, breakfast cereals, cereals, etc.) the main thing is that the cardboard is dense and not porous. Find a butterfly silhouette that you like, transfer it to cardboard and cut it out. There are several silhouettes in the photo gallery. They can be printed, then cut out and transferred to cardboard.
A butterfly on the wall - it would be nice in color. The swallowtail is attractive with its “tail,” but the paper consumption is greater and the work requires more accuracy. Paper butterfly templates for interior decoration are made in half. The second is obtained “automatically” after unfolding a piece of paper folded in half
Some tips for working with templates. Many butterfly contours are given with two wings, but it is better to cut off one wing - you will definitely get it symmetrically.
Jewelry made from winged insects different sizes. Therefore, the same contour can be increased or decreased using the most simple functions graphic editors - the same Paint that is on any computer. Since in this case only the outline is important, the quality of the drawing is not so important, so feel free to experiment with sizes. We cut out the printed template, apply it to cardboard and trace it. We cut it out and get a hard working template with which you can make dozens of identical elements.
Cut and attach

Take a sheet of paper, fold it in half, attach a template, and trace it. Cut along the drawn line. Next, we bend the wings away from the “body” and get a workpiece. Having cut out a certain number of butterflies, we attach them to the chosen place - on the wall, a piece of cardboard, etc.
You can attach it with regular glue (PVA usually the best option), small strips of double-sided glue. Can be used wallpaper glue and so on. If you are in doubt about the result, stock up on sewing pins. They can be mounted on the wall several times without much risk of damaging the surface. When you have placed all the butterflies and you are satisfied with the result, you can glue or use tape.
Openwork
The situation is a little more complicated with openwork butterflies. They are made from paper or cardboard. It is important to have a good sharp knife and a template with lines marked on it along which you will need to cut out the excess paper. It’s worth saying right away that this is painstaking work.
Patterns of butterflies with openwork wings - a variant of medium complexity The second half is symmetrical
The process is the same as described above: prepare a template, then cut it out required quantity elements. The peculiarity is that they first cut out and remove small fragments, and then cut out an outline from a piece of paper. With this sequence of actions, there is less chance of breaking thin jumpers, and it’s easier to work this way.

How to make an openwork butterfly from paper - the process in pictures
You need to work with a knife with a thin and sharp blade. It’s better not on the table, but by placing something quite hard - maybe a piece of plastic, etc. But you need to understand that grooves and cuts will remain on the surface, so it will be problematic to use this piece for any other purposes.
Multilayer volumetric
When making multilayer volumetric butterflies, several pieces of the same shape are cut out (size and color may vary). They are stacked one on top of the other, the “bodies” are glued together, and the wings are folded under different angles. This is how these butterflies turn out to be more voluminous.

You can make a combination of openwork and contour butterflies. Take paper of contrasting colors or find the same color, but different shades. Make them into butterflies of the same shape. Only some will be with openwork, others - without. Arrange them by placing a fragment without a pattern underneath. This produces an interesting effect.

There is a technique that allows you to immediately cut out three-dimensional butterflies from paper. You will need two rectangles of paper - a larger one (for large wings) and a smaller one. We fold them diagonally once, then a second time. You get two triangles different sizes. Now we bend the paper inward from two opposite sides so that we get a triangle like in the third photo (with the newspaper).

Draw wings on the resulting triangles. In larger ones, the openwork can be located only along the edge, in smaller ones - over the entire area. We cut out the blanks and put them one inside the other and glue them together. On top we glue a separately cut out “body” with antennae. Due to the fact that the paper is folded and the wings are double, the products have a larger volume.
Corrugated paper
WITH corrugated paper It’s easier to work with and butterflies for decoration are more airy and light, since the paper is translucent. We select suitable colors, take threads, scissors, glue. Nothing more is required. We cut out rectangles of approximately 7*10 cm from paper.

We sew the resulting rectangles in the middle with a needle and thread, tighten them, and make a couple of turns with the thread. It turns out something resembling a bow. We fold it in half, straighten the paper with our fingers, trying to leave as few folds as possible - we form wings.

When the result satisfies you, take scissors and cut off a strip of a few millimeters from that edge - into antennae. On the rest of the part we form a patterned edge reminiscent of a butterfly wing.

We twist the antennae strips with our fingers into thin tubes. Now they definitely resemble antennae. We unfold the wings and finally straighten them. The result was light butterflies.
From folded paper
You can make paper butterflies for decoration from double-sided colored paper or old magazines by folding them into a small accordion. We cut out two squares or rhombuses from paper (one a little larger, the second a little smaller), fold them into a small “accordion”, starting from one of the corners. The smaller the fold, the more interesting the product will be.

We put two folded rhombuses next to each other, tie them in the middle with thread or flexible wire in a sheath suitable color. We make antennae from the remnants of the wire, straighten the wings, and adjust the shape if desired.
Photo for inspiration
First, a little about how and what you can attach already made paper butterflies to. The easiest way is to apply glue to walls or panels. The second, no less simple way is to use double-sided tape. But to make the decoration more voluminous, it is best to glue it not directly to the wall, but to a small piece of foam rubber. The result will be a more airy composition, with clear shadows.

Paper butterflies are used to create three-dimensional decorative compositions on small hoops with a fishing line tied to them. Cut out paper insects are attached to the fishing line. You can’t hang them on the wall, but they look very original, although creating such a composition is more difficult than on the wall.

Hoops and fishing line are all you need to create this beauty
And several wall compositions in which butterflies are used for decoration, made from different types paper


Another option with a large butterfly...

Colorful tornado...


The main thing is to find a bright picture and even a simple silhouette will look great
Today there are many options for decorating a living space. And if the decor is created according to all the rules and with soul, then the entire interior takes on a harmonious, holistic and complete appearance.
Butterflies are considered popular elements of modern decor. And this is understandable, because they, being symbols of summer, lightness and beauty, create a festive and at the same time cozy atmosphere in room. Moreover, create decorative elements in the form of butterflies is not at all difficult and does not require a lot of money.
Butterflies in residential premises for various purposes
Children's room
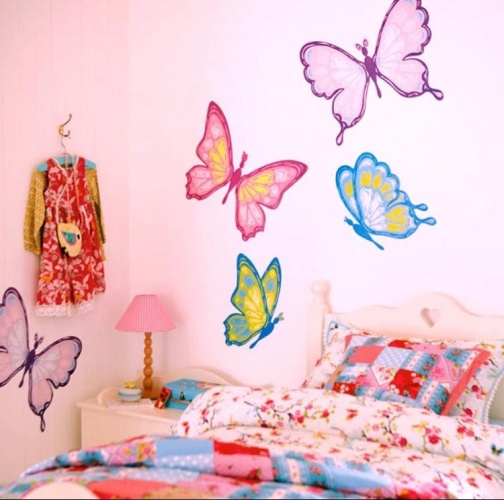
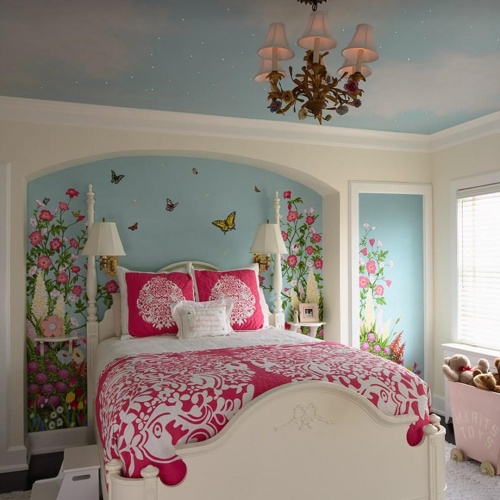
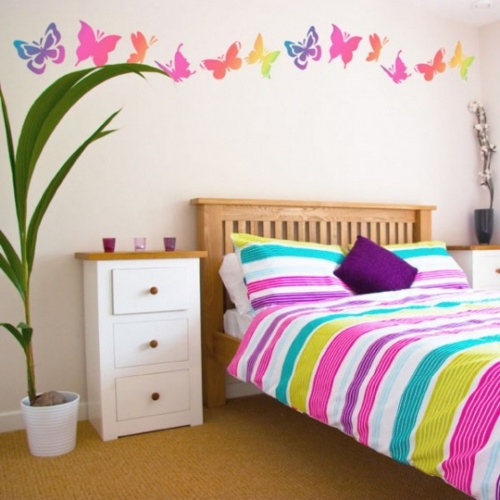
Decorative butterflies will look great in a girl’s nursery. Multi-colored beauties surrounding the little princess will contribute to the development of her imagination, and will also relieve her of negative emotions and impressions. They can be located on a wall panel, bed linen, or ceiling. They can be made in the form of drawings, stickers, paper applications and even made of plaster.

Living room
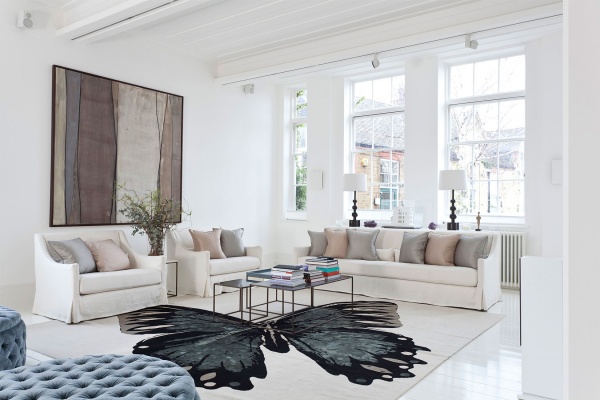
In this room, a large number of butterflies will be unnecessary. Therefore, you should limit yourself to placing only a few elements with this type of decor here. So, you can buy a stylish floor carpet with the image of a large butterfly, or a cozy blanket decorated with them; these cute insects can also be depicted on curtains or walls. This decor will undoubtedly help organize a warm and cozy atmosphere in this room.
Bedroom
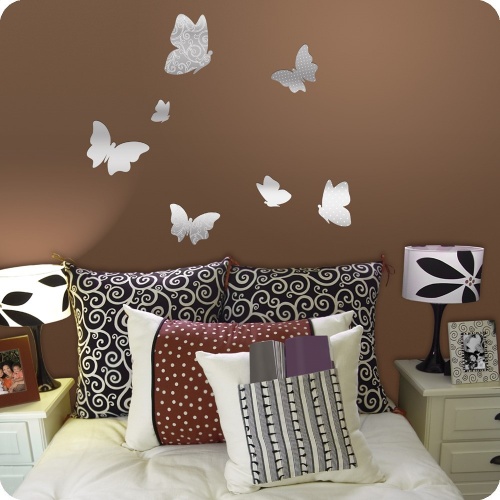
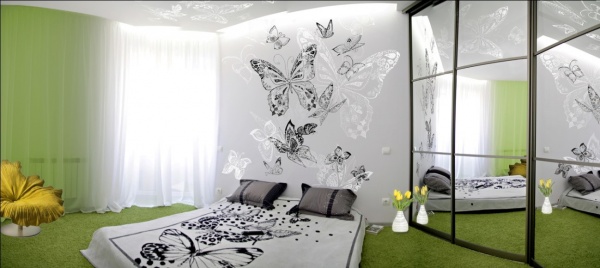
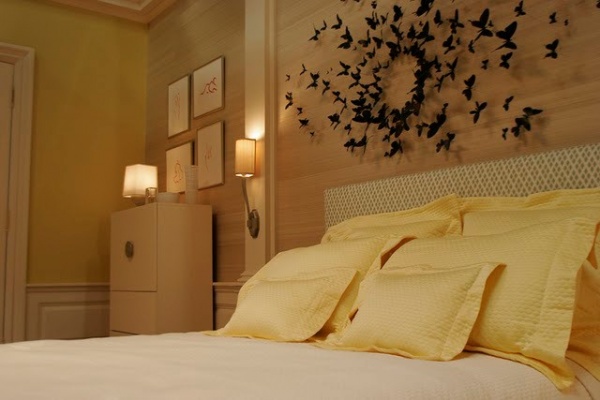
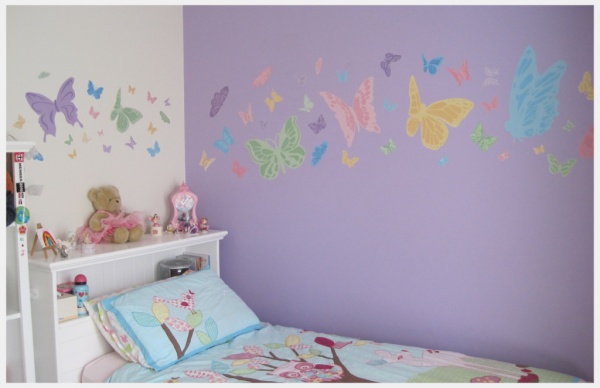
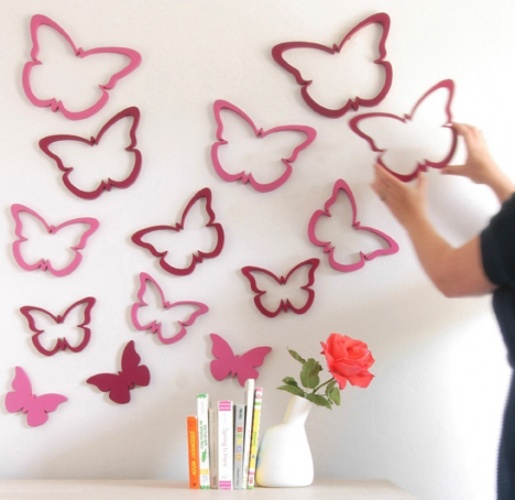
Images of butterflies in the bedroom will help get rid of autumn-winter depression. After all, when you fall asleep and wake up, you will always see these cute creatures, and a smile will involuntarily illuminate your face. In the bedroom, made in classic style, butterflies will look wonderful as images on the doors of a glass wardrobe, bed linen or wallpaper. Patterns of light wings at the head of the bed or their three-dimensional models made of vinyl films or cardboard look original.
Kitchen
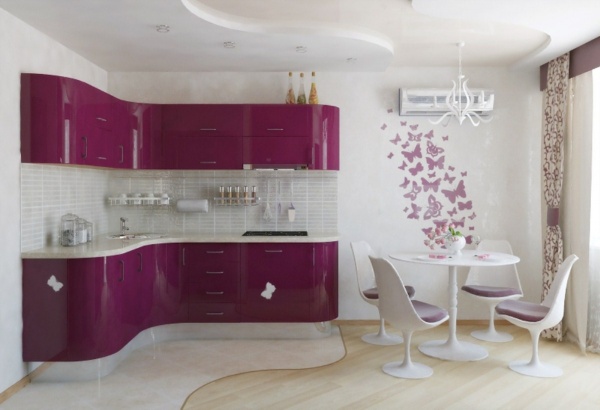
In the kitchen, butterflies look great on dishes or walls. If there big windows, then you can place stickers on them in the form of these fluttering insects or decorate the curtains with butterflies-clothespins. There are many original options decoration, for example, creating multi-colored butterflies from pasta, wine corks or tin cans.
Ways to decorate the interior with butterflies
Wallpaper
Probably the most primitive option would be to use wallpaper depicting these beautiful creatures. This wallpaper can be used to cover all walls. But a room in which the main surface of the walls will be monochromatic, and in several places strips of wallpaper with images of butterflies will be glued, or only one of the four walls will be completely covered with them, will look more interesting.

Stencils
You can draw butterflies on the wall using a stencil purchased at a specialty store or made by yourself. With its help, butterflies can get absolutely any color and position themselves the way you want. This decoration option is well suited for use in a children's room.
Stickers
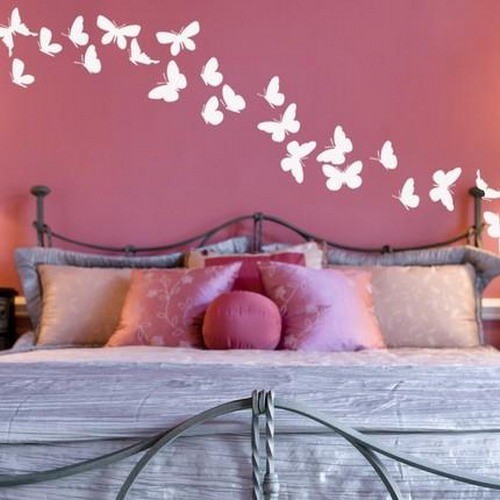
Butterflies are always associated with flight, so pasted in an ascending line above the bed or on the wall parallel to the stairs they will look not only very cute, but also harmonious.

Paintings
You can decorate the walls with paintings depicting winged beauties. You can find a huge variety of such paintings on store shelves. But it is much more interesting to create your own exclusive work of art.
In order to create a three-dimensional picture with butterflies you will need:
- colorful magazine;
- stencils in the form of butterflies of different sizes;
- double sided tape;
- plain cardboard or thick paper;
- scissors;
- Frame.
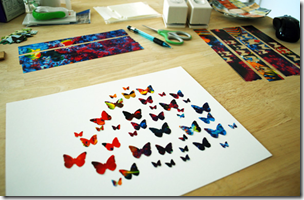
First you need to cut the brightest pages from the magazine into strips.
Then, applying stencils to them, you need to cut out butterflies of different sizes. There can be any number of them, the main thing is that they all fit into the photo frame and do not overlap each other. Then we place the resulting products on the cardboard on which they will be attached, but do not glue them until a perfect composition is obtained. To make the product more harmonious, achieve a gradual color transition. Once the composition is complete, you can proceed to gluing.
Each butterfly needs to be glued with a piece of tape. It is better to use adhesive tape with a foam base. If you only have flat tape, you can put foam rubber between two pieces of it.
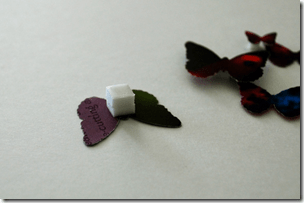
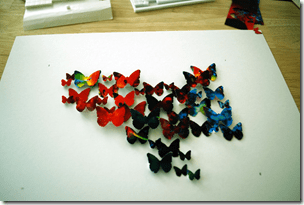
The completed product is placed in a frame. The picture is ready.
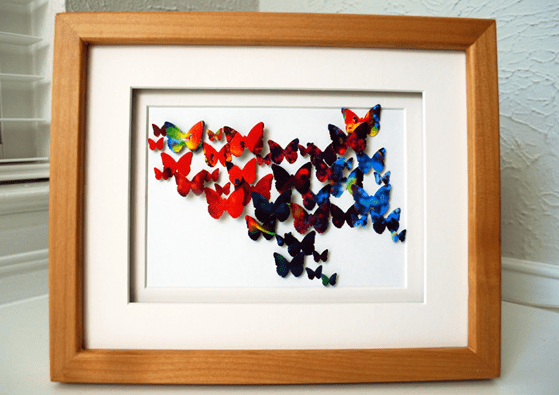
Advice ! Such a painting, made by yourself, can decorate not only your interior, but also become a wonderful gift for your friends.
Butterflies from improvised means
Butterflies for interior decoration can be created from seemingly unnecessary and useless things.
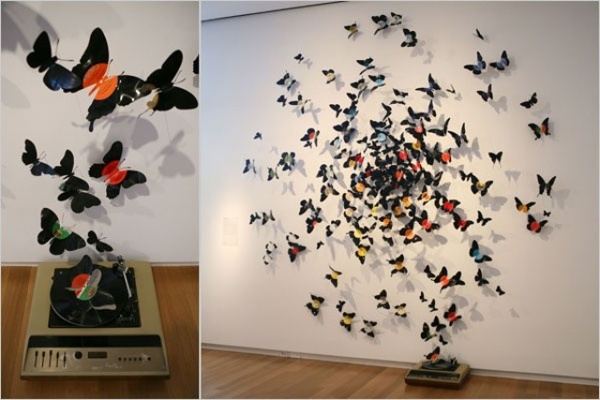
For example, you can cut them out of empty tin cans and attach them to the wall with thin wires to get a kind of mobile that will sway at the slightest movement of air, and the butterflies located on it will come to life.
Volumetric butterflies can be created from foam. To do this, a design is applied to the foam plastic, then it is cut out and painted. acrylic paints and attached with tape to the wall or interior items.
Even from burlap and wine corks you can make an original decorative panel depicting these cute insects.

Decoration of interior items
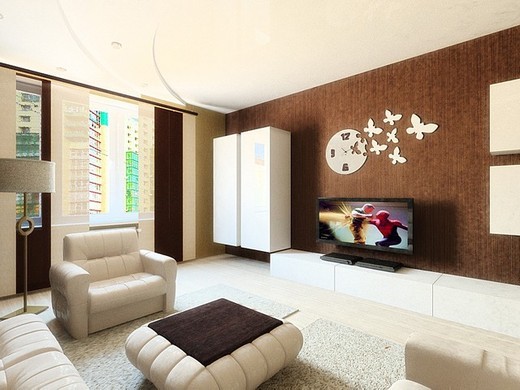
Butterflies can be located not only on the walls of the room, but also on windows, furniture, chandeliers, household appliances and other interior items.
Butterflies attached to a fabric lampshade will look great in a vintage, minimalist or shabby chic interior.
Butterflies can have any color, the main thing is that it is in harmony with the surrounding design.
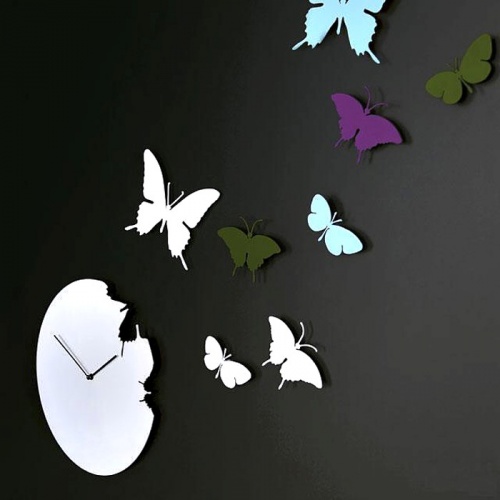
Watches made in the shape of these fluttering creatures, or with their image on the dial, will teach you to appreciate time.
You can decorate a room not only with hanging butterflies. They can also be shown on sofa cushions, lampshade, even the carpet on the floor can be made in the shape of a butterfly.
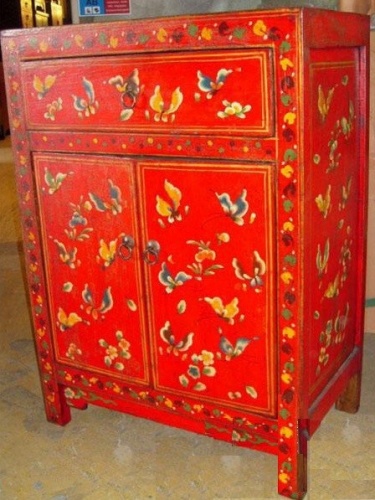
Furniture can also have the shape of the wings of this insect, for example, the head of a bed, table legs or hinged cabinet doors.
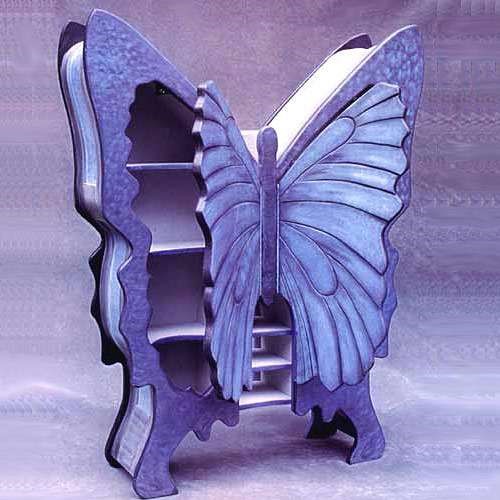
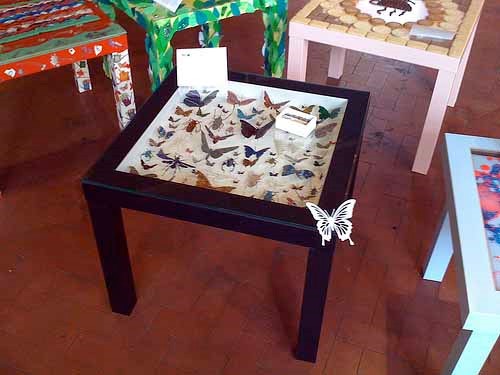
Butterflies can also live on the table: printed on the tabletop or table legs, in addition, they can be placed under the glass table top, which looks very original.
Of course, you will have to pay a lot of money for such an interior detail. But you can also save money by decorating furniture using the decoupage technique. For this you only need: a suitable theme, PVA glue, scissors, brushes and varnish.
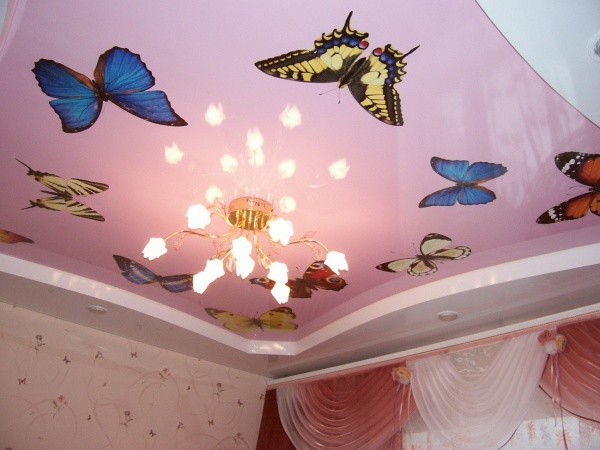
Decorating the ceiling and windows
Butterflies on the ceiling can change the perception of the interior of a room. Their images can be made plain or colored, matte or glossy, alone or in the form of a whole swarm flying into the light emitted by a chandelier. To do this, you only need to acquire a fairly large stencil, and the larger its size, the more original the decor will look.
Using stencils, stickers or stained glass paints, you can depict an original composition on the windows. If this image is translucent, then the light from the street passing through it will create a special magical atmosphere in the room. Using this method, you can also decorate glass doors.
Interesting ideas for decorating the interior with butterflies are shown in the following video:
What Feng Shui says about butterflies
Many people associate these gentle creatures with carefreeness, well-being and, of course, sensuality. The Chinese, in general, call this beautiful insect a talisman of joy and say that where a butterfly lives, love lives. Therefore, lonely people who are in search of their soulmate simply need to decorate the interior with these cute creatures. And then, a romantic meeting will not keep you waiting, and the newly born feelings will quickly develop into true love. They will strengthen the already decorated butterflies family relationships. Try relaxing on pillows or bedding with their image and the result will surprise you.
According to Feng Shui, butterflies should be placed in such a way that it looks as natural as possible. They should have a variety of sizes and be located randomly. They should not be lined up in rows or columns. A wonderful decor option that matches Feng Shui would be a panel located at the head of the bed.
Decoration rules
About the fact that butterflies have become popular and fashionable option decor is not worth mentioning. But, as with everything, you need to know when to stop, otherwise your home risks looking like a motley summer lawn, where only a cow with a bell will be missing.
Be careful with small details so as not to accidentally create the impression of many small bugs crawling around your apartment.
If you use bright decorative elements, then the walls should be plain and painted in discreet colors. This also applies to cases where the interior contains furniture with upholstery that has a pronounced pattern.
But if the furniture is monochromatic and made in soothing colors, then this, on the contrary, will emphasize the originality of the design of the walls, floor or ceiling.
As can be seen from the above, despite the fact that the technique of decorating the interior with butterflies is far from new, it does not lose its popularity. Butterflies can add lightness and individuality to an interior made in absolutely any style: from strict classicism to high-tech. Translucent beauties will help drive out melancholy and loneliness from the darkest room and fill it with warmth, light and joy. Place them in your apartment and you will see how your life will change for the better!
Butterflies decorate postcards, notebooks, photo albums, furniture and even just walls. Finished goods You can buy it in a store and simply stick it in the right place, or you can make it yourself, which is undoubtedly a more exciting activity. What can you make a butterfly from?
Let's look at several ways to make a paper butterfly.
Butterflies using quilling technique

The simplest, but no less beautiful decorative option is a paper butterfly. You can make it with your own hands in several ways.


And get a unique option every time. More complex options is a paper butterfly made from double-sided strips. This technique is called quilling and requires certain skills, tools and a lot of time. But the products turn out amazing.


Having made these kinds of insects of different sizes, you can hang them from the ceiling or chandelier using a very thin fishing line at different levels, which will create a wonderful weightless effect.


They can be used to decorate curtains and walls, cards and albums, and even as jewelry.
Openwork butterflies

Another option is a DIY paper butterfly using the weaving technique.


This technique is one of the types of folk decorative art. Its essence consists of cutting out paper using scissors or special knives.


Works in this style can be simpler, or can reach the heights of grace.


Most often they decorate windows or mirrors and other glass surfaces. They are attached using a soap solution. They are also used in creating postcards.


To make such a decoration, they use paper butterfly templates, which they use to cut out their products. Figured butterflies can also be cut out using a plotter.


This is such a special tool. Then you, of course, will spend much less effort and time on creating them if you need a large number of decorating elements.
Simple garland of paper butterflies
Making a garland, the main element of which is a paper butterfly, is not difficult at all with your own hands.


Moreover, you will probably find everything you need at home. And all you need to brighten up a dull room or decorate a fun party are a few sheets of multi-colored double-sided paper and decorative or regular wire. A ribbon or rope on which the garland will be attached will also come in handy.


For one butterfly you will need 2 squares measuring 15 x 15 cm. Fold each of them diagonally. You should get a triangle. Now fold both triangles towards each other, that is, from the edge to the center, like an accordion. The width of the fold should be no more than a centimeter.


Do the same with the second square. Then connect them together in the center and wrap them with wire, bending the edges in the form of antennae. That's all. Our paper butterfly is ready. Make as many of these as you need. Now all that remains is to attach them to the tape and hang them where you want them to be.
Butterfly using origami technique

Let's look at another way to make a paper butterfly. It cannot be called simple or complex. Rather, both options are present here.


Everything will depend on the paper butterfly pattern used. And, believe me, there are a huge number of them.


And all of different levels of difficulty. And, of course, the more complex and intricate the pattern, the more interesting the origami paper butterfly ultimately looks.


When folding your product, make sure each time that all folds are made perfectly and do not warp. If you select material from interesting colors or an unusual texture, your origami paper butterfly will not disappoint you. Place the square of paper with the white side facing up. Fold it twice diagonally and once vertically.


By making a large number of these butterflies, you can miraculously decorate any room with their help.


You can make them in different sizes and use all the rainbow colors. After this, glue it to the original non-bulky driftwood, imitating color scheme rainbows. And nail a driftwood with butterflies to the wall, for example, in a children's room.
Butterflies on a paper wall

There are many ways to “settle” such wonderful insects as butterflies on your wall. One of them is a three-dimensional transparent picture, inside of which there is a dried butterfly rare species. It looks amazing, but not for those who are for the preservation of wildlife.


This exhibition is unlikely to please such people. Another, no less beautiful option would be butterflies made from feathers and wire. They often have variegated colors and look great on plain walls.


If you have walls with a pattern, then this option is unlikely to suit you, since such butterflies will get lost against this background. Or you can buy butterflies made from self-adhesive film and stick them wherever you want.
What can you do with your own hands?
You can create butterflies with your own hands not only from paper, but also from cardboard.


Perhaps the easiest option for decorating walls would be paper butterflies. Options for mounting the composition Decorative insects made or purchased by you can be attached to permanent place finding in different ways.
There are four mounting options in total.
1. Fastening with glue. The choice of adhesive material will depend both on what you are going to attach your element of the composition to, and on the material from which the attached object is made. If we are dealing with paper insects, then most often the number one choice is PVA glue. And the main thing here is not to get carried away. If you apply more than necessary, you risk not only smearing, but also distorting the color.

2. You can use the pin method. It is, of course, much neater than the adhesive one, but it will only work if there is space between the wall and the wallpaper.
3. Another mounting option is fixation with tape. You can use both flat and volumetric versions. The latter will add airiness and weightlessness to your composition.

4. And last but not least, and perhaps even more original way- using threads and transparent wire. This type of fastening is especially suitable for butterflies that have been folded using the origami technique. This type of fixation will touch your imagination to the maximum and bring a lot of positive emotions in progress.
Preparing to create paper decor
Although paper insects are the cheapest option for decoration, this method still gives you options that no other can give you.

When creating paper butterflies, you can make them flat or voluminous, smooth or textured, multi-layered and even openwork. Or even combine everything in one. The main thing is to approach this issue not only creatively, but also wisely. After all, your composition should improve the room as much as possible. Breathe life and dynamics into it, and not become an indicator of bad taste.

It should also be noted that the paper color range is not only very wide, but can easily be supplemented with all kinds of paints. Although in fairness it should be noted that most a win-win- These are black monochromatic butterflies.

In general, before you get down to work, think through everything down to the smallest detail. Starting from shape and color and ending with methods of attaching the composition.
The process of creating a butterfly for a wall composition
In order to make a paper butterfly, which will become one of the elements of a future wall composition, you will need following materials and tools.
Firstly, this is paper and small decorative elements for decoration, if you want to use them. For example, it could be rhinestones. Secondly, scissors, glue, pencil and everything you need for fastening. Also use ready-made templates on which you will cut out insects for your composition.

So, let's look at how to make a paper butterfly. Cut the paper you will use into squares. The sizes of the figures depend on your idea.


Fold each square in half and carefully trace half of the sketch of your future butterfly on one side, working out all the details. Without unfolding the square, carefully cut out all the elements, and only then unfold it.
You will get a completely symmetrical insect. Once all the butterflies are cut out, decorate them as you intended and begin attaching them to the wall. On the surface that will be the basis of the composition, apply markings in advance so that you don’t end up with any unpleasant surprises.


