In America, the era of settlers became fashionable and remained in it forever - structurally simple and inexpensive frame houses. Special boards called siding were used as finishing for them. Gradually, the boards were replaced with sheathing made of PVC panels, which we now see on sale.
Siding installation
Installing siding is a fairly simple job even for an untrained person; the main thing is to prepare thoroughly. However, with large volumes or short deadlines, the services of specialists will still be required.
The first feature of siding installation is that it cannot be rigidly fixed. If the panel is rigidly fixed, then with a change in ambient temperature it will change its size and either crack or deform, disrupting the entire appearance. At the ends of each panel there are special fasteners that allow temperature play.
To install siding you need special galvanized or aluminum nails with a wide head, a hammer for them, a tape measure, a building level, a plumb line, a hacksaw and metal scissors, a knife, chalk and other tools depending on the need. specific type siding, for example, a circular saw.
It is also advisable to use a special ladder instead of a regular construction ladder: when supported on siding, it can be broken if the upper supports of the ladder are not made to increase the width. In particularly difficult cases, scaffolding is installed.
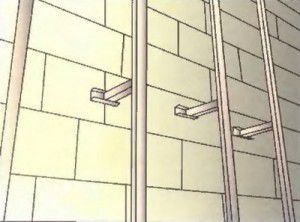
Siding is installed on a frame sheathing protruding above the wall of the building, usually wooden. Commonly used edged boards and wooden beams, profile for drywall. You can also lay insulation and a waterproofing layer between the wall and the siding.
The correct construction of the sheathing largely determines the appearance of the building after installation of the siding. The slightest curvature or inaccuracy will be immediately visible, so it is also necessary to work very carefully here.

Fasteners must not be subject to corrosion. If you do not adhere to this rule, then over time rusty streaks will appear at the fastening site, which will ruin the appearance of the finish. Nails or screws must be made of aluminum or galvanized with a head with a diameter of 0.9-1 cm. The leg of the nail must have a diameter of 0.3 cm and a length sufficient to penetrate the base to a depth of at least 2 cm. Drive the nail exactly in the center of the special hole in the panel, but not at the edge: this may cause the panel to break. Make sure to point the nail straight; a bent or angled nail will bend the panel and can cause the siding to bulge.
It is recommended to drive them in at a distance of 30-40 cm from each other. Do not pull on the siding when attaching it. Excessive tension on a panel changes its shape and can cause panels and other parts to not connect properly. The panel must first be connected to the bottom panel and pushed upward until it clicks into place. After this you can nail it.
When calculating the material, take into account its consumption for “cutting” (10-15%).

Preparing walls for siding installation
a) the location of the sheathing depending on the type of siding, b) the preparation of wooden walls, c) the preparation of brick walls, d) the preparation of walls covered with clapboard, e) the choice of the width of the lath, 1) a block for the starting strip (not always required), 2) sheathing for vertical siding, 3) sheathing for horizontal siding, 4) sheathing or waterproof plywood, 5) wooden wall, 6) siding, 7) nylon or wooden dowel, 8) Brick wall, 9) old clapboard paneling, 10) building level, 11) cord
Locate the lowest level of cladding on the wall of the house. Partially drive the nail 3-4 cm higher than the bottom level. Drive a nail in the same way on the other corner of the wall. Using twine and chalk, mark a straight line between the nails on the wall. Repeat this procedure around the entire house.

Place the starting strip with the top edge on the chalk line. Nail the starting strip along the chalk line. If there are depressions in the wall surface, place a pad under the starter strip to avoid the ripple effect. Don't nail too tightly!
When you add starter strip sections, leave 6mm space between them to allow for possible expansion.

a) fasteners in front side panels, b) too much marking, c) leaving a large gap, d) tilting the fasteners, e) bending the fasteners, c) correct fasteners with a temperature gap
The internal corner is installed at the existing junction of two walls, 6 mm below the cut of the starting strip. Leave a distance from above to the eaves sufficient to install the soffit. Attach the piece by driving nails into the top holes on either side of the piece. The part should hang on these two nails. The corner pieces should rise evenly up the wall to the cornice. Nail the part to the adjacent walls, driving nails at a distance of 20-40 cm from each other, placing them in the center of the nail holes provided in the part. This will allow for possible vertical expansion. Don't nail too tightly.
A similar procedure is performed for the external corner part. Connecting corner pieces is necessary when the piece does not reach the desired height. Cut 2.5 cm from the top edge of the piece, leaving the middle, front part. Overlap the next (top) corner piece over the bottom piece by 2cm, leaving 0.5cm for possible expansion.

Install the outside corner, leaving 6mm of space at the top to the cornice or J-rail. Attach the piece by driving nails into the top holes on either side of the piece. It should hang on these two nails. Place the nails in the center of the nail holes provided in the parts, at a distance of 20-40 cm from each other. The ego will leave room for expansion - contraction at the bottom of the wall.
Don't nail the siding too tightly!
The work on connecting the parts of the external corner is the same as for the parts of the internal corner. Sometimes it is necessary to close an outer corner from the top or bottom. To make the lid, cut a J-rail from the piece equal to twice the width of the outer corner (counting from the base of the corner piece). Cut a 90 degree angle in the center.
Then cut 1 inch off each side, leaving a nailed edge. Bend the J-rail down the center and nail it to the outside corner of the house. Then insert the outer corner piece into the formed channel and nail it too. If the width of the J-rail is not enough to install a corner piece into it, it is necessary to cut off the inner closed part, thereby increasing its width.

J-rail is installed on the top and sides of window and door openings. Nail J-rail around the openings. Don't nail too tightly! J-rail can also be installed under a window or door as a finishing element. An edge installed at the bottom of a window or door protects the siding panel from damage. Cut and install the edge of the J-rail along the edge of the window opening.
Install the other J-rail piece above the window opening, on top of the side J-rails. In the bottom of the J-rail installed above the window, cut an eye and bend it down. Do the same on the other side. Make a 2cm cut on the side of the vertical J-rail and cut the side of the top J-rail at a 45 angle as shown in the picture. Connect the top and side J-rails.

Insert the bottom edge of the first panel into the starting strip and nail the top edge to the wall. Start installing siding panels from the rear of the house, moving towards the facade. Leave a distance of 6 mm where the panel hits the corner piece for possible expansion and contraction.

Work should be carried out from areas with increased traffic (doors, gates, etc.).
Each panel should overlap the previous one by 2.5-3 cm. The last nail should be located at least 10 cm from the edge of the panel.

After completing the installation of the first row of siding, install the second, each time starting from the rear of the house and moving towards the gable. Place the joints of the siding panels so that the joint of the top row is not above the joint or next to the joint of the lower row. Leave a distance of 6 mm between the panel and corner parts and J-rails around windows.

Installing siding panels when framing a window usually requires cutting the panels. Place the siding panel under the window. Holding the panel under the window, mark the width of the window or window and trim, adding 6mm on each side. Measure and mark the vertical space on the panel, leaving 6mm from the bottom edge of the window or trim.
Repeat the procedure to measure the top side of the window. Make vertical cuts on the panel using a saw or hacksaw along the marked marks. Then bend the horizontal notch with a knife and bend the panel along the notch several times until the marked part breaks off. Install the top edge piece below the window across the width of the opening, flush with the frame.
Sometimes it is necessary to nail the battens to make the siding fit more tightly to the wall. Using pliers - a hammer drill, make protrusions in the panel 6 mm below the edge at intervals of 17-20 cm. The resulting protrusions should be face out and placed under the top edge of the siding.
You can install the top edge in combination with the J-rail. To do this, first install the J-rail and then the top edge so that it is inside the J-rail. This combination provides the best appearance. To install siding above a window, measure and cut the panel, repeating previous actions, but cut off the bottom part from the panel, not the top. Insert the panel into the J-rail installed above the window. Nail it.


Vinyl drip installation
Windows with deep slopes and sandwich panels require a low tide. It is attached only from the side of the window, and under it a layer of foam or other insulation is desirable. The side slopes will rest against upper slope and ebb so that they have the opportunity to lengthen with thermal expansion.
Install the top edge piece. Nail the finishing strip to the wall flush to the cornice. You may need to nail the battens to make the siding fit more tightly. You may need more than one finishing strip. The parts are joined as shown in the figure below.
Measure the distance between the top of the inner groove of the top edge and the lip of the siding panel below, subtract 3mm. Cut the top of the panel to this measurement. Place the cut siding panel against the top edge and draw a line where the two pieces meet. Using hammer drill pliers, make holes in the siding 6 mm below the top edge at intervals of 17-20 cm. Protrusions - face out. Lock the bottom edge of the siding to the bottom panel, and snap the tabbed edge into the groove of the finishing strip. Do not drive nails into the face of the panel!

Installing siding on gables
Measure the angle of the roof using a section of panel. Connect it to the panel below. Attach another piece of panel to the roof ridge. Measure the corner line where both panels overlap. This will be a template for cutting the end of the siding that should be installed on one side of the gable.
Repeat for the other side of the gable. Install the J-rail on the gable under the roof overhang and nail it to code. If it is necessary to use more than one J-rail, the joining of the parts is carried out in the same way as the parts of the upper edge. Lock the siding panel to the bottom panel and insert the J-rail into the groove. Note: Leave a 6mm gap between the siding and the J-rail for possible expansion.
Material kindly provided by the site: http://remstd.ru/archives/montazh-saydinga/ Recommended!
– an excellent material for cladding a house. At its affordable price, it has many positive operational and technical characteristics.

You are invited detailed instructions By self-installation siding. The guide is universal. Following its provisions, you can complete any finishing that involves installation on the lathing: fiber cement, wood, metal, vinyl, etc.

Siding is best attached to pre-installed sheathing. We work in the following order.
The first stage - choosing the material

The frame can be assembled from wooden beam or metal profile. Metal products are stronger and more durable. In addition, metal lathing is much easier to attach to an uneven base.
Find out and also familiarize yourself with the calculation algorithm with an emphasis on possible nuances.
Installation of profiles is carried out in half-meter increments. Hangers are used for wall mounting. This technique will allow you to level out differences in the surface and secure the frame elements at a level.
Wooden sheathing is cheaper. When choosing this option, pay attention to the condition of the wood. It is prohibited to:
- the material has peeled off;
- was deformed;
- had bluish spots and traces of rot, etc.
Elements wooden sheathing need to be impregnated with fire retardant and antiseptic. If the house is built from wooden elements, the walls should also be treated with the listed preparations.

Stage two - preparing the base
The sheathing is easiest to attach to a flat base. First of all, we remove any parts that may interfere. These are all kinds of tiles, bars, platbands, gutters, etc.
The third stage - installing guides
Siding is best mounted horizontally. In this case, we fix the bars or sheathing profiles vertically.
For attaching guides to wooden walls use nails or screws. If the house is built of concrete blocks or bricks, we fasten it with dowels, having previously drilled holes for them in the wall of the house.
We align each rail by level.
Important! If you plan to do exterior work, it is best to install the siding sheathing after all insulation work has been completed. In this case, there will be two lathing: for insulating materials and for cladding. In this case, the slats of the two frames should be placed parallel to each other.


You can, of course, try to lay insulating layers after attaching the siding sheathing, but this is not very convenient.

Mounting J-profiles
The starting guides must be secured perfectly, because... The quality of the entire cladding depends on the correct installation.

First step. Take a level and find the lowest point on the sheathing. We step back 50 mm from it and put a mark. To do this, screw a little self-tapping screw into the rail.
Second step. We consistently move around the building and continue to place marks with self-tapping screws to fix the starting profiles. We also screw screws into the corners of the house.
Third step. We stretch the ropes between the corner marks.
Fourth step. We mark the boundaries of installation of corner profiles on the slats. We take the profile itself and apply it to the corner frame structure and put marks along the edges using a pencil.

Important! We leave a 1-centimeter gap between the profiles to compensate for temperature deformations.
Leave a gap between the starting guides and the nail strips.

To avoid making a 6 mm indentation, you can cut off parts of the nail strips so that they do not rest against the J-profile during temperature changes.

Important! Starting profiles must be mounted strictly horizontally! Correct deviations as long as necessary.
If you install guides that deviate from the level, the siding will also warp. It will be extremely difficult to correct this in the future.
We install external corner profiles

First step. We mark the soffits. We need to see where the edges of these elements will be located in the future.
Second step. We apply the guide to the corner of the frame. We do this with a 3mm gap to the soffit or roof. We fasten the profile with self-tapping screws.
Place the bottom border of the element 0.6 cm below the edge of the starting profile.
Third step. Checking the vertical installation. If there are no deviations, we fix the bottom, and then the remaining places. Experts do not recommend placing fasteners in corner elements too often.

If the house is higher than 300 cm, the profiles will need to be placed one on top of the other. To do this, we trim the top profile. As a result, there should be a 9 mm gap between the planks of the joining elements. When laying the elements, maintain an overlap of 2.5 cm.


Important! We join the profiles at the same level on each side of the house.
If the base has a protruding structure, shorten the profile so that there is a 6 mm gap between it and the base.
Helpful advice! Instead of corner profile It is allowed to install 2 J-elements (starting). This way you can save money. But this solution also has its drawback - the corner will not be as tight as when using a special corner profile. If you decide to use this method, first glue the wall around a similar corner with a strip of rolled waterproofing material.

We install internal corner profiles
The installation procedure for these elements does not differ significantly from the installation technology external corners– between the profile and the soffit we leave a gap of 3 mm, and lower the lower end of the profile below the J-bar by 0.6 cm.
If there is a protruding plinth or other element from below that stands out from the general level, then between it and the profile we also leave a 6-mm indentation - the profile of the internal corner must not rest against it.
There are 3 methods of arrangement internal corners, see picture.

If the wall height is more than 300 cm, we splice the profiles. The technology is the same as for arranging external corners.

We leave a 9 mm gap between the slats, carefully cutting off excess material. The overlap of the upper element on the lower one is 2.5 cm. We install fasteners in 4-centimeter increments, placing them strictly in the center of the holes intended for this. The exception is the highest point. Here the fasteners need to be installed at the top of the hole.
We install frames of openings

For most inexperienced craftsmen, difficulties arise precisely at the stage of framing and doorways. The order of work will vary depending on how the openings are arranged in relation to the plane of the wall.
Openings in the same plane with the facade

In this case, we do the following.
First step. We waterproof openings.
Second step. We attach platbands or J-profiles to the openings. We equip each opening using 4 platbands: a pair of vertical and a pair of horizontal.
Third step. Connecting profiles.

To make the connection of the platbands as neat as possible, we do this:

The platband at the bottom is connected in exactly the same way, only the bridges will need to be cut and bent on the side elements for their further laying on the profile below.
Openings are recessed into the facade


When installing near-window profiles, we follow the same recommendations as when installing platbands, i.e. We create cuts on the profile corresponding to the depth of the opening, and then bend the bridges and insert them into the finishing elements.
Take the time to understand the principles of bending such bridges. We make them so that they cover the joint of the cladding elements. As a result, moisture will not be able to penetrate inside.

Installing the first panel

We start cladding from the least noticeable wall of the building. This way we can practice and work out all sorts of inaccuracies.

First step. We insert the first cladding panel into the corner profile and into the locking connection of the starting strip.
Important! We leave a 6 mm temperature gap between the first cladding element and the lower part of the corner profile lock.
Second step. Attach the panel to the sheathing.
It is important to maintain the dimensions of technological indents. If the cladding is carried out in warm weather, we maintain a 6 mm gap; if in cold weather, we increase the gap to 9 mm. When installing panel trims, the indents can be reduced.

Extending panels

We build up the cladding elements with an overlap or using an H-profile.
When attaching panels with an overlap, you must first shorten the locks of the facing panels and the fastening frames so that the resulting overlap has a length of 2.5 cm.

The installation of the H-profile is carried out similarly to the corner elements - at the top we retreat 0.3 cm from the soffit, at the bottom we lower it by 0.6 cm in relation to the starting profile.
Important! We leave a 6mm gap between the H-profile and any obstacles on the house.
Installing the rest of the siding

We continue covering the house with siding. The operating technology is similar to the procedure for attaching the first panel.
Important! Every 2-3 rows we check the horizontality of the cladding using a level.
Having reached the opening, we remove the unnecessary piece of the panel falling on the opening.
We ensure reliable fastening of the panels using “hooks”. For this we need a punch.

We install an additional finishing profile at the bottom of the opening. This will allow the cladding to be leveled.

Installation under the roof

Under roofing structure We attach the J-profile.
We work in the following order.
First step. We measure the distance between the bottom of the lock of the finishing element and the lock of the penultimate facing panel.
Second step. We subtract a 1-2 mm indent from the resulting measurement.
Third step. We mark the whole panel, cut off its upper part with the locking connection.
Fourth step. We create “hooks” in the upper part of the element in 20-centimeter increments. To do this, we make cuts and bend them to the front side.
Fifth step. We insert the trimmed element into the penultimate siding panel. With a slight upward movement, snap the inserted element into lock connection finishing profile.

We mount the pediment
We sheathe the pediment around the perimeter. All fasteners, except the top one, are installed in the center of the holes. The upper one fastener install at the top of the hole. It can be sheathed either with profiles for arranging internal corners or with a starting profile.

The installation procedure is similar to fastening wall panels. We trim the edges of the elements and connect them to the locks of the receiving profiles. We remember the 6 mm indentation when installing in warm weather and 9 mm when doing work in winter.
We fasten the last element of the gable cladding directly through the panel material - this can only be done here.

The cladding is complete.
Find out how, and review the calculations and step by step guide, from our new article.
In order for the finishing of the house with panels to be as successful as possible, you need to know certain subtleties performing such work. There is a list general recommendations for any siding, as well as separate tips for panels made from a specific material.
For different materials
Now you can perform it yourself at the highest level.

| Name (model) | Benefits | Length x width x thickness, mm | Quantity per package, pcs. |
|---|---|---|---|
| Vinyl Siding "Canada Plus" | 1. Coloring in dark colors performed using the “Cool Color” method (heat absorption), which involves the use of masterbatches. 2. Excellent appearance remains unchanged even when exposed to high and low temperatures, the range of which ranges from -50°C to +60°C. 3. Retains shock resistance, even if the ambient temperature drops to -20 to 60°C. 4. Not susceptible to microbiological corrosion (fungi, mold). | 3660 x 230 x 1.1 | 20 |
| Acrylic Siding "Canada Plus" | Among the others useful qualities acrylic siding "Canada Plus" is worth highlighting: Increased resistance to direct influences ultraviolet rays; Excellent tolerance to acidic and alkaline solutions, as well as various fats; Good tolerance to washing with chemical detergents; High degree of deformation resistance (perfectly tolerates temperatures up to 75°-80° C). | 3660 x 230 x 1.1 | 20 |
| "Alta-Siding" – Vinyl Siding | "Alta siding" is: one of the safest finishing materials on Russian market; frost resistance and the ability to maintain strength even at very low temperatures(from -20 to -60°C); resistance to significant temperature changes and exposure external environment; durability: the service life of Alta-siding is up to 30 years; resistance to aggressive substances (can be used to clean siding detergents); non-susceptibility to infection by mold fungi. | 3660 x 230 x 1.1 | 20 |
| Facade metal siding INSI | INSI siding is made of galvanized steel coated with a layer polymer composition, which means it inherits all the advantages of this material: resistance to temperature changes (-50°C - +80°C) and mechanical damage; long service life with preservation of original properties (about 50 years); environmental friendliness; non-flammability; Possibility of installation both horizontally and vertically; protection of the building from overheating (in a ventilated facade system); and when choosing one of two new colors (alder or rosewood) - a complete imitation of the appearance. | Length up to 6000, width up to 200, thickness 0.5 | - |
Good luck!
Video - Do-it-yourself siding installation
Installation of siding corners is quite an important and crucial moment in the decoration of the room. After all, there can be many corners, including windows and doors. Moreover, they can be with or without slopes.
We will look at how corner siding is attached in this article using examples. Corners for siding and other additional elements are available in large quantities in retail chains, but they need to be selected correctly. After watching the video in this article, you will be able to see everything clearly and quickly understand the rules for doing this work.
Rules for performing work
The outer corner for siding is covered with additional elements. You need to immediately calculate them and only then purchase them.
Attention: It is necessary to pay special attention to the length of the surfaces; the amount of waste will depend on this, and there will definitely be some.
Finishing the corners of a house with siding can be done in several ways:
- External corner for siding;
- Internal corner for siding;
- Corners for siding with slopes;
- Corners for siding with a radius.
Now let's look at each type of finish separately.
Finishing the outer corner with siding
How to attach outside corner for siding we will analyze in detail. The internal corner for siding is made according to a slightly different pattern, but now let's look at the option of making an external corner.

So:
- First you need to adjust the length of all elements. If necessary, the excess parts are removed with a grinder, taking into account a small gap for thermal expansion between the top point and the cornice.
- Work should begin at the top point (in a situation where the height of the walls is more than three meters, the fastening is done at the bottom).
- The profile for the corner is applied to the wall with the expectation that its location will be four to five millimeters lower than the starting base and 0.6 centimeters below the upper edge of the wall.
- The element is first attached at the top to the bars of the previously installed sheathing (see). For fastening, you can use self-tapping screws with an aluminum anti-corrosion coating. They are screwed into the first hole at the top on both sides of the corner. The profile will hang on hardware. The vertical must be checked with a plumb line.
- After this, we fix it at the lowest point.
- If there are no irregularities, you can begin fixing corner strips over the entire height. It is attached loose enough so that it can “move,” that is, compensate for the expansion of the panel material due to temperature changes. This can be achieved by not fully tightening the screws. It is better to leave a margin of one millimeter on the thread, and not do it end-to-end. The hardware is screwed into the middle of the oblong perforation hole, maintaining a twenty-centimeter pitch between them.
- If the height of the solution is greater than the length of the vinyl corner profile and it is necessary to extend the strip, resort to an additional one, connecting them overlapping. In this case, the total length of these elements will be greater than the original height. It is necessary to improve the upper corner of the profile, which has been lengthened. Cut off 0.25 cm strips from the sides to the middle of the axis. Top corner superimposed on the lower one with a very small margin. As a result, there should not be a tight connection between the two connected elements, because compensatory expansion requires 0.05 cm. It is important to ensure that on the facade of the building all corner elements are fixed at the same level.
- In the case when there is a need to hide the upper or lower end of the corner, you can make so-called covers. For these purposes, fragments of J-planks are used. In the workpiece, or rather in the center, cut out a right angle and trim the edges. The finished covers are bent along the central axis and screwed to the outer corner of the building. Fixation is first carried out at the lowest and top points. After that, elements are inserted into them and nailed.
- This type of fastening is not the only method of fixation. Profile extension can be done through overlays. To do this, a pair of connected elements, which are located in the same plane, do not contact the edges, but are placed on a part cut from the same profile. It is glued to the bottom bar.
- But there is another order construction work. There are finishing methods in which the corner parts of the facade look more reliable and also aesthetically pleasing. In this case, it is important to purchase only certified high-quality material.
How to cover a window
Installation of siding may vary depending on the depth of the windows:
- Arched windows.
- Depth up to twenty centimeters or higher;
- The window is located flush with the plane of the wall.
This division is associated with the use of various standard elements. Now manufacturers offer several executive options. Everything will depend on linear size profile.
- Before you begin, it is important to create the sheathing. As building elements It is better to take a metal profile, because wood does not have such resistance to external aggressive factors and durability.
- If you still choose wooden slats for the frame, then before work you need to treat them with special compounds. They will increase resistance to moisture, biological and chemical resistance, fire resistance and strength of the material.
Attention: The frame is mounted at a ninety-degree angle, and it does not matter where the slopes of the window opening are directed.
Finishing windows with slopes
There is a special siding corner to do this job. Therefore, you must first take all dimensions and purchase it. The price of this element is not high, but with its help it will be much easier to complete all the work.

- If the seating depth of doors or windows is up to twenty cm, then standard J-type planks are usually used for cladding. Their width reaches twenty-two centimeters. Taking into account the overlaps of the elements of the entire structure, it is possible to block openings up to 20 centimeters using this method. To the plane window frames The finishing strip is placed and the profile is inserted into its groove.
- It is also possible to replace the near-window strip with a system for fastening the corner, cutting strips of siding and a universal strip, which must be laid in the grooves strictly horizontally, and the outer edge is covered with a trim. This method can also be used in cases where the window seating depth exceeds the dimensions of the J-chamfer.
- Installs the profile and the outer corner, the space formed between them is filled with cut siding panels.
Framing windows without slopes
If the door opening coincides with the plane of the wall, then standard elements such as platband can be used when covering the building.

- They can be varied and vary in shape and width: wide (about six centimeters) and narrow (four). To frame an arched opening, it is customary to resort to a flexible platband.
- In this case, all elements can be matched to the color of the siding (see) or, conversely, you can highlight the opening by taking trims that have a different color scheme.
- When finishing siding, the following sequence is followed: first we install the platband and fill all the gaps with siding.
Arched windows
To cover such windows, a flexible standard profile is used, but it is quite expensive.
- For this reason, most people prefer to use a rigid J-profile, whose base is trimmed to the desired pitch.
- It is selected depending on the radius of the rounding. The smaller the turning radius, the more often trimming is done.
Attention: If the profile is flexible, then be careful during work, as the profile may simply crack at the rounding point. Even if the bend can be straightened out, a mark will probably remain in its place.
We frame windows with a slope of more than twenty centimeters
During processing window openings, whose recess is more than 20 cm, resort to external corners, siding panels and profiles, which are cut to specific sizes.
- At the beginning finishing works you need to install the profile, as well as the outer corner. After this, we lay the pre-prepared siding panels in the gap between them.
- To finish slopes (see), you can use not only siding, but also soffit. It is, of course, advisable to use a soffit for this work, because the panel itself has a shape that will drain water, and its appearance is much more attractive.
Attention: Special attention It is worth paying attention to the methods of joining and trimming corners of the frame of a door or window. The corners must be connected in such a way that there are no gaps or gaps, since through them water can get under the finishing materials.
- Straight cutting can also be done, but cutting at a forty-five degree slope will look more presentable and have greater functionality.
- It must be borne in mind that the use of metal fittings makes it possible to cover large slopes. This is due to the fact that it can be ordered according to sizes own home. If you have slopes of twenty-five centimeters, then it will be made and a single part will be attached around the window, and not an assembled “miracle” from separate pieces. Another undoubted advantage of metal fittings is that when decorating a facade, they look much more advantageous than plastic ones.
The instructions will help you do everything correctly and, guided by it, you will be able to cope with the intended work without any problems and will be satisfied with the result. Before starting work, you should study and lift everything; the photo will help you with this.
Starting profile: install it correctly
Siding installation consists of several stages and includes the installation of many components, including starting and corner profiles, moldings and much more. This process occurs along the lines of walls, windows and roofing.
Installation of Deke siding consists of several key points:
- Choice of technology;
- Setting up a starting profile;
- Installation of external and internal corners;
- Covering corners other than rectangular.
How to choose the right technology?
First, determine the type of base (Fig. 15). It can be sunken, protruding and even. The first is that the base “sinks” into the wall, which slightly overhangs it. The second - the wall is narrower, the third - they have the same width. Facade cladding with a flat and sinking base is carried out using the same technology, with a protruding base - using a slightly different technology.
Sometimes the base can change its appearance, turning from protruding to sinking. This transformation is possible due to the thickness of the sheathing. If you have retained the protruding plinth, then you need to install a vinyl molding under the starting panel. In this case, the base can be left untouched and closed.
Rice. 15. Types of socles: a - sinking; b - smooth; c - protruding (aligned with the wall by the sheathing); g - protruding with ebb along the top of the sheathing; 1 - wall; 2 - sheathing; 3 - base; 4 – vinyl deck; 5 - cement screed
Docke siding starter profiles are used not only along the bottom of the wall of a building. Starter strips successfully cover the roof gable, which is especially important with an attic covered with siding and open facades. They are ideal for installation on roof gables and at the beginning of subsequent floors when a design or engineering project requires a visual separation of the cladding. Installation is carried out along the bottom line of the wall.
Siding installation technologies: we create high-quality cladding
For high-quality finishing the facade of the house with vinyl siding, you need to take into account several important points: you can only dream of a perfectly level base; strict adherence to technology will help create a neat and durable cladding; installation must begin by determining the lowest point of the wall.
A special water level will help you, which will help you complete this stage as efficiently as possible (Fig. 16).
- Where the water takes a horizontal position, make a corresponding mark. Such marks must be placed on each corner.
- Between each mark and top part measure the distance from the base. Where the lowest point of the wall is, there will be maximum numbers. And it is from this place that we begin the installation starting bar.
64 millimeters is the height of the Deke siding profile. Measure the same amount from the bottom point up and drive the nail in - not all the way. Now you will need a water level again - to align the water level in one of the tubes with the nail. We repeat all these actions with each corner, mark the horizon with a nail and orient ourselves along the second glass tube. The final point will be the one from which you started the process. Obviously, a secondary bypass is not needed - if you remember, we have already marked the horizon. All that remains is to use a tape measure to measure the distance from the mark that marks the top of the starting profile to the horizon. And transfer the obtained values to all corners of the building. Count from the horizon line.
Rice. 16. Installation of the starting profile (dimensions in mm): a - horizon beating; b - installation of starting strips; 1 - wall; 2 - sheathing; 3 - water level; 4 - nail; 5 - lace; 6 - starting line

Specialists of the Stroymet company draw your attention! If the base has a certain design, then the siding can be lowered below the top edge. And accordingly change the indent distance to a smaller one. For example, by 50 mm instead of the existing sixty-four. In this case, the base will be slightly covered with siding - exactly how much is up to you, the main thing is that half the height of the starting strip is not exceeded (Fig. 17).
So, the corner points are fixed, the upper boundaries of the starting profile are marked, now we must create a visible border of the starting bar. To do this, we will use a cord, which we will stretch between the nails. To visually mark the boundary, it is better to rub the cord with something colored - it can be chalk or charcoal. Now, standing in the middle of the wall, pull the cord towards you and quickly release it. A strong blow to the wall will leave a colored line that will indicate the upper limit. It is necessary to “beat off the horizon” on each wall, after which the cord can be removed.
Rice. 17. Overlapping the sheathing onto the plinth

Now you need to inspect the crate. Perhaps some of the corners turned out to be too raised up - this happens if the base is far from the horizontal. In this case, the length of the sheathing for attaching the profile will clearly not be enough. Nail additional slats to achieve the desired length.
Let's start the actual installation
The width of the shelf of the vertical corner profile is 75 mm, while that of the J-profile is smaller, only 46 mm. We add a few millimeters (from one to five) to the temperature gap and measure the horizontal distances. Next, we will set aside the size of the corner profile and begin the installation work. By the way, the color scheme of the profile is completely unimportant, because later it will be hidden by the cladding. Corner width vertical elements measured from the corner, one temperature gap should be added here. Align the selected colored line (the one we drew with the help of a cord) with the top edge and carefully attach it to the sheathing (Fig. 16b). This can be done with a self-tapping screw or nails.
The next stage of installing Docke siding is the location of the fasteners. Don't forget to check how the panel behaves when moving - it should be free, without any snags. Then we attach the profile. The installation of the second starting profile is carried out in the same way as the first. Between the profiles you need to maintain a distance of 2 mm to 1 centimeter based on two values of the temperature gap. We install all the panels around the perimeter of the house in the same way, periodically checking the horizontal position using a building level.
Important! As you install the starter panels, the siding will be installed. On perfectly level slats you will get perfect surface siding, if there is a curvature somewhere, the rest of the cladding will repeat the mistake.
Protruding plinth: specifics of siding installation technology
The first thing to do is to protect the base from aggressive environmental influences, in particular from moisture and dampness. For these purposes, a vinyl molding is used, mounted between the starting profile and the base. The Docke company has a 10 cm wide ebb, which can be used to hide any base.
A plinth made of concrete, brick or stone must be leveled; a plinth made of wood must be treated with an antiseptic and fire retardant - this will extend its service life.
The installation technology is not too different from that described above - you also need to find the lowest point of the wall surface, only measure 60 mm at the top, beat off the horizon with a cord, going around the entire house around the perimeter (Fig. 18).
But this installation begins with the installation of ebb tides - from the corner. First, we cut off 50 cm from the solid ebb, mark it (as shown in the figure), trim it and carefully fold it into a rigid right angle. Next, the upper part of the plank must be carefully aligned with the line that we drew using the cord, and the corner must be mounted on the wall. We install the next ebb with an overlap at 25 mm work surface, we cut the nail strips to 14-18 millimeters. Half of the overlap is 12.5 mm, here we add additional millimeters (no more than 5) for temperature gaps and thus ensure the expansion of the profile.
Rice. 18. Installation of the starting profile on top of the ebbs: a - general form; b - construction of an external corner from the ebb; in - the same thing, internal angle; 1 - outer corner of low tide; 2 - low tide; 3 - starting bar

The difference in the installation of the internal corner from the external one is in the peculiarities of the bend, which is made along the nail strip.
We attach the ebbs in the center of the nail hole, observing a step frequency in the range of 20-45 cm, the head should protrude by about a millimeter. Another difference in the technology is the need to once again draw out the horizon with a painted cord. This time you will have to maintain a distance of 40 mm from the top of the bar. The starting strips must be mounted above the low tide to the horizon line and fastened in the same way as in the technology for a sinking base.
Features of installing the external corner
Installing the outer corner of siding in a house with a flat or sunken base has its own characteristics. First you need to determine the length of the profile. Correct length– this is the height of the angle to which 3 mm is added. The next step is to attach the profile to the outer corner with screws or nails. Don't forget to step back 3mm from the roof eaves. When the structure hangs on two nails, measure the distances - from the roof eaves it should be 3 mm, from the starting profile - 6 mm maximum lower. After you check the verticality of the corner profile, you can complete the fastenings, keeping the pitch between the holes of 20-40 cm (Fig. 19a). There is no point in attaching it too tightly.
Rice. 19. Installation of external corner profile: a - general view; b - joining of corner profiles with an overlap; 1 - external corner profile; 2 - upper profile; 3 - lower profile

The Stroymet company draws your attention! Before the beginning installation work at the bottom of the corner profile, trim the nail strips by approximately 4 - 6 mm, then when changing temperature regime they will be invisible.
But the length of the vinyl profile is not always sufficient for the height of the corner; sometimes you have to join two elements into one. This must be done at the same height; the upper profile is located above the lower profile - overlapping. To cut the required size of the strip, use metal scissors. You need to cut in the upper corner profile, leaving two flat strips that will form the corner.
Installation begins with the installation of the lower corner profile, followed by the installation of the upper one. This is how we build a node that is absolutely closed from the aggressive influence of natural phenomena (Fig. 19b). Particular attention should be paid to the height of the cut part - it may be greater than the temperature gap or completely correspond to it. In turn, the gap size ranges from 2 to 9 mm, while the overlap of the panels will be about 2.5 cm.
Does installation of the Docke siding corner require the use of additional elements? The installation rules are the same - up to three millimeters top clearance, up to six millimeters of release from the bottom edge of the starting bar.
Are you planning to decorate a façade with a protruding plinth? Or are there structures in the architecture of the house that become a kind of barrier? A convenient length for a corner profile is a maximum of 0.5 cm higher; it needs to be cut at the bottom.
In the same way as the external corner, the internal one is installed. For details, see the figure (Fig. 20).
Non-standard corners: how to make cladding?
The variety of modern architectural solutions often presupposes the presence of an original bay window shape, non-standard angles, and exclusive elements. And sometimes owners wonder: is it possible to cladding them? Of course, using the usual vinyl siding Deke. During the installation process, the external corner profile is “pulled” onto the facade, opening or narrowing it as necessary (Fig. 21).
Rice. 20. Installation of internal corner profiles: a - from one corner profile; b - joining along the length of internal corner profiles; 1 - internal corner profile; 2 - ordinary siding panel; 3 - J-profile; 4 - upper profile; 5 - lower corner profile

Main condition successful installation – correct installation fasteners Only in this case can you stretch the vinyl profile at an angle (external and internal) and vertically. All other installation steps are the same as before.
Rice. 21. Installation of corner profiles on non-rectangular corners

This video shows the technology of working with facade panels which will help bend the outer corner facade siding to the required sizes.
This method is one of the safest and does not violate the overall design and technical properties material.
For example, bend the corner plinth panels Alta profile.
- How to cover a house with siding yourself
- How to make a frame from a siding profile
- How to cover a gable with siding
- How to attach siding to a brick wall
- How to calculate siding for cladding a house
- How to finish slopes with basement siding?
- How to connect siding without a connecting strip?
- How to work with siding for cladding a house?
- How to cover the gable of a gable roof with siding?
Comments
1 #1 Yuri Alekseevich 11/10/2017 14:22
Quote +1 #2 Zhorik Azmasov 11/24/2017 09:48
Interesting way
Quote Update list of comments
Add a comment
Name (required)
Email (required)
Send Cancel
When facing a house great importance It has right choice components. Internal and external corners for siding will simplify the work and give the building completeness. Such details are broken down into several main categories, used depending on the situation. Installing extensions will not be difficult if you follow simple rules.
Purpose and characteristics of corner elements
The use of products is determined by the selected variety. All products are divided into groups that differ in their functions.
Simple and complex corner siding elements
Simple
The main purpose is to create the necessary decorative look. The parts also play a protective role, preventing the penetration of precipitation and wind. They have a regular shape with an angle of 90 degrees. Exhibited after completion of the main work.
Thanks to its design, the strip completely covers the butt joints, creating a smooth transition. Although the color range of elements can be very diverse, most often there are options on sale in light and dark versions.
The size range depends on the manufacturer, the most popular parameters are: width – 50*50 mm and 65*65, length – from 2 to 4 m.
Dimensions of corner fittings in different models sidings are different
On a note! As an alternative, components of other finishing materials of appropriate shape can be used.
Complex
The most preferred variety, which performs several functions:
- Simplified installation and increased reliability. The elements have a place for fixing the edge of the siding, identical in appearance to the J-profile.
If there is no corner element, it can be replaced with two J-profile strips
- Improving decorativeness. The part covers the unattractive junction of two sections facade cladding. To create additional visual effect Smooth, textured or embossed products can be used.
- Increasing the protective parameters of the finish. Demarcating the area where the panels are located, the corner tightly covers the junction of the two walls of the house. This protects the base from moisture and other environmental influences.
The dimensions of complex elements also depend on the manufacturer. The most common options:
- External detail: width of side sections – 65*65 and 100*100 (110*110) mm, installation width – 80 and 120 mm, length – from 200 to 360 cm.
- Internal corner (with one visible plane): the width is most often 80 mm, the length is similar to the previous option.
External corner dimensions complex shape for VOX siding
Basement
These products are often classified as a separate group, but they can also be used for finishing façade areas. The elements are considered complex, although they have an appearance that imitates brick or stone cladding. The length of the parts is 42–47 cm, the width of the sides is 9–16 cm.
Docking Features
Since when installing fragments it is not always possible to use a whole part, there is a need for a connection along the length (height). There are several methods for this:
Overlapping mounting
A fairly common method involves superimposing the top element on the bottom. Installation instructions:
- The product located below must be aligned and the level must be marked. To position the panels along the upper edge, the fastening sections (5–6 mm) are trimmed.
- The size of the overlapped fragment is determined and 20–25 mm is added to it (overlap). A fixation section is cut out of the part, the size of which is equal to the expected overlap plus 5 mm.
- The products are connected.
- Before fixing the corners, check the gap between their internal parts; it should be at least 9–10 mm.
The overlap of adjacent corner elements should be 25 mm
Building up
A transition can also be formed by building up the area using an overlay. For these purposes, a cut of the element used is used. The technology is as follows:
- The size of the working fragment is 10–15 cm. According to it inner surface Places for fixing the siding are cut out on both sides to a width of 20 mm plus 7–8 mm. Due to the fact that the insert part is the junction of the upper and lower sections, its dimensions must be taken into account in the general calculations of the length of the corner.
- Connecting all the elements is quite simple; to do this, they need to be installed in the exact sequence: the product is placed from the ground or base, the connection is made, after which the rest of the space is decorated, everything is fixed. The result will be two overlaps. There must be a gap of at least 5–6 mm between the inner sides of all connections.
Connection of the outer corner profile: a - through an adhesive overlay; b - through the punched overlay; 2 - top profile panel; 3 - the bottom panel; 4 - overlay
A significant disadvantage of this method is the possibility of moisture penetration, so an additional elastic sealant must be used.
Other methods have many more disadvantages and are not recommended for use.
On a note! When installing fragments of the plinth series, you can use a starting corner strip as an additional part.
Installation of corner profiles
The fittings are fastened to at a certain stage finishing work and includes a number of mandatory actions.
Internal corner
You can attach it using the following algorithm:
- The product is displayed after fixing the starting bar. There are two adjustment options: the first is to form a gap between the extensions, the second is to trim the lower part of the corner element, which allows the initial segment to be positioned flush. Due to the fact that the internal section of the frame is not always located at an angle of 90 degrees, if necessary, the part can be slightly bent. This will ensure a tight and even fit.
- Gaps are left at the top and bottom to compensate for expansion.
- The element should be fastened with self-tapping screws. If the existing holes do not fit, then cut additional ones yourself. The screw is screwed into the center at a right angle with a gap of 1 mm.
This angle is also used when sheathing gable and roof overhangs.
External element
An external part of complex shape is most preferable for outside work. Installation is carried out according to the following scheme:
- The element is applied to the corner, the location is noted. If necessary, the area for extension is determined.
- Taking into account the gap, the starting bar is set.
- The outer segment descends 4–5 mm from the initial fragment, but with a mandatory gap at the top and bottom.
- If necessary, the corner can be slightly bent in the desired direction. This is especially true when working without lathing.
- Fixation is carried out using self-tapping screws according to the same principle as the previous option.
The outer corner segment is used for finishing window and door openings, acting as a platband.
You should know! Simple elements They are mounted on top of the created casing; for this purpose, holes are drilled in them.
Attaching a simple corner over siding
To do the job correctly, you can use simple tips:
- Selecting components of the same brand as the selected siding will eliminate problems with fitting.
- Trimming is done using a grinder, metal scissors or an electric jigsaw.
- Be sure to create gaps between the installation profiles and fasteners.
- It is better to refuse products that are too cheap. Due to thermal expansion, it can become deformed and will pull the entire wall cladding along with it.
If you select suitable material and do the work correctly, the finishing of the house will last for many years.
Siding is one of the most popular materials for updating the facade of both old buildings and new houses. In addition to the panels themselves, you also need to purchase additional panels in the store, which will greatly simplify and speed up the installation process.
Such details also make the composition more aesthetic and complete. One of these elements is the outer corner for siding. Let's take a closer look at this detail.
Why install
Every detail general design cladding performs clear functions. In some cases, one additional element can be replaced by another.
But only original and original corners are used, that is, from the manufacturer. Because these elements are responsible for:
- Sealing the corner. There is always a gap at the panel joints. Water, dust, dirt and cold air currents can get into it. It is the outer corner that helps protect both the cladding structure and the base material from destruction.
- Transformation of cladding. The edges of the panels are not attractive, so the element helps to hide minor imperfections.
- Helps maintain clearance for linear expansion due to thermal influences. Dimensional changes when heated or cooled are one of the disadvantages of siding. It must be taken into account during installation.
The elements that are used for internal corners perform the same functions as for external ones.
How to determine the required size of a corner profile
To determine how long the corner siding should be, you need to measure the value from the bottom edge of the starting strip (it is the one that is first attached to the sheathing) to the place where the cornice will be installed. Subtract 6 mm from the resulting value. This is necessary in order to take into account linear changes under temperature influence.
It happens that the length of one standard profile there is not enough to frame a corner or you need to finish it in several pieces, what should you do then? In this case, you will have to install the elements overlapping. Add 2 cm to the size of the additional part for joining.
Such an area will be enough to completely protect the structure from moisture, dirt and cold.
Installation Rules
In order for the finish to be installed firmly and reliably, you must strictly follow the installation rules. Each manufacturer provides instructions for their materials. But now let’s take a closer look at installing the corner profile.
The first thing you need to do is secure the starting bar. It extends to the corner by a distance that is equal to the full length of one side of the corner profile (including the perforated edge) with the addition of a gap for linear expansion (about 6 mm).
Now let's start processing the corners with siding:
- Customized to fit right size element is applied to the wall so that the bottom edge is 3 mm above the bottom of the starting strip. The upper border should not reach the cornice by 3 mm.
- First, the part is fixed in the uppermost hole of the perforated edge. It is on this mount that the corner element will be held.
- To attach the bottom edge, you need to check that the corners of the siding are vertical. To do this, use a plumb line or a building level.
- The fastener is installed in the center of the outer perforated hole, but is not tightened all the way. This avoids deformation of parts due to thermal expansion.
- After this, you need to screw the part along its entire length, every 20–30 cm. In this case, be sure to leave a gap of 2 mm between the fastening and the corner.
Selection of fasteners
To fix the siding, you can use several methods of securing parts:
- Staples construction stapler. Such fasteners are considered the most unreliable. The process can be completed quickly, but it will be of very poor quality. When there are strong gusts of wind, panels or corners and other additional siding elements may come off, which will lead to deformation of the part. Even if under the influence external factors everything remains in place, then over time the strength of the fixation decreases, and the structure may collapse under its own weight. In addition, this option is not at all suitable for metal siding.
- Nails. Very much reliable way fix corners and other finishing details. But there are difficulties with the gap for expansion. With such a tool it is difficult to leave space between the fastener and the part. And when a nail is hammered tightly, it is impossible to remove it. Although if you practice a little, you can cope with such a task.
- Self-tapping screws. The most popular method among professionals and those who are doing the finishing themselves for the first time. Using a screwdriver, the fastener is screwed in until it stops, and then unscrewed one turn. This will be enough so that the part or panel can “walk” freely when expanding.
The most suitable option To secure the siding to the sheathing, the use of self-tapping screws remains. Therefore, if the farm does not have a screwdriver, then you can take it from friends, rent it from construction company or buy a new one.
Docking methods
In the case when you need to make one corner profile from 2 pieces, you should use one of the methods suggested below:
- Overlap. To do this, 2 separate pieces are first folded on a horizontal surface, as it should look on the wall. One part should be 2 cm over the other. This part is adjusted to the required size. Then you need to cut off the perforated edge in the area that you plan to attach first. Next, the structure is disassembled and begin to be fixed in parts, first the lower one, and then the upper one. This method most reliably protects the finish and base from precipitation and moisture.
- Docking using overlays. To do this, take a J-profile. It needs to be bent at an angle of 90°. To do this, crop the profile inner part and give the required form. Then such an overlay is put on the lower and upper parts alternately. In this case, the overhead parts are fixed in the same way as the corner elements.
The method is not as practical as the previous one. The lining allows precipitation and even dust to pass through at angles, which provokes the development of destruction. Therefore, it is advisable to select dimensions that will coincide as much as possible with the height of the corner of the house.
How to finish the corners of the walls so that they turn out smooth, durable and beautiful? Previously, I was often interested in this question, but now, having gained experience, I myself will tell you how corners are finished - external corners inside and outside the building. I am sure that this information will help beginners cope with the task.
The corners of the walls in the home should be strong and beautiful
Finish options
The difficulty of finishing corners lies not only in the fact that they must be even. The fact is that these sections of the walls are often subject to shock loads, so it is necessary to provide them with sufficient strength.
Currently, there are several ways to solve this problem. The choice of method depends on the type of wall decoration, which can be as follows:
The most common wall finishing options
Option 1: plastered or plasterboard walls
If the walls are plastered or lined with plasterboard, then special plaster corners for finishing corners. They come in two types:
- Aluminum perforated. Used for finishing flat areas;
Aluminum perforated corner quite durable and reliable
- Arched. Made of plastic. Their main feature is their increased flexibility, which allows them to be used for finishing curved surfaces;
The arched profile can be glued to curved surfaces
The corners are glued with plaster or putty at the stage of rough finishing of the walls. During their installation, be sure to use a level. This allows you to install them strictly vertically or horizontally.
It must be said that this solution applies both to interior walls, and for facades. But, most importantly, this finishing of the outer corners of the house allows not only to level them, but also to protect them from mechanical damage.
Price:
Please note that all prices are current as of Spring 2017.
The joints of PVC panels can be decorated with special profiles
Option 2: finished with PVC clapboard
IN Lately PVC (polyvinyl chloride) lining, which is simply called plastic panels, is very popular. Most often this material is used in the following rooms:
- Bathrooms;
- Kitchens;
- Hallways.
If the walls are finished with plastic, the corners can be decorated in the following ways:
- Using profiles. This is the simplest method, the essence of which is to use corner profiles. They are installed on the lathing using a level, just like plaster corners.
As a rule, profiles are fixed to the sheathing using a stapler. Then the panels are simply inserted into special grooves;
Scheme of bending PVC panels
- By bending the panels. To bend plastic panel with your own hands, you need to cut its inner side along the fold line. It is advisable to even cut thin strip, as shown in the photo diagram above.
Before bending, it is advisable to heat the front side, for example, using a hairdryer.
Price. The price of guides for PVC panels starts from 25-30 rubles per 3 m (standard length).
Option 3: finished with wooden paneling
Not so long ago, when finishing walls with clapboards, the boards for corner joints were cut and adjusted. At the same time, the remaining cracks were filled with putty. Nowadays, you can purchase a special wooden corner to decorate corners.
Wooden corners allow you to quickly and easily design lining joints
You can secure it to the lining using window nails. The only thing is that it is advisable to bite off the nail heads so that they are invisible.
It must be said that in this way you can finish not only external, but also internal corner joints.
Price. The cost of wooden corners averages about 50 rubles per linear meter.
There are special guide corners for siding
Option 4: facade finished with siding
Many beginners are interested in how to decorate the corners of the house on the facade? As I said above, for wet facades You can use perforated plaster corners.
If the facade is sheathed with siding or other facade panels, you should use special additional elements, which are usually sold complete with panels.
The corner serves as a fastening element for siding, and also performs a protective and decorative function.
Such corners perform several functions at once:
- Provide fixation of panels;
- Design the joint of the panels;
- Protect the ends of the panels from mechanical loads;
- Serve as guides for siding.
In fact, installing siding corners is similar to installing guides for PVC lining. They are also mounted on the sheathing, but not with a stapler, but with self-tapping screws. In this case, a level must be used.
Lumber ends in wooden house need protective treatment
Option 5: wooden walls
At first glance, the design of the corners wooden house outside is not required, since they themselves look quite attractive and are quite durable. However, not everyone knows that the ends of lumber are the areas that are least resistant to moisture and rot.
To protect them, special sealants and impregnations are used for the corners of a wooden house.
Price. Below are the most popular formulations and their costs:
You can use compounds for the ends of lumber not only outside, but also inside a wooden house.
Corners can be decorated in an apartment with decorative corners
Option 6: wallpapered or finished with liquid materials
Above, I have already talked about the rough method of finishing plastered walls. Finally, let's look at how it's done decorative finishing such walls.
So, there are two most common ways to solve this problem:
- Decorative overlays. Finishing external corners in an apartment involves PVC installation or polyurethane corners.
In the photo - polyurethane lining
These products can be made to look like wood or even look like an expensive baguette. The latter are usually made of polyurethane. They look rich and are used in classic interiors;
Decorative stone allows you to decorate corners beautifully and unusually.
- Decorative stone. In this case, the corners are covered decorative stone, which can be made of plaster, cement or even natural stone.
It must be said that this method can be used not only for interior walls, but also for the facade.
Installation instructions decorative corners requires removal finishing coating in the area where they adjoin the wall. This is especially true for heavy polyurethane linings.
Price. Below is the cost of some materials for decorating corners:
Conclusion
Now you know what methods and materials are used to decorate the corners of a house outside and inside. Additionally, watch the video in this article. If you have any questions on this topic, you can contact me in the comments.
If you want to express gratitude, add a clarification or objection, or ask the author something - add a comment or say thank you!


