Installation of siding will be an excellent option for completing the exterior decoration of the house. This material tolerates weathering and other external irritants well, thereby protecting the tree from negative influences. In addition, the house covered with siding takes on an attractive appearance and becomes more presentable. We will consider the technology of finishing a wooden house with siding further.
Siding a wooden house: features and benefits of the material
Siding as a finishing material has become widespread among the owners of private houses. This is due, first of all, to its affordable cost and the speed of installation work.
Previously, only natural materials were used for facade finishing, but now the finishing market offers excellent options in the form of wood, metal, vinyl, which are the basis of siding.
The use of the wood component is the lowest, as it will require the most money to make it. In addition, this type of siding has the most disadvantages. Although wood siding is environmentally friendly, it needs constant maintenance, painting, repair, and replacement of worn parts. Wood siding has a low level of fire safety, as well as a short service life.
It is not recommended to install metal siding on a wooden house. This type of siding is most suitable for cladding production and storage facilities. Among the advantages of metal siding should be highlighted:
- high strength;
- duration of operation;
- a variety of colors and their shades;
- Fire safety.
Although metal siding is practically unstable against corrosion, it also puts a lot of stress on the building structure due to its too heavy weight.
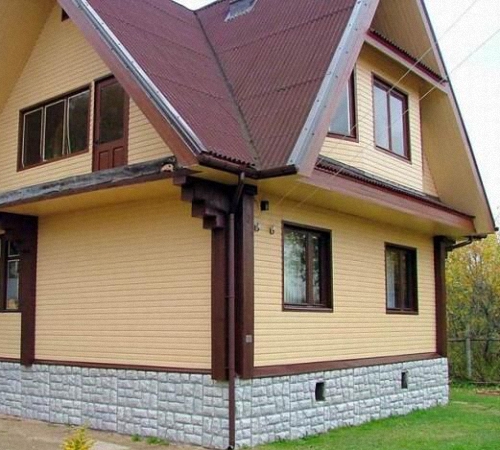
The basement type of siding is its newest type. These panels provide additional protection to the bottom of the house from moisture and weather. In appearance, this cladding is similar to stone or brickwork. Such siding makes the building more sophisticated and complementary.
The most common finishing option for residential buildings is vinyl siding. Such panels consist of a two-layer structure. The first layer protects the material and the second protects its physical characteristics.
Among the advantages of vinyl siding, we note:
- the duration of operation is more than 45 years;
- no need for additional care and processing;
- mounting on any type of surface;
- resistance to corrosion and decay;
- Fire safety.
To begin finishing any home with the help of siding, one should calculate the required amount of material. There are two options to accomplish this task:
- independent calculations, taking into account recommendations from the Internet or relying on your own efforts;
- contacting specialists who will help you calculate the required number of panels and additional materials.

Siding of a wooden house photo and technology
There are two main stages of working on finishing a wooden house with siding, they include:
- installation work on the arrangement of the frame;
- siding cladding.
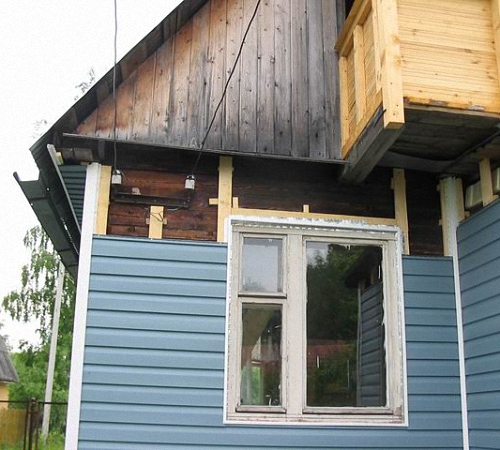
The lathing is mounted if there are large drops on the walls and they are uneven. In addition, if the house has previously installed cladding, then the construction of the frame is also mandatory. Although first you need to take care of removing the old coating.
For the manufacture of the frame, boards or planks made of wood are used. The guides are perpendicular to the siding, the interval between the installation of the slats is 400 mm. If desired, heat and sound insulation is installed in the space between the siding and the frame.
The siding installation procedure includes the following actions:
- do not carry out work immediately after the construction of a wooden house, as it will take some time for it to shrink;
- in order to fix the panels to the house, it is preferable to use aluminum nails with a diameter of 3 mm and a length of 20 mm;
- start siding installation from the central part of the building;
- use an electric saw to cut the material;
- do not fasten siding close to the wall of the house;
- every five rows, check the structure for evenness using a level.

Finishing a wooden house outside with siding: materials assembly
To work, you will need:
- grinders or electric saws;
- scissors with small teeth;
- hammer;
- screwdriver;
- measuring tape;
- level;
- square;
- stairs.

Siding a wooden house requires:
- finishing strips;
- spotlights;
- chamfers;
- edging strips;
- platbands;
- connecting strips;
- external and internal corner elements;
- hinged and initial strips;
- directly panels.
When buying a siding, all these elements are included in the package, allowing you to perform installation work yourself.
Before buying, the customer specifies the type of building, its area, shape and configuration, and specialists complete the materials with the necessary elements.
Among the main components should be highlighted:
- the use of outer corners allows you to equip the outer part of the building, these elements are about three meters in height, if the building is one-story and its height is not more than three meters, then it is recommended to use a solid corner, otherwise, individual fragments are installed;
- internal corners are also calculated when finishing with siding of eaves, then the connection of the wall with it is also finished with the help of internal corners, otherwise, a finishing strip is installed in this area;
- in addition, siding finishing involves the use of materials such as a board that protects from the wind and soffits;
- to calculate the starting bar, the width of the openings for windows and doors should be subtracted from the total perimeter of the house;
- J-profiles allow you to equip areas with different heights or having differences;
- for cladding window openings, a window strip is used; when choosing it, it is better to take material with a margin, in order to avoid the appearance of too large joints;
- installation of ebb or drain bar is carried out along the perimeter of the entire building;
- if the house is more than 366 cm long, then the panels are interconnected with special H-profiles;
- to calculate the required amount of materials, use the following formula: multiply the total area of all walls without the area of openings for window and door purposes by the siding area and by ten cents to compensate for joints, etc.;
- the best option would be to use aluminum nails or galvanized self-tapping screws.

How to sheathe a wooden house with siding: the preparatory stage
Preparatory work is a mandatory process before finishing a wooden building. To begin with, all windows, doors, bars or platbands are dismantled in the house. If finishing work on the installation of other coatings was previously carried out, then you should get rid of them.
First, the crate is mounted. There are two options for it:
- wooden;
- metal.
It is better to install a lathing made of wood directly to the wooden house. The thickness of the slats for the construction of the frame should be approximately 600x400 mm, and the residual moisture should be 16-20%. In addition, the slats are pretreated with an antiseptic solution and dried.
The building level and tape measure will help mark the lines for fixing the battens. As a result, the area should look like a closed contour. After measuring the distance of the corner parts of the house and the basement, another contour is constructed, along which the first rail will pass. If it deviates, the entire structure will be skewed. Therefore, calculations and markup should be carried out with special care.

U-shaped mounts will help to fix the vertical type rails. All work starts from the corner. The planks should fit snugly against the wall; for this, foam plastic or wooden blocks are placed under them. The spacing between the slats is from 300 to 400 mm. If, on the surface of the siding, it is planned to install lamps or other items that provide additional load, more slats should be installed in these areas.
The vertical guides are not connected to each other, since natural ventilation occurs in the places between them. Otherwise, condensation will appear and the tree will begin to collapse under the influence of fungus or mold.
The next stage involves the installation of waterproofing and insulation. Waterproofing is mandatory in wooden buildings. The most optimal option for performing these works will be the use of a wind and moisture protection membrane. If there is no need for insulation, the film is fixed on the wall surface. This maintains an interval for ventilation of the siding.
If it is planned to install a layer of insulation, then first the insulation is laid, and waterproofing is already on it. Next, another crate is created, which accompanies ventilation.
An excellent option for insulation will be plates based on fiberglass, basalt or mineral wool. The option of using foam is possible. Please note that the density of the insulation should be at a high level. A diffusion membrane is laid on the insulation, which is fixed to the surface with a stapler.

The procedure for siding a wooden house
Installation of siding begins with the installation of basement drainage. They are attached in pre-marked places. This structure has a certain rigidity, so its fixation is quite simple.
Next, the corner profiles are installed. Please note that their fixation from above with self-tapping screws should be quite rigid. The following self-tapping screws are screwed into the profiles in their middle part. If necessary, the length is increased gradually. The upper part of the profile is superimposed on the lower one with an overlap of 3-4 cm. Further, the drainage line is installed, on which the starting bar is fixed. It is located five millimeters higher than the lower section of the corner profiles.
The window profiles are fixed along the perimeter of the window openings; in this process, the inner part of the profile should be 2 cm higher than the outer one. A J-profile is used for finishing doorways. Corner sections are filed at an angle of forty-five degrees for a more secure fit. The top profile is laid on top of the side.
If you plan to install the H-profile vertically, then you need to use the level to fix them. A gap is left between them, 4-7 mm, in front of the cornice and the plinth. This will help prevent the bending procedure of the planks during their expansion. The finishing strip is being installed on the roof.
The next stage involves the installation of the panels themselves. Their first row is fixed on the surface of the starting bar. This operation is quite simple, after a click is heard, in the lower part of them, the upper part of the panels is fixed with self-tapping screws. The interval between self-tapping screws is 400 mm. Installation of the following panels is also done. Do not fasten the siding too tightly, it should fit loosely against the batten. The upper section ends with a finishing bar. First, the strip is installed, and the panel is already mounted into it. As a result of installing the panel, the same click should be heard as when installing the first row.
1. Do not fix the siding to the crate too tightly, as this material is capable of expanding under the influence of high temperatures and shrinking when freezing. The length of the material is reduced or increased by 1%, but if it is fixed too rigidly, then there is a risk of damage to the siding. Fasteners by no means pass through the panels, but only through special holes. There is a minimum gap of one millimeter between the screw head and the siding plate.
2. Between the strip and the profile of the guide type, a gap of 1 cm must be present, in order to avoid bending of the siding during its thermal expansion. If cladding is carried out in hot weather, then protect the siding from direct sunlight.
3. Siding installation works are carried out both in winter and in summer. However, if the air temperature is lower than -11 degrees, you should use a grinder to cut the material, otherwise there is a risk of cracking.
Decorating a wooden house with siding video:
Such a question as the cladding of a wooden house with siding worries almost every owner of such buildings. The finishing material is very popular due to its reasonable cost, simple installation technology and interesting appearance. But it seems so far from everyone, people who first encountered it have no idea not only how to fix the panels, but also about the operational characteristics.
Do-it-yourself installation of the crate
Any do-it-yourself siding installation on a wooden house begins with the fact that you need to prepare the main coating. As is often the case in our country, the walls of the house from the outside are not perfect, therefore, a crate is needed, with the help of which irregularities are compensated. The base can be assembled from galvanized, aluminum profiles or wooden beams. In this case, you can be guided by several principles:
- The metal crate will last longer and will not warp from temperature changes and changes in air humidity like a wooden one;
- Wood, in turn, significantly saves the budget, and the material is easy to work with (for an inexperienced worker).
Common vinyl siding, block house and basement siding are very popular in our country. All these types are mounted horizontally, from bottom to top. Therefore, in our case, consider the installation of the frame directly under these types of materials. On our own behalf, we add that boards made under the "chopped log" look very beautiful.
General Provisions
When decorating a house for siding, vertical racks must be placed at a distance of 50 - 60 cm from each other (you need to mount the crate, on which the basement siding will be fixed, at intervals of no more than 40 cm).
Before starting work, it is advisable to remove from the surface of the walls any irregularities that may interfere with the installation of the frame, and, if necessary, insulation.
As mentioned above, the location of the siding profile should be vertical, so the procedure should be as follows:
- On each side of the wall, a vertical is weighed, and 2 profiles are set along it;
- The top of one is connected to the top of the other with a line. Similar actions are performed with the bottom.
- Following a given interval of 0.5 or 0.4 m (depending on the type of material), the following verticals are fixed, on which the siding will need to be attached;
- The frame around the window and door openings must be assembled from all sides, since the siding will be attached to it.
Lathing made of wooden beams

Wooden crate for siding on a wooden house will allow you to save a little on costs. At the same time, one should be very careful about the condition of the wood. The timber should be free of the following defects:
- Fiber delamination;
- Deformations;
- Rot, black or blue spots.
Immediately after purchase, all material should be laid in the shade, in a horizontal position and treated with an antiseptic.
useful in work
Since the repair is being done in a wooden house, it does not hurt to treat all the walls with these liquids.
Galvanized profile lathing

In the case of using a metal profile, at a distance of 50 or 60 cm from each other, you should mark the lines along which you will need to fix suspensions or brackets (this is necessary so that the fasteners are located strictly vertically relative to each other). The number of elements per 3 meter profile should not be less than 6 pieces. The convenience of their use lies in the fact that the unevenness of the walls of the houses can be compensated by the numerous holes in the suspension.
Do-it-yourself house insulation with mineral wool under siding
How to properly insulate, and not throw money down the drain? This is the question many building owners are asking. In this situation, there is only one correct answer; the only heat-insulating material that is recommended for finishing the house from the outside is mineral wool and its analogues (stone, slag). The use of expanded polystyrene is not recommended in this case. Polyfoam does not have sufficient vapor permeability, which does not allow it to be used as an insulating material for wood houses.
Step-by-step instructions for installing thermal insulation depend on the material from which the crate will be assembled. In the case of using wooden elements for these purposes, the insulation plates are pressed against the surface of the walls of the house by the bar itself, on top of which another frame is mounted, it is on it that the siding for the wooden house is attached. 
Using metal material (profile and suspensions) for the installation of the battens, the situation with the insulation of the facade is somewhat simplified. The ends of the suspensions, fixed on the wall of the house, are bent perpendicular to the surface, and thermal insulation plates are put on through them. This should be done carefully, gradually piercing the hole with each side of the suspension. The higher the density of the insulation, the more difficult it is to do this.
 After fixing all the slabs with special plate nails and closing the wall, you can begin the installation of the battens. The only thing to remember is to check the tight fit of the thermal insulation to the surface. In some cases, the insulation is additionally fixed with glue.
Advice from the "facade"
Do-it-yourself warming of the foundation (blockage) of a wooden house
 Often for wooden houses, finishing the foundation and the so-called blockage is a headache. Due to the fact that the houses are very old, their lower part is significantly dilapidated, and in some cases has rotted, therefore it was lined with bricks. In such cases, they can be insulated using extruded polystyrene foam. The material is not afraid of moisture and rodents, therefore it is ideal for these purposes.
Installation of boards is carried out in the same way as in the case of mineral wool. The only difference is that it is recommended to foam the joints between the sheets. This will make it possible to talk about the complete sealing of the foundation. In the future, you can sew up this part of the house with basement siding with imitation brick.
Installation of siding on the crate
The technology of cladding a wooden house with siding implies the exact fulfillment of the manufacturer's requirements for working with the material (the conditions are indicated on the package). The main one is the observance of temperature gaps. 
The fact is that plastic panels, when heated, are able to expand by 1 - 2 cm, while cooling, on the contrary, they narrow. You need to know this and leave free space between the finishing elements, depending on the ambient temperature.
Basic steps
In order to transform your home on your own, you need to know how to sheathe siding according to all the rules, so you should do this work in the following order:
- At the edges of the wall surface, you need to set the corners. External or internal, it depends on each building individually.
It doesn't matter what material is used: ordinary vinyl siding, basement or metal siding, work begins with fixing the corners, starting profile and planks.
- The following steps are necessary in order to sheathe a wooden house with siding involves the installation of a starter profile. The plank must be fixed to the wall exactly level. The quality of the work performed depends on this;
- If the length of the walls exceeds the size of one panel, you need to choose the installation location for the connecting "H - profile". It is desirable that it be placed symmetrically to the other or to the edge of the surface. For example, in the middle of a window, doorway, or so that it divides the entire surface into equal parts;
- Siding installation technology involves sequential installation of panels into each other from bottom to top. For this, there are special locks that firmly fix the connection. The first strip must be installed in the starting strip by snapping the connecting lock;
useful in work
If the ground level is uneven, the "J - trim" strip is used as a starting profile. Such a strip will allow you to cut the first strip of the panel diagonally and fix it without violating the appearance and technological requirements. The next stripes are captured sequentially.
- Vinyl siding is fixed to the crate with self-tapping screws. In this case, you do not need to twist them completely. There should be a gap of 2 - 3 mm between the head and the panel. It is necessary so that the element can narrow and expand when temperature conditions change (finishing a house with metal siding does not require compliance with such conditions);
- Having reached the top strip, you need to install a finishing strip on the wall;
- Having measured the distance from the upper edge of the fixed panel to this strip, cut out a blank from the new strip and make locks for the latches that are in the finishing one with a special knife;
- Install the uppermost panel and make sure that the locks cut in it snap into place and prevent the strip from falling off. When finishing the wall from the outside with siding, it is imperative to cut out such latches. This will prevent the top element from falling out in strong winds;
The installation of siding on a wooden house is carried out sequentially, according to the previously indicated instructions, until the flat surface of the walls is completely closed.
Siding gable trim
Having finished sheathing a wooden house with siding, you should trim the upper protruding elements, gables. First of all, the outer corners and G-trim strips are fixed on them. If the location of the corner is clear, then the situation related to the bar requires clarification.
It is mounted on the lower horizontal ground part, covering the finish, which ended the main surface. One more element needs to be fixed on the upper vertical "step", it is advisable to raise it as high as possible, pressing it against the roof covering from the inside. The siding of the pediment can be performed using special strips or by "cutting" the remnants of the material from the common surface. In this case, there will be practically no waste, and the color of the whole house will be the same. The work procedure is the same. Finishing is carried out without insulation, short sections of the required size are cut and fixed on self-tapping screws with the obligatory "under-tightening" to the stop.
Additional useful information
Knowing superficial information on how to sheathe a wooden house with siding with their own hands, many do not think about the numerous nuances associated with this work. They are equally important, so it is recommended to take them into account:
- Plinth siding installed close to the ground can warp (burst) due to the movement of the ground when the temperature changes. It is advisable to leave a gap of 1 - 2 cm;
- Before you start decorating a wooden house with siding with your own hands, it is recommended to visually check the joints between logs or beams. The outer wall is often damaged by insects or fungus. If necessary, replace the rotten area or foam it;
- Installation of siding on a wooden house built less than 1 year ago is not allowed. The walls should shrink;
- Basement siding is installed in only one order. Strictly left to right and bottom to top. If an incomplete panel is required to complete the row, an additional crate may be required for it. The horizontal lintel is installed without hangers, on 2 extreme verticals;
- While renovating an old village house with new plastic windows, minor problems can arise. Sometimes, the frame can be installed "not on the level, but on the wall." This is done in such cases when the differences in the thickness of the slopes between the top and bottom are very large. In this case, this opening should be finished only after a careful assessment of the situation. In any case, this error will come out somewhere. Either the thickness of the slopes will be uneven or the run will float up somewhere else. This is the difficulty of finishing a wooden house with siding.
Sheathing your own wooden house from the outside with siding is not so difficult. To do this, you will need an assistant and a little skills in working with the tool. But after the completion of the work, the design of the walls will become individual and definitely will not leave anyone indifferent.
Installation of finishing siding panels do it yourself on a wooden house is not difficult even for those who do not have professional construction skills.
Modern way cladding with wood, metal and vinyl siding protects the structure from the harmful effects of the environment and significantly improves the appearance.
Siding is a separate wall panels held together by a special locking system. This type of cladding has a large number of advantages:
- does not need additional staining;
- has a long period of operation;
- lightweight and easy to install;
- easy to clean.
Correct calculation facing material can be made independently, but with the obligatory consideration of some of the nuances:
- external corners docked with a margin are used if the height of the walls of the building exceeds 3 m;
- internal corners are calculated in the same way as external elements;
- finishing the eaves of the roof with siding also involves the installation of internal corners;
- if the cornice finish is already present, then the finishing strip is installed;
- the length of the starting strip depends on the length of the perimeter of the building minus the width of the doorways and gables;
- sections of connection with extensions and differences in height are made out with a J-profile;
- window openings along the perimeter are sheathed with a docked window strip and ebb tides;
- the perimeter of the basement is equipped with a drain bar, and, if necessary, the width of such a bar is increased by ebb tides;
- finishing panels are joined by means of an H-profile.
Formula for calculating the number of finishing panels:
where K is the number of finishing panels,
S 1 - the area of all walls of the house,
S 2 - area of windows and doors,
S 3 - panel area.
To the result of the calculation you need add 10% losses from pruning and rejects.
Installation is carried out mainly with galvanized self-tapping screws with a rubberized head, 2.5-3.5 cm long, with a standard consumption of two fasteners per meter. Purchase fasteners necessary with a margin.
Siding installation technology on a wooden house
Standard mounting technology do-it-yourself siding on the surface of a wooden house is identical for any type of finishing panels.
Main steps the cladding consists in the preliminary preparation of the walls, as well as in the vapor and waterproofing film. There is no need to mount the lathing in the following cases:
- the presence of an even base of the sheathed surface;
- insignificant area for cladding;
- ventilation clearance is provided.
Important: in the absence of lathing for siding, thermal insulation of the walls is not provided, but surface preparation is required.
Preparation of walls and materials for lathing
High-quality installation of finishing panels presupposes correct surface preparation:
- dismantling of all elements protruding on the surface of the facade;
- patching up chips and cracks with tow;
- surface treatment with antiseptic solutions from pests;
- removal of the drainage system, fixtures for lighting devices, awnings, antennas and canopies.
In addition to finishing materials are used grinder or scissors for working with metals, tape measure and square, hammer.
Installation of battens for insulation
Lathing under the panels is a kind of frame, fixed on the surface of the walls of a wooden house:
- the thickness of the wooden bars for the installation of the lathing should be selected depending on the width of the sheet insulation;
- the step of the horizontal guides is determined by the dimensions of the insulation;
- depending on the density of the wall, plastic or impact dowels are used for fastening the rails;
- the lower horizontal rail is mounted in the horizontal plane.
Advice: when installing a metal lathing for siding, it is allowed to exclude the installation of a vertical frame. You need to mount the console on the wall with a distance between the brackets of 50 cm and a step of at least 40 cm.
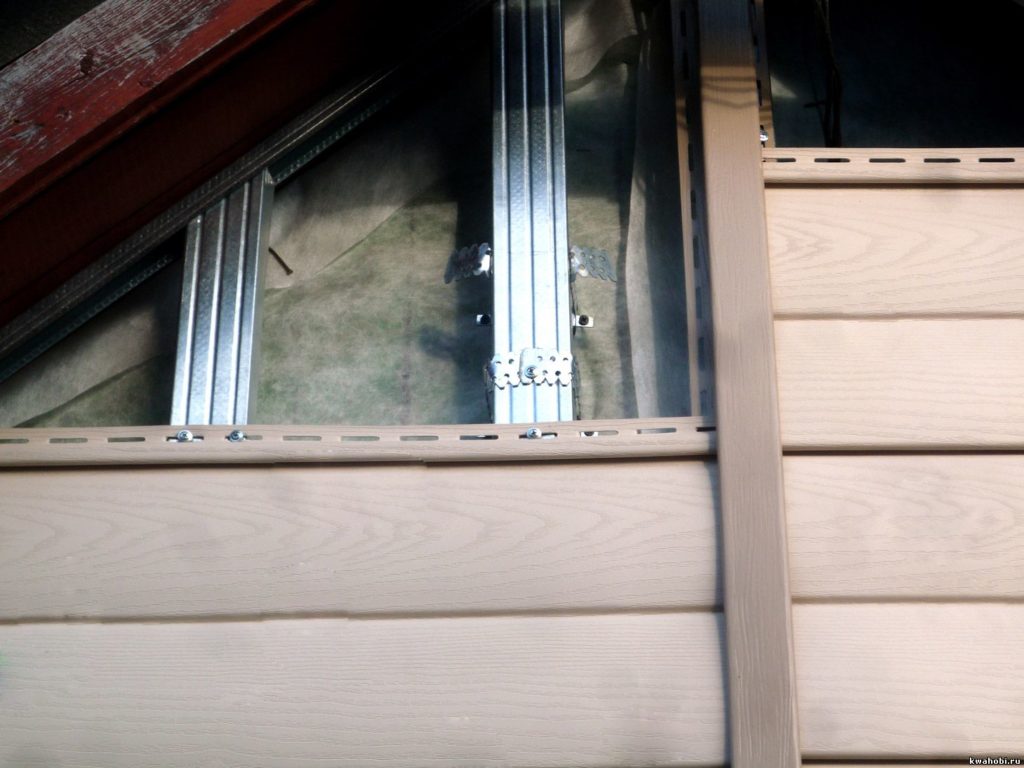
Siding frame installation
Most often used a metal frame made of a U-shaped profile with a section of 2.7 x 6.0 cm and a length of 3.0 m. This version of the lathing has curved edges, which give the necessary level of rigidity to the frame.
The profile is fixed by means of hangers represented by perforated galvanized steel plates. It is possible to increase the strength of the metal frame by means of additionally fixed jumpers.
Installing accessories
 Installation of the frame base starts with a starter bar, which sets the direction for the entire skin. In addition to the starting strip, the installation of the frame includes the installation of J-profiles along the perimeter of window and door openings.
Accessories in the form of rails and profiles are fixed with a step of 40 cm... To install metal siding, you need to reduce the distance between the fasteners to 25 cm.
Installation of siding panels
It is necessary to install cladding panels by means of "hooks" or special locking systems. Every two rows, the horizontal and vertical sheathing is checked.
Fasteners are installed strictly centered factory perforation so that a thermal gap of 1-2 mm remains from the cap to the surface of the finishing strip.
Installation of siding panels on the walls of a wooden house does not require special knowledge and skills in the construction field, as well as the use of complex equipment, therefore it is the best option self-cladding.
Do-it-yourself siding installation technology on a wooden house, see the video:
Find out all about the siding material from the video below:
To get an attractive, reliable and inexpensive finish, you should choose to install siding with your own hands on a wooden house. This material is available in different colors and textures, among which everyone can find their own version.
Choice of materials
Before sheathing a wooden house with siding, it is worth studying the basic information about the types of material. You can give the following brief description:
- plastic siding - the cheapest, most practical, but afraid of mechanical stress;
- metal - strong and durable, but protection from rust is needed (does not apply to aluminum);
- wooden - fits perfectly into the properties of a wooden house and will be the best option, but buyers may be scared off by the price;
- fiber cement - not so popular, not flammable, durable, but difficult to install and has a large mass.


Next, it is worth choosing the material of the crate. It can be made of wood or light metal profiles. Installing metal battens is easier for uneven subfloors. Such a frame will be strong and reliable.
But siding a wooden house with your own hands on a wooden frame will be cheaper. Also, you do not have to worry about the protection of the wall and lathing element in the places of their contact, since they are made of a material with similar properties. When buying and selecting wood for the crate, it is important to control that the tree is:
- without bundles;
- no deformation;
- free of bluish spots or traces of rot.
Before starting work, the wooden crate is impregnated with fire retardants and antiseptics. The former increase resistance to fire, and the latter to mold and mildew.
Preparation of the base
Before sheathe a wooden house with siding with your own hands, you will need to carefully examine the wall. It is necessary to check its strength and the absence of severe damage. Next, you need to remove the old finish, which may interfere with the fixing of the new finishing material. The base is cleaned from dirt and dust.
Frame installation
Finishing a wooden house begins with the installation of guides. For the vast majority of siding, the sheathing needs to be fastened vertically. Its step is selected depending on the insulation. The clean distance between the guides should be a couple of centimeters less than the width of the mineral wool. For polystyrene, the distance is matched exactly to the width.
For the manufacture of wooden lathing, most often they take bars with dimensions of 40x40 mm or 50x80 mm. When using the metal version, you will need a set of special profiles of different sections.
 Frame slats are installed in 40 cm increments, incl. around openings. There should not be a rail at the very bottom
 To fasten the frame to a wooden wall, use nails or self-tapping screws. In this case, the first must necessarily have an anti-corrosion coating of zinc or aluminum.
Before starting the fastening of the crate with a construction steller, a vapor barrier is mounted. To do this, you can use ordinary plastic wrap, but it is better to buy a special vapor barrier membrane. The choice of materials in a wooden house should be taken extremely responsibly. It is not recommended to use those that block the movement of air through the walls. For this reason, a membrane is better than a film.
When decorating a wooden house with siding, the vapor barrier is attached with an overlap of 10 cm. Before starting work, it is recommended to read the manufacturer's instructions. Next, the guides are fixed with the required step, starting the installation from the corners. The flatness check is performed using a building level.
Insulation is placed between the guides of the crate. It is better if it is mineral wool - due to its good air permeability. Above the cotton wool, it is required to fix a layer of waterproofing and wind protection. The best option would be modern vapor diffusion (not to be confused with vapor barrier) windproof membranes.
Securing the Starter J-Profile
Facing the house with siding with your own hands at the next stage involves the following procedure:
- Finding the lowest point on the crate using a level. It is necessary to measure 50 cm upwards from this point and mark this point (for example, with a weakly screwed self-tapping screw).
- Consecutive marking of the line with self-tapping screws along the perimeter of the building.
- Pulling the cord at a distance of 50 cm from the bottom along the self-tapping screws.
- Marking the location of the corner profiles on the rails. In this case, the profile fits to the corner, its edges are marked.
- Fixing the first starting profile along a rope with a gap of 6 mm from the future edge of the corner profile.
- Fastening the rest of the starting strips with a gap between adjacent ones equal to 10-12 mm for thermal expansion.
- Checking the leveling of the starting strips.

The profile must be perfectly aligned. If there are deviations at this stage, the entire siding finish of the wooden house will be skewed.
Corner profiles
Before attaching the siding, you will need to install the corner strips. They can be for external and internal corners. The first ones are mounted in this order:
- Marking the location of the edges of the soffits.
- Applies a guideline to the corner of a building. There must be a gap of 3 mm between the profile and the soffit (roof). The lower border of the profile is 6 mm below the border of the starting profile. The bar is fixed with self-tapping screws at the top.
- Verification of verticality using a building level or a plumb line. Correcting the location if necessary. Securing the bottom and middle with self-tapping screws. Fasteners do not need to be provided too often.
 Corner profile installation
 If it is necessary to dock the profile in height, the docking point is placed at the same level in all corners of the building. Docking is performed with an overlap. At the same time, the part with holes for fastening the upper strip is cut so that a gap of 9 mm remains between it and the same part of the lower panel. Instead of an angular profile, when installing siding on a wooden house, it is allowed to use two starting ones.
The step-by-step instructions for installing profiles for internal corners look almost the same. But in this case, other strips are used.
 Interior corner solutions
 Framing openings
Fixing the siding with your own hands with insulation, you can face difficulties at this stage of the work. The fastening in this case depends on how the opening is located relative to the plane of the outer wall: flush or recessed.
 Waterproofing is required around the windows
 Finishing the facade in the case of flush openings is in the following order:
- Waterproofing of openings.
- Fastening of platbands or J-type profiles. For each opening, you need to use 4 platbands: 2 horizontal and 2 vertical.
- The profiles are connected to each other. On each side of the upper profile, a bridge notch is made. They are bent down to divert atmospheric precipitation into the lower profile. Areas of material on the vertical strips that prevent joining with the upper ones should be removed. The side and top profiles are connected so that the bridges are inside.
- The operations are repeated with the lower platband. But the bridges in this case are cut in the side elements.
 Installation of profiles around windows
 To work with recessed openings, you need to follow the same recommendations as in the previous case. The differences lie in the use of profiles of different shapes.
Installing the first panel
Work should start from the side of the structure that is least noticeable. In this case, there is an opportunity to practice and "fill your hand". The first panel is first inserted into the corner profile and into the starting joint, snapped into place. A gap of 6 mm is required between the bottom of the lock and the first siding element to compensate for thermal expansion.

The next step is to fix the first cladding plank on the batten. For this, self-tapping screws are used. The siding has elongated holes for fasteners; a self-tapping screw must be placed in the middle of this hole. All fasteners are placed strictly perpendicular to the wall surface. Self-tapping screws do not tighten very much, this is necessary to prevent deformation and damage during thermal expansion.
Installing the rest of the panels
Finishing with siding with insulation (or without it) is then done in two ways:
- overlap building;
- build-up using the H-profile.
In the first method, you will need to first shorten the panel locks and frames for fasteners so that the overlap length is 2.5 cm. The installation of the H-profile is performed according to the same principle as for corner elements. It is necessary to remember about the gaps of 0.6 cm from the starting bar and 0.3 cm from the soffit.
Every 2-3 rows, it is worth checking the horizontal position of the siding using a building level. When passing through the openings, a piece of trim falling into a window or door is simply cut off.
Completion of finishing
How to properly sheathe a building under a roof? You need to follow this algorithm:
- Measure the distance between the bottom of the finish bar lock and the penultimate siding panel. From this distance, subtract 1-2 mm by the indentation and obtain the required width of the last panel. The element is marked out and the upper part is cut off, in which the lock connection is provided.
- In the upper part of the last plank, hooks are made, which are located in increments of 20 cm. For this, cuts are made and bend them to the outside.
- The prepared strip is inserted into the penultimate panel and snapped into the finishing profile.


To sheathe the pediment, use profiles for inner corners or starting. The installation technology is similar to the cladding of the main part of the wall. Likewise, you need to trim the panels and remember the gaps of 6 and 9 mm. The last uppermost section of the gable can be secured with a self-tapping screw directly through the panel material. This can only be done here, otherwise drilling is not allowed.
Often the appearance of a wooden house begins to lose its attractiveness over time. From exposure to rain, frost and sun, the tree deteriorates. To return it to its former beauty, people often do the cladding of a wooden house with siding with their own hands. This material is lightweight, therefore it will not give a strong load on the foundation. It is quite easy to install if you prepare the necessary material and tools in advance. Siding trim is inexpensive, and a large assortment of types will allow you to choose the right one for you.
How to choose siding for finishing a frame house
Nowadays, walking along the street, it is impossible not to pay attention to the neat multi-colored facades of the buildings. Such an appearance on city and village streets appears precisely thanks to siding. The plinth and cornices are also made using this material, but still its main purpose is to decorate the facade of the house.
The main advantages of the material:
- Siding is not afraid of the sun's rays, it is resistant to ultraviolet radiation.
- Quite durable.
- Large assortment of color solutions.
- The material is not afraid of torrential rains, since it is moisture resistant.
- It's easy to mount, so you can do it yourself.
- Combines perfectly with other materials.
- If the siding is properly operated, then it will serve you for a long time.
- Polyvinyl chloride, metal, vinyl are used as raw materials for the manufacture of siding.
Even if your house is already many years old, and its appearance has deteriorated over the years, then everything can be covered with siding. Moreover, in this way, the appearance of the house can be made unique. For example, wood finish will add warmth to your home, stone finish - seriousness and solidity. It's up to you to choose.
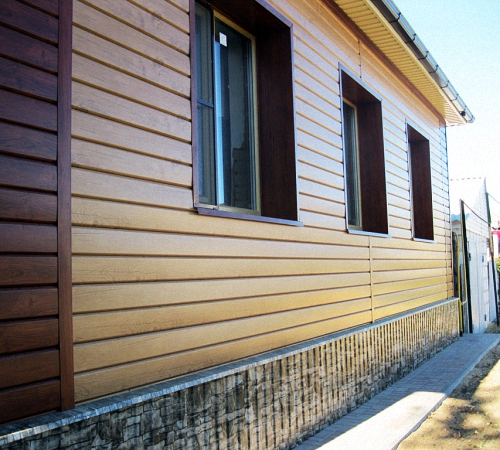
Vinyl
This material is based on durable plastic. It can be smooth or wood-like. There is a huge assortment of colors to choose from, and there are also shades of natural wood.
Table: advantages and disadvantages of vinyl siding
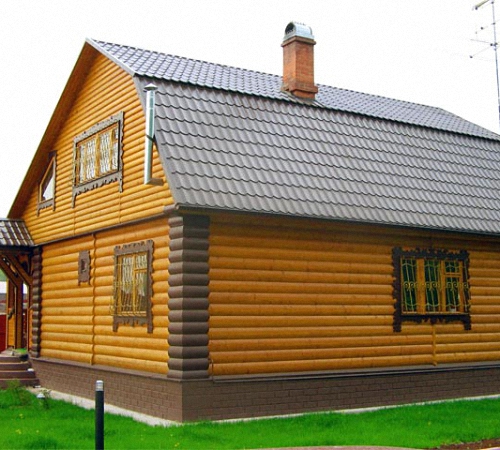
Wood
This species was the very first to appear on the market. A noble, expensive and environmentally friendly material. It also has excellent thermal insulation, but it will last for a relatively short time, and it also requires constant treatment with antiseptics.
Aluminum
Most often it is used for decoration of commercial premises, as well as public buildings. The main advantages are:
- fire resistance;
- waterproofness;
- strength;
- ease;
- long service life.
But you need to remember about its shortcomings. These include absolute instability to mechanical damage. Even during transportation, dents can appear, which are almost impossible to get rid of.
Cement
Nothing worse than artificial stone. In its manufacture, high quality cement is used, to which small elastic fibers are added.
When decorating the facade with this material, you need to use a special mask so as not to inhale the dust generated during cutting.
Table "Advantages and disadvantages of cement siding"
Steel
It can be found on the facade of a residential or public building. The panels are coated with a polymer layer or powder painted. Smooth and embossed.
Table "Advantages and disadvantages of steel panels"
Zinc
Appeared quite recently. It has a gray or black anthracite color. It has the same advantages and disadvantages as steel siding, but the price is much higher, so it is rarely found.
Ceramic
For its manufacture, silicate materials with the addition of fiber are used. Such panels are first hardened, after which they are covered with a special hypercoating (inorganic or silicon-acrylic dyes), which is their ceramic surface. This allows you to maintain an attractive appearance of the siding for a long time, and protects them from the aggressive effects of sunlight.
It has this type of siding and other advantages:
- increased heat and sound insulation;
- resistant to fire;
- environmentally friendly material;
- lasting;
- does not fade;
- does not require special care.
However, ceramic siding costs much more than plastic or steel counterparts. For installation, a solid frame is required due to the large mass.
Plinth siding
When creating a basement finish, a durable polymer is used, which is mixed with various substances. It is done under high pressure. Visually, it can look like natural stone, brick or wood. Thick, moisture resistant and durable. It is easy to install. Possesses a wide range of shades. In addition, it does not change its properties with prolonged exposure to the sun and various weather conditions.
There are a huge number of types of siding, and all of them are perfect for finishing a wooden house. The main thing here is to decide on the budget and appearance. The most democratic option would be vinyl siding, while copper and wood would be suitable for luxury lovers.
Material calculation
So that it does not happen that you did not have enough material or, conversely, you did not buy too much, you need to correctly calculate its amount. Making the right measurements is not difficult at all. To do this, you will need a tape measure and a pencil.
Think about whether you need to finish all the walls of the house, or the siding will be placed only on the facade. If you chose the second option, then whether you will sheathe the pediment. All these points are important when measuring.
House measurements
This is done in order to know exactly the surface area that will be covered with siding.
If you have drawings of the facade with all measurements, then there will be no problems with determining the size of the house. If they are not there, then you have to do it yourself. Measure only the area that will be covered with siding, excluding windows and other similar structures. It is recommended to calculate the dimensions of each side of the house separately, as there may be minor deviations.
To find out the amount of material required, you need to measure the height and width of each wall. To determine the area, these parameters must be multiplied. Separately, it is necessary to calculate the surface area that will not get off with siding. It must be subtracted from the total. This will be the required amount of siding for a particular wall. Repeat these steps for other surfaces.
For convenience, draw a sketch of the house, where all the required measurements will be marked. You can also mark where and what siding will be located.
It is not worth buying the exact amount of material. Take it 10% more. The stock is made in case of marriage and the need for scraps.
Fractional elements
These are the details that will hold the siding planks in place.
Table: how to calculate the number of small parts
| Name | The purpose | unit of measurement | How to calculate correctly |
| Starting bar | The first row of panels is mounted with this fastener. Most often at the bottom and at the joints of different options for facing material. | Running meter | Divide the building perimeter by the plank length. Round up. |
| Finishing profile | Performs an aesthetic function. It is attached in the last row. | Running meter | Calculate using the starting bar method. |
| Internal and external corners | Fastening and decorative function. They are placed at the corner joints of the panels. | Pieces | Add the lengths of all corners of the building and divide the resulting number by the length of the part. |
| T- and H-bars | For connecting vertical joints. | Pieces | Depending on the number of joints, you need to purchase the same number of planks equal to the height of the house. |
| J-bar | It is used to connect the facade and roof. | Running meter | Add up the length of all diagonal seams. |
| Platbands | For window and door openings. | Running meter, pieces | It is necessary to fold all the perimeters of the openings. |
In addition, you must have:
- soffits (they are used to decorate the under-roof space and roof overhangs);
- drainage systems;
- saw;
- drill screwdriver;
- hammer;
- level;
- roulette;
- pliers;
- respirator;
- glasses;
- gloves.
If you want to insulate your house, then you need to take care of this in advance and purchase the appropriate material. You will also need a wind and vapor barrier, waterproofing and beams to build the batten. And, of course, scaffolding or stairs to work at the top.
Video: detailed information about the material
How to sheathe a wooden house with do-it-yourself siding: step-by-step instructions
Usually, building cladding with siding is resorted to in three cases:
- If the house was built using regular or profiled timber, the appearance of which needs additional finishing.
- If there is a need to additionally insulate the house, then heat-insulating material can be laid between the walls and the cladding.
- If the building needs restoration.
How to prepare the surface of the walls
For this you need:
- Remove all protruding structures from the facade of the house (drains, grilles from windows, lighting equipment, etc.).
- Dismantle the old cladding, if any.
- Clean the surfaces of the building from dirt, mildew, mold, etc.
- Treat the walls with special antiseptics and fire-fighting agents.
- Cover the communication pipes with sealant and polyurethane foam.
- Clear the surrounding area (radius 1 m) from debris around the facade.
Installation of lathing
First of all, it is necessary to install wind and vapor barrier membranes. They are mounted with an overlap of 100–150 mm.
The next stage is the construction of the crate. For this, wooden beams are used, although sometimes a metal frame will also work. The width of the timber is from 2 to 4 cm, and the height is 4–8 cm. The exact size depends on whether the insulation material will be installed. The moisture content of the wood for the frame should be between 15 and 22%. It needs to be treated with an antiseptic and antipyrine.
The siding can be laid vertically and horizontally.
When installing the crate, you need to follow these steps:
- Attach the bottom rail directly above the plinth.
- Secure the top bar.
- Pull a thread between them, which will be a guide.
- Place intermediate beams below the level.
- Waterproof insulation with a foil, especially if it is mineral wool.
Fasten the timber with nails or self-tapping screws with anti-corrosion protection.
The most protruding point of the facade will become a reference point for vertical deviations during the construction of the "skeleton".
When using insulation, leave small gaps for natural ventilation.
Paneling
Now you can start finishing the facade with siding:
- Place the J-profile 40 mm above the end of the cladding, which will act as a starter bar.
- Install the profiles to shape the corners.
- Cut out the siding panels to the desired size and install them. The panels are fastened to the frame using galvanized self-tapping screws. It is not necessary to clamp them tightly, leave 1–2 mm gaps to prevent deformation of the cladding.
- The final stage is the finishing bar and installation of spotlights.
After siding, the building is truly transformed. You are able to give a second life to your home.