Sealing cracks in wooden floor is required in cases where the boards have dried out over the course of their long use and some floorboards have begun to creak. Since wooden floors have been used for centuries, during this time many ways to repair them have been invented, and with the advent of new materials, the possibilities for eliminating defects have expanded even further.
Therefore, if the need arises to seal cracks, you can always choose the method that is most accessible in execution. To be aware of ways to solve these problems, you need to consider some of them.
Repair wooden covering can be divided into three types:
- Complete dismantling of the floor and reassembly of floorboards. To carry out this procedure, you will need a hammer with a nail puller and a small crowbar. Such large-scale events are carried out if there is a suspicion of damage to the sheathing joists on which the floor boards are laid.
The boards are carefully sorted and healthy and strong specimens are selected. If necessary, they are planed a little to even out the unevenly shrunken edges.
It is possible that some of the floorboards will have to be completely replaced, so this should be planned in advance by purchasing replacement material. If necessary, some elements of the sheathing are also changed.
After all repair and preparatory actions, the floors are laid again. In this case, the boards must fit tightly and be secured to the joists.
This type of repair is necessary if sealing the cracks, due to their size, is simply ineffective.
- Partial dismantling of the boardwalk is carried out in cases where defects on the boards have formed in certain areas, where wide cracks have appeared and the boards have begun to make creaks. The flooring in these places is carefully removed and a new one is laid in its place. Most likely, the second type of repair will have to be carried out in conjunction with the third, most widespread.
- In most cases, you only have to carry out repair work to seal the cracks. This can be done different ways. Choosing a specific technique Firstly, depends on the size of the cracks and the scale of their distribution over the floor surface.
Methods for sealing cracks
Gaps in the floorboards may appear in various areas of the floor, so you need to consider not only the operating technology, but also the options for sealing materials, as well as places where flaws may occur.
Gaps between the wall and the boards gender
Small distances are always left between these building elements for ventilation and in case of expansion of the material due to changes in temperature and humidity. But if over time they have grown excessively, then they will need to be repaired. This can be done using construction foam, sometimes even adding small pieces of foam to it. The work is carried out in stages:
First you need to carefully dismantle the baseboards;
Then clean the cracks from dust and accumulated dirt;
After the foam has dried, the excess is cut off exactly along the catchers;
It would be best to seal the seams on top with putty so that dust does not collect in the pores of the hardened foam;
Sealing cracks with glue + sawdust
Repair of the floor, in any area, can be carried out with an adhesive composition, which can be made in one of two ways:
First option
- First, small sawdust is prepared. They are placed in a convenient container and filled with boiling water. The mass is mixed until homogeneity is achieved.
- The sawdust is left to swell and cool for one to two hours, then the mass is mixed again.
- Next, glue (carpentry or PVA) is added to the prepared sawdust and the mass is kneaded well until a viscous consistency with high adhesion appears.
- Then you can proceed to preparing the floor - all cracks are cleaned of dust and dirty deposits. Sometimes, if necessary, they top part expands a little.
- Prepared glue mixture using a narrow spatula, apply it to the cracks and carefully compact it inwards as far as possible, but without much effort.
- The mixture is leveled on top and excess is removed.
- After completely dry, after two to three days, the cracks are sanded with sandpaper or are looped using a special machine/
Video: homemade putty from sawdust and PVA
Second option
You can repair flooring in another way, using a repair composition of sawdust and glue, but with the addition of cement.
- To do this, take two parts of PVA or wood glue, add 15 parts of very warm water, everything is mixed well until completely homogeneous. Next, 5 parts of cement and the same amount of sawdust are added to the resulting adhesive solution. The mass is mixed and left for 7 ÷ 10 minutes. If the mixture needs to be given a certain color to the wood, then you can add a special coloring pigment or thick oil-based paint.
- Next, the cracks in the floor are cleaned and lubricated with glue, which was used to make the repair composition described above.
- The mass itself needs to be warmed up a little, and then quickly seal the cracks with a narrow spatula, trying to level the surface.
- It will take about two weeks for this composition to dry completely. Then the cracks must be treated with abrasive materials until they are perfectly even.
This method is often used not only to seal widened cracks, but also to level the floor surface to a smooth state.
Repair using putty
If you don’t want to bother with making complex compositions from numerous ingredients, you can, of course, do it easier: buy a special wood putty at a hardware store and seal the cracks with it. This option is suitable if the gaps not big at all. But you need to know that such fall putty is often quite short-lived - it can crack and crumble over time. Therefore, it is better to use it when you plan to then cover the old boards with plywood flooring.
The finished putty is also applied with a narrow or rubber spatula, pressing it into the cracks. After it has dried, you need to level the sealed surfaces using available abrasive wood processing products.
Sealing cracks with paste and paper
This method is easy to implement and not at all expensive. To perform such a process, you will need paste, paper and a little copper sulfate or, as it is also called, “blue stone”. This ingredient of the composition is necessary so that nests of various small insects do not appear in the adhesive mass over time.
- The paper is torn into small pieces or cut, then it is filled with water. The paper needs to be given time to soak.
- While the paper pulp is being prepared, you need to prepare the paste. It is cooked from flour or starch and water. The water is brought to a boil and one of the selected ingredients is gradually poured into it, stirring constantly, so that there are as few lumps as possible. The composition should cool to a warm state.
- Then add to the paste copper sulfate 1:10.
- Next, the paper pulp needs to be squeezed out, crushed with your fingers, added to the paste and mixed thoroughly. You should get a fairly thick and homogeneous consistency, similar to putty.
- Preparing cracks for sealing occurs in the same way as in other cases. The main thing is to achieve their absolute purity.
- Next, the mass is applied to the cracks and compacted into them. It needs to be thoroughly leveled on top, and after drying, smoothed with sandpaper.
- After this, the floor can be safely painted.
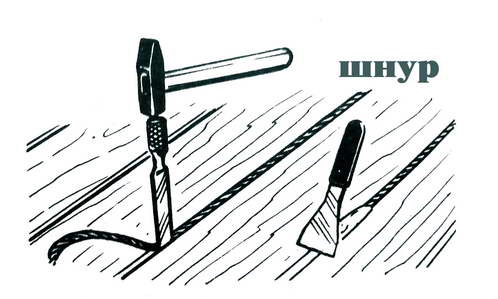
Sealing cracks with cord
A method of sealing cracks, not only between floorboards, but also in walls, has long been known, using a cord selected according to the width of the holes. Application of this folk technology It will not only help get rid of cracks in the floor, but also relieve residents from the unpleasant creaking of boards.
For the repair process in this way, you must have twine, rope or cord made of any material, sawdust, wood glue or PVA and putty.
- The cord must be passed through the glue so that it is completely lubricated with it.
- Next, a mixture of putty, sawdust and glue is made.
- The rope is laid on one of the cracks and deepened inward to such a state that there is 2 ÷ 4 mm from it to the floor surface - this is a necessary condition.
- The distance from the cord carefully compacted into the crack to the floor surface must be filled with the prepared mixture with a small margin on top, since when drying, the adhesive putty composition will certainly shrink.
Sealing cracks using slats or wedges
A more complex method of sealing cracks has long been used - using thin slats, hewn at an angle in the form of wedges. These parts must be carefully adjusted and should not push the floorboards too much, but, at the same time, completely cover the cracks. The work is carried out in several stages.
- As with others repair work To repair floor defects, the cracks must be cleaned and their upper part must be slightly expanded.
- Next, a strip is made according to the size of the gap, narrowed to its lower part so that, like a wedge, it fits into the prepared and cleaned groove.
- The gap and the lath are thickly treated with PVA or wood glue.
- Next, the strip is glued into the gap; it can be slightly tamped rubber mallet or a mallet, or place a plank on top and hammer the strip through it with a regular hammer.
- If the lath does not fit completely into the gap, and a small part of it protrudes above the floor surface, then it is removed with a plane after the glue has completely dried.
- When using this method of sealing cracks in floors, the color of the wedge slats driven in will be significantly different from the main coating, so they can be evened out using stain or well-chosen paint.
- If there is a thick layer of paint on the floors, and it is cracked and peeling around the cracks, it can be removed using a hair dryer or cleaned using special attachments on a drill with a soft iron brush. You can also resort to sandpaper mounted on a sander.
Other repair methods
In addition to the methods mentioned above, there are many other known techniques. In addition, hardware stores can offer numerous modern materials for these purposes.
- Tow - familiar to everyone construction material from flax fibers, which has long established itself for its positive qualities. Therefore, even with the advent of numerous new compositions for sealing cracks and cracks, they are in no hurry to abandon it.
This material is treated with wood glue and compacted into the cracks using available tools. After the glue has dried, the cracks are tinted to match the overall floor.
- A composition of epoxy glue and cement, which is prepared based on equal proportions of the material, is perfect for repairing floors with small cracks. This product is carefully poured into the openings with the top in the expectation that the mass will sag. Since the epoxy mixture sets quickly enough when mixed with cement, it will not have time to seep into the subfloor.
Then, after the glue has dried, the cracks are sanded and covered with paint.
- A composition made from thick oil paint, sawdust or small shavings and wood varnish in proportions 1:4:1, mixed into a single mass of uniform consistency, is also excellent for sealing cracks different sizes. The process can be carried out in one stage, When the cracks are filled immediately, or maybe in several stages, when it is called in cases where such a quantity has formed between the floorboards various sizes cracks that sealing them is unproductive. Therefore, it will be easier, following all the technologies for working with plywood, to secure it to the floor surface with self-tapping screws and close all the defects that appear at once.
- The well-known sealant, which has a convenient packaging and a syringe attachment, is also well suited for sealing seams. Thanks to this special device, you can accurately fill both a wide gap and a very narrow one by cutting the tip to the desired thickness.
The sealant perfectly closes the cracks and eliminates the resulting creaking. Spreading under the pressure created in the syringe, it closes the entire inner surface without compaction or other efforts. This is a durable and fairly reliable material that will eliminate problems for many years.
Sealants made on acrylic and silicone bases that are designed to work with wood are well suited for closing cracks. They are very easy to apply and dry quickly. Therefore, if there is no experience in the manufacture of special compounds or there is no desire to tinker with them, but it is possible to purchase ready-made product For such repairs, you can opt for sealant.
Neither of existing materials does not have the slightest chance of displacing the good old tree from its pedestal, loved by everyone for its beauty, environmental friendliness and durability, for its ability to store heat. It is used in many types of construction and renovation work, and wooden floors are especially attractive and pleasant. However, over time, such coatings also develop a big drawback - unsightly gaps between the boards. The reason for this is drying out natural material. Not all owners are ready for drastic changes, and they don’t really want to part with a cozy floor, so the question of how to seal the cracks in the floor will always remain relevant. There are several methods, and they are all quite effective, simple, and therefore do not require special skills from the owners.
Causes of the unpleasant phenomenon
If the owners eliminate the cracks, but do not identify the culprits of their formation, then soon the defects that appear will “delight” them again. Therefore, the first necessary step is to discover the causes of the cracks. Several factors can be suspected of “complicity.”
- Drying due to natural causes. Any type of wood loses weight over time, but the intensity of this process depends only on the species. The exception is boards that are processed in vacuum chambers; changes in geometry are almost not typical for them. Conventional building material, on the contrary, can lose from 5 to 10%, or even more: the numbers depend on the type and initial moisture content.
- The air in the house is too dry. In this case, the tree will very quickly give up moisture, which means it will decrease in size. Normal conditions “for life” of such coatings are temperature from +18 to +25°, humidity from 40 to 65°.
- Laying wet material. The optimal relative humidity for raw materials that are being prepared to become floor coverings is in the range of 8-10%. If the wood is damp, then it will have to dry during use, and such conditions lead to the appearance of cracks.
- Violation of technology. Incorrect installation - poor fastening of the flooring, non-compliance with horizontal joists - the most common reasons loosening, “walking” of boards, their subsidence, and, naturally, deformation.
- "Living animals" living underground. Rodents - rats and mice - are required to constantly grind down their incisors, so they have to “train” on everything that comes their way. The second reason is hunger, which draws them to heroic deeds. These cracks and holes are the most severe “injuries”.
- Wrong choice of material. The optimal boards are made from oak and coniferous species. A floor made of beech, cherry, pear, maple or ash will definitely require repairs, since these types are most susceptible to deformation.
- Extremely high operating load.

The scope of work depends only on the size and number of cracks, so repairs can be either simple or incredibly complex. The most serious damage already requires radical measures - complete replacement floor.
“Treatment” of cracks with folk remedies
Since the problem has been known to people for a long time, quite a lot of ways have been invented to get rid of defects. Before work, you need to thoroughly study each type of removal, and then choose how to seal the cracks in the floor so that you forget about the flaw for a long time.
Paper, paste, copper sulfate

This method has a big advantage - it is cheaper than other “treatment” options, but it is effective. To camouflage irritating cracks in the floor, the following operation is performed:
- Paper (for example, newspaper) is torn into small pieces, then they are filled with water.
- While it is soaking, prepare a paste: mix starch (or flour) with warm water, copper sulfate is poured into the resulting “jelly” (1:10, where the first is copper sulfate).
- Squeezed out soaked paper is introduced into this composition, the putty is thoroughly stirred until its consistency becomes homogeneous.
- After cleaning the gaps from dirt and dust, spread the mixture onto the cracks, then tamp it down and level it.
- After drying, the surface is lightly sanded with sandpaper and then painted.
Any composition will adhere reliably only in one case - if the cracks are properly cleaned. When dirt cannot be removed, the gaps are widened. Otherwise, the work will be ineffective: cracks in the floor will appear again.
Sawdust and their “companions”

In this case, there are two ways to prepare a saving mixture: glue (PVA for wood or carpentry) with only sawdust and a product in which cement is also added for greater strength. A clean composition for small cracks is done like this:
- Fine sawdust is poured with boiling water, mixed well, covered and left to swell for an hour or two.
- Then they add an adhesive composition in such an amount to form a viscous mass.
- This putty is applied with a spatula, the excess is removed, leveled, and allowed to dry for 2-3 days.
- The dried surface is sanded.
Gaps in the floor with a width of 3-7 mm require other sawdust - large ones. It’s even better to take a mixture of different factions.
Sawdust with cement
Preparing a super product with cement requires precise proportions, so measure out:
- water (also hot) - 15 parts;
- glue - 2 parts;
- sawdust and cement - 5 parts each.
The technology here is also different:

- Water is poured into the glue and mixed, then the remaining components are added: first sawdust, then cement.
- To ensure that the composition has a color similar to the floor covering, add oil paint or dry dye. Let it brew for about 10 minutes.
- Before sealing the floor cracks, the mixture is slightly heated. This solution takes 2 weeks to dry. It is also treated with abrasives.
This composition is used not only for sealing cracks, the method is used to level the entire surface of a wooden floor.
Sawdust, varnish and/or paint

Here other ingredients, more native and familiar to the floor, become “colleagues” of small chips. This composition can “cure” cracks of any depth and width.
- Sawdust, thick oil paint and varnish are mixed in a ratio of 4:1:1.
- If the gaps are small, then the entire composition is poured out at once.
- When the flaw is quite large, the mixture is applied in layers after a short period of time.
Reiki wedges to help

This method is very common, because it is difficult to argue with the logic of this decision. Thin slats, lubricated with adhesive, are very easy to drive into any cracks, and gaps hidden in this way will cease to be a headache for a long time (forever?). The work is done like this:
- Wedges are prepared from pine boards. The width of the elements must be 0.5 mm less than the gap.
- The cracks are cleaned and then widened a little. The gap and the rail are generously lubricated with glue. The wedge is driven in with a rubber mallet or hammer, but then a small board is placed on it.
- Waiting to dry out adhesive composition. The part protruding above the surface is removed using a plane. Tiny defects are camouflaged with a mixture of sawdust and glue.
- The wedge is treated with stain and painted (varnished).
Identical gaps in the floor are very rare, and making wedges for each gap is a small pleasure. Therefore, all holes are adjusted to the same size using a milling cutter. The advantage of this work is the removal of old wood: the fibers on the fresh cut and wedges guarantee a more reliable connection.
Cement and broken glass

This method is suitable for those who have rodents in their floors, who are happy to test even concrete. Therefore, a simple solution is not a panacea; it can quickly turn into a “washcloth”. And in this case, it is best to first cover the seam with broken glass (for example, fragments of rather thin beer bottles), then fill this “anti-personnel ditch” with concrete, and putty on top.
Worthy alternatives to broken glass - dishwashing wire, cut into pieces, store bought mortar, which contains aluminum chips and concrete mortar. They say that this category, unloved by rodents, includes polyurethane foam Macroflex, but such material is not optimal for the gaps between the boards.
Rope, tow, cord

To implement this method, any twine or rope is suitable; the thickness of the cord depends only on the width of the cracks in the floor: it must be larger than the holes. You will also need glue (PVA, wood glue), sawdust and putty. The work proceeds in the following sequence:
- The cord is generously coated with glue; it is better to immerse it in the composition and leave it in it for a while. Separately prepare a mixture of glue, sawdust and putty.
- Using a core and a hammer, the cord is deepened into the gap between the boards by 2-4 mm. The remaining space is filled with a homemade mixture, but the gap is filled with a margin, since the mixture will shrink when it dries.
- After it hardens, the seams are covered with paint to match the floor.
To get rid of small cracks, they use it in almost the same way. plumbing tow, which is also lubricated (moistened) with glue. It is placed in the holes, compacted, and after drying the floor is painted.
The newest alternative is a sealing cord made from polyethylene foam. It doesn’t need glue, leave 4-5 mm on top free space. It is covered with putty, best view- oil-based composition for wood.
Epoxy mixture

This method is considered one of best options dealing with dry boards. The epoxy-cement “mortar” is praised because of the reliability and strength of such a composition.
- Epoxy glue is mixed with cement in equal proportions. The consistency of this composition should be similar to thick sour cream.
- Pour it in with a small margin, because it will shrink during the drying process.
- The last stage is traditional: sanding the floor and painting it.
Not everyone welcomes this type of adhesive composition, which guarantees strong adhesion. The reason is frequent emergencies during operation - its breaking off along with large fragments of boards.
Chipboards, plywood

This is the most original answer to the question of how to seal cracks in the floor. The use of this method is advisable when there are countless cracks in the wooden floor. In this case, “plastering work” will take a lot of time. Therefore, the most effective way is to lay chipboard sheets or plywood. However, after this radical operation, a new topcoat will be required.
The sheets are attached to liquid nails, self-tapping screws or regular nails. When choosing the last two types of fasteners, holes are first drilled in the material with a slightly smaller diameter than those of self-tapping screws (nails). The reason for this need is possible deformation of the material.
Means - professionals
The construction market now does not know the word “shortage”, so the choice various compositions simply huge. Many of them are created specifically to disguise all sorts of imperfections. Therefore, the question of how to seal the cracks in the floor can be asked to the sellers, but it is better to get to know the possible candidates in advance.
Sealants

Their main “vocation” is to make the seams of materials inaccessible to moisture. There are 2 types of sealants suitable for working with wooden floors:
- Acrylic compositions. Their plus is the ease of washing off hands, ideal Smooth surface, which is obtained after sanding and painting. Cons - inability to withstand temperature changes and relatively large shrinkage. However, these disadvantages for indoor flooring are not too terrible.
- Silicone sealants are a real salvation for “walking” floors. They have many advantages. This is plasticity that remains after drying, enviable resistance to stress and compression, and good adhesive qualities. But there is a downside: such mixtures are not suitable for coloring. Compositions are sold in stores different colors, however, it is not a fact that the owners will be able to successfully choose the shade.
The order of work is as follows:
- The cracks in the floor are cleaned with a vacuum cleaner, washed and dried.
- The sealant is squeezed into the gap, then leveled with a spatula, gloved fingers or a spatula.
- All excess is wiped off with a dry cloth.
The operation is simple and straightforward; it also does not require excessive effort. However, the main condition for success is thorough preliminary cleaning of the cracks.
Polyurethane foam

It is recommended to use construction foam only for sealing cracks around the perimeter of the room, and not between the boards. The reasons for disapproval are deformation of the coating under pressure, uneven filling, change in the shade of the foam under the influence of ultraviolet radiation. The whole operation for areas under the baseboards is as follows:
- The floor is cleared of debris and dust. If the cracks are impressive, then they put thin stripes polystyrene foam
- The empty space is filled with foam, then they wait for it to dry.
- The excess is cut off from the seam, and the surface is puttied.
Putty - palliative

This option cannot be considered a reliable replacement for the previous methods, since this composition will eventually begin to crack, crumble, and fall out. The meager range of colors is another drawback. Situations in which the use of these mixtures is justified are the expectation of a quick repair if the floor is planned to be covered. The work is carried out in the following order:
- Putty is applied to cleaned surfaces with a rubber spatula and pressed into the cracks.
- After the composition has dried, the seams are smoothed using sandpaper.
To seal cracks, some recommend using parquet putty, since it has greater elasticity and does not crack so easily. If you are planning to lay tiles or laminate flooring soon, then proceed much simpler: seal the cracks with tape.
Putty with glue

This method gives you a chance to seal small cracks on the floor. It is also suitable if unsightly cracks appear on the surface. This operation requires a certain type of putty - dry finishing mixture, intended for drywall. The same PVA acts as glue.
The composition is mixed in small portions so that its consistency resembles the thickness of sour cream. After applying it to the cracks, the putty-glue is immediately sanded, then quickly leveled, since otherwise it will quickly harden, and in this state it will not be possible to perform the operation efficiently.
How to deal with “playful” boards?
This kind of trouble happens for two reasons: an incorrect lag step is to blame, or the wrong boards were chosen - too thin material. There are also two ways out - installing additional logs or installing thicker boards. Both of them are not very attractive, since they involve dismantling flooring. Yes, these options are optimal, but there is a simple way - rallying adjacent elements with dowels. It makes it possible to stop the “play” of the tree and eliminate the deflection.

This operation is not so simple, because there are many nuances in it.
- Correctly drilling holes at an angle is the first problem. It is necessary to ensure that there is a sufficient layer of wood between the fasteners and the lower/upper plane of the boards. The angle of inclination is selected based on the thickness of the material.
- Diameter of holes for fasteners. It should be at least 0.5 mm larger than the dowels. The remaining gap will be filled with glue (stationery PVA), which cannot be squeezed out. It will promote swelling of the fibers, so the connection will become reliable and super strong.
- Drill and template. The length of the tool must be maximum, but finding a suitable option is very difficult. There is a possible solution: welding a rod of the same diameter. The template will greatly speed up the work, especially at the “beginning of glorious deeds.”
- Sprayer for glue. It is made from a tube of diameter suitable for the spout of the bottle. The length of the segment is 20 cm. The tube is sealed at one end, and small holes are made in it, which will not allow the glue to stain everything around.
Dowels soaked in glue are installed in holes also treated with the compound. The connections are left alone until dry. The raised part of the chops is removed with a grinder, and the cut is polished with what is at hand - the same angle grinder, a hand grinder, or a drill with an appropriate attachment, but at low speeds.
The question of how to seal the cracks in the floor can now be considered closed. Since the choice suitable material depends to a large extent on the depth and width of the flaws, then the owners will have to decide: any means will do, and it doesn’t matter at all whether they are popular or purchased. However, the best way out is to unite the sexes. In this case, the cracks will no longer appear, which means you don’t have to be afraid that at one “wonderful” moment all the “good” that was carefully stuffed in will fall out again.
One of the options for transforming a cracked floor can be seen in this video:
Floor coverings
How to seal cracks in the wooden floor of a cottage or apartment?
From the author: Good day! For everyone who plans to start renovation soon and is waiting for a special sign - here it is. It's time to pick Decoration Materials and stock up free time. For many, the question of how to seal cracks in a wooden floor, if they appear, becomes relevant, without spending the entire family budget. Today I will tell you how the repairs at my dacha took place, I will give tips and recommendations that will allow you to choose methods and materials.
When is it necessary to seal cracks in new and old floors?
The wooden floor is installed in country houses, it is also available in old apartments. That is why the question of how to cover up the cracks that form in it worries many homeowners. In most cases, repair work should begin at the moment when creaking or cracking noises become clearly audible when walking. The main reason is cracked or poorly installed finishing coating, if the problem arose in a recently rebuilt house.
It is important to remember that eliminating coating defects with your own hands requires attention and accuracy. If you don’t have repair skills, you can consult with specialists, and only then proceed to the main stages.

Variety of putties
What is the best way to cover up holes in wood? This question arises in the minds of many people who choose a material for further work. In order not to get confused in the modern diversity, as was the case with me, I recommend that you familiarize yourself with the most popular types of compositions:
- wood putties;
- silicone sealant;
- acrylic sealant;
- oil with wax.
If the cracks are wide, then you will need to use PVA glue in addition to the selected composition. Now in more detail about each putty. When choosing putty, you should remember that it is relatively short-lived. Most often, it is used for cosmetic repairs or to hide a small crack. It is better to treat a large number of them with other compounds so that the floor looks aesthetically pleasing.

Silicone sealant differs from other putty options in that when frozen it retains a certain percentage of elasticity. To work you should use special device- mounting syringe. It allows you to reduce the time of basic work and use the composition economically, achieving High Quality. It is important to remember the peculiarity of this sealant - for some time after application, a slight smell of vinegar will remain in the room.
Acrylic sealant I recommend choosing it for those who are sensitive to odors, since this composition does not have it at all. It is also easy to process if required. Acrylic sealant can be painted, sanded and even varnished if desired - it will not lose its properties.
 Source: http://sure-seal.co.uk
Linseed oil and wax are not only good way correct the existing imperfections of the wooden covering, but also increase its aesthetic appeal. The ratio of components should be equal (1:1). The peculiarity of the composition is that it is poured hot into the existing hole in the floor.
The advantage of using it is that oil and wax provide additional thermal insulation, but actively collect dust and dirt particles, so the floor should be additionally covered with carpet or other covering.
If aesthetics is not the basis in repair work, then you can correct all the shortcomings using ordinary construction tape, fastened along the edges with a stapler. Reliability will be low, but drafts and unpleasant odors are guaranteed to disappear.
Budget savings: affordable formulations

The answer to the question of how to cover up holes on a wooden surface if the budget is limited has been found. One of the simplest and most affordable compositions is paste mixed with paper. To make it, you will need to cook a paste - shred the paper and soak it in water, and then mix the components. After this, the composition is ready for use.
You can get rid of gaps in the floorboards by using PVA glue and sawdust. It is best to choose small sawdust for this purpose, as they will need to be soaked in water. It is important to achieve homogeneity of the composition (mix sawdust and water, leaving to swell for 2-3 hours). After this, glue is added to the resulting mass (you can use carpentry glue), everything is mixed. All spaces between the boards should be filled with the mixture (they should be clean).
Another proven and reliable way to get rid of cracks is to use a cord or tourniquet. Before laying it in the existing space, it should be moistened with glue. The efficiency will be high, since the creaking will additionally disappear.
Other ways to repair wood floors
The relevance of the question of how to putty the floor will disappear if you know that there are a lot of materials that can cope with the problem. The floor in my dacha was restored using slats and wedges. This method requires a certain amount of time and attention, since all elements used must be carefully adjusted to the available space.
You will need to not only create a wedge from the slats, clean out all the dirt from the space, but also apply glue (carpentry or PVA). Similar steps are taken with all existing defects that require repair. Tow is also used to seal spaces, and for rooms in which you do not plan to live permanently, you can use one of the most simple ways to eliminate shortcomings - put on top.

This approach will allow you to temporarily solve the problem or seal wide gaps if you cut the material to specific sizes. Also, plywood will help avoid damage to the new floor - if the boards begin to swell and unevenness appears, sheets should be laid on them and covered with carpet.
Thus, possible materials and there are many methods that make it possible to correct the shortcomings that have appeared with varying degrees of reliability. Choice suitable option depends on many factors, including not only the concept of beauty and quality, but also financial well-being. I hope that the given options for compositions and materials will help you in the fight against this problem.
Find out about all the latest news in the renovation industry country houses and dachas, apartments and outbuildings will be possible by subscribing to our groups on social networks. Good luck with the repair work, see you next time.
- Reasons for appearance
- Description of the work process
- Application of wooden slats
- Puttying
Tree - natural material with good thermal insulation properties. Over time, cracks may appear in it.
As a result, the strength of the flooring will decrease, drafts will arise, debris and dirt will begin to accumulate in the resulting holes, and dirt will begin to flow from the underground into the room. bad smell dampness, rot. But you can seal the cracks, and do it yourself.
It is necessary to seal the cracks in the wooden floor in a timely manner: defects reduce strength and it becomes dangerous to move on the flooring.
Reasons for appearance
- Seasonal changes in humidity. Usually associated with turning on the heating. Wood begins to dry out due to low humidity: the air in the room becomes drier. When the heating is turned off, the humidity returns to normal, but the structures and floors do not restore their previous shape. To protect the wood from drying out, you need to constantly maintain the microclimate in the room with air humidifiers.
- Violation of flooring technology. The cement-sand base may not be sufficiently dried. The wood will begin to warp over time. Similar defects are observed when the vapor barrier film is installed incorrectly between wood and cement.
- Incorrectly selected material. High-quality floors are made from boards of coniferous, oak, and tropical trees. Linden, maple and some other species are not suitable.
- Using poorly dried boards. When purchasing material, you should check its moisture content. Optimal value- about 6–10%. It is not recommended to purchase material from an open warehouse.
- In old rooms there may be rodents that damage the floors. In this case, you need to seal the hole and fill all the passages with concrete mixed with glass or aluminum chips. It is not recommended to pour rat poison into holes: rodents can spread it throughout the rooms. The poison emits an unpleasant odor, which is then difficult to remove.

What will it take to fix the holes?
Required:
- wooden wedges, lath, cord (nylon or nylon);
- paste, sawdust, epoxy resin, tow;
- special silicone, putty, PVA glue;
- hammer, stiff bristle brushes, spatulas, woodworking tools, mastic.
Description of the work process
Furniture is removed from the damaged area. The floors in the room are washed. If the area is small, it is marked with chalk. Use a stiff brush or sharp spatula to remove adhered dirt. Can be removed paintwork, if it interferes with or contributes to the expansion of the holes.

The repair technology depends on the location and nature of the damage.
Application of wooden slats
This is the most effective way, but takes a lot of time. It is used more often if the gap is quite wide and deep.
They begin work by milling holes and slots with a saw: they need to be widened. Then they drive it in. Clean the ends of the boards with sandpaper. If there is a gap between the board and the wall, then the walls are also cleaned. The slats are made from boards of the same type as the main floor, 0.5 cm smaller than the size of the holes. The slats are cleaned.
The boards are treated with glue and glued together. Make a mixture of glue and sawdust. Fill cracks and other minor defects. In some cases, damage between the wall and the floor is filled with sealant.
After filling the cracks, the surface is treated with varnish and paint to match the main shade.
Puttying
If the hole or gap is small, it can be filled with putty. Several options are used:
- Mix paste (or PVA) with sawdust. Before this, the sawdust is poured with boiling water and left for 2-3 hours to swell. Then add glue to the mixture and mix thoroughly. The finished solution should stretch.
- To cover the gap between the boards, you can mix sawdust and gypsum dust in a 1:1 ratio. The mixture is poured with boiling water. The consistency of the finished solution should be thick and viscous. Can add citric acid(100 g per 1 l).
- A mixture of paper (cardboard) and paste is less reliable. Pre-shredded pieces of cardboard and paper are poured with water to swell them. Mix with paste.
The mixture is applied to the damaged area with a spatula. After drying, cover with varnish and paint to match the color of the floor.
A wooden floor, along with many advantages, has one drawback - cracks can form between the floorboards over time. This problem can be solved in several ways, and most of them do not require large financial costs or special skills. Let's look at the most popular of them.
Repairing cracks with silicone
One of the simplest, but at the same time effective ways eliminating cracks in the floor. Before starting work, the floor should be thoroughly cleaned of dust and debris and washed with a damp cloth. After the floor has completely dried, the gap is filled with colorless or white silicone using a construction syringe. This method makes it possible to eliminate both external cracks. So are the voids and depressions formed under the floorboards. After the silicone has dried (usually it takes 24 hours), the floor is covered with a layer of paint.
One of the simplest, yet effective ways to eliminate cracks
Remains of silicone must be removed immediately after applying it, since after it dries this will be quite problematic.
Sealing cracks with putty
Another simple one quick way, which, however, is applicable only in cases where the width of the gap does not exceed 0.5 centimeters, since otherwise the thick layer of putty will quickly crack and the work will have to be done again.
 Putty is used only in cases where the width of the gap does not exceed 0.5 centimeters
 For work it can be used as ready-made putties, sold in construction stores, and a self-prepared mixture based on sawdust and varnish. To prepare it you need to take a colorless varnish on epoxy based and mix it with sawdust in a ratio of approximately 1 to 4. The result should be a mass with a consistency reminiscent of plasticine. Both “store-bought” and homemade putty are applied to a previously washed floor using a regular spatula. After the putty has dried, the seams can be “straightened” by treating them with fine-grained sandpaper. Next, all that remains is to paint the floor, and the work of eliminating the cracks can be considered complete.
To save material, gaps in the floor can be filled to half their depth with cord or rolled paper.
Sealing cracks with epoxy resin
This method is similar to the previous one, with the only exception that epoxy glue is used instead of putty. True, given the special strength of this material, it can be used to seal even the widest cracks.
 You can also seal the cracks with epoxy glue.
 The first step is to dilute the resin by mixing its base with the hardener. You can learn how to do this by watching the following video.
Video about preparing epoxy resin
Please note that epoxy resin hardens quite quickly, so prepare the solution in an amount that you can work out in 20-30 minutes.
The resin can be applied to the gap with an ordinary spatula, but it is worth considering that the resin layer should form a small “slide”, since otherwise after the solution “shrinks” the gap will not be completely filled. If, after the resin has dried, there are raised areas above the floor surface, they can be removed using ordinary sandpaper.
Eliminating cracks with wooden slats
This is perhaps the most labor-intensive, but very effective and durable method.
The first step is to prepare the slats required thickness. They can be made from dry pine boards, previously cut into slats. Adjust the rail to right size You can use a knife or sandpaper.
Please note that the width of the slats should be slightly narrower than the width of the gap itself. So, for example, a gap 7 millimeters wide will need a 6.5 millimeter wide strip.
The finished slats are driven into the cracks using a mallet or a regular hammer with wooden spacer.
 The finished slats are driven into the cracks using a mallet or a regular hammer
 Now you need to coat the gaps between the slats and the boards with glue. This can be done with a brush, but it is better to use a tube with a thin tip. To make the glue flow better, it makes sense to make several small holes in the body of the tube.
The defects remaining after installing the slats are eliminated using putty or a mixture based on varnish and sawdust.
Repairing cracks with tow
This “old-fashioned” method has still not lost its relevance. To work, you will need ordinary plumbing tow and PVA glue (for greater strength, you can use wood glue).
 Tow is wetted in adhesive solution, after which the entire gap is tightly clogged with it
 The tow is thoroughly moistened in the adhesive solution, after which, using a wooden wedge and a mallet, the entire crack is tightly clogged with it. When the glue has completely dried, the surface of the crack will need to be leveled using putty.. After it dries, the floor can be painted.
Covering cracks with plywood
As for the work process itself, everything is extremely simple. Sheets of plywood are laid on top of the boards and secured with self-tapping screws. The screw caps should be “recessed” a little, and then these places should be leveled using putty.
 Sheets of plywood are laid on top of the boards and secured with self-tapping screws
 Please note that plywood cannot be laid close to the wall. It is necessary to leave a gap of 5-6 millimeters as an allowance for “drying out”.
Using the methods described above, you will certainly be able to get rid of cracks in the floor, and this work will take a minimum of energy from you. Funds and time. Good luck with your renovation!