IN winter time there is a desire to create an atmosphere of comfort at home, comparable to the warmth of the hearth. This is due to the cold outside and lack of comfort. This task is being implemented different ways, but there is one that is low-cost from any point of view: building a New Year's fireplace from polystyrene foam, which is accessible to everyone. The construction of a structure of this type is not difficult. A certain amount of diligence and small expenses for the purchase of materials are enough to realize your plans.
Creating a hearth defined as decorative is available from different materials, but the cheapest option is when foam and cardboard are used.
As a result, you can get a product with many advantages:
- aesthetics of appearance;
- unusualness;
- long period of operation;
- ease of installation;
- minimal costs for purchasing materials.
The implementation of the proposed project for the installation of a false fireplace is possible only if there is:
- enough big box from cardboard;
- polystyrene foam (2 sheets);
- water-based paint;
- putties;
- construction tape;
- foam molding and other similar elements;
- assembly adhesive;
- painting knife;
- brushes
After everything has been provided according to the above list, you can proceed with direct installation, following the instructions:

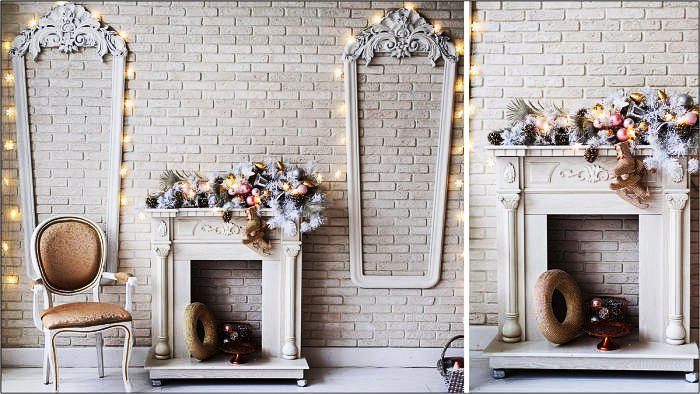
If the installation of the structure is timed to coincide with the New Year, then it is advisable to use fir branches or a wreath with bells for decoration. This will create the required holiday atmosphere.
Retro style
Let's look at how to make a retro-style fireplace out of polystyrene foam with your own hands, following the recommendations below:
The portal is attached at an angle to a small board, to which a longer block is then nailed. To directly fix the portal on the wall, appropriate holes are made in the long strip. The plank is secured with screws, and the entire frame with dowels.
- The next stage of the master class assumes that the tabletop will be assembled and installed in place.
- Close the gaps that have formed between the wall and the portal. In practice, this is realized through special strips. You first need to paint them to match the portal.
- Engage in the design of the structure being constructed. Variability is possible here in accordance with the riot of imagination. If you prefer a vintage style, you can choose aged wood, old newspapers, and the like to decorate the interior of the fireplace.
A portal aged with paint will look original. This is implemented quite simply. We paint the surface with a pale gray color, wait for it to dry and scratch it with any hard object. After which we apply paint again, but in a darker tone. The result of this work is the image of an ancient hearth.
- Paint with matte paint and start decorating the firebox. For example, consider placing an antique wooden chest filled with birch logs. If you also put a New Year’s attribute such as a garland on top, then the appropriate surroundings will be provided.
- The final touch to this guide would be to frame the wall above the fireplace to create a cohesive composition. Family photos framed in wood, false windows, complemented by wooden shutters, etc. are suitable for this.


Styrofoam
To simulate a hearth, only foam plastic can be used as the main material for constructing the frame. This makes it possible to add a festive feeling to the interior for little money. The process of arranging a fireplace composition looks like this:
Corner option
A fireplace as an imitation, where the manufacturing material is polystyrene foam, does not require serious knowledge to build it, and experience is also not needed here. The only obligatory condition is the presence of the corresponding desire.
A good option is a fireplace in the corner. Many designers share the same opinion, preferring the corner method of its installation. To fully understand how everything will look, you can make a preliminary sketch of the future design on paper.
In any case, you will need:
It is easier to implement the expected scope of work if the proposed step-by-step information is correlated with it:
- Creating a frame. Manufacturing material – cardboard. All necessary parts are marked with a pencil. A knife is used to cut cardboard. From the obtained parts, a base is formed by gluing, which is then attached to the wall.
- Pasting the frame. Styrofoam parts are being prepared. The tool for cutting them out can be a stationery knife. After this, the cut parts are glued to the frame.
- Giving the product strength. The corners are aligned and then secured using counters. Then reinforcement is carried out, which is provided by a mesh made of propylene.
- Coloring. Application of water-based paint as the final stage of the work.
Since the hearth cannot be without a flame, you should take care of this. In our case, open fire is unacceptable due to the high flammability of the materials used. You can create something like an electric fireplace using an electronic frame, electric candles, etc.
Conclusion
Polystyrene foam is a material that makes it possible to create an imitation of a fireplace. It's cheap and very simple. It does not require any skill or special knowledge. At the same time, the atmosphere of the room changes, which is filled with spiritual warmth.
A fireplace in the interior of the room will add sophistication to the home. But this design is not suitable for everyone, and it is completely impossible for an apartment. But a fireplace made of foam plastic will come to the rescue; it weighs little and is very easy to install. You can make this design yourself or buy a ready-made one.
Decorative fireplace styles
A false fireplace made of polystyrene foam can be made in the following styles:
- Classical
- Country
- Modern
- Minimalism
- Hi-tech
In the manufacture of such a design can be used bright colors, or vice versa, sustained, freedom of creativity is not limited by anything.
Please note: In any room interior, a decorative foam hearth will give it a feeling of completeness.
Making a false fireplace from polyurethane
Because this process Quite simple and cheap, there are many manufacturing options. To make the structure you will need:

Manufacturing is carried out in several stages:
- Design drawing being developed
- We transfer the drawing to the box. This will be the base of the fireplace; all marked lines are cut and folded, securing with tape.
Important: To avoid sharp corners, they are cut at an angle of 45 degrees using a construction knife.
- A fireplace mantel is made from plywood or foam plastic
- Painting the resulting structure water-based paint
- Inside the fireplace you can mount a screen with simulated combustion or LED lighting with candles.
Important! Never use real candles or open flames, they are not safe.
Finishing materials can be:
- Stone wallpaper
- Brick putty
Fireplaces made of polyurethane in retro style
Such a hearth will look harmonious and interesting in rooms where there is antique furniture. The effect of artificial aging of paint allows you to create an object in an antique style. Creating a design includes the following steps:

The base of the hearth will be made of a pallet, then two guide strips are attached using dowels. The planks should vary in thickness. The base is also attached to the wall using planks, and a fireplace shelf is made on top. The side walls are lined with foam plastic. Next, the structure is painted with paint, with an aging effect. Light is considered the most relevant grey colour. After painting, the coating is slightly scratched and matted with another layer. To add a vintage style, the firebox can be covered with newspaper clippings, and an antique chest can be placed in the niche itself, with a garland at the bottom. Place the firewood in a pile inside the chest, in a chaotic manner.

Retro fireplaces made of foam plastic
Interesting: If you can find a couple of old boards that are not rotten, you can make a shelf with all the elements of natural material.
Thus, the completed art object will fully comply old style. For complete harmony with the interior, you can place on the mantelpiece vintage photos framed graphics.
Let's sum it up
As you already understand, there are many options for making fireplaces from foam plastic and they will all look beautiful, the main thing is to approach the process creatively. This design can be done independently once or twice. The costs for all work are minimal and the design will add completeness to any room interior.
An imitation fireplace, decorative fireplace, false fireplace or bio-fireplace, whatever you call it, is a great thing, especially for city dwellers, for whom a fireplace is, at first glance, a pipe dream. Of course, it’s impossible to make a real fireplace in an apartment, but a false fireplace is easy to make, even with your own hands. So, how and from what you can make a decorative fireplace with your own hands, see below.
DIY decorative fireplace made of cardboard
You can make a false fireplace from an ordinary one cardboard box from under the TV.
For this you will need:
- cardboard box
- foam baseboards and figures
Supporting materials:
- plan drawing
- scissors
- stationery knife
- pen or pencil
- ruler
- construction tape
- special glue (installation time for gluing foam)
To complete:
- putty and spatula (optional - if you decide to putty the fireplace before painting)
- white water-based paint (you can use paint of a different color)
- brush
Having prepared necessary materials, you can safely start making a false fireplace. First you need to transfer the drawing from the drawing plan to the box: use a pencil and a ruler for this.
Do not use a marker as it will bleed through the paint and even if you don’t want to bother with putty, you will have to putty the box before painting.
At the future location of the fire, we make slits with a stationery knife, it should look like in photo No. 5 - 2 labels that we bend to the side back wall boxes and glue them with construction tape (carefully tape them on all sides, including the bottom of the box).
Now we glue the foam parts in accordance with your sketch (we cut the borders at the junction of the corners at an angle of 45 degrees). We glue a wide patterned plinth on top - this will be the basis of the future fireplace shelf.
We place foam plastic supports behind the baseboard (photo No. 10) and place a foam board on top - you will have to work hard with the corners to glue them without gaps.
Once we have glued all the parts, we carefully putty our false fireplace. Let the putty dry, then paint the fireplace with water-based paint. That's all, we admire the finished false fireplace. This fireplace will fit perfectly into a photography location.

You can just as easily make a false fireplace out of cardboard in a corner wall ( corner fireplace). To make this false fireplace you will need: again a cardboard box, adhesive film or brick wallpaper, scissors, tape and a garland.
We make a triangular base from a cardboard box, as shown in the photo. Next we cover it with wallpaper or film (in fact, in this case you can also use foam parts and paint everything at the end). But the tabletop for a future fireplace can be made not only from polystyrene foam; as an option, in this case, several layers of cardboard are glued together, which are then covered with wood-like film. We place a garland or battery-powered candles into the firebox of the finished fireplace or admire the result.

By the way, if you want to make a false fireplace out of cardboard, but you don’t think you have a box of the right size, don’t forget that you can simply glue several boxes together. Further progress of work according to the principles described above.

By the way, if you are making a fireplace not for a couple of photo shoots or just for Christmas, but plan to leave it in your interior for a long time, it makes sense to use the space in the walls of the fireplace. It could make a great hiding place or just shelves for handicrafts.
Creating a fireplace with secret shelves begins with the formation of a “skeleton” - its structure is shown in photo below No. 1 (the structure of the skeleton will directly depend on the size of the shelves you want). The finished skeleton is covered on all sides with sheets of cardboard (photo No. 2, 3, 4). Next, we make podium No. 5 and tabletop No. 6 (the bed is made from 6 sheets of cardboard glued together). For reliability, we cover all joints with newspaper and PVA glue.

Now let’s finish the tabletop: glue it to the top of the fireplace ceiling plinth, so that its top is flush with the 6 sheets of cardboard that were previously glued. And on top of the cardboard sheets and the baseboard we glue the seventh sheet of cardboard - as shown in photo No. 8 (No. 9 - the table top from the wrong side, No. 10 - carefully evenly glue the table top from the wrong side).
We close all the corners of the fireplace with a special construction corner No. 11. We cut out “bricks” from cardboard and glue them into the firebox, simulating brickwork No. 12. We make an uneven relief on the bricks with putty or ordinary crumpled paper soaked in glue, when the brickwork dries, we paint it in the desired way color. We cover the shelves with paper or self-adhesive film. We putty No. 13, 14 on all sides of the fireplace.

But that is not all! Decorations will bring your almost finished fireplace to perfection. We glue the baseboard around the firebox, we also make it with our own hands: we simply glue three newspaper tubes No. 15, 16 together in a pile. We cover the top of the tabletop with a sheet of crumpled wallpaper No. 17, 18 - it turns out beautifully. If you still have any unevenness on the fireplace, they can be easily leveled thanks to liquid wallpaper(if all sides are smooth, you can simply paint it with paint). AND finishing touch- glue “stones” made of foam plastic No. 20 onto the podium. That’s all beautiful fake the fireplace with hidden shelves is ready.
As you probably guessed, such a fireplace can be made by gluing together several boxes of different sizes - each box will directly serve as a shelf.

A false fireplace made of cardboard will be stronger if you first make a reliable U-shaped frame from wooden laminated boards (as shown in photo No. 1). Next, we glue the sheets of cardboard to the finished frame using liquid nails. Then we cover the entire surface with newspaper using PVA glue No. 4, try not to soak it too much - the cardboard will be deformed. In the lower cavity we glue the supporting posts and cardboard on them, then we also glue them with newspaper sheets. Let it dry.

The next step is putty. There will be a lot of puttying and sanding due to the uneven cardboard.
Next, we make the tabletop and bottom: we glue the foam backing for the laminate on the bottom and top of the pva, and on top of the backing we again glue newspaper scraps No. 9. After drying, we glue the baseboards No. 10, cut off the excess from the lid No. 11 and putty. We do the same with the bottom; the plinth can be used without a pattern.
Once again we sand the entire fireplace - finishing. We decorate the portal with narrow plinth No. 13. When everything is dry, thoroughly wash the entire fireplace, give it more time to dry. And you can prime it. Then we paint it in the desired color; after the main painting, the stucco molding can be painted white.

The inner surface of the portal can be painted with white paint with the addition of sparkles - everything will flicker from the candles. That's all, the decorative fireplace made of cardboard on a solid base is ready.

How to make a false fireplace from plasterboard with your own hands
Decorative fireplace Making your own from cardboard is, of course, beautiful and easy, but still it cannot be compared with its more reliable brother in the form of a false fireplace made of plasterboard. So, how to make a false fireplace from plasterboard with your own hands?
First of all, let's start with what you will need:
Essential elements:
- aluminum profile (the basis of the future fireplace)
- drywall directly (you can use scraps if you have them)
- shelf (you can buy wooden step for stairs)
Decorative:
- tile
- mirror panels (for finishing the walls of the hearth)
Auxiliary:
- screws
- screwdriver
- tile adhesive
- liquid Nails
- grout
- varnish for covering tiles and paint (optional)
First you need to decide on the size of the future fireplace. To do this, it’s better to draw a fireplace - the way you want it, and then in order to decide on the size of a real false fireplace, it’s better to first choose decorative tiles and shelf and, based on their sizes, modify the dimensions of your fireplace.
Having decided on the dimensions, you need to make a structure from profile No. 1, 2, which is then sheathed with plasterboard No. 3, 4. Moreover, it is better to first draw out the floor and walls, and also transfer the markings from the working drawing to the details of the fireplace.
Next, we attach the shelf with glue or screws No. 5. On the side walls of the fireplace we glue mirrors No. 6 with liquid nails. Before laying the tiles, we plaster the entire structure thin layer tile adhesive and let it dry No. 7 (this will improve the adhesion of the tiles to the surface of the drywall). Well, you can actually start laying tile No. 8. After a day, you can start grouting, and after a while you can start coating the tiles with varnish (if desired).

In addition, using a sponge and acrylic paint you can slightly transform the appearance of your fireplace (the main thing to remember is: after dipping a sponge in paint, you need to blot it on the paper until dry).
That's all, the beautiful false fireplace made of plasterboard is ready! We admire the photos and come up with our own decor.
Fireplace dimensions: height 100 cm, width 90 cm.
Leg width and depth 24 cm;
Shelf: 90*30 cm, tile: 20*6 cm.

A fireplace made of plasterboard can be made of any size, different shapes, and finishing the fireplace can be done in different ways - it all depends on your imagination. You can make an arch in a niche, glue a mirror into it, or make glass shelves on which to place candles. You can also install an electric fireplace or a screen with an image of a flame, however, for this it is worth prudently connecting electricity to the niche. At the same time, if you are attaching the profile to the walls, remember about the electrical cable routes so that you do not inadvertently damage the electrical network with screws.

You can make a corner false fireplace with your own hands, and decorate the walls of the fireplace not with tiles, but, for example, with Venetian plaster.
If you decide to install an electric fireplace, pay attention to the convex ears for ventilation - you will need to cut holes opposite the ears for ventilation.


If possible, you can embed cast iron fireplace into a plasterboard base. You will get a very unusual false fireplace.

Another thing that caught my attention was the option of “hiding” the holes for cleaning soot. The false fireplace is made according to the above principle; see the beauty of the idea in the photo below. Great idea for those who have a stove.

In addition, you don’t have to stop solely at creating a decorative fireplace; they go well with a false fireplace. various designs: shelves, cabinets, etc. By the way, they are also easy to make, all from the same profiles and drywall.


By the way, it is worth noting that a decorative fireplace made of plasterboard does not have to be screwed to the wall; you can make a completely “independent” piece of furniture that can be easily rearranged.
In this case, the main detail: smooth floors and walls.


DIY wooden fireplace
If you don’t like working with profiles and drywall, you can use timber and plywood. Again, you need to calculate in advance the dimensions of the future false fireplace based on the number and size of tiles (do not forget to take into account the space for grouting). We make a frame from a beam (a beam with a cross section of 40 by 40 mm is taken in the photo). Which is then covered with sheets of plywood. The mouth of the future fireplace is cut out electric jigsaw. The most important stage of work is gluing artificial stone on plywood. Modern adhesives and mastics allow this to be done flawlessly.
Please note that under no circumstances should the adhesive solution come into contact with the front surface of the stone... It will be almost impossible to clean it...
Used as a table top wooden canvas for window sills. Thickness 4 cm.
Painted in English water-based varnish mahogany color.

To finish the vent, a smaller stone was taken and painted with water-based paint.
A beautiful fireplace is made from timber.

A fireplace attached to a windowsill looks good.


But in the end, these fireplaces made of timber and plywood are practically no different from a fireplace made of plasterboard and profiles. Another false fireplace made of wood (carved wood fireplace) deserves attention. You can make a fireplace out of wood from blanks for staircases (as an option, beech wood).
In order to make a wood fireplace presented below, it was necessary: 3 steps 140 cm, 3 steps 90 cm, 2 risers 140 and 1 riser 90 cm, 2 stair posts and a Chinese electric insert for the fireplace (photo No. 1, 2).
The amount of materials needed depends on what kind of fireplace you decide to make (first draw the future fireplace, calculate required amount materials and only then go to the store).
On the existing parts, cut off all excess (No. 3), mill, sand. Next, apply stain to all parts (2 layers with an interval of 6 hours) the next day varnish (also 2 layers with intermediate sanding with 220 and 400 sandpaper, photo No. 8, 9). Afterwards you need to let them dry for two days.

And you can start assembling. Beautiful fireplace made of wood ready.

Of course, in order to create such a decorative fireplace, certain skills and special tools are required: a drawing board, a manual circular saw, belt sander, milling cutter, jigsaw, drill and delta sander.
You can make a decorative fireplace out of wood in another way - as shown in the photo below. It turns out to be a very nice imitation of a fireplace, and most importantly, such a false fireplace is easy to make with your own hands.


By the way, you can make not just a false fireplace from wood, but original stand for shoes.

Or you can buy a beautiful textured board only for the top, and make the entire base from sheets of plywood, but in the end this version of a false fireplace is not like any of the previous ones. First you need to cut strips 7-8 cm wide from sheets of plywood, sand the edges and paint them in different colors. While they dry, we nail the base boards to the wall. Next, using wood glue, glue the strips of plywood to the base on the wall and glue them together. And so that the structure does not fall apart during drying, you can use a press - you can press the entire structure using railings, boards and sticks from the shower curtain (or a mop). As a result, you will get this unusual decorative fireplace.

For those who cannot afford the above methods for making a false fireplace, or simply do not have enough free time, we can recommend false beams made of polyurethane. In this case, you won’t need a lot of effort, the main thing is to buy a beam (one, if you buy it long enough, or 2 shorter ones) and cut it into 3 parts required size, and just glue them together. Such a false fireplace can be complemented with stucco, paints can create an aged effect, attach a glass shelf and admire the result. In addition, on the wall next to which the fireplace will be located, you can make an imitation brickwork. It turns out to be a spectacular decorative fireplace, and most importantly, making such a fireplace with your own hands is very simple.

Do-it-yourself desktop biofireplace
And for those who definitely want a fireplace with a real fire, whose hands grow where they need them and at the same time have enough free time, we can advise you to make a tabletop bio-fireplace with your own hands.
In order to make a tabletop biofireplace you will need:
- transparent sealant
- 4 glasses
- metal box (ceramic, terracotta)
- metal grid
- pebbles
- metal can with fuel for biofireplaces
Prepare all materials; the glass must match the size of the box. The edges of the glass must be degreased with alcohol (the better the surface is degreased, the more reliable the connection will be). Apply sealant to the edge of the glass and place another glass on top. Press lightly and hold for several minutes. We give the U-shaped structure time to dry and glue the last glass.
Don't worry if the sealant goes beyond the edges; it can be easily cut off with a razor after it has completely dried.
Now the screen needs to be attached to metal box Photo No. 6. Apply sealant to the glass and install it on the base (the metal surface must first be degreased).
We place a can of fuel in the box and cover it with a metal mesh.
If the mesh is small, then you can use several parts: the surface will still be covered with stones.
We lay out the pebbles over the entire area of the grid, leaving a free part above the can of fuel.

That's all, the bio-fireplace is ready to set on fire and admire the fire.
To ignite the fuel, use a long torch. You can make do with spaghetti.

In general, as you can see, there are many ways to make a false fireplace with your own hands. Good luck with your experiments!
It’s easy to make a fireplace from polystyrene foam with your own hands, such decor is inexpensive, will decorate any room, and will give it coziness. Safe analogues of real live fire systems are easy to use and very beautiful. Complex materials are not needed for the work; anyone can master the technology if desired.
Pros and cons of a foam fireplace
A portal for a fireplace made of polystyrene foam is a practical, inexpensive, easy-to-arrange decor. It has the following advantages:
- low price;
- high environmental friendliness;
- ease of processing;
- low weight;
- durability.
The solution looks attractive, and aesthetic, functional characteristics does not lose even over a long period of use. One person can make and install a fireplace design - all you need is compliance with the rules and skill.
Important! The foam cannot come into contact with fire, so there will be no flame. Alternative options for the fireplace - diode strips, light bulbs, closed candles.
A foam fireplace has its own strengths and weak sides
When heated, polystyrene foam releases toxic substances; sometimes prolonged contact with a conventional incandescent light bulb is sufficient. This disadvantage is relative, since it is leveled out through proper processing. Liquids cannot be poured onto foam plastic; they will be absorbed, disrupt its structure and appearance. Care products should be used specially, without aggressive chemical inclusions. The design has low resistance to mechanical stress.
Foam Fireplace Styles
Photos of a false fireplace made of foam will help you choose the optimal option stylistically. Style is one of the main factors that should be taken into account when performing work. It is desirable that the fireplace is in harmony with other components of the interior.
Important! A false fireplace made of foam plastic can become the main decorative accent in a room, provided it is used correctly.
Main options:

You immediately need to choose a place for installation, this will allow you to decide on the decor. At the same time, you can move the foam plastic structure around your apartment or house - it is light and mobile.
Important! A built-in burner is an excellent decor for a bio-fireplace made of polystyrene foam, the main thing is to comply with the requirements fire safety.
 The style of the fireplace is selected for a specific interior
How to make a decorative fireplace from polystyrene foam with your own hands
Foam bricks for fireplaces can be purchased at hardware store. What else is needed for arrangement decorative element, correct placement accents - will be discussed further.
Fireplace made of foam plastic on a cardboard base
To create a portal on a cardboard base, use any box of suitable sizes, foam boards, decorative skirting boards or other decor. The tools you will need are scissors, a knife, glue, a brush, construction tape, a can of paint, and putty.
Procedure:
- Prepare a drawing, immediately indicate the dimensions (width, height, length), transfer it to a cardboard base.
 The drawing should convey the future project as accurately as possible
 - In the areas where the hearth is located, make slits, bend the edges inward at the cut points, and secure with tape.
 You can use any dimensional box as cardboard. household appliances
 - Make a tabletop from plywood or foam plastic, fix it decorative skirting boards.
 The more carefully the work is done with the base, the smoother the fireplace will be.
 - Apply putty, level it and wipe it clean, cover with water-based paint.
 Painting work It is better to use a foam fireplace outside the home, for example, in a garage or on the street, if weather conditions permit
 - Install a screen that simulates combustion in the fireplace hearth, or attach a garland, LEDs, or battery-powered candles.
 The future “flame” in a foam fireplace must meet fire safety requirements
 - Paste decorative bricks along the contour of the hearth placement, apply a putty layer on top (it will create an imitation of unevenness).
 You can use ready-made elements as decoration
To obtain a complete image, it is advisable to cover the foam base with paint in the shade of brick. The combustion space is designed in the same way.
Retro-style foam fireplace
Do-it-yourself expanded polystyrene fireplace in retro style will look harmonious in an interior furnished antique furniture. Scuffs and artificially aged surfaces are exactly what gives the solution original design antique
Stages of work:

It is most convenient to install the chest on a mantelpiece made using pallets. To simulate a hearth, logs are used. You can use a couple of old boards, but not rotten ones, and build a shelf out of them to preserve current abrasions, scratches, and errors. Above the fireplace cover, install false windows with vintage shutters, hang old photos placed in retro frames.
Important! A false fireplace covered with “artificially aged” paint looks especially attractive. It is optimal to choose pale gray shade, but be sure to let it dry.
Foam fireplace for the New Year
A false fireplace made of foam plastic with a themed decor will be an excellent decoration for an apartment or house for the New Year. You can do it yourself, it won’t take much time, but you will have to be patient.
Procedure:
- Cut a couple of rectangles 60*40 cm and a couple 40*20 cm from foam sheets (they are needed to create the sides).
 Since polystyrene foam does not adhere well to PVA, you additionally need to secure the parts with toothpicks - up to 4 pieces per cut.
 - Pin the side pieces to one of the rectangles with toothpicks.
 The joints should be pre-coated with glue.
 - Prime the seams, make markings on the inside for the firebox, and make cuts with a sharp knife.
 The thinner the blade, the more accurate the finished cut will be.
 - Secure the back surface of the fireplace with glue and toothpicks. Walk along the lower and upper perimeter masking tape. Prime the resulting frame and let it dry for at least 10-12 hours.
 If necessary, you can repeat the priming work, dry everything thoroughly, sand using fine abrasive sandpaper
 - Wet the braid in adhesive solution PVA, press onto the furnace cuts and prime the surfaces, dry for a couple of hours. Attach small decorations to the corners and cover everything with a gold layer.
 After priming the surface, let it dry
 - Secure the lid to the top of the finished box, prime the narrow sides again, and cover them with gold. Finish the firebox cuts in the same way.
 Gold paint coating is the basis of New Year's design
 - Leave the foam fireplace base open or place it on a rigid cardboard sheet.
 Golden mother of pearl in decorative purposes should be applied to the embossed surface of the tape, the cut of the firebox, the ribs of the fireplace
Let everything dry, wipe off in a piece soft fabric so that the paint gets into the recesses and highlights the relief pattern, and on the edges it looks like natural wear. You can make decoupage on the pediments of the fireplace made of polystyrene foam. To do this, snowflakes cut from napkins are glued using PVA glue, then varnished onto acrylic base. When all surfaces are dry, it will be possible to assemble the fireplace into a single structure.
Important! On the fireplace cover, provided there is no decorative tape, paint is applied directly to the sides.
New Year's fireplace decor made of polystyrene foam includes chains, toys, and decorative traditional boots that are hung near the firebox. Decorations are usually attached to multi-colored stationery nails. Cones, if any, can be used in pure form or after painting them gold, this will make them even more elegant. You can also place soap cones in baskets, and put candles in a decorative improvised firebox different sizes and forms. On mantelpiece Usually they put Christmas tree decorations, sweets and boxes. Sizes are adjusted to suit personal preferences. If you make a small false fireplace, it will even stand on Coffee table.
Conclusion
You can easily make a fireplace from polystyrene foam with your own hands in a couple of hours. It's clean decorative item interior, it does not involve the use of open fire. If you wish, you can add a retro or New Year's decor using appropriate accessories. It will be more convenient to use a cardboard frame and stick foam boards on it. You can buy materials at any hardware store.
Every person strives for coziness and comfort. Home, its warmth is what warms the soul. What could be better than an evening spent with family by the fireplace in the living room? Owners country cottages and houses are able to afford this luxury. What should city residents do?
The solution would be to install false fireplace- this is a unique design, the design of which repeats in full or in part the appearance of a real fireplace. Don't think that this is difficult task, experienced master, yes and a common person, easilywith herwill handle it.
What is it for?
The lack of special ceilings and chimneys in the apartment does not allow building a real fireplace. But there is a way out, because you can make a false fireplace with your own hands, and without having any skills in repair and construction activities. The master class will help you with this.
A false fireplace in the interior is multifunctional decoration, demonstrating a privileged class. Fire inside it is not necessary at all. In addition, creating such a design is an entertaining job that leaves room for flights of imagination. As a result, a false fireplace for the living room will become an exclusive thing, which you can be proud of, in addition, it will give the interior the highest class.
Advantages of artificial fireplaces
False fireplaces have whole line benefits:
- The decorating process involves budget-friendly, but beautiful and unusual materials.
- A fake fireplace can be made from many types of building materials that are available to everyone.
- A false fireplace is inexpensive way decorate the living room space in the apartment. You only need money to purchase necessary building materials, and installation is possible carry out independently.
- There is a unique opportunity to periodically change the decor of a false fireplace, be it painting or adding a new part.
Read also: Making a fireplace for the New Year with your own hands from cardboard
Types of decorative fireplaces
Depending on the structure and shape, false fireplaces can be divided into three types:
- Symbolic. Constructed from simple available materials. But their specific feature is that they are strikingly different from conventional fireplaces. This includes pictures on the wall, beautiful stickers with various ornaments. The purpose of this variation is to abstractly imitate, but without performing the main function.
- This type of fireplace must have projections relative to the living room wall. They are decorated in their own way desire and taste. Place firewood in the fire hole or fill it with candles. To achieve realism, in front of the firebox an original forged grate is placed. It will create fictitious protection from flying sparks.
- The false fireplace has genuine dimensions and completely imitates a real fireplace. Its design principles are the same. Install in the middle of the combustion space. It will create a stunning fire effect in the hearth. The false fireplace is characterized lack of a chimney. All other parameters clearly reproduce the proportions of a real fireplace.
What is it made from?
 To build a false fireplace, they resort to watching a master class. You will also need ordinary Construction Materials, sold in any specialized store. A master who is interested in construction and repair will find homes necessary materials such as:
- medium thickness plywood;
- a certain class of chipboard;
- plain cardboard;
- Styrofoam;
- brick;
- drywall.
If desired, you can use individual parts of used furniture. It would be a shame to throw it away, but it would be just right for making a false fireplace.
Polyurethane model
 How to quickly and easily build a false fireplace from polyurethane? You will need to purchase a polyurethane base and study master class. The main difficulty of the process is drawing up a work plan. In addition, you need to prepare drawings for a false fireplace, think over its style, dimensions that correspond to the parameters of the living room. All the rest of the work will take away minimum time and effort.
Read also: Electric 3D fireplaces with steam
Before proceeding with installation, prepare following materials:
- high-quality putty;
- polyurethane;
- contact glue;
- elements intended for finishing the internal firebox.
Installation procedure
A step-by-step guide will help you assemble a false fireplace with your own hands. instructions master class:
- A false fireplace is best installed in the living room. A side wall will do. The corner option would also be ideal, because it will not interfere with the passage and will not reduce the space of the living room. If you wish, you can watch on the Internet how a master builds a false fireplace.
- If you plan to install an electric fireplace or lighting, you need to think about an additional outlet and wiring.
- For the frame of the combustion hole, several wooden blocks are taken. The walls are constructed using plasterboard or a sheet of plywood.
- Next you can install a portal made of polyurethane. It is carefully attached contact glue. All gaps between the portal and the internal firebox are removed with putty.
- The final stage of finishing. White color The material can be decorated in various ways.
The portal is also made of wood. It looks exceptionally harmonious in ethnic interior. Of course, it is more expensive than polyurethane, but it allows you to create a real masterpiece and show the highest class of craftsmanship.
Modification using foam plastic
 How to make a false fireplace in the living room from foam plastic so that it has an aesthetic and original look, but at the same time it was easy to implement and safe? The answer will not surprise you - you need to carefully think through the progress of the work, everything the smallest details procedures, calculate the dimensions of the structure.
Don't forget about the installation location. After all, to build a false fireplace with your own hands, you do not need the specific knowledge that an experienced craftsman possesses. All it takes is desire. Corner option placement is most preferred. Modern design solutions in most works they represent precisely corner method installation. To get a complete picture, you can sketch it on paper.
For phased installation you will need a special Equipment and materials:
- measuring instruments;
- pencil, paint brush, water-based paint;
- putty;
- polypropylene mesh, counters, special glue, knife for construction needs;
- ordinary cardboard;
- directly the foam itself.


