If you have planned self-installation lamps in a suspended ceiling, it would be useful to understand in detail the features of such an operation. Then the completed installation will ensure uninterrupted and high-quality operation of the lighting sources.
1
Suspended ceiling structures are very popular among amateurs these days. beautiful interiors in various residential areas. For such ceilings, lighting devices should be selected especially carefully. This is due to the fact that the lamps on them perform not only a practical function. They, in addition, make it possible to divide rooms into several separate zones and form harmonious design premises.
Lighting with spotlights
Traditional incandescent lamps are now rarely used. They are an outdated lighting option - uneconomical and inappropriate modern trends registration living rooms. Mounting heavy chandeliers on a suspended structure also does not make much sense. Especially if the height of the room is modest in size. Bulky chandeliers and ordinary lamps have been replaced these days by better quality lamps. If you are planning to create original design ceiling, experts advise using LED or spot lighting devices for these purposes.
The first of these require a minimum of electricity; they have a long service life. But they are usually not used as a full-fledged lighting source, which is due to objective low power such lamps. Most often they are installed to focus attention on some interior details.
But point devices (they are often called spots) are recognized by professionals ideal option complete room lighting. Such lamps are used different kinds lamps, they operate from networks with voltages of 12 and 220 V, differ from each other in their design. It is point devices that are now mounted on suspended structures in most homes. Spots distribute light evenly throughout the room. At the same time, installing spotlights in a suspended ceiling can be done with your own hands without any problems. More on this later.
2
To install the light sources we are interested in, you will need to purchase the lamps themselves and lamps for them - halogen or fluorescent (you can also use traditional incandescent light bulbs, but it is better to do without them), power wire, electrical tape or special heat shrink (insulating), sleeves (as an option - terminal blocks ) for connecting wiring, switch. The power of lamps for a suspended ceiling should be no more than 40 W. If you take stronger products, the ceiling structure may deteriorate due to excessive heat.
Halogen lamps
Halogen lamps are not cheap. But they have a lot of operational advantages:
- compactness (their height does not exceed 4 cm);
- high efficiency;
- wide light spectrum.
Such light bulbs operate with a transformer that lowers the voltage to 12 V, or from a regular network. You can use them if you want to independently adjust the brightness of the halogen lights. But the dimmer is not connected to luminescent products. And the dimensions of such light bulbs are quite large, which complicates the process of installing them in dropped ceilings. The electrical wire for lighting installation is selected taking into account the specific material from which the ceiling structure is constructed.
If you make it from plastic or wood fiber products (MDF), you need to buy RKGM cable (it is characterized high level fire safety). For plasterboard and aluminum surfaces, you can use a simpler VVG wire with three or two cores. Buy any terminal blocks. But remember - such electrical wire connectors belong to the category of regularly serviced ones. This means that you will have to check their tightness every 6 months. Otherwise, there is a possibility of charring caused by the heating of the lamps.
Similar problems do not arise in cases where the wires are connected with tinned copper (or pure copper) sleeves. Therefore, it is better to use them. Let us add that to protect the areas where the wiring is connected to the lighting fixture, you should definitely use heat-shrinkable tubing or regular electrical tape. Direct installation spotlight The suspended ceiling is produced in several stages:
- Lighting system design.
- Laying out electrical wires to the points where the light bulbs will be located.
- Creating holes for lighting devices.
- Connecting the lamps, fixing them and then checking for functionality.
Below we will talk about all these stages in more detail so that you can make your own lighting without any problems.
3
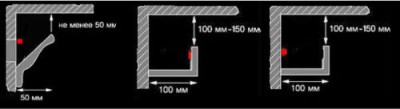
The configuration of the lighting system for ceilings is developed before all elements are installed suspended structure. This is especially important in cases where you implement multi-level ceiling solutions. At this stage, it is important to remember that the lamps should be at least 0.6 m away from the wall surfaces, and a distance of about 100 cm should be maintained between individual lighting devices. The design is carried out so that not a single lamp falls on the parts of the sheathing on which it is subsequently attached facing material.
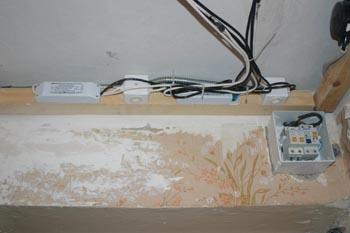
Installation of lamps
Also, before the stage of forming the frame, you need to separate the wiring (each lamp must be connected to its own wiring), and then fix the electrical cables. Then it will not be at all difficult for you to get the wires after drilling holes for the lamps and connect them. It is advisable to secure the wiring with plastic ties. Fasten with cable ties with some slack in the cable; do not over-tighten it. In this way, you will protect the wiring from rupture during thermal deformation observed during lighting operation.
Be sure to make small loops (13–15 centimeters) in the places where holes for the lamps will be drilled. In this case, it will be very easy for you to connect the wires.
After installing the ceiling structure, start making holes in the sheathing. This operation is easiest to perform with a wood crown. It is also used to prepare recesses for mounting boxes for electrical outlets. The cross-section of technological holes is selected as follows. The holes being drilled should have a diameter slightly smaller than the size of the inside of the spot and 3–4 mm larger than the outside of the lighting device. Typically the hole size is 6–7.5 cm.
Now you can connect the wiring to individual lamps. Pull the cable out using the pre-made loops, cut it along the bend, and strip it. After this, connect the wire (one edge is connected to the power core, the second is clamped into the terminal on the spot). It is important not to make a mistake here. Carefully study the markings on the lighting fixture (zero is indicated by the letter N, phase - by the letter L). As you yourself understand, all work with electrical wiring is carried out exclusively in a de-energized room.
The next step is to secure the lights. Everything here is elementary. Bend the brackets on the sides of the spot. Paste them into ceiling structure. After this installation, the brackets themselves will press the lighting fixture to the ceiling. Now you can connect the main power cable to the distribution box and switch. Turn on the lights and admire how chicly you were able to decorate your ceiling with spot devices. Note that LED lamps are mounted according to the same principle. But they must be connected to a voltage-reducing (up to 12 V) power supply.
Suspended ceiling lighting
Mounting ceiling structures hanging type, you will inevitably face the task of organizing lighting. In this case, it is necessary to understand the features of different lamps and technological principles their installations. Correctly selected, placed and mounted luminaires for - most important aspect in the design of any room. They not only allow you to create comfortable conditions in it, but also to achieve energy savings.
Most often, spotlights are used for suspended ceilings - compact modern products. It is worth noting that the dispersion angle they have is small. Therefore, such devices must be used in combination with other light sources, for example, a chandelier. By turning on lamps in the chosen sequence, you can create spectacular accents on interior items.
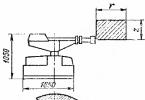
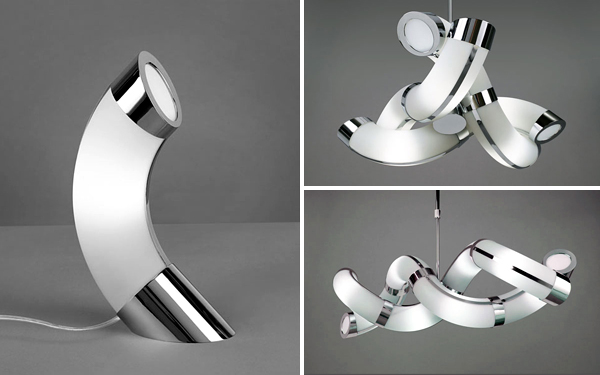
Rotary lamps
Compared to other modifications of point-type electrical appliances, the cost of rotary-type products is slightly higher. External part Due to the design features, the housing of such lamps can be rotated. If the product is mounted on a suspended ceiling, you can direct the light flux to almost any point in the room.
In this case, the mini-shade should be tilted at a fairly acute angle. Then you will have the opportunity to enhance the lighting in those areas of the room where the need arises. In addition, rotating lamps are perfect for illuminating paintings and exhibits from private or museum collections.
Fixed spotlights
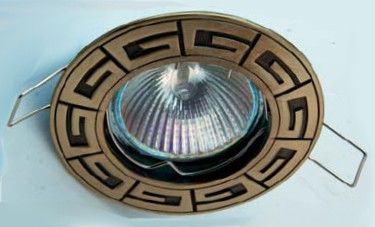
Spot lamp not rotating
Fixed lamps are designed to provide stationary lighting to certain areas of the room. Due to the fact that they are rigidly fixed to the ceiling of the suspended structure, their light spreads straight down.
These products are quite convenient if they are installed in groups - they do an excellent job of lighting small spaces, For example:
- bathrooms
- loggias
- bathrooms
Of course, by purchasing and installing such electrical appliances, you will be deprived of the ability to control the light fluxes, but you will receive quite serious cost savings. Unlike rotary models, these products are cheaper.
Both fashionable halogen elements and conventional incandescent lamps are used in spotlights.
Lamps with halogen elements
Lamp with halogen elements
Small-sized halogen lamps are convenient for installation in suspended ceiling structures. They are especially often used in rooms with low ceilings.
The main advantage of these electric lighting fixtures lies in greater intensity luminous flux, which distinguishes them favorably from products equipped with incandescent elements. Another undeniable plus is low energy consumption, which makes suspended ceiling lighting quite economical.
However, in order to replace a failed halogen lamp, you must first remove the special retaining ring and only then unscrew the burnt-out product. During the replacement process, it is not recommended to touch the lamp with unprotected hands.
The fact is that the fat formed on the skin of the fingers causes crystallization of quartz in the bulb of the lighting element. It quickly loses its tightness, which leads to premature wear. At correct installation and operation, the service life of a halogen light bulb is 2-3 times higher than the same indicator for an incandescent element.
Spot lamps equipped with incandescent lamps
These products are more massive than other lamps, as a result of which illuminated suspended ceilings equipped with such devices are best installed in rooms with high ceilings. Otherwise, your room will become another 100-120 mm lower.
The maximum service life of incandescent lamps is about 4,000 hours, which is much less than that of halogen elements. At the same time, they can be replaced quickly and without complications.
The design of luminaires with incandescent lamps can be either open or with a special casing that protects the base from the penetration of dust and condensation from the carrier side concrete floor. Products assembled with such an element can be used to illuminate rooms with high humidity.
LED lamps for suspended ceilings

LED lamps for suspended ceilings
The latest innovation in the organization of suspended ceilings is LED lamps. They are just coming into use, so it’s worth taking a closer look at their characteristics:
- LEDs are semiconductor elements that can be called, without exaggeration, the smallest light sources. Of course, the intensity of their radiation is not enough to take the place of the main lighting sources, but they can be used as additional and original illumination.
- These elements cope with the functions of recessed lamps where the use of neon lamps is impossible. They are not afraid high humidity and exposure to negative temperatures - LEDs function equally flawlessly in the bathroom, shower room and even outdoors.
- In suspended ceiling structures, such products can work for a very long time, which is important if they are installed in hard to reach places. However, the power and manufacturing quality of LED lamps have a direct impact on the service life. Items that give more bright light, they become unusable faster.
- Impressive durability and low power consumption are not the only advantages of LED lamps. If you install them, you can not only freely adjust the brightness or intensity of the lighting, but also control the color of these devices. Moreover, all this can be done remotely using a special remote control.
- In addition, installation of LED elements does not require any special skills from you.
This type of lamp is not yet as widespread as halogen lamps or incandescent lamps. Meanwhile LED bulbs- the most durable and economical sources of artificial lighting.
Their advantages include compactness. In this regard, they outperform even halogen lamps. Spot LED elements are capable of reproducing color shades, therefore they are widely used in decorative purposes. This is an indispensable tool with the help of which designers manage to embody the most original ideas in interiors.
Advice! These days there are a huge variety of options for choosing electrical lighting fixtures for interior design. But today it is no longer enough to simply choose the lamps you like. It is necessary to think through all the details of the project before purchasing and installing them.
Induction and electronic transforming devices
In such systems the main link there is a transformer that connects groups of lamps and is intended to change the voltage supplied to the lamps.
Electronic type transformers

Ceiling spot lighting
These devices are lightweight enough that they do not put pressure on the suspended ceiling structure. You don't have to think much about the issue of their secure fastening. The only drawback they have is their low durability.
Such products fail relatively quickly. Saving electricity when using them ultimately turns out to be insignificant, because replacing an electronic type transformer is quite expensive.
Induction type transformers
Such devices are much cheaper than the previous ones, but their weight can reach several kilograms. Unlike electronic transforming devices, they are more reliable and do not have to be changed as often.
Installation of recessed lamps is best done simultaneously with the installation of the ceiling. In the niche between load-bearing floor and the suspended structure should hide the housing of the lighting fixture, transformer and wiring.

Interesting lighting idea
Usually several transformers are installed. This is due to the fact that there is no need to connect all the lamps in the room to the central power supply network. Therefore, each group of elements is controlled by a separate transformer.
Thus, in the event of a malfunction in one of them, the remaining serviceable devices take control of the damaged area. The only difference is that the lighting will become less intense.
Wires connecting transformers and lamps into a single electrical circuit, on inner surface ceiling suspended structure should be located freely.
Therefore, be careful during the installation process. Also make sure that when arranging new holes for lighting equipment, the connection wires are not damaged.
Modular lighting systems
Modular lighting systems
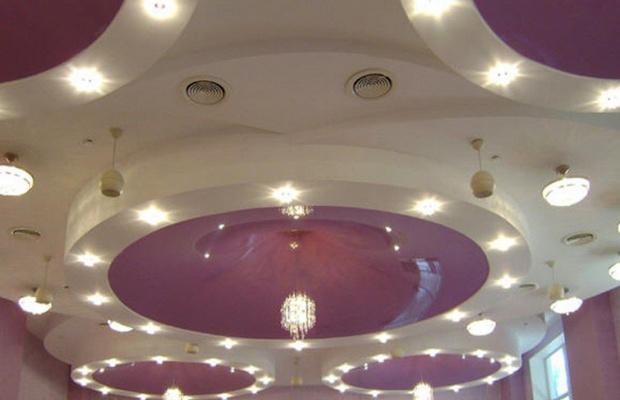
Such designs have become one of the most popular today current trends in the organization of the interior. Modular lighting systems simultaneously serve decorative and practical functions. Modular luminaires built into suspended ceilings have undeniable advantages, providing uniform illumination of all areas of the room.
These electrical appliances are elements with standard sizes, corresponding to the dimensions of tiled or cassette ceiling blocks. They are made in the form of a box with a dissipative lid made of transparent plastic. Metal lids are sometimes used.
For surfaces with slatted structures, special lamps are produced in the form of elongated panels. They use fluorescent lamps and additionally equip them with reflectors and decorative grilles.
Summary
Until recently, a chandelier installed in the center of the room was perceived as something unique and unrepeatable. If it was complemented by sconces located along the perimeter of the walls, then the lighting was generally considered ideally arranged. However, today the requirements for providing decent lighting and overall interior design have changed.
Originality and stylishness of various steel solutions today the most important criteria. Today it is no longer a secret to anyone that artificial light should come from two, or better yet, several sources. And this rule applies to any room.
Using the materials in this article, you can do right choice lighting systems in every room of your home. Become a designer for a while and realize your long-standing ideas for improving the interior by using lamps for suspended ceilings.
Modern construction technologies allow you to create original interiors with unusual finishes on all surfaces. Properly selected lighting for suspended ceilings makes them even more attractive and helps achieve the desired atmosphere in the room.
General and local lighting of suspended ceilings
The feeling of comfort and coziness in your home depends on many factors and not last resort on the particular placement of light sources. Considering the fact that complex multi-level structures, then accordingly new principles for the distribution of light fluxes appeared.
Suspended ceilings are illuminated using both built-in and suspended lighting devices..The construction industry provides many opportunities for implementing the most unexpected and interesting design solutions.
Modern materials make it possible to create, most of which are mounted on a special frame. Between these surfaces there remains a gap sufficient to accommodate lighting and auxiliary equipment.
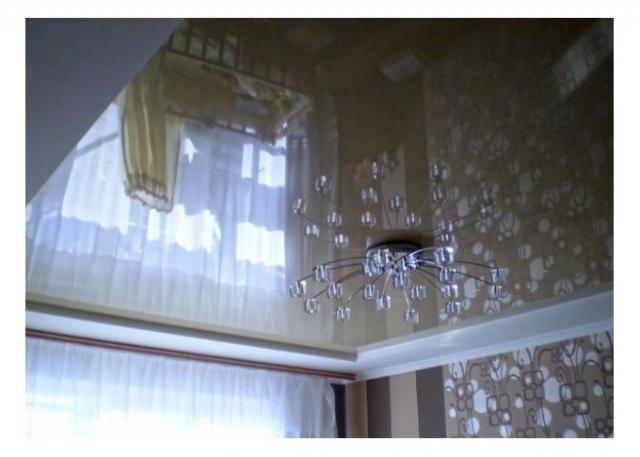
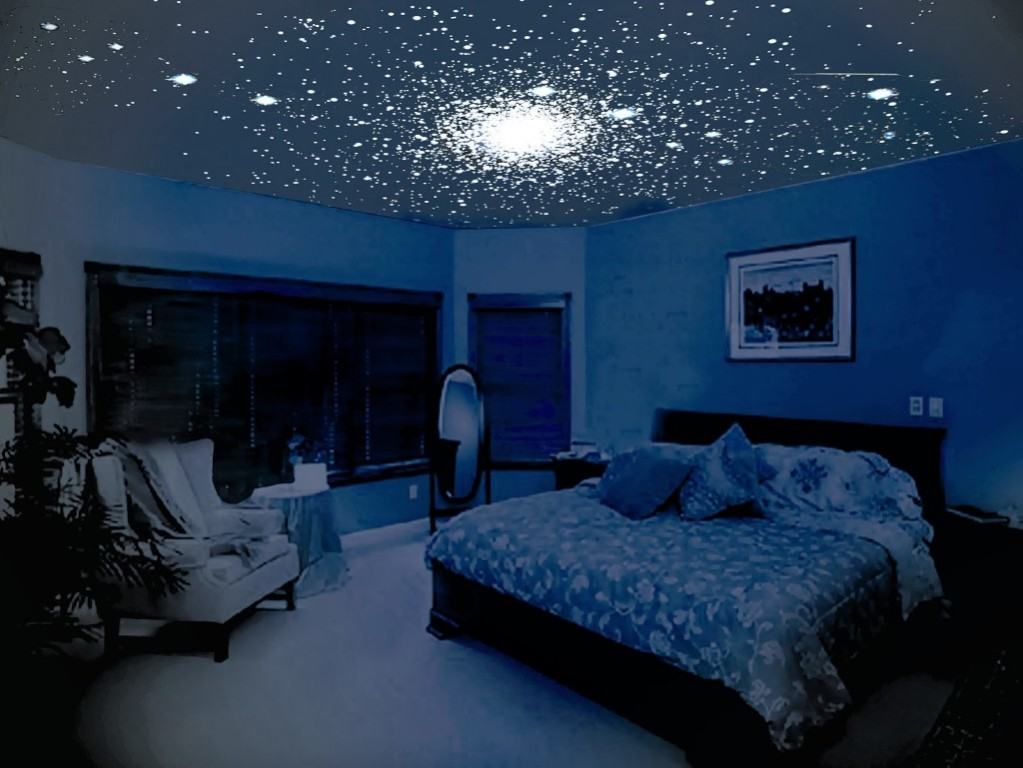
When choosing lamps, it is necessary to take into account the characteristics of the material used; for example, small reflections on the gloss can create the illusion of a starry sky or snowfall. You can find it on the Internet and order something similar for yourself.
However, there is another way, and the opportunity to create a miracle yourself in your own separate home.
Basic principles for placing lighting zones
The scheme familiar to us from early childhood, as a rule, included two levels - overhead light and local lighting fixtures. Among the first devices we can safely include all hanging chandeliers a wide variety of shapes and sizes with incandescent lamps, as well as box-shaped fluorescent lamps.
The second level includes sconces and other Wall lights, and desk lamp and floor lamps. The modern range of devices is more diverse both in appearance and in its parameters.
A suspended ceiling, the lighting of which will be done without taking into account the features of its coating, does not have a presentable appearance. It is important to specify the distribution of lighting equipment at the time of design, especially since many specialists can visualize the picture using special software.
You should also remember about the technical side of this process, because often electric installation work non-specialists are taken. Failure to comply with electrical wiring regulations may result in injury to people. electric shock or to fire from short circuit online.
Mostly the basis of a suspended ceiling is a frame made of steel profile with edges sharp enough to cause damage to wires.
Lighting system installation
Basically produce necessary calculations according to the amount of materials needed and selecting the necessary devices is not difficult. It is important to take into account all the requirements of the operating rules for electrical installations.
You can install the lighting system yourself, if you have the necessary tool and minimal skills in handling them and lighting devices.
Selecting a lighting scheme
Modern electrical installation equipment allows the implementation of two main models. In the first case, standard lighting devices operating from a household network of 220 V are used.
In the second case, light sources are used, recorded from a step-down transformer with an output voltage of 12 V. Each of the proposed options has its own advantages and, accordingly, features and disadvantages.
The traditional household voltage circuit has a number of advantages:
- simplicity of design with a minimum set of elements, which has a beneficial effect on reliability;
- Lower cost in comparison, provided that components of the same class are used;
- Application of long-established techniques for conducting electrical work.
The disadvantages of such a scheme can be listed as follows:
- High risk of electric shock, especially when used in rooms with high air humidity, such as bathrooms or swimming pools;
- Possibility of a short circuit if the insulation on the structure is destroyed.

In many ways, these dangers are absent from circuits that use a step-down transformer; here the possibility of electrical injury is excluded. Even if you carelessly touch the exposed contacts when replacing a light bulb.
Having such safe lighting, the suspended ceiling in the bathroom or shower will meet all the stringent requirements of standards and building codes and regulations. The peculiarity of such a scheme is, first of all, the presence of an additional structural element- a transformer, which reduces the simplicity and reliability of the entire system accordingly.
Due to the use of fairly expensive equipment, the total cost of materials and work increases. As a rule, in this case, a compromise solution is made when different variants with household or reduced voltage.
Lighting system elements
To implement any of the considered schemes, you will need materials and components:
- Lighting fixtures are selected depending on stylistic decision accepted by the designer in agreement with the owners;
- Wires with a cross-section of at least 0.75 square meters. mm in double insulation PVC type PV or PVA. Using wiring of a smaller cross-section that does not correspond to the actual load will lead to overheating and other unpleasant consequences;
- Distribution boxes and connecting elements called terminal blocks;
- Mounting corrugations of the appropriate diameter or plastic mounting boxes;
- Insulating tape;
- Switches of the required configurations with one key or several. It is possible to use complex devices triggered by loud noise or with remote activation.

The low price of purchased materials does not always allow you to save money. Choose from a number of products of the same quality as at different prices is acceptable, but buying substandard devices or ones that do not meet the calculations is simply dangerous.
To carry out the work you will also need a number of tools, the list of which is given below:
- electrical wire cutters with insulated handles;
- wire stripper;
- screwdrivers with straight and curved slots of different sizes;
- a device for determining phase, colloquially called a probe.
As practice shows, the choice necessary equipment and devices are best produced in large construction supermarkets, where everything you need is available. Before going on a trip you should make detailed list everything you need so you don't miss anything.
High-quality lighting of a suspended ceiling can be done only if quality materials and equipment are used. It has long been noted that remodeling always costs more than work done once in compliance with all norms and rules.
Because if you are unsure own strength, then it is better to attract qualified specialists. It will cost less, because they usually have in stock Consumables, which are paid upon the fact of their use, which means that excess will not be purchased.

Lighting
When it comes to choosing specific models of lighting fixtures, owners have freedom of action. It is advisable to buy everything you need before installing the ceiling; the explanation for this is simple.
For lamps, both mortise and pendant, it is necessary to make appropriate holes, which means you need to know the dimensions; in addition, when installing spotlights, you need to install special brackets. The situation is simpler with materials such as plasterboard, plastic panels or MDF.
They are strong enough to not require any special designs to strengthen them. On the Internet video you can see how holes are made using a special cutter, which significantly speeds up the work of installing the ceiling and lamps in them.
The vast majority of recessed lights have spring latches that hold them in place. seat. More complex devices are equipped with rotating deflectors with halogen lamps.
These are quite energy-intensive light sources, however Lately LED elements are becoming increasingly popular, due to their high efficiency and durability.
Precautions when performing work
There are a number of things to remember simple rules, which will ensure the implementation of the entire complex of measures in complete safety. The instructions state that all electrical installation work should be performed only on equipment that is not energized or not connected to the network.
Another rule logically follows from this: when connecting a lighting device, the phase is connected to a less accessible central contact. Similar actions are performed in relation to switches; the phase wire must be broken in order to prevent electric shock when replacing electric lamps.
High-quality lighting according to your tastes is a great opportunity realize all your ideas about how certain rooms in your apartment should look or country house. Overhead lighting and local zones will allow you to create the necessary holiday mood or coziness and comfort in your home.
Creating a beautiful suspended ceiling for the interior is only half the battle, but to make it elegant and emphasize its beauty, you need to equip it with proper lighting. Today, making such lighting is not particularly difficult. All necessary materials You can easily buy it in stores, and to bring your plan to life you will need skills in handling the tool and accuracy when performing work. This article will tell you how to illuminate the ceiling and what is needed for this.
One of unique features suspended ceilings provide room zoning, and in combination with various lighting groups, a stunning effect can be achieved. When planning to install a suspended ceiling with lighting, it is necessary, even at the stage of creating a design project, to think about how many lighting groups there will be, their types and options. Suspended ceiling lighting is usually divided into three main groups:
- general lighting;
- target lighting;
- mood lighting.
For general lighting, use a central chandelier, several lamps or niches with built-in lamps. The main task of this group of lighting devices is to provide maximum illumination of the room at night.
The purpose of targeted lighting is functional zoning premises by creating in separate zones their own illumination of varying intensities and color range. This can be achieved by using lamps mounted in niches of the suspended ceiling and combined into separate groups.
Illumination of a suspended ceiling looks practical and beautiful using LED lamps
Mood lighting is created according to the principle of target lighting with the difference that lighting fixtures combined into different groups, depending on the situation, can create a festive, intimate or work environment.
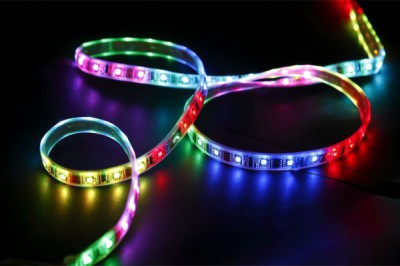
Decorative ceiling lighting using LED strips is now very popular
Various types of lighting fixtures are used to illuminate a suspended ceiling. These can be built-in spotlights, pendant lighting fixtures or lighting strips. Incandescent lamps, fluorescent lamps or LEDs are used as light sources. Today, ceiling lighting is gaining more and more popularity. LED strip. Main advantages LED lighting is durability and low energy consumption.
Installation of lighting fixtures
The placement of groups of lighting fixtures for various purposes begins at the stage of creating a suspended ceiling design project. The installation locations of lighting fixtures are marked and a wiring diagram is created indicating the quantities of materials used, their specifications and power consumption. Already having in hand finished project, you can safely begin installing the lighting.
Wiring process
Having completed the installation of the suspended ceiling frame, you can begin laying the wiring for lighting. Depending on the capabilities and wishes, the wiring can be laid in two ways. The first involves the installation of a cable channel, the second allows you to lay wires in the corrugation directly through the entire frame structure. The advantage of the first method is neat placement and further ease of connection. The second option will allow you to significantly save on the total wiring length.
To lay wiring through cable channels, you must do the following:
- the cable channel itself will be located between the ceiling and the suspended ceiling structure and attached to the wall. The exception is the cable channel for the chandelier; it will be attached to the ceiling. We drill holes for fastening the cable duct around the perimeter of the room, starting from the installation location of the switches;
- Now we drive the dowels inside the holes and screw the cable channel itself;
- Finally, we lay the wiring to each lighting fixture. We try to make a wire reserve of 10 - 15 cm for ease of connection of lamps.
Wiring in the corrugation is carried out as follows:

Electrical wiring to ceiling lighting fixtures must be corrugated
- holes are drilled in the ceiling for fastening the corrugations, after which special fastening clips are inserted into each of them;
- for each lighting group we take a separate corrugation and insert the wires inside;
- The size of a piece of corrugation is taken based on the distance to the lamp. So the entire bundle of wires from the switch to the connection point is in one corrugation. We try to take the length of the wire with a margin of 10 - 15 cm for ease of connection;
- We fix the corrugation in the clips that were previously installed.
Available combined option laying wiring using corrugated cables and cable ducts. In this case, the main wiring is laid through cable ducts, and the wiring for lamps in the center of the suspended ceiling is laid in corrugation.
Marking plasterboard sheets
Now that the frame of the suspended ceiling has been created and the wiring has been laid inside, you can begin to mark the sheets of drywall with the exact location frame profile and installation locations for lighting fixtures. To do this, you will have to take a tape measure, a pencil and transfer the exact dimensions and location of the frame profiles onto sheets of drywall. Having received the exact markings of the frame, we mark the installation locations of the lamps. After this, you can install the sheets in place.
Creating holes for lamps
Having completely covered the frame with sheets of plasterboard, we check the design project for the exact location of the lamps and, if necessary, correct the markings. After making sure that everything is in order, we drill the holes. We select the diameter of the holes, and therefore the diameter of the saw, based on the lamps that we are going to install.
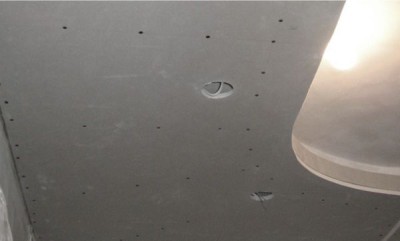
Cutting holes in plasterboard sheets for spotlights
We make the holes themselves using a special attachment for a drill - hole saw. When drilling, you must wear safety glasses, otherwise plaster dust will get into your eyes. It will take very little time to drill, the main thing is to do everything carefully so as not to damage plasterboard sheet.
Video: cutting holes for lamps
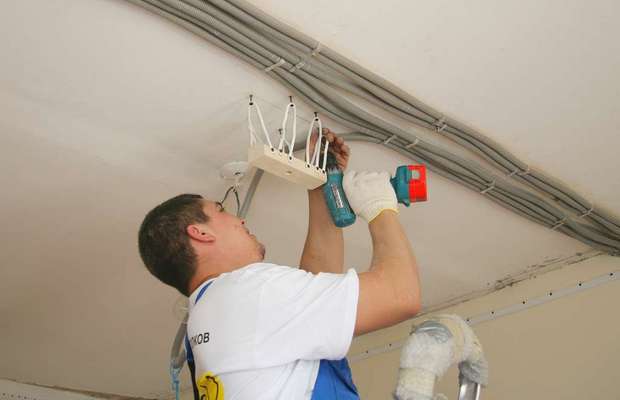
Backlight installation: technology
Having prepared the places for the lighting fixtures, we proceed to install them. As noted earlier, to illuminate the ceiling you can use spotlights, LED strip or classic chandelier, as well as a combination of these lighting fixtures.
Let's start installing lighting with spotlights, for this you need to do the following:
- from drilled holes pull out the wires and strip their ends. To trim the ends we use wire cutters;
- We put a connecting terminal on the ends of the wiring, to which we connect the wires of the spotlight. To perform these works we use a Phillips screwdriver;
- If the lamp has a halogen bulb, then before putting it in place, first install the light bulb. We carry out the installation very carefully, making sure not to touch the light bulb with your hands. There is no such problem for LED lamps. They are usually sold as a whole, and after connecting the lamp can be immediately put into place;
- Installing a spotlight is a very simple matter. You just need to insert it inside the hole and press it tightly to the surface. Thanks to its spacer plates, the lamp will be fixed quite firmly.
Side in the suspended ceiling for LED strip
Installing an LED strip is an even easier task. The tape is attached to the ceiling surface thanks to an adhesive base, and connection to the network is made using a special connector. It should be noted that the LED strip is not intended to create basic lighting. It is best used to create mood lighting. Therefore, it is recommended to hide the tape in specially designated niches or cover it with borders.
At the final stage of installation, we connect the backlight to the power grid, having previously de-energized everything. And after successful completion, you can turn on and enjoy the beauty of the suspended ceiling.
Video: installation of a spotlight
All connection work can be easily done alone, the main thing is to be careful and careful when working with electricity.