Any exit to fishing brings not only joy, but also brings a lot of worries into the process. A fisherman on winter fishing needs to take with him quite a lot of different things and equipment: a tent, an ice auger, a fishing box, etc.
It’s simply impossible not to take some of the equipment: without an ice drill, you won’t be able to make a hole, without a box you won’t be able to sit comfortably, there will be nowhere to keep the bait and equipment, and without a tent there will be no warmth and comfort during the fishing process. Therefore, it is necessary to have everything. But moving on ice, and even more so on a snow-covered surface, with such a load is not easy, especially when changing places frequently. It is to facilitate the movement of the fisherman that special sleds designed for winter fishing are required.
On the frozen reservoir you can always admire the sleighs of the most various designs both store-bought and homemade.
Sled with metal runners
 Such models usually come in two versions: non-collapsible and folding. Previously, only such sleds were used for winter fishing trips. Iron sleds have a very rigid structure and significant load capacity. Things are placed on a cargo area made of wooden slats, plastic or fiberboard.
The disadvantages of such sleds include their difficulty in moving through deep snow: when the thickness of the snow cover is higher than the distance between the base of the skis and the upper plane, the sled is difficult, and sometimes impossible, to pull. The problem is narrow skis that are not able to hold the sled on the snow. Such sleds are convenient and easy to pull on covered with a low layer of snow and clean ice or even on trampled snow.
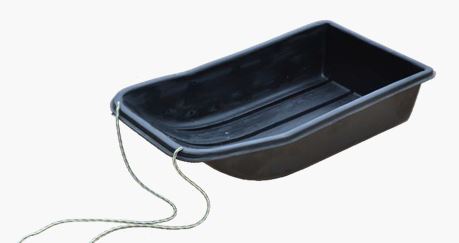
Plastic sled for fishermen
Such models are made of frost-resistant plastic; they are made in the form of a trough with a ski-shaped front part. For smooth and stable movement along the course, they have stiffening ribs on the bottom that act as runners. Plastic sleds? most best option transport for winter fishing. Having a wide base, such sleds do not fall through and move without difficulty even on recently fallen snow.
 Due to the low sides, rubber straps must be used to secure fishing equipment and things, holes for which should be made along the sides with your own hands. The cost of plastic sleds depends on the size and quality of the material. Their dimensions should be selected based on the number of things being transported; usually the size should be selected for a fishing box.
But the most durable, reliable and comfortable are considered to be hand-made fishing sleds; when making them, the fisherman takes into account all his capabilities and wishes.
Making a sled for winter fishing with your own hands is not as difficult as it might seem at first glance. Such homemade vehicles can be made from wood, aluminum, plastic pipes, metal and other available materials.
Homemade fishing sled made of aluminum
To make a lightweight sled, you will need a sheet of aluminum and a profile made of the same material. Their dimensions are selected based on the full capacity of the transported equipment and the size of the fishing box. Such a sled has three main parts: two side walls, a bottom and runners. Their production occurs in several stages:

Wooden homemade sleigh
 Also, a good sled for winter fishing can be made from wood. Before production you will need to carry out necessary calculations and select the material. It is better to use pine boards; it is easy to process, but other wood species can also be used. Having decided on the material, you can begin manufacturing the sleigh parts. You will need:
- boards;
- wood glue;
- sandpaper of different grain sizes;
- electric jigsaw;
- electric drill and other woodworking tools.
On two boards intended for runners, in the front part, using a compass, draw semicircles and cut them out with a jigsaw.
Drill holes on the runners to strengthen the transverse bars; the parts must be connected using round tenons with glue. After installing the crossbars, it is advisable to strengthen the structure by installing transverse strips on round spikes in the front and rear of the runners. After the adhesive joints have completely dried, trim the protruding tips of the tenons where necessary and sand everything down with sandpaper.
 On the board intended for the seat and installation of the fishing box, it is necessary to cut grooves to connect it with the runners. You will need to glue bars into the back of the skis in those places where the runners will connect to the board for the seat and installation of the box. Starting from the rounded part of the runners from below, an aluminum or steel strip is attached to them with screws.
Before starting assembly, be sure to adjust all finished elements and check the accuracy of the connections. All manufactured parts must be well sanded and coated with waterproof varnish. Assembly should be carried out using self-tapping screws and special waterproof adhesive composition. After finishing the work, install the fishing box on the sled, put the necessary things for fishing and check the product for strength.
For convenient operation drill around the edges of the sled required amount holes for attaching an elastic band that will hold the load.
Finnish sleds differ from classic ones in that they have a raised seat and long runners. The person standing behind rests one foot on the runner of the sled, and pushes off with the other, as if on a scooter. For convenience, handles or a special frame for riding are attached to the seat. The stability and speed of the device allows you to comfortably ride alone or together, as well as carry luggage.
Contrary to the name, Finnish sleds were not invented in Finland, but in Sweden. Initially, such sleighs were a traditional means of transportation in Scandinavian countries. Now they are used for outdoor activities in parks and skating rinks, transportation of fishing equipment and just for fun in the winter.
Finnish fishing sleds have a modified design. They have less weight (up to 8.5 kg), the length of the runners is shorter (1.37 m), which simplifies both movement over long distances and transportation in a car. The design of the sled allows you to quickly move around smooth ice and trampled snow (up to 15 km/h). For better gliding on loose snow, plastic runners, similar to cross-country skis, are attached over steel ones.
The high seat and a special frame attached to it reduce the load on the back. A sled is also used instead of a comfortable fishing chair with a high back. On a sleigh you can comfortably transport the equipment necessary for fishing, and on the way back, the catch. For greater convenience, additional hooks and elastic bands are attached to secure the tackle box. Collapsible ones are especially convenient Finnish sleigh For fishing.
Technical characteristics and design features
There are two types of sleds: for walking and for fishing.
The walking version for adults weighs up to 10 kg, the length of the runners reaches 2 m. The design can withstand weight up to 180 kg. Sleds designed for children's entertainment are smaller in size. They are designed to carry weight up to 110 kg; accordingly, the runners are shorter (up to 1.55 m), the weight is also reduced.
Finnish fishing sleds are lighter than pleasure sleds (up to 8.5 kg), the length of the runners does not reach 1.4 m. This option can withstand 150-180 kg. Fans of winter underwater fishing often equip the design additional fastenings for cargo, use plastic linings on the runners. Finnish fishing sleds are also equipped with a motor and a special wheel, which increases the weight to 16 kg and increases the speed of movement to 40 km/h.
Both variations are durable: the racks and runners are made of metal, the seat and back are made of dried wood, coated with varnish or paint. For convenient transportation, folding models are made, which when disassembled take up minimal space.
How to make a Finnish sled with your own hands
Finnish sleds are simply designed: at home, a craftsman can independently make them for fishing or entertainment.
The choice of construction and design depends on skills and technical skills home handyman. The selection of materials and tools is determined by the purpose of the vehicle: more durable and stable sleds are suitable for fishermen than for riding. The walking version is made of wood or aluminum, but to make a Finnish fishing sled with your own hands, it is better to use steel as the main material.
Skids
The easiest way to make your own is to use old skis with a metal edge. 4 corners with pre-drilled holes for bolts are attached to the wooden runners.
To make a sled from aluminum steel you will need a pipe bender and welding. Also required is ribbed rubber for the footrest and footrest. From aluminum pipes the base bends: runners, footrests and chair mounts. Rubber is glued to the footrest and the back of the runners for an anti-slip effect, and holes are drilled for attaching the racks.
The most stable and robust design it will be made of metal. Skids are formed from bent sheet steel. A metal rod with threads at the ends is inserted into the holes drilled in the front part. To prevent slipping, as in the previous version, rubberized pads are attached.
Chair
Can be mounted on skids to save time and effort old chair, having previously marked and drilled holes for the bolts.
To make the seat and backrest yourself, you need to prepare wooden blocks or planks and cover them with paint or varnish. The wooden parts are attached to a frame made of aluminum pipes or metal. Holes are made in the finished chair for subsequent screwing to the runners and stand.
Racks
Finishing the manufacture of wooden sleighs, the back is increased wooden blocks and install the top bar from the same material.
For installation of aluminum vertical racks a frame is bent from pipes, boards are fastened with rivets, and holes are drilled at the bottom for screwing to the base. For convenience, the handles or crossbar are covered with porous rubber.
A stand made of metal plates and wooden blocks is fastened with screws, a horizontal bar is attached to the top or handles are made.
If folding sleds are made, wing nuts are used to attach the vertical posts and chair to the runners.
How to make your sled more comfortable
Finnish sleds are equipped with wide plastic attachments, which are used for riding on loose snow when the runners begin to sink.
The sled can be turned into a self-propelled one by adding motor parts. The engine and gas tank are mounted on a separate frame, and a wheel is additionally installed. The speed of such transport will be almost 3 times greater (up to 40 km/h).
To reduce the likelihood of injuries, in addition to covering the handles and footrest with rubber, an additional anti-slip platform for the feet is installed and a pad is put on the shoes.
To secure the load on the sled, add various fastenings, elastic bands, hooks. This option is used by fishermen to transport equipment.
What is better: homemade or purchased sleds
In order to make a Finnish sled with your own hands, you need to have the necessary skills, materials and tools. From positive aspects independent work You can note not only the money saved, but also the design, limited only by the imagination of the home craftsman.
The purchased sled will be stronger and more durable: factory ones are used for processing metal and wood technological processes. A wide range will allow you to choose a model with the desired functions and related accessories. Whatever the choice, Finnish sleds will be both fun winter entertainment for children and adults, and a faithful assistant in winter fishing.
An avid fisherman differs from an ordinary amateur in that he has a huge amount of fishing equipment in his arsenal. If he goes winter fishing, he will certainly need not only a tent, a fishing rod and an ice auger, but also fishing sled, which you can make yourself. Design features the pattern and its complexity will depend on the nature of the fishing and financial opportunities. However, such products still do not turn out to be expensive, because you can use materials that you can find in your barn.
How to move on crust and ice
If you want to go quite far, then it will not be possible to get there by road, so it is important to think about the optimal means for delivering fishing equipment. Navigating on the ice surface is not as easy as it might seem. This issue is easily resolved with the help of a sled. For some fishermen, they even become a place for overnight stay and rest, because in order to catch a trophy specimen, they sometimes have to stay far from home for several days.
Preparing tools and materials for making wooden sleds

If you want to make a fishing sled with your own hands, then you should prepare some tools and materials, among them the following should be highlighted:
- pine boards;
- sandpaper;
- drill;
- wood glue;
- electric jigsaw.
Step-by-step instruction

Two boards will act as runners, which need to be used in the first stage. The compass will allow you to draw semicircles that are cut using a jigsaw. To secure the transverse bars, holes are made on the runners. Their connection should be made using round probes using the gluing method.
The resulting structure should be strengthened at the back and front of the runners; for this, transverse strips are placed on the spikes. The design should look attractive, so after the glue has dried, the excess needs to be trimmed. A fishing sled must have a seat; a board can serve as it.
At the location where the equipment box is installed, grooves should be cut to connect to the runners. In order to achieve structural reinforcement, bars must be glued to the back of the skis. In places where the runners are rounded in the lower part, you need to strengthen an aluminum or steel strip with screws.
Before final assembly the design should be reviewed to determine the accuracy of the connections. If there are elements that have been previously sanded, they should be coated with waterproof varnish. Fishing sleds must be tested for strength after completion of their production. To do this, all the equipment should be placed inside, because you wouldn’t want the product to fail at the most crucial moment.
Making sleds from aluminum

Fishing sleds should not only be functional, but also be light enough, because sometimes with their help a fisherman has to move on ice that can crack. For the manufacture of aluminum sleds, a sheet of appropriate material and profile should be used. The parameters must be selected based on the size of the equipment being transported and the parameters of the fishing box.
The design will have three main parts, namely:
- runners;
- bottom;
- two side walls.
Manufacturing will require compliance with certain rules. The work will require a bending device. You can get by with metal corners and a mallet. The side parts should be made identical and reinforced; the same principle applies back wall. The aluminum bottom is cut out last. It is important to make the edges of the product safe; for this they are folded.
When winter fishing sleds are made, runners should also be made. They can be made from aluminum profile. To make bending the runners easier, slits should be made in some places. On final stage it is necessary to assemble the sled; for this you need to use nuts, bolts, and self-tapping screws for metal connections.
Refinement of plastic sleds

As practice shows, plastic fishing sleds are convenient in everything; with their help you can move fishing luggage over crust, ice and snow. Such structures are made in the form of a trough, are lightweight, and can withstand the impact low temperatures and may have different sizes. However, such sleds have one drawback, which is the lack of rope attachments. The correction of this disadvantage rests on the shoulders of the fisherman himself.
Fishing sleds can be supplemented by equipping them with appropriate fastenings. To do this, drill around the perimeter required quantity holes into which a metal cable with appropriate fasteners can be inserted. This will allow you to obtain strong and reliable fastenings for luggage rubber bands and rubber bands that are not subject to frost and corrosion.
To install a pulling rope along the front side of the sled, 2 eye bolts should be installed, and the rope will be attached to carabiners. Eye bolts should be installed using nuts, which will be reliable and quick to fasten. This modification of the fishing sled shows that over many years of operation the fastening system does not fail. Everything is held securely and firmly, the elements do not open, and using the sled becomes very convenient.
To pull the sled, it is better to prepare a 20-meter rope that folds in four. Using a carabiner you need to strengthen the eye bolts. This can help not only the fisherman himself, but also his companions who may fall through the ice. If you quickly release the rope, you will have a 20-m section available with which you can provide assistance.
Remaking old sleds

Homemade fishing sleds will be much easier to complete if you use an old sled as a base, which should have a frame and runners. The addition will be light plywood, a sheet that will be used to make partitions for the box. The plywood must be cut carefully so that it does not form creases along the edges.
The sled that will be complemented is secured to the runners using self-tapping screws; holes for them need to be made with a drill. The corners for the frame should be prepared. The walls of the box must be insulated using polystyrene foam or polystyrene foam. It is laid on glue. Then the inside of the box must be lined with plywood blanks. The design may have several compartments that are intended for:
- caught fish;
- warm clothes;
- tackle and bait;
- food supplies for fishing.
Once the box is ready, you can start working on the lid. It must be very strong, since this element often acts as a seat, and therefore it must withstand the weight of the fisherman. To avoid freezing, the seat should be insulated. To do this, foam rubber is placed on its surface and stitched with leatherette. Such a system can be strengthened with staples furniture stapler. To make the sled more convenient during operation, you can strengthen the fishing rods and catch, as well as other gear on the body of the box. This will free up your hands when you fish.

After the sled is made, its bottom should be lubricated with silicone or ski lubricant. This will prevent snow from sticking. For road safety, reflective tape should be attached to the sled. Sometimes fishermen improve their sleds by equipping them with a folding chair. Fishing fishing rods are not very common in Russia. On their metal runners there is high chair. You can move around on such a sled according to the principle of a scooter.
You can make a sled for a snowmobile from plastic pipes. Welding them will allow the elements to be fastened together. During assembly you can use metal corners. The dimensions of such sleds should be determined taking into account the needs of the fisherman. The sled can also be equipped with compartments.
More information about snowmobile sleds
If you forked out money for a snowmobile, but didn’t have time to buy a sled, then you can make it yourself. A similar model was discussed above. Preparing plastic pipes for such a design, products with lengths of 1.8 and 7.5 m should be used. These components will be used for transverse connections. To ensure that the frame does not become skewed, it should be laid on a flat floor and all values should be measured. A sled that is too tall can tip over, while a sled that is too low can be difficult to ride. Therefore, you should make a structure with a height of 30 cm; this parameter will be optimal. When preparing the racks, it is necessary to make them in the amount of 8 pieces or more; the strength of the sled will depend on their number. The final size should be adjusted using a file.
Conclusion
You can easily make a fishing sleigh yourself; it can be expanded endlessly. For example, modifications include the back, as well as the trunk and even decorative elements. Such fishing sleds will become budget option and an excellent alternative to factory products.
A real, experienced fisherman always has additional equipment. For winter fishing, it is advisable to have a tent, ice auger, fishing rod, box, and so on. In this case, a lot depends on the fishing conditions of a particular region. If a body of water is somewhere nearby, then there are no special problems. In such conditions, you can hide from bad weather at any time and return to take what you accidentally left at home.
If it takes a long time to get to a reservoir, then you need to have a device that could facilitate the process of movement.
The fact is that moving in winter, especially with all the equipment, is very difficult. Not only does clothing restrict movement, but you also need to carry equipment. But if you have a sled for fishing in winter, then this problem can be solved. In addition, if you approach this problem correctly, the sled can have more advanced functionality. For example, a sled can serve as a stool or a tent.

There is a huge amount various designs sled specifically for fishing. Sleds on metal runners are widely popular. Sleds can be either folding or solid. Unfortunately, such sleds move well on ice, but on snow, and even with a load, this is a problem. Alternatively, instead of runners, you can use children's skis, then there will be no problems with moving on the snow.
In this regard, many anglers began to switch to plastic structures with wide runners that do not fall through the snow. At the same time, such structures have low sides, which can be considered a disadvantage, since the load has to be secured additionally. Despite this, this factor suits many winter fishing enthusiasts.
How to make a fishing sled with your own hands
Anyone can assemble such a structure. The main thing is to decide what kind of sleds you need and with which ones. functionality. If you need a sled to deliver fishing equipment to a fishing spot, then it can be made from wood, plastic, aluminum or iron. It all depends on the capabilities of the fisherman and the purpose of the sled.

Metal sleds can be made either collapsible or non-collapsible. More recently, other designs simply did not exist. The metal structure is a rigid and durable base, on top of which there is a platform made of wooden boards or plywood. This is the so-called cargo area, which is used for transporting cargo. Their only drawback is the difficulty of operating in snowy areas. Due to the fact that the runners are narrow, they sink in the snow and a person needs to expend a lot of effort to move them, and even when loaded.
Similar plastic sleds are made in the form of a trough. They have good performance characteristics. They move without problems both on ice and snow. In this case, you should pay attention to the dimensions of the structure and workmanship. Although many argue that such a design is not difficult to make on your own.

Wooden sleds are very popular. This is the most affordable and easily processed material, and structures made from it will last for many years. The main thing is to have the following tools and materials on hand:
- pine boards;
- wood glue;
- sandpaper;
- jigsaw;
- electric drill, etc.
Manufacturing technology
- You need to take two boards from which two runners will be made. The appropriate shape should be drawn on them and cut out with a jigsaw.
- The runners need to be fastened together. For this, cross bars of the appropriate size are used. The connection may consist of glue and round tenons.
- To strengthen the structure, additional transverse strips are attached to the front and back of the runners, mounted with glue and spikes.
- For a more aesthetic appearance, all excess is cut off and cleaned well.
- The board, which will serve as a cargo platform in the future, is prepared for subsequent fastening by cutting out all the necessary grooves and drilling the corresponding holes.
- An additional bar for fastening is attached to the back of the 2 runners.
- The places where the runners are rounded are reinforced with strips of aluminum or iron. This is necessary so that various obstacles do not damage the runners of the sled.
- Before final assembly, it is better to check all parts for proper dimensions. At the same time, you need to make sure that all elements are sanded and coated with waterproof varnish.
After the sled is assembled, it should be tested for strength by placing on it all the equipment that is used in winter fishing. Only after this does it make sense to take them with you.
Factory-made fishing sled
For those who do not want to spend their time making sleds, there is the opportunity to purchase ready-made ones at a retail outlet.

- This is a light and, at the same time, durable sled, weighing 10.4 kg.
- They are roomy and have dimensions: 165x81x43 cm.
- Relatively high sides.
- Transports well on icy surfaces.

This is a very light sled, weighing 3.6 kg, which is easy to transport by hand. They are made of polyethylene, which is not afraid subzero temperatures. Thanks to the presence of wide skids, as well as a low center of gravity, they are stable under all operating conditions.

Some anglers use baby sleds for their fishing needs. If they are available, there is no need to specially make or buy sleds. Unfortunately, in the presence of noticeable snow cover, problems arise with their operation. In addition, these sleds are not intended for fishing and you will have to come up with additional elements.

This is the most simple design, which are very easy to transport as they take up very little space. Unfortunately, such sleds do not fit many accessories necessary for winter fishing. In addition, inflatable parts are not particularly reliable.

Such sleds have a number of advantages. Firstly, they are quite spacious, and secondly, they will pass over any surface without any problems, due to the wide contact plane. The main material is plastic, which is not afraid of frost. They are easy to move on ice or snow using a regular rope. These sleds have high sides, which securely holds the load inside the structure.
Due to the use lightweight material, the sleds themselves are not heavy, which means they are easy to use. There are structures that are attached to the snowmobile. This is especially true when there is a need to long hike. Naturally, such conditions require more spacious sleds, up to 2 meters long.
How to make a drag sled with your own hands
Dragging sleds are not at all difficult to make with your own hands. For this you can use any available material, from wood to metal. The simplest design is wooden. This is what is being done for wooden frame, consisting of two runners and two bars connecting these runners. A sheet of plywood is attached to the beams on top or ordinary boards are stuffed. A metal handle or hitch must then be attached to the structure so that the sled can be moved by the snowmobile. If you use metal instead of wood, the structure will be much stronger, considering that you will have to move quite far.
In this case, Special attention attention should be paid to the strength of the coupling mechanism. To make it, you can use two pieces of pipe, one of the ends of which should be attached directly to the frame of the sled.
Option for attaching to sleds
- Holes are made around the entire perimeter of the sled.
- Metal cables with a special fastening should be inserted into each of the holes. Moreover, rubber bands must also be used for fastening, which always guarantee reliable fastening of the entire contents of the sled.
- For ease of use, you will need a rope, which is attached to special bolts attached to the sled frame. The rope can be folded in four, and its length can reach about 20 meters.

Finnish fishermen widely use such sleds, while domestic fishermen do not really recognize them. The design consists of a chair, which is located on runners. Its advantage is that you can sit on it both while driving and while fishing. They are very convenient for moving fishing equipment.
First you need to provide yourself with tools and materials:
- Prepare sheet steel.
- Wooden blocks made of pine or other wood.
- A metal rod with threads on both sides.
- Metal linings.
- Tires.
- Bolts.
- Screws.
Assembling the sled contains the following steps:
- The steel leaves bend on both sides.
- In front of the resulting runners, two holes are made for a metal rod.
- At the back, where the angler will stand with his feet, rubber pads are mounted. They will prevent slipping under the influence of snow.
- The dimensions of the structure must be proportional. The upper bar, in size, should be shorter than the distance between the runners.
- At a distance of 1 meter from the curved edge, weld on both sides along the strip. To do this, you need to use beveled beams with self-tapping screws.
- Horizontal posts should be welded to the rod, in the center of the metal sheets.
- It is better to make the seat and back wooden. If you use your imagination and ingenuity, you can create a real masterpiece for winter fishing.

If you have a snowmobile, then you also need a sled. Many fishermen have become convinced that a sled is a useful thing. The main thing is to determine which design is more suitable for specific fishing conditions. It can be a drag sleigh or a classic sleigh with two runners.
As mentioned above, such sleds can be made at home. By the way, if you try, you can make a snowmobile. There are a lot of interesting and simple designs on the Internet that can be easily replicated at home.
Purchased sleds, as a rule, require some modifications, although not significant:
- To inner surface If the sleds are not covered in ice, they should be treated with a silicone-based lubricant or a special ski wax.
- For driving in the dark, reflective elements should be attached to the sides of the sled.
Today we’ll talk about such equipment as a fishing boat. Not the one on which carp anglers bring bait, but the gear that was used by our ancestors for fishing long distance before the invention of spinning and fly fishing.
The boat, or sleigh, works on the same principle as the water kite. Due to the peculiarities of the shape and fastening of the cord, under the influence of current or wind, it is able to move away from the shore a considerable distance. The use of reverse in the latest models allows you to change the direction of movement of the water glider to the opposite.
Places of application
And in our time of advanced gear, there are places and conditions in which a boat for fishing can be indispensable. In addition, many anglers simply like this type of fishing, it is sporty, exciting and fills the body with adrenaline when biting and fishing.

Thus, this tackle is used in the following cases:
- when fishing at a very long distance with surface baits;
- under the banks with tree branches hanging over them;
- in overgrown reservoirs with the impossibility of placing spinning baits;
- when the fisherman likes this method.
The best and easiest way to use boat fishing is in bodies of water with a current, where the force of the water flow presses on the surface.
In still water they fish using the power of the wind; in calm conditions an air glider will not fly, and a water glider will not float. About the design features for different conditions Let's talk below.
How it works?
For an inquisitive mind, it is always important to know not only how a mechanism works, but also why it happens. In the case of a boat, everything can be explained using the example of the oldest such gear.

Reconstruction of a fishing boat
Imagine a piece of log about 40 centimeters long and 10 centimeters in diameter. The ends of this stake were sharpened, and two ropes were attached to them, one 20 centimeters long and the other 40 centimeters long. The rope was tied at this point, often on a ring, and to a working cord with a garland of two or three thin leashes was tied with it. A certain angle of attack was obtained: the current pressed on the log, and the fisherman, loosening or tightening the main line, maneuvered with the distance from the ship to the shore.
After the bite, the fish were brought ashore along with the boat.
Who is being caught and for what?

This gear is used to catch predators and peaceful fish using surface baits, which can be either natural or artificial, for example:
- chub;
- asp;
- pike;
- perch;
- carp;
- grayling
Depending on the type of fish, the baits with which the boat is equipped are used, these can be:
- bread crust;
- artificial fly fly;
- live insect;
- live bait;
- little frog.
Design
Fishing ships are currently manufactured in the form of catamarans of various modifications. In this case, the near plane or float is made low, and the tackle control elements are attached to it.

The second plane is made bigger size, and some masters generally make it interchangeable depending on fishing conditions, for example:
- A part with a large surface part is better suited for fishing with a boat in a still body of water, using the power of the wind.
- The large underwater part is used in weak currents.
- In medium and strong currents, the size of the hydrofoil is reduced: the faster the current, the smaller the plane.
- For fishing on riffles, where the water glider can overturn, the lower plane is cut out in the shape of a semicircle.
On the near plane there are rings or brackets for attaching the working cord. Usually there are two of them for fishing from one bank or another, depending on the current.
The following rule is observed: if you are standing on the left bank, then attach the working cord to the right ring, if you look at the boat from the side of the fastener, and vice versa.
We remind you that river banks are named by their location relative to the direction of the flow.
Leashes are attached to the working cord with snap hooks or using the loop-to-loop method. The distance from the ship's hull to the first attachment point must be at least two meters. The distance between leashes is usually 1.5 meters with their own length being 350-500 millimeters.

The working line is attached to a large inertial reel with easy movement, for example, the same “Nevskaya”. The diameter of the fishing line depends on the power of the fishing boat and the conditions of use and varies from 0.30 to 0.60 millimeters.
To control the tackle, the reel is mounted on a powerful fishing rod. As it you can use Soviet aluminum forms or products of Chinese comrades under the brand name “Crocodile” or “Alligator”.
Catching

The process of fishing on a boat, regardless of fishing conditions, looks like this:
- The tackle is placed on the water and waited for it to float away a little under the influence of the current.
- Leashes are provided. Their number and the distance between them depends on who you are hunting and what bait you are using.
- The ship is equipped, fishing has begun.
- By tightening or loosening the line, we bring the glider to the desired fishing distance, where, in our opinion, there are asp, chub, pike or other fish.
- At the required distance, depending on the bait used, you can either swim it freely or play along with it in some way.
- The bite is determined either visually or felt by hand.
Manufacturing
Despite the fact that factory models are already appearing on sale, most fishermen make a fishing boat with their own hands. We will describe the manufacture of the simplest model, in our opinion, the materials for which can be easily purchased in the retail chain.
We will describe a model with average parameters; for fishing in other conditions, the characteristics will need to be changed or made additional planes. The requirements for them were described in the “Design” chapter.
We start making the boat by cutting out the planes. For the sidewalls we use wooden boards, preferably made of hard wood, with a thickness of 12 to 22 millimeters. We draw drawings of the blanks on the board and cut them out along the contour with a jigsaw.
They have the shape of a trapezoid with the following dimensions:
- The large distant plane, also called the leading one, has a height of 120 millimeters, and the bases are 350 and 230 long.
- The small near trapezoid, or supporting one, is made with a height of 90 millimeters, with base lengths of 300 and 220.

We cut the inclined side edges of the trapezoid obliquely so that they can more easily cut through the wave. After finishing the carpentry work, the planes are ground and impregnated with drying oil. When the drying oil dries, you can paint the sides. To visualize fishing on a boat, parts protruding from the water are painted in White color, you can add stripes of red or yellow. The underwater part is covered with a blue or green color for camouflage.
The planes of the catamaran are connected in several ways:
- screw studs with nuts;
- strips of metal;
- slats on the top of the boat.
The distance between the planes is maintained from one hundred to two hundred millimeters. Two brackets are attached to the supporting plane for fastening the work cord.

Ship under construction
IN last resort you need to load the planes. To do this, lead or steel plates are attached to them from below. Most of the catamaran, like an iceberg, should be under water, with the exception of models designed for wind pressure.

The ship is ready for launching
Loading must be done so that the structure does not skew to one side. Ideally, the planes should form a right angle with the surface of the water.
Reversible boat
In order to be able to move in different directions, they came up with a device that turns an ordinary ship into a reversible boat. To do this, a special device is attached to the supporting plane or float.

The boat is equipped with a reversing mechanism
The reversing switch consists of the following parts:
- Base for mounting the mechanism. This can be a metal plate into which a bolt is screwed, which will serve as the axis of the lever.
- Lever movable on an axis to change direction. It can be made from a strip of metal. The hole in the strip will make it possible to place the lever on the axle and secure it with two nuts.
- A bracket to protect against line entanglement is placed above the lever. It could be a simple piece of insulated wire.
- The support for tensioning the elastic is a hook attached at the bottom of the support plane.
- Rubber band for fixing the lever. Better is an aircraft model or a “whale” one made from a plug.
The mechanism works as follows:
- The work cord is attached to a movable arm.
- When tensioned, the cord presses the lever to one side, and the elastic pulls it in the opposite direction.
- When the cord tension is released, the elastic will return the lever to a position perpendicular to the planes.
- A sharp jerk of the cord will throw the lever in the opposite direction, and the direction of movement will change.
To make the mechanism obedient, you need to carefully select the elastic band and its tension under the resistance of the water, so that the reverse does not work spontaneously.


