PVC windows, which are more commonly referred to as double-glazed windows, are extremely popular today. Which is not surprising. Such designs have many advantages over old standard wooden windows, which today, for the most part, not only have a rather unsightly appearance, but are also unable to perform the functions assigned to them. So apartment owners are striving to replace outdated structures in order to make their home warm and quiet inside, and beautiful and modern outside.
Today, the cost of professional services in the field of construction and renovation is extremely high. Perhaps this is precisely why many people now try to carry out such work on their own, without turning to specialists for help. Of course, not everything can be done with your own hands, especially if you lack the appropriate skills. However, there are jobs that are completely within the capabilities of a home craftsman, despite their apparent complexity. Among these is the installation of PVC windows. Almost every home-grown craftsman can carry out such a procedure independently. The main thing is to competently follow the process technology, carefully observing all its requirements. Which, in fact, is quite simple to do if you have before your eyes the instructions for installing PVC windows. Competent and detailed. And if there is none, we invite you to read our article, in which we want to talk in detail about what such a procedure as installing a PVC window with your own hands is.
Stages
Installation of PVC windows is a job that many home craftsmen are afraid to carry out due to the seeming extreme complexity of the process. It is worth noting that it is completely in vain. It's not as difficult as it seems to some from the outside. Moreover, when installing double-glazed windows, you don’t even need any special tools. So, almost a regular set home handyman, which is available in every home (we will discuss it in more detail below). The procedure itself includes several stages, including preparatory stages. To summarize, it looks like this: first you need to carry out all the measurements correctly in order to purchase the “correct” double-glazed window; then you need to prepare the opening for installation, install the window and the accessories included with it; then refine the slopes. All these procedures (except for the last one) take professionals only two to three hours. The home handyman, of course, will have to work longer, but during the day he can easily cope with the task. But PVC is still half the battle, because after installation you still have to tinker with the slopes, it’s better to count on a few days. Let's say, devote a weekend to this matter.
So let's begin. From measurements.
Calculations
To ensure that the installation of a PVC window with your own hands goes smoothly, you need to correctly calculate the dimensions of the structure. The fact is that you will have to order double-glazed windows, since it is unlikely that you can simply go to the store and buy them. You can, of course, call specialists from a company that produces and installs windows, however, firstly, you will have to pay for this, and secondly, such companies, as a rule, provide comprehensive services - from measuring to production and installation every PVC window ordered from them. Due to fierce competition, prices for almost everyone today are the same, and they usually charge about 30% of the cost for installation. Typically, the average is around $50. And if you decide to save money, you will have to do everything yourself. Including calculating the dimensions of the future double-glazed window. And in order to do this correctly, you must first study the old structure and the opening itself, because it comes in two types - with and without the so-called quarter. This is a special design that is present on the sides of the opening. To find out, you must first remove the cash from the old wooden window. And then measure the width of the old frame, first from the side of the room, and then from the side of the street. If the result is the same, there is no quarter. If there is a difference, then there is a similar design. From here you dance.
If there is a quarter, the height of the future window will be the same as the opening itself. But three centimeters should be added to the existing width. In its absence, the double-glazed window should be shorter by five centimeters and narrower by three. This difference constitutes the so-called gap. When installing PVC windows, it is necessary, since the installation of such structures is carried out using foam, and it requires space between the opening and the frame itself.

Well, if we are talking about a new building, then at the moment house construction technologies do not provide for the presence of such a structure as a quarter. That is, you will have a clean window opening. Feel free to measure its dimensions vertically and horizontally and take them to a PVC window manufacturing company. There, specialists will carry out all the necessary calculations themselves.
Additional accessories
Because correct installation PVC windows are impossible without the availability additional elements, then when ordering a design you should definitely pay attention to this. Plus, in addition to the double-glazed window itself, you should additionally be provided with fittings, special seal, installation profile and window sill with ebb. As for the last two additions, there are some nuances you need to know.
These items are available in several standard options(in width). Therefore, it is enough to measure the existing old structure and then choose the one that suits you. As for the length, it is better to take elements with a margin of at least twenty centimeters. You will be able to trim off all unnecessary parts when the actual installation of the PVC window sill is carried out. Well, the low tide, accordingly.
Once the design has been ordered and deadlines have been agreed upon, preparation can begin. Of course, you can free the window opening from the old frame only immediately before installing a new double-glazed window. There is no need to explain that it is impossible to sit in a windowless apartment for a week. The installation time for a PVC window, as we have already mentioned, is about three hours for specialists. You may be busy all day without any experience, but old frame need to be removed, of course, only before starting the installation of a new one. But you should prepare everything necessary for the process in advance.

So what will you need?
Tools and materials
When installing a PVC window with your own hands, the craftsman should have a certain and, most importantly, mandatory set of tools and materials, without which the installation process will not be possible. Therefore, you should be concerned about purchasing:
- Drills.
- A mounting gun, which will be needed when carrying out the procedure for foaming seams.
- Construction level.
- Chisels.
- Rubber mallet.
- Stapler.
- Hacksaws for metal.
- Professional polyurethane foam.
- Water vapor barrier tape.
- Construction screws, the length of which must be at least 12 mm.
- Laminated foil hydro-moisture-vapor-proof tape.
This is the basic set that is required when easy installation PVC windows. If you plan to install a structure using them, then you need, naturally, to take care of purchasing them. It is worth paying attention to their strength. It is advisable to buy fasteners made of thick metal, since PVC windows, which are quite heavy, will still be installed, and not some light suspended structures.

Preparatory procedures
So, the new double-glazed windows have been delivered to you, which means you can begin preparatory work. First of all, you need to clear the room of furniture as much as possible. Installing a PVC window with your own hands is a procedure that requires availability large quantity free space, so we remove everything possible from the room. After which you can begin to dismantle the old structure. Naturally, it is quite possible that PVC will be carried out in a newly built house with new window openings. In this case, we naturally omit this stage. However, most often home craftsmen are interested in how to install a PVC window instead of a worn-out wooden frame. And for them, the information presented below will be extremely valuable. Although there is a statement that it is much easier to break than to build, nevertheless, everything must be done wisely so as not to damage the window opening. By the way, it will suffer quite a lot even without this, so try to carry out the dismantling procedure as gently as possible.
Removing the old window
If the wooden structure is so dilapidated that the glass is literally almost falling out, then they must first be removed. To do this, it is enough to first remove the beads holding the glass. If it is still quite strong, then you can try to remove the existing doors along with the glass from their hinges. However, be careful. It’s better to get rid of the glass, so as not to accidentally damage your skillful hands. As a result, the window should have a frame without sashes and a window sill. Arm yourself with a hacksaw or, even better, a grinder equipped with a concrete circle, and saw through the old frame in several places. Then use a pry bar to remove it piece by piece. As a result, a window sill will remain. Do the same with him. First cut it out, and then break it out. The problem can be caused by a window sill made not of wood, but of concrete. In this case, of course, you will have to tinker. And the best way to deal with the problem is a jackhammer. If you don’t have the latter, use a grinder and a hammer drill.
After the old window is removed, carefully inspect the opening. Remove all protruding pieces of reinforcement and fragments of plaster from it. In general, make sure that, despite its somewhat unsightly appearance, it will reliable basis for a new design. And, of course, remove all dust and dirt.

Preparing a new window
Professionals install PVC windows almost always without disassembling them. Which is understandable, because they already have considerable experience. It is better for the home craftsman to play it safe and remove the opening sashes from their hinges, and remove the double-glazed windows themselves from the blind ones. Many people are afraid of this procedure, however, there is nothing complicated about it. To remove the sash, you just need to remove the pin located in the top hinge. To remove it, you only need to have pliers (picked it up and pulled it out). And then remove the sash from bottom loop. As for glass, there are no difficulties here either. It only seems like a PVC window at first glance monolithic design. In fact, it contains exactly the same glazing beads as wooden ones. This is a plastic frame located on top of the glass. You just need to pick them up with a knife and push them out of the grooves. Then take out the glass.
Of course, it is not always necessary to install large structures. In private homes, sometimes a small single-leaf window is replaced. In this case, you don’t have to worry and start installing it without disassembling it.
After the window is prepared, you need to remove the protective film from the outside. All. You can proceed directly to installation.
Types of installation
There are two of them. The simplest is to attach the frame directly to the opening using dowels. The second is installation using anchor elements, which are first mounted to the inside of the frame and then attached to the opening. Professional craftsmen in some cases they combine both presented methods, which does not contradict the requirements of the technology. We will try to talk in detail about both options.

Technology
First, construction wedges are laid out on the lower surface of the opening, that is, in the place where the window sill will be located. The prepared frame is inserted into the opening, leveled using a building level and markings are made. That is, they mark on the wall itself the location of either holes for dowels or mounting anchors. Then the frame is removed. Further, the algorithm of actions depends on the selected installation method. If you plan to fasten with dowels, then at the place of the marks, drill a hole of the appropriate diameter for them. In cases where installation using anchor plates is envisaged, professionals recommend first hollowing out recesses for them, and only then drilling holes for self-tapping screws. Why is this necessary? Yes, so that these same plates do not protrude very much above the surface of the slopes. If this happens, it will significantly complicate the finishing process.
When everything is prepared, the frame is reinserted. Just before this you need to glue it on the sides with hydro-vapor-proof tape. Then the frame is secured on the sides with construction wedges and carefully leveled. After which they are finally secured (either with dowels directly or with self-tapping screws) anchor fasteners). Moreover, experts do not recommend over-tightening these elements. It’s even better if the head of the anchor or dowel protrudes a millimeter above the surface. As soon as it becomes clear that the structure is strong and exactly level, the removed glass and sashes are returned to their place. After which, using polyurethane foam fill the gaps on the sides and top, not forgetting to remove the wedges.
As for the foam itself. It should be filled carefully so that there are no voids left. However, it is not recommended to do this in excess. Therefore, it is best, especially considering that this is the debut of a home master, to carry out this procedure with short breaks. We filled half a meter and waited a bit, at least twenty minutes. Foam tends to expand over time. And if you made a mistake the first time, then the next time it will be much easier to regulate its supply.
On the outside, after the installation of the window is completed, a drip lining is installed. For the same foam. And for greater confidence, they also screw it with self-tapping screws to the construction wedges, which, as you remember, remained with us at the bottom of the structure. As for the window sill, first it is measured in length and the excess is cut off. Then they are inserted under the bottom edge of the frame. It is enough to place the window sill under the window just two or three centimeters. The bottom of the window sill is foamed.
Important! If there is a very large gap between the window sill and the lower edge of the window opening, then it is not recommended to fill it all with foam. It is best to lay wooden blocks. Or even bricks. And after that, secure the structure with foam, not forgetting, of course, to level it.
At this point the installation process can be considered complete. Now it’s better to forget about the double-glazed window for a day and not touch it, so that by slamming the sashes of the new window for no reason, you won’t damage the integrity of the structure. After which you can begin removing excess foam and finishing the slopes.
Installation of PVC window in a wooden house
There are some nuances here, which are due to the fact that wooden buildings, due to the characteristics of the material from which they were built, are capable of shrinking. Logs are able to practically move when there is a temperature difference, contributing to the deformation of window and doorways, walls, etc. Which can cause all sorts of flaws to appear in double-glazed windows. It is for this reason that their installation is not carried out at all in the first year after construction. PVC windows in a wooden house, in addition, are mounted not directly in the window opening itself, but in special design. It's called casing. Simply put: first a special wooden frame from well-dried material. It is then inserted into the window opening, aligned and secured. After which a PVC window is installed in it. This will reliably protect the glass unit from deformation and defects. Which, you see, is very important, especially when you consider the cost of PVC windows. Prices even for the most simple designs, although not exorbitant, are still impressive - on average, a small window costs about two hundred dollars. And under such protection the window is not afraid of any shrinkage. The only thing that needs to be taken into account is that experts recommend leaving a larger gap between the window and the casing - at least 5 centimeters on each side. In all other respects, the process of installing a double-glazed window is the same as described above.

Installation of PVC windows on the balcony
Balcony glazing also has some specifics. If a complete structure is inserted into the window opening, then on the balcony the PVC frame consists of several parts that need to be fastened together. This is done using anchor slats, and some experts additionally recommend lubricating the joints liquid nails. Since the lower part of the windows is installed directly on the railing, before installation it is necessary to carefully check their integrity and strength. And, if necessary, carry out the necessary repair work. After this, a frame is constructed from wooden beam, firmly securing it around the entire perimeter of the balcony. Then the visor is attached to the top from the outside. Next, PVC windows are installed, which are attached directly to the beam. First, they install the front group, after which they move on to installing the side ones. As for the fastening method, use any of the two described above at your own discretion. The only thing that needs to be taken into account is that it is better to make at least four fastening points on the sides, and at least three on top per window. The gaps are also foamed, after which a drip lining is installed on the outside, and a window sill is installed on the inside. As you can see, everything is quite simple.
Conclusion
We tried to tell you in as much detail as possible about how to install a PVC window in a concrete opening, in a wooden house and on a balcony. As you can see, there is nothing complicated in the procedure. If you have skillful hands, it is quite easy to deal with. We hope that now, after reading you detailed instructions, the installation process will be easy and quick.
In this article I will tell you in detail how to install plastic windows with your own hands. I will give some instructions for installing windows, which includes dismantling the old window and all the details of how to properly install plastic windows in an old or new window opening.
Does it make sense to install plastic windows yourself?
I’ll say right away that there is nothing complicated about how to install a plastic window yourself. This does not require special skills or expensive professional equipment. The technology for installing plastic windows is quite simple and consists of dismantling the old window and installing a new one. In terms of time, dismantling an old window takes from 30 to 90 minutes, and installing a new plastic window in its place takes on average another 2 hours (an average window up to 2x2 m in size). In total, it will take you 2.5-3.5 hours to replace one window. Agree, this is not much. So, if you wish, in approximately one weekend, you can replace the windows yourself, changing 2-3 windows a day. The savings will be about $40-60 per window. This is how much window replacement services cost today. Sometimes the price for installation is set as a percentage of the cost of new windows and amounts to different regions and companies from 10 to 40% of the cost of new metal-plastic windows. Dismantling the old window and delivering a new one, as well as finishing the slopes, if you order installation of new windows from them, are most often done free of charge.
If you nevertheless decide to entrust the installation of windows to builders, then below I will list the guarantees that you have the right to demand:
- if you buy windows yourself not from installation organization, then you can only be given a guarantee on: seams, their filling (foam, silicone), verticality and horizontality of the corresponding parts and the operability of the window for about a year after installation;
- if you buy windows at the same place where you order installation work, then you will also be provided with a warranty on the fittings, on average it is 1 year, maximum 3-5 years for luxury expensive windows.
When you install windows yourself, you have the right to request a warranty on the fittings from the organization where you buy the windows. And the responsibility for the seams and their filling remains with you.
I will say one thing for sure, if you have one free weekend, hard work and a desire to save money, then following the recommendations that I will describe below, you can replace the windows in your home no worse than any installation team. Moreover, the word “crew” is applicable to the installation of windows, which is very conditional. Since, in fact, the installation is carried out by 1 person, and another one simply supplies the tools and holds the window at the right moment.
Correct measurement of a plastic window
To order plastic windows from the seller, you need to make preliminary measurements.
To do this, you first need to determine what kind of window opening you have - with or without a quarter. For clarity, in the figure below I show a schematic view of the opening with a quarter (A) and without (B).
Scheme of a window opening with and without a quarter
We measure windows without a quarter
Installation of windows without a quarter occurs as follows. If your house is new, then the windows are installed in an empty window opening. And in order to order a window, you need to subtract 5 cm from the vertical size of the opening - this will be the height of your window. And subtract 3 cm from the horizontal size of the opening - this will be the width of your window. Subsequently, when self-installation These 3 cm of windows will be filled with polyurethane foam (1.5 cm on each side of the window). And 5 cm is 1.5 cm from the top of the window to fill with polyurethane foam and 3.5 cm to the window sill under the window.
You also need to take measurements of the length and width of the window sill and the external ebb and add at least 5 cm to these dimensions so that the window sill “crashes” a little on the right and left into the wall. For an inexperienced installer, you can take 20-30 cm as a reserve; the excess is cut off during installation. In general, window sills and ebbs come in a standardized width (10, 20, 30, 40, 50, 60 cm) and length (up to 6 m), but in any case you must provide minimum dimensions so that they bring you the most suitable window sill and ebb available.
We measure windows and a quarter
We measure the size of the window opening horizontally between the quarters at the very bottleneck. Add 3 cm to this size (1.5 cm on each side of the window). This will be the width of our window. And vertically we simply measure the distance from the bottom of the opening to the upper quarter, we do not add or subtract anything to it. This will be the vertical size of our window. We measure the window sill and ebb in the same way as in the version of the opening without a quarter.
Thus, we get 6 sizes:
- window height;
- window width;
- window sill length;
- window sill width;
- tide length;
- low tide width.

Plastic window sizes
If your house is not new, and window opening If the old window is still installed, measurements are taken in the same way. Only for the window opening, you take the outer dimensions of the window frame, since it will need to be dismantled.
When ordering a window, be sure to check whether the package includes:
- windowsill;
- Plugs are provided for plastic window sills. When ordering them, you must indicate what the width of the window sill (overhang from the wall) will be. There are 300 and 600 mm, but this is the total length, this includes two ends on one leg, and if, for example, the total length of the overhangs does not exceed 300 mm, then a plug will suit you - a 300 mm plug;
- installation profile (also known as mounting profile, sweet clover, heel, window sill profile, etc.);
- fastening elements for windows - anchor plates.
If not, they must be ordered separately.
Also, when ordering a window, in addition to its dimensions, you will also be asked such important characteristics, How:
- window profile type: 3, 4 or 5 chamber;
- type of double-glazed window: 1, 2, 3-chamber;
- window opening method: blind, with opening, tilt-and-turn with ventilation, tilt-and-turn with ventilation and micro-ventilation.
Methods for installing plastic windows, their pros and cons
Today, there are two ways to install metal-plastic windows: installation of windows with unpacking and installation without unpacking the window.
.png)
Diagram of a plastic window
So, the method of installing a window with unpacking involves preliminary disassembly of the window: the glazing beads are removed, the double-glazed windows are removed from the frame and put aside while the window frame is being installed, then the frame is attached to the wall through dowels, after which the double-glazed windows and glazing beads are installed back.

Installation of a window with "unpick"
Installation without unpacking does not require the removal of double-glazed windows and glazing beads, since the frame is not attached to the wall through and through, but with the help of fasteners pre-fixed on its outer surface.

Installing a window without "unpacking"
At the same time, the unpacking window installation method has several disadvantages.
For example, installation with unpacking sometimes leads to fogging of the glass unit during operation. Removal and reinstallation glazing beads, especially without such experience, is often reflected in their appearance (visible scratches, chips). During the installation of windows, double-glazed windows must be placed in a place that is safe for their integrity, otherwise they can be accidentally broken, especially if left near the installation site. The installation method itself is more labor-intensive and takes longer than installation without unpacking (on average, installing each window will take 30 minutes longer, and if you are installing plastic windows for the first time, then about 60 minutes).
Installing plastic windows without unpacking does not have the disadvantages listed above, since the double-glazed window does not need to be removed from the frame.
Now, regarding the strength of the fastening. The unpacking method is considered more durable, especially if you fasten the frame right through to the wall with large, long anchors. Therefore, it’s worth stopping at if:
- You plan to install windows on the 15th floor of a multi-story building and above. On such high floors there is a lot of windage and gusts of wind, especially if the house borders on lower buildings. Below 15 floors you don't need to unpack the windows.
- Your windows are very large (2x2 m or more), then it is better to choose the unpacking or combined method of fastening. Balcony block Can be attached without unpacking.
In private houses, where windows are usually installed in standard medium sizes, and the number of storeys rarely exceeds 4 floors, of course, it is better to choose the method of installing metal-plastic windows without unpacking. The fastening strength without unpacking will be more than enough.
And given that our site is dedicated to issues of private construction, then we will analyze in detail a method of attaching a plastic window, which is more suitable for low-rise construction - without unpacking.
Window installation tool
- screwdriver;
- level;
- spray foam gun;
- polyurethane foam at the rate of 1-3 cylinders per 1 window (it’s difficult to say exactly, as it depends on the size of the window and the filling of the cylinder);
- perforator;
- silicone gun;
- set of hexagons;
- jigsaw;
- stationery knife;
- pencil;
- roulette.
Sequence of installation of plastic windows
In order to understand how to install a window correctly, go to I will briefly list the main stages of installation, after which we will dwell in detail on the main stages:
- dismantle the old window (with a window sill, if necessary);
- We prepare a new metal-plastic window for installation;
- we apply markings to the window frame in places of subsequent fastening;
- We attach fasteners to the window frame;
- we make recesses in the window opening in the places where the fasteners will be attached;
- We level the plastic window;
- we attach the window to the window opening;
- we attach the ebb (it can also be mounted at the very end);
- pre-adjust window fittings;
- foam the gaps between the frame and the window opening;
- install a window sill;
- We make final adjustments to window fittings.
Removing the old window
- On blind windows, remove the glazing beads, then the glass. On opening windows, remove the sashes from their hinges. If the glass in the sashes holds tightly, then the sashes can be removed directly with them. If the windows are very old, the frames move diagonally, then for safety reasons it is better to remove the glass from the sashes first.
- We make cuts in several places of the frame. For this it is better to use a regular saw. Sometimes for such purposes they use a grinder with a circle on concrete (this will produce a lot of smoke). Very important! In this case, it is categorically impossible to cut with a regular circle on metal, as it can jam or even break. And considering that the disk spins at an average speed of about 7000 rpm, this is very, very dangerous. It is also strictly forbidden to insert a disc with teeth for wood into the grinder.

Making cuts when dismantling an old wooden window frame
Then we take it out piece by piece with a crowbar, a hammer drill with a spatula attachment, or other available tools.

Dismantling an old wooden frame using a hammer drill and a crowbar
Sometimes the wooden frame is left if it is in good condition. But it is better to dismantle it and attach it to the wall material. Then the size of the light window will be larger, and the fastening will be more reliable than to wood, and it will rot wooden frame over time it won't.
- Dismantling old window sill. If it is wooden, then we treat it in the same way as with a wooden frame: we make a cut and take it out piece by piece with a crowbar. If it is concrete, then we break it with a jackhammer, if there is such a tool, if not, then with a hammer and a crowbar or, again, with a grinder with a circle on the concrete. If your window sills are concrete, in good condition, and they suit you, then you can leave them. But it is important to remember that a plastic window sill is “warmer”. Also, if you leave the old window sill, it almost always remains big gap between it and the window frame, and even if it is sealed with a mixture using a mesh, cracks are inevitable. In this case, there is only one way out - to cover the top of the window sill with tiles.
- We clean the window opening from debris and dust.
Preparing a plastic window for installation
If the window is opening (not fixed), then during installation, the window must be in the closed position. This is very important, because if the window is open, for example, for ventilation, then the foam, which we will later fill the space between the frame and the window opening, will bend the frame in a semicircle. The window must remain closed for at least 12 hours after foaming. Then you can open it. To ensure that the window is definitely closed, it is advisable simply not to install the handle until the installation of the window is completed. Otherwise, one of your household members may unknowingly open the window when you leave for a couple of minutes. If there is no handle, then there will simply be nothing to worry about.
Do not remove the protective tape from the surface of the window until the window installation process is completed, and if you are finishing the slopes, then until the finishing work is completed.
Installation of a plastic window
- We apply markings to the window frame in the places of subsequent fastening. Fastening is carried out on all 4 sides of the window frame every 70 cm. Sometimes they are fastened less frequently, but we do not recommend more than 100 cm. The indentation of the extreme fastener from the corner of the window frame is usually made in the range of 5-15 cm.The only thing is that you don’t have to attach the frame from below if you have a window with a stand profile.

Diagram and photo of the appearance of the stand profile
- We attach fasteners to the window frame. The fasteners are attached to the window frame in such a way that the self-tapping screw is secured in the metal located inside the frame (a bent metal channel). For this purpose, it is better to take special screws - for metal (diameter 4 mm). They come with a drill at the end. If you use regular self-tapping screws, then first you need to make a hole in the frame with a drill with a diameter of 4 mm (4-5 cm long), and only then you can fix it fastener using a regular self-tapping screw with a diameter of 5 mm.If the windows are large (2x2 m or more), then the drill is 8 mm in diameter and the self-tapping screw is 12 mm in diameter.Special anchor plates can be used as fastening elements. Sometimes they are also mounted on U-shaped drywall hangers.
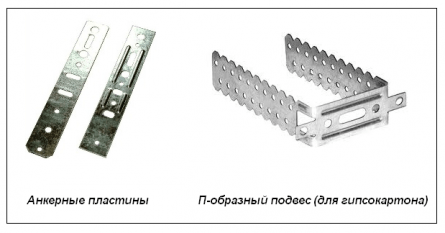
Fastening elements for installing a window into a window opening
But their cost is approximately the same - from $0.05 (for wholesale purchase) to $0.15, and the thickness of the metal is often different: the anchor plate is usually 1.1-1.5 mm thick, and the U-shaped suspension from 0.5 to 1 mm. The thicker the metal, the better, of course.

Fastening elements for a plastic window made from U-shaped hangers
- We make recesses in the window opening in the places where the fasteners will be attached. To do this, we insert the frame with fasteners already attached to its surface into the window opening. In those places where the fasteners will be attached to the opening, we knock out recesses according to the size of the fasteners and to a depth of 2-4 cm (to the wall - brick or stone). We will drown the fasteners in them. We do this so that it will be easier to finish the slopes later. No need to add an extra layer plaster mortar to hide the fasteners.

Recesses knocked out in the window opening for fasteners
Important: If you have a window without a mounting strip, then when inserting it into the opening, you need to raise it to the height of the window sill, so that later the window sill can be placed under the frame, and not attached to the joint with the window frame. To do this, place blocks of wood, pieces of foam plastic or brick under the frame. If the window is mounting plate, then there is no need to do this. The mounting strip just raises the window frame to the height of the window sill. There is no need to attach the mounting strip to the frame; it is usually supplied already attached.
- We level the window. To do this, we place, for example, wooden wedges (blocks of the required size) under the frame in the right places. The wedges are always located strictly under the transverse parts of the frame: under the horizontal part along the line of the vertical ones, and vice versa. We place the wedges in the following sequence: First, the lower two, which will expose the lower edge and, accordingly, the upper one to the horizon.At this stage it is convenient to temporarily secure the top anchor plate to prevent the window from dangling. Then two on top that will secure the frame up and down. And only then, the remaining wedges left and right, and always on both sides, both below and above the window. If there is an impost, then it must also be wedged, and it is also necessary to control that everything vertical racks stood in the same plane. The longest part of the installation is setting up the wedges. As a result, the frame should be level both vertically and horizontally. This work is easier to do with two people: one holds the window, the other places wedges under the frame.

Installing a window by level
- We attach the window to the window opening. After we have the window perfectly level, we can finally fix it in the window opening. Windows are usually secured with dowels, sometimes with anchors. Fastening with anchors is considered more durable, but also more expensive. So the choice is yours. I will say one thing - a dowel driven into concrete can withstand a load of 60 kilograms. So in this case, as for me, it is more than enough. Dowels are used with a diameter of 6-8 mm and a length of 75-80 mm. For fastening to wall materials such as hollow brick, shell rock and foam concrete, anchors with a diameter of 6-8 mm are used. For fastening to wood - self-tapping screws with a diameter of 8 mm.
- We attach the ebb (it can also be mounted at the very end). It is advisable to install the sill under the window to prevent water seepage at the junction of the sill with the window frame. But if there is no way to fix the ebb under the frame, then we attach the ebb to the window frame with metal screws with a diameter of 4 mm and a length of 9 mm.
- Pre-adjust window fittings. Window adjustment is done using hexagons in the area window hinges. As a result, the sash should open and close freely without touching the rest of the window. Plus, if you slightly open the door, it should not close on its own (as usually happens with a refrigerator door) or open, but should remain in the position in which you left it. Sometimes, when closing/opening a window, it may scratch in the places where the locking hardware is installed. To fix this, you just need to unscrew the screw on this element and move the element itself 0.5-1 cm higher or lower.
- We foam the gaps between the frame and the window opening.

Filling the space between the frame and the window opening with construction foam
It is very important here that the filling is 100%, without voids or interruptions. At the same time, if the gap between the window and the opening is more than 2 cm, then it is advisable to foam it several times with a break of 1-2 hours. Then the expansion of the foam is not a “disastrous” factor. And it saves foam that would have to be cut off. If windows are installed at temperatures lower than +5 degrees, then winter or all-season foam should be used. If the temperature is above + 5 degrees, then regular summer polyurethane foam will do.
After the foam hardens, it must be protected from ultraviolet radiation. Since this can already be called part of the work on finishing the slope, this work can be postponed until the finishing of the slopes. But if you do not plan to finish them at all, or if you do, but later than in a month, then it is better to close the foam immediately, since under the open rays of the sun the foam will become unusable. We close it either strong cement-sand mortar(cement: sand - 1:2), or tile adhesive (for example, Ceresit SM 11), or with a special tape PSUL(vapor permeable self-expanding sealing tape). The only thing is that the tape is quite expensive (about $3 per sheet), so the first two options are more often used.
Window sill installation
- Usually the window sills go standard length and width, i.e. with a reserve in length and width. Therefore, first you need to trim it. To do this, you can use an electric jigsaw, grinder, or saw with small teeth.

Trimming the window sill to the desired level
- Then we move the window sill to the stand profile (there should be one). Then we level the window sill, placing wooden blocks, pieces of eps, brick, or even laminate cuttings under it.

Installing a window sill by level
It is better to install the plugs so that they go into the wall. And it is advisable to glue them with super glue, since acrylic and silicone do not glue them.
As a result, your window sill should be level in two horizontal directions and not sag anywhere (check by pressing with your hand). Sometimes the window sill is installed with a slight slope away from the window. This is done so that condensation that may form on the window does not flow under the window. And if you do such a slope, then it is very small, only about 3 degrees.

Load plastic window sill heavy object
If the window sill is not weighted down, the foam will bend it upward.

Blowing construction foam into a cavity under a plastic window sill
- 24 hours after foaming, cut off the remaining foam protruding from the cavity under the window sill with a regular stationery knife.
- Sometimes, due to the unevenness of the window sill, after its installation there remains a small gap between the top of the window sill and the window frame. It needs to be filled with silicone. Immediately wipe off any remaining silicone with a rag. But considering that silicone sometimes turns black over time from fungus and spoils the appearance of the window and sill, it is better to prevent the appearance of such a gap. This can be done by screwing Z-shaped galvanized plates to the window sill profile before installing the window sill. By rehearsing with trimming the window sill, you can achieve a snug fit of the window sill. Also, such plates simplify the installation of the window sill.

Z-shaped galvanized steel plates to ensure a tight fit of the window to the frame
Final window adjustment
Now you can screw the handle to the window and remove the protective tape from its surface. If you still have to finish the slopes, then it is better to remove the protective tape after finishing them.
The most common mistakes when installing windows
There are few of them, but they all ultimately affect the service life of the window, as well as the ease of its use:
- The window is mounted with glazing beads facing outwards. This error leads to the fact that you can easily and silently enter the house by simply removing the glazing beads from the window and removing the double-glazed windows.
- The window is not leveled. As a result, the window opens and closes poorly.
- The polyurethane foam is not covered with anything and is left open under the influence of ultraviolet radiation. As a result, the foam becomes unusable.

Open polyurethane foam
- The measurements are taken incorrectly, or the window is simply mounted low, and the window sill ultimately does not fit under the window. It has to be joined to the window frame.
- The window is not secured with anything, simply filling the space between the window frame and the opening with polyurethane foam. If the opening is a quarter, then this leads, at most, to the appearance of cracks on the slopes, since fastening “on foam” cannot even be called fastening. Such a connection is mobile, especially over time. If the window is without a quarter, then as a result the window may simply fall out; I am personally familiar with one such example. So it’s important to remember - foam is not fastener. The window must withstand loads without foam.
I hope that this article will help you save on installing plastic windows in your home, and also do this simple job correctly and without errors so that your windows serve you for a long time. If you decide to turn to the services of an installation organization, then it will be easier for you to understand what the builders do at each stage of installation, which will allow you to control the process competently.
Attention: All prices are for 2011.
Previously, houses were installed only wooden windows, but nowadays they produce not only wooden ones, but also.
And in the modern world, people often began to install plastic windows in their houses or apartments. So you, at some point, decided that wooden windows no longer hold heat so well, they freeze and look, let’s say, not very attractive, and for this reason you decided to replace wooden windows with plastic ones.
Installation of plastic windows is not easy, so this work is best left to specialists. But, if you are sure that you are capable of installing windows yourself or you have some experience in installing such windows, then you can install the windows yourself.
This is exactly how to properly install a plastic window, which we will tell you further.
The positive quality of installing plastic windows yourself is that you will do it more carefully than many specialized workers. Still, if you do not have the skills to install such windows and have never seen how they do it, then it is best to use the services of specialized workers.
When is the best time to install plastic windows?
Installation of plastic windows can be carried out in winter time, but only if the air temperature outside is not less than minus five degrees. Otherwise, you need to install a special heat shield.
Window measurement
Before purchasing a new plastic window, you need to take measurements of the window opening and, based on the data obtained, buy a ready-made window or place an order for the manufacture of a window. When you order a window according to your size, it will fit perfectly into the opening of your window.
The window should not be inserted tightly into the opening; there should be a small gap between the window and the opening, since it needs to expand or contract, this will depend on temperature changes.
Clearance requirements
The minimum dimensions of the gaps should be as follows:
- Window up to 1m 20 cm, the indentation should be 15 mm;
- Window up to 2 m 20 cm, the indentation is 20 mm;
- Window up to 3 m, the offset is 25mm.
When you replace a window, you must take into account that the window must fit into the window opening only a certain number of centimeters. This is necessary so that the glass unit is not in the wall and in order to make slopes.
All measurements were taken, all the nuances were taken into account and the result was required size window profile. Now you can go to the company and order a window or buy a ready-made one that suits your parameters.
Removing the old window and preparing the opening
Once you have already purchased a window and the weather allows its installation, you can install it. It is necessary to take into account that all work will be quite dusty, so it is better to remove all things or cover them with film.
After you've done everything preparatory work start dismantling the old window, and in order to remove the old window, use a chisel, pry bar and hammer.

Before installing a plastic window, it is necessary to thoroughly remove dirt from the window opening and moisten it a little.
Then you can begin preparing the window for installation.
Installation of a plastic window
Before installing the window profile, the sashes are removed from the window and the double-glazed windows are removed from the blind parts of the window. Then you need to peel off the protective tapes on the outside of the profile and install the protective caps in the drain holes. We attach the fastenings for the mosquito net using self-tapping screws.
Profile insulation
If you decide to use anchors as fastenings, then the profile is drilled through and therefore the chambers are depressurized. Attaching windows to anchors also requires more labor and skill, and for this reason such fastening is not suitable for beginners. If the profile is not secured correctly, it may move, and if it does, the window will be damaged.
But anchorage has and positive traits, for example, the structure will be durable. But negative quality mounting plates is that they do not provide good structural strength. But the mounting plates are the most easy look fastening of plastic windows. Very often, specialists use both types of fasteners.
- Usually we start fastening from the corner and make the first fastener at a distance of 120-150 mm and then make the next fastener at a distance of 700 mm. Three fasteners are installed on each side.
- Before installing the profile in the opening, you need to check all planes using a level, then use wooden blocks to lift the profile and adjust it vertically.
- It is necessary to start vertically from the top of the window opening and raise the profile from below using the materials described above. The next step the profile will be aligned horizontally. Fastening the profile in the opening from the side and from above is made from wooden blades. After you have made the alignment on all sides, you need to make a profile and if everything is in order, then you can fix it.
- If you are fixing the window profile onto mounting plates, then first fix them onto one dowel with a nail. The next step is to check the window profile using a level, and only after that the mounting plate is fixed with a second dowel with a nail.
- If the windows are attached to anchors, then through the holes that were previously made and then using a special tool, make holes in the wall and screw in the anchors without tightening them.
- The anchors are not tightened in order to check the installation level of the window and only then can the anchors be tightened, but very slowly so as not to disturb the balance of the profile. When the profile is fixed, we remove the wooden blades from the sides and top, and the lower blades remain, because they are the basis of the window profile.
How to install sills on plastic windows?
The next step of the work is the installation of the ebb.
We measure it and cut it out using metal scissors. right size, then a special tape is glued to the bottom of the frame; it is needed to protect the seam between the wall and the bottom of the window.
After the tape is glued, a layer is applied to it. A layer of polyurethane foam is also applied to the edge of the slab; this is necessary in order to ensure sealing of the ebb. The ebb should fit into the grooves of the profile and is attached with self-tapping screws.
Sealing seams
Then we close the seam between the wall and the window with polyurethane foam (first from one side, then from the other and from above). After the foam has dried, another one is glued on top of it. insulating tape. WITH inside windows, it is necessary to remove the protective tape and use special linings when installing a double-glazed window.
Use the slats to hold the glass unit, hammer the slats into the grooves and install the sash, fix it in the awnings, then fasten the handle and adjust the sash horizontally and vertically. After all the work, a mosquito net is installed.
How to properly install a window sill on plastic windows?
After all the work, we begin installing the window sill.
- First, fill the bottom assembly seam well with foam, and stick tape on top of it.
- Then they install wooden blocks on which the window sill will be attached.
- Wooden blocks must be at least ten centimeters. Also, the window sill should be tilted five degrees towards the room, and the window sill should not obscure the battery.
- It is necessary to check whether the window sill is securely attached and it is necessary to solder it from below, preferably with polyurethane foam.
As a rule, when installing metal-plastic windows, people order the installation of structures from specialized companies. It is believed that such work is too difficult for non-professional craftsmen. But in fact, installing windows yourself is not difficult at all. It can be done by people who do not have special knowledge and skills. It is only necessary to plan all stages of the upcoming work.
Before starting window installation, you need to carefully plan all stages of the work.
Basic methods of window installation
At the moment, installation of metal-plastic windows is carried out in one of two ways. This is an installation with and without unpacking the glass units.

The method of installing the system with unpacking implies preliminary disassembly of the structure. In this case, the holding glazing bead is dismantled, and the double-glazed windows themselves are removed from the frame. After this, the frame itself is mounted in the window opening. And only then the whole system is reassembled. In this case, to fix the window, craftsmen use anchor bolts that pass through the entire structure and secure it to the wall.
When installing without unpacking, this complex preparation not required. The window frame is mounted on anchor plates, which fix the structure in the window opening. As a rule, when installing metal-plastic windows yourself, it is the second option that is used. Since the unpacking method has a number of significant disadvantages:
- Removing the glazing bead without damaging it is quite difficult. And during installation, surface defects often arise: scratches, gouges, chips.
- When unpacking, the structure loses its tightness. As a result, during further use the window often fogs up.
- During dismantling, double-glazed windows often get damaged or simply break.
In addition, this installation method is much more labor-intensive than without unpacking. And as a rule, it takes much longer.
Return to contents
Advantages of different installation methods
Experts advise installing metal-plastic windows yourself without first unpacking. But besides the disadvantages, installation with unpacking also has advantages. It is believed that fastening frames with anchor bolts is much more reliable than with plates. This should be resorted to in the following cases:

- If the windows are installed on the upper floors of high-rise buildings (above the 13-15th floor). The fact is that such houses have a large windage. And sharp gusts of wind will quickly shake the window structure. This is especially true if the house is surrounded by low-rise buildings.
- If large area windows are installed (over 4 m2). In this case, you can use a combined method, when the upper edge is attached to plates, and anchors are held on the sides of the frame.
- If the walls of the house are made of unreliable or worn-out material (crumbling concrete, brick, sandstone, etc.).
IN wooden houses and on the lower floors there is no point in installing windows with unpacking. The plates will securely fix the frame, and the window will serve for many years. But whatever method you consider optimal for yourself, you will need following materials and tools:

An electric screwdriver will help securely fix all window elements.
- hammer drill or drill with impact function;
- electric screwdriver ( hand tool does not provide sufficiently reliable fixation);
- guns for polyurethane foam and silicone;
- jigsaw;
- set of hex keys;
- rubber spatula;
- sharp stationery knife.
Don’t forget to prepare measuring tools in advance: a building level and plumb line, a centimeter tape, a square. All marks that you will need to put during the work process can be made with a simple pencil or chalk.
Return to contents
Installation of a metal-plastic window
When installing plastic windows, you must follow several general rules:
- When foaming voids, the window must be tightly closed, since drafts can disturb the foam layer and the frame is deformed. The doors must not be opened for at least half a day after installation.
- Accessories (handles and locking elements) must be installed only after completion of the main work.
- Remove the protective film only when the window is completely ready for use. Otherwise, you may damage the plastic coating.
- Regardless of the type of installation you choose, the fastenings should be located along the entire perimeter of the frame. The distance between the nodes is usually 60-70 cm. But make sure that this parameter does not exceed 1 m. In this case, the first fastener is installed approximately 10 cm from the corner of the frame.

Following these simple rules will help you reliably install a metal-plastic window.
Any installation begins with markings. In this case, the “beacons” must be applied simultaneously to the opening of the window frame and to the frame itself. Be sure to check your calculations. Because sometimes the consequences of an error are very difficult to eliminate. If the window design provides for the presence of a support profile, then fastening units at the bottom of the frame are not needed.
Return to contents
Fixing the frame in the window opening
First, all fasteners are installed directly on the frame. If you are using an anchor plate, make sure that the screw fits into metallic profile structure and was securely fixed in it. Therefore, purchase specialized fasteners in advance that are designed to work with metal. They are equipped with a drill (drill) at the end of the tip, which allows them to be securely fastened in the “socket”.
If you prefer ordinary screws, then you will have to first form holes for them. In this case, make sure that the drill is 1 mm smaller than the fastener. To install metal-plastic windows, self-tapping screws with a diameter of 4-5 mm are usually used. If the frame is large, then it is wiser to take larger screws (up to 12 mm).

Diagram of the location of fasteners on a metal-plastic window.
Specialized anchor plates are ideal for fastening. But some craftsmen believe that they can be replaced with standard aluminum suspended profile, which is commonly used for drywall. But such a mounting unit turns out to be much less reliable, and these fasteners cost approximately the same.
Next, you need to determine the exact location of the window. Small wooden wedges will help you with this. different thicknesses. In this case, it is best to adjust the position of the window by knocking out the wedges only horizontally. If your window is not equipped with a mounting strip, then the frame must be raised to the level of the window sill, placing scraps of timber under it. Otherwise, you will not be able to fit the window sill under the frame, and you will have to butt it.
The window is aligned in the following order:
- First install the lower 2 wedges.
- Then the top two.
- If necessary, the frame is leveled by driving wedges from the sides.
Always check that the window is positioned correctly using a level. If you make a mistake, it will be quite difficult to correct it in the future.
Despite all the apparent complexity, installing plastic windows with your own hands is a fairly simple process. Installation of PVC windows in a private house (and not only) can be done independently. The technology for installing plastic windows, in fact, is a set of fairly simple operations performed in a certain sequence. For ease of perception, when presenting the material, I will adhere to this principle.
In this article we will look at the technology of installing PVC plastic windows into an existing window unit.
The main feature of a wall structure made of wood is the settlement of the walls. Wall settlement for everyone specific house depends on many factors, for example, on the degree of humidity of the material (wood) at the time of installation of the log house, on the quality of the caulking work performed, on the quality of assembly (adjustment of mating surfaces) of the log house itself, etc. Shrinkage of walls is a rather lengthy and individual process each specific building. Therefore, before installing windows in a log house, or indeed making any Finishing work, it is recommended to wait at least 1 year for the log house to settle. This is due to the fact that the most intense shrinkage occurs in the first year or two after the installation of the log house. But even after this period, shrinkage continues, although not so intensely. Therefore, the installation of windows in wooden log houses is carried out with the obligatory use of a window frame, which protects the window frame from possible mechanical influences during wall shrinkage. This issue will be covered in more detail in.
In the meantime, you need to keep in mind the following circumstance:
- Under no circumstances should a plastic window be installed directly into the frame of a house.
Preparatory part
Preparation for window installation includes:
- Preparation (purchase) necessary tools and materials.
- Preparing the window itself.
- Preparing the window block
Since the technology for installing plastic windows is quite specific, the set of tools and materials used is also specific, and without it it is impossible to carry out all the work correctly. There may be a problem with purchasing necessary materials. For example, I bought something in stores, and what I couldn’t find, I bought for cash from workers (installers) of window companies. They supply the material as consumables and there were no problems with purchasing. So, installing plastic windows with your own hands will require you to:
Tools
- (household spray cans definitely won’t work)
- Hydraulic level (at least 7 meters) to level the horizon of the common line of windows along the wall (facade) and/or adjacent walls
- (if you make the plums yourself and don’t buy ready-made ones)
Materials
- Professional (gun-mounted) polyurethane foam in cans - for the central layer assembly seam
- Hydro-vapor-proof tape - to protect the central layer of the assembly seam (foam) from moisture vapor, from the room side
- Hydro-vapour-permeable tape - to protect the central layer of the assembly seam (foam) from water from the street side, but capable of conducting steam (removing moisture out) from the seam itself
- Construction self-tapping screws - for fastening the window frame to the window block, length - 120 mm, diameter - 6 mm (with anti-corrosion coating)
- Hydro-vapor-moisture-proof tape, laminated with foil, to protect the central layer of the assembly seam in the lower part of the window in the window sill area, for installation from inside the room;
- Construction mounting wedges
Additionally
- Rolled steam, noise and moisture insulating material
- Galvanized iron sheets (for making external window drains)
Thus, for quality and correct installation windows, you need to prepare tools and materials. As an illustration, the photo shows some of the tools and materials needed to install windows.
The preparation of the window itself is as follows.
It is no secret that in the design of a window, the stand (bottom) profile is the weakest point in terms of thermal conductivity, which subsequently, during installation, will also be drilled to attach the drain (which will lead to a further deterioration in thermal conductivity parameters). Therefore, in order not to deteriorate the heat-insulating properties of the window, it is advisable to foam it, especially since this does not require time and large expenses (see photo).
You need to foam the entire internal volume of the bottom profile, to the full depth (using nozzles on mounting gun). It is better to perform this operation on the day before installation, so that the foam has time to polymerize.

This operation is not provided for by GOST; window companies also do not practice foaming the bottom profile.
After dismantling the old frames, it is necessary to prepare the existing window block for the installation of new windows. Here you need to perform three operations:
1. Inspect the window block for its condition; if there are damaged areas (rot), remove (plane, cut down), treat the block with fire protection, since another such opportunity will not present itself soon.
2. Next, make markings on the window block, the window mounting plane. For this you can use like building level, and plumb. The last one is even better. From point of view thermal regime When working on a window structure, it is recommended to install the window along the depth of the window frame opening, at a distance equal to 1/3 of the frame width from the street. On the other hand, if you plan to do external insulation of the house after installing the windows, then you can shift the window installation plane closer to the outside. Due to this, you will gain in the width of the internal window sills (aesthetics, functionality), and the design of the window and the installation seam (due to subsequent insulation of the wall) will not lose its heat-shielding functions.
3. Since we are talking about installing a window in wooden frame(accordingly, the window block is also wooden), it is important to take into account the following circumstance. Wood is a breathable material; accordingly, it both absorbs (into itself) and releases moisture. If you do not take additional measures, limit yourself only to the requirements of GOST, which states that the inner layer of the installation joint (foam) must be protected both from inside the room and from the street, then the inner layer of the installation joint (taking into account the wall material) can be moistened from the side internal surfaces the window block itself. To eliminate the possibility of moisture entering (leaking) into the foam from the adjacent surfaces of the window block, it is necessary to install an additional layer of vapor and moisture insulation around the perimeter of the window block itself. For these purposes, I used rolled insulating material along the bottom side of the window block and polyethylene foam tape around the perimeter of the block in the plane of installation of the window in the window block.

This operation is not provided for by GOST.
PVC window installation technology
Preparing a PVC window for installation. After delivery of the window to the customer, the windows are assembled, as shown in the photo (frame, double-glazed windows, glazing beads, protective film).

If you enlarge the label, you can see that energy-saving glass is used in the window design. The bottom line is deciphered as follows: 4M1 (glass class M1, thickness 4 mm), 10 - the distance between the glasses of the first chamber (in mm), 4M1 - the same as above for the next glass, 10 - the same as above , but between the second and third glass (in mm), 4 LE - energy-saving glass 4 mm thick.
Thus, the decoding of the double-glazed window formula will be as follows: a two-chamber double-glazed window is used (three glasses with a thickness of 4 mm: 4M1+4M1+4LE), with energy-saving glass, the total width of the double-glazed window is 32 mm (4+10+4+10+4).
To attach the frame to the window block, it is necessary to remove and dismantle the double-glazed windows.
Remove glazing beads starting from more long sides windows, then assemble from the short sides - in reverse order. How to shoot? Place the chisel at the joint between the glazing bead and the frame in the central part of the glazing bead, and with gentle blows on the handle of the chisel, knock the glazing bead out of the groove. Remove sequentially all the glazing beads holding the glass unit in the sash.

If there is an opening transom in one of the frame doors, the double-glazed window does not need to be removed; It’s easier and faster to remove the transom assembly itself.
After the operations are completed, only the frame itself will remain.
To attach the frame to the window block, you need to mark and drill holes on the side and top sides of the frame with an electric drill (when you drill, do not forget about the presence of steel reinforcement in the profile: the drill must be for metal). The number of holes and their location depend on the size of the window, but the outermost holes from the corners of the frame should be located at a distance of at least 15 cm. The corners of the frame should not be rigidly fixed, since the window material noticeably changes its linear dimensions with temperature changes.
It took me 6 self-tapping screws to install each window measuring 90x120 cm. After removing the beads, removing the double-glazed windows, drilling holes for the screws, the frame is ready for installation.
Installing the frame into the window block. For mechanical fastening frames, I used construction screws (self-tapping screws), as the simplest and affordable way. Fastening on anchor plates must be used if there is a thermal break in the structure of the window block, when there is no possibility of mechanical fastening of the frame in the installation plane.

The photo below is a view of the same frame from the street.

Despite the preliminary marking of the window installation plane, all subsequent operations must be done very carefully. Pre-align the frame in the installation plane on the mounting wedges, check with a level the horizontal position, vertical position of the frame and the deviation of the frame in the plane.
The horizontal position of the frame is achieved by adjusting the height construction wedges, by shifting them relative to each other, the horizon itself is checked by the building level.

If everything is aligned correctly, using self-tapping screws and a screwdriver, secure the frame in this position without screwing in the screws along the top side of the frame.
Do not tighten the screws immediately until they stop, do not tighten them, the screws are about 1 cm each. Why? Firstly, the frame will not fall anywhere. Secondly, after preliminary fastening the frame, you need to check the uniformity of the gaps on the sides (you may have to move the frame to the right or left). Thirdly, no matter how strong the window structure is, self-tapping screws of the specified sizes can make a barrel-shaped frame from a rectangular frame. After the frame is installed, the uniformity of the gaps is considered satisfactory, the horizontal and vertical of the window is maintained, fix the upper side of the frame with self-tapping screws, carefully tighten the remaining screws on the sides of the frame and check the horizontal and vertical of the frame again. It is already pointless to check the inclination of the window in the installation plane after attaching the upper screws, but it is not superfluous to make sure that the frame is not barrel-shaped.
We put the double-glazed windows in place. The operation is exactly the opposite of removing them. Do not forget about the reverse sequence of installing beads. First short, then long. It is better to fix the final position (knock) of the glazing beads with a rubber hammer.
After mechanically fastening the window frame to the window block, it is necessary to replace the previously removed glass unit and transom. These operations are performed in reverse of their removal.
Assembly seam construction.
Having read “smart” recommendations (I had never dealt with windows before), when installing the first window, I placed protective tapes on the frame before attaching it to the opening. But, since the tapes are sticky, I had to struggle with them a lot. Next, I installed all the protective tapes on the frame after fixing the window and installing the double-glazed windows in place. It turned out to be much more convenient and practical.

So, the window is installed and fixed in the window block.
We cut it off (with an overlap) and install a vapor- and moisture-proof tape from the inside of the room along the perimeter of the window frame.
It is necessary to take into account when installing the tape that at the junction of the tapes, the tape located above should be overlapped with the bottom one, so that in the event of condensation, moisture does not collect at the junction, but rolls down. After installing the tapes from inside the room and fixing them, there should be no leaks between the window frame and the wall opening so that when foaming, the mounting foam does not come out into the room. I additionally secured a beam wrapped in plastic film along the bottom side.
We install protective tape on the outside. Here we do almost the same as from the inside, but we do not fix the tape, but, on the contrary, we move it into the plane of the window in such a way that it does not interfere with the subsequent foaming of the central layer of the seam.

- Foaming. The foaming technology is usually described in some detail on the can of polyurethane foam itself. I draw your attention to something that, as a rule, window companies do not do. For high-quality foaming, it is necessary to spray the foaming areas with water, before foaming and after foaming. The meaning of this operation is that the polymerization process of the foam occurs due to atmospheric moisture. Lack of moisture leads to poor quality polymerization. Do not try to fill the cavity of the entire assembly seam with foam from the first go; firstly, this can be corrected later, and secondly, cutting off excess foam is an extra waste of foam, and the quality of the assembly seam will only worsen.
- After foaming the seam, spray the surface of the foam with water again and leave the entire structure in this state while the foam polymerizes.
- The next day, we inspect the foamed seam, if there are no additional work There is no need to do this, straighten the protective tape and fix it in its final position. To fix the tape, I used a spot application of polyurethane foam and a construction stapler
- We install tape with foil along the bottom side of the window to seal the installation seam where the window sill is installed. The installation of the window sill itself can be done later, for example, when finishing the window slopes.

- Drain installation. Unlike a window sill, a drain must be installed when installing a window. The drain can be either homemade or purchased. During installation, it is necessary to take into account that the drain must be attached with self-tapping screws to the stand (bottom) profile, and the protruding (overhanging) lower part of the window frame must protect the place where the drain and stand profile are connected from the ingress of atmospheric moisture and moisture flowing down the plane of the window during side rain. . After installing the drain, the space between the drain and the bottom profile of the window is additionally foamed.
- Filming protective films, which are designed to protect the profile during transportation and storage.
From the point of view of installation technology window designs, all installation operations have been completed. The assembly seam is protected from the inside and from the outside. Taking into account properties wall material we protected it from capillary suction of moisture from the walls along the perimeter of the installation joint. The base profile was additionally insulated. Installed drain.
Another question is that after installation, from an aesthetic point of view, leaving the window in this form is hardly reasonable. To complete the job you need finishing slopes, installation of a window sill, etc. But this is already beyond the scope of both the article and the GOST requirements for the installation of window structures, and secondly, there are so many finishing options and finishing features in relation to a specific option that this issue is a separate topic .


