We offer you several options for roofing from used PVC containers: Plastic tiles. To make this simple roofing covering, you need to compress plastic bottles.

If this process is carried out without slightly heating the plastic, the container will simply crack, so the easiest way is to lay the raw material out in the sun and then flatten the containers. PVC installation The installation of modules is carried out using ordinary self-tapping screws to the frame with laying of the material in several layers. From such tiles you can easily form a cone-shaped roof for a gazebo or bathhouse.

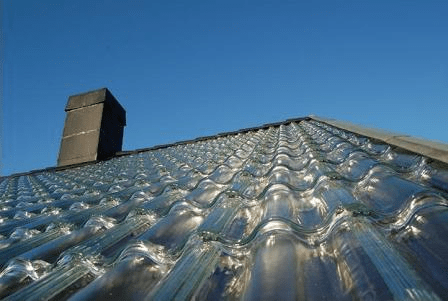
Plastic slate. From the cylindrical part of a plastic bottle it is quite easy to make something like a slate covering for a roof. To do this, you need to cut off the bottom and neck of the container, cut the middle part of the container lengthwise and in half, connect the resulting elements with PVC glue, forming a wavy surface

In order to make plastic tiles, you need to cut off plastic bottles bottom and neck, and cut the resulting plastic ring in half.

To straighten pieces of plastic, you need to immerse it briefly in hot water- but under no circumstances into boiling water. After this, you need to place the “tiles” under pressure for a day or two.

Finished parts of homemade roofing material are laid, starting from the edges of the roof and upward, overlapping. They are attached to wooden sheathing using self-tapping screws, and it is imperative to use rubber gaskets to prevent damage to the tiles.

Last, upper layer homemade roofing material is laid as follows:
· if the roof is sloping, then last layer the tiles are fastened so that the upper parts extend onto the wall, protecting the junction of the wall and the roof;

· if the roof has two or more slopes, then it is necessary to close the joint of the slopes with a number of parts, securing them at both ends of different planes of the gazebo roof.
There's a lot of talk about security these days. environment, about waste disposal, but only a few are really concerned about these problems. Many people simply do not pay attention to the attempts of the "greens" to remake the world, because in this moment It doesn't concern them personally.

However, not everyone knows that some of the waste that we successfully dump in tons to landfills could very well be useful to us ourselves.
One of these wonderful materials is an ordinary plastic bottle. Craftsmen have invented hundreds of ways to use bottles, but one of the most interesting is a roof made of plastic bottles. This way you can save a lot on your purchase. building materials. In short, an excellent roof that practically lies under your feet.

Let's look at several ways to make a roof from plastic bottles. It is advisable to select bottles of the same size, but this is not required condition.
To begin, take a knife and cut off the bottom and neck of the bottle - you get a tube. It is also cut in such a way that it turns out to be a sheet approximately 25x30 in size. We can go further in two ways.

1. Straighten this sheet, either under hot water, or by ironing it with a not very hot iron through the paper. You can also fold the sheets into a stack and place them under a press, under the carpet. After the sheets have straightened, they need to be fastened together, for example with dichloroethane-based glue. It melts plastic perfectly and will therefore connect these parts together.

You can also simply fuse them with a hot iron through thick paper. When you have several sheets of the desired size, you need to attach them using a stapler to a pre-prepared wooden frame. This will be the roof. You can take bottles different color and connect the pieces like a mosaic.
2. After the plastic tube has been cut, the sheet is still curled; it needs to be folded in half, as if unwinding it backwards, and the fold point must be well marked. As a result of this action, we will get a part that will resemble two slides.

Take the second sheet and bend it in the same way. Then we must put the second one on top of the first sheet so that we get three slides, when we add the third sheet, we get four and so on. The parts along the edge are fastened to each other using a stapler.
If you look closely, you end up with tiles made from plastic bottles. When one strip is ready, start making a second one, which you will then attach above the first one with an overlap.

Start fixing the finished strips on the roof from the bottom up, that is, starting from the edge of the roof to the ridge. It can also be made from bottles, which are also prepared and secured at the top.
As paradoxical as it may sound, plastic for the roof is literally lying under our feet. And these are ordinary used plastic bottles. It turns out they make great plastic roof. Thus, we solve two problems at once: we save our money and solve the problem of recycling plastic bottles.

· You will need plastic bottles that are approximately the same size. They need to cut off the neck and bottom so that they get a tube.
· Then you need to cut it lengthwise.
· Thus, we form a piece of plastic rectangular shape measuring approximately 30x25 cm.

There are several ways to make a roof from used plastic bottles:
· First you need to straighten the resulting piece of twisted plastic. To do this, you can use hot water, a press, or a not very hot iron (iron through a sheet of paper).
· After straightening the sheets, glue them together using dichlorethylene or a hot iron.

· So we prepare several large sheets of fused plastic, which we then attach to the roof using a stapler onto a pre-prepared wooden frame.
· If you take pieces of multi-colored plastic, you can get a mosaic roof.
In the second case, a roof made of plastic bottles is made without straightening the sheets. They just need to be bent in half in the opposite direction of twisting. Something like two slides twisting upwards is formed. We prepare the sheets in this way and fasten them with a stapler on one twisted side, making an overlap.

It is worth noting the advantages of plastic bottles:
1. Low cost. It is possible to purchase empty plastic bottles from manufacturers, but an even cheaper option would be to use already used containers. You can ask them to leave such materials for you, for example, in a cafe or with friends. This will help reduce costs for building materials.
2. Durability. Plastic bottles can withstand heavy loads and mechanical shocks.

3. Reusable.
4.Easy to use when carrying out construction work.
5. Durability. It is worth noting that, unlike other building materials, plastic bottles have a longer service life - about three hundred years. This is many times higher than the characteristics of existing analogues.

Instructions for constructing a roof from plastic bottles
There are several options for creating a roof structure using plastic bottles. It is only worth noting that it is better for work if all the material is the same size.
Preparation of material
1. Using a knife, you need to cut off the bottom and necks of the bottles to get an element that looks like a straw.

2. The resulting part should be cut. This must be done so that the end result is sheets measuring about 25x30 centimeters.
Method one
1. The resulting sheets must be straightened. This can be done using hot water, or you can stack all the sheets, placing them under a press or under a carpet. Another option would be to use an iron.
It is necessary to use a not very hot iron, and it is better to iron plastic sheets through paper.

2. When all the sheets are straightened, you can proceed to the process of fastening them together. To do this, you can use glue based on dichloroethane. Such a fastening composition will allow you to create quality connection, and working with it is quite simple. The glue will melt the plastic elements, allowing them to be held together.
3. The connection of the prepared elements can also be achieved with a hot iron, melting the workpieces through thick paper.
4. After you have prepared several sheets having right size, proceed to fastening them with a stapler. This is done on a wooden frame, which must be prepared in advance.

5. This wooden frame will be the basis of the roof. To create such a design, you can use plastic bottles of different shades. Assembling colored mosaics from pieces will make the roof more interesting.
Method two
1. This option involves using cut in half plastic pipes points The product does not need to be straightened. You will need twisted elements that need to be folded in half. In this case, if the semicircle is untwisted back, we get an even designation of the bend location.
2. After the work done, you should get an element that looks like two slides.

4. After adding the third sheet in the same way, you should end up with one more pile, that is, four. In this way the entire roof structure is filled.
5. Fastening of elements is carried out along the edge. The work is carried out with a stapler.
6. This method of making a roof from plastic bottles resembles a tiled roof in appearance.
7. Installation is carried out in strips. After installing one, proceed to the other. The second strip must be attached to the first one, overlapping it, positioning it slightly higher.
8. The finished strips of plastic construction are fixed to the roof, starting from the bottom and moving up - from the edge of the eaves to the ridge.

9. At the same time, the ridge of the roof from plastic bottles is made in the same way, preparing the elements and securing them at the top.
10. Laying the top layer plastic products carry out different ways in contrast to roof slope:
· with a sloping roof, the last layer of homemade tiles is fastened in such a way that the upper parts extend onto the wall, protecting the junction of the wall and the roof;
· if the roof has two or more slopes, then you will need to close the joints of the slopes using an additional row of parts, securing them at both ends of different planes of the gazebo roof.
· It is best to make a roof with a slope to ensure water drainage from the plastic covering.
· When straightening elements under hot water, it is necessary to immerse the product in the liquid for three to five minutes, and then put it under a press for one or two days.
· Installation work is carried out using construction stapler. But more in a quality way will be the use of an awl and nylon or cordon thread. This fastening option will ensure a longer service life of the roof, adding additional resistance to wind loads.
· The plastic covering is convenient to lay on plywood sheets, fixing the structure with self-tapping screws.
· To prevent plastic roofing material from leaking, rubber gaskets must be used.
Plastic bottles find so many uses in the hands of folk craftsmen! They are used to make complex decorations for the garden - vases, palm trees, gazebos. This material is also used to create simple scoops, as well as in costume jewelry. But one of the most interesting directions is the use of plastic bottles as roofing material. It is quite possible to build such a roof with your own hands.
 The roof of their bottle plastic has a lot of advantages
It is worth noting the advantages of plastic bottles:
- Low cost. It is possible to purchase empty plastic bottles from manufacturers, but an even cheaper option would be to use already used containers. You can ask them to leave such materials for you, for example, in a cafe or with friends. This will help reduce costs for building materials.
- Durability. Plastic bottles can withstand heavy loads and mechanical shocks.
- Reusable.
- Easy to use during construction work.
- Durability. It is worth noting that, unlike other building materials, plastic bottles have a longer service life - about three hundred years. This is many times higher than the characteristics of existing analogues.
Instructions for constructing a roof from plastic bottles
There are several options for creating a roof structure using plastic bottles. It is only worth noting that it is better for work if all the material is the same size.
Preparation of material
- Using a knife, you need to cut off the bottom and necks of the bottles to get an element that looks like a tube.
- The resulting part should be cut. This must be done so that the end result is sheets measuring about 25x30 centimeters.
Method one
- The resulting sheets must be straightened. This can be done using hot water, or you can stack all the sheets, placing them under a press or under a carpet. Another option would be to use an iron.
It is necessary to use a not very hot iron, and it is better to iron plastic sheets through paper.
- When all the sheets are straightened, you can proceed to the process of fastening them together. To do this, you can use glue based on dichloroethane. Such a fastening composition will allow you to create a high-quality connection, and working with it is quite simple. The glue will melt the plastic elements, allowing them to be held together.
- The connection of the prepared elements can also be achieved with a hot iron, melting the workpieces through thick paper.
- After you have prepared several sheets of the desired size, proceed to staple them. This is done on a wooden frame, which must be prepared in advance.
- This wooden frame will be the basis of the roof. To create such a design, you can use plastic bottles of different shades. Assembling colored mosaics from pieces will make the roof more interesting.
Method two
- This option involves using plastic tubes cut in half. The product does not need to be straightened. You will need twisted elements that need to be folded in half. In this case, if the semicircle is untwisted back, we get an even designation of the bend location.
- After the work done, you should end up with an element that looks like two slides.
- Next, you need to do the same with the second sheet. It is placed on top of the initial element. This must be done in such a way that the final structure resembles three slides.
- After adding the third sheet in the same way, you should end up with one more pile, that is, four. In this way the entire roof structure is filled.
- The elements are fastened along the edge. The work is carried out with a stapler.
- This method of making a roof from plastic bottles resembles a tiled roof in appearance.
- Installation is carried out in strips. After installing one, proceed to the other. The second strip must be attached to the first one, overlapping it, positioning it slightly higher.
- The finished strips of plastic construction are fixed to the roof, starting from the bottom and moving up - from the edge of the eaves to the ridge.
- At the same time, the ridge of the roof from plastic bottles is made in the same way, preparing the elements and securing them at the top.
- Laying the top layer of plastic products is carried out in different ways, in contrast to the slope of the roof:
- with a sloping roof, the last layer of homemade tiles is fastened in such a way that the upper parts extend onto the wall, protecting the junction of the wall and the roof;
- if the roof has two or more slopes, then you will need to close the joints of the slopes using an additional row of parts, securing them at both ends of different planes of the gazebo roof.
- It is best to make the roof with a slope to ensure water drainage from the plastic covering.
- When straightening elements under hot water, it is necessary to immerse the product in the liquid for three to five minutes, and then put it under a press for one or two days.
- Installation work is carried out using a construction stapler. But a better way would be to use an awl and nylon or cordon thread. This fastening option will ensure a longer service life of the roof, adding additional resistance to wind loads.
- It is convenient to lay the plastic covering on plywood sheets, fixing the structure with self-tapping screws.
- To prevent plastic roofing material from leaking, rubber gaskets must be used.
A bunch of various materials currently used for the manufacture of fences and fences. Periodically on construction markets new ones appear. The main disadvantage of many of them is their significant cost. At the same time, there is a material from which fencing has the lowest cost. It's about about plastic bottles. About the types of fences made from them, the intricacies of their process self-installation and will be discussed further.
The first way to use PET bottles for installing a fence is to use part of their body. To work you need to stock up on enough of this waste material and a sharp knife.
First stage of work t – removal of the neck and bottom of bottles. It will help for this simplest template in the form of a sheet of thick paper or thin cardboard.
Using a sharp knife, such as a utility knife, carefully separate the unnecessary parts of the bottles. They can be used in the future, for example, to decorate the territory of a summer cottage.
Carefully fold the resulting plastic cylinders in half to obtain cutting lines. Next, we cut each existing part into two equal parts, trying to maintain their natural radial bend.
Next stage– assembly of the fence panel. In order to obtain an imitation of slate, we will connect the halves of the bottle body, alternating convex and concave parts. The assembly process is carried out using a stationery or construction stapler. If it is not there, then we drive the staples into a soft wooden block so that they can be easily removed and bent on the reverse side.

By connecting the halves alternately we get canvases required size, which we attach to pillars or rafters using the same stapler, getting interesting option coatings at the lowest price.

Decorative greenhouse made from plastic bottles
The second option for manufacturing a fence will require fewer additional preparatory work. To install it, you just need to cut off the bottoms of the bottles. The basis of the structure will be thin round or square wooden slats, the length of which will be equal to the height of the future fence.

In order to get a fence, string it on prepared rods sufficient quantity parts so that the lower cut part fits tightly onto the upper conical part. We fasten the PET picket fence prepared in this way to the poles with nails, positioning it as tightly as possible.

For creating decorative effect You can use bottles made of colored polyethylene, alternating them, for example, in a checkerboard pattern.
Weaving a fence from plastic tape
Third possible variant Making a fence using PET bottles involves making wide strips from their body and connecting them together. Currently, the Internet contains several fairly easy-to-manufacture devices for cutting polyethylene strips. Moreover, their width can vary from a few millimeters to several centimeters. Let's talk about installing a fence made of ribbons.
Plastic strips obtained using a device or cut with ordinary scissors can be connected by several accessible ways. The first of them is welding. For these purposes, you can use an ordinary soldering iron.

Thanks to fast melting, individual strips are quickly welded at the point of contact with the tip of the heating tool. The second is also quite accessible and inexpensive way - connection plastic tapes using a stationery stapler. At the same time, at the request of users, it is possible to obtain square, triangular or diamond-shaped cells.

To give the fence a geometric correct form It is better to use templates made of plywood or wood. The assembly process can be carried out directly at the site where the fence is installed, or individual sections can be made at home and secured in one or another part of the site.

DIY decorative fences made from plastic bottles
If you don’t have enough free time, it is possible to make a fence from whole plastic bottles without pre-processing them. In this case, it is better to assemble the fencing sections using glue and self-tapping screws. Connect the bottle caps and finished bottles in pairs, placing them with their bottoms facing each other. After hardening, collect the desired amount of plastic products into vertical elements, which you attach to the fence slings.

With this manufacturing method, the distance between them must strictly correspond to the length of the “picket fence”.
Another option for using whole bottles to make a fence involves separating individual rows with longitudinal slats, which help increase the strength of the structure.

This method allows you to use self-tapping screws for assembly, which are used to screw bottles through the bottoms and caps.

The last option for using whole PET containers when installing a fence is based on using strong steel or aluminum wire as the basis of the structure, stretched between the posts.

To install bottles in the center of the bottom and lid, it is enough to drill holes whose diameter is equal to the diameter of the wire.
Regardless of the option for manufacturing fencing based on waste PET containers, the product you receive will be the embodiment of your individuality and will save a sufficient amount of money.
Dear readers, if you have any questions, please ask them using the form below. We will be glad to communicate with you;)
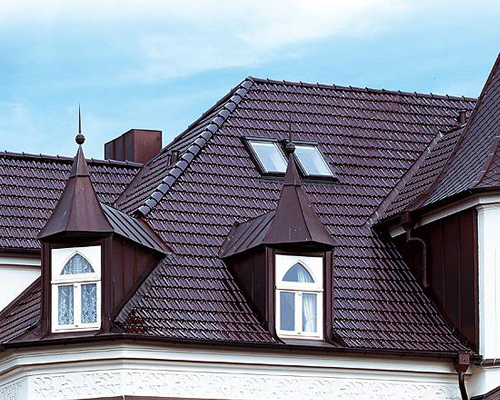
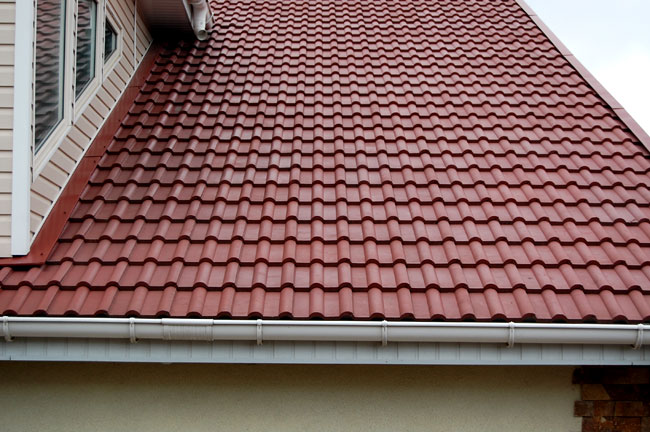
Natural tiles can be called quite attractive and durable. However, such roofing material Not suitable for everyone. The thing is that such tiles have a high price, and their heavy weight does not allow full use. To meet consumer demands, roofing professionals have come up with new products. Is it polymer-sand or simply plastic tiles.
This option is available to everyone and is not without major advantages. On the contrary, in some cases plastic tiles are even better. Let's take a closer look at this material.
The concept of sand-plastic tiles
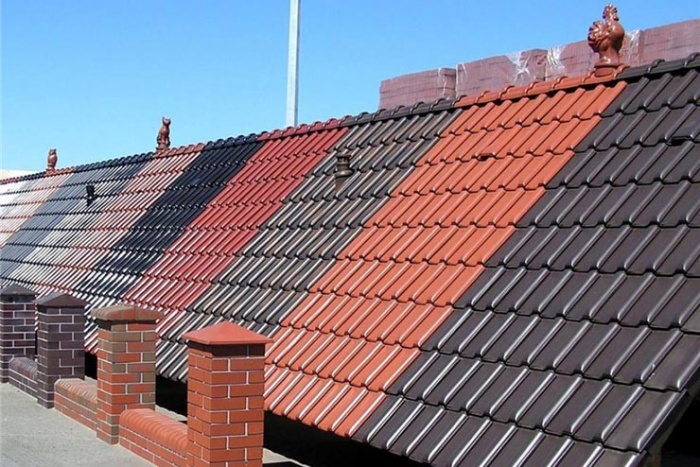
Due to improved technological process material production and optimal composition, individually received products that have exceptional properties. I would like to immediately note that the price of plastic tiles is 4 times lower than ceramic tiles and 1.5 times lower than cement-sand tiles. At the same time, the result was a decent roofing material, which many have already tried. Here is the composition of the material:
- based on quartz sand;
- the second most important component is the polymer;
- various additives that protect the material from fire and UV stabilizers;
- There were also dyes.
In fact, the composition is almost the same as that of cement-sand tiles, only the binding component is not cement, but a polymer, also known as polyethylene. Thanks to him, the products received their amazing characteristics.
During manufacturing, plastic tiles are equipped with special locks, which allows the elements to be firmly connected. The roof turns out to be much more reliable than from natural materials. Oddly enough, this has no effect on appearance. And laying the material is much faster.
What are the advantages of such plastic roofing materials?
Material advantages
The presence of plastic makes the material universal and practical. Despite the fact that at the mere mention of plastic, many begin to associate it with something not very durable and safe, this is not at all the case. We have compiled a list of the advantages of this roofing material:
Note! The material has practically no disadvantages. The only point is handicraft production. Such products cannot boast of those advantages and characteristics. Therefore, you need to choose from trusted manufacturers.
For those who are planning to cover their roof with this material, let's say that you did great choice. Judging by user reviews, the product does not have any flaws. Everyone is happy.
Plastic bottles for roof tiles
Everyone can ask a logical question - if the material is so good, why is its cost lower than others? Maybe there's some kind of trick here? No, it's quite simple. The manufacturing technology uses plastic or plastic bottles. Such tiles made from plastic bottles are inexpensive, because the plastic itself cheap material. So, cheap raw materials make the final product inexpensive.
But what is surprising is the fact that the craftsmen who are friends with bottles and make almost everything from them have taken production literally. They make these tiles from bottles themselves. Look at the photo to see what it looks like.
Although this is original, it is impossible to provide yourself with a full-fledged roof in this way. It is ideal for covering gazebos, sheds, garages and small outbuildings. However, in house construction this method is irrelevant. This is very a budget option, which is resorted to in extreme cases. Simple plastic tiles have a low cost, so if you are interested in quality roofing for your home, which will serve and protect your home for a long time, then choose it better.

They look original and colorful. Bottle plastic tolerates atmospheric and mechanical influences well and can be processed quite well.
Ideas for decorating a flower bed made of bottles
When arranging a flower bed, bottles are selected that are the same color and size. It is better to pre-paint bottles made of transparent plastic acrylic paints desired color for greater decorative effect. A border of stones is first made, which will secure the flowerbed. Soil or sand is poured into its base. This creates a small, gentle slide. An outline of the image is applied to the ground in advance, along which the bottles are screwed upside down. Figures with smooth and clear lines are best suited for a flower bed - in the form of a star, sun, yin-yang symbol, animal faces. Fresh flowers planted in a composition with a pattern of plastic bottles look good. Container flower beds formed in the form of animal figures (hedgehogs, piglets, etc.) look very original. For such a flower bed, large-capacity bottles (5–6 liters) are used.
 Crafts from plastic bottles for the garden
 The side of the bottle is cut off, filled with soil and flowers are planted there. The neck is shaped like the head of some animal. Ears and eyes made from leftover plastic are attached. Several drainage holes are made at the bottom of the container to drain water. Due to their small dimensions, container flower beds can be mobile and can be easily installed in a variety of places garden plot. An ordinary flower bed can be supplemented decorative elements made from plastic bottles. For example, the figure of a girl sitting in a flowerbed with a fluffy skirt made of real flowers or a garden gnome.
 Original garden figurine
 The gnome is made from a large bottle. For handles, liter containers are suitable, the necks of which are cut off and then glued to the body special glue for plastic. All parts for clothing and faces are pre-painted from the inside. A nose, eyes, and a hat are made from suitable corks and available material. To make the craft stable, sand or stones are poured inside.
You can make a border for an ordinary flower bed from plastic containers. For this purpose, along the contour of the flower bed, they dig a groove half the depth of a bottle, where they are placed upside down. Sand and pebbles are first poured into the container and covered with a lid.

Plastic bottles can also be used to make plastic tiles from bottles. For the most part, such products are used for coating country houses, gazebos, sheds and garages. Making tiles from plastic bottles is quite simple. The most common method is to flatten the bottle using a heavy press or to step on it. It is better to heat them in the sun first so that they do not break. The tiles will look more decorative if the inside of the bottles is painted in advance (pour paint inside and shake it).
The finished tiles are attached to the roof frame using self-tapping screws, rope or wire. For example, they make two holes on one side of the part and string the tiles onto a rope. Then they “wrap” the frame with such a rope with bottles, while simultaneously attaching it to the frame slats.
There are other ways to make tiles from plastic containers. You can cut the bottles into sheets, separating the neck and bottom. Products are cut using assembly knife or large scissors. The resulting parts are leveled by heating with an iron or hot water. Slate-shaped tiles will be obtained if the blanks are left cylindrical. In this case, the parts are bent in reverse side and bend. The individual pieces are connected using glue (dichloroethane glue) or a stapler into long strips and secured to the roof frame from bottom to top with self-tapping screws. The frame is made of wooden blocks or metal rods in the form of a mesh. The shape of the frame can be very diverse - in the form of a cone with a square or round base, as well as gable.
Greenhouse made from plastic bottles

For a small greenhouse (18 square meters) you will need approximately 400–600 two-liter bottles. The amount of containers depends on the size of the greenhouse.
Walls from plastic containers for greenhouses are made in different ways: from whole or cut bottles, plastic sheets. To construct the walls of the greenhouse, plastic pipes are pre-made from cut bottles. The bottom is cut off and the pieces are strung on long wooden slats or wire, pressing them tightly against each other. The length of the slats should be equal to the height of the greenhouse.
The finished elements are attached to the frame of the structure. You don't have to use slats to make plastic pipes. Plastic structures are fixed using nylon threads stretched along the frame from above and below. Elements made from bottles are secured with tape for reliability, and the roof is further reinforced wooden slats. To add strength to the structure, you can install thin metal mesh on both sides of the wall. The roof can be additionally covered with film for tightness.
Using another method, the walls of the greenhouse are made from plastic sheets. The neck and bottom of the bottle are first cut off, and the remaining part is straightened. Such plates are sewn together with an overlapping cord thread. The resulting sheet of bottles is stretched and attached to the frame with self-tapping screws. The top can be reinforced with slats.
Bottles are often used to build structures different colors. In this case, you can use them to make an original stained glass window on one of the walls. However, for the wall on the south side it is necessary to select transparent containers for better lighting greenhouses. Covering made from plastic bottles is more durable than conventional greenhouse film and has good thermal insulation properties. It does not require additional heating spring period. In addition, use in construction country houses elements made from plastic bottles significantly saves the family budget.
Garden crafts made from plastic bottles are not only decorative, but are reliable and durable. Constructions made from bottle plastic are practically not inferior in their properties to products made from polycarbonate. Read the site and your garden will be the most beautiful!