The interior door occupies an important place in the interior of the room. It not only serves as a barrier to noise, delimits space and allows privacy, but is also a noticeable piece of decor.
Several reasons may motivate you to decorate an interior door:
- Firstly, despite the huge selection of ready-made (and very attractive) doors, it is sometimes very difficult to find suitable model. Sometimes all the doors seem the same - “I’ve already seen this one at the neighbors’, “and this one looks like the door to our office.” You don’t want to repeat yourself and buy something that is unoriginal and has become banal, because your interior is unique, so the door should match.
- Secondly, even an old door with scratches, peeling paint and irremovable stains is why you often don’t want to replace it! After all, any replacement of a door is also a replacement of the frame itself, which is associated with dust, plaster, sealing the resulting cracks, the need to change the wallpaper (at least around new door) - in general, with local and sometimes major repairs.
That is why sometimes it is much easier for the owner to update already installed door“on the spot,” that is, without changing the entire box, right here in the room. Of course, in some cases you will still have to remove the door from its hinges, but this is much easier and faster than undertaking a full-fledged repair. Whatever the reasons that prompted you to start decorating an interior door, we’ll say right away that often this requires practically nothing except materials left over from the previous renovation.

So, we offer you 14 ideas for decorating an interior door that you might want to bring to life when decorating your interior.
The first idea. We paint, we just paint
The easiest way to get your door in order without any frills or extra work. To do this, you will first need to remove the door from its hinges, then go over it with a spatula, removing the old paint, level the surface with sandpaper, seal the cracks and scratches with putty, remove greasy spots, cover the glass with masking tape so as not to stain it, and you can pick up a roller or brush! It is better to choose acrylic paint - it dries faster, and paint the door in a horizontal position - this way the paint will not run off and will lie more evenly. However, if it is convenient for you to do all of the above on a vertically standing door, you don’t have to remove it from its hinges. Just remember to place something on the floor while painting so as not to stain the linoleum or laminate.

White, simply painted door. Renewing it or repainting it in a different color will not be difficult, although the moldings and carvings need special, careful handling during sanding and removing the old paint layer
Idea two. We paint in several colors
The option is more complicated, although it also involves coloring. In this case, we don’t just paint the door one color, but create a simple or complex geometric pattern of stripes, squares, diamonds, and so on. The door must first be prepared, as in the first case - that is, cleaned of old paint and leveled the surface. However, in this case, we will need much more masking tape - it is with its help that you will delimit the zones between stripes or rectangles. Also, to avoid buying multiple cans of paint different color, you can buy white paint (one liter is enough for the door), as well as several dyes with which you can experiment with shades.

Gold and white, blue and soft pink, bright stripes on a neutral background, diamonds and winding lines - a variety of patterns and color combinations can appear on your door leaf
 When choosing a geometric pattern, remember that a wide strip along the entire door leaf is more suitable for country style, but for classics it is better to choose other options, for example, top part paint the doors a lighter shade and separate the parts with a horizontal stripe
Idea three. Highlighting moldings
Also painting the door, which in general is not too different from the first option. However, in this case we will focus on the moldings, painting them in a contrasting color. White and black are a great but overused combination, so think about what colors will look best next to each other. Designers have long recognized white and green, blue and yellow, red and dark blue as excellent options. Such a door will look great both in a bohemian boudoir and in a strict classic living room.
 A white door with highlighted black moldings is a true classic. By the way, if your door does not have such decorations, it is easy to make them yourself - special thin wooden strips are sold that are simply nailed onto the door leaf
 An unexpectedly bright, pink door that looks especially aristocratic and attractive thanks to the frames highlighted in white
Idea four. We paint according to the finished stencil
A very convenient and simple way to turn your door into a work of art, even if you do not have the talent of an artist. Ready-made stencils can be purchased in construction and specialized stores, or ordered on one of the websites, and the choice of designs and patterns is very large. Then we simply apply the stencil to the already prepared door and apply paint. Easy, fast and the result is very beautiful!
 Applying a drawing using a ready-made stencil is as easy as shelling pears, and the choice will allow you to choose an original inscription, an exotic pattern, or an unusual picture
 Such a deliberately simple design can be easily created without stencils. It was the uneven lines and simplicity that became its main highlight.
Idea five. Artistic painting
Unlike everyone else listed options decorating a door, this option is not for everyone. To create a real masterpiece on an ordinary door, you will need the talent of an artist and certain skills in working with brushes, since a roller is no longer enough. Imagine that your door is a clean white canvas, on which, thanks to your skill, it will appear beautiful landscape, a cheerful picture or an exquisite pattern. Fine hand painting always looks expensive and stylish, and you can achieve this effect by spending only on the purchase of paints.
 Ready-made interior doors with artistic painting offered by many European companies. They are, of course, not cheap, so you can try to create something similar with your own hands. Are you afraid that it won't work out? You can always just paint over a bad drawing!
Idea six. Children's creativity
Does your little one love to draw? Give him this opportunity - let him decorate the door to the children's room himself. Yes, such a naive, bright pattern would be out of place in a formal living room, but as a decoration for a child’s room it is an excellent option. Just agree with the young artist that the second half of the door is already your field for realizing your fantasies!
 Usually children's paints are washed off very easily, so your novice artist will be able to paint the door again at least every day. But you will have to first prepare the canvas by putting the door in order
Idea seven. Unusual texture using paint
If you think that simply applying paint is boring, and you are afraid to take on hand painting, you can try to achieve an unusual texture, such as the effect of a wooden surface or an antique door, using very simple tools. So, using a sponge you can get a mottled surface, steel wool can help you achieve the effect of an antique door, and a stiff brush can create an expressive surface on denim. Special ready-made paints are also sold that perfectly imitate jeans, wood, canvas, velvet or slate board.
 On such a door, painted to resemble a chalkboard, it is convenient to leave messages for household members
Idea eight. Photo wallpaper
If all the previous ideas concerned only working with paints and brushes, then this method is suitable for those who do not want to mess with paint. Photo wallpaper will instantly transform appearance your interior door, turning it into a striking design element. Of course, it is best to purchase photo wallpaper designed specifically for doors - in this case, your drawing will definitely look complete. Ready-made photo wallpapers usually have standard size 86x220 centimeters, therefore suitable only for standard doors, and without moldings and glass inserts. However, now many online stores offer custom-made photo wallpaper for doors, so you can choose the option that is ideal for your door, with any pattern. Can be cut to size for doors and regular ones wall photo wallpaper, however, in this case the drawing may look unfinished.
 How do you like this unusual option- a door turned into a telephone booth with the help of photo wallpaper?
Before sticking photo wallpaper, the door must be cleaned of stains, and the surface must be leveled, sanded and degreased with a solvent. You can use regular wallpaper glue, but PVA is much more reliable. The disadvantages of this option for decorating a door include the fact that a bright image will immediately catch your eye, so it can quickly get boring. In addition, photo wallpaper on the door will lose its original attractiveness due to frequent touches. However, no one will stop you from changing the photo wallpaper on your door to something more original in a couple of months.
 Photo wallpapers with picturesque landscapes are especially popular
 Photo wallpaper on the door will help, due to the increased panoramic perspective, to make small room visually more. And it’s very easy to stick them on; you don’t even need to remove the door from its hinges.
Idea nine. Regular wallpaper
Previously, this decorative option was particularly popular, but now many designers consider it bad manners. It doesn't bother me regular wallpaper, “migrated” to the door, remains a popular way of decorating the interior. Alternatively, you can buy cork wallpaper and coat the top with varnish for reliability. Their unusual texture will make the door more original.
Preparing the door is exactly the same as when using photo wallpaper. The main advantage is low cost, since you can use wallpaper left over from a previous renovation, and ease of decoration. The main disadvantage is rapid wear and tear - the wallpaper can peel off and tear at the joints.
 Wallpaper glued not to the entire door, but to parts highlighted by moldings, looks more impressive
  A door covered with the same wallpaper as the walls will literally blend into the interior. The reverse side of the door, of course, is covered with other wallpaper so as not to stand out against the background of the wall of another room.
Idea tenth. Fabric instead of wallpaper
This option will look especially cute and homey. A door decorated with fabric looks original; the choice of fabrics today is surprisingly wide, but this method also has its drawbacks.
 If you choose a single piece of fabric to decorate a door, you should take care of the original design
First, when choosing a fabric, you should make sure that the glue will not leave stains on it. Secondly, the edges of the fabric should be pre-treated, otherwise the protruding threads will not look very aesthetically pleasing. Thirdly, doors decorated with fabric will not suit every interior design style. Those who are fond of patchwork, that is, creating canvases from different pieces of fabric, can turn their door into a real applique of bright scraps. By the way, if there is space on the door for a glass insert, you can hang a small curtain here, securing it with fishing line and small nails.
 A very cute door, decorated using patchwork technology. The trouble is that classic style Such bright shreds have nothing to do with the interior; this is an option, rather, for “rustic” and colorful country
Idea eleven. Posters, cards, paper
Option for creative people and great idea for a teenager's room. The door can be decorated with a poster and an image of your favorite artist or group, sheets from an old geographical atlas, or sheet music. Pasting such paper sheets and posters is as easy as regular wallpaper.
 Antique geographic map would be appropriate even on the interior door of an ordinary living room, but posters are better “placed” in a teenager’s room
Idea twelfth. All kinds of stickers
This simple and not too expensive way of decorating a door is becoming more and more popular today. Vinyl stickers can be purchased in online stores, cost per size model standard door starts from 2.5 thousand rubles, they are glued very easily, and will last longer than ordinary photo wallpapers.
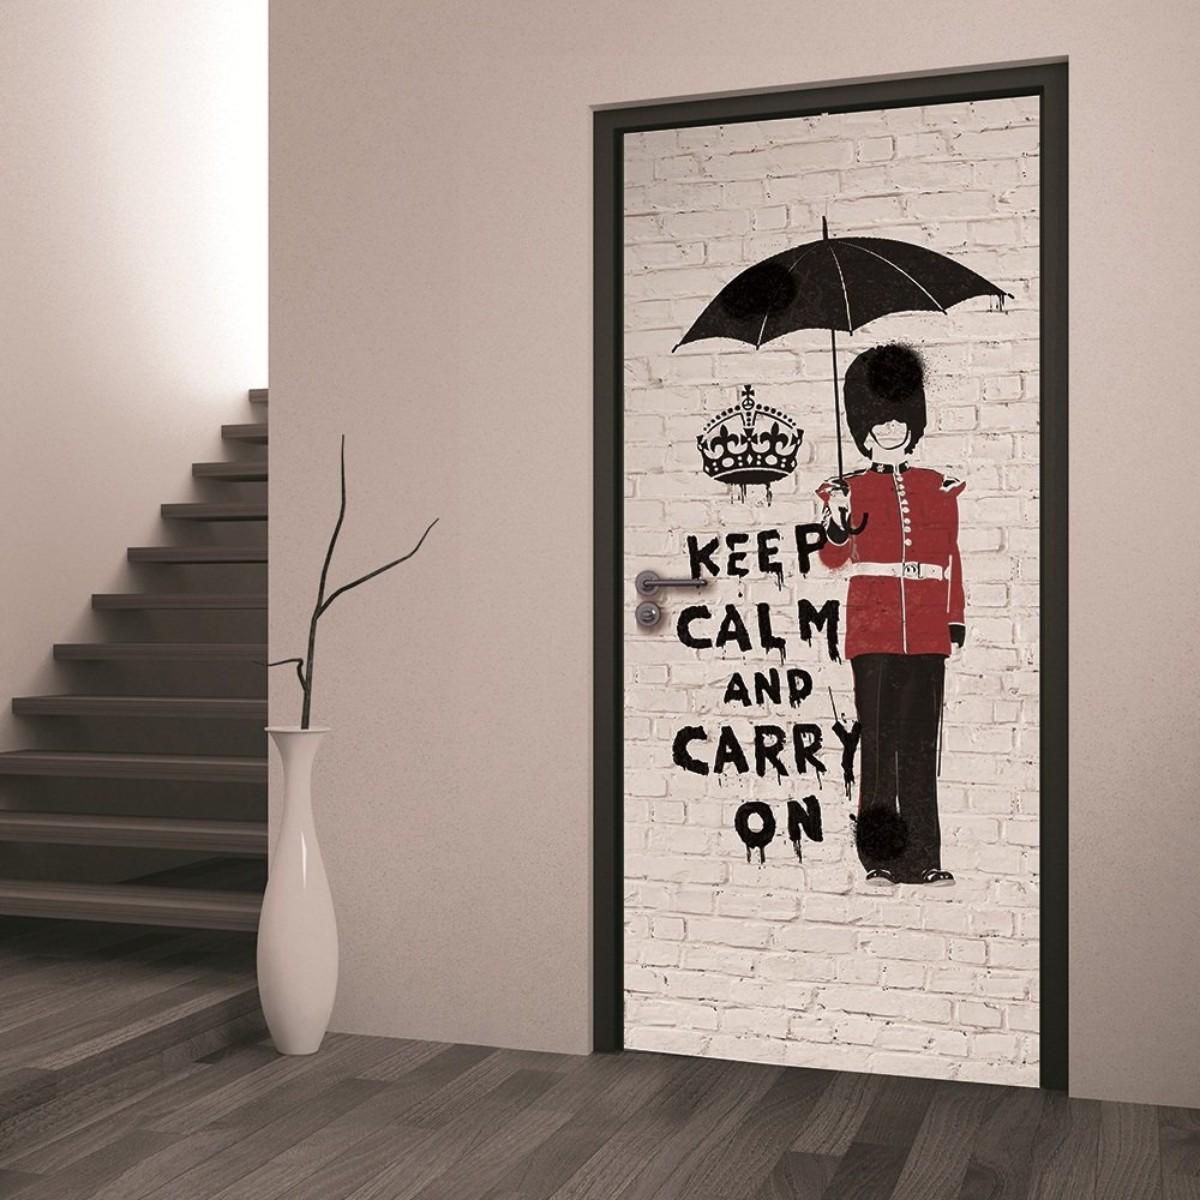
 Stickers with such funny and at the same time useful inscriptions will not only decorate the doors, but also cheer up the guests
 If you do not want to hide the entire door behind stickers, it is quite possible to purchase small images - a butterfly, bright flower and so on. They cost less, and will completely transform the appearance of the door. “Informative” stickers are also popular, for example, on the door of an office, bathroom or toilet, which will tell guests what is hidden behind this door.
 The elegant lady on this sticker will immediately inform guests of the house that the bathroom is hidden behind this door
 Often, stickers can look like ordinary photo wallpaper, and sometimes they can look like hand-painting on a white door or a child's drawing
Idea thirteen. Decoupage
The technology of meticulously cutting out the images you like from paper and then making appliqués from these pieces allows you to transform not only a box or photo album cover, but also an ordinary door. Everything a beginning master of the ancient art of decoupage will need: paper drawings, napkins with a pattern you like, postcards and the like - everything from which you can cut out a design, a brush, PVA glue, scissors, glitter, acrylic lacquer, outline and acrylic paint.
 In the decoupage process, you can literally use anything - from scraps of old newspapers to greeting cards
IN brief description the process looks like this: apply a layer of white acrylic paint to the surface of the door, wait until it dries, then another layer - and again wait until completely dry. Then we apply a layer of paint of the selected shade, and then use PVA glue to attach the cut out paper drawings. At the same time, we try to glue the piece as smoothly as possible, without folds, and to expel all air bubbles. Using glitter and contour we can add dots, stripes and other small details. Then we cover the finished picture with a layer of varnish. That's all. The rest is your imagination and beautifully selected drawings.
 The decoupage technique allows you to create amazing beautiful pictures, and the varnish coating will extend the life of the decor
Idea fourteen. Mosaic
A door decorated with bright mosaics will be an excellent option for a bathroom; you can decorate a metal one in this way front door. Moreover, it is not at all necessary to use pieces of ceramics for these purposes - in this case the door may turn out to be too heavy. Mosaics can be created from pieces of wood or veneer, or you can purchase a ready-made one made from glass.
 In this case, a bright glass mosaic occupies most of the door, making it very unusual and cheerful.
The mosaic is attached special glue(Moment or liquid nails are suitable) onto a prepared and cleaned surface. It is worth thinking through all the details of the pattern in advance by drawing a diagram of the arrangement of the pieces with a pencil. By the way, you can decorate not only the door itself, but also the frame with mosaics, highlighting the slopes using the selected pattern.
 Creating a mosaic pattern is a huge scope for creativity. And if any part does fall, you can always attach it back
An old door can become a real art object; all you need is a little imagination and effort. To get started, you can use one of the most simple ideas, and then, having gained a taste for it, try yourself in the art of decoupage or painting. In any case, your door will definitely be one of a kind!
Tags: ,Original design The design of house doors is not always the prerogative of professionals. At great desire And creative approach unusual decor doors can be made by any talented person. From our selection you will learn how to decorate a door with your own hands in the five most accessible ways for an amateur.
How to decorate a house door with your own hands.
Decorating a door with your own hands is a whole complex of stages, and according to the overwhelming majority of experts, initial preparation is considered perhaps the most important part of the work.
As a rule, the owners decide to decorate the old doors of the house in an original way, brave people who are ready to decorate a brand new home door beyond recognition are rare, because new thing often looks good anyway.
Let's start with the simplest thing, namely, what needs to be done before decorating the front door? In this case we are talking about the street, front part of the door leaf. According to statistics, more than 70% of owners prefer to install metal doors at the entrance.

The easiest way is the outer part metal door paint to match the stencil.
Steel structures can be decorated from the outside in only two ways: painting and cladding with wood or MDF. In both cases, you need to try to remove the old paint, sand the base and degrease it.
Remove paint from steel sheet possible in three ways:
- The simplest thing is to buy a remover and dissolve the coating. The method is quick and effective, but only if the door of the house faces the street. In a closed entrance of a multi-storey building there may be problems with neighbors, because the wash is a “wildly” smelly and harmful thing;
- You can also buy an attachment in the form of an iron brush (cord brush) for an angle grinder and scrape off the paint with it, the only problem here is noise;
- Relatively quiet, harmless and at the same time effective way This is to heat the base with a hair dryer and scrape off the coating with a spatula, but if inside iron door polystyrene foam, the temperature may cause the insulation to melt slightly.

The most harmless way to remove old paint is to heat it with a hair dryer.
Don't try to reheat old paint. blowtorch or gas burner, firstly, you can cause a fire, and secondly, at this temperature the metal may be partially deformed, and burnouts will appear on the wood.
Potholes and chips in old MDF or chipboard panels are cleaned out iron brush and covered with putty, in this case the composition is taken for external work on wood, and when the putty has completely hardened, the surface is sanded with emery and covered with primer.

Continuous application of putty using a spatula.
Preparing an old wooden door is not much different from preparing the same chipboard. The first thing you need to do is remove upper layer old paint or varnish. In addition to the three cleaning methods listed above, you can also take a sharp steel scraper and try to clean the paint with it, which is physically difficult, but quite possible.

The installation sites for the lock must be prepared especially carefully.
When you have managed to get rid of the old finish, you need to clean out and slightly widen the visible cracks with a knife or chisel. Next, pick up a sanding machine with medium sandpaper and sand the surface.
It is impossible to level the surface with sandpaper alone, so before decorating the old door, all serious defects need to be puttyed, dried and sanded again with a machine, but now with fine sandpaper.

Acrylic putty is one of the the best lineups for leveling wooden doors.
Then brush away the dust and cover the wood with acrylic or latex primer. In principle, you can grind it by hand, but it is time-consuming and difficult.
Five ways to decorate doors
The decor of a wooden entrance door (from the side of the home) is no different from artistic decoration internal, interior doors, except that it is advisable to take waterproof compositions and be sure to prime the base.
Method number 1. Coloring
The easiest way to decorate an old door with your own hands is to paint it. It’s difficult to call such home door decor original, but we mentioned it, since coloring is an integral part of most more complex species finishing.

If difficult original decor the door doesn't appeal to you, just paint it.
- Despite the apparent simplicity, painting has its own nuances, so that the composition lays evenly and without drips, it is better to remove the canvas from its hinges and paint horizontally;
- If you are painting for further decoration of doors, then take acrylic or acrylate paint;
- Nitroenamel dries within an hour, plus it has a glossy shine, but such compositions are made with a solvent, and therefore have a pungent smell;
- Oil paints are the most affordable option, but they are not very suitable for decoration, only simple painting.
Method number 2. Wallpaper for old doors
First, about the wallpaper itself:
- You shouldn’t take paper models, because the finish should not only be beautiful, but also durable, and paper will lose all its attractiveness in a year;
- Textured wallpaper with vinyl coating is best used for placing accents, that is, in fragments. Plus, vinyl is resistant to the claws of pets;
- The best option is to decorate old doors with non-woven fabrics and glass wallpaper; they are strong, durable, retain their appearance for a long time, and most importantly, do not stretch when wet.
- But a truly win-win DIY door decor is photo wallpaper. They don't cost much more than standard non-woven fabric, and the effect can exceed your wildest expectations.

Properly selected photo wallpaper will turn the room into a fairy tale.
If the base is well leveled and primed, then you can safely buy regular wallpaper glue and glue it on it. Without primer, for example, when gluing doors painted with nitro enamel, it is better to use PVA.

We cut the canvas to size.
The instructions are usual:
- Remove handles and other fittings from doors;
- Prepare the base;
- Apply glue to the base;
- Lubricate the wallpaper with glue;
- Glue the wallpaper to the doors and remove the air using a special plastic spatula. While the wallpaper is drying, you need to exclude drafts.

There is important point: if you took non-woven or glass wallpaper, then they are not smeared with glue, the glue is applied only to the base.

We expel the air and decorate the doors polyurethane moldings.
The door will look original, one might even say chic, if you decorate it with polyurethane moldings. Moreover, you need to take polyurethane and glue it to liquid nails or some similar composition. Foam fillets look the same, but they are easy to break.
Method number 3. “Creative mess”
This DIY door design can be called truly unique. After all, even the best wallpaper is still a serial product, and here you create your own unique picture.
This method also looks especially attractive because there is no need to sand or putty the doors; all irregularities and defects will be hidden by the relief ornament; all you need to do is degrease or prime the base.

We will do the general relief decoration of the door using papier-mâché from egg trays. There is nothing complicated here: take an egg tray and knead it, naturally it will tear, but this does not matter, because we do not need clear dimensions.

Prepare and glue the papier-mâché.
Papier-mâché can be glued to doors with any high-quality glue, for example “Moment”, or you can use a glue gun.

The more little things there are, the more original the panel will be.
In addition to egg trays, we will need various small trash. Here, everything from buttons to a broken computer mouse will be used, and the more diverse this “garbage” is, the higher the likelihood of creating a truly unique decor. Small things are also glued to the door; choose the pattern yourself.

Any old things are suitable for decoration.
After the door is decorated in this way, it needs to be painted; the paint will, as it were, depersonalize the small details, turning them into the overall picture. Of course, a roller and brushes won’t help here, so you need to buy aerosol enamel; it’s better to take automotive enamel, it’s of better quality. The canvas takes about 2 cylinders.

Aerosol enamel for exterior and interior use.
Method number 4. The simplest decoupage
Decorating doors with your own hands using the decoupage technique can be different, but since we are talking about the most available ways, then as the main material we will use three-layer paper napkins with a pattern

Decoupage technique is not new, but always original.
We begin work as usual, that is, leveling, puttying, sanding, painting. Next we will need the napkins themselves and PVA glue.

We don’t need complete napkins, we are only interested in the top layer with the pattern, and we separate it from all the napkins. Be careful, the paper is very thin and tears easily.

We tear the napkins into strips.
Now the napkins with the ornament need to be torn into strips. Keep in mind: you need to tear, not cut, we are interested in elements with uneven edges. Since we tore a regular square, we will have two strips with straight edges, they need to be put aside, and the entire middle should be torn into small squares.

We tear the middle strips into small squares.
PVA glue in the form in which it is sold does not suit us (it is very thick), so before decorating the door we dilute the glue clean water in a 1:1 ratio.

The strips with a straight edge are glued first. Take a soft brush and first coat the door fragment with diluted glue. After this, carefully apply the strip and level it with a brush on the plane. You shouldn’t pay attention to small wrinkles; they will only make the decor better.

When the outline is pasted over, you begin to arrange the middle part. The technology is the same: you lubricate the base and glue those small squares of napkins that we have folded separately.

PVA glue dries on average in about a day at normal room temperature. Next, buy transparent acrylic varnish and cover the doors with it. It is not advisable to use another varnish, since initially we painted the base with acrylic paint and the reaction to a different composition can be unpredictable, even to the point of rejection.

Decoupage with paper napkins looks original and is easy to set up.
Method number 5. Fashionable Shabby chic
To explain it more simply, the overseas name Shabby Chic This is one of the many options for artificial aging; after processing, the wood acquires a grayish noble shade.
Please note: the base here is not initially sanded, but on the contrary, the surface is stitched with an abrasive ball. This ball is a hard metallized brush that selects soft fabrics array, leaving hard, clearly defined fibers.

Sanding wood with an abrasive ball.
Now we need to lightly sand our door with an abrasive wheel. In hard-to-reach curved nooks and crannies, you will have to sand them manually using sandpaper with P180 grain.

Sanding wooden doors with an abrasive wheel or P180 sandpaper.
Decorating doors with your own hands using the Shabby Chic technique looks like this:
- The first layer is applied with white acrylic paint and immediately wiped off with a napkin, after which we leave the door to dry for 2 hours;

- After 2 hours, apply a layer of paint a little darker and also quickly wipe off the excess with a napkin;

- After 2 hours, apply a third, dark layer of binder and wipe again with a napkin;

Wipe off the next layer of binder with a napkin.
- After half an hour, take the finishing varnish, cover the doors with one layer and leave to dry for another half hour (the finishing varnish dries quickly);

- After drying, take P180 sandpaper and sand it down to wood, but without fanaticism, not evenly;

- The finishing is completed by applying 2 layers of finishing varnish, the first layer is a primer, the second is a front layer. That's it, finishing is finished.
Conclusion
Now you know how to decorate an old door in five relatively simple ways, there are other options in the video in this article, they are also worthy of attention.

Mirror door decor is fresh and original.
DIY door decor is great way add variety and a touch of creativity to the interior or exterior of your home. This is especially true on the eve of the holidays. In addition, small defects may appear on the door over time, which again can be eliminated by decorating. How to decorate your door so that it looks stylish and beautiful - read in this article.
DIY New Year's wreath: making the base
Perhaps the most traditional and simplest way to decorate a door in a New Year's style is a spruce wreath. Of course, you can buy ready-made wreath stencils. But it’s much more interesting to make a wreath with your own hands.
So, in order to make a traditional New Year's wreath you will need the following materials:
- fir branches;
- wire (it can be replaced with newspaper, paper, embroidery hoop);
- small Christmas decorations;
- New Year's tinsel;
- beads;
- bunches of rowan;
- medium-sized tangerines, sweets;
- ribbons.
The most important thing when making any wreath is to create a strong base-frame. Of course, you can buy ready-made stencils. But, if you don’t find them in the store, then there is nothing difficult in making the base. As a material, you can take wire and wind it several times in the shape of a circle to get a base. Other interesting wreath stencils include embroidery hoops, newsprint, and paper towels. An unusual, but troublesome option is to fasten together bushings from toilet paper(see photo).
DIY New Year's wreath: let's start decorating
The next step is the most interesting. This is the decoration of our base. Most traditional way– attach fir branches to it. If you used wire, you can easily do this with it. If you used paper as a base, then the branches can be attached with staples, threads, or the same metal wire. Every other time we glue the protruding spruce edges with glue. It is necessary that the entire base is covered with branches. Let it dry. And let's start decorating. And you will get a New Year's wreath, as in the photo. It can also be used on sliding wardrobe doors.
Door decorations for Valentine's Day
On this day you can make a special decoration for front door. Hearts are suitable for this different sizes, cut out of cardboard or fabric, and hung in the form Garlands on the doorway (as in the photo).
A great idea could be a small embroidered by you personally decorative pillow in the shape of a heart with a declaration of love. It can be hung on the front door using a nail. This will not only be a decoration, but also a gift to a loved one. Can be used as temporary decoration Balloons in the shape of a heart that can be tied to sliding doors.
Door decorations for March 8
You can surprise your loved one on this day not only gorgeous bouquet fresh flowers. Original gift can be placed directly on the door. This will also make a great decoration. If you can’t raise your hand to attach live tulips around a metal wire, then you can use artificial flowers. This decorative element can be used not only for the door, but also for sliding cabinet doors.
Doorway decor
You should not ignore not only the door itself, but also the space around the doorway. Good New Year's decor can be done by attaching colored ribbons around it. And at the top of the doorway place such a festive element as a bow. On February 14, you can make an impromptu curtain from hearts, stringing them on long threads. And on March 8, the top of the doorway can be wrapped with a wreath of artificial flowers.
Door decor when damaged
However, the need to decorate a door is not always associated with such pleasant chores as decoration for the New Year. Sometimes such decor is caused by necessity. After all, doors are short-lived and may lose their original appearance over time.
If this option does not suit you, then you can use mirrors as decoration. So, you can use acrylic panels with amalgam. And in this case Special attention attention should be paid to preparing the door. You can also use shaped acrylic mirrors in the form of animals, flowers and other shapes. This decoration will also look good on sliding doors. You can decorate the doorway in a similar style. In addition, you can decorate the cabinet doors in the same way.
If you decide to update the interior of your home, but do not plan to spend huge sums of money, you can decorate the doors yourself; this will significantly refresh the room with minimal expense. A wide variety of materials are used for this: wallpaper, fabric, paint, moldings, stickers, decoupage, mosaic, stained glass, decorations, etc. Let's take a closer look at how to work with them and what design ideas are best suited.
The decor allows you to give the door an individual unique design
Wallpaper
The easiest way to decorate interior doors with your own hands is to use wallpaper. This universal material, since it is widely used not only for finishing walls, but also ceilings, furniture elements and, of course, doors. For this purpose, you can use the following samples:
- remains of wall wallpaper;
- plain contrasting;
- with a pattern or pattern;
- photo wallpaper.
Finishing is done as follows: first you need to prepare the surface; if there are cracks, it is best to rub them with a special wood putty. old paint need to be cleaned and the door itself treated with fine sandpaper. In order for the glue to adhere well to the surface, it should be thoroughly cleaned of dust and degreased.
Wallpaper decoration can be done different ways. If you decide to make a completely plain door, the door is covered with one type of wallpaper on all sides. You can try to create a complex composition from individual pieces of material.

Photo wallpaper on the door
Textile
The second way to decorate an old door with your own hands involves using fabric. It should be borne in mind here that not every material is suitable for such a purpose. Much depends on the purpose of the room. It is highly not recommended to use the fabric at the entrance to the bathroom or kitchen, as it will quickly become dirty, saturated with odors and moisture.
If you want to decorate the door to the living room in this way, this perfect option, especially for children. Using fabric, you can create a colorful pattern, give the canvas an interesting texture, or lay out a soft drapery; such a finish will create a fabulous atmosphere in the room.
To decorate a canvas with fabric, you can use several approaches:
- glue;
- glazing beads;
- furniture stapler or nails.
Make sure that the fabric does not fray or become stained. Fabric with a lace structure can be additionally painted in one tone or strokes of a contrasting color can be added using, for example, a sponge.

Fabric door trim options
Dye
You can also decorate an old interior door with your own hands using paint. This method is one of the most popular to this day; a huge plus is the ability to create any design, even a complex pattern.
Before performing the final decoration, it is necessary to prepare the canvas. This is done according to the same principle as before wallpapering, however, in this case you need to bring the surface of the old door to perfection, since minor defects are unlikely to be hidden. If necessary, replace the beads holding the glass. The wood can be additionally treated with antiseptic impregnation.
Finishing is done gradually. To begin, divide the door into several sections with squares of approximately 50x50 cm. If you are dealing with a smooth solid surface, you need to work with a brush from top to bottom and from left to right, evenly painting the conditional squares. are worked out first at the places of inserts, and then along the central strips and in last resort- On the sides.
If you decide to create a drawing, you first need to prime the product, and then level the background. Only after such preparation can you begin to create a decorative composition.

Painted doors
Stickers
Another simple method is to decorate doors using vinyl stickers. This method is great if the canvas is generally in good condition and you just want to add more color to the interior or link the product with some piece of decor or furniture.
Ready-made stickers can be purchased at almost any store. If the existing assortment does not suit you and you want to add a piece of your own individuality, you can create unique design do-it-yourself doors. To do this, you only need self-adhesive PVC film. Templates are best made from cardboard. Transfer the outlines to reverse side film, cut out the element and carefully stick it on the door.
You can decorate the canvas using a roll of self-adhesive. This is a great alternative to painting and wallpaper. Just pick it up suitable option and transfer the film to the product in a matter of minutes. Such decorative finishing takes a minimum of time, but looks simply amazing.

Ready-made door stickers
A popular way to create unique vintage items is decoupage finishing. Using this method, you can decorate old wooden doors with your own hands. In principle, any surface can be decorated in this way, but in combination with wood, decoupage looks incredibly stylish and organic.

Decoupage doors
In order to apply a pattern to the surface, it is necessary to clean and prime the base. Next comes finishing special paper, napkins or printed design. Place it on the surface and cover with a layer of a mixture of water and PVA glue. Using a flat brush, carefully spread it over the paper, pressing it against the wood.
After drying, be sure to varnish the decoupage to protect the design from wear and damage.
Enough original method decorative finishing DIY doors - using moldings. With their help you can create some kind of imitation of stucco. This option is perfect for a classic interior, as well as for rooms with notes of antiquity or modern combinations, for example, art deco.

Door moldings
Decorating with moldings involves the use of special elements made of foam or polyurethane. To fix them on the door, use glue similar to liquid nails. You can create almost any composition, but due to the limited shapes, it is best to focus on straight lines and geometric angular shapes. However, keep in mind that decorating this way sliding doors will not work.
Mosaic
More rare and unusual way decorating old doors with your own hands - decorating with tiles or mosaics. The low popularity of this method is primarily due to the fact that ceramics are quite heavy, and therefore not every door can withstand such a load. In addition, the thickness of the canvas increases, which can also affect the quality of the product.

Options for decorating the door leaf with mosaics
If you want to decorate an interior door in this way, it is best to use mosaics in fragments. This will make the canvas bright original look, but at the same time, the finishing will not greatly affect the thickness and weight of the structure. For glass products you need to use a special white tile adhesive. It is even better to use epoxy mastic or other transparent resin, including liquid glass.
Another way to decorate an old door is to use glass inserts. Can be purchased now finished glass with film, pattern or metal inserts, however, it is much more interesting to decorate the canvas yourself. The most popular methods are glass painting acrylic paints or creating a stained glass window.

For the latter option, you will additionally need a decorative mastic contour that imitates a metal frame. You can only work in a horizontal position so that the paint is evenly distributed over the surface. After drying, insert it into the panel and secure with glazing beads.
Any decoration can change the aesthetic perception of the door leaf and turn it into a real masterpiece of home decor.
If old door lost my original appearance and defects in the form of scratches or cracks have formed on it, then it can be easily restored by decorating it with original drawings of your own making. They can be made either using ready-made templates or by giving in to the flight of creative inspiration. The main thing is that the pictures on the doors match general style interior and gave it a special charm. This method of restoration helps to save a lot of money cash, as well as find a worthy use for your artistic talents.
It is not necessary to replace old doors with new ones; it is enough to seal the cracks and crevices in them with special mastic and decorate them with decorative painting. A correctly selected pattern will not only enliven the interior or change it beyond recognition, but will also give the room coziness.
Main types of painting:
- Template painting;
- Airbrush;
- Artistic painting with acrylic paints.

For template painting, you need to purchase special stencils or make them yourself. Art stores sell reusable templates, but they are quite expensive. If you plan to apply the same pattern to all the doors in the apartment, then the advisability of purchasing them will be fully justified. But for one-time use, you can cut out a stencil yourself from cardboard or film. You can also order from advertising agencies the production of a template printed on vinyl film according to the customer’s sketches.
At self-production template, it is not recommended to use patterns with a large number of small elements or with thin bridges between patterns.
To apply airbrushing you will need two professional tools: airbrush and compressor. Acrylic paints can be used on water based or nitro enamel. Professionals advise painting a metal entrance door with nitro enamel, and interior doors with acrylic or oil paints. Using airbrush, you can draw absolutely any design if you have special skills. Beginners who like this type of painting are recommended to select for work simple drawings in the form of an abstraction. You can also pre-make templates that the artist will use during the process of applying the image.
Artistic painting is the application of a design with brushes directly onto door leaf. Almost anyone can do this with minimal artistic skills. Even if you don’t have the talent of an artist, you can simply redraw a picture from a book or the Internet. The main thing is to choose the right colors and make sure that drips do not form.
Beautiful drawings on doors with your own hands using a template
The easiest way to decorate a door is to apply a design to it using a template, which is easy to make yourself at home. To do this you will need cardboard or thick plastic film.
Sequence of work when making a stencil:
- We draw the outlines of the future drawing on paper or print it on a printer;
- Transfer the image to cardboard or film, tracing the contours with a simple pencil or a marker;
- Carefully cut out the pattern with a stationery knife or nail scissors;
- We fix the stencils on the door using masking tape or special glue.
After the template is securely fixed, the ornament is drawn with acrylic paints, which, after drying, is covered with furniture varnish.
It should be remembered that the design is applied to a previously prepared, degreased and painted surface.
Using stencils, you can also decorate doors with relief plaster or liquid wallpaper.
Creative decor: how to draw a stained glass window on a door
Doors with glass inserts suggest limitless possibilities for revelry creative imagination. You can draw or stick a stained glass window on them, or lay out a mosaic pattern. The main thing is that the door can withstand the weight of glass mosaic tiles.
Construction stores sell ready-made stained glass film that just needs to be glued evenly onto the glass. But to create a real masterpiece, you will have to use decorative mastic that will imitate a metal outline, and special stained glass paints. They fit perfectly even on a textured surface.

Step-by-step process for creating stained glass:
- It is advisable to remove the glass and lay it horizontally;
- Symmetrical or arbitrary patterns are laid out on glass with mastic;
- After the mastic has dried, the composition is painted with stained glass paints;
- The glass is then inserted into the panel and secured securely using glazing beads and small nails.
Mastic contours are coated with gold or silver paint to give them a metallic shine.
How to draw an open door in the interior
Sometimes to implement creative design solutions in the interior you need to depict an open door, in the opening of which you can see a garden, river, forest or even a throne room. To do this, it is enough to have minimal artistic skills, as well as limitless patience and diligence.

Step-by-step image of an open door:
- First you need to find a picture from which the image will be redrawn. It is desirable that the drawing be large and clear, with small details drawn.
- Drawing general outlines doors and the landscape that can be seen in the opening. This should be done as symmetrically as possible.
- Are clearly drawn the smallest details future drawing.
- At this stage, you can outline the contours of the falling shadows, but this is not necessary.
- The drawing is carefully painted with acrylic paints.
If you can’t depict open doors or the drawing is hopelessly damaged, then you can correct the situation by sticking photo wallpaper with a similar image, which can be bought at any hardware store or order a custom print.
Beautiful drawings on the doors (video)
Beautiful painted doors will decorate any interior. Even children over four years old can be involved in their design. They can paint with acrylic paints using a stencil or outline contours previously drawn with a simple pencil. This joint creative process will give many unforgettable moments to both parents and children and will help transform the room without spending much money.


