Without barbecue or other meat, fish, vegetable dishes Cooked over coals, not a single holiday organized at a summer cottage or when going out into nature is complete, so in the arsenal of any owner there is usually such a convenient device as a barbecue. The main thing is to correctly imagine how to make a barbecue with your own hands from metal, have the necessary tools and materials for this, and have certain plumbing skills. There are many types of this useful “field” kitchen equipment on sale, but it is quite possible to make it yourself.
The first step is to decide on the most convenient model, since the barbecue can be stationary, permanently standing on the site, or collapsible and mobile.
A stationary barbecue can be multifunctional, since when making it, by adding a few additional elements, you can get not only a barbecue roaster, but also a grill, barbecue or even a smokehouse. In addition, such a grill sometimes becomes a real decoration landscape design plot.
The mobile grill is good in its own way - it is compact and can fit in the trunk of a car. This option is ideal for those who like to frequently travel not only to the countryside, but also to nature. This type of grill can be collapsible or foldable.
Tools and materials for manufacturing barbecue
Braziers may be different, but the materials, as well as the tools for their manufacture, are, in principle, no different from each other. The only thing that may vary is the amount of material, since if you plan to make a stationary barbecue with a roof and additional decorative design, then you will need much more different elements and metal.
So, for work you will need:
— angle grinder machine – “grinder” with required quantity cutting and grinding wheels;
- electric drill with a set of drills required diameters;
— a jigsaw with cutting elements for metal;
- tape measure, square;
- screwdriver;
metalworking tools - hammer, pliers, core.
Materials you will need to purchase:
- metal sheet 2 ÷ 3 mm thick, old gas cylinder or metal barrel;
— metal corner, size 25 × 25 or 20 × 20mm;
— square pipe with sides 20 × 20 mm;
— fastening elements;
- for some barbecues that have a lid, hinges and a handle for opening will be needed;
— for mobile barbecues that are planned to be moved around the site, wheels will be needed for convenience. Their number will depend on the chosen model - two, three or four.
How to make a barbecue with your own hands from metal - several options
There are many types of metal barbecues, and they are made in different ways, so it is worth considering some of them so that you can choose the most suitable one.
Brazier from a metal barrel
 Barrel - excellent raw material for making a barbecue
 The barbecue model, made from a barrel, can be made in two versions - with and without a lid. The first of them is made from two halves of a barrel, and the second from one.
Whatever option is chosen, you first need to draw a drawing of the future barbecue.
All details and their sizes should be clearly visible and understandable in the drawing. As an example, one version of the drawing is presented, but it is quite possible to make changes to it. The drawn up plan will be the most important assistant in the manufacturing process.

The second point in working on a barbecue is preparing all the elements from which it will be assembled.
- You need to start this process, of course, from the main element - barrels. It needs to be cut, and this can be done in two ways:
- In half, the height of the container - this method is suitable for both the first and second versions of the barbecue.

— Another way is when only the top part of the barrel is cut out. Subsequently, the cut out element will become a lid for the grill.

The edges of the cut container must be cleaned, freeing them from metal burrs.
- Having prepared the barrel, you can figure out what size pieces of corner you will need to frame the opening. Therefore, the next step is cutting corners and pipes, which will later become legs and stands for the grill.
- Next, all fasteners are prepared - it is best to purchase them with a small margin.
Making a barbecue
1. It’s easier to make a barbecue from half a barrel than with a lid attached to its back wall. To make it easier to work on top part barrels, it is best to start by arranging legs with stands. They are made from square or round pipes.

- If it is not possible to bend the pipe in a semicircle to fit the size of the barrel, then, having calculated correctly, you can weld a corner of two pipes, and then weld two pipes welded to it into a T-shaped structure. There should be two such legs with stands. They are welded together with one or two jumpers, and if desired, they can be fastened with a kind of basket or mesh on which firewood can be stored.
- Next, half the barrel is placed in stands and welded. It is better to clean all welding points and seams immediately so as not to return to the lower parts of the grill.
- Next, you can calmly work on half the barrel. First, a corner is welded to its edges - it will immediately give the product neatness. In addition, it will be convenient to place skewers on such a shelf.
If you planned to use the grill also as a grill, then the racks for it can be attached, as shown in the diagram, to a stand under the container or to the sides of the half-barrel itself and to the corners on its edges.

If it is decided to make a lid from the second part of the barrel, it is also scalded with a corner. Then the hinges are welded to the halves - and the lid is ready. To make it comfortable to use the lid, you need to attach a handle and a metal holder with a movable mount to it. It is installed on one or both sides of the grill.
- To make the grill also serve for barbecuing, you can lay a net on top of the half-barrel. For this, special stand elements are screwed into the edges of the barrel.

- To ensure good traction in the grill, round holes are drilled in the walls of the lower half-barrel.
2. In the second case, the barrel is not cut in half, but a pre-marked part is cut out of it, having a rectangular shape in plan.

In this model, products cooked on fire will be protected from the wind by the rear wall of the barrel. The photo clearly shows how the barbecue grills are installed.

- If you choose this option, there is no need to scald the edges of the barrel - they just need to be very well cleaned and rounded.
- The rest of the work is carried out in the same sequence as in the first case, and the hinges are screwed or welded to the top of the grill and the lid. In this model, a holder for the lid is not needed - when tilted, it will rest on the top of the grill.
It should be noted that you can add a function to this barbecue. To do this, fix in the side part chimney. In any barrel there is always on top neck with a stopper, which Can be used to install pipe. But you need to think about this in advance before you start cutting the barrel, since the hole needs to be located in the upper part of the grill.

If necessary, for convenience, shelves-tables can be arranged on the sides of the barrel, both in the first and second options. To do this, weld to the barrel metal brackets, onto which a wooden or metal covering is subsequently fixed.
In the same way, barbecues are made from gas or oxygen cylinders. But you need to take into account that they will be narrower and designed for short skewers.

As mentioned above, wheels can be attached to any of the barbecues described for ease of moving it around the site. But the described options have mobility only within the territory suburban area- transport it to long distances extremely inconvenient.
A barrel or cylinder is an excellent material for making a barbecue. There is always room for imagination - just look, for example, at the options presented in the video:
Video: what can be made from metal barrel or gas cylinder
Read the master class on in our new article.
Collapsible grill
A collapsible or folding barbecue will not be superfluous in any house or even in an apartment. It is compact, so it will not take up much space, as it can easily fit on a shelf in a pantry or mezzanine. Such a grill can be used not only when traveling out of town, but also in the courtyard of a high-rise building, naturally, observing all fire safety rules.
When planning your work, you should assume that when folded, the barbecue looks like a thin suitcase that will accommodate all the accessories for frying meat. So, for example, camping skewers have a length of no more than 600 mm, which means that the length of the barbecue can be only 630 ÷ 650 mm, and its width when unfolded is 400 ÷ 450 mm.

Making the grill shown in the photo yourself is not so difficult. To make it you will need:
— steel sheet t 2 ÷ 3 mm thick - large walls of the barbecue and installed triangular side elements will be made from it;
- steel corners 10 × 10 mm - they will be used to scald the main planes. In addition, such corners are fixed in the inner part of the walls of the barbecue and serve as supports for a grill made of steel wire;
— loops for fastening and folding two halves of the barbecue;
— folding legs are attached to the sides, which, when disassembling the barbecue, are laid exactly along the height of its walls;
- steel rod Ø 7 ÷ 8 mm - will be needed to install a handle on the halves of the roasting pan;
- ready steel mesh or wire for its manufacture.
Manufacturing process
- It’s best to start by making a drawing and putting all the dimensions on it, so that later you don’t have to redo the work due to the slightest inaccuracy.
- Next, you need to draw on the metal and then cut out all the necessary parts from it:
— Two main walls of the grill, measuring 400 × 630 mm or 450 × 650 mm.
— Square measuring 400 × 400 mm or 450 × 450 mm. Then, it is cut diagonally and two equilateral triangles are obtained, which will rigidly hold the entire structure.
— Cut out blanks from the corner, you will need 4 pieces. 630 ÷ 650 mm and 4 pcs. 400 ÷ 450 mm for framing the walls of the grill and stands for the grill.
- Next, you need to make two elements on movable fasteners like furniture ones - these will be the folding legs of the barbecue. To do this, four strips, 10 mm wide, are cut out of thick metal, or sections of a corner are used. Their length can range from 400 to 600 mm, but the higher the legs are, the more unstable the structure will be.
When all the elements are prepared, you can begin assembling the barbecue. So that it cannot be distinguished from a factory-made one, it is necessary carry out work very neat.
- The first thing to do is to refine the front and back wall grill, thoroughly cleaning and scalding them on three sides with a corner.
- Next, having marked the location of the grid in the grill, weld or screw the corner stands under it.
- The next step is to mark and weld the hinges onto the walls, on their long side, not the corner-welded side.

- Then, folding legs are attached to the sides of the assembled structure so that they can be moved apart to a certain width and easily folded when assembling the barbecue. Angle open barbecue should be 45 degrees so that prepared metal triangles - side walls - can be easily inserted on its sides.
- Two holes are drilled in the upper part of the canvases, and handles bent from a steel bar are installed and welded into them. If desired, you can install a hook so that the grill does not open when assembled.
At the end, you can assemble the entire structure completely and lay it on its bottom metal mesh and try to cook shish kebab.
In addition, if desired, an attachment can be made that will help prepare a barbecue. In this case, the grill will become multifunctional. For this element, you will need to cut and weld five elements together. These are side attachments that have an angle of 45 degrees at the bottom - they will be installed instead of side triangles, two long front panels and a grille installed on top. You can also make this part collapsible - cut it in the sides parts large holes and weld to the side parts narrow fabrics have special hooks that should fit into them easily.
Another interesting version of the barbecue is presented in this video:
Video: a version of a homemade collapsible barbecue
Prices different kinds barbecues
Stationary barbecue made of sheet metal
If you plan to use the grill only at the dacha, without transporting it from place to place, then you can without complicating the task, stop right there simple version, which can only “roam” around the site and be installed on a flat, hard surface.

Before starting work, you need, of course, to make a drawing - it is very easy to draw it up yourself, since there are no complex elements in this option. Having purchased everything necessary, the blanks are cut out based on the dimensions indicated in the drawing.

As an example, you can consider a ready-made drawing, and based on it, make your own, adding elements to it that will make it more comfortable to use.
- A metal sheet with a thickness of 2 ÷ 3 mm, a steel corner 10 × 10 or 15 × 15 mm is used, which will be necessary for the manufacture of legs and a frame for the barbecue. If you plan to arrange shelves on one or both sides of the grill, then you will also need a corner to make them.

- The details of the barbecue are marked on a metal sheet. If the metal has a small thickness (about 2 mm), then it can be bent, saving yourself from extra work by welding the seams connecting the walls and bottom of the grill. In this case, having made the markings, four are cut out of the sheet quadrangle- and the shape of the cross is obtained.
- The middle part is the bottom of the grill, and the other four are the side walls. They must be bent at right angles to the bottom.
 The walls bend perpendicular to the bottom...
 - The next step is to place the walls together at vertical corners.
 ... and then boiled in vertical corners
Video: do-it-yourself barbecue made from sheet metal
Owning necessary tools and experience working with them, you can calmly one two day to make a grill, thereby saving a considerable amount from the family budget. Having done the work efficiently and accurately, you can be sure that the resulting product will not differ from factory models and will reliably serve for many years.
TOP 9 best barbecues for a summer residence
| Photo | Name | Rating | Price | |||
|---|---|---|---|---|---|---|
| The best steel grills | ||||||
| #1 |
|
⭐ 100 / 100 | ||||
| #2 |
|
⭐ 99 / 100 | ||||
| #3 |
|
⭐ 98 / 100 | ||||
| #4 |
|
Balezinsky LMZ | ⭐ 97 / 100 | |||
| The best combined grills | ||||||
| #1 |
|
⭐ 99 / 100 | ||||
| #2 |
|
⭐ 98 / 100 | ||||
| #3 |
|
⭐ 97 / 100 | ||||
| #4 |
|
⭐ 96 / 100 | ||||
| #5 |
|
⭐ 93 / 100 | ||||


An excellent model for a summer residence, which began selling in 2017 and is in demand to this day. The walls are made of 4 mm thick steel, with perforations at the bottom to enhance the heat. The legs are slightly decorated, so the product will not only be functional, but will also complement the appearance of the yard. For more convenient carrying, there are handles on both sides.
- You can place 9 skewers on the surface of the body at a time, which is suitable for a large company;
- the leg supports are large and square, so you can even place the barbecue on the ground and there will be no distortion;
- the whole structure is rigid and strong, since there are jumpers at the bottom;
- the steel is heat-resistant, its thickness is 4 mm and it does not change even when the fire burns for a long time;
- the upper part is 37 cm wide, so it is suitable for long skewers;
- all parts use a 15x15 mm profile pipe;
- the structure is powder coated;
- the product is disassembled, which makes it easier to transport the goods in the car;
- It's easy to clean everything after barbecuing or grilling.
- small height at 81 cm, so you need to bend over a little while cooking;
- the total weight is not the smallest, as much as 24 kg;
- there are no hooks for additional equipment;
- The side handles are made of metal strips, and when carried, they cut and squeeze your hands.
Product High Quality, durable and easy to use and maintain. The structure is quickly disassembled and assembled. The structure is made of stainless steel, the walls are 3 mm thick, so the device does not deform. To increase strength there are stiffening ribs. The dimensions of the bag are 49x31x48 cm, and the weight is only 10 kg. The bag is made of synthetic material, strong, and suitable for transportation in the trunk or carrying by hand. Product optimal height assembled, which will allow you to cook comfortably, the depth is sufficient and prevents burning. In addition, the manufacturer provides a 1-year warranty.
- portability;
- ease of assembly and disassembly;
- light weight and size;
- sustainability;
- thick stainless steel;
- suitable for coals and firewood;
- There is a sufficient guarantee from the manufacturer.
- no deficiencies identified.
A good option for the dacha if you need to constantly take the grill from there. This is due to its low weight and convenient transformation, which allows the product to be transported even on a bus or train. The grill is completely collapsible, and the legs are the main components for fastening the walls and bottom. Total weight only 2.3 kg, length 50 cm, designed for 6 skewers.
- completely collapsible model, suitable for transportation in a bag;
- suitable for working with coals and firewood;
- there are perforations along the walls to improve the combustion of coals;
- the presence of special cutouts for better fixation of skewers;
- minimum weight and dimensions. It will take 3 minutes to assemble.
- does not come with a carrying bag;
- The width is only 30 cm, so only short skewers are used;
- low design, only 50 cm;
- to prevent sinking, you need to use pads for thin legs;
- steel is 0.8 mm thick, so deformation is possible;
- If the grill gets exposed to rain, rust begins to appear quickly.
Balezinsky LMZ
Balezinsky LMZ is one of best models cast iron barbecues for a summer cottage, which will serve for 30 years or more. Its walls and legs are made of thick cast iron steel, so the structure is not subject to corrosion and other external factors. For reliable installation of skewers there are 10 holes. side parts with patterns for decoration.
- there are special holes in the corners that are used for a spatula, poker and other additional equipment;
- the grill is collapsible, so it can be transported in the luggage compartment of a car without any problems;
- the total width is 35 cm, which is suitable for long skewers;
- there are large perforations to improve inflation;
- The walls are high, there are brackets for a spit at the ends.
- if you place it on the ground, the barbecue will load in due to the thin legs;
- the total weight of the structure is 37 kg, so 2 people are needed to carry it;
- the height is only 65 cm and working without a chair will be inconvenient;
- does not come with a spit.
This model is suitable for a summer house and is characterized by the presence of a table around the barbecue itself. To eliminate melting and other negative factors from exposure to temperature, the table is made of tiles, which also act as decoration.
- legs are thick, made of profile pipe and will not sag from the mass. The legs have large pads that prevent loading;
- a table around the grill 12 cm, which will allow you to place dishes or additional equipment. You can put a spit.
- the steel is 3 mm thick, so it does not deform under the influence of heat;
- The walls and bottom are solid, without welding seams. The length is 1.24 m, and in 1 cooking stage you can place up to 17 skewers;
- the coal box itself is 64 cm wide;
- The box can be removed for transportation.
- difficult to clean after cooking;
- total weight is 41 kg;
- difficulties of transportation in a car.
This best grill 2019 in its design, it will perfectly complement the summer cottage, suitable for relaxing with a large group. By purchasing this option, the client gets everything at one hand. The product includes a bracket on the right for a cauldron, which is also sold along with the barbecue. You can put meat in it for barbecue and make it easier to string it on, or you can put the finished dish in it. On the left and behind there is wooden tables for any container, so you don’t have to go anywhere during the process.
- large stops on the legs, which prevent sinking into the ground;
- the arms on the sides are made of a round rod in the form of an arch, so during transfer they will not damage or squeeze the palms;
- there is a fastener for spit or roasting large carcasses;
- At the bottom there is a compartment for collecting firewood.
- the walls are 2 mm thick, this is enough to preserve the shape under the influence of heat;
- The height of the grill is 93 cm, so cooking is comfortable and convenient.
- heavy weight - 23 kg.
Comfortable and functional design with excellent physical characteristics and great equipment. The product is considered a mobile-stationary combined type. To simplify its transportation around the site, wheels are installed. This will allow you to quickly move the device under a canopy or into the house. The only drawback is that the wheels are made of plastic and you need to carefully move the product so as not to spoil the appearance of the ground or lawn.
- the grill is made of high-quality blued steel, so the structure does not deform over the years due to temperature;
- rich equipment;
- high degree of mobility;
- the presence of tables on the sides of the grill;
- you can install a spit.
- plastic wheels that can ruin the appearance of the ground or lawn.
Mobile grill with wheels. In addition to functionality and other properties, the design is simple and collapsible. Appearance very good, the dimensions are optimal for preparing barbecue for a large company, but the weight of the product is 38.2 kg. The body is made of high-quality steel with a thickness of 2 mm, and the bottom is 3 mm. The box can withstand up to 700 degrees. At the bottom of the grill there is a special perforation for air intake, as well as removal of ash, which immediately falls into the box.
- the grill is strong and stable;
- the body is not exposed to temperature, so it does not deform over the years;
- high degree of functionality and mobility;
- excellent package.
- There are no significant shortcomings.
Although the grill is considered collapsible, it is also a stationary model. There are no wheels in the design, but if the weather changes quickly, then it does not need to be moved, since the box and main elements are protected by the roof, so there is no need to move it under a canopy. The bottom and walls are made of high-quality steel with sufficient strength and temperature resistance. The wall thickness is 4 mm, so they do not deform during operation.
- durability;
- appearance, which is obtained through decorative elements;
- the presence of a roof to protect from rain;
- good equipment;
- high-quality fasteners.
- large sizes, which complicate transportation;
- a very large mass of the grill when assembled.


The article provides information on how a collapsible grill is made. What are its dimensions, what materials are used for it. Will a drawing be required for production? If “yes,” then what you need to pay attention to, what parameters are important taking into account the convenience of using a barbecue grill. The manufacture of a barbecue is considered in stages.

Grill dimensions
Understanding the dimensions of an iron barbecue grill according to the drawings presented on the Internet, we can only say one thing: among them there is only one standard parameter– height of sides. It varies in the range of 13-15 cm. It’s not worth doing less - the kebab will burn; a higher height means you’ll have to prepare more coals, which means costs and time.
All other sizes are at the customer's discretion:
the width is selected depending on the length of the skewers used;
the length depends on the amount of kebab required in terms of simultaneous frying, for example, if a gap of 5 cm is left between the skewers, plus the width of the meat itself, then it will be within 8-10 cm, if you need to fry 10 sticks, then the length will be within 1 m ;
the height depends on how to cook on the grill: standing or squatting, in the first case it is 70-80 cm, in the second 20-30 cm;
As for the thickness of the sheet iron, a size of 2 mm is suitable for a collapsible structure, but for the bottom it is better to use three-millimeter metal.

Dimensions of a high barbecue with a lid
Manufacturing technology of a collapsible fryer
First of all, a drawing of the barbecue is sketched out on paper with the dimensions indicated on it. In clean constructively This device is a parallelepiped. That is, all its opposite paired walls are equal to each other. The only plane that is present in a single form in the roaster is the bottom.
The development of drawings for barbecues must be approached thoroughly. Because this is the basis future design. This is where the proportions of the frying pan are displayed. And although this is of little importance for a portable collapsible version, there is still a certain aesthetic side must be present in the design.
See the drawing below, which shows the full details of the structure. This is exactly how the masters sketch it out on paper. The main task is to show the dimensions of each part, because they are each manufactured separately. A exact dimensions will help you arrange the parts into a single whole without adjustments.

Drawing of the barbecue and its parts
If the drawing of a metal grill with dimensions is ready, the master proceeds directly to making the brazier.
Materials
As mentioned above, the material you will need is a steel sheet with a thickness of 2 and 3 mm. Reinforcement with a diameter of 10 mm can be used as legs. To connect the parts of the fryer you will need eight M6 or 8 bolts.
Marking
According to the drawing, all dimensions of the grill parts are transferred to a sheet of iron. As already mentioned, there will be two side walls, end walls too, and one part of the bottom. The paired walls are identical.
You cannot scatter markings all over the sheet. Many of the dimensions of the parts are the same, so the edges of the two parts will be indicated by a single line. This way you can save money by reducing waste.
You can find cut sheets of metal on the market. If you correctly arrange (make a competent diagram of the arrangement of parts) the markings, then you can purchase not a whole sheet, but a cut one. It costs several times less.

Now important point. The parts of the barbecue are connected using bolts (as one of the options), so sides are made under the joining points, which are bent inward from the main plane of the walls by 90°. In this case, on the side walls, the bend is made at three ends with fastening to the end walls and the bottom, on the end walls only on that side - to the bottom. Bend width:
if an M6 bolt is used for connection - 10 mm;
if the M8 bolt is 12 mm.
This parameter must be added to the dimensions of the parts. For example, if the length of the barbecue is 50 cm, then the length of the side walls is 52 cm, because a fold of 1 cm is added to it on both sides.
Cutting, bending, drilling
The next stage is cutting out all parts of the grill exactly along the marking lines. This is usually done with a grinder with a cutting diamond blade. You can also use other tools: a plasma cutter, a jigsaw with a metal blade. Cutting must be carried out exactly according to the applied markings. Everything must be done carefully.

In the end, you should get five parts: side walls - 2 pieces, end walls - 2, bottom - one.
The next operation is bending the connecting areas of the grill parts. On the cut out parts of the roaster, indentations for bends are applied. Again, a ruler and marker are used. There will be three lines on the side walls: two parallel (to connect to the end walls), one perpendicular to them (to connect to the bottom). There is one line on the end walls. It should coincide in location with the line for the bottom.
A shallow cut is made along the drawn lines; it is not through, but with a small indentation of up to 0.5 mm. This is done in order to bend the bends easier and more evenly. Notice on the side walls where the cuts of perpendicular lines will create squares in two corners. They are cut off completely.
Now bends are made using a hammer. The workpiece is placed on the edge of the table, it is better if it is trimmed with a steel corner, and with light blows the edge of the bend is bent along the cutting line. The bending angle is 90°.

The next stage is the formation of junction points. To do this, a marker mark is made in the bends of the side walls with a 3 cm indentation from the top and bottom edges inward. Through holes are drilled through them.
It should be immediately noted that the bottom of the grill is not secured to the walls. It simply lies freely inside the box of side and end parts, resting against the bends on four sides.
All that remains is to drill holes in all parts of the grill. They are intended to Fresh air, oxygenated, penetrated into the coal combustion zone. Without air, the coals will not be able to release maximum quantity heat, this will make frying the kebab until it’s ready.
In principle, the homemade grill is ready. It remains to be assembled and secured with bolts.

A simple barbecue design is ready for use
Making legs
There are a huge number of options here. They are often made from sheet iron 3 mm thick, bent in a “Z” shape. To do this, you just have to make holes for bolts in the bottom of the grill and in each leg.
More reinforced design– from fittings or tubes of small diameter. The main thing is to choose the method of connecting the legs to the barbecue (collapsible). The simplest one is to weld a bolt to the leg and make a hole in the bottom for it. The leg is inserted into the grill from below with a bolt and tightened from above with a nut.
There is another option - weld tubes with a diameter slightly larger than the diameter of the fittings to the lower edges of the end or side walls of the barbecue in the places where the legs are installed. The length of the tubes is 3-4 cm. That is, the legs will simply be inserted into the tubes when assembling the fryer. It cannot be welded to the bottom, because this element is not attached to the structure of the grill. There is one point in this option - limiters in the form of washers or perpendicular transverse rods, made, for example, of wire rod with a diameter of 6 mm, are welded onto the legs. Although there are many options here.

Grill legs made of smooth reinforcement
The collapsible device for frying shish kebab can be supplemented with different convenient devices. For example, handles for lifting the entire structure in the form of rings, electrically welded or attached bolted connection to the end walls. You can do without handles by making slots for your fingers. Today, grills in the form of barbecues are popular, that is, equipped with a lid and a mesh on which meat, poultry or fish are placed.
Video description
The video shows a folding barbecue book:
On our website you can find contacts construction companies, which offer installation services for stoves and fireplaces, as well as various turnkey metal structures. You can communicate directly with representatives by visiting the “Low-Rise Country” exhibition of houses.
Conclusion
As an example, one type of collapsible barbecue was considered: its drawings with dimensions, manufacturing and assembly technology. The main task of the work producer is to select correct sizes designs and coordinate them with the customer. If you have any specific requirements, it is advisable to discuss them with the master - the convenience of further use of the barbecue and the quality of cooking depend on this.
For country holidays, a camp grill made of stainless steel has been created, which allows you to grill meat or semi-finished products over coals. During transportation, a folding one is more convenient, all the parts of which are assembled inside a transforming case. But the collapsible one has greater strength, is faster to install and dismantle upon departure.
For frying meat in nature, instead of 4 bricks, which still need to be found in the forest, it is much more convenient camp grill from the trunk of a car. Mobile hearths differ in size and design into two large categories:
- transformers - fold out, but some parts have a hinged, permanent connection with each other;
- kits - a collapsible stainless steel grill is transported in the form of separate parts.
Traditionally, the folding type is more difficult to manufacture, the individual parts of which must be hinged relative to each other, and the dimensions of the side walls and bottom must be coordinated so that they do not interfere with each other during transformation. Accurate drawings and a layout diagram are required, some are provided below. 

This drawing can be enlarged by clicking
Before making a collapsible barbecue on your own, welding is not needed, but you need another power tool: an angle grinder (angle grinder) with abrasive equipment and a drill. The size requirements are not as stringent as in the previous case, but seats must fit perfectly, see video for details.
Manufacturing technology with drawings and photos
To build a folding barbecue with your own hands, you should take into account general requirements cooking mass on coals:
- kebabs should be at a height of 20 - 30 cm from the coals;
- a distance of 8–10 cm should be provided between the skewers so that they can be rotated periodically without touching adjacent rods with meat;
- The classic portion is 6 pieces, so the skewer is 30 - 40 cm long.
Unlike stationary type, drawings for the manufacture of a portable hearth are required. For folding modifications of transformers that turn into convenient suitcases during transportation, or are placed in diplomatic cases, you will additionally need a diagram of a metal grill (layout/assembly).
Attention: The stationary fireplace has a height, based on the height of the average cook, of 0.8 - 1.2 m from the ground to the top edge on which the kebabs are placed. To save space in the trunk of a car, the mobile type has shorter legs of 40 - 50 cm.
Additional dimensions can be seen in the drawings below: 

The drawing enlarges by clicking on the picture
Collapsible design
Depending on the preferences of the owner, a prefabricated grill can consist of a different number of elements:
- with removable legs – rectangular welded body, non-separable, supporting elements screwed or installed in special grooves at the site of operation, the structure is rigid and durable, but requires a lot of space during transportation;
- completely collapsible - consists of a bottom, side end and longitudinal walls and legs.
In the latter version, collapsible barbecues are the most difficult to make with your own hands, since to connect individual elements inside them, it is necessary to make mounting holes. Most often used the following options commits:

In any of the above options a dismountable barbecue with your own hands has the same bottom size - 50 - 70 cm in length, 25 - 30 cm in width. The slots for the seats of adjacent elements are cut with an angular abrasive disc grinding machine(angle grinder), their width is equal to the thickness sheet metal, from which the structure is assembled. Here's an option you can do yourself:

Photo enlarges when clicked
Before you make a folding grill, you need to make a sketch by hand, a drawing in a program (AutoCAD, Compass, Sketchup) or download it from the Internet. All parts must be manufactured with an accuracy of 1 mm for quick transformation into the working/transport position.
The easiest way is to make a grill suitcase with your own hands according to the model in the bottom photo using the following technology: 
- the bottom is cut out of 3-4 mm sheet steel, 2 cm shelves are bent on all sides (the corners are cut with a “grinder”);
- two side sides are made in the same way, the shelves on them are bent on 3 sides (bottom and sides), vertical slots are cut on one part at the top, triangular or round on the other;
- the side walls are hinged to the end shelves of the bottom with screws, during transportation they are stacked on top of each other, in the working position they are installed vertically, at right angles to the bottom;
- The end walls are made in an identical way, the shelves on them are bent only at the sides, in the transport position they are placed inside the bottom box, and during assembly they are attached to the long side walls with screws.
On last stage To make a transforming barbecue with your own hands from metal, you need to perform three operations:
- legs - nuts are welded to the bottom, the posts are made of a rod, at one end of which a thread of the appropriate diameter is cut;
- fastening unit - so that the side walls do not fold back when moving the folded barbecue, the entire structure is drilled through the center, a bolt is passed through the hole, the parts are secured with a wing nut;
- handle – attached to the side shelf of the bottom for carrying the fireplace.
The legs can be made non-separable by welding pieces of pipe to the bottom of the briefcase, passing a rod through them, and bending it in the shape of the letter P. During transportation, the legs are pressed against the body of the suitcase, and when installed, they are folded back and stuck into the ground. Related video:
Attention: the length of the legs should be selected according to the dimensions of the bottom, so that when transformed for transportation they fit into the body.
Original designs
There are camping barbecues unusual design with real operating experience. For example, in the bottom photo there is a portable version in the shape of a truncated trapezoid. 

Although, to lighten the weight, folding barbecues usually do not have decorative ornaments, some products have unusually shaped holes to ensure traction and good combustion of the coals located inside. 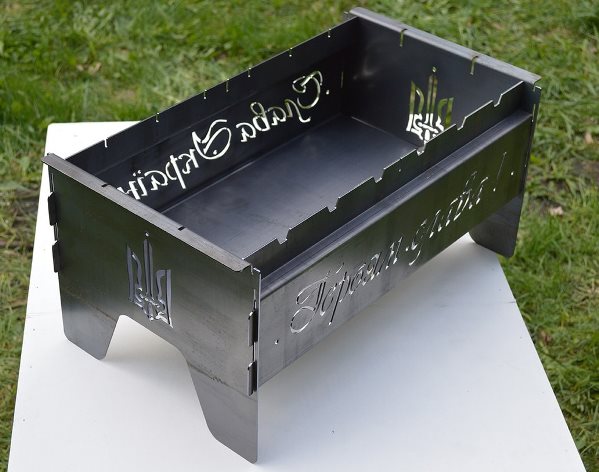
The universal design of a stainless steel barbecue can also work as a regular barbecue with skewers, weighs a little more, has additional elements housings. 
Thus, from the variety of folding and collapsible barbecues House master can choose a design that is optimally suited for specific operating conditions in order to manufacture it in-house.
Self-production of such structures allows you to accurately take into account real needs. There will always be some shortcomings in standard products. This article presents do-it-yourself metal barbecues, sizes, photos, various designs and detailed step-by-step instructions.
Forged jewelry is difficult to make. But some other parts of the design can be used as samples to create a functional product on your own
How to create metal barbecues with your own hands: dimensions, photo examples, main definitions
Buying a metal grill is not difficult. You can find many offers in the trading network. But it's unlikely to be found perfect sizes And technical equipment. This is why it seems preferable to self-production. But in any case, a preliminary formulation of specific requirements will be useful.
Compiling a list of required criteria
If the family is small and the lifestyle can be called closed, it will be enough to create a compact, lightweight structure. It will be easier to carry and clean from dirt. When regular meetings are expected as part of a large company, you will need equipment of appropriate size.
This example explains that the intended purpose of the product is especially important. To clarify its parameters, it is necessary to accurately determine the following parameters and features:
- The number and length of skewers that will be installed simultaneously to prepare one batch of dishes (maximum quantity).
- Dimensions that are suitable for the location of the future installation of the barbecue.
- Approximate weight and need for wheels.
- Protection of the barbecue area from weather influences.
- Individual requirements for appearance.
In some cases it will be useful collapsible structures. They can be transformed into a compact form, convenient for storage. Small models are useful for picnics.
Designs and materials
If you study high-quality metal barbecues with your own hands, sizes, photos, it will be easier to clarify the parameters of your own product.
The notable features of this design are listed below:
- Thick walls and a protective and decorative coating provide good strength and resistance to external influences of various natures.
- Cutouts on the edges of the body are made to fix the skewers in different positions.
- There are holes at the bottom. They are designed for free access of oxygen to the combustion area.
- On one side at the bottom there are legs with welded plates. With their help, they create reliable support points and prevent movement.
- Large wheels are suitable for moving around uneven surfaces without any extra effort.
- A small table with fastenings for attaching a scoop and poker is rigidly attached to the side of the grill. Please note that experienced master turned the hooks to the side. In this position they will not harm the user.
- The wide handles are also rigidly attached. They are easy to grip even when wearing mittens.
It is difficult to copy such a product. But this is hardly necessary if practical functions are needed. Curls and ridges quickly become dirty and can be difficult to clean. Sharp ends metal leaves unsafe. Such structures are rather used to decorate garden plots.
Brazier with a metal roof: photo of a factory product
And this solution will come in handy. The design can be made smaller and simpler, from other materials. But the idea itself is interesting - in work area Comfortable conditions will be maintained even in the rain.
Such products provide automatic rotation of processed food products, without user intervention. Uniform heat treatment is ensured and labor costs are reduced. But such a device can be purchased separately in finished form, or created separately, taking into account the dimensions of the resulting structure.
Making a stationary barbecue with your own hands from metal: drawings, photos
To create a structure, you can use the following sequence of actions:
- Install required dimensions the contour of the walls, taking into account the criteria discussed above. The depth is made from 15 to 25 cm. At a greater distance, you will have to spend too much coal to obtain a similar result.
- The length of the supporting parts is selected taking into account the height of the users. It is fashionable to measure the distance from the middle of the palms of freely lowered arms to the surface of the earth. If it is intended to make the legs sharp for penetration into the ground, make the appropriate correction (5-10 cm).
- The holes in the lower part of the body are created with a diameter of 8-12 mm.
- After determining the general parameters, they are marked on the drawing.
- Further actions will depend on personal skills, equipment, and ability to work with specialized equipment. To simplify, let’s assume that welding equipment will not be used.
- In this case, first, blanks, rectangles with the right sizes. Use a hacksaw with a suitable blade. The ends are cleaned with a file and burrs are removed.
- The edges of the sidewalls (10-15 mm) are bent at a right angle. Drill ventilation and mounting holes.
- For the legs, you can use ready-made steel corners of a suitable size.
- The individual parts are fastened with screws and nuts.
This picture shows an example with different legs. They are made of threaded steel rods. Nuts of the appropriate diameter are welded to the bottom of the body. This design can be disassembled upon completion. summer season, if it is not intended to be used in winter.
To make a barbecue with your own hands from metal, the dimensions with a roof can be estimated using a photo. Eliminate hammered curls and other excesses. Straighten the lines of the supporting elements. The result will be simple design, but no less functional than in the picture.
Related article:
More types, ideas and drawings of barbecues(collapsible, non-dismountable, with a lid, from barrels and cylinders, stationary and portable, etc.) can be found on the pages of a popular online magazine HomeMyHome.ru. In addition, there you will find a lot of useful information about the construction and renovation of your home.
Drawings of metal barbecues with dimensions, compact designs
Below are examples of small do-it-yourself metal barbecues, dimensions, photos, drawings. For their manufacture, the technological operations described above are used.
note! Steel walls must be painted using heat-resistant emulsion compositions. Regular construction paints will quickly be destroyed by flame and heat.
When choosing the size of a metal barbecue grill, you can quickly decide correct solution. But it is more difficult to decide on the type of connections. Welding requires not only equipment, but also professional skills. You will have to make the appropriate investments and undergo training. They also use the production of parts according to individual order in the workshop, they use other assembly techniques.
How to make a barbecue with your own hands (video)
You might also be interested in:

 Do-it-yourself stove: drawings, videos and a lot of photos
  DIY fireplace: step by step photo instructions with explanations
  Wood stoves fireplaces long burning for cottages and country houses
Today we’ll talk about a constant attribute of most country houses. There are many variations of metal barbecues, differing in ergonomics and decorative design. Let's go from simple to complex and explain how to make a barbecue convenient, while leaving room for imagination.
Stationary or portable
There are no special tricks to making a barbecue - it's a simple iron box with holes. It is much more difficult to make it convenient and universal for different tasks and conditions. Even better is to be able to put the iron “monster” out of sight when not in use, or take it with you on trips to the river, while it should easily fit with the rest of your things in the trunk.

Stationary iron barbecues popular for other reasons. If there is no need to frequently move them from place to place, therefore, there are no restrictions on weight - thicker and more durable metal can be used for manufacturing.

We offer the design of a folding portable barbecue, light and compact when folded, but you can always make it whole, inheriting the general principles. Approach the choice of barbecue type wisely and carefully. Remember that portable barbecues are not decorated with forging; moreover, it is better to make them from heat-resistant steel.
We select and prepare materials correctly
Why? main reason- gain in weight and durability, greater neatness. A brazier made of carbon structural steel is subject to increased scale formation when burning wood; due to cyclic heating, its walls are quickly “eaten up.” In addition, black sheet steel tends to change its structure under the described conditions, which is expressed in the appearance of waves, swelling and planar deformations on the bottom and walls. So it is likely that you simply cannot disassemble and reassemble a portable grill made of thin carbon rolled steel.
Considering the above, we can safely discard such “improvised” materials as barrels, canisters, system unit cases and other disposable hardware. But 40-liter cylinders for natural gas can be called suitable due to the fairly thick metal and radius shape, eliminating overvoltage points. But they must be burned before use, forever getting rid of traces of gas condensate. Of the features of such a workpiece, we only point out that the small width of the cylinders limits the length of the skewers. It is more practical to use a cylinder to make a smokehouse.

On average, a carbon steel brazier reinforced with forging should have a wall thickness of 4, and an unreinforced one - from 6.5 mm. For heat-resistant steel, reinforcement is almost never required: walls made of it (from 13% chromium and more than 10% nickel, with a low carbon content) with a thickness of 3.5 mm survive the fire almost unchanged.

And an extreme warning: any grill will look proportional and impressive if the master paid due attention to the preparation of details:
- cut as accurately as possible with a tolerance of no more than 0.5 mm;
- secure the workpiece with clamps to the edge of the table or in a yew;
- use a larger angle grinder - the larger the plane of the disc, the more accurate the cut.
Do not forget about safety precautions; be sure to wear protective clothing, use gloves and safety glasses.

Making the main box
We determine the width of the grill based on the length of the skewers, on average it is 45 cm. The length depends on the amount of cooking, but preferably not less than the full length of the skewers; they are convenient to store inside. The optimal size is 800 mm, which is enough for cooking and at the same time preparing a new portion of coals.

With height it’s even more tricky: approximately the thickness of the coal layer at the bottom should be 1.5 times greater than the thickness of the coal layer itself. big piece meat. And the distance between the meat and the coals should not go beyond 170-200 mm. In general, a height of 290 mm will be sufficient. Remember that the meat should not be heated by hot air, but by the thermal radiation of the coals directly.
By established sizes From a 4 mm sheet of grade 20Х20Н14С2 (or similar) we cut out:
- bottom 412x800 mm;
- two longitudinal walls 800x290 mm;
- two transverse walls 420x290 mm.

From a “black” corner 25x25x4 mm we make a frame with oblique cuts at the corners. Important inner dimensions: 816x429 mm, you need to measure on the outer surfaces, taking into account the thickness of the walls, do not forget to check the diagonals.

We are finalizing the side (long) walls. Centered on long side We make a cut 95 mm deep and 10 mm wide, having previously drilled the part to round the edge. On all walls, at intervals of 30-40 mm, we make 10 mm holes in a checkerboard pattern for blowing from the sides.
We weld to the bottom from below or place on steel rivets two or three longitudinal angles 20x20 mm, possibly from ordinary steel. We place them at a distance of 120 mm from the edges, and another 30 mm closer to the center we make two rows of 8 mm holes for air flow into central part braziers. On front side We weld short (50-70 mm) pieces of angle steel around the perimeter of the bottom; they can also be riveted.

The remaining part of the “box” is the upper frame from a corner 20x20x4 mm, welded like the bottom one, but with external dimensions of 412x800 mm. We make hooks on the outer shelves of the frame using one of the following methods:
- We make a couple of 12 mm cuts and, after heating the tongues red-hot, bend them outward.
- We squeeze in a vice and weld two strips of steel of the same thickness as the walls, with an overlap of 10 mm, and cut them into hooks 20-30 mm wide.
- We cut 2-3 cm pieces of corner and weld them around the perimeter of the frame.

At the corners of the bottom, 15 mm from each side, drill a 6 mm hole. We put the bottom into the lower frame, center it and transfer the holes to the corner. We make four L-shaped cotter pins 50x150 mm from 6 mm pins. We weld a 10 mm rod perpendicularly to the center of the bottom. The final touch on the shelves of the upper frame is to make straight and oblique cuts to secure the skewers.
Legs and assembly diagram
The legs of the barbecue are made from meter-long pieces of 35 mm corners. To allow installation on the ground, the bottom of each leg is welded with a “heel”.
At 35 mm from the top edge, a cut is made to the full depth on one of the shelves. In the same shelf, 250 mm below, a second cut is made, then they are both connected longitudinally. At the bottom, the cut continues for another 40 mm. The resulting “tongue” should be bent inside the corner, leveled, secured from below by welding and the protruding excess should be trimmed.

At the top, the cut continues for another 15 mm, but here it needs to be expanded to 7-8 mm, that is, to the thickness of the barbecue wall and the shelf of the corner of the upper frame. It is recommended to process this area of the part manually with a file, adjusting the width of the cut so that the legs fit tightly to the body. After installing all the legs, you need to transfer them through the holes in the corners of the bottom and frame to the gussets inside the corners, and then drill 8 mm holes according to the marks. The legs need to be folded “square” and one 10 mm hole must be drilled in the center and two 6 mm holes 150 cm from the edges of the uncut shelf.
The grill is assembled like this:
- We put the bottom into the bottom frame.
- We install the walls (the short ones cover the long ones).
- We insert the upper frame with hooks onto the walls of the grill.
- We hook each leg to the wall, align it and insert the cotter pin into the hole.
After use, the grill can be assembled into a relatively light compact stack. The inverted upper frame is placed on the bottom with a slight offset. On top of it there are short, then long walls, all of which is covered by an inverted lower frame. Now you need to put the legs on top, orienting the protruding rod between them.

First insert another 10 mm rod into the holes in the centers of the legs, and tighten both pairs with threaded cotter pins. Place a bend on top and weld the rod threaded through the corners to the rod secured to the bottom. Now, to disassemble the grill, just unscrew the cotter pins and pull the corners to the side, after which the entire stack will remain free.
Bells and whistles: ash pan, smokehouse, grill grate
In the end, we’ll talk about some additions to the grill that simplify cooking and maintenance. Everything is made modular, so you can only use what you need.
First of all, if you still assembled the barbecue as a stationary one, make it 50 cm higher than planned. At the bottom, place an insert made of 8 mm expanded metal mesh on 50 mm legs from the corner, weld a handle in the center. This will make the burning of the coals and the temperature more uniform, making it easier to remove ash after burning.

Using a system of hooks, like on the top frame, you can also equip the grill with an openable lid, and if you make the legs 30-50 cm longer in height, you will get a support for a small canopy from the rain. If you like to cook meat on a grill grate, do not be lazy and get a square 10-12 mm rod from of stainless steel, weld with a clearance of 15-18 mm. Such a grill will be heavy, stable and will fit perfectly into the top frame of the new grill.