Your own welding machine will always come in handy on the farm, albeit infrequently, but it is very necessary, and sometimes it’s just not possible without it. Especially if you are used to making things yourself. Therefore, do-it-yourself microwelding, made from improvised materials and outdated household appliances- just what we need.
We will not consider the option of buying a factory welding machine, as this will require money, but we will immediately follow the path of making home-made mini welding at home. There are several quite affordable schemes of welding machines for self-production, but the contact or spot welding machine seems to be the simplest and least expensive.
So that there is no doubt right away why we will describe exactly the option as, for this we will clearly determine that for this we will not need theoretical knowledge of the electrical engineering course and virtuoso mastery of locksmith skills. Everything will be simple, clear and accessible.
Preparation
The main part of all electric welding machines is a power transformer (if you do not consider modern electronic welding equipment, also called inverters). Therefore, first of all, we will need to take it from somewhere and the most suitable and affordable option for this there will be an old broken microwave oven. And the bigger it is, the better for us. More precisely, the more powerful its transformer will be and the stronger our welding.
If you want to find an old microwave oven, it’s not a problem by looking for it either from your closest friends (those who are richer), or by looking at free classifieds boards, where they are often offered for a nominal fee. From the insides microwave oven we will be interested in only one detail - this is a high-voltage transformer.
Here we will immediately define, without going into particular technical calculations that a contact welding made from such a microwave transformer will be able to generate a welding current of 800 to 1000 amperes. This current is quite enough for welding together strips of metal up to 2 mm thick, and even from of stainless steel which for simple welding is a challenge.
Preparation of the welding transformer
The high-voltage microwave transformer is a steel core, recruited from thin steel plates and located inside its two windings of copper wire. We need the winding that looks smaller, it is considered primary and will be wound from a thicker conductor. The other winding (the one that is larger in size) will be secondary and we simply do not need it. Here it is in the first place and must be dismantled from the transformer.
To do this, you need to disassemble the transformer, or rather, its core, which is made of steel plates, tightly compressed and fastened together by two thin welds. Here we need to cut these welds, for which you can use either a hacksaw or a grinder with a thin circle.
Keep in mind! There may be transformers fastened with an outer tin casing and bolts. In this case, simply unscrew the bolted connections and carefully open the casing. Everything, problems with further disassembly should not arise.
Perform this operation of disassembling the transformer very carefully, since we still need the primary winding, therefore, in no case do we bend or scratch it when removing it. But we don’t stand on ceremony with the secondary winding, it can be cut and pulled out with a hammer and a chisel in parts, it will be much easier.
As a result, we have a whole and undamaged primary winding of the transformer and its steel core in the form of two separated parts.
Next, we wind the secondary winding of our future welding transformer. Here we still have to buy a piece of new insulated copper wire with a cross section of 50 mm2 or about 8 mm in diameter. To do this, we take it and wind it around the central E-shaped magnetic circuit of the core, making two full turns. We will need all such copper wire, taking into account the output to the welding contacts of about 50 cm, the only condition is that the winding must be made so that it is the middle of the conductor.
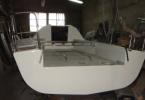
Then we assemble the transformer, while the primary winding should remain in its place, and our new winding made of copper wire should be placed instead of the secondary. We fasten the two parts of the core using the usual two-component epoxy resin and clamp the entire structure in a locksmith vice for a day. After the epoxy has dried, the transformer is completely ready for operation. Photo
Construction assembly
Having made verification measurements with a simple tester, when connecting the primary winding to a 220 V network, we have a voltage of about 2 V on the secondary winding, but with a force electric current about 800 A (this is not measured, but calculated - here we take our word for it). This current strength is more than enough to make a strong welded joint of two metal plates.
Now we make the body. To do this, you can use any materials at hand, such as wood, plywood, sheets of durable plastic or galvanized sheet. The main thing is to place the transformer itself and the bottom contact on a solid base, since one of the conditions is a strong contact. welding electrodes with a weldable surface, which, in turn, is possible with the application of great efforts.
It remains to make welding contacts and the mechanical part of our welding machine will be completed. One of the contacts will be at the bottom and it will be fixed, so it is better to make its base from a wooden block 30 cm long, so it will be easier to attach it to the base. At the end of the bar, using the manufactured bracket, we fasten the welding electrode, to which we connect one of the wires of the power winding of the transformer.
Welding electrodes for microwelding can be made with your own hands from a copper bar with a cross section of 5 to 10 mm in diameter, making a slight sharpening at the end at the point of contact with the surface to be welded. It is better, of course, to use tungsten rods or special electrodes for resistance welding from an alloy of beryllium bronze with zirconium additives for this.
We make the upper contact in the form of a lever. For this you can also apply wooden block or not very massive metallic profile in the form of a tube of small diameter. The only thing is that on a metal lever, the design of the welding electrode attachment will be more difficult, since it will also need to be isolated. At the base of the moving contact lever, we must provide a spring so that the lever in normal condition was always in the top position. To do this, you can use a steel spring or an elastic rubber band.
At the end we complete wiring diagram mini welder by connecting a wire with a standard plug for a 220 V network to the ends of the primary winding of our power transformer, and it is imperative to provide a 220 V switch. For this, both the old wire from the microwave oven and any switch designed for a voltage of 220 V and current strength of 5 A, it is better if it is a push-type microswitch (mic).
Important! Do not forget to isolate all electrical connections and contacts well.
Everything, your own hand-made mini welder for a summer residence or at home is ready and, as it turned out, making it yourself is not so difficult. Now you can safely weld small flat parts from various metals, but for this you will need to practice and gain practical skills.
And also you can watch the video on how to make a contact spot welding with your own hands and how you can use it.
No work with iron can do without a welding machine. It allows you to cut and connect metal parts any size and thickness. Good decision- do welding with your own hands, because good models are expensive and cheap ones are of low quality. To implement the idea of \u200b\u200bself-manufacturing a welder, it is necessary to acquire special equipment that allows you to hone the quality skills of a specialist in real conditions.
Types and characteristics of the tool
After everything the necessary conditions the preparatory stage has been successfully observed, it opens up the opportunity to make a model of the welding device with your own hands. Today there are many schematic diagrams by which the device can be manufactured. They operate in one of the following ways:
- Direct or alternating current.
- Pulse or inverter.
- Automatic or semi-automatic.
It is worth paying attention to the apparatus belonging to the transformer type. An important characteristic this device is work from alternating current allowing it to be used at home. AC devices are capable of providing the nomenclature quality of welded joints. A unit of this type can easily find its application in everyday life. when servicing real estate located in the private sector.
In order to assemble such a device, you must have:
- About 20 meters of cable or wire of large cross section.
- High magnetic permeability metal base to be used as the core of the transformer.
 The optimal core configuration has a U-shaped rod base. In theory, a core of any other configuration can easily fit, for example - round shape taken from the stator, which has become unusable electric motor. But in practice, winding the winding on such a base is much more difficult.
The cross-sectional area for a core belonging to a home-made household welding machine is 50 cm 2. This will be enough to use rods from 3 to 4 mm in diameter in the installation. The use of a larger section will only lead to an increase in the mass of the structure, and the efficiency of the apparatus will not become higher.
Manufacturing instructions
 For the primary winding, it is necessary to use a copper wire with high heat resistance, since when performing welding work she will be affected high temperature. The wire used must be selected according to fiberglass or cotton insulation designed for stationary use in the high temperature zone.
For the winding of the transformer, it is not allowed to use a wire with PVC insulation, which, when heated, will instantly become unusable. In some cases, insulation for the transformer winding is made independently.
To perform this procedure, you need to take a workpiece from cotton fabric or fiberglass, cut it into strips about 2 cm wide, wrap the prepared wire with them and impregnate the bandage with any varnish that has electrical properties. Such insulation in terms of thermal characteristics will not yield to any factory analogue.

Coils are wound according to a certain principle. First, half of the primary winding is wound, followed by half of the secondary. Then proceed to the second coil using the same technique. To improve the quality of the insulating coating between the layers of the windings, fragments of strips of cardboard, fiberglass or pressed paper are inserted.
Hardware setup
 Next, you need to configure. It is produced by turning on the equipment in the network and taking voltage readings from the secondary winding. The voltage on it should be from 60 to 65 volts.
Precise adjustment of the parameters is carried out by reducing or increasing the length of the winding. To obtain a qualitative result, the voltage on the secondary winding should be adjusted to the specified parameters.
A VRP cable or a SHRPS wire is connected to the primary winding of the finished welding transformer, which will be used to connect to the network. One of the outputs of the secondary winding is fed to the terminal, to which the “mass” will subsequently be connected, and the second is fed to the terminal connected to the cable. The last procedure is completed and the new welding machine is ready for operation.
Small unit production
For the manufacture of a small welding machine, an autotransformer from a Soviet-style TV is easily suitable. It can be easily used to obtain a voltaic arc. In order for everything to work out correctly, graphite electrodes are connected between the terminals of the autotransformer. This simple design allows you to perform multiple simple jobs using welding, such as:
- Making or repairing thermocouples.
- Warm up to maximum temperature high carbon steel products.
- Hardening of tool steel.
 A home-made welding machine, created on the basis of an autotransformer, has a significant drawback. It must be used with extra precautions. Without galvanic isolation from electrical network, it is a rather dangerous device.
The optimal parameters of an autotransformer suitable for creating a welding machine are considered to be an output voltage in the range from 40 to 50 volts and low power from 200 to 300 watts. This device is capable of delivering from 10 to 12 amperes of operating current, which will be sufficient when welding wires, thermocouples and other elements.
As electrodes for a DIY mini welding machine, you can use leads from simple pencil. Holders for improvised electrodes can serve as terminals that are on various electrical appliances.
For welding, the holder is connected to one of the terminals of the secondary winding, and the workpiece to be welded to the other. The handle for the holder is best made from fiberglass washer or other heat-resistant material. It should be noted that the arc of such a device operates for a rather short time, preventing the autotransformer used from overheating.
In everyday life, especially in a rural courtyard and suburban housing, there is a type of work on a mini-farm that is simply impossible to do without. This is the connection or cutting of any iron, non-ferrous metals and aluminum (in a protective gas environment) using electric arc welding. Hiring craftsmen for them is more expensive.
Why do you need a welding machine
Craftsmen without welding will not collect a single mechanical device, no mini-transport to facilitate work in the field, vegetable garden, garden, transportation of a lot.

It is clear that you cannot become a welder in an instant, you need to learn or at least practice with professionals. And, of course, assemble it yourself or purchase a store device for the formation of an electric arc.
And our advice will help them navigate the range and models. Because this market is filled with both reliable in work, but expensive, and cheap, but useless due to poor quality or for primitive welding.

Typification of electric arc devices
Similar household devices are of the following types:
- types of current;
- three-phase for 380 v.;
- inverter.

Devices for home assembly are most suitable for people with little skills in an electric circuit based on currents - direct and alternating.

Although there are several variations with the first current, and a beginner can get confused in them. We recommend them for those trained in electricity.

And below we will consider how to make a welding machine with your own hands quickly and efficiently.
Transformers. These devices lower the voltage and increase the current to form an electric arc. For example, instead of 220 volts, you get 17-45, but with a current of up to six hundred amperes (home welding needs no more than 160 amperes, the optimum is two and a half hundred).

The current is adjusted in steps. You can make a simple addition to this from high-voltage triodes and diodes with adjustable resistance. Or connect a few turns of thick metal (copper) to reduce the current. The scheme of the welding machine is shown on the site, you can also see it on the video.

In addition, they also perform a second function - they generate direct current with the help of built-in rectifiers, also for welding.


The largest number of homemade products are created on the basis of the transformation of current and voltage in one direction or another. Their properties are enough for simple electrical work in everyday life.

Rectifier. It is also a welding unit, but for high-quality work and with various metals. They are not made in everyday life. And to acquire such a device, by the way, is not cheap, it is worth it only for long welding processes and for creating especially strong seams.

For example, in case of major traffic accidents with significant damage to the car body. Given the thin metal, so as not to burn it and make the necessary connections, which are not inferior in strength to factory ones.

Inverters (from English - converters). First, about the classification of currents: there is direct (DC) and variable (AC).

Scientists from Edison to the equally famous Nikola Tesla have been interested in these transitions from one to the other. This is how the inverter welding machine was born.


The current transformation in it is multi-pass. The amplitude current turns into a direct current, and that, by means of a welding transformer, again goes out either in DC or in AC.
Both, looking at which the circuit is set, then turn into an electric arc with a gradual change in its parameters in the required ranges.

It is difficult to create it at home, but on sale it is massive, despite the significant high cost.

What is "cooking"?
The current strength depends on the tool that you use to weld - the electrode.

Its thickness is tied to the thickness of the parts to be welded: if they are equal to five to six millimeters, then the electrode should not be thinner than four. This is the maximum on homemade products.


You can reduce electricity consumption if you cook sizes with thinner cores (up to one and a half cm). In this case, the current will decrease by five times.

Installation of a welded unit in the form of a transformer
For this you need:
- a set of plates for a magnetic circuit - buy from burned-out windings at the bazaars inexpensively or in disassembly;
- large-section wire for both types of windings.

The basis for them is steel plates no thinner than a third of a millimeter. You collect them in a rectangle with a large inner space, where the primary and secondary windings should fit on the two vertical sides.
The number of turns depends on the area steel frame, it is easy to calculate it with a ruler and arithmetic. And divide the amount in half.

The thickness of the wire is calculated according to the following scheme: divide the installed kilowatts of the welder by two thousand and multiply by one with thirteen hundredths.

How is the construction of the welding machine assembled. First, the primary winding is wound, start layer by layer, isolate the entire winding, bring it to the contact plate with four fasteners: the beginning and end of the winding for connecting 220 V., two more taps from 165 and 190 turns. Taps - current variators.

The secondary winding goes like this: out of 70 turns 40-41, the primary is covered on top, the remaining turns go to the other side.

Also bring its ends to getinax (textolite) - from here the “plus” and “minus” will go one to the welding lever, the second to the part to be welded. The device is ready to work. Take a photo of a homemade welding machine.

During long-term operation repair of the welding machine is possible: tightening of fastening of plates (vibrate), contact plates.

Photo tips on how to make a welding machine with your own hands


Inverter welding is a modern device that is widely popular due to the low weight of the device and its dimensions. The inverter mechanism is based on the use of field effect transistors and power switches. To become the owner of a welding machine, you can visit any tool store and get one useful thing. But there is a much more economical way, which is due to the creation of do-it-yourself inverter welding. It is the second method that we will pay attention to in this material and consider how to do welding at home, what is needed for this and what the circuits look like.
Features of the operation of the inverter
An inverter-type welding machine is nothing more than a power supply, the one that is now used in modern computers. What is the basis of the work of the inverter? In the inverter, the following picture of the conversion of electrical energy is observed:
2) The current with a constant sinusoid is converted into an alternating current with high frequency.
3) The voltage value decreases.
4) The current is rectified while maintaining the required frequency.
The list of such transformations electrical circuit necessary in order to be able to reduce the weight of the apparatus and its dimensions. After all, as you know, old welding machines, the principle of which is based on a decrease in the magnitude of the voltage and an increase in the current strength on the secondary winding of the transformer. As a result, due to the high value of the current strength, the possibility of arc welding of metals is observed. In order for the current to increase and the voltage to decrease, the number of turns on the secondary winding decreases, but the cross section of the conductor increases. As a result, it can be seen that the transformer-type welding machine not only has significant dimensions, but also a decent weight.
To solve the problem, a variant of the implementation of the welding machine by means of an inverter circuit was proposed. The principle of the inverter is based on increasing the current frequency to 60 or even 80 kHz, thereby reducing the weight and dimensions of the device itself. All that was required to implement an inverter welding machine was to increase the frequency by a thousand times, which was made possible thanks to the use of field-effect transistors.
Transistors provide communication between themselves with a frequency of about 60-80 kHz. A constant current value comes to the power circuit of the transistors, which is ensured by the use of a rectifier. A diode bridge is used as a rectifier, and capacitors provide voltage equalization.
Alternating current, which is transmitted after passing through the transistors to the step-down transformer. But at the same time, a hundreds of times smaller coil is used as a transformer. Why a coil is used, because the frequency of the current that is fed to the transformer is already increased 1000 times thanks to field effect transistors. As a result, we obtain similar data as in the case of transformer welding, only with a big difference in weight and dimensions.
What you need to build an inverter
To assemble inverter welding on your own, you need to know that the circuit is designed, first of all, for a consuming voltage of 220 volts and a current of 32 amperes. Already after the conversion of energy at the output, the current will be increased by almost 8 times and will reach 250 amperes. This current is enough to create a strong seam with an electrode at a distance of up to 1 cm. To implement an inverter-type power supply, you will need to use the following components:
1) A transformer consisting of a ferrite core.
2) Winding of the primary transformer with 100 turns of wire with a diameter of 0.3 mm.
3) Three secondary windings:
- internal: 15 turns and a wire diameter of 1 mm;
- medium: 15 turns and a diameter of 0.2 mm;
- outer: 20 turns and a diameter of 0.35 mm.
In addition, to assemble the transformer, you will need the following items:
— copper wires;
- fiberglass;
- textolite;
- electrical steel;
- cotton material.
What does an inverter welding circuit look like?
In order to understand what an inverter welding machine is in general, it is necessary to consider the diagram below.
Electrical diagram of inverter welding
All these components must be combined and thereby obtain a welding machine, which will be an indispensable assistant in the performance of plumbing work. Below is circuit diagram inverter welding.

Inverter welding power supply circuit
The board, on which the device's power supply is located, is mounted separately from the power section. The separator between the power section and the power supply is a metal sheet connected to the body of the unit electrically.
To control the gates, conductors are used, which must be soldered near the transistors. These conductors are interconnected in pairs, and the cross section of these conductors does not play a special role. The only important thing to consider is the length of the conductors, which should not exceed 15 cm.
For a person who is not familiar with the basics of electronics, reading this kind of circuit is problematic, not to mention the purpose of each element. Therefore, if you do not have skills in working with electronics, then it is better to ask a familiar master to help you figure it out. Here, for example, below is a diagram of the power section of an inverter welding machine.

Scheme of the power part of inverter welding
How to assemble inverter welding: a step-by-step description + (Video)
To assemble the inverter welding machine, you must perform next steps works:
1) Frame. As a body for welding, it is recommended to use an old system unit from a computer. It fits best because it has required amount holes for ventilation. You can use an old 10-liter canister that you can cut holes in and place the cooler. To increase the structural strength of the system housing, it is necessary to place metal corners, which are fixed with bolted connections.
2) Assembly of the power supply. An important element The power supply is precisely the transformer. It is recommended to use 7x7 or 8x8 ferrite as the basis of the transformer. For the primary winding of the transformer, it is necessary to wind the wire across the entire width of the core. Such an important feature entails an improvement in the operation of the device when voltage drops occur. As a wire, it is imperative to use copper wires of the PEV-2 brand, and in the absence of a bus, the wires are connected into one bundle. Fiberglass is used to insulate the primary winding. From above, after a layer of fiberglass, it is necessary to wind the turns of shielding wires.

Transformer with primary and secondary windings to create inverter welding
3) Power part. The step-down transformer acts as a power unit. Two types of cores are used as a core for a step-down transformer: W20x208 2000 nm. It is important to provide a gap between both elements, which is solved by placing newsprint. The secondary winding of the transformer is characterized by winding turns in several layers. Three layers of wires must be laid on the secondary winding of the transformer, and PTFE gaskets are installed between them. Between the windings, it is important to place a reinforced insulating layer, which will avoid voltage breakdown to the secondary winding. It is necessary to install a capacitor with a voltage of at least 1000 volts.

Transformers for the secondary winding from old TVs
To ensure air circulation between the windings, it is necessary to leave air gap. A current transformer is assembled on the ferrite core, which is connected to the positive line in the circuit. The core must be wrapped with thermal paper, so it is best to use a cash register tape as this paper. The rectifier diodes are attached to the aluminum heatsink plate. The outputs of these diodes should be connected with bare wires, the cross section of which is 4 mm.
3) inverter unit. The main purpose of the inverter system is the conversion of direct current into alternating current with a high frequency. To ensure the increase in frequency and apply special FETs. After all, it is transistors that work to open and close at a high frequency.
It is recommended to use more than one powerful transistor, but it is best to implement the circuit based on 2 less powerful ones. This is necessary in order to be able to stabilize the frequency of the current. The circuit cannot do without capacitors, which are connected in series and make it possible to solve such problems:

Inverter on aluminum plate
4) Cooling system. Cooling fans should be installed on the case wall, and for this you can use computer coolers. They are necessary in order to ensure the cooling of the working elements. The more fans you use, the better. In particular, it is mandatory to install two fans to blow the secondary transformer. One cooler will blow on the radiator, thereby preventing overheating of the working elements - rectifier diodes. Diodes are mounted on the radiator as follows, as shown in the photo below.

Rectifier bridge on the cooling radiator

Photo of thermostat
It is recommended to install it on the heating element itself. This sensor will be triggered when critical temperature heating element. When it is triggered, the power to the inverter device will be turned off.

Powerful fan for cooling the inverter device
During operation, inverter welding heats up very quickly, so the presence of two powerful coolers is prerequisite. These coolers or fans are located on the body of the device so that they work to extract air.
act Fresh air into the system will be thanks to the holes in the device case. The system unit already has these holes, and if you use any other material, then do not forget to provide fresh air.
5) Board soldering is a key factor, since the entire circuit is based on the board. It is important to install diodes and transistors on the board in the opposite direction to each other. The board is mounted directly between the cooling radiators, with the help of which the entire circuit of electrical appliances is connected. The supply circuit is designed for a voltage of 300 V. The additional location of 0.15 μF capacitors makes it possible to dump excess power back into the circuit. At the output of the transformer, capacitors and snubbers are located, with the help of which overvoltages are damped at the output of the secondary winding.
6) Setting up and debugging work. After the inverter welding is assembled, it will be necessary to carry out a few more procedures, in particular, to set up the functioning of the unit. To do this, connect a voltage of 15 volts to the PWM (pulse width modulator) and power the cooler. Additionally included in the relay circuit through the resistor R11. The relay is included in the circuit in order to avoid power surges in the 220 V network. It is imperative to control the switching on of the relay, and then apply power to the PWM. As a result, a picture should be observed in which rectangular sections on the PWM diagram should disappear.

Homemade inverter device with a description of the elements
You can judge the correct connection of the circuit if, during setup, the relay outputs 150 mA. In the case when a weak signal is observed, this indicates an incorrect connection of the board. It is possible that there is a breakdown in one of the windings, therefore, to eliminate interference, it will be necessary to shorten all the supply wires.

Inverter welding in the case of the system unit from the computer
Device health check
After carrying out all the assembly and debugging work, it remains only to check the performance of the resulting welding machine. To do this, the device is powered from the mains 220 V, then high current strength is set and the readings are verified using the oscilloscope. IN bottom loop the voltage should be within 500 V, but not more than 550 V. If everything is done correctly with a strict selection of electronics, then the voltage indicator will not exceed 350 V.
So, now you can check welding in action, for which we use required electrodes and carry out cutting the seam until the electrode burns out completely. After that, it is important to control the temperature of the transformer. If the transformer simply boils, then the circuit has its drawbacks and it is better not to continue the workflow.
After cutting 2-3 seams, the radiators will heat up to a high temperature, so after that it is important to let them cool down. For this, a 2-3 minute pause is enough, as a result of which the temperature will drop to the optimum value.

Checking the welding machine
How to use a homemade device
After being connected to the circuit homemade device, the controller will automatically set a certain current strength. If the wire voltage is less than 100 volts, then this indicates a malfunction of the device. You will have to disassemble the device and again re-check the correctness of the assembly.
Using this type of welding machine, it is possible to solder not only ferrous, but also non-ferrous metals. In order to assemble a welding machine, you will need not only knowledge of the basics of electrical engineering, but also free time to implement the idea.
Inverter welding is an indispensable thing in the garage of any owner, so if you have not yet acquired such a tool, then you can make it yourself.
Welding work at home has long been commonplace. Availability of devices and Supplies, the opportunity to inexpensively study in welding courses, various manuals for obtaining independent skills. All these factors make it possible to save on the wages of a professional welder, and increase the efficiency of work.
However, if you carefully study the market for welding machines, unpleasant moments are revealed:
- High-quality welders have a high cost, it is more profitable to hire a specialist several times (unless, of course, you do this work all the time).
- Affordable units have a number of disadvantages: low reliability, poor quality seam, dependence on the supply voltage and the type of consumables.
Hence the conclusion: if necessary high quality equipment for affordable price, you have to make a welding machine from available materials with your own hands.
Before considering the options for homemade welders, we will analyze the principle of their work.
Ohm's law is at the heart of the operation of any unit. At constant power, there is an inverse relationship between current and voltage. For normal operation, a current of 60–150 A is required. Only in this case, the metal in the welding zone will melt. Imagine a welding machine that works directly with a voltage of 220 volts. To achieve the required current strength, a power of 15–30 kW is required. Firstly, for this it will be necessary to lay a separate power supply line: most inputs to residential premises are limited specifications at the level of 5–10 kW. In addition, for such a current strength, wiring with a cross section of at least 30 mm² is required. You will have to cook in compliance with protective measures when working in electrical installations up to 1000 volts: rubber boots, gloves, workplace fencing, and so on.
Of course, it is impossible to provide such conditions in reality.
Therefore, any welding machine converts the voltage (downward): at the output we get the desired current while maintaining reasonable power.
The optimal voltage value is 60 volts. With a welding current of 100 A, this is quite acceptable 6 kW of power. How to convert voltage?
There are four main types of welding machines

Any of these devices can be assembled independently. Let's review manufacturing technologies by models:
Transformers (with or without rectifier)
The heart of the transformer is the core. It is recruited from transformer steel plates, which are quite problematic to make manually. Truth and Falsehood raw material mined at factories, in construction teams, at scrap metal collection points. The resulting structure (usually in the form of a rectangle) must have a cross section of at least 55 cm². This is a rather heavy construction, especially after laying the windings.
When assembling, it is imperative to provide an adjusting screw with which you can move the secondary winding relative to the stationary primary.

In order not to go into the complexity of calculating the cross section of wires, we take typical parameters:
- current strength on the secondary 100–150 A;
- open circuit voltage 60–65 volts;
- operating voltage when welding 18–25 volts;
- current strength on the primary winding up to 25 A.
Based on this, the cross section of the primary wire should be at least 5 mm², if done with a margin, you can take a wire of 6–7 mm². The insulation must be heat-resistant, of a material that does not support combustion.
The secondary winding is recruited from a wire (or preferably a copper bus), with a cross section of 30 mm². Rag insulation. Don't let the thickness scare you, the number of turns on the secondary is small.
The number of turns of the primary winding is determined by a factor of 0.9–1 turns per volt (for our parameters).
The formula looks like this:
W(number of turns) = U(voltage) / factor.
That is, with a network voltage of 200–210 volts, it will be about 230–250 turns.
Accordingly, at a secondary voltage of 60–65 volts, the number of its turns will be 67–70.
From a technical point of view, the transformer is ready. For ease of use, it is recommended to make a small margin for the secondary winding, with several branches (on 65, 70, 80 turns). This will allow you to work confidently in places with low mains voltage.
Hiding the unit in the case, or leaving it open is a matter of safe use. Typical manufactured welding transformer by hand it looks like this:

The optimal material for the case is textolite 10–15 mm.
Adding a rectifier
A home-made powerful welding transformer from the point of view of circuitry is a conventional power supply. Accordingly, the rectifier is arranged as simply as in the mains charger for mobile phone. Only the element base will look several orders of magnitude more massive.
As a rule, in a simple circuit from diode bridge add a pair of capacitors that dampen the rectified current pulses.

You can assemble a rectifier without them, but the smoother the current, the better the welding seam is obtained. To assemble the bridge itself, powerful diodes of the D161–250 (320) type are used. Since a lot of heat is generated on the elements under load, it must be dissipated using heatsinks. Diodes are attached to them with bolted connection and thermal paste.

Of course, the radiator fins must either be blown by a fan or protrude above the case. Otherwise, instead of cooling, they will heat the transformer.
mini welding transformer
If you do not need to weld rails or channels from 4–5 mm steel, you can assemble a compact welder for soldering steel wire (making frames for homemade products) or welding thin sheet metal. To do this, you can take a ready-made transformer from a powerful household appliance ( perfect option- microwave), and rewind the secondary winding. Wire cross section 15–20 mm², power consumption no more than 2–3 kW.

The scheme is calculated in the same way as for more powerful units. When assembling the rectifier, you can use less powerful diodes.
micro welder
If the scope is limited to soldering copper wires(for example, when installing junction boxes), you can limit yourself to a design the size of a couple of matchboxes.
It is performed on the transistor KT835 (837). The transformer is made independently. In fact, this is a high-frequency boost converter.
Unlike traditional welders, this scheme uses high voltage, up to 30 kV. Therefore, care must be taken when working.
We wind the transformer on a ferrite rod. Two primary windings: collector (20 turns 1 mm), base (5 turns 0.5 mm). Secondary (step-up) winding - 500 turns of 0.15 wire.

We assemble the circuit, solder the resistor piping according to the circuit (so that the transformer does not overheat at idle), the device is ready. Powered from 12 to 24 volts, with the help of such a device you can weld wire harnesses, cut thin steel, connect metals up to 1 mm thick.

A thick sewing needle can be used as welding electrodes.
Inverter (switching power supply for welding)
A homemade inverter welding machine cannot be made simply “on the knee”. This will require a modern element base and experience with the repair and creation electronic devices. However, the scheme is not as terrible as it is painted. There are a great many such devices, and they all work no worse than factory counterparts. In addition, in order to create a pulse welding machine with your own hands, it is not necessary to purchase dozens of expensive radio components and ready-made assemblies. Most of them, especially high-frequency elements for the power supply, can be borrowed from old TVs or a PSU from a computer. The cost is close to zero.
The considered inverter has the following characteristics:
- Load current on electrodes: up to 100 A.
- Power consumption from a 220 volt network - no more than 3.5 kW (current about 15 A).
- Used electrodes up to 2.5 mm.
The illustration shows finished circuit, which has been repeatedly tested by many home craftsmen.

Structurally, the inverter consists of three elements:
- Power supply for the converter and control circuit. Made on affordable element base, using an optocoupler from an old computer power supply. At self-manufacturing transformer cost is almost zero: cheap parts. Denominations and names of radioelements in the illustration.
- Capacitor charge delay unit (for the starting arc). Made on the basis of KT972 transistors (absolutely not a shortage). Of course, transistors are mounted on radiators. For switching, an ordinary automobile relay with a current load on the contacts of up to 40 A is sufficient. For manual control, conventional circuit breakers (bags) of 25 A are installed. Output 300 volts - idling. When loaded, the voltage is 50 volts.
- The current transformer is the most critical node. When assembling Special attention should pay attention to the accuracy of the inductors. Some customization can be done with variable resistor(highlighted in red in the diagram). However, if the parameters are not consistent, the required arc power cannot be achieved. PWM is implemented on the US3845 chip (one of the few parts that you have to buy). Power transistors - all the same KT972 (973). Some elements in the diagram are imported, but they can be easily replaced with affordable domestic ones by looking for analogues on the datasheet website. The high-frequency unit is made from parts of a horizontal transformer from a TV.
To the exit welding inverter work wires no more than 2 meters long are connected. The cross section is at least 10 squares. When working with electrodes up to 2.5 mm, the current drop is minimal, the seam is smooth and even. The arc is continuous, not worse than the factory counterpart.
In the presence of active cooling (fans from the same computer block supply), the design can be compactly packed into a small case. Considering high frequency transducers, it is better to use metal.

Outcome
The more complex the homemade welding machine, the greater the savings. Exactly simple transformers are more expensive due to the use of expensive copper in windings or transformer iron. Impulse blocks power supplies, especially if there are old parts from typical electrical appliances in stock, are almost free.
Related videos