Renovating a bathroom is an expensive business. Today, prices on the construction services market are such that a team of professionals will have to pay at least 50% of the cost of materials. Self-execution work will allow you to save significantly. However this process requires not only extensive knowledge in many areas (from installing sockets to pipe routing), but also skill. We’ll talk about how to renovate a bathroom with your own hands in this article.
Expenses
Before you get involved in the adventure called “do-it-yourself repair”, study the prices. Check out the offers at professional field, estimate the cost of materials, the time you plan to spend on repairs, and decide whether it’s worth doing it yourself. It is difficult to predict costs with high accuracy, however, you can rely on the following current prices:
- floor tiles (30*30 cm) - from 50 rub. per piece;
- tiles for walls (15*15 cm) - from 40 rub. per piece;
- porcelain stoneware slab - from 50 rub. per piece;
- moisture-resistant plasterboard (250*120*1.25 cm) - from 300 rub. per sheet;
- PVC panels (30*10*0.5 cm) - from 15 rub. per piece;
- self-leveling floor - from 200 rub. for 10 l.;
- self-leveling floor with insulation - from 600 rubles. per sq. m.;
- latex paint - from 300 rub. for 3 kg;
- sealant - from 300 rub. for 300 ml.;
- grout for tile joints- from 130 rub. for 2 kg;
- primer - from 250 rub. for 10 kg;
- polypropylene pipes - from 24 rubles. per sq. m. for cold water, from 50 rub. per sq. m. for hot;
- sewer pipe - from 50 rub. per sq. m.;
- fittings for pipes (adapters, couplings, angles) - 60% of the price of pipes;
- tile adhesive - from 25 rub. for 5 l.;
- shower cabin - from 18 thousand rubles;
- bath - from 6 thousand rubles;
- toilet - from 3.5 thousand rubles;
- sink - from 2.5 thousand rubles;
- furniture with water-repellent film - from 2 thousand rubles. behind the sink cabinet;
- heated towel rail - from 1.5 thousand rubles;
- mixer - from 1 thousand rubles.


Pay attention to quality characteristics goods. Facing material must be resistant to moisture and steam, salts, cleaning agents, including aggressive ones.
Floor
The most common option is tiles measuring 30*30 cm. Thus, one slab is enough to cover 0.09 square meters. m. surface. Divide the total floor area by the area of each tile to obtain the required amount of material. Buy 7% more than you received in the calculation to be prepared for unforeseen circumstances (battle, incorrect cutting). Porcelain tiles can be a good replacement for tiles. It is durable and decorative, but costs a little more. Calculate the required quantity according to the same scheme.


Walls
Popular materials for cladding:
- tiles - durable, moisture-proof, with a wide palette of colors;
- PVC panels - cheap, decorative;
- moisture-resistant wallpaper - a special composition with which the paper is impregnated reliably protects against moisture and steam, but is only suitable for well-ventilated rooms;
- latex paint - the coating will protect against fungus and steam only if applied in several layers;
- decorative plaster - ideally required smooth walls, does not get wet from steam, but does not retain its original appearance for long.
Calculation required quantity tiles, mosaics, marble, PVC panels for walls follows the same rules as for floors. Paint consumption per 1 sq. m. is usually indicated on the product packaging. To estimate required quantity wallpaper, divide the perimeter of the room by the width of the roll. It is better to purchase all materials with a small reserve.


Ceiling
The optimal solution for the ceiling during a budget bathroom renovation is to paint it with moisture-resistant paint, use plaster or PVC slats. Some people use glass wallpaper; they are practical and easy to install. No specific skills are required for gluing them.

Pipes and fittings
Polypropylene pipes are cheaper than metal-plastic ones, they are easier to weld into a monolith, hide behind tiles or in plasterboard box. They bend well without losing their insulating properties. Choose fittings made from solid plastic; they provide excellent protection against leaks and last a long time. Metal ones are only suitable for connecting a boiler. Pipes will be needed for a toilet, sink, washing machine, bidet, bathtub or shower. Based on where you plan to supply the water, decide on the quantity.


Tool
To carry out your own repairs you will need:
- tile cutter;
- diamond drill;
- alignment beacons;
- level;
- machine for welding polypropylene pipes;
- drill;
- perforator;
- screwdriver;
- spanners;
- screwdrivers;
- putty knife;
- paint brushes;
- buckets and basins for mixing solutions;
- improvised means for removing excess material (cloth, sandpaper).
The set of props varies depending on the type of material selected. Don't rush to buy a tool. To save money, you can rent it.
Repair stages
Work plan
Compose detailed plan actions taking into account all the nuances. Decide which elements you want to replace and which can be patched up, restored and left. Draw a rough sketch, select color scheme, draw up a diagram of the location of water intake points, electrical appliances, and plumbing fixtures. Estimate the estimate, decide on the type of material and its cost. Some salons provide free design services if you purchase facing material from them.
Dismantling
Take out the plumbing: bathtub, furniture, sink. You can leave the toilet. Then proceed to dismantling the old finish: ceiling and wall covering. Stock up on trash bags and patience. If the tile setter has done his job properly, you will need a hammer, chisel, drill and hammer drill. Installation with a hammer drill speeds up the process, but increases the amount of dust. You can forget about neatness and cleanliness. Oil paint removed with a special solution.
Communications update
Old cast iron pipes To drain, you will have to remove them and replace them with polypropylene ones. It is necessary to make connections to the planned water intake points - bathtub, sink, washing machine. When laying pipes, do not forget about the installation location of the meters. To avoid stagnant water, place pipes at an angle. Provide a podium for the shower stall if you plan to install one. Do not neglect this advice to avoid water stagnation. The minimum drain angle is 5%. Think about ways to disguise the wiring: you can make boxes from plasterboard, then lining them with tiles.
Don't forget to update your electrical wiring. It must meet all safety rules (have a high degree of protection) and functionality. Allowed outdoor and hidden gasket cable. We advise you to provide at least 3 sockets: near the mirror surface, for household washing machine and additional (for a boiler, electric heated towel rail).
Flooring installation
Floor repair begins with a screed. If there is no insulation, consider only the thickness of the tiles. If you plan to use a “warm floor” system, add 3-4 cm to the screed. You will have to work hard with its installation. He can be:
- water - a system of pipes heated from the central water supply;
- film - infrared frame with thermoregulation;
- electric - made of heating elements, operating from the network.
Only a person who is well versed in electricity can implement this idea.
Work plan without complex system insulation is as follows:
- treatment concrete slab deep penetrating primer;
- installation of reinforcing mesh;
- laying simple insulation (expanded polystyrene) on the reinforcing mesh;
- installation of beacons by level (the distance between them is 60-70 cm);
- preparing the mixture for pouring;
- filling with mortar, leveling;
- removal of beacons;
- removal of unevenness (grinding, grouting).
The mixture hardens on average in 12 hours.
Wall covering
Tiles
Plaster the walls before laying, achieve perfect flat surface. Then coat them with primer and water-repellent mastic. Next stage- marking the wall for installation (use a construction marker, stencil). After the surface is lined, all that remains is to place the tiles on the glue. Be sure to use plastic crosses in order to get perfectly even seams. It is better to insert 4 crosses per tile, placing them in the middle of each side. The last stage is grouting the joints. Don't forget to pull out the crosses; you may need pliers for this.

Plastic
PVC panels are a budget replacement for ceramics. Don't limit yourself to white. Now in stores there are options in a wide range of colors: stone, with ornaments to suit every taste, imitating brick, metal. At a certain level of skill, it will take 1 evening to install the plastic. Panels are placed on prepared, even walls using liquid nails, in other cases they use metallic profile.

Wallpaper
Give preference special material with increased moisture resistance. Usually used vinyl covering. It is dense and meets the stated requirements. Wallpaper is glued to smooth, plastered walls coated with a compound against fungus and mold. A special glue is also used, suitable for rooms with high humidity.

Ceiling installation
Easier and cheaper to use plaster mixtures. The majority still prefer suspended structures, considering them more aesthetic. Let's talk about their varieties.
Made from PVC slats
As in the case of walls, a ceiling made of PVC panels is the most budget option. They are mounted on a metal profile and installation takes a couple of hours. Despite their low cost, modern plastic panels are difficult to distinguish from stretch ceiling, which is extremely difficult to install yourself. Now they produce PVC slats different forms, in a rich color palette, which allows you to create fancy multi-tiered structures.

Plasterboard
Look for special ones in stores moisture resistant drywall. Installation of the box is not difficult. Using sheets you can create niches for lamps and decorative borders. It should be remembered that the structure “eats” 7-10 cm of height.

Tensioners
Glossy Vinyl Film light shade visually expands the room, despite the fact that it lowers the ceiling by several centimeters due to the installation features. However, traces of condensation are clearly visible on the gloss. It is better to give preference to the matte variety.

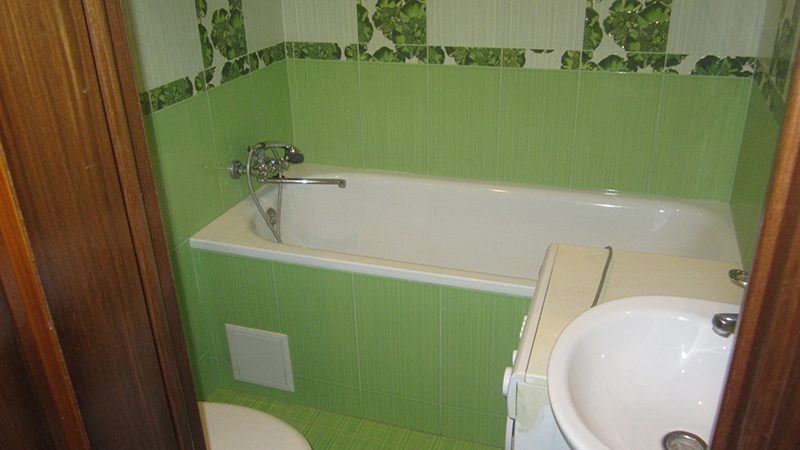
Plumbing installation
IN last resort plumbing is installed: shower or bathtub, toilet, bidet, sink, faucets. Tip: no need to buy new bath, if the old one suits you in size. It can be updated by covering it with acrylic. If desired and possible (depending on the area of the room), a cabinet under the sink and a cabinet for towels can be installed.


Secrets of saving
Finally, we will give some valuable tips on how to reduce the cost of repairs without losing quality.
- Take a closer look at to domestic producers finishing materials and plumbers. You overpay for a brand of well-known foreign brands. Now on the market there are many goods from Russia and the CIS at an excellent price, not inferior in quality to foreign ones.
- Plan your expenses carefully. Without an estimate, it’s easy to go over budget, and there’s a high risk of spontaneous purchases. Reserve 10% for unforeseen circumstances.
- Monitor offers from city flea markets. People often give away leftover material for free (pickup), rather than donate suitable plumbing fixtures at a price below the market price.
- If you did not use insulation when screeding the floor, place a fluffy anti-slip mat near the sink and toilet. You don't have to endure the cold of the tiles.
- Even if you used cheap materials during the renovation, beautiful clean towels, an interesting shower curtain and an organizer for accessories (toothbrushes, cotton pads and swabs) will transform the most budget renovation. Use hanging storage racks and keep the area clean. Don't clutter it.

Before you get started self-repair in the bathroom, evaluate your strength. You will save money, but you will spend a lot of time and effort. Such work requires specific knowledge in the field of repair, at least several free hours a day, responsibility and accuracy. On average, a person working a basic 8-hour job can independently renovate a bathroom in a couple of months. We hope that the advice in our article will help you implement your idea. Good luck!
Not everyone can afford expensive ones - that’s why many owners of apartments and houses are interested in economical bathroom renovations. Cheap does not mean poor or ugly. Even with minimum investment You can turn your bathroom into a functional and aesthetically pleasing space by cutting costs wisely. In this article we will help you make a choice of inexpensive finishing materials and show original ideas inexpensive repairs.
How can you cut costs?
- cost of work,
- price of materials, furniture and plumbing fixtures,
- delivery of purchased goods.
The more repair work If you do it yourself, without paying for the services of third-party specialists, the cheaper it will cost you to update your bathroom. All building materials should be purchased in one place, since large specialized supermarkets offer volume discounts and often provide free delivery within the city.
But the main area for savings will, of course, be building materials. However, the approach to their choice should also be rational, so as not to fall into the trap of your own greed and not ruin your bathroom renovation ( good economy options can be seen in the photo on the Internet).
You can also save significantly on plumbing:
- old cast iron bath easy to restore (from acrylic coating to plastic liner).
- The most inexpensive toilet will be a floor-mounted earthenware product, which, moreover, can easily be installed on your own.
- Of the mixers, the most practical and economical is the lever type (and not an expensive thermostat, and not an overly cheap valve).
What you shouldn't save on
It is absolutely impossible to save on those things that have the greatest functional load in the bathroom.

Basic plumbing elements (bathtub, toilet, sink);
Faucets and pipes (fraught with breakdowns and flooding);
Floor finishing;
Wall finishing (especially in areas of contact with water).
We choose inexpensive finishing materials.
Let's say right away: due to high humidity, never use in the bathroom. paper wallpaper or lime whitewash.
Ceiling
Renovating economy class bathrooms most often involves next finishing ceiling:
- painting (matte waterproof paint - inexpensive and beautiful);
- installation of suspended rack PVC ceiling(helps to hide communications, complete with fasteners will not exceed 1200 rubles per sq. m.).
Floor
Least expensive:
- linoleum (only waterproof types are suitable for the bathroom, they cost about 400-500 rubles per sq. m.);
- tile.
Walls
If you have started a bathroom renovation, think very carefully about the budget option for finishing the walls (the most significant ones in terms of volume). Choose from:
- tiles;
- PVC lining or panels (with fasteners and frame will cost no more than 400 rubles per sq. m.);
- moisture-resistant paint (water-dispersion acrylic);
- washable wallpaper.
Photos are enlarged, click!
The work plan should look like
- We think through the design of a bathroom with different options layouts and colors external design, we determine the final version.
- We calculate the quantity of materials, their purchase and delivery, and organize everything.
- Delete old finishing, we are preparing the room.
- We carry out floor repairs (if necessary): concrete screed and waterproofing.
- We install or repair pipelines and electrical wiring.
- We level the walls and ceiling (plaster).
- We do finishing of ceilings, floors and walls.
- We install ventilation.
- We install plumbing fixtures.
Designers claim
budget renovations in the bathroom can be carried out with a minimum of costs (and many photos of such ideas can be found on the Internet).
And here are four original and inexpensive way bathroom decoration:
“Striped Flight” - fresh and dynamic
Using three cans of paint different colors(but matching each other) draw three wide stripes from the floor, through the ceiling, to the opposite wall. Place all shelves and hooks inside the strips, not at the joint. The following combinations are good: yellow-orange-beige, lilac-lilac-violet, blue-blue-green, sand-cornflower blue-indigo, white-lilac-pink, etc.
“Wall of creativity” - transforming the entire room
Bathroom renovations can be considered economy class by decorating just one wall. Spend some money on original design expensive tiles, beautiful vinyl stickers, artistic painting manually or a portrait on the entire wall - and you will create the impression of a super renovation of the entire room.
“Repairs underfoot” - emphasis on the floor
If you find a stylish and bright solution for decorating the floor, then even the most boring walls in the bathroom will sparkle with unprecedented colors. It can be a white floor with black polka dots, imitation transparent sea water with fish and algae, a monochrome coating with a decorative border, tiny tiles with mosaics in the style of ancient Roman baths - in a word, creativity and maximum imagination.
“Favorite color” - harmonious interior
Repaint the walls in one color that you love and is pleasing to the eye, match the bathroom curtain, soap dishes, cups for toothbrushes and towels - and the room will be transformed.
If you plan your bathroom renovation wisely, the budget option will not be a problem for you. Trust your preferences and fresh ideas professionals - and you will get a beautiful bathroom inexpensively.
Our works:
Video material:
It doesn't always make sense to renovate an apartment at a five-star hotel. There could be countless reasons for this, from plans to sell your home to the usual shortage of Money. If you wish and have the opportunity to spend a couple of free evenings, you can find a good option for a budget bathroom renovation with your own hands photo.
At the same time, the costs of materials and work will not be so frightening, and the decrease in quality to the budget level will be almost unnoticeable.

What can a budget renovation offer?
The only thing you will need in huge quantities is patience, since economical repair bathroom design assumes that expensive materials will be replaced with the cheapest analogues, and the limited budget will have to be compensated by ingenuity and careful consideration of possible options.

To make a budget bathroom renovation, you will need to strictly adhere to three basic rules:
- We divide all the elements of decoration and interior of the bathroom into the foreground and background. The first plan includes everything that always catches your eye when visiting the bathroom, or elements of plumbing that you cannot skimp on;
- We replace all the finishing and decor with the cheapest, but still somehow preserving appearance or consumer qualities;
- The main way to save money is to do a budget bathroom renovation yourself.
The exception is work that requires certain knowledge and qualifications, this is, first of all, connecting wiring and plumbing. The rest will have to be mastered with your own hands.

The concept of finishing the first plan includes doors to the bathroom, switches and lamps, a ventilation system and part of the decor laid on the front of the main wall, central part floors, tiles adjacent to the bathtub, toilet and the bathtub itself. Of all the furnishings, any guest or visitor who enters the room for the first time sees precisely these objects. If it is important to maintain a good impression of a budget bathroom, these items will have to be selected especially carefully.
The foreground line also includes:
- Faucets in the bathroom and in the washbasin;
- Drain tank with shut-off valves;
- Sewer pipes;
- Toilet.
For your information! If you wish, you can find budget versions of all of the above, but in order to choose inexpensive and at the same time high-quality plumbing fixtures, you will need to re-read several hundred reviews about a variety of models.
In addition, there are many sales and promotions when companies sell very good plumbing fixtures for relatively little money. This is the most the best option for a budget bathroom renovation. This costs a lot of effort, but the money saved will help bring an economical bathroom renovation to a state where the furnishings, decoration and plumbing of a budget level will not look like a blur.

Stylish budget renovation
The first thing you have to start a budget repair with is a complete audit of the condition of the water supply and sewer pipes. An inlet shut-off valve that was installed many years ago can most likely be inspected, cleaned, the cuff replaced, and reinstalled. The pipes are replaced with metal-plastic ones, they are inexpensive, and you can assemble the water distribution for the toilet, washbasin, bathtub or shower in a couple of hours.

Budget version of flooring
The simplest option for finishing the floor is to lay out concrete screed With inexpensive tiles, in order not to go beyond the budget estimate, you will have to use plain brands, without a pattern or glaze. If ventilation is functioning normally in the bathroom, and the difference in temperature between the air and the floor is no more than 3 o C, you can lay tiles with minimum thickness seam in one carpet. So, with the help of budget tiles you can create the impression of expensive Spanish tiles.

The second option for a budget covering is a good waterproof linoleum on a polyethylene foam backing. This is one of the few ways to give a very stylish and fresh look to a bathroom with a budget renovation, photo.

If the floor had beautiful and expensive tiles, you can try replacing the worn track in the center of the floor. To do this, you will need to replace the worn part with budget tiles of suitable size and color. To make the replacement less obvious, a mesh path or a rug made of waterproof carpet is laid in the central part.
Budget plumbing options
The most difficult stage of a budget renovation will be the purchase of an inexpensive toilet and washbasin. You can immediately give up your hopes of buying a high-quality Chinese toilet for pennies; this is unrealistic. Any budget-class compacts with more or less correct geometry, no cracks and high-quality earthenware are sold under brands from Poland, Turkey and neighboring countries. One thing is good - there are a lot of offers for the budget line of Polish and Turkish washbasins. Therefore, on sale you can choose a decent budget model with a minor defect.

It is necessary to choose mixers and taps from Chinese models in the mid-price range. Too hyped trademark for a budget renovation it will be too expensive, you can buy a Chinese model for the bathroom that is 10-15% cheaper than a Turkish mixer or tap. This will be the most best option for the budget.

Advice! Even as part of a budget renovation, you need to purchase only brass mixers and taps, with a nickel, not chrome, coating. Do not buy steel-aluminum products; their service life is a maximum of a year and a half. You can distinguish a real faucet from a cheap imitation by weight - brass is one and a half times heavier than powder stamping.

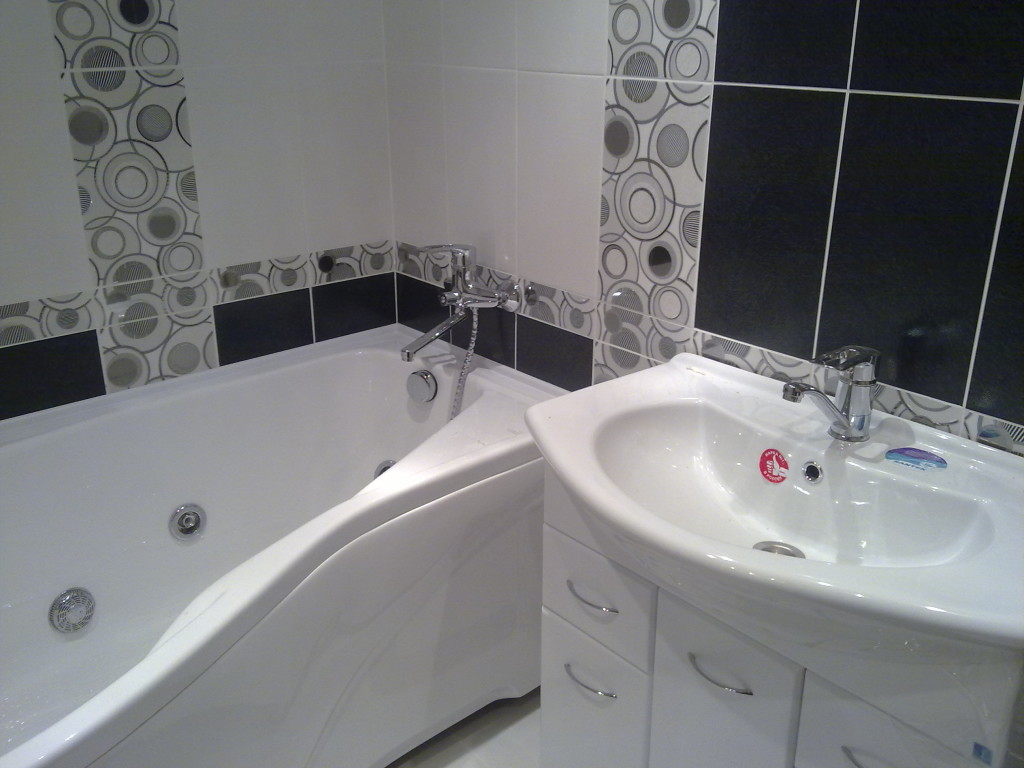
The bathtub will have to be restored, especially if it is old cast iron model released in the 50s of the last century. Budget bathroom renovation photo involves applying a protective acrylic coating, replacing ceramic enamel. The resin with the modifier is applied by roller or pouring in two layers.

In a similar way, you can restore almost any bathtub, if there is no through corrosion. The second economical bathtub repair option involves installing acrylic liner, but for this you need to find inexpensive model, which would fit the size and depth of the bowl.
Walls and ceiling
In a budget renovation option, the easiest way is to cover the ceiling with PVC panels. It will be cheaper and at the same time more practical solution than laying drywall or installing suspended ceiling. If the ceiling is in perfect condition, you can completely abandon any cladding, and simply prime and paint it with a high-quality acrylic enamel to match the color of the walls.
The largest volume of work falls on the finishing of the bathroom walls. For budget repairs, you can use one of the options:
- Painting with acrylic or latex enamel;
- Pasting wallpaper or film;
- Wall cladding with plasterboard with painting or sticker drawings.
By using latex paint You can solve two problems at once, characteristic of all budget repairs. Firstly, a huge number of colors and shades makes it possible to choose your own for the bathroom. individual style. Secondly, latex coating is highly resistant, so the colorful design of the bathroom can be maintained in its original form for quite a long time.

Solid colors look good in a classroom, gym or children's room. Even for a budget renovation in the bathroom, you want to see something more decorative, for example, photo wallpaper. It is not necessary to buy multi-layer vinyl sheets; you can stick regular photo wallpapers with subsequent processing acrylic varnish.

Instead of wallpaper, you can stick PVC film with photo printing. It turns out very beautiful, but such decor will require perfectly smooth and even walls. Considering the budget level of repairs, wall cladding with waterproof plasterboard will “eat up” most of the budget, so it makes sense to use film decor only on relatively flat walls, which can be further corrected with gypsum putty and plaster.

One of the options in the Loft style involves using a regular wall painting in the bathroom interior, as in the photo. At first glance, such an option budget finishing You may not like the walls, but there are always plenty of fans of this style.

If you correctly level the walls of the bathroom, rub it with gypsum finishing putty and open it with acrylic varnish, you will get White background, on which you can apply images that are absolutely fantastic in shape and execution. In this case, the budget finishing option is not inferior in terms of entertainment value to wall repairs using mosaics or designer tiles.
How to do it, the most budgetary repair
Most often, budget repairs are required not because you need to save money and do it efficiently and inexpensively. In half of the cases, the economical option for bathroom renovation involves inexpensive restoration of all functionality, with minimal decoration and comfort.
Wall and ceiling finishing
The first step when carrying out budget repairs is to get rid of old tiles on the walls and floor. The work is hard, but it allows you to gain an extra couple of centimeters of space and get rid of the old bathroom smell. The surface is cleaned down to the brick and concrete, leaving only the outlets for the washbasin mixer in place.

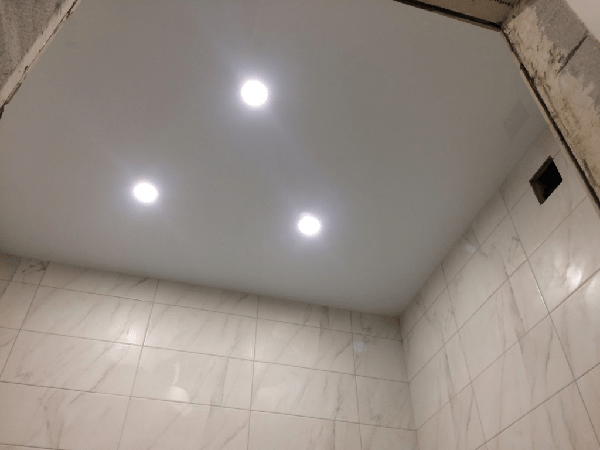
According to the plan, the walls and ceiling will be covered with PVC panels, so after priming the walls it is necessary to fill wooden sheathing. This is not the best option for a bathroom, but given the budgetary nature of the renovation, you have to use wooden slats, treated with alkyd varnish.

Wide panels with decorative film are laid on the side walls; the front wall is decorated with white panels. The ceiling is covered with PVC lamellas in a similar way, to enhance the impression of a budget renovation, you can install two or four built-in LED lamps.


Option with PVC panels can be considered the most successful for the bathroom. If you try to cover the walls with the most budget tiles with your own hands, you can only ruin all your hard work. This is difficult; only a professional can lay low-quality tiles more or less evenly.

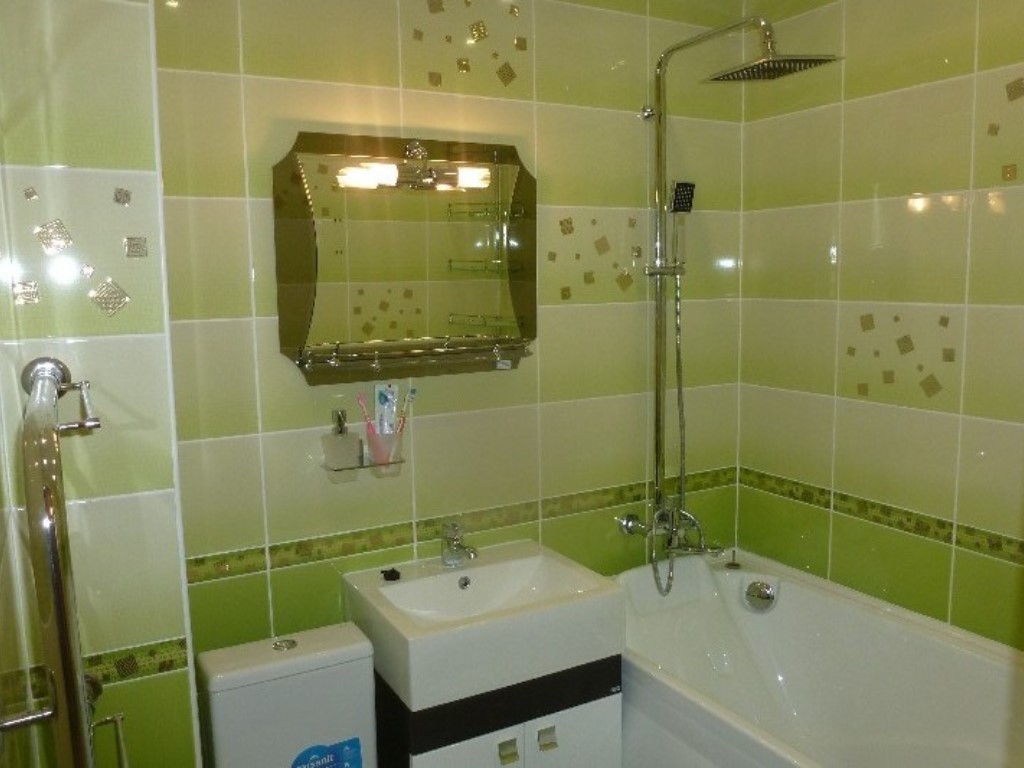
Floor design and overall tone of the bathroom
The overall tone of the bathroom is white and blue-green. To slightly diversify the color scheme, you can lay tiles of different colors on the floor, for example, red and green. Because of the red color, the lighting in the room became softer and more comfortable. White color plastic cladding goes well with any mirrors and glass. Therefore, the use of a mirror and wall lamps for a budget renovation is very effective way visually expand a very cramped bathroom space.
Budget renovation assumes that you can make some of the bathroom furniture yourself. For example, shelves made of glass or polycarbonate, stands for shower accessories. As a last resort, you can choose a regular plastic bedside table for bathrooms, preferably matching the tone and color of the walls and flooring.

On last stage The bathroom door needs to be fixed. Buying a new one as part of a budget renovation will be expensive, and an MDF door will not be suitable for the humid atmosphere of a bathroom. If the canvas and door frame is still in good condition, then the bathroom door can be cleaned old paint, prime, sand and cover with high-quality PVC film, for example, with a stone or wood texture, so that splash marks are not visible.
Conclusion
The only detail that cannot be done in the budget option is the repair of electrical wiring, switches, and sockets in the bathroom. This should be done by a specialist, and it is best if he not only checks, but replaces the switches with safe models. This should be done at the stage of preparation for repairs.
To do high-quality repairs in the bathroom, you don’t have to have a lot of finances. After all, if you want, you can save a lot of money.
For example, you can refuse the services of a designer and come up with the style in which the renovation will be carried out yourself.

You can also save on construction team and do everything yourself.

But in order for the process to be streamlined and the result to be achieved, it is necessary to draw up a detailed action plan in advance.

So, you will need:
- Come up with a design;
- Stock up necessary materials and tools;
- Make an estimate;
- Calculate exact dimensions bathroom and plumbing dimensions;

When choosing a design, you need to pay attention to the area of the room. Owners of a small area should take into account that a small space is less functional.


Light colors in the interior and large mirrors on the walls will visually enlarge the room.

You can refuse to install a bathtub and give preference to a shower stall. Thus, there will be more space in the room.

For hygiene products, instead of bulky floor cabinets, you can hang compact hanging cabinets.

Once you have decided on a design choice, you need to create an action plan. After all, for the process to proceed continuously, all actions must be performed sequentially.

Negligent attitude towards previous work can significantly affect the final result.


Step 1: Calculate the amount of building materials
This is very important stage under repair. An unpleasant moment may be that if the calculation is not correct, there may not be enough tiles, panels or other building materials.

Indeed, in the process of cutting and laying, some of the material may be damaged. To avoid such an incident, you should initially purchase building materials with a reserve.

Step 2: Remove the old surface
To remove tiles from the walls and tiles from the floor, you need to stock up on a hammer and chisel. However, it will be easier to cope with the work using a hammer drill or drill. There are two options for dismantling: gentle and emergency.

The first is done using a hammer and chisel. First you need to soak the grout, and then carefully separate each tile from the wall or floor.

The second option is much faster, but more dusty and noisy. To do this, you simply need to demolish the coating in layers using a hammer drill.


Step 3: Repairing the floor
First of all, install the screed device. If installation is not provided additional system“warm floor”, then the height of the screed will be 1-1.5 cm. The height will be 3 - 4 cm if the floors are insulated in the future.

There are several types of “warm floor” systems: water, film and electric. Any of the systems maintains the microclimate in the bathroom well, is not expensive and is easy to install.

Step 4: Wall Decoration
Today, the market offers bathroom materials for “any budget.” First of all, it all depends on the finances you have. Most often, tiles are placed on the walls.

But you can choose a more budget-friendly option, for example, plastic panels or special moisture-resistant plaster. At this stage of repair, everything depends on your imagination and finances.

Step 5: Ceiling
When repairing the ceiling, it is worth starting from the materials that were used on the walls. For example, elastic vinyl film looks very nice with tiles and plastic.


If you plan to make a ceiling with various transitions, then use special moisture-resistant plasterboard. However, there is a more budget option: plastic panels.

After everything is done Finishing work, you can install a bathtub, furniture and plumbing. Do-it-yourself repair is not an easy task, but it is very educational. Plus, this can save you money and make the design exactly the way you want!

DIY bathroom renovation photo


