Have own house- the dream of many people. When the opportunity arises, they begin to build a mansion on their own. During its construction, many questions arise. One of the most common is the installation of sewerage in a private house. If it is present, it ensures comfort when living in the house. It allows you to take away wastewater from the home to a special well.
When it comes to plumbing when building a home, many people turn to the services of specialists. Although their work is of high quality and after its completion the owner receives effective system sewage systems, however, their services are not cheap and require certain expenses. Or maybe refuse outside help and do all the work on your own? Moreover, although there are difficult moments here, the task of independent device sewerage is not among the impossible. If you delve into the intricacies of constructing a sewer network in your home, then you can do all the work yourself, save a lot of money and get an effective sewer system.
What should you know?
 When an owner decides to install a sewer system in a house, the first thing that needs to be done is to find out whether there is access to a centralized highway. If such a line runs through your village, then installing a sewerage system in this case is not very difficult. You just need to find out from the experts:
- which pipes are best suited for draining wastewater and water from the house;
- how to lay pipes correctly;
- how to properly route pipes to the collector.
The greatest difficulty when connecting to a centralized main line is laying pipes on the street. During this work, you have to dig a trench. How deep the trenches will be required largely depends on the level of soil freezing. Usually pipes for sewerage on the street laid at a depth of 0.5-1 m.
If your house is located far from the sewer main and there is no way to connect to it, then in this case you will have to start working on installing an autonomous sewer system.
Types of sewerage in a private house
First you need to decide what the sewer system will look like. It can take different forms:
- cesspool;
- septic tank
cesspool
Traditionally for draining wastewater from a home cesspools were used. Now they are considered a relic of the past. However, they have the right to life if only because:
- they effectively handle wastewater disposal;
- Construction work is devoid of difficult moments.
If you decide to create a sewer system like a cesspool, then before you begin to implement this plan, you need to find out about the engineering and geological features of the soil on your site.
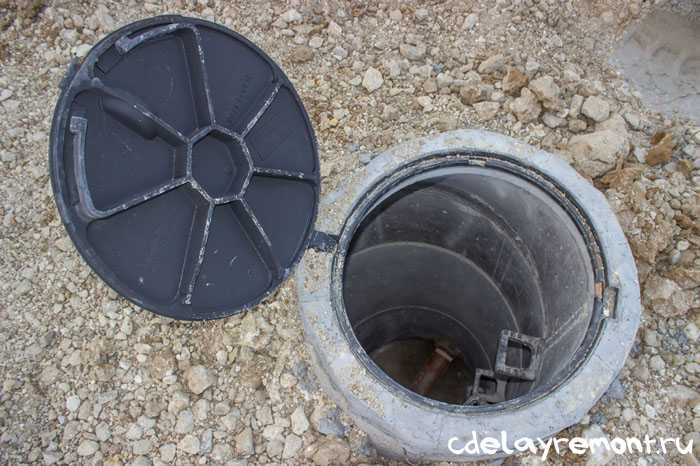
The easiest way to build cesspool - do brickwork . It makes the most sense to use red as the material. ceramic brick. If you are ready to spend money on attracting special equipment, then you can build this structure from concrete rings. When constructing such a pit, the bottom is concreted, and then rings are installed. The structure is covered on top with a slab ventilation hole and an inspection hatch.
Septic tank
 Many homes use a septic tank as their sewer system. Its main advantages are:
- simplicity of construction work;
- reliability during operation;
- possibility of installation on your own;
- simplicity of work on the installation of such a sewage system.
At present There are several types of septic tanks. There are even three-chamber ones that have a high degree of purification of wastewater and domestic water. And all thanks to the fact that such systems contain an aeration complex and biofilters.
Sequencing
Before starting work on the device autonomous sewerage in your home, you need to decide on a work plan:
First you need to decide where on your site the cesspool will be located. You should know that the well for drains must be located below the level of the house.
Determining where the collector exits the building is also important. It is necessary to carefully inspect the exit point of the pipe, taking into account that all waste water from your home will be concentrated at this point. It is necessary to inspect the place of receipt in order to make sure in the correct installation of the collector. There should be no distortions or deviations during installation.
When the area has been inspected and important questions solved, you can proceed to drawing up a sewerage project.
It must be taken into account that the external sewage system must be straight. The inner one has many angles and bends, therefore, when working on its installation, you should calculate all the dimensions of the pipes and bends.
When all the important points have been resolved and all calculations have been completed, you can proceed to purchase necessary materials.
 The appearance of the internal sewage system is no different from that installed in the apartment. But the amount of work involved in its installation will vary significantly.
Less time and effort will have to be spent on its creation if the home has old sewer . In this case, the main work will be related to the dismantling of old pipes. You can use old sewer pipes. However, it may turn out that you will have to redo the entire system. In this case, you will have to spend a lot of time and effort on creating a new autonomous sewer system in the house. The floor will need to be raised.
And if it turns out that the depth of the sewer is insufficient, then it will have to be deepened. To do this, you will have to dig a hole under the foundation, and then measure the distance from the bottom edge of the foundation to the top. It must be at least 1 m. In this case, the wastewater transported along the laid collector pipe will not freeze even in severe winter.
It is necessary to dig a trench with outside Houses directly to the well. It should be deeper than in the house. This is necessary to ensure a constant slope for the pipe. In this case, the water will flow freely into the well.
At the exit from the house, the trench should have a depth of at least 1 meter, and every 10 meters the depth of the trench should decrease by half a meter.
Laying sewer pipes in a trench
![]() The installation of a wastewater disposal system involves laying pipes both outside and inside the house. Next, we’ll talk in detail about how external pipes should be laid. Experts give the following recommendations in this regard.
The installation of a wastewater disposal system involves laying pipes both outside and inside the house. Next, we’ll talk in detail about how external pipes should be laid. Experts give the following recommendations in this regard.
At the bottom of the dug trench it is necessary add a layer of regular sand. Its thickness should be 15-20 cm. Creating such a sand cushion will protect sewer pipes from excessive pressure, even if they are polypropylene pipes. By laying the pipes on the sand, they will sag slightly and take a comfortable position. This will eliminate excessive load on them in the form of pressure from the filled soil.
Another important point is the connection and sealing of joints. A tee must be inserted every 3 m of pipe. Thus, an audit will be arranged, which is the same pipe that goes to the surface of the earth. The inspection is necessary so that if there is a blockage in the pipe, it can be cleared without any difficulties. Experts do not advise saving on installing an audit. The funds spent on the purchase of tees will pay off during the operation of the sewer system. After every four meters it is advisable install revision. From the outside, the pipe outlet is closed with a special plug.
When installing internal sewerage, many owners of private houses are increasingly using polypropylene pipes. These products have many advantages:
- they are not subject to corrosion;
- have a long service life;
- installation of such pipes is simple and accessible to every owner.
 Having made a choice in favor of polypropylene pipes when laying internal sewerage, it is necessary to take into account how many sources of wastewater there are in a private house. If the home is installed a large number of plumbing fixtures, then in this case it is optimal to use pipes with a diameter of 100 millimeters for laying internal sewerage.
It should also be taken into account that when leaving the washbasin, the pipe must have a diameter of 50 mm. Therefore, when laying internal sewerage, pipes will have to be joined different diameters. However, we note that at the moment this does not pose a big problem, since special adapters are available. Therefore, you don’t have to worry about reliable sealing of the joints.
When connecting pipes to each other, it would be useful to check the quality of the gaskets. They should be free of damage, in which case leaks at the joints will be excluded.
The risers are also equipped with an inspection. Its installation is carried out from the floor at a height of at least a meter. In addition, special exhaust pipes are installed, which should be located above the roof at a distance of 70 cm. Why is such a thing necessary? complex design boner? When a private house is connected to a sewer, gases and an unpleasant odor are inevitable. If the riser has reliable ventilation, then you can get rid of such unpleasant phenomena. Installing a riser for sewer ventilation ensures the displacement of polluted air. Therefore, by spending time and money on its installation, you can get rid of the unpleasant odor in your home.
Another important point that you should know: if the riser is located in an unheated room, then it is necessary to carry out work to insulate it. A special outlet must be used to connect the riser to the external sewer. Its diameter should be smaller than that of the pipe on the riser.
Installation of the outlet to the riser in the direction of movement of contaminated water should be performed at an angle of 90 degrees. In addition, it is necessary to use two 135 degree bends to connect the risers. If there is a need for another additional riser, then use an oblique 45 degree tee. In addition, an additional outlet is installed.
Arrange autonomous system sewerage in a household is much simpler if there is one riser and one collector pipe. When laying external sewerage It is best to use 150 mm polypropylene pipes.
Conclusion
Any private home must have sewerage. It provides convenience during your stay. If your home cannot be connected to a centralized sewerage main, then in this case you will have to carry out work to create an autonomous sewerage system. This work is not so difficult, so you can do it yourself. Most often when laying sewerage in a house polypropylene pipes are used. It is necessary to select the right materials and perform the installation correctly so that the joints between the pipes are airtight.
The depth of the trench in which the pipes will be laid is of great importance. It should be below the freezing depth to prevent freezing of the drains in the pipe in winter period. If you are starting work on laying an autonomous sewer system for the first time and do not know how to do it, then for high-quality installation sewer structure, before starting work, you should read the instructions for its construction and find out about the recommendations of specialists. By following them and carrying out work in accordance with the technology of laying a sewer system, you can get an effective system that will ensure the effective removal of wastewater and used water from the house into the well.
Nowadays, a house without amenities suits few people, even if it is located in rural areas. In addition to the supplied water, the outflow of used water must also be organized, and in addition fecal matter. Thus, without the presence of sewerage in country house the people living in it will not have proper comfort. It is not a luxury at all, but really a necessity, and the solution - installing a sewer system in a house (wooden or brick - it doesn’t matter) is a completely doable task if you approach the matter with all responsibility.
Internal and external systems
All sewerage installation work comes down to designing the internal and outdoor system. Internal sewerage involves the installation of a riser, fan pipe, piping to wet areas such as kitchen, toilet, bathroom (shower), etc. External or external sewer system - everything that is located outside the house. In particular, its arrangement involves supplying pipes to homemade septic tank(storage or with a filtration field) or to a deep cleaning station (quite expensive ready-made solution). Naturally, if it is possible to discharge wastewater into centralized system the task is simplified. But in our case, we will talk specifically about an autonomous system with effective wastewater treatment in a septic tank; we will not consider any primitive cesspools - this relic of the past - we will not consider.
Internal sewerage diagram
Of course, it’s worth starting with the diagram. Already at the stage of designing a house, it is better to think about ensuring that all the so-called wet rooms are as close to each other as possible - this approach will subsequently simplify the arrangement of internal sewage systems. The pipe layout in a private house is individual and can look like anything. Below we present one of the floor plan options.
It is taken into account that to drain wastewater from the toilet it is necessary to use pipes with a diameter of 100-110 mm, and their recommended total length is 1000 mm. For the so-called gray drains entering the sewer risers from the bathroom and kitchen, PVC or PP pipes with a diameter of 50 mm are used. The network turns are performed by combining two plastic bends with a 45-degree bend, which minimizes the risk of blockage that will have to be removed during sewer operation (read how to deal with this scourge here). It is cheaper and more reliable to rely on polypropylene (PP) or polyvinyl chloride (PVC) sewer pipes, since they are cheaper, more reliable and durable than cast iron ones. In addition, installation internal system When using them, it becomes much easier.
The most important thing in design is determining the future location of the riser or collector pipe. From this alone, as they say, we will “dance” further.
But still, let’s talk in more detail about how to develop a sewerage system for a private house on your own. After all, with its help we will be able to objectively judge how much and what (materials and plumbing equipment) is needed to construct the system as a whole. It is better to carry out all the work using ordinary checkered sheets, but it is still better to buy a couple of sheets of graph paper. We will also need a sharp pencil, a ruler and a tape measure. The sequence of work on drawing up a sewerage diagram for a private house can be presented as follows:
- we draw up a house plan to scale (you can use the existing one, or you can walk around the house with a tape measure and “take down” all the dimensions);
- determine the location of the riser(s);
- on each floor, in accordance with our needs, we conditionally depict plumbing fixtures (at this stage it is advisable to know how to connect them);
- next stage drawing up a diagram involves depicting pipes on a plan from plumbing fixtures to the riser and fittings (connecting elements such as bends, tees, etc.);
- all of the above operations must be carried out for each floor of the house;
- we determine the dimensions of the riser and the fan pipe, which will be discussed below;
- sum up the lengths of all internal sewerage pipes up to the outlet;
- something needs to be done with the wastewater, so the next stage is an external system;
- We draw up a diagram of the external sewage system of the house, which includes pipes from the outlet to the septic tank or deep biological wastewater treatment station and takes into account the requirements of SanPiN 2.1.4.1110-02 and SNiP 2.04.03-85
Sewage pipes
Depending on the conditions for which the pipes are used, products for external and internal systems differ. Today, when laying the internal system, PVC and PP pipes of a characteristic gray color are mainly used. Most often these are products with a diameter of 110 mm (for risers and sun loungers), 50 and 40 mm - for draining wastewater from plumbing fixtures. It is necessary to understand that all of them are intended exclusively for wiring inside the house - there are solutions for external sewage systems, which will be discussed below.


Most often, pipes intended for laying underground, for example, from the outlet to a septic tank or a deep biological wastewater treatment plant, have a characteristic Orange color. This color can be explained very simply: the bright red color is more noticeable in the ground than the others. But it is not only the color that distinguishes pipes for external sewerage from other products - the requirements for the material from which they are made are somewhat different. So, for “outdoor” pipes they have greater rigidity, because they will have to withstand a significant load from the ground. There are even more durable products, for example, double-layer corrugated pipes. But when installing a sewer system in a private house, the depth of the pipeline is usually small (no more than 3 m, and most often up to 2 m), so there is no need to use the latter. The most common diameter of red pipes is 110 mm, which is quite enough for adequate drainage of wastewater from the house.
Below we have presented a table in which we examined the properties of pipes made from various materials. This is not a complete list - only the most popular solutions are given.
| Material | Purpose, pros and cons of pipes |
|---|---|
| Cast iron |
|
| Polypropylene |
|
| Polyvinyl chloride |
|
Pipe laying
One of the most labor-intensive processes in arranging an autonomous sewer system is laying and routing pipes. In a situation where you decide to do this work yourself, be sure to involve at least one assistant - not only the speed, but also the quality of the work depends on this. Looking ahead, we recommend checking the tightness of the system by pouring clean tap water and only after checking all the seams should you begin full operation of the system.
Pipe connection
As we have already said, the simplest option involves using sewer PVC or PP pipes. Today, these products are presented in a wide range, so you can easily find elbows, tees, revisions and plastic pipes, which, thanks to the presence of rubber cuffs at their joints, are connected easily and reliably. Perfectionists can additionally treat the joint with plumbing sealant, for example, silicone-based. In places where pipes pass through the ceiling and walls, sleeves must be installed.
Let's talk about the slope of the pipes right away. The relevant SNiP (2.04.01-85 and 2.04.03-85) clearly states that the angle of inclination of pipes in a free-flow system depends on their diameter. So, for 50 mm pipes it is necessary to create a slope of 3 cm/m, for pipes 100-110 mm - 2 cm/m. Keep this in mind, because you will have to place different points of the horizontal pipeline at different heights.
Sewer outlet
If you do not want to face the problem of a mismatch between the external and internal systems, then you should start installing a sewer system in your house with work on the outlet. The outlet is the boundary part of the sewer system that connects the pipes exiting the house (the riser or risers) with the pipe leading to the septic tank.

The outlet is installed through the thickness of the foundation at a depth below the soil freezing depth (SFD) characteristic of your region. It can be made even higher, provided that work is carried out to ensure thermal insulation of the pipe. This is necessary in order to avoid freezing of the sewage system in winter. The owners can tell you what this entails. country houses who were able to use the toilet only in March-May, when the pipes thawed.
If this was not taken care of at the stage of constructing the foundation, then it is necessary to punch a hole in the foundation sufficient for the subsequent installation of the outlet pipe with the sleeve. The latter is nothing more than a piece of pipe with a diameter of 130-160 mm, i.e. larger diameter sewer pipe. The sleeve must protrude from both sides of the foundation slab by at least 150 mm.
Essentially, at this stage it is necessary to make a hole (if one is not provided) in the foundation and insert a pipe with a sleeve into it. It is important that the diameter of the outlet pipe is not less than the diameter of the riser pipe. The sleeve itself allows you to set the slope point of the pipe to the septic tank: 2 cm for every meter. Now you have a rough idea of how you can “remove” the sewer system from a private house.
Installation of riser and pipe routing
Considering the recommended dimensions of the pipe running from the toilet to the riser (1000 mm), it is better to place the riser in the toilet. Installation can be open or hidden, depending on whether the pipes are mounted next to the walls (fastened with clamps, hangers, etc.) or in special niches, channels, walls or boxes.

To connect the riser with sewer pipes, oblique tees are used, and the joining points of pipes of different diameters are connected using adapters. In places where pipes from the shower, bathtub, and sinks intersect, install a collector pipe with a diameter of 100-110 mm. It is imperative to take care of the installation of so-called water seals. They will protect your sense of smell from less than pleasant odors.

Important! On each floor, a revision (special tee) is installed in the riser, thanks to which, if necessary, the blockage can be cleaned. To protect yourself from labor-intensive sewer cleaning work, it is recommended to install a cleaning device after each turn of the pipes.
Fan pipe outlet
An important role is played by the installation and removal of the drain pipe, which serves for:
- ventilation of the sewer system, which is mandatory for efficient work septic tank;
- increasing the durability of sewerage;
- support atmospheric pressure inside the system, which, in turn, avoids air discharge and water hammer
The fan pipe is nothing more than a continuation of the riser: a pipe that leads to the roof of the house. It is connected to the riser, having previously mounted an inspection on it. Next, the fan pipe is led out into attic space at convenient angles as shown in the diagram below. Any of these ventilation schemes can be used in private houses with an attic.

Important! You should not simplify your work and combine sewer ventilation (fan pipe) with the actual ventilation of the house or, God forbid, with a chimney. Moreover, the outlet of the vent pipe must be made as far as possible from balconies and windows (a distance of at least 4000 mm), with a height indentation from the roof of 700 mm. Again, the house ventilation, chimney and sewer ventilation outlets must be located at different levels.
Let us summarize all the above information about pipe installation in a private house:
- at the first stage it is necessary to draw up detailed diagram wiring in such a way as to minimize the distance from the riser to plumbing fixtures;
- the diameter of the pipes going to the riser should increase as they are connected additional devices. It is not allowed to change the diameter downward;
- you need to remember a simple rule: devices with a large outlet are located closer to the riser than those with a smaller outlet diameter. The toilet should be closest to the riser;
- the sewerage layout in a private house must exclude the presence of sharp corners, and the pipes must be laid with a certain slope;
- in places where blockages are expected to form, inspections and cleaning should be provided;
- the wiring diagram must necessarily include a fan pipe for system ventilation
External (external) network
It is difficult to overestimate the importance of the correct arrangement of the external part of the sewer system of a house. But if you want to make full use of your water, you should think about effective purification. Of course you can buy ready septic tank or, as it is also called, a deep wastewater treatment station. Or purchase autonomous installations, for example, reviews on the use of the Tank septic tank are quite good (see for yourself). But you can make a septic tank with your own hands, saving a decent amount of money. The installation of an external sewer system in a private house with your own hands must be approached with no less responsibility than the design of an internal one. There are also issues of your comfort and potential fines from environmentalists, but, most importantly, relations with your neighbors in the area depend on your steps. One mistake, and local external network will become one big stinking problem.
External sewerage scheme
In the figure below we have presented a diagram of the construction of a primitive septic tank. In fact, it can be done by anyone who would like to save money and have full control over an effective wastewater treatment system.

The device of a settling-type septic tank is a container or a combination of them, passing through which the wastewater is clarified due to the natural sedimentation of heavier inclusions. Next, the wastewater is further treated in the field or in a filtration well. Here, along with mechanical purification, biological purification processes take place. There are simpler options when only a large-volume container (storage septic tank) is used to collect wastewater, but in this case you will have to periodically pump out the sewerage - call a sewer truck. This option is easy to install, but that’s where its simplicity and convenience end.

Capacity calculation treatment plant for the dacha is carried out as follows. The volume is calculated based on a three-day settling period with an average consumption of 200 liters per person (can be calculated individually). Those. if 5 people live in a house, then the volume of the septic chamber is:
5 ? 200? 3 = 3,000 liters or 3 cubic meters. m.
Accordingly, than more people lives, the larger the volume of the septic tank required. It's simple!
Stages of making a homemade septic tank
- we find ready-made PP containers or reinforced concrete rings based on the required volume of the future septic tank (also keep in mind that it can be made of brick or simply filled with concrete on the walls and floor of the pit);
- we determine how the wastewater will be purified: in a well field or in a filtration field;
- We carry out excavation work: digging a pit for a septic tank, trenches for pipes;
- we connect all the elements into a single structure, taking care of the ease of maintenance of the septic tank;
- We install the system pipes with a slope of 2 cm per meter and reliably seal the joints;
- we will equip a septic tank ventilation system;
- we fill up the installation, having previously carried out work on hydro- and thermal insulation of its individual components
Naturally, this scheme is far from detailed, but it is possible to independently manufacture a septic tank from Eurocubes, reinforced concrete rings, etc. Other articles on our site are devoted to this. And do not forget to take a responsible approach to choosing a location for a septic tank. Don’t be naive, hoping to later build a brick grill somewhere near this place or equip a children’s playground!
When starting to install a sewer system, you need not only to be patient and dig up more than one cubic meter of earth, but also to read a lot of literature on the proper organization of work, and perhaps take advice from experts. Ultimately, however, you'll be proud of the work you've done when you can soak in your own Jacuzzi or shower in your new walk-in shower. And it doesn’t matter whether it’s a wooden or brick house - sewage works according to the same principles everywhere!
Sewage in a private house is absolutely necessary if you live there permanently, and is highly desirable if you live there only during the summer months. I will help you understand the basic layouts of sewer systems, and together we will analyze the algorithm for performing key stages of work.
Sewage scheme
Sewage for a private home is an essential condition for comfortable living. You can use street and garbage pits only temporarily. Sooner or later the question of creating a comprehensive system is understood.
Before making a sewer system in a private house, you need to decide on its configuration. The easiest way to do this is sequentially:

- Analysis of existing communications. If in locality there is a centralized sewer network, then the work is simplified by an order of magnitude. We just need to get to the collector pipe and connect to it.
To connect to a common collector, you need permission from the local administration, and it is better to entrust the work itself to specialists. But in any case, it will be much cheaper than making a sewer tank yourself.
- Determining the type of tank. Here we have only two options: a septic tank or a cesspool. It is more difficult and expensive to make a septic tank, but it needs pumping less often; a cesspool is the opposite. Optimal choice- a septic tank combined with a biological treatment station, but the high cost acts as a limiting factor.

- Choosing a location for the tank. In this matter one must be guided current regulations, which determine minimum distance from a pit or septic tank to various objects. It is advisable to find a point in the lower part of the terrain (less digging) at a distance of at least 10 m from the house and at least 15 m from the well/borehole.
- Allocation of a room. The sewer system of a private house must connect together all water drainage points. It is worth collecting them as close to each other as possible, so we determine where the bathroom will be located. It is advisable to place it at outer wall, on the side of the house where the tank will be - this way we will spend less effort and money on laying pipes.

- Pre-planning. Based on the information received, we build a plan for the entire system and preliminarily calculate how much and what materials we will need. Based on the calculations, we plan the budget (we immediately include a 30% excess in it) and evaluate whether the project will be feasible.
If preliminary stage completed successfully, you can proceed to procurement and preliminary work.
Materials for creating an autonomous sewer system
Independent sewerage installation in a private household is a fairly resource-intensive project. What minimum materials will be required for its implementation?
The main expense items are shown in the table:
| Illustration | Design element |
 |
Ready septic tank.
The optimal solution for an autonomous sewer system is the installation of an industrial septic tank (Tank, Triton and analogues). Such products are equipped with multi-chamber tanks of sufficient volume and all the necessary devices for primary wastewater treatment, so all we have to do is simply install them. Main disadvantage- high price. |
 |
Plastic container for a septic tank.
A plastic (polyethylene, polypropylene) tank for storing waste can be used as a reservoir. You can also purchase the so-called “Eurocube”. Plus- complete tightness of the system. Minus- quite high cost and the need to install additional cleaning devices. |
 |
Concrete rings.
If cost savings are a priority when creating a sewer system, then tanks for storing and treating wastewater can be made from standard concrete rings. Flaw- the need to additionally seal the containers and the complexity of installation. It’s probably impossible to do without using a crane. |
 |
Pipes for external sewerage.
To connect the cesspool or septic tank to the house, special external pipes (orange color) are used. They tolerate temperature changes well and do not deform even under significant pressure when laid at depth. |
 |
Pipes and fittings for internal sewerage.
Internal sewerage distribution is formed from polypropylene (gray) pipes with a diameter of 110 to 40 mm. It is advisable to purchase along with the pipes required quantity fittings for designing turns, bends, revisions, etc. |
 |
Pipe thermal insulation.
When laying the external part of the network, as well as when installing communications in unheated rooms (basement, basement), there is a risk of pipes freezing. To avoid this, it is advisable to insulate the sewer system using casings made of mineral wool, polyethylene foam, polyurethane foam, etc. |
In addition to the basic materials that are used directly to create the system, additional ones will be needed:
- gravel and sand for excavation work and laying a drainage layer;
- cement mortar;
- sealant based on moisture-resistant silicone;
- inspection wells - if you need to lay a long or winding pipeline.

Exterior works
Stage 1. Operating principle and calculation of septic tank volume
Installation of sewerage in a private house includes two types of work:
- external- consist of constructing a reservoir (cesspool or septic tank) and laying a pipe to the house;
- internal- involve installing pipework in the house and connecting water consumption points to it.

If possible, then these works are carried out in parallel, but if not, then you need to start with the construction of the outer part.
The most effective design for autonomous sewerage in a private home is a septic tank. Unlike a cesspool, it does not accumulate wastewater, but ensures its recycling. The output is relatively clean water, which is filtered into the soil, polluting it with organic matter at a minimum level.

The septic tank works quite simply:
- Advocacy. First, wastewater enters the first container - a settling tank. It separates wastewater into fractions: solid particles precipitate (silt), light organic matter floats on the surface, and clarified liquid collects in the middle part. Here, bacterial decomposition of waste occurs with the release of gaseous reaction products and mineralization of residues.

- Overflow. An overflow hole is made in the wall of the first container, which is located at the filling level. Through the overflow tube, clarified water flows from the sump into the second chamber, and solid residues are retained.
- Filtration. In the second chamber (filtration or drain well), clarified wastewater passes through a drainage layer at the bottom. Drainage also retains some of the contaminants, so almost clean water enters the soil.

Almost all septic tanks work on this principle - both homemade and factory-made. The difference lies in the design of the tanks, as well as their number. Sometimes a septic tank has not two, but three chambers - then another tank is added between the sump and filtration tank for more effective cleaning.
Before installing a septic tank, you need to calculate its optimal volume.
The volume of a septic tank is calculated using the formula:
V = n * Q * 3 / 1000, Where
- V- the required volume of the septic tank in cubic meters;
- n- the number of people permanently residing in the house;
- Q- rate of water consumption per person, liters per day;
- 3 - average duration of wastewater cleaning, days.

If we take 200 liters approved in SNiP as the consumption rate, then, for example, for 4 people the volume will be as follows:
V = 4 * 200 * 3 / 1000 = 2.4 m3.
Stage 2. Installation and equipment of a sewage tank
Now let's figure out how to properly install a sewer system in a private house. The algorithm for installing a septic tank is in the table:
| Illustration | Stage of work |
 |
Digging a pit.
In the selected location, we apply markings to the area, after which we dig a pit to install the tanks. We select the dimensions of the pit with a margin - so that a layer of bedding and waterproofing/drainage can be laid on the bottom, and a clay castle can be made on the sides. For small-volume septic tanks, the pit is dug manually; for large-scale structures, it is better to use the services of an excavator. |
 |
Preparing the base.
We level the bottom of the pit, and then lay it sand bedding up to 20 cm thick. Compact the filling. Under the installation site of the sump (the first tank), you can pre-lay a waterproofing pad made of clay or a concrete disk, the diameter of which will correspond to the diameter of the well. |
 |
Installation of containers.
We lower concrete rings to the bottom of the pit, from which we form two wells. We seal the joints between the rings to prevent untreated waste from entering the ground. |
 |
Construction of tank bottoms.
We make the lower part of the sedimentation tank airtight by pouring a layer of concrete up to 10 cm thick. Additionally, you can treat the base with bitumen mastic and lay waterproofing roll material. We fill the bottom of the filtration well with drainage: pebbles, gravel, broken ceramic bricks, etc. You can also make holes in the lower ring of this tank or use a special perforated reinforced concrete blank. |
 |
Overflow design.
We connect both tanks with an overflow pipe, which we insert into the holes at a distance of approximately 1.5 m from the bottom. To ensure that organic waste does not get from the sump into the filtration tank, we install a T-shaped fitting on the pipe. Due to the presence of a lower pipe, such a fitting allows the selection of clarified liquid under the surface film of organic matter. The installation sites of the overflow pipe are carefully sealed. |
 |
Overlap and necks.
Floor slabs with holes for hatches are installed on the wells. If the septic tank is located deep, then necks can be additionally used - narrower rings that provide access for cleaning, inspection and repair. |
 |
Ventilation and hatches.
We build a ventilation pipe into the ceiling. It is advisable to make it higher - this way the unpleasant smell will evaporate faster. We cover the wells or separately removed necks with hatches of a suitable diameter, securing them with cement mortar. |
If the septic tank is below the level groundwater, then it is advisable to seal it from the outside using roofing material or bitumen mastic. Also, laying a dense layer of clay around the perimeter of the tanks - the so-called clay castle - will help prevent moisture from seeping into the chambers.

Stage 3. Laying pipes from the tank to the house
The next element of the external sewerage system is the pipe connecting the tank to the house. It will carry wastewater to the treatment/storage facility.
Pipe laying technology:
| Illustration | Operation to be performed |
 |
Digging and preparing a trench.
Between the house and the septic tank we dig a trench with a depth of 50 cm to 1.5 m (the deeper the soil freezes in winter, the more you will have to dig). For the most efficient drainage, we form a slope towards the septic tank of about 2 cm per 1 m. We lay a sand bedding up to 15 cm on the bottom. We moisten the bedding and tamp it down. |
 |
Pipe laying.
We lay a pipe in the trench to drain the waste. The optimal pipe diameter for the outer part of the sewer system is 110 or 160 mm. |
 |
Pipe thermal insulation.
If the septic tank is located relatively shallow, and the pipe cannot be buried more than 1 m, the circuit requires additional insulation. To do this, we wrap it roll material based on glass wool or mineral fiber, or we use cylindrical casings of suitable diameter. |
 |
Entering the septic tank.
We see one end of the pipe into the septic tank through a hole in the concrete wall of the well. As with the installation of the overflow, carefully seal the hole. |
 |
Entering the house.
The entrance to the house can be designed in different ways, but most often the pipe is inserted through a hole in the base or foundation. It is advisable to insert a metal sleeve into the hole, which will protect the sewer from damage during movements and subsidence. Also, the input node should be insulated. |
After completing these works, we completely fill up all the trenches and pits, and then lay fertile soil or a layer of turf on top of the backfill.
It is also advisable to make marks on the wall of the house at the entrance. These marks will be needed when we look for exactly where the sewer pipes are laid.
How to make a sewer line correctly
Stage 4. Basic elements of the internal network
The next stage is the arrangement of internal sewerage. Its configuration directly depends on where the sources of waste are located, so here I will give a description of its main elements:

- Riser- central vertical pipe, large diameter (minimum 110 mm), which unites all the contours together. As a rule, in a private house there is one riser, but in large buildings there may be several. In the lower part, through the elbow, it is connected to the outlet sewer pipe.
- Fan pipe- mounted in the upper part of the riser, serves to remove gases accumulating in the pipes from the system to the external environment. It is discharged into a separate ventilation shaft or connected to a ventilation pipe located above the roof level.

Without a drain pipe, the pressure in the system will increase, which may lead to incorrect operation shut-off valves. In addition, accumulating gases cause unpleasant odors.
- Main branches- pipelines with a diameter of about 50 mm (2 inches). Used to connect plumbing fixtures and other sources of drainage to the riser. Because the local sewer is usually made gravity (i.e. operating without additional pressure), then the pipes are laid with a slope towards the drain. For two-inch pipes, the optimal slope is about 3 cm per 1 m.
- Supply pipes- used to connect the outlets of plumbing fixtures to the mains. The diameter of such a pipe cannot be greater than the diameter of the main line.

- Audits- special fittings, which are a tee with one outlet equipped with a closing hatch. The inspection is placed at the base of the riser, at turns, branches and at the ends of highways. It provides access inside the pipeline to remove blockages or perform preventive maintenance.
Stage 5. Pipe connection

All pipes are connected to each other using fittings, which allow you to create turns, bends, branches, etc. When installing the system, it is advisable to avoid turns at sharp and right angles, forming smooth arcs - this way we will reduce the risk of blockages in the area where the flow rate decreases.
Typical modern pipes, equipped with bells and elastic cuffs, are easy to install with your own hands :
| Illustration | Installation operation |
 |
Pipe cutting.
Using a fine-toothed hacksaw, cut the straight end of the pipe to the desired size. |
 |
Chamfering.
We clean the cutting area, removing burrs from the outer inner side - they can cause a blockage. |
 |
Preparing the bell.
Insert a rubber o-ring into the socket. We level the seal, placing it in the groove and making sure there are no bends or creases. |
 |
Pipe connection.
We insert the pipe into the socket and push it in until it stops. If necessary, rotate the pipe so that the outlet or inspection hole is in the desired position. |
After assembly, all pipes are installed on supporting surfaces. The instructions allow for both hidden (in grooves or behind the casing) and open gasket. In the second case, plastic clamps with a latch or screw fixation are used to secure the pipes.


Stage 6. Connection to plumbing fixtures
On last stage plumbing equipment is being connected:

- Toilet- usually installed in close proximity to the riser. The toilet outlet is connected by corrugation or a piece of pipe either to the riser outlet or to a short main with a diameter of at least 110 mm.

- Bath or shower stall- connected to the sewer using compact siphons, which are placed under the drain holes. The optimal diameter of the outlet pipe is at least 50 mm.
Some models of shower cabins and toilets require a vertical sewerage supply - this must be taken into account in advance when designing the system.

- Sinks in the kitchen and bathroom- built into the system using siphons with water seals. The siphon usually has the shape of a flask and is placed under the sink, and it is connected to the sewer outlet by a flexible corrugated pipe.
- Washing machines and dishwashers- also mounted using flexible corrugated hoses. To connect such devices, you should install a separate sewer pipe outlet, equipped with a socket with a rubber sealing collar.

Conclusion
The technology for installing a sewerage system includes a number of nuances that directly affect the final result. Now you know them too. You can clearly see the intricacies of the topic in the video in this article. You can get answers to any questions you may have in the comments to this material.
Modern man is spoiled by civilization. Sewerage, which not so long ago seemed to be a component of luxury housing, has now become an integral part of almost any apartment. For those who live in multi-storey buildings comfortable houses, you don’t have to think about designing and installing this system, but it’s more difficult for owners of individual buildings. Internal sewerage – sufficient a complex system. The efficiency and reliability of its operation directly depends on the design and installation of the structure. How to avoid mistakes during the system development process? Let's figure it out.
Where to start construction work?
The arrangement of internal sewerage involves the installation of risers of waste pipes and the installation of piping into the premises. It is best to take care of the drainage system at the design stage of the building and locate all “wet” rooms at a minimum distance from each other. Ideally, make them adjacent, this way you can significantly simplify the arrangement of internal sewage systems. It is also important to correctly determine the location of the collector pipe to which all pipelines will converge.
Now you can begin to develop a scheme for the future sewerage system:
- Keeping the scale in mind, we draw a plan of the building.
- We mark on it the locations of the risers.
- We draw on the diagram all the plumbing fixtures that we plan to install. Let's take a look at the features of their connection.
- We draw pipelines that will connect risers and plumbing equipment. We mark all the necessary turns, joints, etc. Be sure to indicate the connecting elements that will be required for installation: tees, bends, etc.
- We determine the parameters of the riser and vent pipe.
In accordance with the diagram, the installation of the system will subsequently be carried out, in addition, it will help determine the amount of materials needed.
Internal sewerage includes risers of waste pipes and piping in all interior spaces private house
Now you need to choose a pipe laying method. There can be two of them: hidden and open. In the second case, the line is mounted on a wall or floor. The first is more labor-intensive and involves making grooves in structures into which pipes are subsequently laid. When choosing this option, experts advise laying internal water and sewer pipes in one groove. The water supply is on top and the sewage system is below. This is very convenient because it reduces the time required to carry out installation work, and their volume. In addition, it will take much less material for sealing grooves.
Here is an example of such work:
Important points when designing a system
When designing internal sewerage, the following aspects must be taken into account:
- For a gravity system, and internal sewerage is such, it must be maintained. For pipes with a diameter of 50 to 80 mm, it is 2 cm per meter; for products with a diameter of 80-100 mm, the slope increases to 3 cm per meter.
- Drain pipes dishwasher And kitchen sink must be equipped with grease traps.
- The toilet must be connected to the riser only with a pipe with a diameter of at least 100 mm.
- For a house with several floors, the diameter of the riser should be 100-110 mm. Cleaning hatches must be installed on it.
- It is best if there is only one sewer riser in the house. All branches of the internal sewer system will approach it.
- The location of the pipeline outlet is determined by the location of the collection well, which should be installed in the lowest place on the site. The outlet is located in the wall closest to the well.
By following these simple rules you will avoid many problems.

Internal sewerage can be laid in a hidden or open way. The first option involves making grooves in which pipes are laid, which makes it quite difficult to install. The second is much simpler to implement, but less aesthetically pleasing.
Selecting parts for the pipeline
First of all, we determine the material from which the elements are made.
Option #1 - cast iron pipes
Some time ago there was simply no alternative to such details. Their advantages include durability (such pipes last more than half a century), high strength and fire resistance. At the same time, cast iron is not resistant enough to impact point loads, from which it should be protected whenever possible. The disadvantages of the material include very heavy weight, high cost and complex installation. In addition, the inner surface of such pipes is rough, which promotes the deposition of layers, which over time can completely block the path of sewage.
Option #2 - polypropylene products
The advantages of such elements are resistance to all types of corrosion and solutions of salts, alkalis and acids, durability, and high heat resistance. The latter quality allows the parts to easily withstand both low and high temperatures, which makes it possible to lay them in almost any conditions.
Another advantage is increased fire resistance. Polypropylene can withstand fire for quite a long time without releasing toxic substances. Attractive and affordable price. Some difficulty is associated with the installation of parts, which requires special equipment.

The most popular are plastic pipes for sewerage. They are lightweight, easy to install and have a smooth internal surface, which prevents the appearance of build-up on the internal walls of parts.
Option #3 - PVC parts
They can be made from non-plasticized or plasticized polyvinyl chloride. The characteristics of products made from these materials are similar. The advantages of PVC pipes include a low coefficient of thermal expansion, which allows the products not to expand or sag when heated, as well as resistance to UV radiation. In addition, a very large assortment of shaped elements is produced, which makes it possible to assemble a pipeline of any configuration.
Disadvantages of products include fragility when low temperatures, low resistance to fire and the release of toxic substances during combustion, as well as sensitivity to certain chemicals.
General installation rules
Internal sewerage in a private house is arranged in accordance with a number of rules:
- Elements of risers with a 90° rotation are assembled from two plastic elbows rotated by 45°. If a cast iron pipeline is installed, two 135° bends are used.
- In order to be able to eliminate possible blockages in sections of the pipeline, an oblique plastic or cast iron tee at 45° with a plug and one elbow or a cast iron bend are installed. Cast iron fittings differ from plastic ones in names and gradations. For example, a plastic bend at 45° will fully correspond to a cast iron bend at 135°.
- The outlet pipelines, which are located in the basements, under the ceiling of the premises are connected to the risers using crosses or oblique tees.
- The height from the lower section of the horizontal socket of a tee or straight cross to the floor should be no more than 20 mm.
- The length of the pipeline from the toilet to the riser should not be more than 1 m. For other plumbing fixtures - no more than 3.5 m.
- To make turns on risers or at transitions to horizontal sections, you can use 90° crosses or straight tees.
- To prevent the appearance of odors from the sewer, an exhaust hood must be installed in the room. The so-called vent pipe is led through the roof to a height of about 0.7 m. It is unacceptable to connect it to a chimney or ventilation.
- If this is not possible, a special one is installed air valve for sewerage.
- The diameter of the riser must be equal to the diameter of the exhaust part. One hood can combine two or even more risers on the top floor or in the attic. Horizontal sections of such a pipeline are fixed with hanging brackets or simply wired to the rafters.
- On risers that do not have indentations in the upper and lower floors, inspections for sewerage are installed. Standard height arrangement of the audit - 1000 mm from the floor level. If the part has to be installed in a corner of the room, it should be turned at an angle of 45° relative to the walls.
- When installing an internal sewerage system, all plastic pipes passing through the ceilings are installed in special metal sleeves. The height of the element depends on the width of the overlap. The top of the part should protrude 20 mm from the floor level, and the bottom should be flush with the ceiling.
- The riser is installed with the sleeve on. To prevent it from falling from the pipe, it is tied with a thin wire to the higher socket of the cross or tee, or it is pushed apart with pieces of foam plastic.
- If it is assumed that a toilet and other plumbing fixtures will be connected in series on a horizontal section, a sewer adapter must be installed between them. Plastic parts must not be rotated high. This can lead to problems with subsequent connection of equipment, especially with a shower or bathtub. On average, the turn should be carried out halfway up the socket of the tee in height with the direction towards the wall.
- Clamps are used to secure the sewerage system. Plastic pipes fastened on horizontal sections as necessary, so that fractures do not occur. On average, one clamp is installed per half meter - meter of line length.
- Cast iron pipes are mounted on steel brackets with a bend at the end, which prevent the pipeline from moving. Fasteners are installed under each pipe near the socket.
- The risers are secured to the side walls with 1-2 clamps on the floor. Fasteners are installed under the sockets.
It is important to note that upon completion of installation work, tests for tightness must be carried out.

The vent pipe can be brought to the roof in different ways. The diagram shows three possible options designs

Various connecting elements are used to install internal sewerage. It must be taken into account that the same cast iron and plastic elements may differ in names and markings
Sewage is a necessary element of any comfortable home. Its arrangement does not require any special knowledge, but at the same time, it cannot be called a simple matter. There are many nuances and features of the system design. You should start by developing a pipeline laying diagram, which will become the basis for subsequent work and will help to correctly calculate the amount of materials needed. Already at this stage, you can assess your strengths and understand whether you will be able to cope with the work on your own or whether you will need to look for help. Many companies specialize in providing plumbing services. Professionals will quickly and competently install a sewer system of any complexity.
Regardless of whether a private house is connected to a central or autonomous sewer system, the wastewater disposal system on the street must be equipped independently. Before you begin this work, you need to develop an installation scheme that allows you to avoid minimum size pipelines and sewer network distributions.
This will reduce the cost of purchasing material and increase the efficiency of the wastewater disposal system. Special attention it is necessary to pay attention to the depth of laying pipes, their angle of inclination and the reliability of flange connections, since the performance of the sewage system depends on these parameters.
Connecting a private house to the sewer systemCircumstances and layout of external sewerage
The external part of the sewer system in a private house connects the outlet of the internal drain with a pipeline network to a waste storage tank located on the site, or to the central sewer system. ABOUT internal wiring in the house, read the article. The laying of external sewer pipes is carried out according to a pre-developed scheme, taking into account the following circumstances:
- terrain features;
- weather;
- remoteness of wells and reservoirs;
- the total volume of wastewater, depending on the number of people permanently residing in the house;
- the depth of soil freezing and its composition;
- access paths for a vacuum truck, if necessary.
In the scheme for laying external sewerage, it is imperative to provide for its ventilation, since otherwise, over time, unpleasant odors will penetrate into residential premises. Read about the rules for sewer ventilation in the article. Ventilation is arranged using a vent pipe, which can be placed on the lid of the septic tank or on a section of the pipeline passing from the house to storage capacity drains.
 Scheme of arrangement of autonomous external sewage system
 The septic tank is installed at the lowest point of the geological terrain of the site. This arrangement allows for the most optimal installation of external sewerage. It should be laid in a straight line to the location of the outlet pipe of the internal wastewater disposal system.
Choosing a drain location
When choosing the location of the drain, you should first of all make sure that the unpleasant odor does not penetrate into the living quarters. As a result, it should be located no closer than five meters from the house. The optimal distance would be ten meters; it is also not worth placing the septic tank too far away, since this significantly increases the cost of laying the pipeline network. The external sewage system should not be connected to the house at a right angle. In addition, the following must be taken into account:
- water sources should be located no closer than thirty meters;
- a septic tank cannot be installed on the border of a neighboring plot;
- for ease of pumping out sewage, it is better to locate the drain close to the road;
- Particularly careful sealing of the storage tank is necessary when soil water is close to each other;
- The laying of the pipeline network is facilitated by the natural slope of the area.
 Rules for placing a septic tank on the site
 The cesspool for sewage has been used since ancient times. Previously, no effort was wasted on sealing its walls, and when the hole was filled, they covered it with earth and dug a new one. Now the walls are laid out of brick, concrete rings and other building materials.
Liquid fractions of waste seep through the soil at the bottom, filtering, solid components gradually fill the mine, and after some time they need to be pumped out.
It is advisable to install a cesspool if the volume of wastewater in a private house does not exceed one cubic meter per day. If this norm is exceeded, pollution will occur. environment.
Instead of a cesspool, you can equip a sealed container to accumulate wastewater. In this case, the bottom and walls of the shaft are thoroughly waterproofed. This prevents the possibility of soil and drinking water contamination. The disadvantage of this system is the need for frequent cleaning, since the sealed container fills up quite quickly.
Deciding on the type of treatment plant
Treatment facilities for a private home are equipped in the form of a simple cesspool without a bottom or sealed container for wastewater. A single-chamber septic tank with soil treatment or a two-chamber septic tank with a filter well can improve wastewater filtration. It is possible to build three chambers with a filtration field, as well as using a biofilter and an air supply system.
 Septic tank with filtration from tires
 A single-chamber septic tank is essentially a cesspool with a drainage layer. Crushed stone or gravel mixed with sand is poured into the bottom of the well. Passing through the filter layer, liquid waste fractions are purified before entering the soil. After some time, the drainage layer needs to be replaced, as silt deposits are deposited on it. A single-chamber septic tank is suitable for a private house with a small volume of wastewater.
A two-chamber septic tank consists of a storage tank and a filter well, which are connected by an overflow pipe. In the settling tank, the feces are partially clarified and then fall into a shaft with a drainage layer at the bottom. They seep into the soil already sufficiently purified.
A two-chamber septic tank is a popular sewerage option for a private home, as it does not require large financial costs for its equipment and works efficiently.
Installing a septic tank with two or more chambers, as well as a filtration field, virtually eliminates the possibility of environmental pollution. After settling in the first container, the partially clarified wastewater flows through the overflow pipe into the next chamber with anaerobic bacteria that decompose organic residues. Read about how to make a septic tank with your own hands from scrap materials in the article
Having sequentially passed through all sections, the wastewater enters the filtration field, which is an area underground of about thirty square meters, where the final soil cleanup takes place. If there is free space on the site, this method of arranging a sewer system is optimal.
 Diagram of a septic tank with a biofilter
 A septic tank with a biofilter is a deep sewage treatment station. According to the principle of operation, it is similar to a treatment system with a filtration field, only in this case it is replaced by a water separator and anaerobic bacteria introduced at the outlet of the overflow pipe into the fourth section, which purify the wastewater by approximately ninety-five percent. This water can be used for technical needs.
It is irrational to install deep cleaning stations in private houses with periodic residence, since if a sewer system of a similar design is not used constantly, the bacteria that decompose organic residues die. In addition, they are quite expensive.
Laying depth of sewer pipes
The depth of soil freezing is a fundamental factor when burying sewer pipes into the ground. They need to be laid below the freezing point, otherwise they will freeze in winter, and it will be impossible to use the sewer until the spring thaw. The appearance of even small ice build-ups on internal surfaces pipelines leads to a decrease in their permeability and the formation of blockages.
 Map of standard freezing depths
 In the southern regions, the depth of laying sewer pipes is fifty centimeters or more, in the central regions - seventy centimeters or more. You need to know exactly the depth of soil freezing in your region so as not to go deeper into the ground than necessary, since in this case the costs of doing the work will increase.
Organization of sewer pipe removal from the house
The organization of the removal of the sewer pipe from the house depends on the stage of readiness for operation of the building. If the house has just been built, shrinkage of the foundation is possible, so drilling a hole in it for the outlet of the sewer pipe must be of a noticeably larger diameter than the cross-section of the pipe itself.
 Options for drainage schemes from the house
 If the house is just being built, the outlet pipe can be walled up during the process of laying the foundation. The foundation of a house built several years ago will no longer settle, so the diameter of the hole drilled for the outlet pipe does not need to be increased. Plumbing fixtures should be located at a short distance from the common drain, since in this case it is easier to connect them to the common outlet. If the house has two or more floors, the bathrooms should be placed one above the other, and in this case you can get by with one riser.
Do-it-yourself installation of external sewerage in a private house
The external sewerage system consists of a cleaning tank and a pipeline system connecting the septic tank to the house. Before performing installation work, a diagram of the external sewerage system is drawn on the site plan.
 Practical options removal of sewerage from the house
 Then special pipes with a diameter of at least 100 mm are selected, intended for outdoor use. They are usually orange in color. A trench is dug to lay the pipeline. Its depth is selected depending on the climatic characteristics of the area, the composition and characteristics of the soil, as well as other factors. If necessary, the pipeline network is insulated.
The most labor-intensive part of the work when installing a sewer system with your own hands in a private house is digging a pit for a cesspool or septic tank. The optimal distance at which the septic tank is removed from the house is about ten meters.
The volume of the storage tank directly depends on the number of people permanently residing in the house and the frequency of their use of plumbing fixtures.
Connect the storage container to the outlet of the internal sewer drain best in a straight line, bends and turns in the piping system increase the likelihood of clogging. For ease of cleaning, a long line in places where the direction changes should be equipped with inspection hatches.  This is what a properly equipped outdoor sewer system looks like
Wastewater moves through the pipeline system by gravity, under the influence of gravitational forces, so it is necessary to withstand correct angle tilt If it is too small, large pieces of waste will be retained and the drain will become clogged.
If the slope is too great, solid fractions will be thrown towards the walls of the pipe, and again it will become clogged. You will find information about the correct slope of the sewer in the article
The right angle maintained and controlled building level when digging a trench, its depth increases as it approaches the storage tank or central sewer. A shock-absorbing cushion is placed at the bottom of the ditch, which is a filling of sand, and pipes are laid directly on it. If it is necessary to change the slope angle of the pipes, sand is poured in the right place.
An important operational parameter of the sewer system is the depth of the pipeline network. It must be below the freezing point of the soil in a given region. Otherwise, in winter, frozen wastewater may break pipeline network and disable the sewer system. To carry out repair work, you will have to wait for the spring thaw.
How to properly insulate a pipe
To prevent emergency situations during the cold season, it is better to insulate the sewer system. Many have good thermal insulation properties. modern materials, for example polyurethane foam, fiberglass or mineral wool. You can properly insulate a pipe by simply wrapping it with insulation and placing it in a shell made of a mixture of asbestos and cement.
 Options for insulating external sewerage
 You can also attach plastic film over the thermal insulation. In cold northern regions, to protect sewer pipes from freezing, the insulating layer is additionally equipped with an electric heating system. In any case, the pipeline network must be laid below the level of soil freezing depth, especially if snowdrifts that melt in the spring form on the surface. Interesting experience You can learn more about laying external sewer pipes from the following video.


