Smooth floors are considered not only the finishing touch of the interior, but also an indicator that the renovation in the house was carried out with high quality. Ideally, the floor should have one level without differences or steps, because in the future from correct installation decorative covering The functioning of doors and furniture will depend. In addition, a crooked floor in residential areas often causes problems with appliances; its unevenness makes it difficult to install a refrigerator or stove.
Today, there are many leveling methods, thanks to which the surface is smooth and subsequently serves as an excellent basis for installing any type of floor covering.

Peculiarities
When renovating a house, it is sometimes necessary to replace floors if they have lost their original appearance or simply do not fit into modern home design. Before you start laying new material, you need to not only dismantle, but also level the old floor in the apartment.
Each type of coating has its own characteristics of surface preparation:
- Ceramic tile. Installation of this product carried out on different kinds screeds with mandatory waterproofing and cleaning of the base from dirt and dust. Due to the fact that the tiles are laid on a thick layer of adhesive, installation in the floor is allowed minor irregularities, but in this case the glue consumption will be large.


- Linoleum. The base for laying such a covering requires a flat surface without defects or cracks. Therefore, the screed should be made from high-quality mixtures that will not only preserve old layer floor, but will also eliminate all its flaws.


- Laminate. If its boards are placed on a curved surface, then over time they can undergo deformation and will constantly “creak”. As a result flooring will not last long and will have to be repaired again. To avoid this, it is recommended to install the laminate on a perfectly flat base.


- Carpet. To lay it, you will need a well-prepared surface, which must be leveled, cleaned and primed. For this purpose they most often use chipboard sheets. After laying them, the joints are puttied and primed. You can also fill old wood floors with a self-leveling solution.


To make the base ideal for covering, first of all it is necessary to comprehensively inspect the room and determine in which places there are differences, then find the lowest and highest point of the floor. After this, it will be possible to select a suitable method for leveling the surface and eliminating all flaws. For this, as a rule, a laser level is used.
Such measurements are carried out as follows: they make a mark along the perimeter of the room and, using tools on the surface, find the desired point at which all the lines from the perimeter are collected. This will serve as a starting point for determining the height of the floor.
In case you don't have it at hand professional level, you just need to select any point on the wall and draw parallels from it to the ground and draw lines using a regular board.
This procedure must be repeated until a closed loop is formed. The floor should be level from the lowest to the highest point.


Why is this necessary?
There are many reasons for having a level floor. The further fate and operation of not only the floor covering, but also equipment and furniture will depend on the condition of its surface. In addition to all this, the presence of bumps and grooves on the base will spoil appearance rooms.
Most materials do not tolerate defects in the “rough” layer during installation; for example, laminate or parquet installed on a crooked floor will begin to loosen and crack just six months after use. A uneven surface in the bathroom and toilet will cause a serious problem with the plumbing, the drainage system will be disrupted and the water will not drain well.


Floor leveling is important in both residential and non-residential premises.
If you lay ceramic tiles in the bathroom on bumps, then their strength and adhesion properties will be lost, and the product may “float”, and this will provoke the appearance of voids and dampness: later mold and mildew will appear in such rooms, which will be difficult to remove.
It is worth noting that uneven surfaces are found both in old houses and in new buildings, where slopes often exceed acceptable standards. Therefore, when starting a floor renovation, you should eliminate differences in all rooms of the apartment and make a screed that will correct surface defects and simplify the installation of new coatings.

Methods
You can do the floor repair yourself or use the services of hired workers. Of course, in this case it is best to trust the professionals, but Lately Most home owners prefer to save money and level the flooring with their own hands. In fact, there is nothing complicated about this, you just need to choose the right material and technology for performing the work. First, the old base is dismantled, large cracks are repaired and waterproofing is applied.


After preparing the surface, the level of the future floor is determined and the leveling process begins, which can be done in several ways.
Using a solution
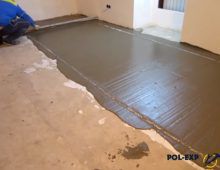
This is considered the most affordable and easiest option for eliminating surface defects. The mixture is prepared from cement, water and sand. The solution turns out to be liquid and spreads evenly over the base, creating a smooth surface.

The work execution stage occurs as follows: on preliminary surface apply a primer, and then prepare a solution and cover the floor with it.
In addition, when preparing the solution, you must strictly follow the “recipe” and the ratio of water to sand and cement; all components are thoroughly mixed with a drill and nozzle. The finished mixture is poured onto the surface and distributed evenly around the entire perimeter, while removing air bubbles using a needle roller. This floor dries completely on the third day and is ready for further finishing.


Concrete screed
Similar technology involves leveling the floor with concrete. The result is a durable monolithic and smooth surface. This type of screed is used when bulk mixture cannot be applied.
Although concrete is considered heavy material, but it provides the basis long term service and allows you to perfectly level the floor. First, prepare the surface, perform waterproofing and find the zero level. Then beacons are placed around the perimeter of the room and slats or metal profiles are attached, retreating 30 cm from the walls.


The beacons must be placed strictly according to the level, so that upon completion of the work, horizontal guides should be obtained. After the solution has dried, you can begin the screed itself. The main point in this alignment is considered proper preparation mixtures, the slightest inaccuracies can further damage the coating.
The concrete is laid out in strips, performing shaking movements, this will help get rid of air bubbles; after installation is completed, the surface of the solution is moistened with water, covered with film and left to dry for two weeks. This method is often used in panel house, and “new building”.


Bulk screed
Expanded clay is also used to obtain a smooth floor. He is lightweight material, which is easy to install and allows you to eliminate strong slopes with deep holes.
As a rule, expanded clay is chosen when you need to raise the level and level the floor on your own in a “Stalin” building. It will not create large loads on the floors and will ideally eliminate all defects.

In this case, the zero level is chosen to be the highest, since the thickness of the floor will increase by backfilling the material by 4 cm. After preparing the base, set up beacons and prepare expanded clay, for this purpose the fine and medium fractions are mixed well together.
When the expanded clay is poured, sheets of chipboard or fiberboard are laid on it. It is important to ensure that the seams of the sheets match; self-tapping screws are used to fasten them.
Then “light” cement mortar is poured and covered waterproofing film, for greater reliability, it is recommended to complete this leveling with a concrete screed.


Alignment by lags
This technology is suitable for wooden bases and involves installing logs on old boards. At the end of the work, the slopes are removed and small irregularities are hidden. To determine the zero level in this case, the thickness of the beams is added to the highest point in the room.
Compared to previous leveling methods, this method is characterized by speed and cleanliness.

Most often, logs are used in private houses and apartments on the ground floor. In addition, when performing such alignment, it becomes possible to lay additional communications and thermal insulation.
The base of the floor is prepared, primed and joists are applied. In this case, you can buy as ready material with adjustment and regular bars with a cross section of 40*100 mm. The logs must be laid strictly level at a distance of 50 cm.
If necessary, you can additionally place a plastic spacer or plywood board under the beams.
The logs are fixed to the floor using plates or anchors, and the cells formed between them are filled with insulation.


Covering installation
For such leveling, ordinary sheets of plywood or chipboard are used. They are laid in two layers and fixed with self-tapping screws, and the resulting joints are puttied.


What to choose?
When the question arises about leveling the floor covering, everyone wants to find cheap options for this. Recently, in the interior of houses they prefer to make floors from laminate, linoleum or tiles. If you choose a self-leveling mortar or screed for their installation, you will not only have to wait a long time for drying, but will also require additional costs for the material. Therefore, it is best to give preference wooden floor, it installs in one day and allows you to continue finishing immediately.
Cement mortar screed is also considered an economical option.
Unlike natural wood, cement and sand are much cheaper, and such leveling is characterized by strength and durability.


How to make a flat floor?
The result of any repair is the final covering of the floor, but before that it is necessary to do rough screed and level the surface. In order for the floor preparation to be carried out correctly, it is necessary to follow all work technologies and use high-quality materials.
The technical characteristics of concrete floors must meet the requirements of SNiP 2.03.13-88 and the recommendations of the manual in the development of existing rules and regulations. Unfortunately, not all builders do their work efficiently during flooring finishing coating we have to deal with correcting the defect.
Concrete floors can be leveled with self-leveling mortars, cement-sand mortar screeds or adhesives. ceramic tiles. For linoleum and carpet, leveling concrete floors is considered a mandatory operation; for ceramic or stone tiles, the decision is made based on the actual state of the load-bearing base. All floors installed on joists can be laid without prior leveling of the concrete base.

In this article we will look at several examples of alignment using various materials taking into account the actual condition of the floors.
Part modern materials for leveling concrete floors, several components are included; at the same time, with high mechanical strength, the mixtures have good spreadability, ease of use, low shrinkage, resistance to various chemical compounds, manufacturability and relatively low cost.

Most existing brands meet consumer requirements; when choosing, the main attention should be paid to the following factors:
- which floor should be leveled. There are options for monolithic concrete, industrial reinforced concrete slab, basic cement screed, self-leveling floor, heated floor system, etc.;
- fill thickness. Depends on the maximum roughness ratings and the type of alignment. Alignment can be preliminary or final. There are no strict requirements for the preliminary surface horizontality; it is used for finishing floor coverings along joists. During installation, the position of the joists is monitored and, if necessary, they are leveled using wedges or other pads;
- type of floor finish. The softer flooring, the more accurate and durable the alignment should be, the better quality the material should be purchased.
Once all questions have been answered, you can begin work on leveling the concrete floor. To carry out the work you will need a self-leveling floor suitable for the given case, a primer, a construction mixer for preparing the mixture, a container for the solution, a powerful (preferably industrial) vacuum cleaner, a needle and paint rollers, wide spatula made of of stainless steel, laser or water level, dowels for beacons, damper tape, tape measure, ordinary bubble level or rule.

Step 1. Count the amount of materials. To do this, first find out the maximum difference in height of the concrete floor. When checking its condition, you need to use a long level or rule. Place tools around the perimeter of the room, in the center and diagonally, keep the level horizontal. The clearance is determined by eye or using a tape measure. The more lines are tested, the more accurate the final results.
The minimum thickness of the leveling layer should be within 2–3 mm, to this value add the maximum height of the unevenness. Thickness liquid screed should be 2–3 mm greater than the height of the maximum unevenness.
Practical advice. In order to save expensive material, it is recommended to cut down the highest projections. Preliminary mechanical leveling can save 25–30% of material.
Step 2. Preparing the base. The grade strength of the material for the leveling layer should not exceed the strength of the concrete base by more than 50 kg/m2. You can check the strength of the base with an ordinary coin. Using the edge of a coin, draw two perpendicular lines on the concrete at an angle to the surface of approximately 30°; if the lines are even and without chips, then the base has sufficient strength for leveling work. The presence of a deep groove, the appearance of chips at the intersection of lines indicates that the strength of the base does not meet current standards. In this case, you cannot simply level the concrete floor; you need to pour another layer in accordance with SNiP. If the height of the floor does not allow this, then the old layer will have to be completely removed. It is very long and expensive.


Why is foundation strength so important? If the leveling layer is much stronger, it will tear during shrinkage weak foundation, the fill will peel off. There is a way out - leveling with a weak solution. But it can only be used for hard topcoats; this option cannot be used for soft ones.


Removing the old screed is the best solution
Step 3. Clean the concrete floor. Dust, dirt, and all loose elements of the concrete floor must be removed. Remember that the cleaner the base, the higher the adhesion of the leveling layer.

Step 4. The day before the start of leveling, seal large gaps. Clean them from any remnants of old material, remove dust and moisten them a little. The cracks can be sealed with the same solution that is used to level the concrete. Pack them tightly, leaving no air pockets. You can level it with a trowel or a small spatula.

Step 5. Prime the surface. The primer should only be used for concrete surfaces. Due to it, not only does the adhesion of the two materials improve, but also the waterproof performance improves, which is very important for floors in residential premises. It is necessary to prime with a roller, in hard to reach places use a paint brush. If the primer is absorbed very quickly, the operation will have to be repeated. The second coat of primer is applied only after completely dry First, the time depends on the brand of material, temperature and humidity in the room.

Step 6. Glue along the perimeter of walls, columns, interior partitions damper tape made of foamed polyethylene. It compensates for thermal expansion and prevents swelling and cracking of the leveling layer.

Important. If the room has a large area, then you should do shrink seams. They are located at a distance of approximately three meters, the lines must be parallel, and at the intersections the angle is only straight. Damper joints can be made in advance using metal profiles or cut the next day after pouring the solution. Remember that the second option is accompanied by a lot of noise and dust.
Step 7 Find the horizon level on the wall. It is much easier and faster to do this with a laser level; if you don’t have one, then use a water level. Place the laser level in the center of the room and shine a horizontal beam onto the walls. Use a tape measure to mark the required height from the surface of the concrete floor.

Step 8 Screw self-tapping screws into the concrete floor to control the height of pouring the leveling layer. The beacons should be in the corners and along the lines of the room, the step between the rows is approximately one meter. First, fix the dowels against the walls; the height is set according to the marks. Then pull a rope between the extreme opposite ones and install all the other dowels along it. If you do not have strict requirements for horizontal filling, then you don’t have to install beacons.


Step 9 Prepare the solution. The proportions are indicated by the manufacturer on the packaging; follow his recommendations. Water is always poured into the container first, and then the dry mixture is added. It is advisable to pour the mixture while the mixer is on, this will help minimize the number of lumps and allow you to constantly monitor the consistency of the solution. Mix the material thoroughly and leave it for 5–10 minutes. for insisting. During this time, all the smallest lumps of cement will be completely saturated with water. At the same time, chemical hardening reactions are started. After steeping, stir the mixture a little again.

Important. Do not overdose on water, this will significantly reduce the strength indicators. One more thing. Accurately calculate the volume of solution depending on your productivity, take into account the recommended time of use. Keep in mind that once the hardening process begins, it is impossible to stop it, and adding water to the thickened mass only worsens the situation. On average, a freshly prepared mixture should be used within half an hour.
Step 10 Proceed to pouring the solution. Start pouring from the far wall of the room and move towards the exit. Pour the solution from a height of 20–30 cm, avoid large splashes. Move the bucket in a zigzag manner, do not leave large gaps. The width of the strip is approximately 40 cm, you should be able to smooth it out easily with a spatula. Each subsequent portion of material should overlap the previous one by about five centimeters. Constantly monitor the marks on the wall and the markers from the dowels, if necessary, increase the thickness of the mass or disperse the excess over the free area.


Step 11 As the filled area expands, roll it with a needle roller. It removes air bubbles and improves the adhesion of the mass to the concrete base. The length of the roller needles should exceed the maximum thickness of the solution by several millimeters. Keep this in mind when purchasing a tool.

Practical advice. To increase the strength of the leveling layer, you need to prevent direct sunlight from entering the room, close windows and doors to prevent drafts. If this is not done, then some areas will lose moisture much faster than necessary for optimal conditions flow chemical reactions. In these places, the strength of the layer becomes significantly lower than expected.

After complete hardening, the floor surface can be covered with any soft coverings or covered with ceramic tiles. But it should be borne in mind that leveling with bulk materials using the technology described above will always have deviations from horizontality within ±1.5–2 mm. Is it possible to level concrete floors with perfect accuracy? It is possible, but for this you need to use a different production technology.
Prices for self-leveling floor mixtures
self-leveling floor mixtures
Leveling the concrete floor along the beacons
This method takes a little more time, but guarantees a perfectly horizontal surface. The most difficult thing is creating beacons. For this process we will give detailed instructions. To work, you only need a laser level; an ordinary water level cannot achieve this result.

The tools you will need are a large rule, wide and narrow spatulas, a trowel and a folding wooden meter. The tape measure is no good, it's too soft.

Lighthouses can be made from any cement or gypsum mixtures, but we recommend using Fugenfüller putty. It has high levels of physical strength, excellent adhesion with all mixtures made on the basis of cement with or without the addition of innovative fillers. In addition, the hardening time of the putty is approximately 30 minutes, which is quite enough for making beacons at an average pace. After completing the preparation of the last beacon, you can already work on the first ones.

Another advantage of the leveling beacons we offer is that they make it possible to save building materials. The height of metal profiles is at least one centimeter, which means that the minimum thickness of the fill will be the same. Minimum height of our beacons is equal to the thickness of plastic crosses and is only a few millimeters. The difference in fill volume due to height is significant for large rooms.
Step 1. Align the laser level, check the condition of the floor, and decide on the minimum thickness of the leveling layer. Remove from surface construction garbage, vacuum it.

Step 2. Prepare putty. Follow the proportions specified by the manufacturer exactly, do not experiment, they will not lead to anything good.
Step 3. Start installing the beacons against the wall; the rule will be used instead of a tape measure to measure the distances between the beacons. Place the first pile of putty at a distance of approximately 15–20 cm from the wall, and smooth it out a little.

Place a plastic cross for ceramic tiles in the center.

Place a meter on it and, taking into account the location of the laser beam, sink it into the solution. Make sure that the cross lies horizontally, check its position in several places.

Carefully remove excess putty. You don’t have to remove it near the cross; it will then be cut off with a spatula. If you touch uncured putty, you can disturb the position of the cross, and you will have to redo everything again.
Step 4. Place the rule on the floor; the distance between the beacons should be 15–20 cm shorter than the length of the rule. In the same way, the width between the lines of beacons will be determined. Install all beacons indoors.

Step 5. After point beacons frozen, clean the surface of the crosses from putty, making sure that it is even. Place the rule on top of two adjacent points, and use a spatula to apply the solution into the gap formed between it and the concrete floor. It is difficult to guess the thickness the first time, but later you will gain practical experience and the work will go much faster.


Step 6. As a rule, carefully level the surface of the shaft you have made. If there are any unfilled spaces, add a little putty to them and again level the surface as a rule. Immediately remove excess mixture into a container and stir the mixture periodically.


The floor can be leveled only after the beacons have completely hardened. It is allowed to use a self-leveling floor solution, a cement-sand mixture or ceramic tile adhesive. Decide for yourself which one, but there are general recommendations.
- The cheapest in terms of price cement-sand mortar. If you have large areas or significant thickness of the floor leveling, it is better to use this material. Considerable financial savings are obtained per cubic meter of solution.
- In terms of physical strength, tile adhesive comes first. But it’s a little difficult to work with; you need to have practical experience.
- Self-leveling floors serve as additional waterproofing; in some cases, this property allows you to speed up construction work.
As for time, there is almost no difference. You don’t have to believe that self-leveling materials can significantly reduce the time it takes to level the floor. An experienced builder will make exactly the same footage using beacons and rules.
Step 7 Pour the mixture between the beacons and level it as a rule. You need to pull the tool towards you and at the same time perform small amplitude movements left and right. If there are gaps, add solution and repeat leveling.


Practical advice. For inexperienced builders, after leveling with the rule, small waves may remain on the floor surface. This is not a problem; there is no need to scrape off the frozen mass. It is much better, easier and faster to repeat the leveling of the floor perpendicular to the first direction. There is no need for any beacons anymore. Just pour a thin layer of solution onto the floor and usually pull off the excess, making the mass a little thinner. It will fill all the waves and perfectly level the floor.

Leveling a concrete floor with tile adhesive according to a simplified scheme
This method is excellent for ceramic tiles; the work time is significantly reduced, and the quality completely satisfies tilers. Leveling the floor while laying tiles by changing the thickness of the adhesive is quite difficult; only highly professional tilers can do this. And even then, most of them prefer to level the concrete base themselves and lay tiles on the finished surface, especially if this is done if the height difference is 1 cm or more. The end result is time savings.
Step 1. Cut down large mounds, remove the surface from construction dust and garbage. If the concrete is very dry, it is recommended to moisten it generously with water. Water should not be immediately drawn out of the glue; it is needed for optimal chemical reactions. The absence of the required amount of liquid critically reduces the strength of the leveling adhesive layer.
Step 2. Prepare tile adhesive. There is a nuance here; the glue should be a little thinner than the manufacturer recommends. It will be difficult to work with thick material; in addition, in places with a small thickness, water is quickly absorbed by concrete, which causes a decrease in physical strength. We have already mentioned this. The consistency of the solution should resemble ordinary sour cream or heavy cream and spread slightly over the surface.


Step 3. Pour the glue onto the floor surface in portions and regularly pull off the excess. The raised areas of concrete serve as beacons; the glue fills only the depressions.
Important. Before starting work, you need to determine which direction to pull the tool. This can be done after a careful inspection of the concrete floor. You should find the lighthouses along which it was flooded. Then use a bubble level or rule to find out the location of the recesses.
During such leveling, professional builders make a few additional diagonal or circular movements as a rule after the first screed. The pressing force is minimal; the quality of alignment largely depends on practical experience.


If after the first pass there are still differences in height large values, then draw the rule in a perpendicular direction to the first pass. We warn you again: on the second pass, reduce the pressing force. You do not need to achieve ideal results; differences in height within ±5 mm for laying tiles are not a problem.


In order to improve the adhesion of the adhesive to the concrete, after pouring it is recommended to thoroughly rub it into the floor using a spatula or trowel. Depressions discovered after pulling the rules must be immediately filled with glue and re-leveled. The work does not take much time, the only drawback is that the tiles can only be laid the next day. But professional builder time is not wasted; there is always a small amount of previously postponed or preparatory work on site.
Video - Leveling a concrete floor with self-leveling mixtures
Agree, it’s difficult to imagine a beautiful and cozy home without a flat floor, because this is the basis of all foundations. Entering new house or an apartment, every owner strives to first of all deal with the arrangement of the floor. And modern Construction Materials and the latest technologies make it possible to make the floor beautiful and even with your own hands, even for a person who does not have sufficient experience.
In the vast majority of cases, building slabs are used as the base of the floor covering, often having a far from even surface, which inevitably entails differences in floor level. Of course, you cannot install a new coating on such a surface. The floor must be leveled, in other words, a cement screed is required.
It should be noted that leveling the floor yourself with a concrete screed is a rather long and very dirty process, but even a beginner can do it.
Surface preparation
The video describes how to take measurements to level the floor in all rooms of the apartment to the same level.
Before starting work, the surface to be leveled must be carefully prepared - cleaned of dust, paint, loose parts of concrete, and oil stains. All cracks in the base are sealed, as they lead to material leakage.
Professional builders, in the process of laying electrical wiring in the cavities of slabs to illuminate the center of the room, often do not drill one side of the slab from the ceiling side, but make a “high-tech hole” using a sledgehammer and a crowbar, punching through the slab to its entire depth from a higher floor. This, of course, will save the builders some time, but will give you decibels of noise and “odors” from the apartment below.
Preparing the surface for screed
If you are a victim of “high domestic construction technologies", then carefully and thoroughly seal all the holes, otherwise you will have to get acquainted with your neighbors later under different circumstances.
Marking the level of concrete screed
When the surface is well cleaned, you can begin to mark the level of the future coating. For this purpose, a construction hydraulic level is used, made up of a pair of flasks with marks connected to each other by a long hose. The operation of this instrument is based on the principle of connected vessels - the liquid in vertically located flasks will be located at the same level.

Marking using a hydraulic level
The marking should be carried out by two people: one will install the first flask in the corner of the room, marking the initial strip on the wall, and the other should move with the second flask, making marks along the entire perimeter of the room at the same level. Next, by taking measurements from the floor to the marks, the level of the future floor is determined directly.
Important point: For greater strength, it is not recommended to make a coating less than 30 millimeters thick.
Primer for concrete screed
The primer makes it possible to increase the adhesion (adhesion) of the screed to your surface, and in addition, it helps waterproof the base. And this operation cannot be neglected, since savings can lead to the floor subsequently cracking.

Primer for concrete screed
If you are leveling floors in the kitchen or, then use specialized waterproofing primers. Choose a primer marked “for concrete”. For the primary treatment of bases, primer compositions are usually called “primer primers”.
Dry building mixtures for concrete screeds
It is better to make a cement screed for leveling floors using dry building mixtures. The binding components in them are non-shrinkable types of cement. Fine-grained sand is used as filling material. After mixing with water, this composition forms an emulsion that spreads well over the surface and fills all unevenness well.

Dry mixes
When compared with conventional cement-sand mixtures, dry mixtures have a number of advantages. First of all, we're talking about about the short drying time of the coating - you can walk on the floor within a day. And secondly, the high strength of the coating, which is ensured by the use of small filler materials.
Groups of building mixtures:
- mixtures for primary leveling. Allows you to create the main layer of coatings. The surface ends up being uneven, since such mixtures use filler materials of a large fraction;
- finishing mixtures of the second type correct the shortcomings of the first. They contain small fractions of fillers, and they spread very well over the surface, resulting in a smooth and even coating. Apply finishing mixture thin layer, the thickness of which should be only a few millimeters.
Installation of beacons for concrete screed
After the priming has been carried out, it is necessary to install beacon profiles on the floor surface - they will be a kind of level for setting the thickness of the screed being performed. In cross-section, such profiles resemble the letter “T”.

Guide profiles are fixed with mortar
The slats need to be mounted on the floor parallel to each other - so that the top is located at the same level as the marks on the wall. This can be done, for example, using a stretched cord or a regular building level.
The slats are fixed to the base at several points along the entire length of the walls using plaster or mortar. Maintain a distance between the fastening points - 1-1.5 meters, based on considerations of the length of the leveling tool. In particular, if it is a 1.5-meter instrument, the distance should be 120-130 centimeters. If the three-meter rule is used, the slats can be spaced 2-2.5 meters apart.

The slats are fixed at several points along the entire length
Highly professional specialists do not install these profiles, since they know how to create horizontal surfaces without them.
But if you are not confident in your abilities, it is better to install them, as slats really improve the quality of work.
Leveling a concrete floor without the help of hired specialists is not such a difficult task if you approach it “armed” with certain knowledge. Let's figure out how you can complete this process yourself.
Why do you need to level floors?
Floor concrete covering these days can be seen in commercial premises, industrial facilities, and living rooms. It has a lot of useful characteristics, but you can only take advantage of them if the concrete bases are properly leveled. The most common defects in concrete floors are the following:
- small "waves" called plows that appear after the rule;
- smooth repeating changes in floor level - wave changes;
- increases (local) floor level - sagging.
With prolonged use of poorly constructed concrete foundations, cracks often form on them, as well as cavities and lenses—lowering (local) floor levels. Sometimes protruding pieces of crushed stone filler appear on its surface, which indicate destruction of the coating. All the mentioned defects lead to unevenness on the floor, which can cause injury to a person, the impossibility of reliable installation of equipment used in everyday life and in the kitchen, and furniture.
And from an aesthetic point of view, an uneven floor covering, you see, does not add beauty to the room. To avoid these inconveniences, you need to properly level the floor yourself. Such a procedure, carried out efficiently, will also allow achieving high level noise, hydro and thermal insulation of floor coverings. Leveling the concrete base is carried out by arranging a screed, which can be done wet or dry.

In the first case, it is mandatory to use a special leveling compound with the addition of water. With the dry method, dry mixtures are used. The choice of the optimal technology for each specific case is based on the condition of the initial floor covering and the height differences present on the floor of the room. Typically, cement-sand compositions, “dry” compositions and self-leveling mixtures are used for screeds. We'll talk about them further.
Cement-sand composition - classic leveling
Screed based on sand and cement is considered classic and very effective way giving the floors the desired “evenness”. It is recommended for rooms where the difference in the level of the concrete base is five or more centimeters. Technology cement-sand screed characterized by certain difficulties and high labor intensity of the process.

But you can do it yourself in any living space - in the bedroom, hallway, kitchen, and be confident in the strength and excellent reliability of the resulting coating. It is only important to remember that the thickness of the prepared mixture must be at least three centimeters. With a smaller thickness, the strength indicators of the completed screed will be unsatisfactory. We'll tell you how to level a concrete floor using a mixture of sand, cement and water.
First you need to remove all dirt and accumulated dust from it, wipe off stains from oil solutions that were used during construction or repair work. Then it is laid on the floor waterproofing material- it can be anything. At this stage, it is important to glue the waterproofing joints well and leave allowances near the walls. Next, beacons are installed using a level. For their installation, metal profiles are used, fixed to the floor using gypsum hardening solutions.

The distance between the guides of the “frame” being performed is up to one meter, no more. If the distance is greater, pouring the mixture and leveling it will be difficult. The sand-cement mixture is prepared from M-300 cement, ordinary sand and water. Nowadays no one makes such a solution on their own. It is much more convenient to buy dry ready-made mixtures and add water to them in the proportions recommended by the manufacturer of the material.
The composition must be mixed very thoroughly. This is best done with a construction mixer. The finished solution should not spread, but on a flat surface it should spread slightly. Please note that the mixture is applied after stirring for 60–90 minutes (otherwise it will simply harden). Moreover, it needs to be prepared for the entire area of the room at once.
Pouring cement-sand screed - work carefully
The prepared solution begins to be poured from the far corner of the room between the beacons. It is necessary to immediately level the composition after applying each individual portion of it, using the rule. We move it towards ourselves, and not away from ourselves. Also, the rule is to “spread” the mixture on the sides (some level it exclusively along the guides, which is incorrect) in order to achieve a good compaction of the screed layer and fill the existing voids.

Professionals also advise piercing the applied composition with a metal rod of small diameter. This simple action will avoid the risk of air voids appearing in the screed. If a mixture of sand and cement is made large thickness, it is advisable to strengthen the screed with reinforcement from a convenient (available at hand) material. In addition, it is recommended to cut special seams in it (they are called shrinkage joints) every 250–300 cm. Long breaks when laying a cement-sand composition should be avoided.
If you hesitate, “cold seams” are guaranteed to appear on the surface. They will significantly reduce the strength properties of the finished layer. For this reason, leveling the floor with your own hands should not be done alone, but with an assistant. Having laid all the cement-sand mortar, leave it for 24 hours, and then use a spray gun or roller to painting work moisten thoroughly. After 48-60 hours you will need to check how well it has set.

After this, the screed is moistened again and a plastic film is placed on it. It protects the floor from drying out quickly, which can cause cracks. Over the next 7–8 days, you need to moisten the screed with water once a day. And then the film is removed and the floor is left to dry naturally for another 1–2 weeks. You can safely lay the floor covering that you have chosen on the completed screed in the kitchen or in another room. But first make sure that the screed is done well.
If everything was done correctly, the floor surface has a uniform grey colour, and when you tap it with a block of wood, it makes the same sound in all parts of the room. We hope we have explained clearly enough how to level a concrete floor using a wet mixture of sand and cement. This technique can be used in all areas of the home, including the kitchen and even outside (on open verandas, terraces). We add that the finished surface can be additionally sanded. There is no point in performing such a procedure if the coating was done outdoors. But for living rooms it will not be superfluous.
Grinding is carried out with a special unit (machine), which quickly and efficiently smoothes out all minor irregularities.
Dry screed - how to level floors without water?
A cleaner leveling of the floor with your own hands is carried out using mixtures consisting of granulate, quartz sand, expanded clay or expanded polystyrene, and fiberboard, chipboard, moisture-resistant gypsum fiber sheet materials or regular plywood. This screed additionally soundproofs and insulates the room, so it is used in the kitchen or living room in apartments of multi-storey buildings. It is not difficult to do such an alignment on your own, even for a person who is very far from the intricacies of construction.

Advantages of dry screed:
- quick completion of work and the ability to lay the selected floor covering immediately after finishing the leveling operations;
- no need to use water to mix the solution;
- installation allowed engineering communications inside the screed;
- work can be done without assistants, performing it gradually in small areas of separate areas of the room.
In addition, dry screed makes it possible not to worry about the need for additional installation of sound and thermal insulation systems for the floor.

The diagram of how to level a concrete floor using this technology is as follows:
- the base is thoroughly cleaned;
- a waterproofing material is laid - a 50-micron polyethylene film (it is advisable to prime the surface before this);
- scatter the dry mixture over the film and distribute it evenly;
- lay plywood, sheets of gypsum fiber or chipboard, fastening them together with glue and self-tapping screws;
- prime the resulting screed and remove the excess film (cut off its protruding parts).
The work is completed quite quickly. The only problem you may have is that the sheets are prohibited from moving over a layer of dry leveling material. This means that you need to place them in the planned place the first time.
Self-leveling floors - an affordable and convenient leveling method
If in your kitchen or in another room the difference in floor levels is relatively small - up to three centimeters, it is recommended to level them with special mixtures, which themselves spread over the surface. Such compositions are very popular these days. They are made on the basis of cement, to which modifier additives are added that increase the fluidity of the solution.
Such self-leveling coatings cannot be used “bare” - without laying ceramic tiles, PVC materials, linoleum, cork or carpet on them. If you decide to use, for example, in the kitchen, be sure to make them finishing the specified materials. Otherwise, they will actively absorb oils and various liquids.

How to level the floor with your own hands using a self-leveling compound? It's not difficult at all. Follow this pattern:
- prepare the base - remove dirt from it, vacuum, seal even the smallest holes and cracks;
- clean the surface with a primer (special primer composition);
- prepare a small portion of the mixture according to the manufacturer’s instructions (it becomes unusable after 15–20 minutes);
- Apply the self-leveling solution to the floor in 30–50 cm wide strips and spread it with a spatula.
Now just wait until the mixture hardens completely (6 to 24 hours).
A major renovation of an apartment is unthinkable without leveling the floor, since it is never perfectly smooth, and in some cases even has a slope. The rough surface does not allow laying flooring, which is very demanding on the quality of the base, and due to the slope there may be problems with installing doors and even furniture. That is why It is best to start repair work by leveling the floor, especially since sometimes this process can be lengthy and quite dirty.
Today there are several ways to make the floor level. Each of them has its own advantages and disadvantages, so the choice will depend on the initial state of the surface, as well as the wishes and financial opportunities developer.
Regardless of the alignment method chosen, you will need preparatory work, which are the same in almost all cases.
- First you need to prepare the surface: remove old coating, repair deep cracks. If there are peelings and any pinpoint protrusions, knock them out with a hammer drill. After this, remove all debris and dust, and if necessary, degrease, since any foreign particles and stains may prevent the solution from adhering to the base.
- The next step is waterproofing the surface. The floors in rooms where the risk of leakage is high (bathroom, toilet, kitchen) are completely insulated, creating a kind of waterproof bowl into which the screed is poured, and in ordinary living rooms it will be enough to treat the joints of the base slabs, the junction of the floor and walls and space under the pipes.
True, some craftsmen still advise covering the entire floor with a film (at least 100 microns thick) - this will not harm the screed. The level of insulation is always made higher than the surface being constructed - after laying it, the remnants of rolled or film materials are carefully trimmed.
- Laying damper tape around the perimeter of the room. This is a kind of shock absorber for monolithic screeds, which can expand due to temperature changes. If a dry screed was used, the tape will prevent the appearance of sounds arising from the contact of the covering slabs with the walls.
- Search for the zero level, that is, the height of the future floor. To do this, you will need to find the highest point of the surface, add to it minimum thickness screeds depending on the chosen method and project the resulting height onto the walls in the form of a control line. Check its horizontalness with a level.
After this, you need to check whether, due to raising the floor, difficulties will arise when opening balcony and room doors, and whether you will have to raise the battery higher. Such nuances should be considered before leveling work begins.
Method 1: using a leveling solution
Features of the method
This is the simplest option for leveling the floor. The point is that ready solution made from sand, cement and special plasticizing additives, it is diluted with water and the floor is poured with it. Due to the property of the liquid to spread evenly, the finished surface is perfectly smooth.
When to use
Unfortunately, this method is only suitable for leveling out small roughnesses. If the surface of the base has significant unevenness and, in addition, a slope, which together creates a height difference of more than 3 cm, then you will have to abandon the use of a leveling solution: it will dry unevenly, and this will lead to cracking. True, it can be poured over a finished concrete screed - like this finishing touch Make the subfloor level before laying the topcoat.
Stages of work completion

Method 2: concrete or sand-cement screed
Features of the method
This method involves leveling the floor with concrete or cement mortar. Allows you to obtain a monolithic, durable and even screed that can hide even significant floor defects.
When to use
If the difference in heights, taking into account the slope and roughness, does not allow the use of a self-leveling floor, then the best option there will be such a screed. It is strong, durable and, if done correctly, will last a long time. However, there are a number of cases when it is better to refuse it:
- the thickness of the screed is more than 10 cm. Concrete is heavy, so it will create a significant load on the floor;
- the desire to place additional communications below the floor level;
- time restrictions. If a flat floor is needed urgently, then a concrete screed that takes a long time to dry will not be suitable.
Stages of work completion
- Preparing the base, waterproofing, finding the zero level. A primer won't hurt either.
- Display of beacons, which would allow checking the zero level at any point in space. For this purpose, slats or metallic profile. They are laid along the walls with a distance of about 20–30 cm from them. This is a margin for the rule. The distance between adjacent beacons should be such that the ends of the rule rest quietly on them. When installing beacons, you need to check the level, adding mortar every 20–30 cm. Upon completion of the work, you should get strictly horizontal guides. When the solution has set, you can begin laying the screed.
- Preparation of the solution. This is a very important moment, because mistakes can lead to damage to the coating. If you have no experience in preparing a cement-sand mixture, it is better to use purchased materials. Strictly following the instructions will help you avoid mistakes. In the same case, when you have experience in such work, you can prepare the solution yourself.
- Laying the solution. It is laid out in strips along the beacons, shaking movements to get rid of air, and smoothed out using a rule. The screed in one room must be done at a time so that it is monolithic.
- Drying of the screed occurs in indoors where there are no drafts. After two days, when the solution has hardened, you need remove the beacons and smooth out dents from them, and then moisten the surface or cover it with cellophane for two weeks to prevent rapid evaporation of moisture. This may lead to cracking. After the specified time has passed, remove the cellophane and leave it for another two weeks so that the screed completely dries and gains strength.
Method 3: leveling with expanded clay
Features of the method
It uses a lightweight bulk material, most often - expanded clay. It allows you to smooth out even deep holes and strong slopes.
When to use
There are several ways to level a floor with expanded clay, but all of them are used when it is necessary to remove significant unevenness. If the height difference is more than 10 cm, the concrete screed will be very heavy, which will create a load on the floor slabs. It will dry unevenly, taking longer in holes than in shallow places, which will lead to cracks. In such cases, it seems more appropriate to use expanded clay.
Stages of work completion
- All preliminary steps: preparing the base, waterproofing, laying damper tape, searching for the zero level. In this case, it will be quite high, since the thickness of the backfill layer must be added to the height difference, and it is not less than 3–4 cm.
- Installation of beacons.
- Preparing expanded clay. You need to mix two fractions: medium and fine. The medium one is needed to reduce the weight of the finished screed, and the small one is needed to compact it.
- Expanded clay is leveled along the beacons, compacted, and sheets of various types are laid on top flooring material. This can be gypsum fiber board, chipboard, fibreboard and similar things. They are laid side by side according to the principle of brickwork, so that the transverse seams of one row do not coincide with the other. A second layer is laid on top of the first layer, which is attached to the bottom layer with self-tapping screws.
- Expanded clay is poured onto the floor, leveled along the beacons, not reaching their top 2-2.5 cm, compacted and filled with cement “milk”, that is, a mixture of water and cement. This will give strength to the expanded clay pillow. After a day, when the composition has hardened, you can lay out a solution for a regular concrete screed on top, leveling it now along the tops of the beacons. Or you can remove the beacons, wait for complete drying, cover the expanded clay with a waterproofing film and fill it with leveling agent.
- Preparation of expanded clay concrete leveling mixture. To do this, cement, sand and expanded clay are combined with water, and the finished mass is laid out on
Leveling a wooden floor along the joists
Features of the method
With this leveling, a so-called false floor is created, that is, the covering is mounted on logs made of wood evenly laid on the floor. wooden beams. The coating can mask significant unevenness and remove slopes, but you need to take into account that the floor will rise significantly. To find the zero level, you need to add the thickness of the timber and two sheets of top covering to the highest point.
This method is quite labor-intensive, even compared to leveling the screed using beacons, but it is not so dirty and very fast, since you do not have to wait for the cement to dry.
When to use
The method is most suitable for private houses, as well as for apartments on the ground floor, since the space between the joists can be filled with heat-insulating material. This option is also suitable for those wishing to place any additional communications under the floor.
Stages of work completion

Leveling the floor in an apartment is an important part of the renovation. At first glance, this process may seem quite complicated and time-consuming, but if all stages are strictly followed, reliable tools are used and quality materials it will be suitable for anyone who is ready to do all the work themselves.


