Box:
The structure is made of fixed profiles - racks, on which the canvas is hung using hinges. The interior door frame consists of two vertical and one horizontal posts. Boxes come with longitudinal slots for telescopic platbands and without them. The box is made from solid wood, followed by veneering or staining to match the canvas. Any door leaf can be used without a frame - when it is hung on roller mechanisms(doors - compartment). In this case, it is possible for the door leaf to “roll” along the wall or be covered with a false wall.
Door leaf:
Movable part door block, which covers and opens an opening in the wall. The canvases can be smooth or paneled, solid or glazed.
Platband:
The elements covering the junctions between the frame and the wall are made of MDF, chipboard or solid wood, followed by veneering or staining to match the canvas. Platbands are divided into overhead and telescopic (with wings for insertion into the corresponding boxes, which facilitates fastening and allows you to cover wider walls without the use of extensions).
Extras:
Flat elements that allow you to easily install the platband on both sides of the doorway. They resemble a regular board, installed flush against the box or in a special groove in the box to increase its width in cases where the wall thickness is greater than the width of the box. Made from MDF, chipboard, plywood, solid wood coniferous species wood, followed by staining to match the canvases or veneering.
Seal:
The seal serves for sound insulation when using doors with a threshold (lower horizontal post of the frame). Or to absorb the impact of closing the door if the threshold is not used.
Accessories:
The lock is used to block the opening of the door. More often, a latch is used instead of a lock; it opens with natural pressure on the handle. The latch may have a key mechanism or a lock for a plumbing door. The latch is installed directly into the door leaf. In the part of the box opposite to the latch, a mating part of the latch is installed to prevent the protruding part of the latch from stripping the box. The choice of handles, hinges and glass - door decoration elements is incredibly large; specialized enterprises (sales of locks and hardware and glass workshops) deal with these products.
Dimensions:
Doors are manufactured by factories according to certain GOST standards. Standard dimensions "on the canvas": 400, 600, 700, 800, 900 mm in width and 2000 mm in height. 600 - bathroom doors, 700 - kitchen doors, 800 and 900 - interior or entrance doors, 400 + 800 or 600 + 600 - double-leaf hall doors. The width and height of the opening are calculated by adding 10 cm in width and 5 cm in height to the size of the canvas, respectively. Bathroom doors can have a height of 1900 mm; in this case, the panels are cut to the required size. In older houses, bathroom doors have dimensions of 550 x 1850 mm, which requires a slight expansion of the opening. The thickness of the box is usually 7-8 cm. If the width of the wall is larger, extensions are usually installed; if it is smaller, you can file the box or move it outside the wall (which looks much more interesting). In what order should doors be installed when performing repairs? The answer is simple - it depends on the level of repairs performed. Ideally, doors are installed as late as possible. Definitely, all wet work (plaster, screed, etc.) is carried out first. Doors must be installed before wallpapering the walls, otherwise you will have to cover the openings with film to prevent the wallpaper from peeling off due to drafts, but door casing must be installed on finished walls to cover the joint between the wall and the door frame. It is better to install doors after laying the floor coverings, but if you leave a gap between the bottom of the box and the floor equal to the thickness of the floor covering, you can install the doors before laying the floors. If the walls are not level, a gap will form between the wall and the casing, because for normal opening the doors are installed strictly vertically. Experienced craftsmen on site can determine the most painless options for solving such a problem. Cutting the box and platbands. The box can be cut with a quarter cut if the box is rectangular or at 45 degrees if the box is round. The quarter cut is made using a hacksaw and a chisel (in this case, they first make a cut, and then use a chisel to chop off required area). The box is cut down at 45 degrees using an electric or mechanical miter box. In this case, to obtain an even joint, a tool with an undivided guide part and a hacksaw is used. Platbands are installed last. More often, cuts at 45 degrees are used, made with the same tool. In this case, the edges of the platbands should fit tightly to each other.
The door block is sold assembled or in parts. In the first case, the canvas is matched to the block, and all parameters are adjusted by the manufacturer. If the purchased door does not fit into the opening, then it is expanded. In the second case, you can purchase parts of the door frame and the leaf separately and fit the block to the door opening.
To assemble the door frame you will need:
self-tapping screws;
screwdriver or screwdriver;
hacksaw with blade for wood and metal;
pencil or marker.
Door Installation Tools
So, let's start assembling the door frame.
On a flat horizontal surface (the floor or a large table) we spread a material that will serve as protection against scratches during assembly.
We lay out 2 vertical bars of the disassembled box. They have a vestibule - special grooves that secure the canvas.
We put the door leaf into the narthex, leaving a gap of 2-3 mm.
We align the frame posts and apply the top block.
Mark the length of the top of the box and cut off the excess. It’s worth cutting strictly according to size, but if you miss a little, it doesn’t matter, the small imperfections will be hidden by the platband.
Screw the top rail to the posts using self-tapping screws or carefully nail it in place.
Measure the doorway again and cut off the excess.
Doors to bathrooms are equipped with a threshold. Measure another short beam for the threshold in the same way as the top crossbar.
The door frame is ready for installation.
Assembly order
Methodology – right angle. When assembling it yourself, it is recommended to completely assemble the structure, and only then place it in the opening.
Some step-by-step instructions discuss a different technology - preparation and installation individual parts frame into the opening, their alignment with the help of linings and further connection into a single whole. This method is much more complicated, and it is better not to practice without proper experience.
- Preparation of the workplace: release a certain segment on the floor, put together several tables of equal height. The goal is to provide a level, solid base. Otherwise, it will not be possible to produce a high-quality assembly of the frame for the entrance or interior door.
- Measuring the dimensions of the opening. Produced in 3 levels (width) and three points (height: in the center and sides). In accordance with this, the required dimensions of the box are determined; there should be a technological gap between it and the walls (recommended within 4±1 mm).

- Cut out the samples. This is done if their length dimensions do not coincide with the opening. To do this you will need a pencil (draw lines) and a handsaw.
- Pre-assembly of the box. All parts are laid out according to the diagram, taking into account the direction of opening of the canvas. That is, it takes into account which side of the rectangle the porch and loop jamb should be on. After the “shape” is aligned, its geometry and size matches are checked and marks are applied to select part of the quarter.
- Preparation of joints. Notches are made along the marked lines, after which part of the part is removed using a chisel. To increase the reliability of the joint, the cut is leveled to an ideal state - with a knife, file, or grinder.
- Marking for fittings and selecting material. It is more expedient to immediately prepare the “sockets” for the hinges and the latch (lock) strike plate than to do this after the door frame is installed in the opening. But modern canopies (for example, “butterflies”) should not be attached. They are fixed on the box when hanging the canvas. The only exception is for hinges of old modifications, dismountable; one half of them is installed on the frame during its assembly.

- Connecting the parts of the box. For each “line” there are at least two fasteners. The interval between them is chosen so that they are located at least 5 mm from the edge.
Note. If a threshold is provided, then it is placed in a box with the calculation that there is at least 10 mm from it to the canvas. This is necessary to ensure natural air circulation.
All that remains is to check the correctness of the geometry, process the joints in order to eliminate possible differences in height and install the door frame in the opening.
It turns out that there is nothing overly complicated in assembling the jamb. During the work, you will not need cutters, a laser level or other special tools (equipment). All that is needed to “construct” a box is accuracy, attentiveness and precise markings.
Proper sizing is the key to success

The standard sizes of door leaves are
- height 2000 mm
- width 600 mm, 700 mm, 800 mm and 900 mm
All other sizes outside the scope are usually made to order items. (I mean single canvases, not swing ones)
You need to add 70 mm to the size of the door leaf - this is the standard width of the door frame. If the dimensions of the door frame are different, then the size will naturally change up or down. And we also add 6 mm - this is the technological gap between the leaf and the door frame.
Now you need to check how the door frame fits into the doorway. If it needs to be expanded, then we are not in a hurry to break everything at once. We soberly assess the situation - we may have to strengthen the opening with lintels. If you need to reduce the opening, then we fill it with bricks, or “sew on” bars - it all depends on the situation.
To help you understand what size doorway is needed, look at the formula:
Door leaf size + door frame size + 6 mm tech. gap + 60 mm (30 mm on each side for mounting foam and wedges that will be needed when installing the box)
Usually sizes doorways are controlled at the construction stage, but in old private houses (like mine) there are “severe” discrepancies.
Next important size- this is the gap from the floor to the door leaf. Before calculating it, you need to check the level of the floors for the width of the door “swing”.
You can do this in two ways:
- Using a hydraulic level
On the side walls of the opening we place marks at the same level. We measure the distance from each mark to the floor plane. The difference that you get when measuring should be added to the minimum height of the posts so that when opening the door does not rest on the floor. If you still “miss” this moment, then you can eliminate it only by trimming the door leaf, and this is still a “handjob” :(
2. Using a laser level
If you are the happy owner of a laser level, then everything becomes much simpler. We set the level and, using a construction square, determine the curvature of the floors. The obtained values are taken into account when setting sizes.
The minimum gap is 10 - 15 mm, depending on what kind of floor covering is planned. But it is better to immediately lay linoleum, or carpet, or, and then carry out the installation.
See the table of correspondence between door blocks and openings.

And here is another table of typical door frame sizes

Operation and care of interior doors
In order to interior door served longer and retained its original appearance, you must adhere to simple rules for care and use:
- It is recommended to use interior doors when the room temperature is from +10 to +30C° and humidity is not more than 65%.
- It is not recommended to allow sudden temperature changes or increases in air humidity in the room, which will lead to damage to the structure.
- For rooms with high levels of humidity, or in unheated buildings, it is strictly not recommended to install MDF doors.
A glass door is suitable for such premises.
- If there is high humidity in the room, in order to prevent damage to the interior doors, it is necessary to constantly ventilate the room.
- It is necessary to open and close the door in such a way as not to cause damage, chips or scratches to the door leaf or frame.
- In order not to spoil the appearance of the doors, it is necessary to carefully handle any mechanical influences.
- It is recommended to wipe the door from dust and dirt with wood care products specially designed for this purpose in order to avoid damage to the coating.
Can be varnished
- The door must be treated with a soft napkin or cotton cloth.
- Never use acid or alkali for cleaning.
Before purchasing a door leaf, you need to carefully check the appearance and necessary equipment.
By following simple rules, you can ensure that your doors will delight you with their beauty for a long time.
Interior doors made of MDFMInterior doors made of solid wood  Interior doors made of glassInterior doors made of metal-plasticCombined interior doors
Assembly and installation of an interior door frame: dimensions, how to properly assemble the structure, make and connect the frame with an MDF threshold for a door measuring 80 cm, installation of door jambs, holes, cutting down the corner of the beam, video, photo
Features of assembling boxes for wooden baths
Wood is an excellent building material, differing from others in its ability to settle after construction, which is not very pleasing to its owners. Openings in bathhouses and houses made of logs or timber should not be equipped at all in the next couple of years after the construction of the crowns. Moreover, it is imperative to find out how to properly install a door frame in a timber or log opening.

There are 2 options here:
- If the width of the opening formed during the construction process corresponds to the design solution, a groove is cut out in the end right in the middle and then a beam is hammered into it. It is to this beam that the box can be nailed, but not directly to the walls, because even after shrinking they continue to “settle” a little.
- If the opening is not formed, you need to cut a hole for the passage with a width less than the design by two thicknesses of a kind of ridge. In such cases, the box beam is made with a groove.
In both options, the elements of the box also serve as a connector for the crowns. A gap is always left above the opening to protect against deformation during shrinkage.

It is up to the owner to decide which method of collecting the box to use. A lot depends on the specifics of use and the properties of the building material. We tried to introduce you to the most significant moments and subtleties that you should not forget about.
Inserting and hanging hinges for a door frame
Let me immediately draw your attention to the fact that without professional tools and experience, you are unlikely to be able to install high-quality mortise hinges. The insertion is done using a manual milling machine, and not with a chisel and hammer, as many people think and are mistaken
Therefore, I recommend buying overhead loops, as in the photo. They do not require insertion, and their installation does not take much time and effort. The overhead loop consists of two parts that fit into one another and form one plane. The smaller inner part is attached to the door leaf, and the larger one to the frame post.
Mark at the end of the door leaf 20 cm from each edge. Examine the canvas carefully and decide which way the door will open.
Here it is important not to make a mistake and place the loops correctly. Hinge hinges should face the direction the door swings open


Place the hinge at the end until the hinges stop. Do not press the hinge too hard against the edge of the canvas. The loop should rotate freely on the hinges without touching the canvas. If, when opening the hinge, you notice that the hinge scrapes along the canvas, leave a small gap of 1 mm.
Place a mark in one of the hinge holes and drill a hole slightly thinner than the self-tapping screws that come with the hinges. There is no need to drill all four holes at once. You can make a mistake in the markings, and the loop will lead to the side. After tightening one self-tapping screw and making sure that the hinge has not moved and sits straight, drill the remaining holes and secure it. Do the same with the second loop.
Now we’ll screw the mating part of the loop to the box post. For convenience, it is better to place the door leaf on the floor and place the frame post next to it. In order for the hinges to lie evenly on the frame, the door needs to be raised slightly, adjusting the height with wedges. By leaning the box stand against the end, make sure that it protrudes slightly above the length of the canvas, which after assembly will allow the required gap of 3 mm to form. Then drill holes to secure the hinge. Now you don’t need to completely screw the hinges on, because you still need to assemble the box, and it’s more convenient to do this without a canvas.
Sequence of the simplest assembly diagram
Without experience, there are not too many people willing to mill or painstakingly select tenons and grooves with a chisel, and not everyone has stocked up on equipment for perfect sawing diagonally. That's why most home craftsmen stop at the simplest scheme with joining of elements at right angles.
Now let's find out how to properly assemble the door frame. It is more convenient to work by laying out all the components at a single level horizontally. Most often this happens on a surface covered with cardboard or other soft material On the floor, or less often on two tables pushed together, you can fit four stools.
When purchasing timber separately from the canvas, keep in mind that the base for attaching the door in the opening should not be narrower than the canvas or wider than the wall.

- On the site equipped for work, we lay out the box beams with the front side up, that is, with the rebates facing outward. If the beam is wider than the canvas, we bring the plane of the door to the same level as the future frame, placing soft-cover books under the canvas. According to any of the selected schemes, three standard elements are first used in the work: a false and hinged jamb and an upper crossbar.
- It is recommended to make the top crossbar of a door frame installed in a brick or foam concrete opening wider than the frame to increase the load-bearing capacity. Usually it is 0.5 cm narrower than the opening. To find the points for attaching the vertical bars to it, first find the center of the lintel, then set aside equal distances in both directions.
- To form an equal gap around the entire perimeter between the canvas and the box beam, cardboard or old linoleum cut into pieces is laid.
- Having marked the gaps, we mark the cutting points without scratching the surface. It's better to press lightly with your fingernail. Use a pencil, especially a poorly sharpened one, for marking experienced craftsmen not recommended. It will not provide accuracy.
- Let's saw off the crossbar according to the chosen pattern.
- Preferably, with an awl or a sharp scalpel, mark the part of the false profile that needs to be removed so that a plane is formed at the junction. Then we carefully “cut” the marked area with a chisel or saw it off. This is one of the most significant stages of box assembly, which does not tolerate inattention and mistakes. A minor shortfall in the length of the box beams will still be covered by the platband, and the projections of the narthex, poorly cut with a chisel or sawn off, will be visible. Have you decided to cut? Take a hacksaw and cut so as not to accidentally tear off the veneer from the underlying plane. For insurance, it is better to cover it with cardboard. After we have made a cut to the depth of the protrusion, we clean off the excess with a chisel.
- We lay out the sawed-off bars around the canvas with cardboard in the gap. We mark the location of the loops with maximum accuracy. The standard is considered to be a distance for installing hangers of 20 cm from the top and bottom of the canvas. Not forgetting about the upper gap, we place a point on the hinge beam at a distance of 20.03 cm from the intersection of the lintel and the jamb.
- We attach a hinge map to the hinge beam onto two screws and use a scalpel or awl to mark the shape of the socket and the points of the holes for the screws. Slowly and scrupulously remove the veneer or solid wood to a depth equal to the thickness of the card.
- We will place the hinge flags in the sockets and secure them there with self-tapping screws. The lock strike plate on the box is installed only after the box has been secured in the opening and the door has been hung, as there may be discrepancies.
- We return the loop beam to its proper place. We thoroughly check the perpendicularity of the elements to each other. We fasten the crossbar and racks, distributing two screws per connection.
The threshold is made in the same way as the lintel.
Opening measurement
Measuring the height of the opening
For those who like to do everything with their own hands and reduce the cost of work, we offer short instructions to help you correctly and quickly measure the doorway:
- Measurements should be taken on bare walls. To do this, remove the door leaf and frame before starting work.
- The distance between the walls is measured in several places: top, bottom and center. The smallest value is recorded.
Tip: If it was not possible to dismantle the door leaf and frame, you need to measure the door leaf or size from the center of one of the trims to the center of the other opposite trim. This will give approximate figures for the size of the opening.
Measuring the width of the opening
- The distance is measured from the lowest point of the floor to the top of the opening or the distance between the floor and the center of the upper casing is calculated if the box could not be removed.
Opening measurement diagram
- The depth of the opening is equal to the width of the wall. Therefore, the width of each wall is measured: on both sides of the opening and on top, or the thickness of the door frame is measured, and the wall protruding beyond it is added to it, if there is one.
Calculation of opening dimensions
After taking measurements, you can correctly calculate the size of the door leaf.
This takes into account:
- The height of the door leaf and its width.
- Thickness and width of the door frame.
- Width of platbands.
- If there is a threshold, its dimensions.
For example, we take the calculation of an opening for a door leaf with dimensions:
- Height – 2 meters.
- Width – 80 centimeters.
- The thickness of the door frame is 25 millimeters.
When calculating the size of the opening for an interior door, it is necessary to add the thickness of the frame on both sides to the width of the door. In addition, the calculation also takes into account the installation gaps on each side, approximately 15-20 millimeters.
In this case, the width of the opening will be equal to: 800+25+25+15+15=880 millimeters. An example for calculation is shown in the photo.
Scheme for calculating the width of a door opening with a frame
This width of the doorway is an almost ideal option for manufacturers of interior doors. Doors are easy to install standard sizes openings of residential premises.
The height of the opening is calculated in the same way, taking into account the installation gaps and the presence of a threshold. The height of the doorway will be: 2000+25+10+15=2050 millimeters.
As a result, for a door leaf with dimensions of 2 x 0.8 meters, the opening in the wall is 2.05 x 0.88 meters.
Scheme for determining the height of the opening
What is the thickness of door frames? Typically the standard size is 75 millimeters. This must be taken into account when installing the door.
Otherwise, you will need to use a box expander or saw it lengthwise. In this case, problems may arise during the subsequent installation of platbands, which will lead to damage to the appearance of the door.
Installation diagram of the additional element
To determine the parameters of the wall, you need to measure its thickness on all sides in three places. If the parameters around the perimeter of the doorway are the same, an interior door with non-standard dimensions is ordered. At different thickness At these points, the door frame is sawn or an extension is installed.
Installation diagram of the box with extensions
Watching the video in this article will allow you to correctly calculate the opening for installing the door leaf, taking into account the style, characteristics of materials, and operating conditions.
Assembling a door frame without a threshold

Let's look at assembling a door frame with your own hands using an MDF frame as an example. We will connect the upper parts at 45°, as this is the most aesthetic way.

1.First of all, you need to trim the parts of the box. This is done in order to eliminate irregularities or manufacturing defects.
If you have to use hand tools, then it is better to use a fine-toothed saw or a hacksaw. Start making cuts from the veneer side so that chips, if any, remain on the invisible side.

2. We “saw” the loop beam and the vestibule at 45°. It is best to do this with a miter saw, but if you don’t have one, you will have to work with a miter box. To avoid unevenness when cutting, the miter box must be secured. We use a hacksaw with a fine tooth.

3. Next we move on to the most difficult part - “sawing” the top of the box - the lintels. You need to clearly set the size and not miss the corners. You can use a tape measure, but there is an easier way. To do this, we apply the lintel to the top of the door and mark the marks “in place” with a sharp pencil. To maintain the technological gap, you can use packaging cardboard - its width is just 3 mm.

4. Mark the height of the loop and false beams. I told you how to find out the required height a little higher. This is the height of the door leaf + the top gap of 3 mm + the bottom gap. If the floors are level, then 10 mm is enough. When opening, the door leaf should not catch or rest against the floor. You should not create a very high gap - 10 - 15 mm is enough for normal air circulation. If the room is damp, then larger values are allowed.
IT IS IMPORTANT TO KNOW:
If there is a difference where the doors are installed and there is no way to correct it, then the height of the racks may be different. The most high place difference
IT IS IMPORTANT TO KNOW:
We constantly and meticulously check all the applied dimensions before washing down. If the box turns out to be smaller than the canvas, you will have to buy a new beam.

5. After all the components have been sawed down, we assemble the MDF door frame together, having previously drilled holes with a drill of a smaller diameter to prevent the frame from splitting. For connection we use 50 cm wood screws. It is more convenient to carry out work on the floor, placing cardboard or other material under the box.
IT IS IMPORTANT TO KNOW:
When you tighten the door frame, press its parts as tightly as possible, since the screws will stretch them.

Well, this is approximately the result you should get.
How to secure a door frame in an opening (detailed instructions)
The stronger and more securely the box is fixed in doorway, the longer the door will last without requiring repairs. There won’t be any particular difficulties if you follow all the tips and instructions. When installing an interior door, it should be secured so firmly that you can, for example, attach children's jumpers to it.
 When securing the door frame in the opening, you can additionally read the instructions
How to properly secure a door frame:
- After the door has been secured with spacers, you need to drill three holes on each support;
- Anchor bolts or metal rods are driven into the prepared holes, the ends of which are flattened;
- If installation is carried out in concrete wall, then special dowels are driven in;
- All cavities are carefully filled with polyurethane foam with the expectation that it can double in volume;
- In a narrow passage, wide metal plates with holes are used to fasten door frames into which self-tapping screws are screwed or anchors are driven in.
Choosing material
I don’t have a definite answer here, since the choice depends on your preferences and budget. I will give examples of the most common materials used for door frames.
MDF doors

MDF is a wood fiber board. The doors are cheap, but they look good. The advantages include lightness and environmental friendliness. The disadvantages are reduced impact resistance, poor noise insulation and short service life.
Laminated solid wood

Glued board or "euro-timber".
These doors do not consist of solid wood, but from parts glued together under high pressure. The joints on them are practically invisible. The doors are quite durable and cost a little more than MDF. Price and quality are acceptable.
Solid wooden doors

Doors are much more expensive than glued ones. Strong and durable. The disadvantage is incorrect processing by the manufacturer, as a result of which the wood is excessively saturated with moisture.
Doors made of chipboard and fibreboard

Wood-fiber or wood-pressed boards. These doors are very cheap as they are made from leftover material. The advantage of these doors is good mechanical strength, and quite good sound and noise insulation. The disadvantage is low moisture resistance, as well as the presence of a volatile substance in the glue, which has a detrimental effect on health. Another aspect is the complexity of installation, since the screws in such doors do not hold well.
In addition to those described, there are also plastic, glass, aluminum, and veneered ones. Doors with honeycomb filling, laminated, etc.
The choice of material is up to you, but it should be appropriate and practical.
Dimensions of interior doors
Their elements are made of pine boards or timber, and on top it is decorated with veneer of trees of more valuable species.
Box thickness
In standard apartments built in Soviet times, this size is 7.5 mm, so a box with a size of 10.8 cm is selected for them. If the thickness of the interior partitions is 10 cm, then you need to install a box of 12 cm. These are the standard sizes that are accepted domestic GOST standards. In interior doors from foreign manufacturers, the door thickness range is wider and ranges from 8 to 20.5 cm.
If the thickness of the wall turns out to be greater than the selected frame, then it can be increased by using additional elements or using a compensatory frame, which can be telescopic, expansion or act as a transformer.
 The photo shows the thickness of the box
When taking measurements of interior doors, the thickness of the opening may be different; this is caused by the nature of the walls; they can be load-bearing or installed as partitions.
It is regulated and can range from 190 to 200 cm. These dimensions will satisfy the opening dimensions ranging from 194 to 203 cm or 204-211 cm.
When calculating the height of the future door, you need to take into account the threshold. It can be from 1 to 2 cm, and in the end it can be 208 cm, and without it 206 cm. This is the ideal height that meets the standard dimensions of many door frames.
Door structure width
It is measured from one to the second wall. Between this distance the canvas and two side elements of the box should fit. The standard width is 800 mm. Almost all manufacturers adhere to this dimension.
Dimensions of extensions
They can be no less important than the box itself. Thanks to them, you can eliminate the hollow section of the doorway.
They come in two types:
- Planks with a protective edge. They are fixed in the opening with nails or an adhesive base. Their width can be changed by sawing, and their height is 2 meters.
- Telescopic extensions. Suitable for solving any lack of width. Their installation is carried out using a special lock, which is a “tenon and groove”. The groove is made in a box, and the tenon is on the extension. Their width is adjustable from the side of the platband.
The feasibility of using extensions can be determined after measuring the width of the doorway.
In the video, the dimensions of the extensions are:
Dimensions of double doors
Comfortable dimensions for use are door widths of 120-180 cm. If the opening does not allow them to be accommodated, then the door leaves will be different in width, one smaller leaf is fixed in its place, and the second with larger dimensions is used as regular door. The latter has standard dimensions, and its smaller counterpart has dimensions equal to 1/3 of it.
 The photo shows double doors
The height of such doors can be from 2 to 2.5 m. Depth double doors according to the standard it is from 7.5 to 11 cm.
Setting the parameters of doorways is not difficult if you know in which places they need to be measured. The obtained parameters are adjusted taking into account all gaps. If a mistake is made when installing interior doors, it can be corrected by filing the frame or installing additional elements; with the front door, the situation is not so simple. If there is a large gap between them and the wall, it may be necessary to install a counter box.
Preparation of the side surfaces
Then, on one of the side parts, which will be located on the hinge side, you need to mark the places where the hinges will be located. This is done by attaching this part to the side surface of the door. The depth of the groove is made equal to the thickness of the hinge sash. The recesses for the hinges are cut out very carefully so as not to damage the door leaf. This is easy to do with your own hands using a chisel and a hammer, while specialists usually use an electric cutter.
Next, you need to insert the loops into the recesses prepared for them in this way, and using a drill, make recesses for the screws on the side surface. Moreover, the diameter of the recesses should be smaller than the diameter of the screws that will be located here. Then, using self-tapping screws, the hinges are attached to the door leaf.

A latch lock is installed on the other side surface of the door.
Assembling a box from complete parts
When purchasing a door as a complete set, you are faced with the fact that only the door leaf corresponds to the size of the opening. The box has to be mounted and adjusted manually - the manufacturer cannot assemble it in advance, since he does not know the exact size of the opening.
The doors also do not have hinges, handles (see Handles for interior doors - how to choose the best) and locks, because the fittings are installed depending on the direction of opening the door. By the way, there may not be a threshold, and the thickness of the wall may be such that it will be impossible to cover it without additional planks. Therefore, before assembling the door frame of the interior door, all these nuances need to be taken into account.
Joining parts
The main problem when assembling the door frame is to correctly make cuts and connect the pillar parts with the lintel. The crossbars and jambs have a profiled structure, and for an inexperienced person, the most difficult part may be making cuts at 45 degrees, and even more so cutting grooves and tongues, which are done before joining the parts.
If you type in the query line: “how to properly assemble a door frame video,” you will find many videos with which you can clearly see what the craftsmen do and how. As for the theoretical part of the work, you can familiarize yourself with them by reading our article.

How to properly assemble a door frame from MDF: joining using the groove method
- You can use a regular miter box to make angled or straight cuts, but if you have the option of using a miter saw, the cut will be much neater and more precise. But to make the tenon joint, which is shown in the photo above, you need a manual router.
- It should be noted that this option for joining the box parts is the most reliable. Tongue-and-tongue joints are considered nailless, but for greater strength craftsmen additionally reinforce them with galvanized nails. The tenons are formed over the entire thickness of the box beam, which must certainly be taken into account when marking before cutting parts to length.
Note! There is no big difference on which of the parts: vertical or horizontal, the tenons will be cut, and on which of the grooves are chosen - the main thing is that the connection is rigid. .

Cutting a blank for assembling a box using a miter saw
But if we look at things realistically, we understand that a router is a professional tool, and it is unlikely to be found in any home. And even more so, few people would want to painstakingly select grooves in a beam using a chisel with their own hands. Therefore, home craftsmen choose connection options that are more affordable, preferring to join the box parts at an angle.
Assembly technology
The door frame is assembled in several stages.
Stage 1
 Door frame layout
- Lay the bars on the floor door design.
- Carefully inspect the existing material and make sure that the shortest bar of the structure has grooves (their presence is important for the convenient connection of all parts).
- Carefully fit the grooves on the top bar together with the side bars, and then knock all these elements together. To avoid damaging the material, use a wooden mallet.
- Fasten the parts together with screws and check the reliability of the resulting structure.
- If there are no grooves in a short bar, all parts of the structure are fastened with nails or screws.
Stage 2
- Compound Saw off the protruding ends of the wooden blocks (so that they do not interfere with the assembly).
- Pay attention to the surface of the resulting door structure - it should be even and smooth.
- Check all corners of the structure - it is important that they are straight.
- Take accurate measurements of the width of the top of the door frame.
- Cut the strip so that its length is slightly longer than the measurement obtained, and nail it to the side beams.
- Cut off the unnecessary ends of the rail.
At the next stage, you will need to start installing the door hinges.
Stage 3
 Installing hinges on a box
- On inside Measure 20 cm from the top edge of the structure.
- Attach the door hinge and trace its outline with a pencil.
- It is known that a folded hinge leaves a small gap from the door to the frame (0.4 cm). Considering the thickness of the loop, calculate the depth of its installation.
- Using a router, make a platform for attaching the hinge. If you don’t have an electric router, you can use a set of chisels for these purposes.
- Make a seat for the bottom door hinge in the same way. But keep in mind that the distance from the bottom edge of the structure should be 21 cm (1 cm is allocated to the bottom gap).
- Place the door frame, with the hinges installed on it, against the door and mark on the door the places where the hinges will be attached. Organize the hinge locations on the door in the same way as you previously did on the frame.
Stage 4
 Using a plumb line during installation
- Take measurements of the height of the side part and then transfer the resulting dimensions to the side bars of the door structure.
- Keeping safety precautions in mind, carefully lift the U-shaped box from the floor and immediately begin installing it in the opening. Using a plumb line or level, carefully check the verticality of the box, the perpendicularity of all its constituent elements and the horizontality of the top bar. The frame may not “fit” into the opening the first time (even if you made all the measurements correctly). But it doesn't matter. The resulting gaps between the opening and the frame can be easily and quickly eliminated using wooden wedges or polyurethane foam.
- After you install the frame in its designated place, be sure to secure it. Screw the door frame with dowels to the opening slopes.
- Make sure that the door frame you assembled fits securely into the doorway.
- Remove the temporary spacers and slats, and be sure to saw off the protruding parts of the wooden wedges.
 Installation diagram
Proceed to hanging the door on its hinges and attaching the trim.
The platbands are secured with nails, self-tapping screws, or glue. After installation, the nail heads are usually rubbed down, and if self-tapping screws were used, decorative plastic plugs are put on them.
As you can see, installing a door frame requires not only knowledge, but also experience installation work and patience.
Door frame dimensions
The dimensions of a wooden door frame are determined by several parameters:
- The first is the dimensions of the door leaf chosen for the frame.
- The second is the purpose and characteristics of the room.
Before starting work, you should read the instructions on how to assemble the door frame. It is worth saying that different rooms There are various requirements for ventilation and sound insulation, and these, of course, must be provided by the door being installed. For example, a bathroom door should not let cold air in, nor should it allow warm air to leak out. Other rooms, for example, storage rooms, on the contrary, need ventilation so that the materials inside do not deteriorate. If the door is installed in a boiler room, then it would be useful to provide additional ventilation, especially if there is gas equipment.
To prevent heat loss, the door frame structure is constructed from four bars. As a result, it will be shaped like a closed rectangle. At the same time, the design of the door itself will contain such details as recessed and hinged vertical beams, as well as lintels. Between the frame beam and the door along the entire perimeter it is necessary to maintain a gap of 3 mm so that the door moves freely.
If it is necessary to provide ventilation, the box is assembled from only three parts. In this case, instead of the threshold, a technological gap of 16-18 mm is left. The door base will then have the shape of the letter P. In this case, the required offset of 3 mm must be observed only along the top beam and vertical posts. In addition, a gap of 2.5-3.5 mm must be maintained between the threshold and the new floor covering to compensate for the expansion of the material due to temperature changes.
A closed box is usually larger in height than an open one. This is due to the fact that the height increases due to the thickness of the threshold, and, consequently, the thickness of the door frame will be greater. This must be taken into account when carrying out calculations and measurements. Otherwise, the door will be too long and will have to be shortened to fit the opening. This is extremely undesirable to do, especially if the canvas is coated with veneer. If you have to cut such a coating, it is best to start from the side where there is decorative finishing, and then move to the side where this finishing is not present. In this case, the design of the box will not be damaged.
How to install a frame in an opening
A door frame assembled from any material must be correctly inserted into the opening intended for the door, so that it performs its functions for a long time without creaking or jamming.

Installation of an interior door with a frame
To do this you need to work as follows:
- Carefully move the assembled structure to its intended location and temporarily secure it with polystyrene foam or packing cardboard. Using a level, the verticality of the surface is checked with the side where the hinges will be attached. The strength of the structure is necessary so as not to disrupt the evenness of the installation, so fixation is inserted into the gaps using wedges. They are made from wood waste.
- Installation for such fastening is carried out from below the hinge arrangement, where fastening with dowels or screws will take place. The stakes are driven into the upper corners to achieve a stable position for the entire frame. Spacer wedges are driven in on each side one by one, and try to align them with each other with the cut parts. On one side, the installation of extensions is carried out, the other is carried out by leveling the door frame with the wall surface.
- The door frame is fastened using holes prepared for fasteners to install hinges. Wedging must be present there so that deformation moments do not occur at the moment of screwing in the screws. In this case, the pretend side is slightly secured and not brought to the final stage. In order not to knock down the dimensions, the installation of this part occurs after the door leaf is installed.
- For stability, foam is applied to the gaps.
- All door hardware is installed.
- Place a gasket under the canvas and screw on the looped parts one by one, starting from the top.
After completion, close the door completely, using spacers, and finish installing the door part. After this, they begin to apply foam around the perimeter of the entire structure. Experts recommend using spacer stakes; only they will ensure reliable stability and prevent skewing of the risers.
You should not increase the number of fasteners, since the door leaf acts under its own load with the help of hinges, so the main attention is paid to these places. . Excess hardware can create the appearance of unnecessary holes and only under the hinged base will the fasteners reliably hold, which must be screwed tightly
You cannot hide unreliable screwing with foam; it cannot get rid of the problem.
Excess hardware can create the appearance of unnecessary holes and only under the hinged base will the fasteners reliably hold, which must be screwed tightly. You cannot hide unreliable screwing with foam; it cannot get rid of the problem.
Do-it-yourself door installation is shown in the video:
- Categories
Windows and doors
- Related Posts
Door frame assembly process
In work of this nature, preparation plays a big role. The process of assembling a door frame usually does not cause any particular difficulties. To do this, you should prepare the most necessary tools (drill or screwdriver) and screw several blocks into one common structure.
In order for the installation of the box to proceed quickly and in an organized manner, you need to prepare a number of devices:

Tools for assembling a door frame.
- roulette;
- pencil;
- a drill with drills of different diameters or a hammer drill;
- screwdriver;
- chisel;
- electric jigsaw;
- plane for leveling door elements;
- plumb line, level;
- hacksaw for wooden surfaces;
- polyurethane foam;
- screws;
- finishing nails.
Installation of the door frame begins with preparing the drill. A drill of 2-3 mm in diameter is screwed onto it, then the corner of the future box is carefully aligned with the end of the support and 2 holes are drilled. You can’t do without them, because screws can damage the wood when screwed in. Once the holes are drilled, you need to take a Phillips screwdriver and screw 50-60 mm screws into the finished hole. Other corners are made in the same way.

Door frame assembly diagram.
These are the main points used in the construction of the door leaf
To check the size match, you should put it in a box, focusing on the gaps, the acceptable dimensions of which will be 2-3 mm. Once the appropriate measurements have been made, the products are combined into one design.
The door frame can be assembled in another way; the supports and lintels with the threshold can be cut at an angle of 45°. However, this approach is complex, so it is best left to specialists. This will require special equipment and experience in carrying out such work.
Step-by-step instructions on how to assemble the structure. Photo
In order to install an interior door frame with your own hands, you will first need to cut the timber according to pre-measured dimensions.
- Initially, you need to cut parts with a longer length, be sure to take into account the gap from the floor to the door (depending on the thickness of the floor covering).
- Next, cut off the remaining bars, exactly to the measured dimensions.
- Any trimming of the canvas that is required is best done with a “circular” in order to accurately maintain the size - 45º.
Cutting the blade at an angle of 45 degrees
- Connect long and small parts that have been cut off, clamp them with a clamp and accurately drill through. Drill for two (using the same principle) on both sides and tighten the elements together with self-tapping screws.
The main thing is to carefully ensure that in no case is there any mixing or distortion of the combined elements.
- After choosing the side into which the door will open, you can install the hinges and lay the U-shaped frame. Attach the door leaf. It is worth considering that there should be a gap of 3 mm between the box and the canvas (to account for this, you can insert cardboard between the two elements).
- Check whether the right angle is maintained everywhere and whether there are the necessary gaps.
- Next, you can start marking the space for mortise lock and loops.
Lock mortise
- Now you can remove the door leaf from the frame.
- At this stage, it is necessary to cut into the mating part of the lock and make the corresponding groove.
- Secure the parts with screws and screw the hinges to the door leaf.
Installation of hinges
- After this, check everything carefully again, try to turn the door leaf in the direction in which the door will open.
- Next, you can proceed in two ways:
- Install the entire block: box, canvas and necessary parts;
- The box is separate with spacers.
The door leaf must be covered with tape or film in order to protect it from polyurethane foam, which will then be very difficult to remove.
- Place the canvas in the box carefully in the opening and use wedges to secure its upper part.
Fixing the door leaf
- Check the alignment and vertical position of the installed structure with a level or plumb line.
Even if the doorway has some deviations vertically, the door is still installed vertically, otherwise it will not close in the future.
- After the wedges fix the structure, a spacer is installed (door width + 6 mm), clearly opposite the wedges located below.
- Now you can foam the structure, with the door closed and after it dries, remove the wedges and excess construction foam.
Foaming the box
Polyurethane foam is unsafe, so it is recommended to work with it only with gloves.
Recommendations on how to connect a frame with an MDF threshold for a door measuring 80cm
The threshold is an extension of the frame and includes special strips that match the width of the opening, which are matched in color and texture to the door leaf or frame.
Thresholds are most often made of MDF and generally have a height of up to 20 mm.
Special strips for the threshold are attached to the frame with screws, and construction foam is blown into the gaps formed by the wall.
Provided that the door is 80 cm wide, the frame will be mounted in the doorway, you must carefully measure everything so that the frame fits the threshold.
Based on previously performed measurements, a box is installed according to the classical scheme and before blowing in the foam, a threshold is set, the size of which should vary 80 cm + 6 mm for gaps.
Advantages of pressing
The choice of many owners of MDF doors and frames is due to the following advantages:
- exerting small load effects on load-bearing elements due to the lightness of the materials
- products are manufactured with a homogeneous structure, which is the reason for their integrity; in addition, the stability of fastening elements is noted
- the development of technological processes in the field of decoration produces products with imitation of expensive natural finishes
The disadvantages of cheap panels include:
- poor resistance to direct contact with water, swelling and deformation of geometric parameters occurs
- the change in shape is caused by the installation of a thin door frame and a heavy door leaf
- requires careful handling regarding mechanical damage
- installation contains labor-intensive procedures
If we compare MDF and wooden boxes, of course, natural material takes precedence on all sides.
Even if it has lost its original appearance over time, it can be easily restored with the help of repair and restoration projects. But for consumers, their ability to pay often comes first.
The materials and tools for carrying out the work are no different from the above list except for the MDF elements. The main condition for assembly is the formation of a rectangle.
The work must be carried out on a flat surface on which:
- laying the door leaf
- parts of vertical risers are placed on the side sections
- carry out cutting of workpieces, adjusting the height with the corresponding 3mm. gaps at the top and bottom, if a threshold is provided
- the jumper at the top is also cut according to the width and side gaps
Then they move on to the connecting actions of the jumper and vertical riser. As soon as the assembly is completed, it is necessary to check whether a structural distortion has occurred.
Making a door frame
Door frame manufacturing diagram.
You can assemble a frame for interior doors yourself from a standard wooden frame profile (timber). First, the height and width of the doorway are carefully measured. 30 mm is subtracted from the height of the opening; two beams of this length are measured and cut for the side posts. Prepared in the same way top bar. Using a special tool - a miter box - the upper ends of the side posts and both ends of the crossbar are cut at an angle of 45º. A special tool is used to precise formation corner. When preparing the crossbar, it should be taken into account that the length of its shorter side after cutting the corners should be the width of the door leaf plus 7 mm.
The side post and the crossbar are joined along the cut so that the bars are strictly perpendicular. A soft sealing gasket of small thickness (about 3 mm) is first placed between them. The beams are compressed and secured with clamps. Two holes are drilled in the long element perpendicular to the cut plane with a diameter of 4 mm. The joint is tightened through the holes with screws. It is advisable to coat the joint plane with wood glue. The second corner of the box frame is tightened in the same way. To temporarily strengthen the structure, it is recommended to install a removable jumper at the bottom.
Even greater confidence in the strength of the joint can be achieved by installing a dowel. To do this, a hole with a diameter of 12-15 mm is drilled in the middle of the joint perpendicular to the cut plane (joint of beams) and a wooden dowel is driven into it. The hole and connecting element are pre-coated with wood glue.
Return to contents
How to properly install a door frame for an interior leaf
When looking for the most suitable option for an interior door, you cannot leave out the question of a door frame for the product you like. Selecting and installing a door frame is sometimes simply impossible due to unacceptable wall thickness or poor location of the opening. In order to correctly select and then correctly install the structure in question, careful measurements and calculations are necessary.
The width largely determines the aesthetics of the design and the opening itself: for example, with a narrow interior door, the space has to be closed by installing additional elements or trims. At the same time, a too wide door frame causes significant alterations in the partitions or walls of the room.
Before starting the required calculations, it is necessary to perform a number of measurements. Without this, the installation process will be quite tedious and may not work the first time. The following are subject to measurements:
- the actual width of the existing opening (taking into account the space remaining after all dismantling work);
- the actual height of the opening (the restrictions are the same as for the width);
- wall thickness at the location of the opening;
- distance to nearest corner rooms/premises.
The described list is valid in the case when the opening will not be moved, and everything will be limited only to installation new door. Otherwise the situation will become even more difficult.
First of all, it is worth analyzing the standard sizes of door frames for interior doors. Of course, if you have the appropriate funds, you can order a non-standard design. Especially when it comes to arranging interior passages in large halls or living rooms.
You should also take into account the country in which the interior door is made. Products imported from France, for example, have dimensions that differ from those generally accepted in our country
Fortunately, there are no more exceptions - all Italian and Spanish-made products have already been adapted to domestic standards.
Blade size, mm
Box size in plan, mm
The information given in the table concerns only the minimum and maximum dimensions of standard canvases produced by domestic furniture factories. For more detailed information, please contact the manufacturer directly.
During the selection process, the subsequent installation location of the finished product should also be taken into account. For example, formally a design with overall dimensions 670×2047 mm, but if it is then impossible to bring a washing machine into the room, then all the work will be in vain.
Preparing the bars and assembling the box
Our door is flat and therefore for our door the length of both vertical beams will be 2010 mm (the height of the door leaf is 2000 mm + two gaps between the door leaf and the frame beam of 5 mm at the top and bottom). Be sure to check the cut on each side of the beam, as they often do not correspond to a 90-degree angle from the factory. To ensure an even cut and a 90 degree angle, it is better to use a miter box. Our lintel and threshold are also the same, 860 mm each (door width 800 mm + two gaps between the door leaf and the box beam, 5 mm each on the left and right + 50 (two thicknesses of the box beam, excluding the size of the rebate, which has a height of 10 mm).Next follows a very important moment, shown below in the figures.To tightly connect the horizontal beam with the vertical one, it will be necessary to saw off the rebate on both sides, both at the lintel and at the threshold, in our case by 35 mm (this is the thickness of our box beam, taking into account the rebate).Total 4 cuts that must be made carefully and carefully so as not to damage the side visible surface of the frame beam with the saw teeth. To do this, do not cut the rebate completely, leaving about 1 mm (it’s better to carefully remove it with a chisel or file) and be sure to place it under side visible surface of the box beam is protective, dense and thin material(a piece of sheet metal or transparent plastic). It’s better to play it safe and be patient, the work is very delicate, because if you overdo it a little, the surface will remain damaged, which will ruin the appearance of the solid structure. When cutting the narthex, you need to ensure that the further connection of the perpendicular bars is without any gaps, using the same 90-degree cut discussed above.


Let's start rolling the box.
NOTE! When twisting, check the correct assembly with a square. And to make the process of screwing in screws (especially by hand and long ones) easy and fast, use the old, time-tested, “old-fashioned” method, lubricating the threaded part of the screws with soaked soap (shown in the figure)
As fasteners we use wood screws (70-80 mm long), having previously drilled holes with a drill (2.5 mm in diameter) in the places where screwing will be done so that the beam does not burst. For a better and more reliable connection, it is recommended to drill holes to a depth slightly less than the length of the screws (about 60-65 mm for 70 mm fasteners), and, naturally, the diameter of the drill should be less than the diameter of the screw core (that is, without a spiral external thread of the fastener element). We screw two screws into one side of each corner of the box. If you want to make the box more durable, you can add another screw in the middle on the other side of the corner.


Go back to previous section“Installing the handle and latch in the door leaf.” >>
Go to content, to the main page “Do-it-yourself door installation” >>
Assembly methods
The door frame installation guide depends on how it is assembled. Designs come with or without a threshold and with different nuances of securing parts.
How to assemble a door frame at 45° and without a threshold
Typically, MDF products are installed according to this scheme. Detailed instructions for making a box using this method:
- To eliminate unevenness, you need to trim the box blanks.
- The loop and false beams are sawn in the upper part, at 45 degrees inward. For work, it is better to use tools with fine teeth or a hacksaw, this will help avoid damage to the finish. When working with products made from eco-veneer or laminated MDF, it is best to cut from the reverse side, so that possible cracks remain on it.
- After processing the side parts of the box, you can proceed to sawing the lintel. It is sawn on both sides at 45 degrees inward. It is important to measure everything carefully so that when assembled the parts form a right angle. Do not forget that a gap of 3 mm must be maintained. Measurements can be made either using a tape measure or by placing the beam directly against the doorway, making notes with a pencil.
- Next, you need to adjust the loop and trim beam in height, from the bottom, to the beginning of the cut corner. If there is no threshold, it is enough to add two gaps to the height of the door, 3 mm + 10-15 mm. After hanging, the door should close tightly enough, without obstacles to opening, and not touch the floor.
- Once all the components are sawed down, you need to move on to assembling the parts. It is easier to work by placing them on the floor. For safety, it is better to use a small diameter drill. Self-tapping screws must be for wood; they are also screwed at an angle of 45 degrees. When fastening the parts, they must be pressed tightly against each other, since the screws stretch the parts.
- After assembly, the structure must be tried on in the doorway; if the calculations are accurate, it will fit into it without any problems.
The measurements must be checked several times. If a mistake is made and the door frame turns out to be too small for the door leaf, you will have to purchase new material.
How to assemble a door frame with a 90 joint yourself
The simplest assembly option, which a beginner can handle, is also often used when working with wood-fiber materials. How to assemble with a 90 degree joint step by step:
- The side beams are adjusted to the height of the doorway, taking into account all the gaps. They will reach to the very top of the doorway.
- The upper part is fixed between the loop and the false part, so it must be shortened by as much as the width of both side beams. After connecting, the three parts should fit snugly into the width of the opening.
- After preparing the components, you can proceed to assembly. Holes for self-tapping screws are made in advance to avoid cracks in the wood; they should enter from the sides, at an angle of 90 degrees.
Assembling a door frame with a threshold
Structures equipped with thresholds are usually installed at the entrance to houses, as they retain heat and make the box more durable. Even though a new part is being added, assembling the parts is not difficult. The first steps are identical to those performed during the installation of boxes without a threshold. The lintel and side beams can be installed at angles of 45 and 90 degrees. The threshold is always set at a right angle. Step-by-step instructions for assembling a box with a threshold:
- The threshold beam must be sawn exactly at a right angle, observing the width, from one side part to the second, you can also focus on the formula: door width + 6 mm gap. To correctly determine the height of the threshold, it is necessary to place the structure in the door leaf.
- Next, you need to carefully cut down the thrust quarter on the false and hinged beams, to the height of the bottom board, to securely fasten the threshold. Measurements must be taken accurately, otherwise you can simply ruin the material.
- Once the components are prepared, you can proceed to connecting them, also tightening them tightly so that the parts do not fall apart. When working with entrance doors, it is better to use galvanized self-tapping screws.
Door frame tenon connection
A less common method of connecting box parts can be done without using self-tapping screws, however, to ensure strength it is best to use galvanized nails or special assembly adhesive.
The principle of this method is that at the junction of the components, it does not matter whether they are placed at a right angle or at 45 degrees, they are cut out tenon joints. One of the parts has the connection itself (tenks), and the second has grooves machined for it, into which it is tightly inserted.
.
Preparing material and tools
Since we are talking about improving the interior of the room, before starting assembly it is necessary to decide on the material:
- Metal has excellent strength, so it is best suited for entrance doors. But you need to take into account that working with metal requires special tools, skills and a lot of energy.
- The tree is great combination durability and environmental friendliness, so it is a universal option. Noble types of wood are suitable for both exterior and interior doors.
- MDF ( fibreboard) – environmentally friendly material, made from sawdust with a natural binder, has a smooth surface, looks good, and is therefore perfect for when you need to install interior doors. MDF is easy to process, is not afraid of moisture, and in many characteristics is not inferior to wood at a price almost half as low.

There should be enough material:
- timber for the door frame (two lengths L + 8 cm, where L is the height of the door and two more lengths N + 8 cm, where N is the width of the door leaf);
- platbands and extensions (in case the width of the doorway is greater than the width of a standard beam).
If the box is without a threshold, then only one beam of shorter length will be needed - for the top crossbar.
Prepare the necessary tools. We will need:
- slick;
- hammer;
- hacksaw (ideally, a special electric saw with rotating mechanism, but we will assume that you are not a specialist and do not have expensive tools);
- electric drill with a replaceable bit, which can also be used as a screwdriver;
- level;
- carpenter's knife.
For fastening we will use screws of different sizes with fine pitches.
Let's assume that you have already carefully dismantled the door frame that you want to replace.
How to assemble a box
Beginning craftsmen choose the easiest method, joining the parts at right angles. To begin the procedure, you need to assemble all the structural elements on horizontal platform. Covered with any available material will do. floor surface or moved tables.
The technological process consists of the following working order:
- Lay out the bars facing the front, align the door plane with the future frame. Regardless of the chosen connection, the elements consist of a loop, a false jamb and a lintel piece.
- The crossbar related to the lintel frame, if it is installed in an opening made of foam concrete or brick, must be wider in width than the frame, this increases the load-bearing capacity. Then they determine where to attach the jambs to the lintel. From the middle of the lintel beam, equal dimensions are measured on both sides.
- Form equal gaps between the frame and the door leaf on all sides using various gaskets.
- If necessary, the points for cutting are determined.
- The crossbar is being manufactured.
- An awl or scalpel is used to mark the false profile area for further removal to form an area for connecting points. Careful cuts or cuts are made according to the marks.
Installation actions are carried out with special attention. Allowing minor errors in the dimensions of the beams masks other elements and appears unaesthetically in the false areas
The formation of excess can be removed with a chisel if the recess is cut out correctly.
The next assembly stage consists of the following actions:
- The pieces of bars prepared with the necessary cuts are laid out where the gaps on the canvas are marked with gaskets. Mark the places where the loops will be placed. If a standard door is selected, add the upper gap to this size and determine a point equal to a distance of 2.03 m from the intersection of the jamb and the lintel.
- Hinged sashes are screwed onto the corresponding beam, a sharp object is used to mark the boundary along which material will be removed and traces will be made at the points where mounting holes will be drilled. Based on pre-made measurements and markings, selective actions are carried out on the section of the bar. The recess should be equal to the thickness of the loop element.
- After the shapes for the hinged sashes are formed, they are placed in the prepared recesses and screwed with screws.
- The work will be completed by checking the correctness of all fastenings made, fixing the crossbar element with the posts.
Only the accuracy of measurements, checking the level for compliance of all parts, the correctness of their fixation without distortions, will make it possible for everything to work well.
Final stage
The final stage includes the installation of platbands on the door frame. They give the door block aesthetic appearance and hide minor installation flaws.
Completing the installation of the interior door
First of all, the length of the casing is determined. To do this, you can use the size table, or determine it yourself by measuring the length and width of the structure at the extreme point of the box. To join the platbands, it is necessary to make a side cut at an angle of 45°. You can use a miter box (a special device that allows you to cut wood products according to specified angle parameters) or a jigsaw, having previously measured the required angle with a protractor.
Next, each of the side trims is nailed to the box with two nails (bottom and middle). The upper horizontal casing is measured and sawed at an angle of 45°. After this, all 3 planks are finally nailed.
Advice. To ensure that the nails do not peek out from the platband, they must be recessed. Using a drill with a diameter corresponding to the size of the nail head, cut a recess of 1-1.5 mm.
Determining the dimensions of door frames in a newly manufactured opening
And in this case, you cannot do without careful measurements and calculations. Installing the door frame correctly means not only getting rid of unnecessary work during installation. The size of the door together with the frame can affect the subsequent arrangement of furniture, the availability free space in the room, etc.
The sequence of actions in order to correctly determine what the thickness of the door frame should be is as follows.
The dimensions required for installation are determined. Initial data:
- overall dimensions of the door leaf,
- overall dimensions of the door frame,
- presence or absence of a threshold,
- width of platbands.
The width of the opening is calculated according to the dependence: Шп = Шд + 2Вк + z/2, where Шд is the width of the interior door; Vk – thickness of the door frame; z = 30-40 mm – installation gap between the interior door and the frame. Such gaps are arranged to improve air exchange, and for the kitchen the gap is taken to be the maximum allowable. Taking into account the above, the width of the door frame is set.
From similar considerations, the required opening height Нп can be determined: Нп = Нд + Вк + z/2 + Нп. Here Hd is the height of the door leaf, Hpr = 10-20 mm is the height of the threshold (if a threshold is not provided, then instead of the z/2 value it is necessary to substitute the double value of the installation gap into the formula). It should be noted that the presence of a threshold reduces heat loss in rooms such as bathrooms or toilets, and will also help stop the spread of water in the event of flooding.
The telescopic frame of the interior door provides significant convenience for subsequent installation. This design option is equipped with special grooves that eliminate the use of platbands, therefore, the fastening of the entire assembled product is simplified. This design is intended mainly for main walls, where fastening in a standard way is difficult. Fastening and assembly is carried out with your own hands before wallpapering the wall, and there is no need for additional installations.
What is the root problem?
The complexity of a number of operations for assembling the base frame for hanging a door lies in the specifics of the production of cuts and in the connection of components. The work, which seems simple to the inexperienced layman, is made difficult by the presence of a pretend recess on the profiled jambs and crossbars of the future box.
Two schemes for constructing a box
You can join them by making cuts:
- at an angle of 45º, for which you need a good miter box with a reward, but it is much better if you can cut off the excess beautifully with a miter saw;
- at an angle of 90º, for the implementation of which you will need not only a fine-toothed saw and the accuracy of the performer, but also knowledge of the technological subtleties of essentially not too complex work.
To make a strong connection between the components, galvanized self-tapping screws or “nailless” tenon joints are used. Tenons can be formed at both of the above angles. However, they are milled predominantly perpendicular to the full thickness of the box beam, which must be taken into account when calculating and marking the length and width of the door frame.

It makes no difference whether the tenons of the transverse planks of the box will fit into the grooves of the horizontal ones or vice versa. If only the connections were strong and unshakable, for which they are sometimes reinforced with additional zinc-coated nails.

Shape and dimensions of the structure
The geometric parameters of the base box being constructed determine two conditions:
- the width and length of the door leaf itself, which this frame is designed to cover and support;
- purpose and category of the premises being equipped.
Therefore, even before the starting stage of work, it is necessary to clearly determine where and how the owner of the door and opening on his personal property wants to install the door frame.
Depending on the purpose of the premises, the requirements for ventilation or insulation that the door must provide change. The entrance door to the bathhouse and the door to the steam room should not let the cold in and let the beneficial warm air out. Washing department on the contrary, it needs additional ventilation so that excess vapor generation is spontaneously discharged and building materials do not rot. Additional ventilation is definitely needed in the boiler room, especially if gas equipment is installed there. What can be done:
- If it is necessary to provide a barrier against heat leakage, four bars will be required to construct the door frame, which, after joining, will turn into a closed rectangular frame. The door frame will consist of a rebated and hinged vertical bar, a lintel - an upper cross member and a threshold connecting two vertical elements in the area where they interface with the floor surface. Between the box beam and the leaf along the entire perimeter, a 3 mm technological gap must be maintained for free movement of the door.
- If it is necessary to ensure the natural outflow of steam and polluted air, the box is assembled from only three parts, since instead of a threshold that prevents aerodynamic processes, a gap of 15.0 - 20.0 mm must be made. In such cases, the door base resembles the letter P. The 3 mm gap established by the technology runs only along the vertical posts and the lintel.
Between the threshold and the newly laid floor covering, you need to leave a gap of 2-3 mm in case of thermal movements.

A closed box, naturally, is higher than its open counterpart, since it is increased due to the thickness of the threshold. This nuance must be taken into account when making calculations so that you do not have to “shorten” the door leaf, which is especially undesirable if it is covered with veneer.
Important. If you must cut on a veneered surface, start on the side with the finish and work your way to the side without the decorative finish.
This way the veneer will suffer the least amount of damage and the chips will be minor.
Assembling a door frame with a threshold
Now it’s worth considering the process of assembling a door frame with a threshold. For variety, we will connect the elements of the box not at an angle of 45°, as in the case described above, but at an angle of 90°. We do this on purpose in the hope that extra knowledge will not hurt anyone.

Construction of a door frame with a threshold

Wooden threshold in box design
In addition, such a connection of door frame elements is considered more durable. If in the first case the length of the screws was limited by the thickness of the corner joint, now these restrictions are removed; the screw can enter the body of the bar by 2–3 centimeters. A stronger connection increases the stability of the door frame threshold, and it can be subject to significant forces.

Measurements and preparation
Checking the condition of the doorway, checking the floor level in the corners, taking dimensions, preparing places for installing hinges and drilling for screws to secure the frame is no different from assembling a door frame without a threshold. And then the differences begin.
Step 1. Saw off the top horizontal bar of the box. Its length should be equal to the width of the door leaf plus 6 millimeters for gaps on both sides of the frame. You need to make two such blanks - one is used under the door threshold.

Marking and cutting blanks
Step 2. On the vertical bars of the box, you need to remove the protruding thrust quarter. Keep in mind that the clean size of the vertical posts should be equal to the height of the door leaf plus 6 mm for gaps on both sides. In addition, the left and right vertical posts of the door frame must take into account the difference in floor height at the corners of the doorway. We have already described all technological operations in the first example; there is no point in repeating them.
To remove a quarter, attach the horizontal part to the end of the vertical post of the box and mark its width. Take measurements with maximum accuracy, do not allow any gaps to appear in the connection. No matter how you fix them later, a true master will always see the shortcomings. Carefully file the protruding quarter along the marked line; the depth of the cut should be equal to the height of the quarter. Use only a fine-toothed hacksaw; the tool, as always, must be in good condition.

Removing the Quarter Box

Sawing a quarter
Step 3. Remove a quarter from the end of the vertical bars with a chisel. Do the work very carefully. The plane of the block after removal should be perfectly flat across its entire width. Hold the chisel correctly while working. It has a flat bottom part, and the top is sharpened at an angle. The top plane should always be visible, otherwise the chisel will spontaneously cut into the wood and you won’t get a smooth surface. This rule applies to all cases of working with a chisel. Do the same work on all sides of the door frame.
Step 4. Put the parts on flat surface and connect the upper part of the door frame first. Before screwing in, you need to first drill holes in the parts that are slightly smaller in diameter than the diameter of the screws. This will eliminate the possibility of cracking or the appearance of a gap between the parts during connection.

Assembling the top of the box

Corner assembly diagram
Step 5. Before assembling the threshold, we advise you to check the compliance of its dimensions and the correct location. To do this, carefully place the assembled frame of the box, consisting of two vertical and one horizontal elements, on a flat area and put the door leaf in place. Mark the exact position of the hinges on the door leaf, check all the gaps around the perimeter of the door frame and door leaf. As long as there is no threshold, the vertical posts can be moved a little. Check the distances again, check that the threshold is made correctly and, if necessary, correct any mistakes; in this situation, you have the opportunity to slightly adjust the dimensions.


Installation of a door frame - photo
Classic door threshold
Video - Assembling a door frame with a threshold
Installation of the frame in the doorway
In order to initially “hold” the door frame in the opening, you will need hanging strips, which are used during installation metal frame for plasterboard walls. The installation procedure for the box will be as follows:
- Hanging strips are attached to the wooden profile bars on the side adjacent to the wall with self-tapping screws so that their tendrils extend onto both sides of the wall by 5-7 cm. 2-3 such strips will be enough for vertical bars, 1-2 for horizontal bars.

The box is installed in the opening and secured to these strips. The mustaches are attached to the wall on both sides with anchors or self-tapping screws with dowels.
At the bottom, if there is no lower bar, it will be necessary to install a spacer bar equal in width to the upper bar.

Wooden wedges are carefully driven into the gaps between the frame and the doorway to impart rigidity to the structure. In this case, it is constantly necessary to control the level of strict horizontality and verticality of the bars.

Along the perimeter of the box, several holes are drilled at equal distances for anchor bolts to securely fix the box. It will need to be deepened to the width of the cap, after which the hole can be sealed with a primer or special wood putty.

The door leaf is hung, the gaps between the frame and the wall are filled with foam.

Install the platbands, securing them with furniture nails, after which the joints are covered with wax mastic.
A correctly installed frame will allow the door to open and close easily, without noise or extraneous sounds. We hope our tips will help you install the door frame yourself quickly and efficiently.
Read about further steps when installing an interior door in the following review.
How to properly assemble a frame for an interior door yourself
The door frame is mounted in the entrance opening of the wall and is part of the door structure on which the door is hung using hinges, serving as an obstacle to entry into or exit from the room. The box is made of MDF, chipboard or wooden beams with a thickness of 75-85mm. When the wall thickness is more than 85 mm, additional strips are used, which are installed in special grooves of the beams. The door frame has a cutout 1/4 deep equal to the thickness of the leaf.
To install hinges in the box, material is sampled in an amount equal to the thickness of the hinged sash. This is necessary for a tight fit of the door leaf to the frame jambs. Butterfly door hinges are installed without insertion.

The door frame is a frame structure. Its vertical components are called jambs, one of which is looped, the other is feigned. The hinge beam carries the main load of the door leaf. The horizontal upper box lintel is called the “lintel”, and the lower one is called the “threshold”. The threshold in the box is an optional element. It is installed when it is necessary to eliminate drafts by covering the gap under the door leaf. Doors with thresholds are often installed to keep spilled water from entering adjacent rooms. The gap between the floor and the threshold is hidden by the thickness of the floor covering. Therefore, the assembly of the door frame with the threshold is carried out before laying linoleum, laminate and other materials used for finishing the floor.
Requirements for the door frame
Door frame size table.
In order for the box to fulfill its functions, several conditions must be taken into account when choosing or manufacturing it. First of all, the door frame must match the dimensions of the doorway - be 20-30 mm smaller sizes opening in all directions. Side racks the boxes must be strictly vertical, and the top crossbar must be strictly horizontal. The thickness (width in the transverse direction) of the box must be selected so that the platband lies on its side edge and the wall without distortion. The thickness can be adjusted further.
An interior door (its frame) usually has a height of 207 cm and a width of 80 cm. In bathrooms and toilets, the opening width is most often 70 cm.
The door frame must have sufficient mechanical strength to hold the door leaf without the slightest deformation. In interior boxes installed in the bathroom and toilet, it is desirable to install thresholds (height above the floor about 2 cm), which play the role of some sealing of the room. In the kitchen, on the contrary, a threshold is undesirable, and the door leaf has a gap of up to 20 mm at the bottom for ventilation.
Introduction
In this article I will tell you how to assemble a door frame, namely how to cut and assemble a door frame in two different versions:
- Wash down the boxes at 45°
- I washed the boxes down at 90°.
Door frame assembly
Door frame with seal

box with seal

Door frame without seal
An interior door consists of a door leaf, hinged hinges, a mortise lock or latch, and a door frame. As a rule, the door frame for doors of the middle price class is supplied in the form of a do-it-yourself “designer”, that is, in disassembled form. The box consists of three profiled wooden beams, covered with veneer or film to match the color of the door leaf. The length of vertical beams is 2100-2200 mm; horizontal beams are 1000-1100 mm. Door frames differ from each manufacturer in their readiness for installation.
Door frame with factory cut 45 degrees.
For some manufacturers, the door frames are already sawed off and cut at an angle of 45°, just to the size of the door leaf and are completely prepared for assembly. But most boxes are delivered unprepared. They need to be prepared.
Let's consider two options for assembling the door frame
Option 1. Sawing and assembling the box at an angle of 45°

Wash down the boxes at 45 degrees

Correct joining of the door frame in the corners

Washed down the boxes on the miter box
The door frame is ready for assembly
- Take two future vertical bars of the box. With a canvas size of 2000 mm and a finished floor covering of 30 mm, the length of the short side of the beam should be -2000 + 30 + the gap between the canvas and the finished floor: 10-15 mm = 2040-2045 mm.
- Place a mark on the inside of the box beams along the required length of the canvas.
- Saw off the excess at an angle. The cutting angle of the timber should be 135° on the inside or -45° on the outside. The length of both vertical beams of the box must be the same.
- Do the same procedure with a horizontal short beam. The only difference is that you have to saw off from both sides. Be careful with the sizes. The main thing in all carpentry work: Measure twice, cut once.
When marking, do not forget that the gap between the canvas and the box itself should be 3 mm.
Option 2. Assembling the box at an angle of 90°

Assembling the box at an angle of 90°

Door frame view for direct connection

Door frame connection at 90 degrees

Preparing for Direct Box Connection
With this assembly option, in the vertical posts of the future box, the so-called box ledge is removed by the thickness of the vertical beam. See picture.
Assembling a door frame step by step

Door frame assembly

Assembling a door frame with a gash
After preparing the box, we begin assembling it.
Place the prepared parts of the box on the floor. Connect the corner joints of the box with screws, two screws in each corner. In door frames sawn at 90°, the self-tapping screws are screwed in at right angles (photo above left). In door frames sawn at 45°, the screws are screwed in at an angle of 45° (photo top right). The box is "almost complete."
In order to maintain parallelism of the vertical posts and the same distance between them according to the size of the door leaf, place the door leaf on the “almost assembled” frame, since it will stand in the opening. Fix the gap between the canvas and the box by inserting identical pieces of hardboard or wedges into the gap.

Fixing the canvas in the box for its correct assembly
Now the box needs to be fixed in this position. There are several ways to do this.
Ways to fix the door frame in the desired position before installation

Method 1. Secure the door frame using thin slats. Nail the slats perpendicular to the posts, using thin nails to the very edge of the vertical posts. There should be two slats: in the middle and at the bottom.

Mounting angle for box assembly
Method 2. Strengthen the joints of the box beams of the future box. Add wide and rigid force angles with holes for fastening to the screws. Screw the force angles, strictly checking the perpendicularity of both vertical and horizontal beams. But I recommend adding another fixing bar to the bottom of the box.
The assembly of the door frame is completed, remove the door leaf from the frame. The assembled box is ready for installation.
Do-it-yourself door frame - step-by-step assembly and installation process

The complete door set includes the door leaf, frame and hinges. It can be difficult to purchase a ready-made complete set, so there is nothing left to do but make a door frame with your own hands from profiled timber or entrust this task to specialists. The box, most often, has to be selected separately, and it is not a structure ready for installation, but several elements that need to be adjusted in accordance with the size of the opening, the necessary cuts made and assembled. It is not so easy to assemble a door frame with your own hands, so in addition to tools, it would be nice to have at least a little carpentry skill.
Door frame material
The frame serves not only as a frame for the door leaf, but also as a load-bearing base. The strength of the entire structure and its durability depend on the quality of the material and installation of the product. The choice of material depends on the purpose of the door and the material of the leaf itself. Metal-plastic and metal doors are usually supplied fully equipped, so we will consider only those cases when the door frame has to be manufactured independently. As a rule, in this case we are talking about two types of material: wood and MDF.
- Natural wood has different densities and is graded into soft and hard. The cheapest and most popular product is pine, but when it comes to installing entrance doors, you should focus on a harder and more expensive type of wood, for example, oak. It will ensure durability, strength and reliability of the structure.
- MDF is used exclusively for interior doors. If you are going to assemble a box from this material, you should treat all cut edges with nitro varnish to ensure protection from moisture.
Equipment and standard sizes

The door frame consists of several slats: two side, top and bottom, if the design includes a threshold. If the depth of the doorway exceeds the corresponding parameters of the timber, your kit must be supplemented with extensions that will increase the depth of the box.
Standard door block sizes vary in width and height. The correspondence of the parameters of the door leaf, block and opening is indicated in the table.

Do-it-yourself door frame assembly is carried out taking into account the following points:
- There should be a technological gap of 3 mm wide between the inside of the frame and the door leaf along the entire perimeter.
- The gap between the wall and the top of the box must be at least 20 mm.
- The gap between the side planks and the wall is 10 mm from each side. When installing on polyurethane foam, it is necessary to increase the gap to at least 20 mm.
- The gap between the bottom of the sash and the frame or floor depends on the material and location of the structure. For dry rooms, these parameters can vary between 5–15 mm, for wet rooms, in order to ensure ventilation, - 50 mm.
Options for connecting structural elements

The main difficulty in assembling door frames is the process of connecting individual elements. The joining of horizontal and vertical strips of the product can be done in two ways:
- I washed it down at an angle of 45 degrees. This process is best done with a miter saw, but in the absence of one, a miter box will do.
- At a right angle of 90 degrees. To cut the workpiece you will need a saw with fine teeth.
The joining of the planks is carried out using tenon joints or galvanized self-tapping screws. The figure shows options for tenon joints, which clearly show how to assemble the door frame yourself to ensure high strength of the joints. 
When calculating the parameters of the length and width of the profile slats, it is necessary to take into account that the length of the tenon should be equal to the thickness of the box beam. Tenon connection provides sufficient strength finished design, but if desired, additional reinforcement of the joints can be done with zinc-coated nails.
Door frame assembly process

Let's look at how to properly assemble a door frame . As source material we will need profiled timber made of natural wood or MDF.
The box is assembled in the following order:

Step-by-step installation process

To secure the assembled frame in the opening and install the doors yourself, you must perform the following steps:

Tip: Before foaming, you need to clean the surface from dust and moisten it with water from a spray bottle. These measures can significantly increase adhesion.

Another important condition in order not to disturb the geometry of the frame during the installation process is the use of spacer wedges that correspond to the width of the box and are inserted across it.
The final stage of installation of the frame and door is the decorative design of the opening with platbands.
How to assemble a door frame
In the last article we found out how to cut holes for installation door handle and latches. It's time to figure out how to assemble the door frame.
Door frame consists of two side vertical elements and one upper horizontal element connecting the first two. Less commonly, the lower horizontal element is also used as a threshold, but this is rather an exception to the generally accepted rules.

How to properly file the ends of a door frame
One of the rules of “good form” is filing box joints and platbands at an angle of 45 degrees. The highest quality cuts are made using a miter saw. If you do not have the opportunity to use this tool, you can use a miter box and a special hacksaw for an ultra-clean cut with a “pass” or “tenon”. I highly recommend that you first practice on ordinary bars and “get your hands on it.”


First they file down side elements of the box. Do not immediately cut the racks to length. I'll explain why. If you cut the top part incorrectly at an angle of 45 degrees, you will no longer have the opportunity to correct the mistake by cutting it again, because the post has already been shortened, and there will simply be nowhere to make it even shorter. First, file the most difficult part, that is, the upper corner joints and check the correctness of the file with a square. The angle should be clear, without deviations, and the cutting plane should be perfectly flat. If there is a deviation of even a couple of degrees, when assembling the box, you will not be able to achieve an angle of 90 degrees at the joints, which is prerequisite quality work.
Having finished cutting down the racks, we move on to transverse element of the box. Here you also need to be very careful. After all, the second end will need to be sawed down not only at an angle, but also along the length, so that the necessary gaps remain between the door leaf and the side posts of the frame. The length of the inner part facing the door leaf should be 8 mm. greater than the width of the door leaf . If the width of the door leaf is 60 cm, then the length will be 60.8 cm. Make precise markings and make a cut.
Now you need to cut the side posts to length. There is a small nuance here that should not be overlooked. Not only do we need a gap above the top of the door leaf, we also need a gap below of about 10mm. But the floor on which the box will be installed may not be perfectly level, or “out of level.” In this case, if we cut the side posts to the same length, then during installation the door frame will warp, because one post will be higher than the other.
To avoid this, you need to check the level of the floor in the doorway. It is most convenient to use a laser level here, but you can also successfully see the difference with a regular rack level. It is only necessary that the level itself fits the width of the doorway. If the level is short, then do the following simple operation. Cut an even block of the required length, and place a level on it, thereby increasing its length.
So, let's say for example that you find a difference in floor height at the edges of the doorway of 6 mm. What to do next? The stand, which will rest on a low place, needs to be made longer by this same 6 mm. We do the calculation this way. The side posts should be 13 mm. exceed the length of the door leaf and equal 2.013 meters, which includes the length of the door leaf (2 meters), the gap above the leaf (3 mm) and the gap below it (10 mm). Let's add a difference of 6 mm to the rack resting on a low place. and we get 2.018 meters. If the floor is flat and clearly level, then the racks should be the same length (2.013 meters).
Now that all the elements of the frame have been sawed down, assembly can begin, but first you need to mark the places for the hinges on the door leaf and frame.
Inserting and hanging hinges for a door frame
Let me immediately draw your attention to the fact that without professional tools and experience, you are unlikely to be able to install high-quality mortise hinges. The insertion is done using a manual milling machine, and not with a chisel and hammer, as many people think and are mistaken.
Therefore, I recommend buying overhead loops, as in the photo. They do not require insertion, and their installation does not take much time and effort. The overhead loop consists of two parts that fit into one another and form one plane. The smaller inner part is attached to the door leaf, and the larger one to the frame post.
Mark at the end of the door leaf 20 cm from each edge. Examine the canvas carefully and decide which way the door will open. Here it is important not to make a mistake and place the loops correctly. The hinge hinges should face the direction the door swings.


Place the hinge at the end until the hinges stop. Do not press the hinge too hard against the edge of the canvas. The loop should rotate freely on the hinges without touching the canvas. If, when opening the hinge, you notice that the hinge scrapes along the canvas, leave a small gap of 1 mm.
Place a mark in one of the hinge holes and drill a hole slightly thinner than the self-tapping screws that come with the hinges. There is no need to drill all four holes at once. You can make a mistake in the markings, and the loop will lead to the side. After tightening one self-tapping screw and making sure that the hinge has not moved and sits straight, drill the remaining holes and secure it. Do the same with the second loop.
Now we’ll screw the mating part of the loop to the box post. For convenience, it is better to place the door leaf on the floor and place the frame post next to it. In order for the hinges to lie evenly on the frame, the door needs to be raised slightly, adjusting the height with wedges. By leaning the box stand against the end, make sure that it protrudes slightly above the length of the canvas, which after assembly will allow the required gap of 3 mm to form. Then drill holes to secure the hinge. Now you don’t need to completely screw the hinges on, because you still need to assemble the box, and it’s more convenient to do this without a canvas.
Twisting or assembling a door frame
Lift the door leaf from the floor and set it aside, thereby making room for the door frame. It is also more convenient to roll the box on the floor, as you will soon see for yourself. To begin, the following preparations are required. Take the top part of the box and in the cut plane, perpendicular to it, drill two holes on each side for self-tapping screws, about a centimeter from the edges, as in the photo. In the uprights of the box, make one hole in the middle, also perpendicular to the plane.
Now, positioned correctly box elements, one by one, continue drilling to the adjacent part, and then screw them together with self-tapping screws. No need to look for any special screws. Any type will do, for example those that are used to secure drywall to metal profiles. The most important condition here is the clear connection of the sawn ends.
To ensure that the parts fit snugly together, place plywood under them. If you have a very flat floor, then you can do without it. I repeat that the most important thing here is to keep the plane from sliding at the moment of twisting. If you have strong hands, you can avoid skewing by simply holding the box with one hand while tightening the screw with the other.
How to assemble a door frame with your own hands
Doors are an important part of any room, as they provide protection from unwanted entry, retain heat and sound insulation. In order for the design to cope well with its functions and last longer, you need to know how to assemble the door frame if you cannot turn to professionals for help.
Door frame components
To understand exactly how the door frame of interior doors is assembled, it is necessary to study its structure and components. These include:
- lintel - a “ceiling” strip located on top of the structure;
- loop beam - the side part, the loops cut into it;
- the recessed part is the opposite of the hinge part, it closes with the door when closing, and the counter side of the lock is installed into it;
- threshold - a beam located below.
Necessary tool
In order to assemble the door frame with your own hands quickly, you need to prepare in advance the tools that will be needed during the work process. In addition to the components of the box, the following accessories are needed:
- a simple pencil, tape measure, square and level;
- electric jigsaw or circular saw;
- perforator;
- drill or bit;
- screwdriver;
- hacksaw;
- screws, mounting foam, fastenings;
- necessary accessories.
How to take measurements
To assemble a high-quality structure, it is important to take the dimensions correctly, otherwise the door will not fit in the frame. There are several rules for taking measurements at home:
- First of all, the doorway is measured; the external parameters of the frame should exceed it by 70 mm. As for the internal parameters, a gap of 3 mm around the perimeter should be maintained between the door leaf and the edge of the frame.
- There is a separate rule for the gap located below; its height can be from 10 to 15 mm. This is necessary to ensure air circulation in the room, which is especially important for closed rooms, such as a bathroom or storage room. When installing sliding doors, it is necessary to take into account that profiles will be installed.
- Often, when building bathhouses, owners do not make a large gap at the bottom of the door, this is acceptable, but in this case, it is necessary to carefully measure the door threshold with a level in the corners.
These parameters are mandatory; if a discrepancy is found, the doorway must be expanded or reduced. It is easier to work with artificial openings made of plasterboard.
Assembly methods
The door frame installation guide depends on how it is assembled. Designs come with or without a threshold and with different nuances of securing parts.
How to assemble a door frame at 45° and without a threshold
Typically, MDF products are installed according to this scheme. Detailed instructions for making a box using this method:
- To eliminate unevenness, you need to trim the box blanks.
- The loop and false beams are sawn in the upper part, at 45 degrees inward. For work, it is better to use tools with fine teeth or a hacksaw, this will help avoid damage to the finish. When working with products made from eco-veneer or laminated MDF, it is best to cut from the reverse side, so that possible cracks remain on it.
- After processing the side parts of the box, you can proceed to sawing the lintel. It is sawn on both sides at 45 degrees inward. It is important to measure everything carefully so that when assembled the parts form a right angle. Do not forget that a gap of 3 mm must be maintained. Measurements can be made either using a tape measure or by placing the beam directly against the doorway, making notes with a pencil.
- Next, you need to adjust the loop and trim beam in height, from the bottom, to the beginning of the cut corner. If there is no threshold, it is enough to add two gaps to the height of the door, 3 mm + 10-15 mm. After hanging, the door should close tightly enough, without obstacles to opening, and not touch the floor.
- Once all the components are sawed down, you need to move on to assembling the parts. It is easier to work by placing them on the floor. For safety, it is better to use a small diameter drill. Self-tapping screws must be for wood; they are also screwed at an angle of 45 degrees. When fastening the parts, they must be pressed tightly against each other, since the screws stretch the parts.
- After assembly, the structure must be tried on in the doorway; if the calculations are accurate, it will fit into it without any problems.
The measurements must be checked several times. If a mistake is made and the door frame turns out to be too small for the door leaf, you will have to purchase new material.
How to assemble a door frame with a 90 joint yourself
The simplest assembly option, which a beginner can handle, is also often used when working with wood-fiber materials. How to assemble with a 90 degree joint step by step:
- The side beams are adjusted to the height of the doorway, taking into account all the gaps. They will reach to the very top of the doorway.
- The upper part is fixed between the loop and the false part, so it must be shortened by as much as the width of both side beams. After connecting, the three parts should fit snugly into the width of the opening.
- After preparing the components, you can proceed to assembly. Holes for self-tapping screws are made in advance to avoid cracks in the wood; they should enter from the sides, at an angle of 90 degrees.
Assembling a door frame with a threshold
Structures equipped with thresholds are usually installed at the entrance to houses, as they retain heat and make the box more durable. Even though a new part is being added, assembling the parts is not difficult. The first steps are identical to those performed during the installation of boxes without a threshold. The lintel and side beams can be installed at angles of 45 and 90 degrees. The threshold is always set at a right angle. Step-by-step instructions for assembling a box with a threshold:
- The threshold beam must be sawn exactly at a right angle, observing the width, from one side part to the second, you can also focus on the formula: door width + 6 mm gap. To correctly determine the height of the threshold, it is necessary to place the structure in the door leaf.
- Next, you need to carefully cut down the thrust quarter on the false and hinged beams, to the height of the bottom board, to securely fasten the threshold. Measurements must be taken accurately, otherwise you can simply ruin the material.
- Once the components are prepared, you can proceed to connecting them, also tightening them tightly so that the parts do not fall apart. When working with entrance doors, it is better to use galvanized self-tapping screws.
Door frame tenon connection
A less common method of connecting box parts can be done without using self-tapping screws, however, to ensure strength it is best to use galvanized nails or special assembly adhesive.
The principle of this method is that at the junction of the components, it does not matter whether it is placed at a right angle or at 45 degrees, tenon joints are cut out. One of the parts has the connection itself (tenks), and the second has grooves machined for it, into which it is tightly inserted.
Installing a frame in a doorway
This step is best performed with an assistant, since the door block can be heavy, especially if the door is used with an internal filler in the form of a slab, which can lead to difficulties in operation. The structure is installed in the doorway in several stages:
- The structure is inserted into the opening and secured in it using wedges. Then, its position is completely leveled so that it stands perfectly horizontal and vertical axes. Once the exact position is determined, holes for dowels are drilled in the opening itself and the frame.
- When the structure is tightly fixed in the opening, you can begin preparing the door for hanging. First of all, the hinges are screwed to it, and the second part is fixed to the hinge beam. The main thing is not to make a mistake with the height, since the door will not be level. If everything is done correctly, after you hang the canvas, all the gaps will be respected.
- Then, the box is fixed; this can be done using polyurethane foam; it is also used when filling the gaps allowed between the beam and the opening.
- As soon as the work is completed, you can proceed to installing telescopic or simple platbands, casings and other accessories.
Errors during installation and assembly of the door frame
Not everyone can correctly install and assemble a door block without making mistakes. The most common of them:
- Incorrectly selected tools and screws, which can damage materials or make the structure fragile. For example, doors made of fiberboard have a fibrous structure and a different density, unlike PVC, which means that different fasteners must be used.
- Insufficient vertical alignment of the door can cause the door to open or close on its own.
- Inattention when observing the direction of opening doors.
- When working with polyurethane foam, it is important to consider that it tends to expand; if you apply too much, the box may bend.
Don’t be afraid to ask questions to experienced installers; only an experienced installer will be able to give the right advice and warn against possible mistakes. If the steps are performed incorrectly, you have to purchase new material, which is not profitable and takes a lot of time.
Making a doorway frame
There are two options for placing the door, which depend on the requirements for its position. If the location of the doorway is strictly defined, the structure is “tied” to it and adjusted so that the drywall joints do not fall on the door posts (Fig. 1, a).
In the case where the position of the opening is permissible to vary, it can be “built into” the structure, that is, made where there are no joints (Fig. 1, b). It is better to arrange the opening so that there are two structural posts on both sides of the profiles framing the doorway. They can be connected to several door jumpers, which will further strengthen the door block.
Door frames can be attached to the vertical rack profile of the partition frame without installing additional stiffening elements if the following conditions are met: the height of the partition does not exceed 2600 mm; door leaf width - no more than 900 mm; door leaf weight - does not exceed 25 kg.
Rice. 1, a. Options for placing a doorway in a strictly defined location.

Rice. 1, b. Options for placing a doorway when varying the location.
In this case, the rigidity of the partition with the doorway will be ensured by reliable connection of the rack and guide profiles, which, in turn, must be secured to the ceiling with dowels at a distance of no more than 100 mm from the opening. Above the doorway, the rack profiles must be separated by a crossbar, which increases the rigidity of the entire door frame structure. Between the crossbar and the top guide you need to install 1-2 intermediate posts.
There are three ways to make a crossbar over a doorway.
1st method. In a section of the PN profile equal in length to the width of the doorway plus 60 mm, cuts 30 mm deep are made with scissors. Then the back of the profile is bent at an angle of 90° (Fig. 2, a). The resulting part is fixed with self-tapping screws on the posts made of the PS profile of the doorway (Fig. 2, b). The sidewalls of the crossbar are fastened to the shelves and the bent back.
2— th way. In the shelves, make cuts with scissors at an angle of 45° and bend the back. In Fig. 2, c shows a doorway post with a lintel with shelves cut at an angle of 45° and a bent back at an angle of 90°. The jumper is attached to the rack at four points - two on the bent part and two on the jumper itself. That is, only eight attachment points for the jumper.
3— th way. The lintel above the door frame is made from a piece of the PN guide profile, a length equal to the width of the doorway plus approximately 200 mm. Having marked the width of the opening on the profile, use scissors to cut the shelves to the back and bend the ends at an angle of 90° (Fig. 2, d). Attach the finished jumper in place with self-tapping screws through the bent backs (Fig. 2, e). For reinforcement, wooden blocks with a cross-section along the width of the PN profile are inserted into the corners and fixed on both sides with screws at the bend of the profile (Fig. 3, a). This will ensure the reliability of the design. Inserting bars into corners is the “know-how” of Russian craftsmen; there is no such information in the technological instructions of drywall manufacturers.
If one of the above conditions exceeds the norm, then the racks of the partition frame framing the opening must be strengthened. Rigips company and German company Knauf (meaning the main company in Germany) recommend using reinforced UA profiles with a thickness of 2 mm. Their width corresponds to standard CW/UW wall profiles - 50.75 and 100 mm. UA profiles are attached to the floor and ceiling using connecting corners.
Rice. 2. Manufacturing and fastening of doorway crossbars:
a - making the side of the crossbar (the back is cut and bent at an angle of 90°); b - crossbar with sides (the backs are notched and bent at an angle of 90°) in the partition frame; c - doorway post with insert corners and crossbar with sidewall (the shelves are cut at an angle of 45°, the back is bent at an angle of 90°): 1 - PS profile, 2 - PN profile, 3 - crossbar, 4 - LN9 screw, 5 - insert corner for the door jamb, lower, 6 - insert corner for the door jamb, upper; g - crossbar with sidewall (the backs are cut at an angle of 90°, the back is bent at an angle of 90°): 1 - stand, 2 - crossbar, 3 - LN9 screw; e - frame of a doorway with insert corners and a crossbar with sidewalls (the shelves are cut at an angle of 90°, the back is bent at an angle of 90°): 1 - lower guide, 2 - upper guide, 3 - door jamb post, 4 - insert corner for the door lower jamb, 5 - upper insert corner for the door jamb, b - crossbar.
The corners are fixed to the floor and ceiling with dowels and connected to the reinforced profile with an M8 bolt with a washer and nut. In our practice, this reinforcement is carried out either by pressing a wooden beam into the rack and then securing it with screws (see Fig. 3, a, b), or by installing an additional profile (Fig. 3, c).
The maximum weight of the door leaf depends on the selected profile. According to German and Austrian standards, a door leaf weighing 30 kg can be installed in a frame made from a CW50 profile, a door leaf weighing 40 kg can be installed in a frame made from a CW75 profile, and a door leaf weighing 49 kg can be installed in a frame made from a CW100 profile. When using reinforced UA profiles (2 mm thick), the weight of the door leaf for installation in the partition frame increases and is 50 kg for the UA50 profile, 75 kg for the UA75 profile, and 100 kg for the UA100 profile.
Window openings and niches in partitions are reinforced with racks according to the same principle as a doorway.
Rice. 3. Strengthening the doorway: a - general form frame of a doorway with racks, reinforced with bars and crossbars, reinforced with scraps of bars: 1 - bars, 2 - scraps of bars; b - reinforcement of the stand with a block (section); c - reinforcement of the rack with an additional profile (section)
Rice. 4. Making a doorway near the main wall
Making a doorway in a frame partition near the wall to which the partition adjoins is no different from those described above. On the guide profile, which will be attached to the base wall, the length from floor to ceiling is marked with lines. Then add the length of a short section of the partition to each side and cut off the excess with sharp scissors. Along the lines of the floor and ceiling, the profile flanges are cut to the back and the tips of the corners are slightly trimmed in these places so that they do not interfere with bending. Bend the ends of the profile along the marking lines at an angle of 90°. Using a plumb line and a building level, level and fix the guide profile with dowel nails (Fig. 4).
Source: P. Smirnova - Drywall. Step by step: Encyclopedia of modern renovation
How to make a doorway from plasterboard

Installing a plasterboard partition with a doorway allows you to easily and quickly make large room two small rooms. In the simplest version, it is an ordinary working partition with a door installed in it, but with a creative approach to the matter, this design can really decorate the interior.
Of course, a beginner will not be able to make an option like the one in the photo on his own right away. First you need to master the basics of working with drywall, and you need to start small. For example, you can make a doorway in plasterboard partition- and the instructions offered in this article will help you with this.
How to organize the process
One of the most popular concepts of modern interior design is the constructive delimitation of space, allowing it to be divided into several zones. But if you look at things more realistically, most residential property owners have no time for design.
They often need to install a partition with a door in order to allocate, although not large, a separate room for an older child, or a young couple who still have to live with their parents. How to adequately cope with such a difficult task?
By searching: “Do-it-yourself plasterboard doorway video,” you can find and watch videos with master classes from professionals. But we think that theory will also not hurt – especially for those who have never encountered such work before.
Making a doorway for drywall requires, of course, a certain skill, but before you begin this work, you should stock up on the necessary tools. First of all, you will need two planes specifically designed for working with plasterboard. They are called: peeling and edge: the first one processes the cut line of the sheet, and the second one is necessary in order to cut a chamfer on it at a certain angle.
- Cut drywall sheets with a knife with a reinforced blade. However, in some cases a special hacksaw is used, which you see below. To cut the profile, you can use ordinary metal scissors. For the rest, they use general construction tools that every owner has in their arsenal: a hammer drill with drills, a screwdriver, a hammer, a set of screwdrivers.

- Cover the opening door plasterboard the simplest thing is that the main thing is that the frame is correctly installed under it. The main role here is played by correct marking, which cannot be done without building level, a plumb line, a dye cord, and a tape measure with a magnetic hook at the end. Professional installers use a completely different tool for this - but their scope of work is appropriate.
- In terms of materials, you will need two types of metal profiles: a guide, mounted around the perimeter of the partition (floor, walls, ceiling), and a rack, on the shelves of which there are stiffening ribs. Profiles domestic production, mark PN and PS, for an imported profile, indicate UW and CW, respectively.

Note! During the installation process, the profiles are joined, so they need to be selected in pairs - so that the height of the rack shelf matches the width of the back of the rail: UW 75*40 mm and CW 75*50 mm.
- The bearing capacity of the profile directly depends on the size of the section, and the longer the span, the thicker the partition will be. It must also correspond to the width of the door frame that is installed in the opening. Therefore, the standard size of the profiles must be appropriate.
- To strengthen a plasterboard doorway, you will need a couple more wooden beams. Since they will have to be inserted inside the racks framing the opening, the cross-section of the beam must correspond to the size of the profile. And, of course, you can’t do the work without fasteners. To fix the guides, you will need 6*40 dowel nails, and to install the sheathing, you will need 3.5*25 mm plasterboard-metal screws.

- The frame elements are fastened to each other using small self-tapping screws. The price of such a tool is not that high - you can buy an inexpensive option in the range of 580-980 rubles. But the connections are more rigid, and the work progresses much faster.
- All that remains is to buy basalt mineral wool 60 cm wide, which is used for the internal filling of the structure and, in fact, the cladding material. To mount a plasterboard doorway in a working partition, you need to take a wall gypsum board with a thickness of at least 12.5 mm.

- And it’s even better to use gypsum boards rather than plasterboard - they have greater strength, since they are reinforced throughout the entire mass with asbestos fiber. The width of the sheets is standard: 1200 mm, but the length is selected depending on the height of the partition.
If it is higher than 2500 mm, then it is better to take sheets 3000 mm long - this way you will not have to insert narrow strips along the top. Accordingly, before covering the doorway with plasterboard, the sheet is oriented vertically with its long side.
Frame part of the structure
So, everything that is required for the work has been prepared - now we will figure out what and how to do. You need to start by preparing the surfaces. Of course, you won’t have to level them, but removing the covering from the floor and dismantling the wall or ceiling cladding, if any, may be necessary.
Installation of guides
The guide profile is installed first on the floor, for which the starting line is marked with a marking cord. Using it, you should measure the distance between the walls, after which you can cut the profile into pieces of the required length.
Even for a small partition, the lower guide profile cannot be solid, since there will be an opening in it, which means that at least two pieces will have to be cut.
- When cutting a profile, you should always minus 5-6 mm so that during thermal expansion it does not rest against the walls. Then, on the back side of the profile shelf, you need to stick sealing tape made of foamed polyethylene. The tape is needed to improve the sound insulation of the structure, and also serves as a kind of shock-absorbing substrate.

- Now you can install the profile. To do this, it is applied to the marking line, and holes for dowels are drilled directly through it. Drilling is done at intervals of one meter, but in any case, each profile must be attached in three places.
- After the guide is installed on the floor, the level marking line is transferred to the ceiling. Installation of a profile on it is carried out in the same way, only its length should be measured along the ceiling, and not along the floor, since due to deviations of opposite walls in height or vertical, serious errors may occur.
- The same goes for load-bearing profile. Before cutting it, you need to measure the height of the room for each rack in the exact place where it will be installed. When cutting profiles, you need to subtract not 5, but 10 mm from this figure - after all, in addition to thermal expansion, it is also worth taking into account the thickness of the metal of the guides.

First, install the wall profiles, gluing sealing tape on them in the same way as was done on the floor and ceiling.
When the base is concrete or brick, dowel-nails are used as fasteners. If the vertical guides have to be mounted to plasterboard sheathing, then fastening is done with self-tapping screws into the wall rack profile, or using special butterfly-shaped dowels.
Posts and lintels
As soon as the frame along the contour of the partition is ready, they begin to install the doorway pillars. We have already mentioned that they are strengthened using wooden blocks, but there is another way.
If the door is not too heavy (no more than 30 kg), then experts will do this.
- In this case, the support posts are made from two profiles using the attachment method - that is, the shelves of one element are inserted inside the other and pressed well. Then their ends of the double profile are inserted into the guides and secured with self-tapping screws or a cutter. There should be a distance between the vertical elements of the opening corresponding to the width of the door block.

- Once the racks are securely fixed, you can begin installing the horizontal lintel of the opening. Cut it out from the guide profile. The length of the jumper is the sum of the distance between the posts. We also add a plus 10 cm of margin for the bend, which is necessary in order to join the jumper with the vertical elements of the frame. How to cut and bend the ends of the profile is clearly shown in the picture below.
- Now you need to strengthen the jumper. To do this, you need to install one or two short posts above it, which will connect two horizontal structural elements. The number of studs above the lintel depends not only on its length, but also on how the drywall is installed around the doorway.

- If it is a single sheet that completely covers the opening, then one rack is enough. In this case, the excess part of the gypsum board that covers the opening is cut out with a hacksaw after the sheet is mounted on the frame. If the sheathing elements are cut in advance and then joined, there must be at least two posts above the lintel.
- Next, intermediate vertical frame elements are mounted. The step between them should be no more than 60 cm so that the sheet, whose width is 1200 mm, is secured both at the edges and in the center. To make this possible, the backs of all profiles must face the front side towards you.
Where sheets have to be joined horizontally, it is necessary to install the same jumpers as above the doorway. All load-bearing frame elements must be double. This is necessary so that they can be sheathed on both sides - otherwise, you will have to install two parallel frames.
Covering the partition frame
Let's say you want to make lighting, install sockets or switches on the partition. After the “skeleton” of the partition is mounted, it’s time to install wiring in it.
The cable must be perpendicular to the racks, and it is passed through specially prepared holes in the profile shelves. Laying wiring inside profiles is unacceptable!
- Next, you can begin installing drywall. The length of the sheet should be cut so that it is 10 mm less than the height of the room. The gypsum board is attached to the rack profile with plasterboard-metal screws measuring 3.5 * 25 mm. Fastenings along the rack are made at a distance of a maximum of 250 mm, and the sheet begins to be fastened in the direction from the center to the edges.

- The end of the sheet on which the chamfer was cut should be adjacent to the ceiling surface, and the outermost screw should be at least 15 mm away from it. Fastenings made on joined sheets must be offset by approximately 10 mm. The self-tapping screws must fit straight into the plasterboard and go deeper into the rack by no less than a centimeter.
- When making fastenings, you need to ensure that the heads of the screws enter the thickness of the drywall by about 1 mm, which is necessary for subsequent puttying - just don’t overdo it. The sheet adjacent to the wall must be cut to width, the edge cut, and a chamfer made.

- If the sheet extends beyond the perimeter of the doorway, it can be very easily trimmed after it is completely secured. They do this with a hacksaw, first piercing it with a sharp end, the sheet in the corner of the opening. When performing cladding, it is necessary to remember that the joints of the elements should not be placed on the racks along which the door frame will be mounted.
Now that one side of the partition is completely ready, fill its cavity with mineral wool. This is insulation (see Insulation for doors: types and parameters) - but in this case, it plays the role of a soundproofing layer.
Next, all that remains is to cover the second side of the structure with sheathing - and your partition is ready for puttying and finishing. You will get information on how to do this correctly from the video in this article.
How to make a wall from plasterboard and profiles with an opening for a door - instructions and drawings

Redevelopment of premises and their zoning are quite often implemented techniques that make it possible to increase comfort in the same “squares”. A plasterboard partition with a door is the most common home renovation option. If you delve into the nuances of such work, then it is quite possible to do without outside help, especially without the services of a professional.
Preparatory stage
Drawing up a drawing
Development of a partition scheme. Here you should take into account such points. Since you are installing not just a plasterboard partition, but a doorway, you need to choose a place for it in the “new” wall. In this regard, one should proceed from the specifics of the further use of adjacent premises and their filling household appliances, furniture and so on.
 Is there anything supposed to be mounted on the gypsum plasterboard sheathing? The sheets themselves do not differ in strength; they acquire it only with additional reinforcement. And if you simply cannot attach a shelf, a lamp, hang a massive picture or something similar to a plasterboard wall, then it is necessary to provide for the installation of load-bearing elements in the sheathing. The practice of constructing partitions from gypsum plasterboard shows that the installation of single vertical racks from profiles is impractical for a number of reasons. One of them is that a relatively thin metal “plays” under strong pressure.

A simple solution is to install a second, additional guide. If significant strengthening of the structure is necessary, it is advisable to place wooden blocks (thick slats) in the required places.

If the partition diagram is drawn up correctly, it is not difficult to find these elements after covering the frame. Alternatively, leave marks on the floor with a pencil or felt-tip pen.
When planning to make a partition from plasterboard, you should immediately determine which door it will have - a hinged or sliding one. In the latter case, when calculating the insulating material, the volume of its purchase is significantly reduced. And if the opening is large and the width of the room is small, then the cavities between the gypsum boards are generally left unfilled; otherwise the doors simply won’t move apart.
Vertical posts require reinforcement. Therefore, jumpers from the PN profile are installed between them. The layout of their location is developed independently.

Taking measurements
The dimensions of the room at the location of the partition are determined. You need to understand that floor slabs do not lie in a strictly horizontal plane. Therefore, the height should be measured at opposite walls. For what? If its difference is significant, then you will have to think about how to level out this drawback. The prospect of cutting a sheet of drywall at an angle, moreover, cutting off a small fragment from it, is not the best. Most likely, 1 – 2 samples will be hopelessly damaged.
The distances from the walls to the vertical posts that form the doorway are measured. This is necessary to calculate the required length of the lower guide profiles, since the threshold is not made. Consequently, you will have to attach two PN slats to the floor (before the passage).

Calculations
A gypsum plasterboard partition is made on your own, including due to reasonable savings on paying for the services of third-party specialists. The same applies to purchasing materials. A certain supply of them is necessary, but large quantities of surplus are not needed; the prospect of quick use is illusory, which means a waste of money.
You shouldn’t immediately buy at the first one you come across. point of sale plasterboard sheets and profiles. Although they are of standard dimensions, not all manufacturers strictly adhere to standard dimensions. The task is to select samples so that you have to do as little cutting as possible. This will make your work easier and save on waste optimization.
On the other hand, in certain areas you will have to install small fragments of gypsum boards and install jumpers (to strengthen the frame) from profiles. Consequently, materials should be selected according to linear parameters with the expectation that after cutting them, finished “parts” will be obtained.
The connection of plasterboard sheets is done on vertical posts. The recommended interval between them is within 55±5 cm. If the gypsum boards are large, then one additional rack is mounted approximately in the middle to prevent pushing through the wall.

Selection of materials
Guides
No installation load-bearing frame It won’t work to make a plasterboard partition, especially with a door. For all its advantages, gypsum board has a number of disadvantages, one of which is the fragility of the sheets. Therefore, during installation they must be fixed to a solid base.
When arranging partitions, two types of profiles are used. What is the difference?
- UW (or PN, in Russian markings). The last letter in the abbreviation suggests that these metal slats are used as guides. That is, they form the outer contour of the sheathing. Therefore, they are mounted on the floor, ceiling, and also walls, but only if they are load-bearing.

- CW (PS). These profiles provide the necessary “rigidity” of the structure and are installed vertically, according to the developed installation diagram. They are called rack-mount (this is indicated by the letter C).

- PU – corner profile. It is used to strengthen (strengthen) joints.

Advice. When choosing slats by width (and it can range from 50 to 100 mm), you should take into account the dimensions of the room, and therefore the linear parameters of the gypsum board partition. The more spacious the room, the higher the ceilings, the more massive the profile needs to be attached when constructing the frame.
Drywall
Its sheets are produced in a large assortment, and each type of product has certain characteristics. When choosing gypsum boards, you need to take into account the specifics of the room and the partition layout. For example, if it is mounted in a room with high humidity, then drywall is used in the “moisture resistant” category (GKLV). It is also worth taking into account whether the sheets will have to be bent during the work; Based on this, the thickness of the facing material is selected.

Insulator
You can make a partition from plasterboard only inside the building. Accordingly, one room turns into two. The choice of insulating material depends on how the “new” premises are planned to be used. In other words, what properties should be prioritized. If the main criterion is to reduce heat loss, then it is optimal to insulate with mineral wool. If you need to improve the characteristics of the interior design, such as sound insulation, it is better to purchase polystyrene foam. Or sheet or roll products based on cork, but they are somewhat more expensive.
Additionally
- Dowel-nails.
- Self-tapping screws (for metal).
- Screws for fastening gypsum boards (commercially available).
- Damper tape. It is placed under the guide profiles to isolate them from the base and compensate for temperature deformation.
- Serpyanka ribbon.
- Primer + putty for drywall.

Tools
- Scissors (for metal) – for cutting profiles.
- Construction knife - for cutting plasterboard.
- Plumb and level.
- Hammer.
- Screwdriver.
This is the main thing you will need. Other accessories, if required, can be found in any home.
The procedure for constructing a partition
Marking
- Determining the attachment line for the bottom guide (this can be easily done using a “beater” cord).
- Projecting it onto the ceiling and walls (to help - a staff, a construction or laser level, a plumb line).
- Marking the floor at the location of the opening. If the door is hinged, then you need to add about 25 cm to the width of the block.

Construction of sheathing
- Cutting PN profiles.
- Stick damper tape on their sides adjacent to the surfaces.
- Fastening the guides. It is recommended to first fix the top rail to the ceiling. This will allow you to check the symmetry of the line below using a plumb line.
- Installation of wall (vertical) racks.

- Formation of the opening. Already noted - either double profiles, or single + wooden slats. For swing doors, you can use a square pipe with an appropriate diagonal. There are several options for strengthening the structure, and it is advisable to study this issue in advance.
- Fastening PS profiles along the entire width of the partition, in accordance with the diagram.
- Installation of lintels and embedded bars. The latter can be used to attach wall cabinets and the like.
- Installation of electrical wiring, internet – everything that is provided.

Frame cladding
- Finish the gypsum board sheathing on one side, leaving a gap between them and the surfaces of about 5 mm. When tightening the screws, their heads must be recessed into the chamfers.
- Laying insulation material.
- Covering the second side of the frame.
- Reinforcement of the partition with corner profiles.

Installation of the block
It is necessary to ensure that the frame does not protrude beyond the plane of the wall. After fixing the door, the gaps are sealed with foam.

Exterior finishing
- Puttying gypsum board joints and locations of hardware heads.
- They are reinforced with sickle tape.
- Primer treatment.
- Surface grinding as a stage of preparation for finishing.
There are many ways to decorate a plasterboard partition yourself - painting, pasting with wallpaper or decorative film, applying textured plaster. GCRs are popular in the construction industry due to the ease of working with them and the variety of surface design options. If the meaning of all technological operations is clear, then the services of a master are not needed to construct such a partition.
We build partitions and doorways from plasterboard with our own hands
During redevelopment, they try to arrange the living space to the maximum by moving interior partitions. After the destruction of the old structure, it is easier to make a new wall from sheets of plasterboard. A passage must be provided between rooms. Making a doorway from plasterboard consists of two stages: assembling the frame and covering it.
In construction, drywall (gypsum plasterboard) is considered a universal material. You can build new structures from gypsum plasterboard or use sheets for cladding instead of plaster. It is impossible to build a load-bearing wall from plasterboard, but the material is excellent for interior partitions. Lightweight partitions are used for zoning a room and making false walls for sliding doors. The arrangement of a doorway in a plasterboard partition can be done with imagination, making the arch a classic, asymmetrical or other shape.

GCR walls have many advantages:
- creates minimal load on the load-bearing elements of the building due to its light weight;
- one person can erect a partition;
- affordable cost of materials;
- If necessary, the partition can be easily dismantled.
In offices, plasterboard walls can be installed temporarily to create a separate office or for other purposes. Designers use the structure when arranging decorative passages of unusual configurations.
Required materials and tools
To arrange a plasterboard opening in an interior partition, you will need the following: tools:
- roughing plane for processing the gypsum board cut;
- edge plane for cutting chamfers at an angle;
- a sharp knife or a special hacksaw for cutting drywall;
- metal scissors;
- drill;
- screwdriver;
- screwdrivers, level, pencil, tape measure.
From materials prepare for work:
- profiles made of galvanized steel;
- if it is planned to hang the sash, to strengthen the doorway you need a wooden beam corresponding to the section profile;
- assembly of the frame and fixation of the casing is carried out with self-tapping screws;
- if it is necessary to increase sound insulation or insulate the partition, use basalt wool slabs.

The main material in the manufacture of a partition with a doorway is drywall.
- As a standard, wall gypsum board with a thickness of 12.5 mm is used.
- The curved elements of the arch are made from sheets 6.5 mm thick.
- To enter the bathroom or kitchen, it is better to take moisture-resistant plasterboard. It is easily distinguished by its blue or green color.
- There is fireproof gypsum board. This material is rarely used in apartments. An exception may be the kitchen, where there is a possibility of strong heating of the partition from household appliances.

How to make a doorway from plasterboard?
Before making a doorway from plasterboard with your own hands, think through the dimensions and shape of the structure. It is determined in advance whether the sash will be hung.
Changing the dimensions of the opening
When installing a non-standard door, it is not necessary to destroy the partition. Simply changing the dimensions of the doorway is enough. To reduce the height or width, a frame is constructed from a rack and starting profile. At the construction stage, do not forget about the sash. A galvanized profile will not withstand a heavy door leaf. If you decide to hang the doors, then a wooden beam is placed inside the rack profile.

When the passage is planned to shift to one side, part of the wall is first cut out. It is better to use a grinder, since blows from a hammer drill can damage the integrity of the entire partition. After preparing the contour of the opening, the starting profile is fixed from below and above, vertical elements are placed along the edges, as well as additional racks on the wall side. The starting and rack profiles are connected with self-tapping screws. The frame is given rigidity by additional cross members.
When it is necessary to reduce the height of the passage, only wall profiles are installed. They will support the upper cross members.
After making the frame, the gypsum board is cut out. All fragments are connected so that the joints are located in the middle of the profile. Fix the casing with self-tapping screws.
Straight frame construction
To make a plasterboard wall with a doorway from scratch, first draw up a project. Calculate the dimensions of the structure, the location of the passage, and the shape. The easiest way is to build a rectangular classic opening. When calculating the dimensions, it is important to take into account that after finishing the thickness of the partition will increase.
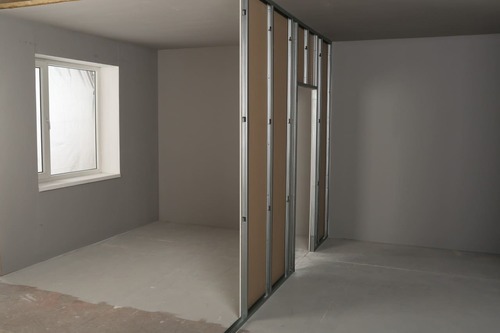
The construction of a wall and an opening made of plasterboard begins with markings. The location of the starting profile is marked on the ceiling. From it, an exact projection is made with a plumb line onto the floor, where the lower starting element is installed. Mark the location of the rack profile. Vertical elements are placed every 40 cm. The outer racks must be fixed to the adjacent load-bearing walls. Additionally, racks are installed to form the door passage. The vertical parts of the frame are reinforced with horizontal cross members.
When the frame is ready, basalt wool insulation is placed inside. The structure is sheathed with gypsum board, fixing the sheets with self-tapping screws.

Making an arch is difficult. It is important to bend the elements equally to obtain a symmetrical design. Arches come in different shapes, but if you lack experience, it is better to stick with the classic semicircle. The process consists of the following steps:
- The new partition is constructed according to the principle of a direct frame structure. If there is already a partition, the opening will have to be widened so that the base of the frame does not interfere with the installation of curved elements of the arch. A wall profile is fixed at the top and side of the passage.
- The frame of the semicircle of the arched doorway is made from a guide profile. The side shelves of the workpiece are cut at a distance of 3 cm with metal scissors. The cuts should be located strictly opposite each other. Prepare two identical elements
- A semicircle is bent from the cut profiles. The details should be symmetrical. It is better to bend the blanks at the same time.

- The bent elements are fixed with self-tapping screws in the upper part of the opening to the side posts and the lintel. Further actions are aimed at strengthening. Using scissors, cut pieces of the profile, place spacers, connecting the semicircular element with the base of the opening frame.
- The covering of the door passage begins from the front side. Two identical fragments are cut out from the plasterboard. It is important to make the oval correctly. It will be impossible to smooth out large defects with putty later. The finished front fragments of the doorway are fixed to the profile with self-tapping screws.
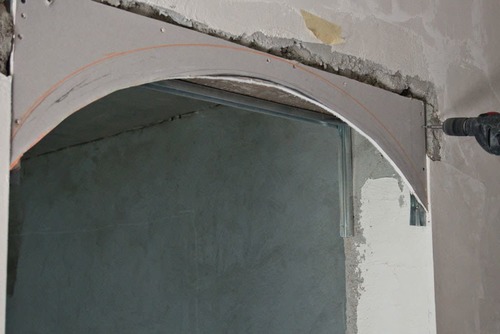
- To make a curved part, use a tape measure to measure the width and length. It is better to take the second indicator with a reserve. The measurements are transferred to a thin sheet of ceiling plasterboard, and a strip is cut out.
- The back side of the fragment is rolled with a needle roller and moistened with water. When the punctured cardboard gets wet, the gypsum board strip will easily bend into a semicircle. The fragment is attached to the frame with self-tapping screws. It is advisable to do this with an assistant.

After covering, the corners of the arch are reinforced with a perforated corner. Further actions are aimed at finishing the door passage: primer, putty, sanding, painting or wallpapering.
Plasterboard finishing
When you only need to correct the contours of the passage, it is enough to simply line the doorway with plasterboard without constructing a frame from a galvanized profile. Fragments of the required sizes are cut out from the sheets. GKL on slopes and in the inner part of the opening is glued with special glue for drywall, putty or fixed with self-tapping screws. The corners are protected with a perforated corner.

Finishing
After covering, the plasterboard openings are subjected to finishing. The work is carried out in the following order:
- The gypsum plasterboard doorway is primed. Before completely dry no actions are performed.
- The joints and screw heads are treated with serpyanka and glue. A perforated corner is glued to the corners.
- The surface is leveled with a starting layer of putty and a plastic mesh is glued.
- The structure is covered with finishing putty on top of the frozen layer. After the finishing layer has dried, grouting is done with a sanding mesh or sandpaper.
For better adhesion, the sanded surface can be treated with a primer. After it dries, the new doorway is painted, covered with wallpaper or other material of your choice.
Working with gypsum plasterboard is so simple that you can arrange even the most complex doorway in 1–2 days.
How to make a plasterboard partition with a door, with your own hands (step-by-step instructions)

Many modern apartments do not have a layout and therefore the owners independently divide the total area into rooms using interior partitions, or use decorative partitions to zone the room.
The simplest, fastest and most affordable way to create interior partitions are plasterboard structures . Such partitions can be either solid or with a door, and if you have the desire and time, then you can make them yourself.
Advantages of plasterboard partitions
Drywall is a universal building material that is used both for finishing a room and for creating new structures in it, including interior partitions, and for creating partitions for zoning in an office and apartment. The only things that can compete with it in terms of characteristics are: partitions made of tongue-and-groove slabs or polystyrene concrete blocks.
- it's light material, so the load on the structure of the house will be insignificant;
- All work with it is done by hand, without the involvement of assistants, since the material is light;
- the cost of drywall is low, as well as the materials necessary to create the frame and surface finishing ;
- material is easy to cut, it bends easily, so even arched structures are created with its help;
- installation of the frame and sheets is simple and quick;
- finishing of such structures is carried out with various materials;
- plasterboard sheets consist of natural materials, therefore they are safe for human health.
 Eat different types drywall, so before buying it, you need to decide which one you need:
- ordinary, most often gray in color, used in rooms where humidity is no more than 70%;
- moisture resistant, has a green or blue color and is used in rooms where there is constantly high humidity;
- refractory, usually used in the kitchen, where there is a possibility of strong heating of the wall, it contains fiberglass and other additives, it is red or gray in color;
- fire-resistant moisture-resistant, it is rarely used in rooms with difficult conditions.
The thickness of a regular sheet is 12.5 mm, and to create arches they use sheets 6.5 mm thick, to give them flexibility, they are pre-moistened.
Installation of an interior partition
At the first stage of the work, it is necessary to determine the location of the future partition. To mark, use a plumb line and a cord, parallel lines are drawn on the floor and ceiling.
 It is much easier to work with a laser level, but buying it just to create a plasterboard wall is impractical.
When marking, the width of the partition is also taken into account, if it is sheathed in one sheet, then 2.5 cm is added to the thickness of the frame, and if the gypsum board is laid in two layers, then 5 cm is added.

To perform the specified work, you will need the following tools:
- building level;
- measuring instruments;
- cord and plumb line, or as their replacement - a laser level;
- corner;
- electric drill;
- metal scissors or jigsaw;
- pencil;
- stationery knife;
- putty knife;
- container for plaster.
 After marking, we cut the profile to the required length, and cover the rear walls with sealing tape.
Installation of profiles
 Work begins with laying and securing the guide profile to the floor, after which it is installed along the entire perimeter of the future partition. The profile is fastened using self-tapping screws or dowel nails, it all depends on the material of the walls.
 Now, using the rack profile forming a doorway, this must be done carefully and carefully, so that the distance between the posts at the top and bottom is the same. The verticality of the racks is checked by level, after which they are fixed.
At the next stage, the remaining rack profiles are mounted if you have gypsum plasterboard standard width, then the distance between them is required 60 cm. 
To increase the strength of the future partition, between the vertical posts it is necessary to secure horizontal jumpers, which are cut from the same profile.
A wooden block is also installed and secured into the transverse profile located above the doorway; it should easily fit into it so as not to disturb the shape, using a square check that the angles are 90 degrees.
The remaining transverse profiles are attached to the racks; special short screws are used for this.
After the frame is created, you will see that its structure is quite rigid and durable, start laying electrical wiring. The rack profiles have holes through which it will be convenient to thread wires.
The wiring is placed in a special corrugated non-combustible insulation.
Fastening drywall
At home You can use a utility knife to cut drywall and a long ruler or staff. To do this, apply a ruler to the sheet, make a cut along the line several times, the deeper it is, the better, and then carefully break the gypsum board and get the required size.
 To simplify Finishing work, make a chamfer at the cut site at an angle of about 45 degrees, a plane or knife is used for this.
During the calculations, It is necessary to foresee in advance the places where you plan to mount hanging furniture or equipment.
Here additional profiles reinforced with wooden blocks must be installed, it all depends on the weight of the suspended structures.
 Left place the sheet on the posts and secure it, this is done using self-tapping screws; they are installed in increments of 20 cm and slightly recessed into the sheet.
Carrying out finishing work
Installation of the frame and gypsum board is only the beginning of creating a plasterboard partition. At the next stage All seams are sealed. To do this, use sickle tape and putty. The entire surface of the wall is also puttyed. 
After the base has dried, begin leveling the surface. The wall is covered with primer, which will allow the plaster to adhere better and provide additional protection for the plasterboard. Leveling is carried out with a wide spatula and finishing plaster. 
Door block installation
In the prepared opening is performed installation of a door frame, do this with wedges, screws and polyurethane foam. First, the frame is aligned using wedges and fixed with self-tapping screws, after which they proceed to installing the door leaf.
The correctness of the work is checked, and the door should open and close easily. If everything is normal, then the remaining gaps are filled with polyurethane foam.
 At this time, the door is in the closed position, or spacers are inserted into the frame so that when the foam hardens, it does not deform it.
The foam is cut off after it has completely hardened; if the canvas was removed, then it is hung only a day later, after installing the box.
Finishing
On last stage creating a wall from plasterboard, its finishing is carried out, for this purpose it is usually use paint or wallpaper. The frame is covered with platbands, which help hide the door attachment points.
Features of insulation and sound insulation
It is not recommended to leave a hollow partition; it will be filled with sheet or roll insulation. They are laid after one side of the wall is covered with plasterboard, and only then is it sheathed on the other side. 
If you plan to install utilities in such a wall or sliding door, then in the place where they are located, insulation is not laid.
To create sound insulation, use mineral wool or isover. From below, when installing the sheet, you need to leave a small gap, so stands of the appropriate thickness are installed.
In order for you to be able to create a plasterboard wall with an opening for doors yourself, must be adhered to the following tips specialists:
- During the installation of partitions in the room must be at least 10 degrees Celsius.
- You need to calculate the required number of guides and rack metal profiles, only then purchase them. Cut them according required size You can use a jigsaw or metal scissors.
- The sheets are laid tightly to each other.
- To create holes for sockets, you must use special drill bits.
- In the places where the sheets are joined, be sure to use a sickle and seal the heads of the screws well with putty, after which the entire wall is puttied.
- As finishing materials, you can use paint, wallpaper, tiles, cladding panels and others.
Conclusion
Now you see that there is nothing complicated in the construction of plasterboard partitions and all the work can be done independently. Having studied the technology for performing the work, advice from experts and having prepared the necessary tools, feel free to begin performing the specified work.
Useful video
How to make a partition from plasterboard with your own hands, step-by-step instruction on video:
When starting to install the interior structure, prepare the materials and tools required for this. This will reduce the duration of work and improve its quality. It is advisable to cut all the elements of the interior frame frame to size in advance, preparing a beam of suitable length. Remember that the frame, like the door leaf, can be made from various materials. Before choosing a timber, check out all available options to decide which is better.
Materials used in making boxes
In order for an interior door to last a long time, you need to correctly install and select suitable material for the manufacture of all structural elements. Typically, to make an interior door frame, the following is used:
- Fiberboard. Although distinguished by its presentable appearance, such material does not always become ideal option for making boxes due to low strength. There is a high probability that during operation the stand will begin to bend under the influence of applied loads. Especially if the weight of the door leaf turns out to be significant. If you use this material, avoid installing a door made of natural wood or MDF;
- Untreated wood. The material is similar in cost to fiberboard, but in this case, dry profiled timber, which is highly durable, is used to make the box. If you have a choice, it is better to purchase untreated timber instead of fiberboard. Considering the condition of the surface of the assembled box, take care in advance about the materials for processing the timber. It is also advisable to purchase a composition that will prevent rotting and warping of the door material under the influence of moisture;
- Laminated wood. In this case, the surface of the timber for making the box is initially covered with a layer of decorative paper. The service life of the box and the interior system as a whole largely depends on the characteristics of the latter. If the thickness of the laminated layer is insufficient, characteristic scratches and abrasions will soon appear on the surface of the timber, which will worsen the appearance of the box. Sometimes they appear already during the installation of the door.
The choice of material used to make the frame depends on where the specific interior door will be located. When it comes to a bedroom or office, you don’t have to worry and feel free to purchase fiberboard if you are satisfied with its characteristics and appearance. For other rooms, it is recommended to purchase a wooden beam, which is better suited for making a door frame stand.

Types of door leaves
There is a wide range of doors on the market, which creates certain difficulties when choosing the right option. When choosing, it is important to know what technology was used in the production of the canvas, since the installation procedure depends on this. Typically, interior doors are made of wood, MDF and fiberboard. There are also combined options.
Door made of fiberboard
The door made of fiberboard has a frame structure. During its manufacturing process, laminated fiberboard sheets are attached to the natural wood frame. This door has an affordable price. It does not create problems during the installation process, which can be done in-house. That is why preference for products made from fiberboard is given to those people who decide to install the door structure themselves.

For those who do not intend to replace the door in the next 10-15 years, it is recommended that they avoid purchasing fiberboard panels. Such a canvas can be easily damaged during installation or subsequent operation. Even careful treatment does not guarantee that after a couple of years the door will not lose its presentable appearance. In addition, fiberboard is afraid of moisture.
MDF door
The best option in terms of combination of price and quality. Products made from MDF are durable, not afraid of moisture, and therefore can be installed in rooms with high humidity. Provide an acceptable level of sound insulation. You can also do the installation of an MDF door yourself. Wherein installed structure will definitely last longer than a fiberboard door.

Door made of wood
A door made of natural material has undeniable advantages in terms of appearance and performance characteristics. However, the high cost of such products forces buyers to pay attention to cheaper products. In addition, there are certain requirements for the installation process. Considering that a solid wood door is heavy, it is attached to strong hinges.
Assembly and installation of the box
When choosing timber for interior doors, from which the stand and other elements of the frame will be made, make sure that its humidity meets regulatory requirements. Otherwise, some difficulties may arise when operating the interior door. After a while, the canvas will definitely begin to jam, and then stop opening altogether.

Web size control
Even before purchasing, make sure that the geometry of the canvas is correct. Even if upon visual inspection it seems that all sides are equal, check this with a tape measure. Sometimes manufacturers offer canvases in which opposite sides differ by only 2 mm.

It would seem that the difference is relatively small, but during installation it is very difficult to eliminate such an error. Especially if you purchased a budget model of an interior door. In such a situation, you will have to figure out how to ensure a uniform gap along the entire perimeter of the canvas. Sometimes the task may turn out to be impossible, and you will have to either hang the door in the shape it is or purchase a new one.

Before installing the canvas in the box, prepare a mounting hole for the lock. Carry out the work extremely carefully so as not to damage the decorative coating of the interior door. If this does happen, it is worth trying to repair the canvas. Otherwise you will have to buy a new one.
An example of calculating the dimensions of box elements
For example, let’s take a door with a standard leaf 2 m high and 80 cm wide. Such products are installed in most living rooms and offices. To install it, a box of suitable size timber is first assembled. The beam is taken slightly longer than the height and width of the doorway. When ordering moldings, carefully calculate the required quantity. A stand formed from two elements will have lower strength characteristics compared to a product made from solid timber.
In order for the post to be installed in a specific doorway, it must first be measured correctly and then cut. Before adjusting the stand to the dimensions of the box, make cuts in the upper part at an angle of 45°. This is where the box beam will be connected. The tightness of the fit of the structural elements depends on how smoothly and accurately the cut is made. It is better to do the work using a miter saw. Only professionals can handle a hand saw and wort.

Considering that initially the stand is larger than the required size, it will have to be trimmed. When calculating the final length, the size of the upper and lower gap is taken into account. A minimum of 4 mm is left between the top end of the door and the frame. Below - 1 cm, so that the installed interior structure can work properly. Both posts must be the same size.
Attention! Adding the height of the canvas and the gaps together will give you the internal size of the rack. This should definitely be taken into account! In the example given, the internal size of the cut beam will be 2.014 m.
When determining the size of the lintel, follow the same principle. To the width of the door leaf, add the size of the gap between the door and the side posts. The latter should be about 4 mm. As a result, the length of the lintel will be 808 mm (it is determined by the inside). To ensure that the lintel fits tightly to the counter, make cuts on both sides at an angle of 45°, carefully controlling the beginning of the cut.
The procedure for assembling and installing the door frame
The frame is assembled before the door installation begins. Installation requires special equipment and tools. The work is done on the floor. The elements of the box are connected to each other with self-tapping screws with a flat press head. If we are talking about a rectangular box, the beam should be located at a right angle.
Attention! If MDF is used instead of timber, it is mandatory to first drill holes for installation. If this is not done, installation will be difficult and the material may burst.

Once the box is assembled, begin its installation. Taking into account the operating conditions of the door, the frame is fixed in the doorway as securely as possible. Otherwise, there is a high probability that if the sash slams suddenly, the interior structure will simply fall out due to improper installation.
The box is fixed at three points, having previously ensured its spatial position. The longitudinal beam must be strictly vertical to prevent jamming of the door leaf. To make it easier to fix the box in the opening, you can use pegs of suitable thickness. Self-tapping screws are tightened in the places where the hinges and the mating part of the lock are installed. Considering that the elements listed above will be located on top, the fasteners will be invisible.
After the box is fixed with self-tapping screws, the gap that necessarily forms during the installation process between the vertical beam and the wall is foamed. The foam is poured in several stages, waiting until the previous layer has completely dried.
After the installation of the box is completed, the installation of the canvas begins. The hinges are attached to it in advance, then hanging the door will not take much time. If at this stage the sash jams or the lock does not open/close well, you must immediately correct the errors made during the installation process. If this is not done, the door will soon stop working normally and the installation will have to be repeated again.

To properly assemble the frame for an interior door, you should prepare the tools in advance and required quantity material. The timber must be of the appropriate size and have the necessary characteristics. Following the advice of professionals, you will quickly assemble the box, install it in the opening and hang the sash. If everything is done correctly, the interior door will last a long time and will not deform.
In contact with
Comments
Unfortunately, there are no comments or reviews yet, but you can leave your...
New articles
New comments
S.A.Grade
SvetlanaGrade
SergeyGrade
Sergey


