The construction of fences today is subject to requirements for strength, reliability and stability. At the same time, not the least role in choosing a fence for summer cottage plays its aesthetics. The fence should not only be durable and strong, but also fit harmoniously into the overall design.
A universal material for constructing a fence is considered to be corrugated sheeting, which is based on galvanized a metal sheet. Previously, profiled sheets were used only for covering the roofs of non-residential buildings, garages and for fencing construction sites. But this is already in the past.
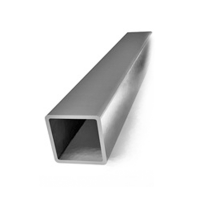
Profiled sheet
Modern manufacturers of corrugated sheets have brought it to more high level quality. And today, corrugated sheeting is the same galvanized metal sheet, covered with high-quality protective layers, corrugated on a special machine and attractive in appearance. It is manufactured by using cold rolling, hot galvanizing and coating the surface with various protective compounds:
- applying a protective layer of aluminum-zinc is considered the simplest and cheapest method, which provides acceptable strength and protection against corrosion. Such the material is suitable for covering a garage, outbuilding and small fence;
- coating polymer composition, which provides higher protection and allows you to paint corrugated sheets in any color;
- application of plastisol, which will provide the profiled sheet with maximum strength and durability.
Due to the fact that corrugated sheeting has a corrugated shape, it is durable, rigid and resistant to damage and wind.
Advantages of a fence made of corrugated sheets
Constructing a fencing site from profiled sheets with your own hands has a number of advantages:
- As a rule, fences made of corrugated sheets are installed faster than fences made of brick and natural stone; their installation does not require expensive equipment or special knowledge and skills. It is only necessary to correctly calculate the perimeter of the site, the amount of consumables and install support pillars. To give the fence an attractive appearance, you can also use brick, natural stone, and forged elements;
- the ability to combine with other building materials, including chain-link mesh;
- regardless of the height of the fence, its strength and reliability remain the same;
- sound insulation property allows you to protect the area from extraneous noise;
- environmental Safety;
- rich color range. At the same time, the corrugated sheets do not lose their color, do not fade or fade throughout their entire service life.
In addition, a fence made of corrugated sheets is cheap. But, most importantly, you must strictly adhere to all the rules on how to make a fence from corrugated board with your own hands.
Required tools and materials
Before building a fence from corrugated sheets, you need to prepare everything Construction Materials and tools. To calculate the number of profiled sheets, it is enough to know the length of the fence around the perimeter of the site and add it to the height of the fence. You will also need:
- profile pipes for support posts 60x60 mm. Of course, as supports for profiled sheets, you can also choose pillars with brickwork, and stone pillars, and logs, and asbestos pipes. But when building a fence from corrugated sheets with your own hands, as a rule, pipes are used, the number of which is calculated as follows: the distance between the posts should not exceed 2.5 meters, and the height of the pipe should be equal to the height of the future fence plus the burial depth:

The data obtained is added up and the result is the required number of pipes; - profile pipes 20x20 or 20x40 mm, which are necessary for installing crossbars for fastening sheets:

The number of such pipes depends only on the height of the future fence;


IMPORTANT! It is impossible to use aluminum rivets to connect sheets of corrugated sheets, because they do not withstand loads well.
- drill and building level;
- welding machine and electrodes for creating a frame;
- solution container, cement, crushed stone and sand;
- rope and wooden pegs;
- paint for painting pillars and cross beams match the color of the fence.
After installation, the fence will look like this:
Installing a corrugated fence with your own hands
Perimeter marking
Before you start building a fence from corrugated sheets, you need to correctly measure the perimeter of the fenced area and calculate the number of support pillars. Marking the territory is carried out by driving pegs into the corners of the future fence, between which a strong thread is pulled tightly, and necessary measurements. Only after this is a project for the future fence made of corrugated sheets drawn up.
Installation of support pillars
Before proceeding directly to the installation of pipes for the fence supports, it is necessary to dig holes around the perimeter for pouring the foundation. Of course, you can dig with a shovel, but this is a labor-intensive process. Therefore, it is better to use a garden auger. After each hole dug, the distance is measured and the next hole is dug. And so on.
The reliability, durability and appearance future fence.
The height of the supports for a corrugated fence depends on the height of the fence itself. The supports should be placed strictly straight, and the distance between them should be up to three meters. And in order to install pipes, it is necessary to dig holes 1-1.5 m deep.
IMPORTANT! The higher the fence, the deeper the holes should be.
After all the holes for the support pillars have been dug, you can begin installing the supports themselves, during which it is important to constantly ensure that they are strictly vertical. To do this you need to use a building level. If the support pillars have been installed straight and vertical, then you can start pouring concrete. Those pipes that will be lowered into dug holes 1.5 meters deep are filled with solution only to a meter, and the remaining 50 cm of pipes must be tightly wrapped with roofing felt, and then filled and compacted with sand. The foundation must be left in this state for three days.
IMPORTANT! The concrete mortar poured into the support holes should definitely be pierced using available materials. This is necessary to release the air that remains in the solution.
Mounting support beams
After the support pillars have been installed and the foundation has been firmly strengthened, you can begin installing the transverse joists, which are placed parallel to each other.
In order to securely attach the logs to metal poles, it is best to use a welding machine.
There is a second way to fasten the joists - using bolts and nuts, but it is not as reliable as welding.
IMPORTANT! The support logs should be attached to the posts at a distance of at least 20 cm from the top edge of the support post and from the surface of the ground.
Fastening corrugated sheeting to a metal frame
The construction of a corrugated fence is completed by the installation of the profiled sheets themselves, which are attached to the frame slats using self-tapping screws, rivets or galvanized bolts. As a rule, sheets should be joined with an overlap on one wave.
Today, more and more owners of private houses are erecting fences from profiled metal sheets (profiled sheets) on their property. And this is not surprising - this durable and reliable material quickly gained popularity among the people. It is not difficult to build such a fence yourself. You can learn about all the subtleties and nuances of this work in this article.
Peculiarities
A fence made of corrugated sheets can be installed on the site according to your drawing without contacting professional builders or renting special equipment. This and other factors make it very popular among private home owners.


Advantages
- Wear resistance. Profiled fence steel sheet will last for many years, since the material does not change its characteristics over time. It is reliably protected from corrosion by a special coating and is resistant to strong gusts of wind.
- Economical. In terms of price-quality ratio, corrugated sheeting can be called the best for making fences.
- Ease of installation. Almost any summer resident can cope with the design features of such a fence as quickly as possible.


- It does not require special care. It is enough just to occasionally wash the fence with plain water and, if necessary, replace individual sheets.
- Large selection of colors.
- Reduces noise levels. Corrugated sheeting is capable of reflecting sound waves.
- Aesthetic appearance.


When buying profiled sheets, you should pay attention to the price. Too low a price may indicate poor quality galvanized or insufficiently thick metal, which is not suitable for erecting a fence.
First you need to check the thickness of the sheet (for building a fence, an indicator of 0.6-0.7 mm is quite enough). Then you need to make sure that the seller has certificates confirming the quality of the material.


For fences, wall corrugated sheeting is most often used. It is cheaper than a load-bearing one and is suitable for any terrain without strong wind loads. It is important to find the optimal balance between price and protection of the sheet from external influences. We must not forget that the cheapest option in any case loses in durability.
The material has many layers, each of which serves a separate purpose. Of course, only the right combination of them makes corrugated sheeting truly high-quality. For example, a low-grade steel coating will not have the desired effect. To settle on a specific material, you need to know what the steel is coated with.


Types of protective coatings for corrugated sheets.
- Zinc. The cheapest option, the reliability of which cannot be expected. It is rarely used for the construction of fences in summer cottages, but it is popular in warehouses, construction sites and industrial enterprises as a temporary fence.
- Aluzinc. This is a coating made of aluminum and zinc. Externally, such a fence will be more presentable, moreover, it can be covered with acrylic or oil paints for metal. But the final cost will be quite high, considering the cost of high-quality paints.


- Polyester. The glossy surface of such a fence will always look neat, and any dirt can be easily washed off with rain or water from a garden hose. The coating is resistant to any weather conditions and is not afraid of solvents.
- Plastisol. The most expensive and at the same time the most reliable option. It can often be seen in luxury buildings. A fence coated with plastisol will last for decades and look like new throughout this time.


Special attention It is also worth paying attention to the thickness of the sheet. If it is less than 0.45 mm, then the fence can easily deform in the wind and tear off the holes for the screws.
It's about about the thickness of the galvanized sheet in its original form, without a protective coating.
To avoid problems with choice and not to stumble upon low-quality material, it is better to order corrugated sheets in Europe. Leading world-famous manufacturers are concentrated there.


Constructions
Before starting construction, it is important to decide what design the fence will be. There is little choice here: the lower edge can be buried in the ground or located above the ground. The distance between the fence and the ground is prerequisite, if construction is carried out on a slope or on excessively wet soil.
It is also worth remembering that wind and dust will gradually erase protective layer corrugated sheeting and it will need to be tinted to avoid rust.
But there is another way out - install special U-shaped profiles on the fence for protection. They will also need to be tinted every few years, but this is much easier than dealing with rust on the fence itself.


If the supports are round pillars made of brick or wood, the fence frame must be mounted with an overlap, i.e. by welding the logs and the surface of the pillars, and attaching the sheets exclusively to the logs. In the same way, you can assemble the frame on rectangular supports. Professional developers often do this.
But for greater strength, it would be useful to secure the logs in the space between the supports so that their outer parts coincide. With this assembly method, the sheets can be attached to both supports and joists. Of course, in this case you will need more self-tapping screws, but the strength of the structure will also increase many times over.
There is also a so-called modular (sectional) fence - each profiled sheet is framed around the perimeter by a frame and then welded to the supports. This option is very labor-intensive, but in the end such a fence will look more stylish and finished than a regular metal one.


Material calculation
Corrugated sheeting is a fairly durable material, and fences up to eight meters high can be built from it. The metal is attached to logs, of which there are often two or three. Metal screws are also needed for installation.
To calculate for yourself how many supports you will need, you need to divide the length of the fence perimeter into the spaces between the supports. To the resulting number you need to add 4 (two posts at the edges of the gate and for attaching the gate) and another 4 for each corner.
The amount of corrugated sheeting is calculated taking into account the width of the sheets. Again, the perimeter of the fence must be divided by the width of the selected profiled sheets. It is recommended to take a couple more sheets in case the calculations give an error.


To get the required log length, you need to multiply the perimeter by 2, and to the result add the required footage for installing the gate and wicket.
To make it easier to install the fence, you can immediately order sheets of the required size. Their standard width is approximately 120-130 cm, and their height is 190-200 cm. You will also need metal screws, paint (if necessary), gravel and cement.
The final cost of the fence can be affected by the installation method of the supports, the thickness of the profiled sheet, the size (number) of gates and gates, the number of posts and joists.


Preparatory work
Step-by-step instruction Preliminary work before the start of construction involves performing several stages.
Marking
The first step is to decide where exactly the fence (gate, wicket) will be placed and mark the place for the posts. You also need to decide what the height will be in order to correctly calculate the amount of material when purchasing.

Choosing material for pillars
Most often, metal pipes are used as supports. The thickness of their walls should be at least 2 mm, for tall buildings - at least 3 mm. Between round and profiled pipes, it is better to choose the latter, since they are characterized by increased mechanical strength. The height of the supports directly depends on the height of the fence, and metal is often placed half a meter underground. Over time, metal supports must be treated with anti-corrosion compounds.


If you need to save money, you can choose wooden posts for supports. They are not as durable as metal ones, but will cost much less. In this case, the most suitable species would be spruce, cedar or pine. It is important to choose timber without cracks, with flat surface, otherwise repairs may be required quite soon. Before placing the pillars in the ground, they must be treated with an antiseptic and a water-repellent mixture.
An alternative to wooden and metal supports can be concrete structures. Such pillars are made of cement, crushed stone and sand and are highly durable.
Sometimes the foundation of the fence is made of brick, which looks more advantageous in appearance. But building a fence with brick supports will require a lot of effort and time.


Installation of supports
When the issue with the choice of material has been resolved, you should proceed to the direct installation of supports. Here, the easiest and most reliable option would be a fence with concrete pillars. The standard distance between pillars will be 3 meters. The fact is that profile pipes are 6 meters long and with spans of 3 meters it will be much easier to join the logs.


Next, in the right places, using a drill, you need to make holes that will be at least 10 cm wider in diameter than the selected supports. Gravel is poured into these holes, which needs to be properly compacted. The supports are then inserted and aligned.
Having filled the holes with gravel approximately to the middle, you can begin pouring cement. The pillar must be well secured with boards or braces, which can be removed only after the solution has completely hardened.

Manufacturing and installation
When the foundation has completely hardened, you can install the logs. Here you will need a six-meter pipe, which was mentioned earlier. The number of lags varies from 2 to 3 depending on how high the fence is. The logs are installed at a universal distance from the edge - 4-5 cm. For reliable fixation, it is better to weld them.
To prevent rust, the pillars are coated with a primer. If the soil in the area is soft, then the pillars can sag quite quickly over time. Therefore, in this case it would be logical to make a strip foundation. It is not difficult to install it with your own hands - a ditch is dug exactly along the pillars and a low tape box is built, then waterproofing is laid along the walls of the structure and the whole thing is filled with concrete.


Next stage– installation of metal profiles on logs. In order to attach them firmly, ordinary metal screws will be sufficient. The joining of metal profile sheets is done with an overlap. It is necessary to install it using construction gloves, as there is a danger of cutting yourself on the corners of the corrugated board.
The last and most labor-intensive stage will be the installation of gates and wickets. You need to build frames for them. In this case, it is necessary to prevent the gate leaves from sagging by welding a separate strip to each of them, which will connect the opposite edges of the frames. After fastening, the frames are sheathed on top with corrugated sheets.


Important features to consider during construction.
- To prevent the final structure from slanting, when installing pillars it is very important to monitor the vertical position using a plumb line.
- It is better not to make the distance between the supports more than 2.5-3 meters, because otherwise a sailing effect may be created.
- You can start building a fence made of corrugated sheets at any time of the year. Its further properties will not be affected by weather and air temperature.
- If the sheets are slightly damaged or scratched during installation, any damage must be painted over immediately. Otherwise, the corrugated sheet will lose its anti-carrosion properties.


Between the posts on which the wicket or gate will be installed, you need to dig a trench up to 30 cm wide, lay a frame of reinforcement inside and pour concrete on top. This is necessary so that the pillars are connected to each other by one foundation and the influence of weather conditions is the same on both sides of the wicket (gate).
This design will prevent the sashes from skewing and they will open/close freely. For pillars that are planned to be lined with brick, this design is required.


If the site is located on a slope, this is not at all a problem for constructing a fence made of corrugated sheets, there are simply a couple of features that should be taken into account during construction. To make the structure even, you need to stretch the rope around the perimeter of the building. Based on this, the corrugated sheets are fastened in such a way as to prevent differences in height between them. It turns out that each sheet has a slight deviation from the vertical relative to the ground, but on a small slope this will be almost imperceptible.
If the fence is erected on steep slope With large differences in height, then another technology is needed. In this case, the installation line is determined using a rope, a plumb line and a building level. It is necessary to measure the height of the difference between the pillars. To calculate the number of supports in this case, the height of the differences is divided by the span between the supports.


For example, if you plan a fence 30 meters long with spans between supports of 3 meters, and the difference is about 1 meter, then you need to divide 10 centimeters by the number of spans, i.e. 10. We get a result of 10 centimeters. It is by this value that each of the spans should be made lower, which will preserve the aesthetic appearance of the building. The result is a kind of ladder that gradually descends the slope.
If the slope is very steep, you can install profiled sheets of different sizes for each span. So it won't be the best nice option, but at least the differences between the sheets will not be very noticeable and the fence will look more solid.

Combined structures with stone or brick supports require special attention to the condition of the soil at the site of the proposed construction. Soils that retain moisture can become a problem for construction. This property of the earth can lead to a sharp rise in ground level when the soil freezes and, as a result, to the destruction of the entire foundation.


There are several ways to solve this problem.
- You can remove all the soil based on the freezing level and replace it with another soil. This must also be done with the soil around the foundation.
- You can install the foundation below the freezing level, but in this case, the wet soil will put pressure on the foundation.
- There is also the option of insulating the foundation special material to the entire depth of soil freezing. But this method is only suitable for light buildings.
- Most best option– installation of drainage in the form of a trench with a pipe that needs to be wrapped in filter material. This drainage is erected at a distance of about 40 centimeters from the fence, and the final structure is covered with crushed stone.
As you can see, you can build a fence from corrugated sheets yourself in the shortest possible time and be sure that it will last for many years. If concrete pillars do not look very aesthetically pleasing - there are many ways to make the fence more attractive and stylish.


Decor
Initially, corrugated sheeting was produced as a material for finishing warehouses, temporary construction sites, and parking lots. That is, buildings that do not have an attractive appearance. Today, corrugated sheets have become in great demand, so manufacturers had to think about the color scheme and options for its decor.


The most common method of decoration is a combination of corrugated sheeting with brick or stone supports. Can also be finished artificial stone concrete pillars or buy corrugated sheets painted to resemble wood or stone.
The color of the fence should not stand out too sharply against the background of the design of the other buildings and the entire site. Some summer residents choose corrugated sheets of the same color as the roof. It is better to use for decorating steel elements powder paint, which will not fade or crack.
Technology plasma cutting allows you to make figured cuts on profiled sheets. Often owners limit themselves figured design the top edge of the fence.


Many people decorate their fences with forged elements. It can be geometric figures, patterns, ornaments and everything you can imagine. They can be welded or simply screwed to the corrugated sheet. These elements will look especially advantageous if similar ones are already present in the decoration of the balcony, staircase or gate.
In the presence of facade paints You can make your fence one of a kind. You can draw your favorite scenes, flowers, abstractions. Better yet, hire a professional artist to paint a reproduction of a classic painting. After drying, such a drawing must be varnished so that it does not crack or fade over time.


Well classic version decoration – climbing plants, remains always relevant. Often greens help to grow in in the right direction a couple of small fastenings on the fence, leaving only the gate and the gate free.


- If suddenly during installation the sheets of corrugated sheets are scratched by screws or something else, you should paint over the damage with a spray can as quickly as possible.
- Without at least minimum experience There is no point in using a welding machine. It is better to invite a professional or use alternative ways installation without welding.
- If the parapets (ebbs) of the fence are left open, then moisture will constantly enter into small cracks in the material. With temperature changes, this moisture alternately freezes and thaws, which can lead to the expansion of cracks and subsequent destruction of concrete.


- A mandatory step is waterproofing the holes. Especially if the level of occurrence groundwater above average. Roofing material is well suited for these purposes.
- If corrugated sheets with inside will be very dark, the area will visually appear smaller.
- The sheets must be joined in such a way that the corrugated sections are positioned vertically. Sometimes they are deliberately installed horizontally, but in this case it is worth taking care that moisture does not accumulate in the recesses.
- Sand poured before pouring the foundation will protect against uneven freezing of the ground in winter.

- Welds must be degreased and painted the same color as the posts and gate. Otherwise, the seams may quickly rust.
- The work will go faster and easier if you immediately install the first sheet correctly and carefully. The standard distance between screws can be called three waves on a profiled sheet. Thus, 10-12 screws are used per sheet.
- For additional protection from moisture and to complete the construction, you can install a wind strip.
- When the pillars are installed, you need to once again make sure that they are evenly positioned. To do this, you need to take a thick thread and stretch it along the entire fence, securing it to the first and last post.

- Some self-taught builders simply hammer supports into the ground and attach corrugated sheets to them. This should under no circumstances be done, because without a planned foundation, the fence may fall in a couple of years from a simple gust of wind. So that such improvisation in construction does not turn out to be complete destruction, you should immediately turn to professionals.
- To fasten the logs, both a welding machine and bolts are used. Experts advise choosing the first option. This will not change the overall cost of the project, but the strength will significantly increase.
- To avoid sheet deformation, it is necessary to provide correct distance between the edge and the joists. It will be optimal if it does not exceed 40 mm.

- To fasten profiled sheets, galvanized screws are required. The use of aluminum fastenings can lead to the appearance of cracks on the fastenings in cold weather and subsequent destruction of the entire fence.
- The choice of materials for the future fence depends entirely on the owners of the site and can greatly affect the final result and service life. If you come across dubious material at a low price, it’s better not to take it. After all, the desire to save money at the initial stage of construction can lead to additional expenses for repairs or even to the need to completely redo the fence.


- If financial opportunities allow you to purchase a profiled sheet with a double-sided protective coating, then it would be logical to do so. After all, this option will be much more reliable and durable than conventional corrugated sheeting with one-sided protection. Such an investment will allow the structure to be repaired less frequently.
- When painting sheets, it is best to apply several layers. This is due to the fact that after installation certain areas will no longer be available for painting, and additional protection never hurts.
- It is clear that supports made of brick or stone will look much more attractive than metal pipes. But the latter are still used most often. It has to do with ease self-installation and the ability to install a lightweight foundation.


- When decorating, you should not limit yourself to identical sheets of the same color. With the right approach, you can combine multi-colored sheets with different corrugations and stone or brick supports.
- To decorate with plants, you can plant grapes, ivy or other species that can grow along the fence.
- Also, more voluminous plants are often planted around the perimeter - spruce, garden shrubs, or install large flowerpots in which ornamental trees grow.


- Interior decoration The fence may include various shelves on which you can place pots with climbing flowers or simply hooks on which decorative items for the yard and garden are hung. In addition to decorations, these shelves can be used to store household items or garden tools.
- The question often arises about how to close the space under the fence if there is strip foundation. This can be carefully done from the inside of the fence using the remaining pieces of corrugated sheets or ordinary boards. Of course, this will spoil the aesthetic appearance of the fence, but dense shrubs planted around the perimeter will easily solve this problem.
- If you need to plant flowers along a high foundation, it is better to choose varieties that are not afraid of shade.


- To ensure that the walls of the concrete base are smooth, it is recommended to add stone chips to it before pouring it.
- Some builders weld the lintels to the posts for added stability. It's worth doing with outside or between pillars. This method requires a lot of time and effort, but will produce a very rigid and reliable frame. In this case, each individual support will be attached to the sheets and thereby strengthen the entire structure.
- The amplitude of the corrugated wave directly affects the rigidity of the corrugated sheet. Accordingly, the larger this value, the stronger the fence will be. If the site is located on an area with strong winds, then the optimal material would be class C20.


- When choosing the thickness of the sheet, you need to take into account the future height of the fence. For a fence up to 2.5 meters, the optimal thickness is 0.5 millimeters. A standard fence for a summer cottage they are rarely made higher than two meters.
- The coating should also be given special attention. Powder coating is more durable, so you need to opt for it. It is also worth considering the fact that a standard profiled sheet is sold coated with paint on only one side, the reverse side is either painted grey colour, or not processed at all. If the appearance of the inside of the fence is important to the owners and they do not want to spend a lot of effort on decoration, then it is better to immediately purchase corrugated sheeting with double-sided coating.


- If you need to cut the profiled sheet yourself, then special metal scissors will help. In this case, it is better not to use a grinder, because the edge may end up with jagged edges, and scissors are much safer.
- Another important feature that for some reason many builders neglect is that the top of the support column must be welded, otherwise it will simply flatten and this will lead to moisture getting inside and, as a result, to the support becoming larger and cracking in the winter.
- It is better to start installing the pillars from the outer ones, fixing them with wedges and a stretched cord. Based on them, it will be much easier to adjust the height of the following pillars.

The decision to build DIY corrugated fence requires certain skills and knowledge. Installation of a corrugated fence requires preliminary study of some nuances; it is important to understand the types of construction, draw up a work plan, and select suitable components and materials. This review will help you understand how to build a fence, A video at the end of the article it will be useful for beginners.
Types of designs
The variety of landscape and aesthetic requirements determine the features of the structure:
- Continuous fencing. Sheets of corrugated sheets cover the supports. This option is most often used.
- Sectional. Not in demand so often, they are constructed in the presence of stone or brick pillars. The length of the section depends on the terrain features. Accurate calculations of span lengths make it possible to reduce the amount of waste from cutting corrugated sheets.
In addition, fences are divided into:
Fundamental. The pillars are included in the strip foundation design. It increases the wind resistance of the fence. The gap under the fence is completely covered with profiled sheets, and dust from the street will not blow into the area. Construction time and costs for its arrangement are increasing. This is how permanent façade fences are built.
Supported - fences are mounted on support posts that are not connected to each other. This results in significant cost savings. However, the high height of the building significantly reduces the reliability of the fence. But it ensures good circulation of soil and water on the surface of the earth. These advantages are especially noticeable when building on a slope or on loose, creeping soils, as well as soils with high humidity. Fences between neighboring areas are usually used as support fences.
It is better to determine the type of structure after creating a complete sketch of the construction.
Required materials and tools
To install any type of fence you will need:
- Corrugated sheeting, wave height 8-20mm.
- Fasteners, rivets, screws.
- Sand, gravel, cement.
- Coating against metal corrosion – metal paint.
- Marking ropes, pegs.
- Tools for earthworks(shovels, drill).
- Welding machine, electrodes, fasteners for cross beams.
- Riveting device, drill, screwdriver, cutting devices.
- Supports from profile pipe 60x40 up to 3.5 m long for support.
- Measuring tools (tape tape, level, plumb line).
- Cross members – profile pipe 40x20.
- Ruberoid, another insulating material that prevents concrete and earth from mixing in the holes.
Measurements and a sketch of the fence allow you to calculate required amount materials.
Watch the video! Mistakes when installing a fence
Carrying out work according to plan
Step-by-step instruction How to create a fence from corrugated sheets is suggested below. Installation involves 6 stages of work. It is better to study these steps in advance so that make a fence from corrugated board strong and reliable.
Marking
The future location of the fence is marked with pegs that are driven into the corners around the perimeter. After measuring the distances, you can determine the number of openings. The locations of the supports are marked with pegs. You will need to designate a place for a gate or wicket. Pegs are driven in there too.
Advice! For sectional fence better width make spans a multiple of the sheet dimensions. For solid – the standard 2.5 – 3 meters is suitable.
Installation of a fence on a strip foundation, including a stepped type, requires the installation of levels. Marks are placed on appropriate posts installed in the corners along the perimeter, and on inclined areas - at the beginning and end of each section.

The marking of the territory is carried out independently; there is no need to use any complex equipment.
Creating a Project
To create a plan, the perimeter of the territory, slopes are measured, and obstacles that cannot be moved or removed are identified. These could be pipelines, electrical poles. According to the measurements taken, a fencing plan is drawn. Depending on the type of soil, terrain features, and economic opportunities, choose:
- foundation type;
- rack design;
- material for pillars and additional structures (cross beams, connecting brackets, mortgages);
- types of fasteners used, finishing.
Drawing up a detailed sketch allows you to carry out comprehensive calculations and determine the number of necessary components.
Installation of supports
The following types of racks are used to ensure strong fastening of sheets:
- regular tubing pipe diameter from 73 mm to 89 mm or profiled 60x60 or 80x80 mm;
- pillars made of reinforced concrete or wood;
- brickwork;
- screw piles.
Installation of profile pipes as supports
In the designated locations, holes are drilled with a depth of 1 to 1.5 meters and a diameter of 20 to 40 cm.
Comment! At high altitude fence from 2 meters, the depth of embedding supports should increase by 35% underground and 65% above the ground.
The racks are placed in one line using a plumb line. Verticality and linearity eliminate possible difficulties in joining corrugated sheets.
 The supports will need to be concreted. Before pouring the solution, the edges of the pits are covered with roofing felt, you can apply plastic film. This will prevent mixing of concrete and earth and maintain high structural strength. The solution is poured to a depth of 1 meter, the rest is covered with sand and compacted. This method helps compensate for soil deformations when temperatures change.
Important! Concrete always has air pockets that need to be removed. The air is removed by bayoneting with available tools. It is permissible to use reinforcement or a metal corner.
The remaining types of work can be performed only three days after pouring the concrete.
Before installing the profile pipe requires:
- Make a top cap to prevent rainwater from entering. You can use plastic plugs and decorative tips. It's a good idea to just weld the top of the counter.
- It is better to immediately coat the supports with paint of the required color.
- It is necessary to weld metal heels (a square of sheet iron) onto the base of the supports. This will simplify the work of aligning the pillars. The fastening will be more reliable and reduce the draft.
Installation of reinforced concrete or wooden poles
 Installation of wooden or reinforced concrete supports is carried out in the same way as when installing a tubing or profile pipe. Wooden supports short-lived.
Reinforced concrete pillars are too heavy weight, the crossbars are difficult to attach to them. It is better to install such elements on a strip foundation.
Installation of brick pillars
Installation of brick pillars requires the presence of a strip foundation, since the weight of the structure is very large, the pressure on the ground increases. Such poles are difficult to install and require significant costs and additional waterproofing.
The installation process repeats the installation of a profile pipe, which is later covered with brick.
Important! When installing brick pillars, it involves installing metal mortgages, which are used when attaching the transverse elements of the fence.
Watch the video! Fence made of corrugated board. Very a budget option
Fence on screw piles
Installation advantages:
- creation of a traditional foundation;
- can be used on any soil;
- no need to use special equipment, high installation speed.
Proper anti-corrosion treatment ensures a fence service life of more than 50 years.
However, there are also disadvantages. Screwing into rocky soils disrupts protective covering, visual detection of damage is impossible. The posts are attached to the piles by welding. Its implementation requires certain qualifications and experience. Installation of posts on piles using screw connections is carried out after welding the flanges.
Installation of cross beams
 The next stage of fence installation is the installation of transverse joists. This is done using welding, clamps, bolted connections. Electric welding is the most efficient reliable way. The logs are placed parallel to one another and to the base of the structure. For a fence less than 1.7 m high, 2 logs are required; if the height is greater, you will need to install 3 logs.
The created structure is a frame. Everything is painted with anti-corrosion paint. Particular attention is paid to welding areas to prevent corrosion.
In addition to welding, it is allowed to use:
- Brackets, clamps for connecting joists to supports.
- The brackets allow you to fasten the logs to the pole (end-to-end at the front, with holder pads, at the side of the supports).
Installation of corrugated sheets
The fifth stage is attaching the corrugated sheets to the transverse strips using screws. The joining of the canvases is usually done with an overlap.
Important! One edge of the sheet should have a full wave, the other - not a full one. The joint is made in one direction only. This point is important if the sheet is marked and cut gradually during installation. The joint should be secured with rivets.
 Self-tapping screws are screwed into the lower front wave:
- Loose screw tightening will cause leakage.
- a self-tapping screw that is tightened too tightly causes deformation of the gasket and destroys the metal coating.
- A screw placed crookedly will tear the metal, causing a loose seal on the gasket, which can lead to premature corrosion.
Correctly, the screw is tightened at an angle of 90 degrees in order to evenly press the gasket without touching the metal surface. Self-tapping screws are allowed to be attached every third wave.
Completion of installation work
The end of construction will be the installation of a U-shaped strip on top of the fence. The element is optional, but creates a smooth edge. The bar is secured with clamps.
Some features of installing a fence made of corrugated sheets
Uneven areas or heaving soils require special techniques.
Heaving soil
 This aspect is taken into account by those who want to install sectional or combined fences with heavy stone pillars. Sandy loams and loams pose a danger. In other words, soil that retains moisture during frost has a heaving effect. The soil rises sharply when it freezes. The foundation behaves like plasticine.
The problem can be solved in various ways:
- Complete removal of soil to the freezing depth and its replacement with sand. The soil around the foundation must also be removed.
- Installation of the foundation below the freezing point. But the pressure of the heaving will remain on the walls of the base.
- Lightweight structures can be installed if the foundation is insulated with special material. The insulation is laid at a width equal to the freezing depth.
- A good solution is drainage. It is a trench deep equal depth foundation. The bottom of the trenches must be equipped with a pipeline wrapped in filter material. The trench is dug at a distance of 30-50 cm from the foundation. The finished drainage is covered with crushed stone.
Uneven areas
If leveling the area is too expensive, you can install a fence on uneven ground. An area with sharp slopes can be fenced off with sectional or combined fences that fit perfectly into the terrain. It is necessary to calculate the height and width of each span. Aesthetics will be ensured by a stepped foundation.
On a slope of less than 35 degrees, it is allowed to make fence spans 2.5 meters wide. If the slope is uneven, you can make a fence from spans of different lengths. Increasing the slope requires reducing the length of the section. On uneven areas It is better to install fences on a strip foundation.
- The connection of sheets at an angle must be closed corner strips, which are obtained on bending equipment.
- Working with corrugated sheets requires the use of work gloves, since the material has sharp edges.
- Sheets are cut using metal scissors. The edges need to be painted over. A grinder cannot be used; it destroys the decorative coating.
Features of care
There is practically no need to maintain a fence made of corrugated sheets with a polymer anti-corrosion coating. The polymer serves as excellent protection. The barrier along the road can be damaged by stones and gravel. Places of damage must be periodically painted over with a special paint.
Watch the video! How to make a fence from corrugated sheets with your own hands
Every homeowner strives to protect their site from prying eyes and thieving hands, and increasingly, profiled metal sheets are chosen as the main material for the fence.
It is popularly known as corrugated sheet or corrugated sheet and is distinguished by its affordable cost and ease of use - any owner can build a fence from it.

Why professional sheet?
Corrugated sheeting is a steel profiled sheet with a zinc or aluminum-zinc anti-corrosion coating. The type of rolled profile and the thickness of the original sheet determine its functionality and purpose.
Thus, for the construction of a fence, the most optimal, durable and inexpensive profiled sheets of the “C” or “MP” series are most often chosen.

Along with being economical, fencing made from corrugated sheets has a number of advantages:
- High installation speed;
- The coating is continuous, without cracks or holes;
- Any fence height;
- The presence of a sharp protective edge;
- Durability;
- Aesthetic appearance, big choice colors and textures;
- Easy sanitation;
- Silencing street noise.
Materials and tools
The main advantage of a fence made of corrugated sheets is the limited number necessary tools and materials, which allows you to install it on our own, without involving a construction team and without hiring special equipment.

So, optimal material For the future fencing, it will be wall or universal corrugated sheeting with a wave height of 18 to 21 mm.

For aesthetics and long service life of the fence, you should choose a coating in advance: economical polyester, resistant to local damage, matte polyester, or the most durable pural, plastisol or polyvinyl fluoride.

The frame for corrugated sheeting is made of metal pipes, preferably of a rectangular profile with a cross-section of 60x60 mm and a wall thickness of 3-5 mm. It is recommended to use jumper logs for the strength of the structure.

You will also need a concrete solution, sand and gravel backfill, and among the tools: mortar shovel, tape measure, welding machine, construction level, cord or rope, self-tapping screws, drill, grinder and screwdriver.
We measure and calculate
First of all, the perimeter of the site is measured, necessary calculations and all required materials are prepared. The number of profiled sheets is calculated by dividing the perimeter of the fence by the installation width of the sheet, and the resulting result is rounded up.

The length of the sheet varies depending on the wishes of the customer and can reach 3 m. When planning the height of the fence, a mandatory ten-centimeter distance from the ground is taken into account.

The length of the metal support pipes is determined by the sum the following indicators: depth of the drilled well and height of the fence. The number of posts is calculated by dividing the perimeter of the fence by 2-3 m - the recommended distance between supports.
Fence installation
Step-by-step photographs of the construction of a fence from corrugated board show the entire simple algorithm.


The most simple circuit Construction of a fence from corrugated sheets does not require a solid foundation, which makes it the fastest and most affordable.

Below is the procedure:
- For each reference metal pipe a well is drilled with a depth of 0.5 to 1.3 m, depending on the characteristics of the soil.
- A concrete solution is prepared from M400 cement, sand and fine gravel in a ratio of 1:2:4.
- The pipe is aligned according to construction level, fixed concrete mortar and sprinkled with a mixture of sand and gravel.
- Horizontal jumpers are welded to the supports, and an indent of 25-30 cm is made from each edge of the fence.
- The corrugated sheeting is attached to the crossbars with self-tapping screws or other fastenings through each wave.
- Each sheet should overlap the adjacent one by one profile wave.

Note!

Every owner can fence his property with a fence made of corrugated sheets with his own hands.

The lightness and reliability of the design, the minimum required tools and a simple algorithm have a pleasant effect on the speed, quality of construction and saving the family budget.

Photo of a fence made of corrugated sheets with your own hands


Note!


Note!


