The benefits of essential oils are undeniable both for a person’s physical health and for his psycho-emotional state. But in order to enjoy your favorite aroma for as long as possible, you will need not only a bottle of ether, but also an obligatory attribute of this magical therapy - an aroma lamp. Don't have such an accessory at home? No problem! Do useful device It won’t be difficult to do it yourself from scrap materials - just desire, ingenuity and some unnecessary trash.
The aroma lamp is simple design, which consists of a container with essential oil And heating element. This device, in addition to aromatic, can serve as gentle, pleasant lighting, as well as interior decoration. Modern products are made from clay, glass, ceramics, metal and other natural materials.
When the oil is heated, esters begin to evaporate, the aromas of which spread throughout the room, plunging those present into a special state, depending on the functionality of the selected scent.
Modern aroma lamps come in several types:
- the classic device consists of a bowl of water and oil, which is heated by a burning candle;
- an electric lamp involves using a regular light bulb as a heating element;
- An ultrasonic device involves evaporating the aromas of the oil that is supplied to the diffuser.
How to make an aroma lamp with your own hands at home
You can make a simple aroma lamp yourself from scrap materials. In terms of functionality, it will not be inferior to a factory accessory, and you can work on its attractive appearance, if desired, using your imagination.
Important: the material for the aroma lamp must be fireproof to avoid sudden fire.
Regardless of the material from which the lamp will be made, it is important to adhere to some recommendations:
- the oil container should have a volume of 30–40 ml (2 tbsp);
- the bowl should be easy to wash;
- the distance from the fire to the oil reservoir is about 8–10 cm (so that the water does not boil, but is hot).
From a tin can
The most affordable, fastest and affordable way enjoy the aromas of your favorite essential oils - make an aroma lamp from tin can, which can be found in every home. An oblong tall jar, for example, an olive or beer jar, is suitable for this purpose..
In addition to the main component, the work will require:
- marker;
- construction knife;
- awl;
- small candle;
- container for oil (bowl or salt shaker);
- glue and decorations (shells, sea stones, etc.).
The following procedure should be followed:
- First you need to make a hole through which the candle will be placed inside the lamp. To do this, you need to draw cut lines on the side of the jar with a marker (for example, in the form of an arch), taking into account the size of the candle. The bottom of the arch should be level with the bottom of the jar.
- By using construction knife Carefully cut out the opening for the candle.
- In the upper part of the can, use an awl to make holes for the combustion products to escape (can be in the form of a pattern). Preliminary drawing of the pattern with a marker will make the task easier. Small holes in the form of a pattern along the entire side wall of the can will become creative decoration products.
- Using the prepared decorations and glue, decorate the lamp according to your preference.
- Place an oil container of suitable diameter on top of the jar. Fill it halfway with water and add a few drops of prepared essential oil.
- Place a lit candle at the bottom of the jar.
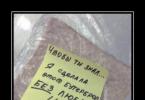
One day, in a moment of creative inspiration, I was struck by the idea of making an aroma lamp with my own hands. I don’t have the patience or opportunity to spend a lot of time and effort on crafts, so I chose the simplest method, which is described above. I even managed to make it even simpler. By simply cutting off the bottom, I got a through jar, which you just need to place on top of a burning candle. In this case, the candle should be smaller in diameter than the jar. I used a steel cocotte maker as a bowl for the butter. All that remained was to make holes in the side wall of the jar to allow smoke from the fire to escape. Here I gave free rein to my imagination so that my aroma lamp would also look attractive in dark room. The whole job took me no more than half an hour. And I get pleasure from the emitted smell every day.
Video: master class on making a lamp from a tin can
From clay
To make a product from clay, although not very complicated, you will have to spend a lot of time, effort and diligence. This process is quite labor-intensive, but it will be rewarded with exclusive, beautiful and useful item interior Here you can give free rein to your imagination and reproduce exactly the shape, color and design style that you like the most.
To work you will need:
- modeling clay;
- foil;
- special knife for clay;
- paints;
- water.
The principle of operation is reminiscent of modeling from plasticine, which everyone went through in kindergarten and school, but still working with clay has its own characteristics. The instructions for sculpting a standard-shaped clay aroma lamp look like this:
- Lay out the foil and work on it.
- Make a bowl about 10 cm high with a hole on the side to place the candle inside. You can sculpt from a solid piece, or you can lay out flagella in rings one on one, which are finally leveled to smoothness with the help of water.
- Separately, create a plate from a small piece - a container for oil.
- Using a special knife (if you don’t have one, you can use a toothpick) apply a relief design or pattern. You can apply volumetric shapes.
- Then the product should be dried. To do this, you first need to put the figure outside, and after drying, place it in the oven, increasing the temperature by 30 degrees every 15 minutes. After turning off, leave the lamp in the oven until completely dry.
- Now you can paint the product in the desired color.
Using the same principle, you can sculpt a product from salt dough: After drying, it turns to stone, creating the effect of a clay figure. To prepare such a mixture, you need to take a glass of fine salt and flour, add 5 tbsp. spoons sunflower oil or hand cream, mix well. After this, start kneading the mass, gradually adding water until homogeneity and elasticity are achieved (about 1–1.5 cups of water should be used). To get a colored dough, you can add food coloring or natural juice to it. You need to dry a craft made from salt dough in the same way as clay dough in the air, and then in the oven.
Photo gallery: Modeling a clay product
Modeling clay can be purchased at a store for children's creativity The bowl should have an opening on the side for a candle. The bowl can be laid out in flagella one on one. With some effort, you can get an exquisite piece of furniture
Express method of aromatherapy session using orange
If you not creative person or you simply lack inspiration, but want a fragrant break right now, here is a simple way that will help you relax. An ordinary orange from the supermarket will come in handy for an aromatherapy session.
To create a simple version of a fragrant lamp, you will have to work very little:
- Cut the orange exactly in half.
- Use a spoon to separate the peel from the pulp.
- Cut a hole (or several small ones) of any shape in one of the halves.
- Lubricate with your chosen ether inner side peels.
- Place a lit candle in the whole half and cover with the holey part.
To add some zest, you can decorate the peel with clove buds, which will not only improve appearance, but will also add a special light note to the aroma.
Safety regulations
Using an aroma lamp, we are dealing with fire, so we must remember the safety rules in this process:
- do not leave a burning lamp unattended;
- to protect furniture, use an additional fireproof stand;
- choose a place for the device away from curtains and other flammable objects;
- Do not spray deodorants, hairsprays, air fresheners or other flammable products nearby;
- Place the lamp out of the reach of children.
The process of making an aroma lamp at home is simple. And if you have good imagination, then you can find many options for creating a product. The main thing is to follow safety rules when handling fire, and also not to get carried away by frequent inhalation of ethers.
Modern man is constantly in a state of stress. This, as well as poor ecology, affects well-being and susceptibility to disease. Aromatherapy helps correct the situation. Essential oils can be used different ways. A very convenient method is to use an aroma lamp. Another advantage is that you can make the lamp yourself.
Aromatherapy is one of the oldest methods of relaxation known to mankind. There is an opinion that special incense burners appeared many centuries ago. Now, as then, special oils are used in them. Esters, due to their volatility, allow you to purify the air in the room and leave behind a pleasant aroma.
The oils are placed in special lamps. The most common are ceramic. Aroma lamps consist of 2 main parts - a bowl for oil and liquid, as well as an arch. There should be at least 10 cm between them. Otherwise, the liquid in the bowl will boil away too much. The rules for using an aroma lamp are extremely simple. If it is made of ceramics, then you need to additionally acquire small tablet candles. Pour a small amount of water into the bowl and add a very small amount of essential oil. Then the candle is lit and placed inside. It should be located under the bowl.
The most important thing in aromatherapy is to find the right ratio of liquid and oil. It is also important to control the time of aromatization of the room. Before using the lamp for the first time, you need to ventilate the room. Then the windows are closed - there should be no drafts in the room. Usually 2 to 6 tbsp are poured into the bowl. water. The quantity depends on the area of the room. Usually 15 sq. m. need 2 tbsp. Add 3-4 drops of ether to the same area in the bowl.
For the first time, the aromatherapy time should not exceed 20 minutes. By repeating the procedure regularly, it can be increased to 2 hours. It is not recommended to exceed this time. The thing is that adverse reactions are possible with such a long procedure. At the very least, you may get a headache.
It is worth using an aroma lamp in many cases. It will not only help create a romantic atmosphere. Essential oils also help relieve stress and relax. To do this, you need to choose the scent that suits you. Also use the lamp during periods of epidemics of viral diseases or when someone is sick at home. Useful material evaporate when exposed to fire. As a result, they will remain in the air of the room for some time, clearing it of germs.

Now let’s take a closer look at which essential oils to choose for different occasions:
- Elimination unpleasant odors spoiled food or tobacco - opt for mint, lemon oils. You can also choose rosemary ether.
- Diseases and their prevention - if there is a person at home with the flu, you can treat the air with an aroma lamp with tea tree. Eucalyptus also works well. Remember that these oils are very concentrated. Therefore, they must be used with caution. More gentle, soft options are bergamot or tangerine.
- For relaxation, the delicious essential oil of ylang-ylang is suitable. The smell of orange or tangerine will lift your mood. To create a special atmosphere at home or on a romantic date, you should choose rose and neroli.
Aroma lamp: photos and types


Aroma lamps are not only ceramic. Modern technologies allow you to make devices similar in action. So, you can find electric aroma lamps on sale. In this case, essential oils evaporate when heated from the mains. More modern options– devices that work like USB flash drives. Such aroma lamps are simply connected to a computer.
A fairly common device is a thermal fragrance. It can be produced in the idea of small boxes with electronically controlled and a container for ethers or their mixtures with water. The flavoring device allows you to set the temperature and heating time. You can also use the device to preset the start of aromatherapy.
The Oasis thermal fragrance also has the function of dispersing oil particles. This happens thanks to the built-in fan. The Accord electronic flavoring device has 2 channels for oils. This allows you to create a variety of aromatic compositions. The disadvantage of the above devices is their high cost.
DIY aroma lamp: master class
There are many ways to create aroma lamps. Some of them are so simple that they won’t take you much time. An excellent option is a lamp-lamp made of oranges.

You will need:
- Orange – 1 pc.
- Essential oils
- Tablet candle
Manufacturing instructions:
- Take a large orange. Cut the fruit into 2 equal halves exactly in the middle. Using a knife or gentle movements with your fingers, remove all the pulp. Try not to leave any pieces inside.
- At the top of the hemisphere, draw a star with a pencil. Then we cut it out with a knife. The inner walls of the orange should be lubricated with essential oil. The lamp-lamp is almost ready. Next, light the candle. Then cover it with half an orange. The star should be located on top. Remember that the workpiece must be large enough. Otherwise, the candle flame may set it on fire.
Dr. an option is an aroma lamp in the form of a jar.

You will need:
- Beautiful small jar
- Fir branches
- Small bumps
- Cinnamon sticks, clove stars
- White candles
- Wick (or cord)
- Lid
Manufacturing instructions:
- Place all the aromatic ingredients beautifully in the jar. If you don’t have them, you can use a mulled wine mixture. Instead of fir cones, put orange peel. It can be beautifully carved into the shape of stars or crescents.
- Take a thin candle and break it into small pieces. Then put them in the pan. Take a larger container. Pour water into a larger saucepan. Then place a container with a broken candle in it.
- Place a large saucepan over medium heat. Heat to a boil, and then reduce it. Leave on the stove until the paraffin melts. In the meantime, cut off a piece of the future wick. In length it should be approximately 2/3 of the height of the can.
- We lower it into the container so that the small tip protrudes above its edge. At the same time, pour hot paraffin into the jar. Let the mixture harden. Take the lid and make a hole in its center. We screw it on with the lid, pulling the wick through the hole. The aroma lamp jar is ready! All that remains is to light the fuse.
More easy way aromatization of premises - creation of special sachets. Usually they are filled with soda, into which a little ether is dripped. Sometimes dried lavender is poured into a sachet. Then the bag is placed in a beautiful case. The top is decorated with lace or any other method. Sachets are often used to add a fresh scent to stale laundry.
DIY aroma lamp – great way master the basics of aromatherapy. Its use helps prevent depression, infectious and viral diseases. The aroma lamp also creates amazing results at home cozy atmosphere. It can be made by pouring paraffin into various fragrant herbs and spices in a beautiful jar. Aroma lamps are also made from clay and tin containers.
Reasons why you should make your own aroma lamp:
- This will add comfort, warmth and happiness to your home.
- Allows you to enjoy the process of creating a lamp that will turn out 100%.
- A pleasant aroma wafting throughout the house.
Are you ready for magic?
5 steps to make an aroma lamp from a jar
Materials for making a lamp from glass jar:
- Wick, paraffin oil.
- Vegetable oil: 1 tablespoon. Olive, sunflower and other oils will increase the duration of the candle up to two hours.
- Glass jar 0.5 l, water.
- Awl.
- Favorite aromatic oil: lavender, ylang-ylang, patchouli, cinnamon, etc.
Algorithm for making an aroma lamp:
- Place petals, spices, cones in the bottom of a glass jar and fill 2/3 with water.
- Pour some paraffin and vegetable oil from above, approximately 0.5 cm.
- Add 3-5 drops of aromatic oil.
- Close the jar with a lid, make a hole in it and stretch the wick so that it sinks 2/3 into the oil.
- Screw the lid on tightly and light the wick. Enjoy the aroma and comfort.

6 steps for a flour lamp
Secret ingredients for the flour aroma lamp:
- Wheat flour 1/2 cup 300 ml.
- Water to knead the dough.
- Vegetable oil 1/4 cup 300ml.
- Cotton thread.
- Glue.
- Paint for decorating products.
- Paint brush.

Algorithm of actions:
- Gradually add water to the wheat flour.
- The dough should be slightly dense and not too soft.

- Divide the dough into 3 parts. Give each part the shape of a round boat with an elongated bow, as in the picture.

- Grease the baking dish. Preheat the oven to 200 degrees Celsius. Place the future lamp in the mold. Bake for 15 minutes. Let cool. Decorate the lamps in your favorite colors. Let dry.
- Dip cotton thread into oil. Fill an oil lamp with oil such as coconut, olive or castor. Add a few drops of aromatic oil. Leave the wick on the surface of the lamp, placing it in a special hole.

- Light the wick with a match. To reuse the lamp, use tablet candles.

An aroma lamp for essential oils is not only beautiful item interior design, but also a useful accessory with which you can create a unique atmosphere in your home and even improve your health a little. Today their choice is very wide, and they differ in material and “coverage area”. We will tell you how to quickly make an aroma lamp with your own hands.
We have prepared several for you step by step instructions with photos that will help you learn how to make this accessory from scrap materials. Some things will be very simple, but with other master classes you will have to tinker a little. We advise you to choose one or another method of creating a lamp depending on how often you plan to use it and how often you are willing to change aroma lamps.
The operating principle of aroma lamps is always the same. The accessory should have a bowl into which you can pour water and add a few drops of essential oil to it. There will always be a candle at the bottom of a homemade aroma lamp. Its function is to slowly heat the liquid. The water will gradually evaporate. Due to its density, the oil will always remain above the water, and the steam will carry the aroma into the surrounding space.
Remember that oil is poured at the rate of 1 drop per 5 square meters room, but you should not add more than 15 drops to the aroma lamp. An aromatherapy session should last no more than an hour.
Option number 1: from a tin can
This method of making an aroma lamp with your own hands is quite simple. It is especially good if you are not entirely sure that you really want to use such an accessory. It happens that not everyone likes aromatherapy: some people get headaches from essential oils. So an aroma lamp from a tin can is a great budget find to check this out.

We will need:
- soda can;
- sharp knife;
- candle with tray.
The manufacturing process is very simple. You need to make a “window” in the jar. Take a look at this helpful video tutorial that explains this process in detail.
Be careful both when working with the jar and when using your express aroma lamp. It is advisable not to turn this accessory into a reusable one. However, it is so easy to make that you can make a new candlestick for each new aromatherapy session.
Option number 2: from a glass jar
And this aroma lamp will appeal to those who primarily value aesthetics. The aroma from it will not be as strong as when using standard accessories for heating essential oils. And yet, with the help of this aroma lamp you can fill your room with subtle pleasant smells.

We will need:
- transparent jar with a metal lid;
- coniferous branches, cones, nuts, etc.;
- wick;
- paraffin oil.
Place at the bottom of the jar decorative material. It needs to be filled with paraffin oil.
We make a small hole in the lid. The wick should fit into it, but so that it does not roll into the jar.
That's all - our aroma lamp is ready! When you screw on the lid, the wick will be immersed in the oil and soaked in it. Set it on fire - from heating the oil, infused in the pine-herbal mass with nuts and cones, will fill the room with a very thin pleasant aroma.

The decor described above can be replaced with any other (even non-natural). In this case, you will need to drop about 10-15 drops of your favorite essential oil into the paraffin oil. The effect will be the same.
Option number 3: made of clay
If you like labor-intensive master classes and want to make an aroma lamp with your own hands that will serve you for many years, choose this lesson. You will have to tinker a little to make the craft really beautiful, but you can sculpt it into any shape and paint it in your favorite color.

We will need:
- modeling clay;
- clay knife;
- candle.
You need to work on foil so as not to stain the surfaces. Fill a bowl with water first to wet your hands from time to time. Modeling an aroma lamp from clay will be reminiscent of working with plasticine, so even children can cope with this task.
The first step is to sculpt the bowl. Its height should be approximately 10 centimeters. You need to cut a hole on the side into which we will insert the candle.
You can sculpt from a single solid piece or roll the clay into flagella and stack them on top of each other. If you choose the second method, dip your hand in water from time to time to fasten the parts together.
Using a knife for working with clay, we make several patterns in the form of carvings on the lamp or apply additional decorations cut from small pieces of clay. That is, at this stage we decorate our future aroma lamp.
The product is dried in several stages. Leave it to “set” for about an hour and a half. Then place in the oven at 30 degrees. Every 15 minutes, increase the temperature by another 30°. When the future aroma lamp is baked, turn off the oven, but leave the craft inside for another 15 minutes.
Let the aroma lamp cool. After 3-4 hours you can paint it, but do not add paint to the bowl, which will be filled with the fragrant mixture.
The dried lamp will be ready for use. All you have to do is insert a flat-bottomed candle into it and light it so that your room smells fragrant and you get a relaxation session or beneficial inhalation with essential oils.

Choose any of the described methods to create your own aroma lamp at home and enjoy your favorite scents at any time. The first lamp is an express option for beginners and those who are a little lazy to create something complex. Well, the other two will help you make aroma lamps with your own hands that you won’t even be ashamed to give to your loved ones and would be a pleasure to place at home.
Views: 4,697
Modern man is constantly in a state of stress. This, as well as poor ecology, affects well-being and susceptibility to disease. Aromatherapy helps correct the situation. Essential oils can be used in many ways. A very convenient method is to use an aroma lamp. Another advantage is that you can make the lamp yourself.
Aromatherapy is one of the oldest methods of relaxation known to mankind. There is an opinion that special incense burners appeared many centuries ago. Now, as then, special oils are used in them. Esters, due to their volatility, allow you to purify the air in the room and leave behind a pleasant aroma.
The oils are placed in special lamps. The most common are ceramic. Aroma lamps consist of 2 main parts - a bowl for oil and liquid, as well as an arch. There should be at least 10 cm between them. Otherwise, the liquid in the bowl will boil away too much. The rules for using an aroma lamp are extremely simple. If it is made of ceramics, then you need to additionally acquire small tablet candles. Pour a small amount of water into the bowl and add a very small amount of essential oil. Then the candle is lit and placed inside. It should be located under the bowl.
The most important thing in aromatherapy is to find the right ratio of liquid and oil. It is also important to control the time of aromatization of the room. Before using the lamp for the first time, you need to ventilate the room. Then the windows are closed - there should be no drafts in the room. Usually 2 to 6 tbsp are poured into the bowl. water. The quantity depends on the area of the room. Usually 15 sq. m. need 2 tbsp. Add 3-4 drops of ether to the same area in the bowl.
For the first time, the aromatherapy time should not exceed 20 minutes. By repeating the procedure regularly, it can be increased to 2 hours. It is not recommended to exceed this time. The thing is that adverse reactions are possible with such a long procedure. At the very least, you may get a headache.
It is worth using an aroma lamp in many cases. It will not only help create a romantic atmosphere. Essential oils also help relieve stress and relax. To do this, you need to choose the scent that suits you. Also use the lamp during periods of epidemics of viral diseases or when someone is sick at home. Beneficial substances will evaporate under the influence of fire. As a result, they will remain in the air of the room for some time, clearing it of germs.

Now let’s take a closer look at which essential oils to choose for different occasions:
- Eliminating unpleasant odors of spoiled food or tobacco - opt for mint and lemon oils. You can also choose rosemary ether.
- Diseases and their prevention - if there is a person with the flu at home, you can treat the air with an aroma lamp with tea tree. Eucalyptus also works well. Remember that these oils are very concentrated. Therefore, they must be used with caution. More gentle, soft options are bergamot or tangerine.
- The delicious essential oil of ylang-ylang is suitable for relaxation. The smell of orange or tangerine will lift your mood. To create a special atmosphere at home or on a romantic date, you should choose rose and neroli.
Aroma lamp: photos and types


Aroma lamps are not only ceramic. Modern technologies make it possible to make devices similar in operation. So, you can find electric aroma lamps on sale. In this case, essential oils evaporate when heated from the mains. More modern options are devices that work like USB flash drives. Such aroma lamps are simply connected to a computer.
A fairly common device is a thermal fragrance. It can be produced in small boxes with electronic control and a container for ethers or their mixture with water. The flavoring device allows you to set the temperature and heating time. You can also use the device to preset the start of aromatherapy.
The Oasis thermal fragrance also has the function of dispersing oil particles. This happens thanks to the built-in fan. The Accord electronic flavoring device has 2 channels for oils. This allows you to create a variety of aromatic compositions. The disadvantage of the above devices is their high cost.
DIY aroma lamp: master class
There are many ways to create aroma lamps. Some of them are so simple that they won’t take you much time. An excellent option is a lamp-lamp made of oranges.

You will need:
- Orange - 1 pc.
- Essential oils
- Tablet candle
Manufacturing instructions:
- Take a large orange. Cut the fruit into 2 equal halves exactly in the middle. Using a knife or gentle movements with your fingers, remove all the pulp. Try not to leave any pieces inside.
- At the top of the hemisphere, draw a star with a pencil. Then we cut it out with a knife. The inner walls of the orange should be lubricated with essential oil. The lamp-lamp is almost ready. Next, light the candle. Then cover it with half an orange. The star should be located on top. Remember that the workpiece must be large enough. Otherwise, the candle flame may set it on fire.
Dr. An option is an aroma lamp in the form of a jar.

You will need:
- Beautiful small jar
- Fir branches
- Small bumps
- Cinnamon sticks, clove stars
- White candles
- Wick (or cord)
- Lid
Manufacturing instructions:
- Place all the aromatic ingredients beautifully in the jar. If you don’t have them, you can use a mulled wine mixture. Instead of fir cones, put orange peel. It can be beautifully carved into the shape of stars or crescents.
- Take a thin candle and break it into small pieces. Then put them in the pan. Take a larger container. Pour water into a larger saucepan. Then place a container with a broken candle in it.
- Place a large saucepan over medium heat. Heat to a boil, and then reduce it. Leave on the stove until the paraffin melts. In the meantime, cut off a piece of the future wick. In length it should be approximately 2/3 of the height of the can.
- We lower it into the container so that a small tip protrudes above its edge. At the same time, pour hot paraffin into the jar. Let the mixture harden. Take the lid and make a hole in its center. Screw the lid on, pulling the wick through the hole. The aroma lamp jar is ready! All that remains is to light the fuse.