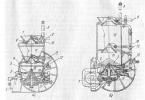
Battery installation
If the house is beautiful, but cold, it will not be very comfortable to live in it. Therefore, the assembly of utilities is a very responsible business. If it is carried out independently, experts recommend first studying all the installation features in maximum detail. We will talk about how to connect a radiator and which circuit to choose for maximum heat transfer.
Before talking about the options for connecting radiators, it is worth dwelling on the existing heating schemes, choosing the most successful place for installing the radiator, as well as describing the ways of circulating the coolant
Heating schemes
To service apartment buildings and private houses, two heating systems are actively used today - one-pipe and two-pipe.
The one-pipe scheme assumes the supply of hot coolant from the top of the house, and then its distribution among the heating devices installed in each apartment. This system has one major drawback. It does not allow you to regulate the temperature generated by heating devices without additional installation of special devices. And one more significant minus - having reached the lower floors, the coolant noticeably cools down, so there is not enough heat in the apartments.
The two-pipe system is completely devoid of such moments. This is a more efficient scheme from existing heating systems. Indeed, in it, hot water is supplied to the battery through one riser, and then through the other - the return line - goes back into the general scheme. Separate batteries are connected to the system in parallel, therefore, in each heater, the coolant temperature is approximately the same. It can be adjusted by installing a thermostat on the radiator. And this is another advantage of such a heating organization.
What is important to consider when choosing a place to install a radiator?
When choosing a place for connecting the battery, it is important to take into account that the functions of this device are not only to provide heat, but also to protect the room from the penetration of cold from the outside. That is why radiators are installed in places that are weakest from this point of view - under windowsills. So they cut off the flow of cold air that enters the room through a window or balcony block.
There is a ready-made layout of heating batteries. Mounting distances are determined in accordance with existing SNiP standards. As a result, they allow you to get maximum heat transfer. Therefore, it is worth mentioning them.
Note! Place batteries at a distance of 12 cm from the floor, 10 cm from the windowsill and 2 cm from the wall. It is not recommended to violate these norms.
Additional equipment and methods of circulation of the coolant in the heating system

How to connect the heating correctly
Before proceeding to the description of heating connection schemes, it is worth talking about the equipment that will be needed at the time of its implementation.
The water inside the system can circulate in a natural and forced way. The second option involves connecting a circulation pump. He pushes hot water, helping her to get to the most inaccessible places. In order to do this, the pump must be built into the general system, choosing a place directly at the boiler.
Note! By connecting a circulation pump, we make the heating system volatile. In the event of a power outage, it will not work.
But engineers have long come up with a device that allows you to reconfigure the forced circulation of the coolant to the natural one. This device is called a bypass. In fact, such equipment is a conventional jumper that is installed between the supply pipe and the return pipe. For the system to work without interruption, the diameter of the bypass must be less than the diameter of the main wiring.
Radiator connection diagrams
There are several heating schemes that allow you to connect the batteries to the central line. It:
- Side one-way connection.
- Lower.
- Diagonal.
The first option provides maximum heat transfer, so many people prefer it. When choosing such a scheme, the batteries are connected to the wiring as follows. The supply pipe is connected to the upper side pipe, and the outlet pipe is connected to the lower one on the same side.

Installing radiators
This scheme contributes to an even distribution of the volume of the coolant inside the battery. The latter heats up completely, which means that it gives off heat in greater quantities. Experts strongly recommend choosing this option when the radiator consists of a large number of sections - up to 15 units. It should also be used when all heating devices in a house or apartment are connected in parallel into a single network.
The bottom connection allows the piping to be hidden in the floor. With it, both the inlet and outlet pipes are connected to the lower outlets of the batteries. The system works effectively only at constant maximum water pressure. As soon as it falls, the radiator is half-empty inside, and the heat transfer is reduced by 15%. With this option, the batteries heat up unevenly - their bottom is hotter than the top. And this must be taken into account when choosing a similar connection method.
The diagonal connection assumes the supply of the supply pipe to the upper branch pipe of the battery, and the return branch to the lower one, located on the opposite side. With this option, the battery inside is also filled completely, so the loss of heat transfer is no more than 2%.
How to connect correctly?

Installation of heating radiators
After choosing the wiring diagram, you must install the batteries correctly:
- It is better to hang the radiator from the wall using brackets. In this case, two are attached from above, taking on the main weight load, and two from below, supporting a heavy heater. Note! If a radiator consisting of 12 sections or more is used, an additional bracket is required, which is attached from above exactly in the center of the heaters.
- When fastening, it is advisable to arm yourself with a building level and set the batteries horizontally and vertically. Any misalignment, even the smallest, will lead to the formation of an air lock inside the radiator. It will not allow the device to demonstrate its maximum capabilities.
- The number of sections is calculated not only taking into account the capacities. Models are selected whose width completely covers the space under the windowsill.
- When connecting, it is necessary not to allow the upper supply pipe to bend downwards and the lower discharge pipe upwards. This will also lead to the formation of air jams, but not in the battery itself, but in the pipes. Moreover, it will be extremely problematic to eliminate them.
- If radiators with more than 12 sections are installed, it is better to choose a diagonal connection. Otherwise, it will be extremely difficult to fill the entire volume of the heater with a coolant.
- To achieve maximum heat transfer, experts recommend using a foil shield, which is attached from the back of the device directly to the wall. If this is not done, a significant amount of heat goes to heating the wall, and not the room.
What material to choose for connecting batteries?

Complete diagram of the heating system
Today, in 90% of cases, metal-plastic pipes are used to connect radiators. The bends are attached to the devices by metal welding, and then the wiring is installed using the soldering method. The result is a very strong and reliable connection that looks very aesthetically pleasing.
For greater safety, all the necessary locking equipment is immediately installed. Instead of ball valves, experts recommend paying attention to valves with thermostatic heads. They will make it possible to carry out all the necessary adjustments in automatic mode.
When buying modern radiators, you do not need to think about choosing a kit for a competent connection. The package already includes brackets, radiator fittings, an air vent, and American taps, several connectors, tees, elbows and clamps. Therefore, it will be very easy to make a high-quality connection, taking into account the recommendations given.
Conclusion on the topic
Heating batteries are connected in three ways. The choice of a particular option depends on many factors. It is important to consider the number of radiator sections and the characteristics of heating systems.
So, for example, in the presence of forced circulation, any of three types of connection can be used - both bottom, and diagonal, and one-sided lateral. With natural circulation, pressure surges of the coolant often occur, and the bottom connection in this case is not always effective.
The heating system is necessary in order to provide the most comfortable temperature in the house, which depends on many factors. These include the method of laying pipes, and the number of radiators, and the total length of the system, the area of the house, etc.
And this means that a system is selected individually for each house, so many ask the question - how to properly connect the heating battery?
Connection methods
There are ways to connect heating batteries with your own hands, which can often be found in private houses:
- Unilateral... It consists in the fact that the supply pipe and return pipe are connected from one side to the first section: the straight one is connected to the upper part, and the reverse one - to the lower one.
In this way, uniform heating of all radiators is carried out. However, it is recommended to use this connection when there are many sections or in tall buildings with a parallel connection; - Saddle and bottom connection ideal for a system where the pipes are hidden under the floor. In this case, both main pipes are connected to the branch pipes of opposite sections in the lower part. This method is ineffective, since power losses are within 15 percent;
- Diagonal... It is used when there is a large heating system with an appropriate number of sections. This method of connection produces an even distribution of the coolant and maximum heat transfer from the devices.

Place to connect
In principle, the connection of the heating battery should be carried out in a certain place where it is possible to create protection against the access of cold air from the street and at the same time heat the room well. That is why radiators are often located under windowsills.
At the same time, it is necessary to observe a certain distance from the device to the wall - up to about 5 centimeters, and to the floor - 10 centimeters. If you adhere to these recommendations, then the warm air from the radiator will create a kind of thermal curtain.
Important. The window sill should not obscure the battery or overlap it, as this will significantly reduce the efficiency of heat generation.
In some cases, the radiators are covered with a screen, usually this is done when they are very hot.
The main types of heating systems
Today there is a connection of heating batteries in a private house for two heating systems: one-pipe and two-pipe.
- In the first option, water enters the pipes from above (the tank is on the hill) and thus spreads through the pipes.
This is a fairly common system, but with this option there is no way to adjust the temperature, since this requires additional options. - The second option is that warm water flows through one pipe, and cooled water goes through another. In this case, the batteries are connected in parallel.
Such a scheme for connecting heating batteries is common in cottages and houses. It is characterized by the same temperature of all radiators, and the temperature is controlled in the supply pipe using a thermostat.
In any case, the heating battery connection diagrams can be designed in a vertical or horizontal system. In the first, heating devices are connected to a vertical riser, and in the second, they are connected to horizontal pipelines.
Any scheme for connecting a heating battery can be carried out by connecting pipes with an energy carrier to a radiator using a lower or side path.

Radiator structure
Typically, a standard heater consists of the heating element itself (radiator) and additional parts, as shown in the figure below.

In this case, the installation is carried out when a thermostat is needed in the heat supply system. Since many people connect heating batteries with their own hands, this scheme will be interesting for them.
But before you understand and determine for yourself how to properly connect the heating batteries in your particular case, you need to familiarize yourself with a variety of videos and photos in our site gallery. They will tell you in detail about the pros and cons of a particular system, as well as help you choose pipes and other additional elements.
Naturally, it is better to start installation in the warm season, so that later in the cold season you will not be left without heating. Therefore, prepare everything in advance, buy everything in order to quickly carry out all the necessary work.
The big advantage is that the scheme for connecting heating batteries in a private house can be very different, and you are not in a certain "technical" framework.
Advice!
When replacing batteries, do not forget to install the Mayevsky tap, with which it is easy to bleed air from the system.
And so that the room is not very stuffy, a valve is installed that partially or completely blocks the heat supply.
Shut-off valves
Everyone understands that shut-off valves play an important role when connected, since they not only provide water supply, but also distribute the coolant through the radiator. Control and shut-off valves are located on the return and supply branch pipes. Shut-off valves are required to cut off the water supply to the battery in order to carry out its replacement or repair.

The piping of the heating battery with bottom connection may not imply the installation of a bypass and adjusting devices. Shut-off valves are provided in most two-pipe systems with lateral or diagonal connection. Usually, the instruction requires always easy access to the shut-off and regulating elements, even if the radiators are closed.
Battery selection
This is an important stage in the construction of heating, because the material from which the radiators are made directly affects their heat transfer, and, accordingly, the temperature in the room. Also, you must correctly calculate the number of sections in the room.
According to the material from which the batteries are made, they can be divided into:
- Cast iron;
- Bimetallic;
- Aluminum;
- Steel;
- Copper-aluminum.
Aluminum batteries have a power of about 192 W in one section, and a working pressure of 16 atm. They are distinguished by good heat dissipation and fast heating. They are used in autonomous and central heating systems.
Their main disadvantage is that they are sensitive to the composition of water, so they are quickly destroyed by internal corrosion. Also, these devices are subject to sudden changes in system pressure.

Cast iron batteries have a section power from 79 to 160 W, and a pressure from 10 to 15 atm. They can operate at high coolant temperatures - up to 150 degrees Celsius. Their minus is a lot of weight, and their plus is the usual installation and resistance to various pressure drops.

Bimetallic radiators have a power of about 200 W and a working pressure of about 35 atm. They have a steel core and an aluminum body. Such batteries are often used in offices or apartments with central heating.
Their advantages: lightness, practicality, resistance to the internal environment, high heat transfer. The downside may be a higher price compared to the rest.

Important!
Even if you choose the right battery and calculate the correct number of sections, you should know one piece of advice - the better the thermal insulation of your house, the higher the efficiency of your system.
Conclusion
The installation of heating elements is a crucial step towards creating an efficient heat supply. To carry out these works, it is necessary to calculate everything to the smallest detail and consult with several specialists.
The very procedure for installing a heating battery is reduced to two operations:
- installation of radiators in a specially selected place;
- connecting the battery to the heating system.
Installation of heating radiators
When choosing a place to place radiators, one proceeds from the need not only to warm up the room, but also to create a kind of "thermal curtain", a kind of protective heat shield from the penetrating draft or frosty air blowing from the front door or windows. Therefore, radiators are mounted either on the wall of the "hallway" or under the window.
The designs of radiators on legs are very rare so far (mainly, these are design radiators made of cast iron), almost always the batteries are mounted on the wall. In order for the actual heat transfer to be maximized, it is recommended to leave the distance from the inner wall to the sections no more than 5 cm, and from the floor - up to 12 cm. The radiator should be installed in such a way as to provide free access to valves and taps.
Modern radiators are unified for any type of connection with a riser, having two upper and lower end connection points.
It is important! When installing the radiator on the mounting brackets, it is necessary to control the level of the correct horizontal alignment in order to avoid the appearance of air locks in the future.
After the radiator has been installed, the diagram for connecting the heating batteries to the central heating system is determined. However, it should be taken into account that in high-rise buildings a one-pipe serial connection of heating batteries is used, therefore it cannot be spontaneously replaced with a parallel one without consulting a specialist.
Before deciding on the connection to the heating riser of the house, you need to pay some attention to the type of heating system itself in the house. Currently, there are one-pipe and two-pipe options for organizing the heating of a residential building. It depends on which system is used how to connect the heating battery.
One-pipe heating system
In a one-pipe system, the coolant is fed through a vertical pipe to the series-connected heating radiators, gradually losing its original operating temperature. In such structures, there are no pipelines for the return intake of the spent, that is, already cooled, coolant. At one time, Soviet builders were very happy with this, since a vertical system with only one pipe is easy to install, economical in terms of material consumption (there are no connecting pipes, jumpers and return risers) and easy to maintain. But this simplicity did a disservice to maintenance and the tenants themselves.
Serial connection of radiators is doomed to unequal temperature values on the upper and lower floors of the building and even inside each apartment. Another disadvantage of a one-pipe system is the need to pump high pressure of the coolant in order to ensure uniform heating along the circulation circuit. This leads to frequent accidental leaks and wear and tear of heating equipment.
 Two independent pipelines are used here, one for supplying a hot coolant, the other for receiving a cooled one. They are connected by means of the final device of the system. With such a two-pipe system, the question of how to connect two heating batteries is solved by connecting them in parallel. A two-pipe system does not require such a high coolant pressure as a one-pipe system.
Methods for connecting heating batteries
Distinguish between serial and parallel methods of connecting batteries.
 When connected in series, the radiators are built directly into the heating system, being, as it were, an integral part of it. Pressurized hot water flows through them, preventing the battery temperature from being regulated. Repair and replacement of the battery can only be done when disconnecting and draining the water from the entire system. An emergency situation forces to completely shut off the heating on the entire riser, only then proceed with the repair.
In order to avoid strong cooling of the hot coolant in a system with a serial one-sided connection of radiators, the inlet and outlet pipes are connected with a jumper at the closing section. Then part of the hot coolant with a temperature close to the initial one will pass by to the next heating device. It is impossible to oversight here in determining the diameters of pipelines in all sections. Such a calculated piping is often violated in high-rise buildings by spontaneous dismantling of the lintel, which is completely unacceptable.
When connected in parallel, the radiators are supplied with a coolant through a pipe cut into a common vertical riser. Water is drained from the battery in a similar way. Thanks to ball valves, you can shut off the movement of the coolant for repair work, without creating problems for yourself and your neighbors. The inconvenience of this scheme lies in the insufficient heating of the heating batteries in the case of low pressure in the system, since the main flow of the coolant will flow through the main pipeline.
The battery connection options will depend on their type; for aluminum and bimetallic batteries, parallel connection is used, and for cast iron and tubular batteries, a serial connection is optimal.
Heating radiator wiring
There is no unambiguous criterion on how to correctly connect the heating battery. The unified design of the radiators allows the supply of pipes from the bottom, from the side and from both end sides of the battery. Currently, in addition to metal pipes, metal-plastic, polyethylene and polypropylene pipes are widely used. The most optimal in the complex ratio of price / quality / ease of installation is the connection of the heating battery with polypropylene.
Side connection of radiators
This method consists in connecting the inlet branch (with a hot coolant) to the upper radiator pipe, and the outlet branch to the lower one. In this way, maximum heat transfer is ensured. In the case of using a side one-sided connection for a radiator with a large number of sections, it is necessary to install an extension for the coolant flow, since the last sections do not warm up well. Side connection is the most common arrangement for multi-storey buildings with a central hot heating system.
Bottom connection
It is used in special cases when the heating system is located in the floor. The hot water pipe and the cooled water pipe are connected from opposite sides of the radiator to its lower branch pipes and go vertically into the floor. This scheme loses in efficiency to lateral and diagonal connections.
Diagonal connection
The wiring principle consists in connecting hot water to the upper pipe on one side of the radiator and connecting the return pipe to the lower pipe on the opposite side of the battery. The hot coolant is evenly distributed over the entire volume of the radiator. The circuit is excellent for multi-section radiators and provides rated heat dissipation.
Selecting a kit for connecting a radiator
 If there is a desire to do the decoupling with your own hands using polypropylene or metal-plastic pipes, you must remember that a standard thread (mostly half-inch) is used at the entrance to the radiator on both sides. Therefore, the pipes must be proportionate. The connection kits contain silicone or paranite gaskets, so no special winding is required during installation.
It is important! The abundance of information on how to connect heating batteries often provokes consumers to spontaneously carry and connect their own batteries, without thinking about the consequences for the neighbors in the riser. Without agreement with the specialists of housing and communal services, you can create a lot of problems for yourself and your neighbors.
First you need to decide which steel radiator you need to connect - with a side or bottom connection.
A steel panel heating radiator is connected in the same way as aluminum and bimetallic radiators. A steel radiator with a bottom connection has two outputs at the bottom - supply and return, which should not be confused.
Radiator side connection diagrams
There are three main schemes for connecting pipes to a radiator:

1. Diagonal connection- the most preferable option for maximum heat transfer. In this scheme, the supply pipe must be connected to the upper pipe of one side, and the discharge pipe to the lower pipe of the other side of the radiator. In this case, the heat output at the radiator is maximum. With the reverse connection - the supply pipe from the bottom, and the return - from the top, the heat transfer of the radiator will decrease by 10%.
This scheme is preferable for long radiators and radiators with more than 12 sections. From an aesthetic point of view, the best option would be to lay suitable piping in the wall (in a groove, or behind a false wall).

2. Side one-way connection- the most common case in apartments. In this embodiment, the supply pipe is connected to the upper branch pipe, and the return pipe is connected to the lower one, on the same side of the radiator. In this case, the maximum power is less than in the case of a diagonal connection by 2%. By reconnecting the suitable and return lines, the power is reduced by another 7%.

3. Bottom connection... This option for connecting a radiator is most often used when laying trunk pipelines in the floor or along the wall, when it is not possible to hide the pipes in the gates.
The maximum heat dissipation of the radiator is 7% less than with a diagonal connection.
Steel panel radiator connection with bottom connection
Steel radiators with a bottom connection must be classified as a one-way connection, because all wiring (upper and lower branch pipe) is made inside it.

It must also be remembered that when tying a steel radiator with a bottom connection, the supply and return must not be interchanged... The return pipe is always the first from the near corner (see figure).
All steel radiators with bottom connections are universal, that is, they can be connected through the lower pipes or the second option, plug the lower pipes with plugs and unscrew the upper built-in thermostatic valve. Connect the supply pipeline in the place of the valve, and connect the return pipeline to one of the lower side connections.
How to connect a steel radiator
A steel radiator with side connection is mounted in the same way as any sectional radiator. In most cases, it has an outlet with a 1/2 inch female thread, into which: a plug, a Mayevsky valve and control valves are screwed.

In most cases, steel radiators with bottom connection are tied with copper, metal-plastic pipes or cross-linked polyethylene. To connect pipes to the radiator, as well as to cut off the radiator from the system, the lower connection nodes (angular or straight) are used.
The nut is tightened by 3/4 the external thread of the radiator, the pipe is connected to the lower connection unit through a 3/4 eurocone.

For some steel radiators, the inlet fittings have a 1/2 inch female thread; to connect such a radiator to the bottom connection unit, you must use special 1/2 x 3/4 nipples for Eurocone.
In addition, such radiators can be connected using conventional thermostatic valves.
When it comes to providing a room with heat, then first of all it is about. The comfort in the house depends on it, regardless of whether it is a private house or an apartment. Naturally, in our time, this system should be economically viable. One of the important points with the device is how to connect the heating battery correctly. If they are not placed correctly, the heat consumption will increase significantly. In most cases, radiators are installed under windows so that warm air can be more efficiently combined with the air in the room.
It is necessary to correctly approach the choice of radiators and think over how to connect the heating battery properly. After all, if you don't do it according to the rules, you can get in big trouble. Therefore, during installation, you need to know some parameters:, purity and coolant temperature, and also its design should be considered.
Connecting heating radiators can be conditionally divided into several stages:
- Fastening the radiator to the supporting surface
- Installation work
Let's talk about this in more detail.
Choosing a radiator installation location

A heating radiator in a private house can be installed almost anywhere. It all depends on the owner's desire, his idea of comfort and design. However, it is more expedient to install heating devices "on the way" of heat losses, which will not only reduce their value, but also create a feeling of comfort.
The greatest heat loss in a house occurs through the surface of the windows. Installation of modern double-glazed windows, triple glazing and the use of the latest technologies to reduce the thermal conductivity of glass reduce the level of heat loss, but still the thermal resistance of glass units is much lower than the thermal resistance of the walls.
In winter, at sub-zero temperatures, even in the complete absence of drafts, there is a flow of cold air coming from the window openings. To create comfortable conditions in the room, the window surface is shielded by ascending streams of warm air. For this, heating radiators are installed under the windowsills. Moreover, the width of the heating device should be commensurate with its width (a deviation in one direction or another by 5-10% is considered permissible)
If the installation of radiators under the windows is not enough, they are mounted on the surface of the outer walls.
For normal operation of the radiator and to ensure free circulation of air flows, the heating device must be at least 3 cm from the wall.There must be a distance of at least 10-12 cm between the floor and the radiator, as well as between the upper part of the radiator and the window sill.
Fastening radiators to the supporting surface
Most manufacturers of heating equipment in the technical data sheet of the radiator give comprehensive recommendations for their installation and method of attachment to the base surface. Brackets and all the necessary accessories for the correct installation of the radiator are usually also included in the kit.

The installation of the radiator begins with marking the wall, the surface of which must be completely finished (painted and prepared for installation). It is very problematic to carry out any finishing work under an already installed radiator.

When installing heating devices with a large internal volume and a large mass, for example, cast iron radiators, special requirements are imposed on the quality of the wall and the method of fastening. To ensure greater reliability, cast iron radiators are equipped with an additional support installed on the floor.
Installation of cast-iron radiators only on the floor is not practiced: it is imperative that the heater is mounted to the wall.

It is allowed to install specially designed radiators on the floor (without fixing to the wall surface): most often, the design of radiators is in the form of benches, benches and couches.
Connecting batteries to pipes of the heating system
The connection of heating radiators can be side or bottom. Information on this is contained in the technical data for the heating appliance. It is not difficult to determine what kind of heating device we are talking about, it is enough to simply inspect it: for a radiator with a bottom connection, the inlet and outlet openings are located close to each other and are located in the lower part of the case.

Both pipes of the heating system (supply and return) are connected to the radiator at the bottom of the housing. Moreover, the feed is located closer to the center, and the return is shifted to the edge. The flow of the coolant inside a heating device with a bottom connection can be compared to the movement of water in a circle. The movement of the coolant along such a complex trajectory inevitably leads to a decrease in its speed, which negatively affects the efficiency of the radiator. As a result, the heat dissipation of a radiator with a bottom connection is always lower than that of a similar radiator with a side connection.
However, heaters with a bottom connection allow you to get rid of heating pipes in the interior by placing them under skirting boards or under a false floor, which inevitably arouses interest in them from the side of interior designers and explains the ever-growing popularity of this particular type of radiator.
Installation of side connection radiators
A conventional radiator has 2 pairs of holes located on one and the other side of the device, which allows them to be connected in the most convenient way, taking into account the real situation of heating installation, which is especially important when there is a shortage of free space (for example, a radiator in the corner of a room can be connected only on one side ).
If the situation allows, you need to choose the most efficient connection methods with minimal losses of thermal power:
The best and most efficient way: a diagonal connection, in which the supply is connected to the upper pipe and the return to the lower pipe on the opposite (diagonal) side of the radiator. This connection ensures the maximum heat transfer of any heating device.
The most undesirable connection option: a diagonal connection, in which the supply is connected to the lower pipe, and the return to the upper pipe from the opposite (diagonal) side of the radiator. Such a connection ensures the minimum heat transfer of any heating device.
The supply and return are connected to one side of the heating appliance. With this method of connection, there is a decrease in the efficiency of the radiator by an average of 5%
The supply and return are connected to the lower branch pipes of the heating device. This method of connection reduces the heat transfer of the radiator by an average of 10%.
Features of installing radiators in a one-pipe heating system
One-pipe heating system can be vertical or horizontal. Its device is extremely simple: each heating device "replaces" a piece of pipe with a coolant, without changing the direction of its movement. This means that if the radiator fails (anything can happen: for example, a blockage has occurred, blocking the movement of water in the system), the entire heating system will stop, and this is already fraught with defrosting pipes or boiling the boiler. To avoid this, radiators in a one-pipe heating system are installed with a bypass, the diameter of which must be less than the diameter of the supply and return.
We connect ...
As mentioned above, all the components necessary for installation are usually purchased together with the heating device. If they are not included in the delivery set, it is better to buy all the elements for installation (lining, plug and Mayevsky tap) of the same brand as the heating device.
The radiator connection begins with the installation of liners, two of which are with a left-hand external thread, and two with a right-hand thread. When screwing them in, the main thing is not to make a mistake and not to overdo it: if the part “doesn’t fit”, you don’t need to make efforts and try to install it in any way. It probably just has a different thread. You need to be especially careful with aluminum radiators, in which threads easily break off. All liners have a right-hand internal thread.
After connecting the radiator, two nozzles will remain free, into the upper one of which a Mayevsky valve is screwed in, providing air release and elimination of air congestion, and a plug is installed in the lower one.
Video instruction - How to install a heating battery
The radiator installation is complete!
Types of heating systems
Before installing radiators, you need to clearly know which system it will be connected to. It can be one-pipe or two-pipe.

The simplest way of connection is one-pipe. According to this principle, the heating system in multi-storey buildings is made, when heated water flows upward through the radiators installed in apartments. Such a system is inconvenient in that there are no devices in it that allow you to adjust the temperature of the heaters. Especially for this, it is necessary to install separate structural components.

The two-pipe system is especially good for those who are thinking how to connect a heating battery in a country house. Its work is based on supplying hot water through one pipe, and its outlet through another in the opposite direction. In this case, the heat is distributed equally across the batteries. It can be controlled by a valve mounted in the radiator pipe.
Types of radiators
When choosing heating radiators, you need to know exactly where they will be installed, on which side, and whether they will fit the design of the room. Moreover, in our time, the choice of this equipment is huge:
- sectional;
- lamellar;
- tubular;
- panel.
Sectional batteries are easily constructed from separate sections into a radiator of the desired length, depending on how much heat is needed from them. In turn, they are divided into categories:
- steel;
- aluminum;
- cast iron;
- combined (bimetallic).