As you know, not only the theater begins with a hanger, but also a visit to other less pretentious institutions. Every housewife, of course, wants her house to be remembered by guests not just for its rich treats, but for its unique furniture.
More than just a decorative element
Making an interior item both beautiful and multifunctional is not easy. But with regard to a clothes hanger, these two points are fundamental, because the limited number square meters in the hallway obliges you to save not only free space, but also “working” space.
For small rooms, only floor-mounted hanger options should be considered. Why?
Firstly, the things that should be in the hallway belong to the demi-season period or the cold season. Jackets, fur coats, and down jackets weigh a lot, which is why ordinary hangers rarely support their weight. And when not only parents’ coats are hung on one hanger, but also children’s jackets, guests’ raincoats, grandmothers’ umbrellas, even the most persistent “fighters” cannot withstand this load. The “correct” floor hanger allows you to place all the necessary things, and can also easily support their weight!
Secondly, winter and demi-season coats often differ radically in weight. As you know, it is impossible to put fighters of different weight categories into the ring. The same case: if a September raincoat hangs on one side of the scale, and a fox fur coat is piled on the other, the mechanism will crack. The stains from dirt stains will have to be removed from the beautiful fur of the fur coat, and the unstable hanger will need to be repaired.
Thirdly, things need space and air - without it they wither away. The lack of the necessary distance between several warm things gives rise to bad smell, infections. That is why it is important to leave some space between the fur of a fur coat and, for example, a sheepskin coat. Floor-standing ones with a strong rod allow you to correctly place almost all warm items into categories without the risk of mold, unpleasant deposits or suffocating odors.
Here she is, my only one...
Unfortunately, often ready-made versions of floor hangers are designed for large apartments or private houses, and the inhabitants of modest “one-room apartments” or “two-room apartments” are allowed to be content only with wall-mounted fragile mechanisms: compact, but absolutely impractical.
In this case, you can develop the design yourself or entrust such a task professional designer. He will take into account your wishes, the number of free meters in the hallway, color scheme and the amount of warm clothing.
Which options to choose from?
Corner
The high ceilings of the hallway (in this part of the apartment the ceiling can reach a height of 3-3.5 meters) allow you to make a closet that reaches right up to the ceiling. This allows, in addition to the hanger itself, to fill the space inside the cabinet with various useful internals:
- open/closed shelves;
- retractable drawers/just drawers;
- boxes/hooks.
Your hanger turns from an ordinary rod into a multifunctional closet in which you can hide everything: from shoes and umbrellas to a butterfly net or fishing rods.
Mirror corner
One of the varieties is angular, appearance which brings it as close as possible to a wardrobe (including in terms of multifunctionality). It makes sense to install a large number of mirrors in a closet only if the lighting in your hallway is installed correctly. If desired, you can add wall lamps or mini floor lamps, but you must take into account that such a light source is still not enough if you want, for example, to apply makeup or try on a new skirt.
If you decide to install a mirror, then you need to choose the most convenient option for you: external or internal. The external mirror will have to be washed more often, but there will be no problems with light (if other lamps are present). The interior will be in constant twilight, but the surface will always remain clean. The choice is yours.
Hook hanger
The design of the hook hanger, known to us from the old Soviet times, has now been significantly improved. We are all accustomed to the fact that hooks are usually located on a crossbar, which is attached directly to the wall. This makes the structure entirely dependent on the strength of the wall and the strength of the material from which it is made. Typically, hangers of this design are left for the bathroom or pantry: these rooms do not require much physical effort from the furniture.
Meanwhile, correct design floor hanger that has no a large number of crochet, allows you to increase functionality, and will solve some problems associated with the short stature of the apartment’s inhabitants. Floor-standing usually imply the presence of an upper shelf on which they place:
- hats;
- scarves;
- gloves;
- umbrellas and other necessary items.
This is not always the right decision for families with children or for adults whose height is less than 170 cm: if, for example, a person comes to visit you who cannot reach the cherished line, this can put you in an awkward position.
The decision to put things on the lower shelves also poses some difficulties, since many apartments have pets: your beret may not be happy.
In this case, the only the right decision There will be either a closed wardrobe or special hooks for small items. Of course, the entire hanger cannot consist of such hooks. But they will be an excellent addition to those elements that are already in the design.
Actually, a wardrobe
A sliding wardrobe is now one of the most common, most expensive and, unfortunately, most impractical options. What's the catch here?
- A standard wardrobe takes up too much space. This is a great option for a bedroom or living room, but there is too much left in the hallway free space. Most wardrobes are designed according to the same principle: two doors + several shelves + several pencil cases + several hooks. Any additions are considered unnecessary, since this model has gone through fire and water.
- The assembly of sliding wardrobes makes them very fragile for such a conflict zone as the hallway. Agree, on this small area space, anything can happen: a soccer ball will break the outer glass of the cabinet, a cat will jump into the bottom pencil case and the door will slam, a neighbor who comes in to buy salt will accidentally hit the door with his shoulder, and she will jump out of the rut. Movable structures are always not The best decision for rooms in which there is active movement.
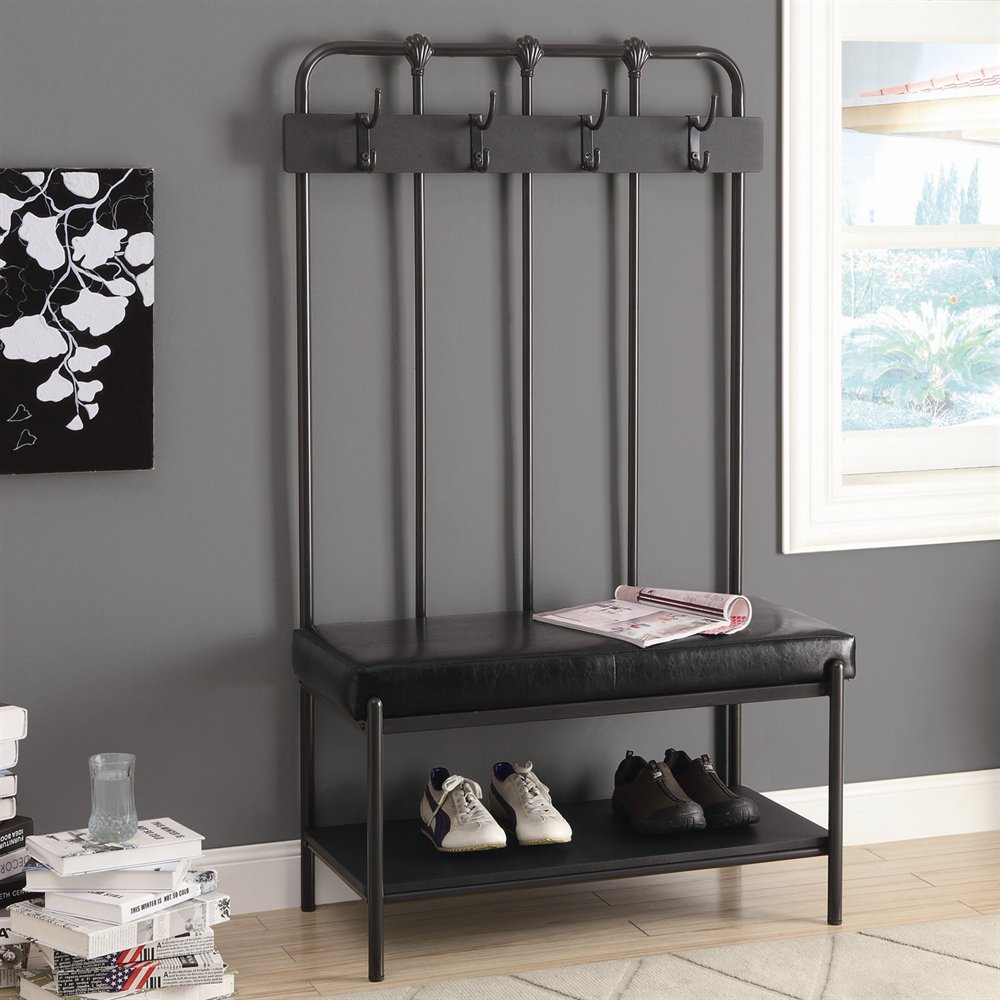
Open hanger bench
This is one of the most conservative and most acceptable solutions for small apartments. A hanger-bench usually consists of the following modules:
- several upper cabinets (options with open shelves or mezzanine models are possible);
- several lower pencil cases for shoes (also possible open shelves or retractable shelf boxes);
- a base with attached various models of hooks and a crossbar (sometimes a mirror is added);
- shop.
These are rarely metal or plastic. The design of this somewhat old-fashioned, but very practical unit is carried out exclusively by people who know a lot about organizing space. Products are usually made of wood; hooks, base and crossbars in this case should be metal or also wooden.
In addition to strength, it is good for apartments where elderly or disabled people live. A stool next to the wardrobe takes up an unacceptable amount of space. The bench hanger is more compact. The option that, between you and me, you can think about...
Hanger bar
“Minimalism is our everything,” this phrase has practically become the motto of postmodern interior design. Small apartment With small rooms And small-sized furniture Needs a small hanger.
The hanger-bar can fit everything that a couple needs in a cozy “one-room apartment”:
- several warm coats;
- several down jackets;
- demi-season raincoats;
- sport jacket;
- vest;
- handkerchief;
- several hats.
The stand below can accommodate several (6-8) pairs of shoes (for one season). True, shoes will have to be removed from time to time (alternating summer and winter seasons), but the same problem arises in the case of a wardrobe.
Remember a simple truth: the more space there is for things, the more things try to fill that space.
Advice
When purchasing a crossbar, pay attention to the material from which the crossbar is made, the holders and the fasteners themselves. The rod must withstand the weight of coats and jackets, and also all the hangers that you will attach to this crossbar.
Below there may be an additional shelf for shoes, made of a material that will not be too easily soiled (pay attention to the color).
Have you chosen a type, but are still confused about the material from which it will be made? Both the appearance and its strength depend on the material.
What to choose from?
Interesting plastic model
Plastic furniture offers a wealth of design solutions:
- color mixing;
- the ability to melt and create original shapes;
- matte and glossy.
This is especially true for manufacturers of sliding wardrobes: what more beautiful furniture, the faster the owner will be found. Meanwhile, after just a few months, the same owner is forced to take the warranty card out of the box, since a cabinet or shelf made of plastic will show its true face after just a few weeks of use: a screw will fly off and get scratched glossy surface, or even worse: the door will fall off...
A sad prospect, isn't it?
Metal
Good strength, but not too much practicality - that's what metal cabinets are all about. Metal structures can withstand a giant's outerwear, a dozen of the heaviest sheepskin coats, and many pairs of boots... However, the obsessive shine and too sharp reaction to temperature changes may not be very pleasant for both the floor covering and wall cladding.
Often, due to too sharp a temperature change (condensation has formed on the hanger), excess moisture begins to have a decomposing effect on the space of the wall near the hanger: wallpaper peels off, plaster “flows,” and unpleasant streaks appear on the paint. Sometimes parquet or linoleum may become deformed. Moreover, the deformation is caused not so much by condensation as by the large weight of the hanger: metal structures weigh up to several tens of kilograms.
The external strength is very attractive for a floor hanger. But is this characteristic worth it? cosmetic repairs hallway?
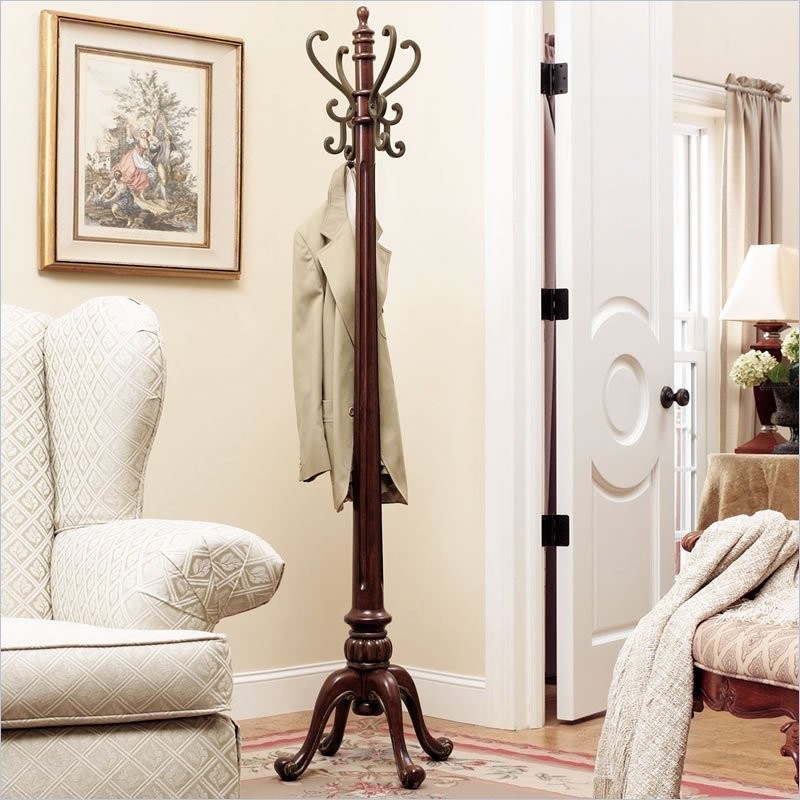
An invariable element of the interior is the hanger. We encounter this object when we enter a room from the street. Today, many varieties of such products are produced. They are built into a closet, hung on the wall, or placed on the floor. Clothes hangers easy to move to the right place, floor products can be an independent piece of furniture.
If there was no structure for storing outerwear, people would put coats and jackets on the shelf, having previously rolled up the items. The clothes would take on an unpresentable appearance, so this element is difficult to overestimate. Interesting design and convenience makes these items popular. Such products are purchased for the hallway, veranda, and placed in the bedroom and bathroom. Designs in the shape of wood, letters of the alphabet, interesting figures, etc. are used as hangers. Hangers complement the interior, it takes on a finished look.
Advantages
When entering a room, a person immediately takes off his outer clothing. Removed items are hung in the closet, on wall hooks; they are used for these purposes. floor models. You have access to the right item wardrobe placed on it. When clothes are placed in a closet, you have to spend time searching for the right thing. You don’t have to look for a coat on a floor hanger; it’s in plain sight. The cabinet takes up more space than a floor-standing structure. Not all hallways have space to install it, so a floor product becomes the preferred option. 
The advantages of such interior items:
- Mobility is an important advantage, since the hanger can be easily moved to another place at any time.
- Wall-mounted products are attached to the wall, which damages the coating. During dismantling, you will have to repair the surface. This will not happen with the floor option. If you have changed the decor in the room and the hanger is no longer needed, you can easily put it away in the utility room.
- Rich the lineup makes it possible to choose an item to suit any interior style.
- Capacity. On the hanger you can place many things in a circle, which is convenient if you have guests.
On such a device, clothes hang freely; some models are equipped with hangers on which wardrobe items are placed. If your clothes are wet and need to be dried, hang them up carefully and move them close to a heat source.
Materials
Depending on the material used, hangers are as follows:
- The metal structure has impressive weight and excellent stability. Such products are made from chrome-plated aluminum, painted different colors. It is roomy, will allow you to place a lot of things, and is irreplaceable if you have guests. Simple devices are painted in a variety of colors.
- Forged products will become a unique decoration for the veranda or hallway. They are stable, comfortable and practical. Such a product will enliven the interior and bring chic to it.
- Wooden models look great in the hallway. They are made from different breeds trees. Strong and durable products are obtained from this material. Wooden structure is suitable for classic interior and in a trendy loft. It will complement the country style interior. This option will do for a hallway decorated with natural materials.
- Plastic models are lightweight and inexpensive, but if there are a lot of things on them, they can fall.
 Select suitable option for office, home, cafe. There are many original models for solving interior problems on sale. Unique products are created by designers to order, in which case they fit perfectly into the home decor.
Variety of models
A huge selection of such items allows you to choose the right option for a specific design. There are many types of floor hangers.
Tripod hanger is a tripod with hooks; they are often equipped with additional hooks for bags and a horizontal hoop for umbrellas. The bottom is made like a tripod or with a flat base. This convenient design will solve the problem with many things in the hallway. It is convenient to hang jackets, coats and other things on it. 
Model in the form of a chair With high back will allow you to change your shoes by sitting down on it. It has a shelf for shoes and a bar with hooks for clothes. This is a convenient option, especially if the apartment has old man or small children. There are folding models that can be hung in a closet. This original and functional item will become the highlight of the hallway interior. 
Hanger rack has a U-shape. The crossbar is equipped with hooks or is intended for placing clothes on hangers. This product is placed in the dressing room. Your things will not get wrinkled and will look impeccable. A good option is a model with a stand for umbrellas, shelves or special holders for hats. 
Hanger-basket has a base made in the form of a basket. Umbrellas, slippers and other things are stored in it. It is indispensable in your home, but takes up more space than the previous option. 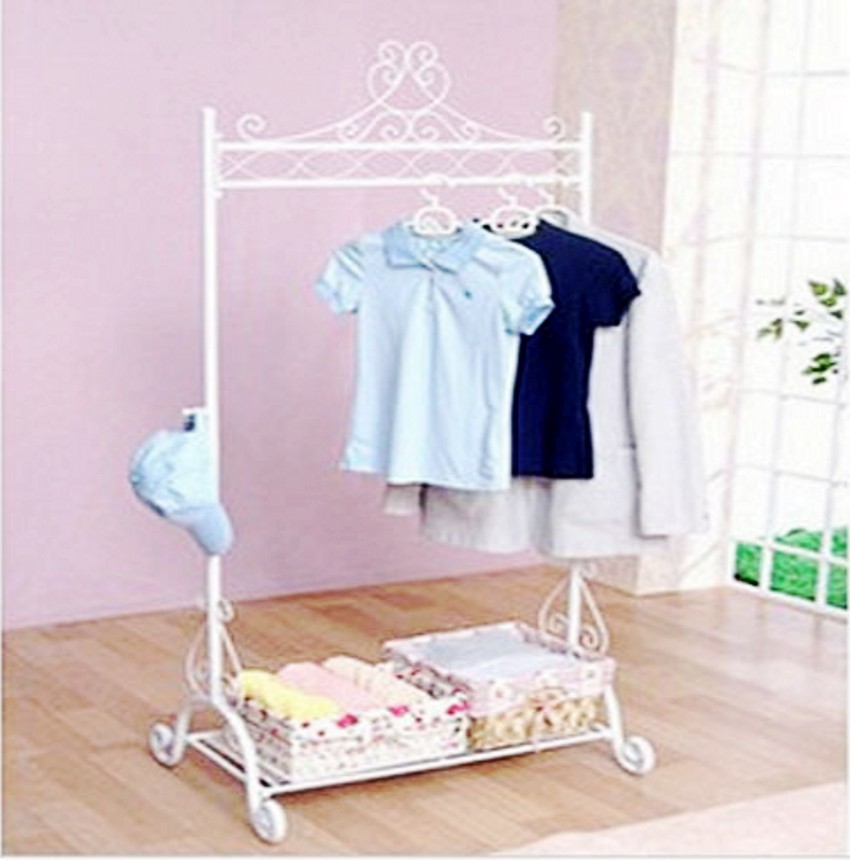
Suit model Convenient for storing trousers and jackets. It is also suitable for a dressing room. A floor hanger will help keep your suit tidy. It will be a wonderful addition to your office, and your jacket will always be in perfect condition. Such an item is necessary not only for men's suits and ties. Women's items can also be hung on the product: cardigan, shawl, coat. 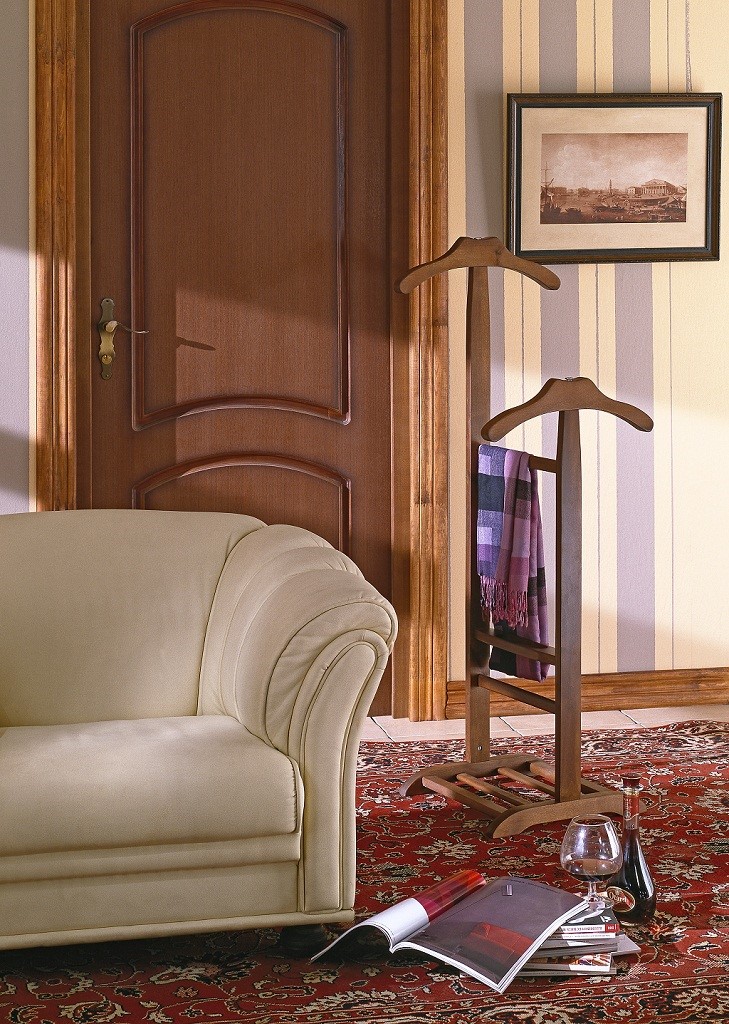
Non-standard hanger models
They combine functionality and beauty. Unusual products became fashionable back in the 70s of the last century in Italy. Scandinavian designers once came up with tree-shaped hangers that look great in the interior. If you have the desire and space, you can place several of these ornamental trees at the entrance. Today in interiors you can find hangers in the shape of flowers, abstract items, etc. Mobile objects are in fashion. Products on wheels are used in offices as they are easy to move. But they can be a great addition to your home decor. 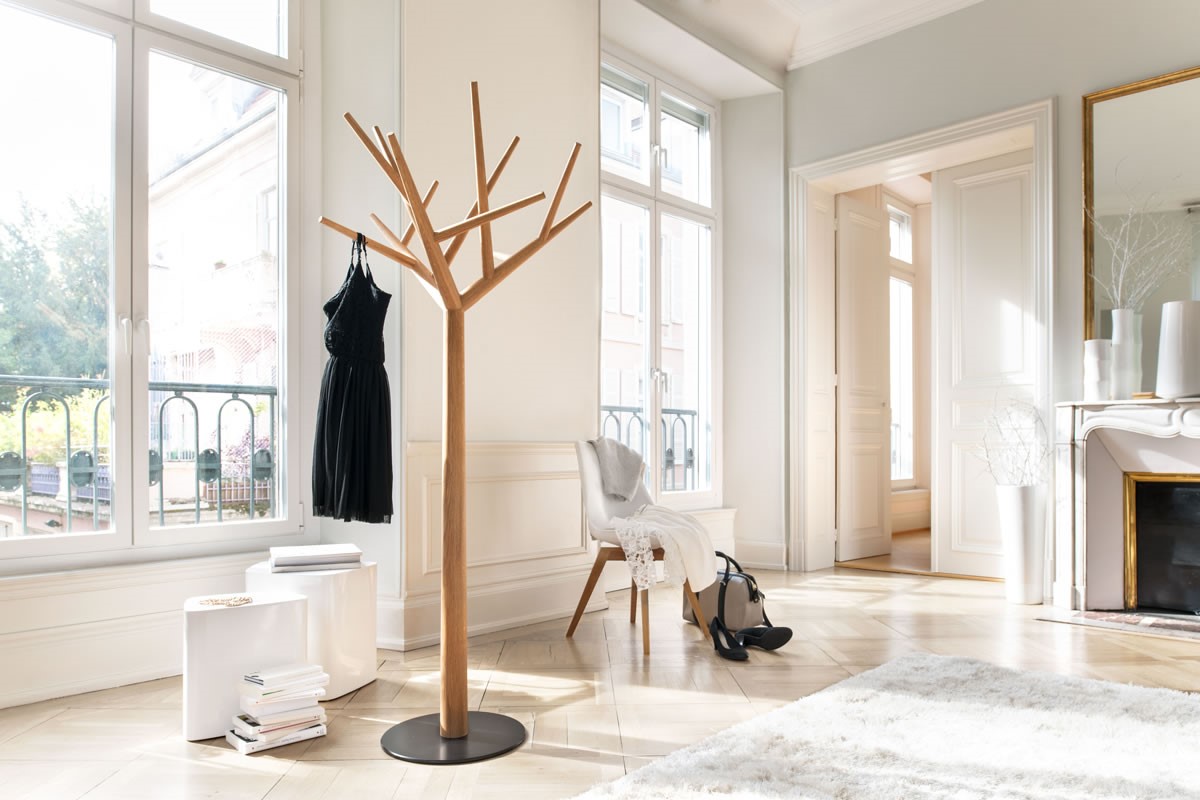
Products with a special adjustment system allow you to change the height. The system will make a standard hanger convenient design for children. This is especially true when many children are invited to the house for a celebration. Geometric designs made of chromed metal, original models in the form of art objects are available to everyone. Having purchased a bright design, focus on it. Owners spacious apartments And country houses can safely choose a fancy model that will become an original piece of furniture.
Choosing a clothes hanger
It’s difficult to do without a hanger in an apartment, country house, the office needs it. The appearance of the hallway depends on it. The hanger should be in harmony with the interior and accommodate all the necessary clothes. For an apartment, it is better to opt for a compact floor-standing product. Floor hangers often have questionable stability, so when choosing, you need to consider what items they will be used for. There are many on sale interesting items, from which it is easy to choose a high-quality, stable and safe model. 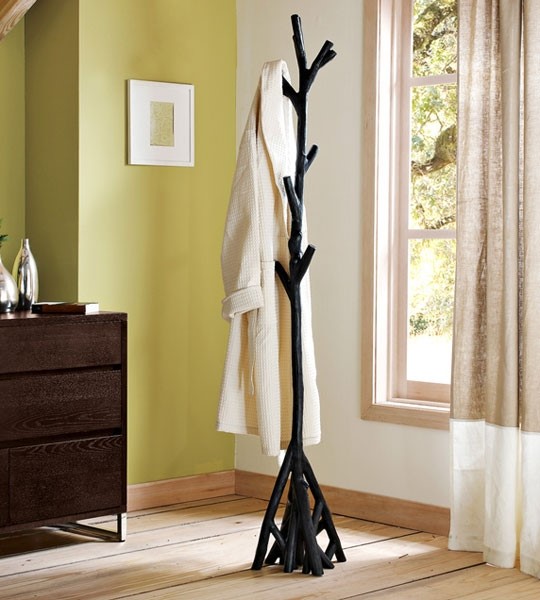
The choice of hanger depends on the design of the room; you can buy a product from valuable species wood of different shades or choose more simple version. Hangers have hooks that are made of wood, metal, and plastic. Products with metal hooks are stronger and will serve you well for a long time. You should think about where exactly the item will be placed.
Advice! It is necessary to take into account the size of the room where you plan to place the item, as well as the number of residents in the apartment or house. If one or two people live in a home, then any compact option will suit you. For an apartment where a large friendly family lives, they buy floor option, on which the clothes of all household members can easily fit.
More massive models are selected for the hallway, and a lighter version is suitable for the bedroom and bathroom.
DIY floor hanger
Build such a piece of furniture from an old floor lamp. To do this, remove the lampshade and wire, and attach the hooks to the tripod. If on personal plot or there is a tree growing in your dacha that has not produced fruit for a long time, then use it for hanging. The plant is cut down and the branches are removed. The bark is removed; if left, it will begin to fall off over time, and things will cling to its uneven surfaces. After cleaning the wood, you need to go over it with sandpaper. The structure is then attached to the base. 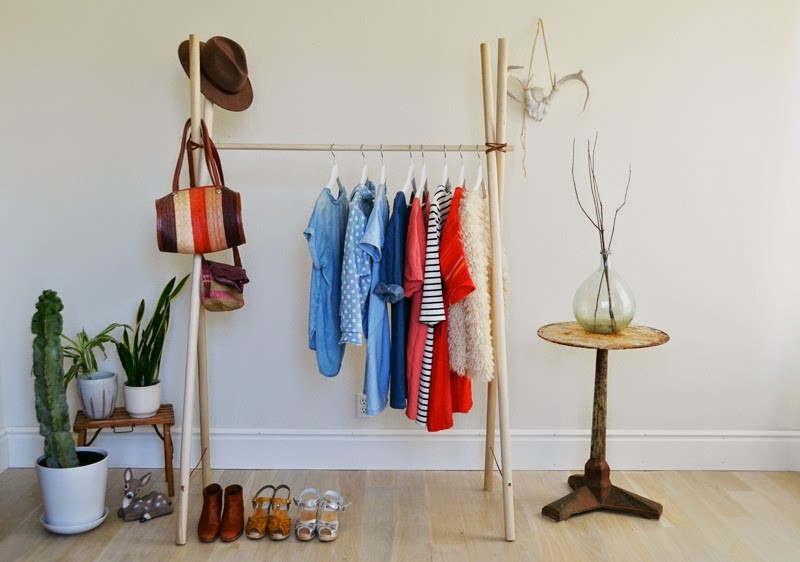
The item for storing clothes should not have sharp parts, so as not to damage the floor or things. It must be stable aesthetically pleasing, reliability. Stability is ensured by the base, which is made in the form of a circle and crosses. The center of gravity is placed as low as possible. To do this, use heavy bars, metal parts. Installation of the product on three points of support is necessary for the stability of the structure. The bottom of the hanger is upholstered with a material that is softer flooring. This will prevent leaving marks on the floor. To give the product functionality, hooks are attached to it.
Important! The center of gravity of the clothing placed on the product should not extend beyond its cross. Otherwise, the product will not be stable and will fall.
The final stage is giving the structure a finished look. Cover the lower part of the product with fabric, wood, or plastic. The structure is covered with a layer of paint or varnish.
Basic interior items form the style of the room and make it attractive. It's the little things that create an impression of the room and the owner. Interior items can emphasize the individuality of a home and tell about the character of the owner.
43 photos of floor clothes hangers:


IN cozy home It is impossible to do without a hanger - floor, wall or ordinary hangers in the closet. But in addition to its utilitarian function, storing clothes in a straightened form is also a way to show your creativity, the opportunity to do something with your own hands for household use. An original do-it-yourself floor clothes hanger or original nailed hooks in the hallway - how can you do without them? To make the simplest tremmels for jackets or horns for hats, you don’t need to be a jack of all trades, all you need is a tool and a few creative ideas.
Hanger as an art object or decorative element
To quickly clean up your home by arranging things in your closet, it is important to have sufficient quantity places where you can easily accommodate:
- dresses and jackets;
- hats and caps;
- bags and belts;
- scarves and neckerchiefs;
- blouses and sweaters;
- business suits;
- outerwear for the off-season;
- skirts and trousers.
But for each such thing you need a special device:
- wall hanger;
- hangers (trempels);
- panel or shelf with hooks;
- clothes hanger in the hallway;
- rings and hooks for the closet for scarves and accessories.
It’s easy to build many types of clothes hangers - with your own hands, photo:

If you look through old things from grandma's closet or chest, there are probably some pretty interesting clothes hangers in there. Vintage trempels and homemade hangers, if they do not qualify as “antiques,” may well be the basis for renovation or even become a unique art object. No matter how hard they try to transform an old hanger, masters of folk crafts, needlewomen and just those who like to “get creative” with something! For example, a clothes hanger photo.

Grandmother's hangers were made in an era when plastic or plastic products were not produced. An old wooden base can be used as original object decor, especially if there is no closet in the room. They can be transformed in any way or use any suitable technique:
- decoupage;
- original painting;
- application for varnishing;
- pasting posters, magazines, geographical maps etc.
It wouldn’t hurt to make soft “shoulders” for the knitwear on the old base so that it doesn’t slip or stretch. These simple devices It’s also easy to make “from scratch” from scrap materials. But if you need a wall-mounted base for wooden hooks or an original floor-mounted clothes hanger-rack, then you need materials, tools and woodworking skills.
Wall mounted wooden hanger
Although a wall hanger is the simplest device that is suitable for self-production, you should not make it crude and primitive. Even if you plan to use it temporarily, for example, in the country, it is still better to make it beautiful so that the wall-mounted clothes hanger decorates the house for many years.

For quality product will be needed good wood, board or scrap of a block, the required length - the width of 2-3 freely hanging trempels with jackets. The board for the base must be strong and dry, without cracks, and treated with antiseptics. On this basis you will need to stuff several hooks:
- in line;
- in 2 rows;
- in 3 rows - in a checkerboard pattern.
The simplest single-row hanger is useful in any room:
- on the back of the bedroom door - under dressing gowns;
- in the bathroom or toilet - for linen while swimming;
- in the pantry - for work or seasonal outerwear;
- in the pool or sauna - under towels and bathrobes.
A child's room or a teenager's room also needs a simple wall hanger - teaching schoolchildren to be tidy, to hang everyday clothes on hangers so that they do not wrinkle.
Tip: The simplest hanger is a board with hooks and loops for mounting on the wall. But do not forget that it cannot be nailed to an unplastered wall or whitewash. An unprepared surface will cause clothes to get dirty. Therefore, they must hang them on the wall in an unfinished room under a hanger. wooden shield, plastic film or whatman paper. And wet outerwear will stain the wallpaper or painted wall on the prepared wall.

If you have any original idea Regarding the design of the product, it is not necessary to make it in the form of an oblong rectangular disk. Wooden base You can make a do-it-yourself wall-mounted clothes hanger in the form of:
- oval;
- wave-shaped panel;
- stave;
- heart;
- spirals, etc.
After making the base, the wood must be sanded and varnished or processed in another way. It is important that the wood does not give rise to splinters when used homemade hanger. It is advisable to make the hooks or “nails” of the hanger any way in an original way, will fit:
- old wooden thread spools;
- handles of broken screwdrivers, scissors and other household items;
- specially planed hooks.
Hooks, “nails” or “holders” for a hanger do not have to be made of wood or metal; they can also be bought at a hardware or construction supermarket. Natural material is also suitable - dry branches, twigs, cuttings or root cuttings. They must be cleared of bark, cut or sawed off excess, sanded and varnished.
Another standard option hangers are made of wooden planks nailed in parallel. They will become not only the basis for hooks, but also a decorative shield for clothes on a whitewashed wall or simply a beautiful piece of furniture. It will take a little more time to make, but this design looks more solid than just a board for hooks. And if you attach a visor to the hats, it will already be a full-fledged clothes hanger in the hallway with your own hands.

Homemade clothes hanger for the hallway
The hallway hanger should be enough:
- durable and strong;
- aesthetic;
- roomy;
- multifunctional.
Ideally, a small space of the wall in a narrow hallway should fit:
- outerwear for all family members or guests;
- hats;
- umbrellas and bags;
- shoes under clothes.
It is this versatility that is important to consider when building a homemade hanger for the hallway. Therefore, it is wise not just to make a board with hooks, but to decorate it beautifully:
- shield with hooks for clothes;
- visor for caps and hats;
- shelf for shoes;
- stand for bags and umbrellas.
Tip: The dimensions of such a hanger should not be arbitrary; they are measured against the part of the wall where the hanger should be located.

Usually a space of about 1 m in width is enough; the height of a clothes hanger in the hallway with your own hands should be greater than head level. There are 2-3 rows of hooks under trempels and outerwear, plus a visor (shelf) for hats. Shelf connection reliability side shield can be connected with planks at an angle of 45°C. The hanger must be attached to the wall with brackets or dowels.
Floor hanger rack
Another type of device for placing clothes at the entrance to a building is a do-it-yourself floor clothes hanger. You can often see them:
- in the clinic office;
- in the reception area;
- in the hall or vestibule;
- in an Internet cafe, etc.
They are usually called "standing" or "horn" hangers and are made of tubular metal. They are notable for the fact that they are convenient for hanging not only outerwear, but also hats, bags and umbrellas. And although they are not as stable as hangers nailed to the wall, they are more compact and mobile. They can be rearranged to any place or stored in the pantry for the summer.
In houses and apartments, this type of hanger is used less often than in public places, but it’s also easy to do it yourself. There are a few good ideas for example use:
- cross for Christmas trees as a base and a long handle of a shovel as a stand, where ready-made long hooks are nailed;
- trimmings plastic pipes And couplings for the base of the hanger;
- process the base of a dried garden tree in the form of a multi-armed structure and install it on a cross or other base;
- cutting pipes of different sections as a telescopic stand;
- the remains of old chairs and stools and build a hanger on a rotating rotating mechanism(buy ready-made);
- as a basis - a tripod from an old camera, a floor lamp and other household items.

Attention: Whatever the design, it is important to observe the main condition - the stability of the floor hanger. And this depends not only on its design, but also on its support. It can be a rotating disk, 3-6 legs or a cross.
DIY coat hanger or trempel
It’s not difficult to make a clothes hanger yourself, using any available material as a base:
- thick wire;
- a fragment of a thick branch in the shape of a hanger;
- small plastic bottles, strung on metal base in the form of a large “paperclip”;
- bent metal plate or angle.
The base for the hanger hanger remains to be wrapped in padding polyester (another filler) and covered with any beautiful fabric. This best option for knitwear. A beautiful satin bow or a small face will help add originality. soft toy. Children will love these hangers. The main thing is to find the right metal for the coat hanger hook.

Original do-it-yourself hangers from scrap materials
Interesting ideas for making hangers of any type yourself can be implemented using a variety of available materials.
1. Metal. Scraps of steel wire, tube or angle are suitable for a metal clothes hanger. Depending on the flexibility and thickness of the metal, the structure can be bent or joined by welding. The shape and design of the product is your choice, see photo:

2. Remains of timber, boards, veneer and other wood are suitable for wall hanger or a universal product in the hallway. A detailed video will be useful for those who love woodworking;
3. Parts of old furniture can also be easily transformed into a hanger, for example, by building multifunctional model based on the chair. This design is convenient because a jacket and suit trousers, a shirt and a tie are conveniently located on one module.
4. The original base for hangers will become original device in a room where there is temporarily no wardrobe. Any wooden stalk that is suspended from the ceiling parallel to the floor at a level slightly above height will do.
5. The old “hunting” idea is to use deer horns instead of hooks for hangers. They can be attached to any base - for a wall hanger or a vertical rack with horns. Moose antlers will also work.
6. The design made of plastic pipes will appeal to fans of technical crafts.
7. Small hangers for the closet are also needed, for example, in the form of connected rings made of cardboard or plastic. They are suitable for hanging scarves and neckerchiefs, belts and belts.
8. A simple roll-up wire hanger with clothespins along the edges is an excellent device for storing trousers or skirts. The shape of such simple hangers can be classic, in the form of a curved paper clip or in the form of an intricate labyrinth - as your imagination suggests.
Hangers as a stylistic decoration
When choosing the material, shape and design of hangers, you should consider the style of your interior:
- wooden hanger with turned decorations suitable for English office or a discreet classic hallway;
- soft hangers covered with bright fabric will decorate a bedroom in country, shabby chic, romanticism or boho style;
- metal-plastic structures will emphasize the originality of loft apartments and decorate the shelter of a lonely wanderer in the power of techno or hi-tech;
- old restored hangers fit vintage, retro, Biedermeier or Victorian styles;
- hangers of the simplest shape and design - an ascetic attribute in the style of minimalism or functionalism;
- original hangers with a “girlish” design are suitable for a Barbie-style children’s room;
- a chic and impressively decorated hanger - for a boudoir in a palace style;
- satin ribbons, sparkles, beads and stones are the attributes of a glamorous bedroom.
Read more about self-production hangers watch video:
There is a large number floor hangers for clothes. At home, this is very relevant and practical furniture that fits perfectly into any interior. Such hangers can be easily moved around the apartment and room. Things in this case wrinkle much less than in the closet. It requires a cover to protect it from dust. This design can be made with your own hands. Let's take a closer look at the manufacturing process of various models, photos of which will also be presented in the article.
Advantages

It will stylishly fit into any interior and does not take up much space.
The good thing about this thing is that hanging clothes does not come into contact with the wall, and this helps protect the wallpaper from damage. Moreover, the device can be folded, removed or rearranged at any time, which is very important in small apartments.
If you make it yourself, then the following advantages appear:
- the cost is significantly reduced;
- is an exclusive piece of furniture;
- there is no need to drill holes in the wall to hang it.
Necessary materials

Consumables can be absolutely anything: from oak to metal.
How to make a stand with your own hands? First you need to decide on the material. Plywood is suitable for work, these are the most practical materials, which can be easily worked with. When used in the house, it is not exposed to moisture, which significantly increases its service life.
Working with plastic or metal at home is quite difficult, so it is better to avoid them. It is also necessary to take into account the fact that a large load is placed on it, therefore materials are needed of appropriate strength, which do not allow them to break.
When purchasing plywood or wood, you need to pay attention to their quality, since the appearance of the product will depend on this. Typically, oak structures are coated only with varnish or stain.
Made from plywood in the form of a tree

The process of creating a product, with its subsequent use for storing clothes.
It’s not difficult to make such a product yourself and it doesn’t require much. materials and tools. This product requires two sheets of plywood measuring 70x170 cm and 18 mm thick. To work you will need:
- jigsaw;
- glue;
- sandpaper.
The manufacturing process itself does not take much time. First, draw an outline on one sheet of plywood future design. The main thing is to have a width of about 60 cm. This is necessary for stability, because if they are narrow, it will fall if heavy winter clothes are hung on it.
To avoid drawing a picture on the second sheet of plywood, you need to fasten the two sheets of plywood using clamps or self-tapping screws, making sure that the sheets do not move. To transform blanks into ready product, make two slits. On one workpiece the slot is made from the top to the middle, and on the second from the bottom. The width of these slots should correspond to the thickness of the plywood.
WITH inside both slots should carefully treat with glue, and then one workpiece is put on another. The result is quite original item, photos of which can be found on the Internet. All that remains is to sand it and paint it. You can decorate it in different ways or simply cover it with varnish, stain or paint.
From a tree trunk

Very original solution are interior items that look like a branch or trunk with knots. Such things always fit harmoniously into any room.
good design solution – this is a stand made of natural material, namely from the trunk. It is very easy to do and there is no need to purchase special tools.
How to make it yourself? To do this, you first need to find a high-quality blank from a dry log that will not have rot. The species does not matter, but it is still better not to use coniferous species that contain a large amount of resin. Glue can be released even from a dry trunk. It is advisable to use hardwoods, having good branching, so there was more space for clothes.
His you need to clear the bark, cut the lower branches to a height of one meter, and shorten the upper ones, leaving branches on which you can later hang clothes. After this, the rack is completely sanded and cleaned of irregularities and dirt. If the wood is damaged by a bark beetle, then this will not hurt, because it creates an amazingly beautiful pattern that fits perfectly into the design.
Then you need to make a stand, because the tree trunk cannot stand on its own. The main thing is that the stand is massive, this makes the structure more stable. The stand itself can be of any shape: round, square, triangular.
Photo gallery


The base is attached to the stand in different ways. For example, if its lower part is quite thick, then the board can be screwed to it using self-tapping screws, the heads of which will be located at the bottom, so they will not be visible. If the bottom of the trunk is thin, then a hole is made in the stand, no larger than the diameter of the trunk itself, after which the base is fixed to the stand with glue, since this method is the most reliable.
After it is manufactured, it must be varnish to maintain natural color. But if the light system does not fit the design, then you can use dark paint.
In the form of a staircase, with your own hands

Old and unnecessary stairs can also be used and given a second life.
Very looks original- in the form of a staircase. To make it yourself, you will need two bars 170 - 180 cm long and 5x5 cm thick. For the crossbars, you will need three smaller bars, the length of which will be equal to the width of the product. All bars need to be sanded or processed with a plane.
To make the structure look neat and beautiful, all parts are connected to each other using spikes. After this, the product is coated with varnish and stain. A comfortable and convenient do-it-yourself clothes rack is ready. It can be installed both in the bedroom and in the summer house.
Rustic style
This design will fit well into a corridor or hallway, and you can put shoes under it. This model is not easy to make yourself. First, holes are made in the intersecting round posts large diameter. It is very difficult to drill holes in round parts with a household tool. To get around this unpleasant nuance, you need to take square posts and use a drill to make holes in them required diameter. It is best to take a metal crossbar, as it will sag. This model can be disassembled. To do this, remove the crossbar from the holes, and the parts that make up the hanger are folded compactly.
On wheels

The wheels are very convenient and make the thing very mobile.
This design has regular hangers on top, which is very convenient for placing blouses, shirts and jackets. It is more convenient to hang trousers on the crossbars. Thanks to the wheels, it is easy to move it to another place.
To make it yourself, you will need special fasteners. The vertical posts are attached to the base using metal screws. The only difficulty is drilling holes for the screws in the vertical racks. The rest of the assembly is pretty simple. The disadvantage of this design is the need to disassemble it during transportation. To do this you need from vertical racks unscrew long bolts.
Thus, there are many ways to make such a clothes hanger with your own hands, a photo of which was presented in the article. This is a very simple interior element, the manufacture of which will require readily available materials. Usually, the work does not require special tools, and the result is a unique and exclusive item.
If several people live in your apartment, then there will definitely be a need to store and place the wardrobe of each of them. And then you can’t do without such a device as a clothes rack. This design will fit perfectly into both spacious room with a dressing room, and in small hallway. Such a stand would be very appropriate in a country house.
Advantages of floor racks
- The clothes rack is very easy to disassemble and assemble. And most importantly, this does not require special skills.
- If you store clothes on hangers, then as a result they will not cake or wrinkle, their appearance will always be impeccable.
- The cost of a floor stand compared to a cabinet is much less.
DIY floor rack for clothes
Quite often, there are not enough hangers in the hallway and not many things can be placed on them. And sometimes you need to place your shoes there. In this case ideal option will become floor stand, made of metal pipes of small diameter (15-25 mm). You will also need screws, a drill and, if necessary, furniture wheels if you plan to then move the rack to another room.
Step-by-step instruction
The process of creating this design is as simple as possible.
- The vertical base will be long pipes (1.4-1.8 m) - 3 pieces.
- Shorter pipes (0.8-1.0 m) - 4-5 pieces - will be used as lower horizontal crossbars. In this case, one of them is fixed in the lower vertical axis. The remaining pipes are screwed tightly to it, thereby creating the bottom of the rack.
- A crossbar of similar length is fixed horizontally on top, fixing the verticals.
- Next, perpendicular to it in the same plane, it is necessary to screw the products, 0.4-0.5 m long. In the same way, they are fixed at the ends.
- Subsequently, hanger hooks will be located on this crossbar. At the same time, the lower base, due to its area, will allow you to keep the structure vertical.
- So, the floor rack for clothes is ready. If necessary, it can be placed on furniture wheels, which should be placed in the corners around the entire perimeter.

Wooden clothes hanger
A DIY wooden clothes rack is a budget option. And the main thing is that you definitely won’t find one like this in a store. On it you can place various clothes: robes, dresses, T-shirts, shirts, belts, ties and much more.

Design detailing
It will look like this.
- For the lower fastening element (floor legs) you will need boards measuring 15 x 30 x 360 mm.
- The middle element (racks) will be made of planks 20 x 30 x 280 mm.
- For the upper fastening element (hangers), you will need to take boards measuring 20 x 80 x 460 mm.
- For a short rack we take strips 20 x 50 x 763 mm.
- Boards measuring 20 x 50 x 1003 will be required for the long rack.
- As a connecting element, you will need to take three types of blanks, 460, 430 and 390 mm long, with the same diameter - 18 mm.
- Every structural element must be made from dry planed boards. Sharp edges are rounded using sandpaper.
- Then holes of the required diameter are drilled. It is advisable to treat the wood with an antiseptic and then cover it with a decorative composition.
- The rack parts are connected to each other using chrome wing nuts, threaded rods or oversized washers.
- The racks are held together by chrome plated metal pipes or wooden elements cylindrical shape of appropriate length. This is done using glue.
- Hangers are installed on top. The planes of the joined elements are treated with glue.
- Thus, the wooden clothes rack (photo shown above) is assembled. Such a stylish detail can decorate the interior of any hallway.