This is an additional condition to make you feel more comfortable when contacting us. If something doesn’t suit you during or after the restoration of the bathtub, just call our dispatch center 24/7 and I will return all your money to the last penny! By the way, in 2018 we received only 9 requests for a refund (out of 38,990 requests!).
🔧 After the warranty you will receive LIFETIME SERVICE
There is no need to worry about what will happen to your bathroom after the warranty. I give every client lifelong service at Lenremont. This means that if this bath needs restoration again after warranty period, bathtub restoration will cost 2 times less! So you get 25% discount on post-warranty repairs.
✅ 1 year warranty (subject to compliance with standards) for bathroom restoration
Yes! I am so confident in the skill of my masters that I boldly give you 1 year warranty (subject to compliance with standards) for bath restoration. This is the biggest guarantee in all of Russia.
And one more surprise - you will receive 4 months warranty on all spare parts, since Lenremont orders parts from a direct supplier.
This guarantee means that, if suddenly Your bath will need restoration again, The master will come for free and restore the bathtub. Even if the master who carried out the restoration of your bathtub gets sick or no longer works for us, you do not need to worry that you will be left without warranty service: we have more than 100 bathtub restoration masters on our staff. We take it upon ourselves full responsibility to ensure that you, our dear client, are satisfied.
Over time, the bath loses its attractiveness appearance. Smudges and traces of rust appear, the gloss disappears, and it becomes rough to the touch. Everything suggests that it’s time to replace the old bathtub. And these are not small expenses. In addition, when replacing a bathtub, you cannot do without renovating the entire bathroom, and small expenses will turn into medium, or even large ones. But there is an alternative - do-it-yourself bathtub restoration. Available on the market a large number of materials with which you can independently update your bathtub with the proper quality.
Bathroom restoration methods
Now there are three methods for restoring old bathtubs:
1. Restoration of the enamel surface of the bathtub.
2. Restoration with liquid acrylic.
3. Restoration by installing an insert.
Method 1: ordinary enamel
Cast iron and steel enameled bathtubs are the most common types of bathtubs in our apartments. They are produced according to GOST 18297-96, which has been in force since 1997. According to this GOST, the warranty on bathtubs is 2 years. But as practice shows, the enamel on them lasts no more than 10 years of use.
Enamel is applied quite simply to bathtubs in the factory. First they heat it up outer surface red hot, then on inner surface sift the enamel powder and leave for some time to sinter the powder with the metal. Heat the outer surface again until the powder melts. The result is a smooth, glossy enamel coating. It is clear that at home this method of restoration cast iron bath, just like steel, is not suitable.
Why does enamel usually wear out?
Wear of the enamel surface occurs as a result of two factors:
- The use of cleaning products containing abrasive powders or substances with chlorine inclusions.
- The use of chemical reagents when cleaning water supply networks.
As a result of many years of exposure to these factors, the enamel surface of the bathtub becomes thinner, becomes rough and begins to rust.

Restoration of an enamel surface
Restoring enamel with your own hands is a fairly simple process. It consists of two stages: preparing the surface and applying a new layer of enamel.
What will you need for work?
You will need the following tools and materials:
- electric drill with an attachment in the form of a grinding wheel;
- abrasive powder;
- sandpaper;
- rust converter (for example, “Tsinkar”);
- degreaser (for example, Nefras);
- lint-free napkin;
- natural bristle brushes or spray bottle;
- respirator and gloves;
- enamel, preferably two-component (enamel plus hardener).
Preliminary stage: surface preparation
Very important stage. The more thoroughly the bathtub surface is cleaned, the better the quality of the new enamel layer.
- old enamel is sprinkled with abrasive powder and cleaned off with sandpaper or a grinding wheel mounted on an electric drill;
- treat areas affected by corrosion with a rust converter, leave for half an hour, then clean with sandpaper;
- wash off the enamel and crumbs with water;
- thoroughly clean the bathtub with a degreaser using a lint-free cloth;
- fill the bath hot water and let it warm up for 10 minutes;
- drain the water and wipe dry with a lint-free cloth; Make sure that there are no lint or other foreign elements left on the surface.
Main stage: applying enamel
- according to the manufacturer's instructions, mix the enamel and hardener in a certain proportion and mix thoroughly;
- apply the first layer of enamel with a brush or spray;
- maintain a certain period of time according to the instructions;
- apply a second layer of enamel.
This concludes the process of restoring an enamel bathtub with your own hands. It is advisable to wait at least a week before using the bath. This is exactly how long it takes for the enamel to completely polymerize.
The service life of the new enamel will be about 6-8 years.
Method 2: bathtub restoration with liquid acrylic
This method of bathtub restoration appeared relatively recently, thanks to the advent of special material– glass.
How do we restore?
Stacrylic is a two-component acrylic material developed specifically for the restoration of bathtubs. It consists of acrylic itself and a separately supplied hardener. When acrylic and hardener are combined, the polymerization process begins, and when applied to the surface, the composition turns into a high-quality acrylic film with a thickness of 4 to 6 mm.
Advantages of glass
Stacryl has three remarkable properties that help it quickly and effectively restore a bathtub:
1. Viscosity
Optimally selected glass viscosity coefficient helps without special effort do acrylic coating 4 mm thick on the walls of the bath and 6 mm on its bottom.
2. Fluidity
The fluidity effect allows the glass to independently envelop the surface of the bathtub and lay down in an even layer.
3. Delayed polymerization
Thanks to this quality, you can calmly and relatively comfortably carry out work on the restoration of the bathtub, without fear that the acrylic will harden too quickly.
Once polymerized, the acrylic surface has mechanical and impact strength far superior to an acrylic liner or enamel layer.

Work execution technology
Technology for restoration of bathtubs with liquid acrylic even simpler process enameling and is as follows:
1: Surface preparation
This stage is no different from the restoration of an enamel surface. Repeat the same steps. Then disconnect the siphon and place a container under the bathtub drain where excess acrylic will drain.
2: Applying liquid acrylic
- prepare the acrylic mixture according to the manufacturer's instructions;
- pour slowly ready mixture on the upper edge of the bathtub, as soon as the stream reaches the middle, we begin to smoothly move the stream of glass around the perimeter of the bathtub;
- when the circle is closed, repeat the procedure, starting from the middle.
Process self-leveling restoration must pass continuously, for this you need to take a glass container of a suitable size. You shouldn’t skimp – it’s better to pour out a little more acrylic than not have enough of it; the excess will go into the container under the drain hole.
Acrylic polymerizes, depending on the type, from one to four days. Choose glass acrylic with a long drying time; in this case, the acrylic surface will be of higher quality.
The service life of the restored bath will be about 20 years.
Method 3: bathtub restoration using a liner
The simplest, but also the most expensive method of restoration is installing an insert. In addition, it is impossible to completely restore the bathtub with your own hands using this method, since the liner is manufactured in a factory.
There is an option to order the production of a liner for a specific bathtub at the enterprise, and install it yourself.
The technology for installing the liner is as follows:
- thoroughly clean and degrease the surface of the bathtub;
- insert the manufactured liner into the bathtub;
- check the correct connection of the drain holes;
- cut the liner along the line of the wall tiles;
- apply special glue to the inner surface of the bathtub and outside liner and dock them;
- The joints are additionally sealed with silicone.
After installing the liner, pour into the bath cold water and leave it for a day. After this, the restored bathtub is ready for use.
The insert will last you up to 10 years.
How much will it cost to restore a bathtub?
In conclusion, we will conduct comparative analysis the cost of restoring a bathtub, based on the methods discussed above.
Bathtub enameling
The cost of high-quality enamel “Reaflex 50” produced by the Finnish company “Tikkurila” is 550 rubles per 1 kg. The Russian restoration kit “Svetlana” costs 750 rubles. As a result, you will have to pay 1300 rubles.
Self-leveling restoration
If you buy a kit for restoring a bathtub with liquid acrylic, for example Plastall, it will cost about 2,000 rubles. By the way, it contains everything you need for independent work, even a CD with a video lesson.
Acrylic liner
The cost of the liner itself and polymer glue ranges from 2800 to 3000 rubles.
The best option is the self-leveling restoration method, in which you will get a beautiful and durable coating for little money. Moreover, any of these methods is several times cheaper than purchase and installation new bath.
The top layer of enamel on steel and cast iron bathtubs wears away over time. Unsightly stains, cracks, chips, and yellowness appear on the surface. Of course, you can throw away such a bathtub and install a new one in its place, but restoration will extend the life of your plumbing and save the family budget.
Restoration. Methods
Restoration can be carried out different methods, among which:
- application of two-component enamel. The two components are the hardener and the enamel itself. The mixture is applied to the surface like regular paint;
- Filling the bathtub with acrylic (glass). After sanding and thorough degreasing, the bathtub is filled with acrylic. After just 2 days, the updated plumbing is completely ready for use;
- installation of a “bath in a bath.” This method is to install acrylic liner, completely identical to the old bath. The liner is attached with glue or foam and allows you to use the restored bathroom for a long time.
Preparing a bathtub for enameling or acrylic application

Although these methods have their own characteristics, the preparation procedure is completely identical. Layer needs to be removed old enamel and achieve maximum adhesion of the future coating to cast iron/steel.
Find out what they are, and also check out the types and tips for choosing from our new article.
Need to prepare following materials and accessories:
- cleaning powder;
- solvent;
- fabric-based sandpaper (for example, P24);
- quick-hardening polyester automotive putty;
- polyethylene, newspapers and masking tape;
- vacuum cleaner (or wide soft brush);
- grinder + grinding wheels;
- clean, lint-free cloth;
- construction hair dryer;
- screwdriver
Step 1. Clean the entire surface of the bathtub with a brush and an abrasive agent (powder).

Step 2. Take sandpaper and clean the bathtub until risks from abrasive appear. There is no need to rinse off the cleaning agent when sanding. Instead of sandpaper, you can use an angle grinder with a special attachment. This will greatly simplify the work and speed up the preparation process.


Step 3. After sanding, thoroughly rinse off all crumbs and soap film. We etch the bath using oxalic acid. Neutralize the acid with soda.
Step 4. Fill the bathtub with hot water up to the sides. We wait about 10 minutes, open the drain to let the water drain, and then wipe the bathtub dry with a cloth. You can warm up the vessel with a hair dryer. This way, the moisture will quickly evaporate and the bathtub can be further prepared for restoration.

Step 5. Inspect the bathtub for major defects and potholes. We apply automotive putty, and after it dries, we sand it with fine sandpaper. Remove dust with a vacuum cleaner/soft brush, then thoroughly degrease the entire surface of the plumbing fixtures with a solvent and wipe with lint-free wipes.
Step 6. Unscrew the shower hose. We wrap the spout and taps in polyethylene so that drops of water do not fall into the bath during operation.

Step 7. Armed with a screwdriver, remove the grate and siphon under the bathtub. We place a container under the drain hole into which drops of acrylic or enamel will flow.
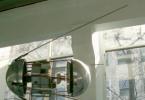
Strapping diagram. 1 - overflow pipe; 2 - a drain pipe; 3 - metal support wedge; 4 - floor siphon; 5- sewer bell; 6 - metal grounding strip
Step 8. Seal masking tape all surfaces that are adjacent to the vessel being restored. Floor, standing nearby washing machine, cover the sink with polyethylene or old newspapers.
Let's begin the restoration process.
Applying enamel
You can enamell not only a bathtub, but also a shower tray made of steel and cast iron, a washbasin, kitchen sink. Both the entire surface of the plumbing fixtures and individual areas are restored, if necessary.
This method of restoration is short-lived, but quite economical. It will serve you for a couple more years, after which you will again have to think about painting or replacing it.
Note! The enamel has a pungent chemical smell, so all work can only be done in personal protection for the respiratory system.
Step 1. Open the enamel and hardener. Pour them into a convenient bowl and mix with a mixer until smooth (see the exact proportions on the package).

Step 2. We begin to apply the enamel with a brush, making first horizontal and then vertical strokes. Carefully paint the entire bath.

Advice! To prevent bristles from coming out of your brush, soak it in water for one day!
Step 3. Without waiting for the first layer to dry, apply the second. Gently stretch out the smudges with a brush.

Step 4. Paint the bottom of the vessel again.
The bath will be ready for use in about 5 days. Until this point, it is advisable not to turn on the water and prevent dirt from getting on the painted surfaces.
Prices for bath enamel
Bath enamel
Restoration with glass acrylic or self-leveling bath
This two-component mixture is quite easy to apply, has no pungent odor and has increased strength characteristics. The glass spreads on its own, forming a monolithic, smooth film on the surface of the bathtub. At the same time, glass does not dry too quickly, which means that work can be done without haste and fuss.

Step 1. Mix the stacryl with a mixer in a convenient bowl.
Step 2. Add glass from a common container into a small glass and pour it onto the top edge of the bath. As soon as the stream reaches the middle of the wall, we begin to move the glass around the perimeter, periodically pouring the mixture into the glass.


Step 3. We repeat the process, starting to pour from the middle of the walls. There is no need to save the mixture; the excess will be poured into a container under the hole, and the coating will be even and smooth.
If bubbles form on the surface, they can be smoothed out with a plastic spatula or brush.
The polymerization process takes up to 4 days. Exact instructions for proportions and drying time are indicated on the glass packaging.

When the surface has completely hardened, you can remove the films, newspapers, tape, install a siphon (old or new, at the discretion of the owner) and use the bathroom restored with your own hands.
Video - Restoration of a bathtub using liquid acrylic using the “pouring” method
Prices for bulk acrylic
“Bath in bath” or acrylic liner

If you do not want to spend several days hygiene procedures, using a basin or visiting a bathhouse, then the method of inserting an acrylic liner will suit you perfectly. The process of self-restoration in this way takes no more than three hours, and you can use the bathroom the next day.
In addition, the liner made of durable sanitary acrylic significantly reduces the thermal conductivity of the bathtub, as a result the water cools very slowly.
For best result It is important not only to choose the appropriate size liner, but also to correctly distribute adhesive composition(foam and sealant from Henkel).


Step 1. Armed with a screwdriver and a grinder, we dismantle the strapping elements.

Step 2. Prepare the bathtub for installation of the liner. We clean the entire surface with sandpaper, a grinder, remove debris with a vacuum cleaner and degrease the surface. Wipe all drops of water dry. This measure is necessary to improve the adhesion of the adhesive foam to the plumbing fixtures.
Step 3. The inserts are transported with a technological edge, which is carefully trimmed with a grinder before installation.
Step 4. After the edge is cut, insert the liner into the bath and make markings for the technological holes. To do this, we draw circles with a marker, sticking our hand under the bathtub and tracing the drain and overflow holes.

Step 5. According to the markings, we drill technological holes.
Step 6. Apply two-component foam and sealant. We insert a bottle of sealant into the gun and distribute it around the drain and overflow holes. Next, we take the foam and use a syringe to inject a special composition into the balloon, which will prevent it from swelling excessively. From bottom to top, apply foam in strips to the bottom, walls, and sides of the vessel being restored.

Step 7. Insert the acrylic liner into the bathtub, gently press it with your hands, leveling it. Remove excess sealant and foam.

Step 8. We install the siphon (piping).
Step 9. Fill the bath with water so that the foam, when hardened, does not displace the lightweight liner. The next day, you can drain the water and use your updated bathroom.

IN free time You can install a decorative screen under the restored bathtub, as well as protective edges on the edges in contact with the walls.
Before starting hygiene procedures, do not forget to remove protective film from the insert.
Video - Installing an acrylic liner. Do-it-yourself bathtub restoration
How to repair chips or minor restoration of damage to a bathtub
Sometimes small chips, cracks from fallen heavy objects, or scratches appear on the surface. And in this case, there is no need to carry out a complete restoration; it is enough to carry out minor repairs in the proper sequence.
Previously, such defects were eliminated by mixing glue with tooth powder or applying epoxy to the chip and sprinkling it with porcelain dust. But such methods are extremely unreliable and should be abandoned.


Step one. We are preparing the chip for repair. First, apply a rust converter to the chip, wait, and wash off the composition with water. Then we clean the chip with powder or dishwashing liquid. Rinse with water and wipe dry.
Step two.
Using acetone or another solvent, degrease the defective area. Dry and heat the surface with a hairdryer.
Step three.
Using automotive putty, we coat the chip. We wait for it to dry and sand it with sandpaper. Step four. We cover the putty area with two-component acrylic or automotive enamel. Also for restoration you can use a ready-made repair kit for a bathtub, which includes acrylic paint detailed instructions. approximate cost such a kit ranges from 900 to 1300 rubles.

Video - Repairing chips and even through holes in a metal bathtub
It’s no wonder that cast iron bathtubs are extremely popular among buyers. Even though the market is flooded with acrylic and steel taxes, cast iron models not only do not go out of fashion, but also strengthen their position. The reason for this demand is quite simple - a cast iron bathtub is durable, and at the same time it retains heat well. However, over time, the coating of a cast iron bathtub wears out and chips, stains and cracks appear on it. In such a situation, there can only be two options for solving the problem - restoring the enamel on a cast-iron bathtub or buying a new one.
If we talk about purchasing, then it is worth considering a number of points that significantly affect the price of the issue, namely:
- in addition to the cost of a new bathtub, the dismantling of the old model and its disposal should be taken into account;
- the costs of delivery, transportation and loading of the purchased bathtub significantly increase it final cost;
- restoration of cast iron bathtubs allows you to avoid such issues as installation and connection, because when restoring the enamel you will not have to overpay for installation and dismantling.
Restoration of cast iron bathtubs
If you are not used to wasting money and time, you will certainly be interested in such a service as restoring cast iron bathtubs. Modern technologies And innovative materials They allow you to quickly return the bathtub to its radiant appearance and presentability without any special expenses.
Our advantages
High-quality materials from Germany direct from the manufacturer
The material is non-toxic, odorless! Hardening - 20 hours
We work without prepayment, under a contract. Responsible approach
Experienced craftsmen. We have been restoring bathtubs for over 10 years.
Warranty up to 5 years! Material service life 15 years
Prompt order fulfillment. Technical support
Price for restoration of cast iron bathtubs


Bath 120 cm.
- German quality.
- Drying time: 20 hours.
- Service life 15 years!
RUB 3,800
3,500 rub.


Bath 150 cm.
- German quality.
- Drying time: 20 hours.
- Service life 15 years!
4,000 rub.
3,700 rub.


Bath 170 cm.
- German quality.
- Drying time: 20 hours.
- Service life 15 years!
4,200 rub.
RUB 3,900
Restoring enamel on a cast iron bathtub
Restoration of cast iron bathtubs in Moscow is one of the services offered by our company. Even if your bath has completely lost original appearance, don’t rush to look for a replacement. A unique technology for restoring enamel on a cast iron bathtub will transform it, eliminating the need for an expensive purchase.
By contacting us, you can be sure that:
- all work on restoring a cast iron bathtub will be carried out high level;
- You will be provided with a guarantee for all types of services provided;
- the quality of work will not cause any complaints;
- the cost of restoration will not hit your pocket.
Call us and make sure that restoring the enamel on your bathtub is quick, simple and very profitable!
Additional services
| Name of service | Price |
| Installing an acrylic baseboard on the side of a bathtub | 1300 rub. |
| Installing our screen under a bathtub on an aluminum frame (regardless of the length of the bathtub) | 2200 rub. |
| Installation of a new siphon (re-visit of the technician 24 hours after drying. New siphon, corrugations, cuffs, connection + warranty) | 1250 rub. |
| Installation of acrylic liner 150 cm. | 4000 rub. |
| Installation of acrylic liner 170 cm. | 4200 rub. |
| Call a measurer for consultation and correct measurement baths | 500 rub. |
| Retaining the old piping (siphon), replacing only the drain grate with a new one | 150 rub. |
| Dismantling old cast iron trim | 400-600 rub. |
| Removing the plastic trim | For free |
| Cleaning non-factory enamel | from 400 to 800 rub. |
| Color color | 400 rub. |
| Removing chips on a bathtub | 150 rub. |
For you, dear residents and guests of the city. We are pleased to offer a bathtub restoration service in Moscow. Any shapes and sizes, cast iron and iron.
On this page you can see what your restored bath will look like. Also presented here current prices for Moscow and its suburbs: Zelenograd, New Moscow, Troitsky, Khimki, Solnechnogorsk,
Your benefits
Why should you entrust the restoration of your bathtub enamel to us?
- Financial discipline - The price is strictly fixed.
- The price includes travel and labor.
- Double surface cleaning.
- Free leveling and strengthening of the bottom.
- Puttying of chips and cracks is carried out free of charge.
- Tinting is carried out at the request of the customer and is also free.
- Experienced workers from 5 years, strictly Slavic.
- Prompt completion of work in 2.5-3 hours.
Our works:
Bathtub enamel.


Bathroom restoration.


Restoring bathtub enamel.


Bathroom update.


Restoration of bathtubs.


Restoration of bathtubs Moscow: price
Cost of enameling and restoration of bathtubs in Moscow
| Type of restoration (work + material) | Price ₽: |
|---|---|
| Filling bath | from |
| 1.2 Size. Restoration with liquid acrylic | 3200 |
| 1.5 Size. Restoration with liquid acrylic | 3500 |
| 1.7 Size. Restoration with liquid acrylic | 3600 |
| Restoring a shower tray with liquid acrylic | 2900 |
| Cleaning up the old layer | 600 |
| Restoration of a sink with liquid acrylic when ordering a bathtub+sink | 500 |
| 3 year guarantee on all work done by the master. | |
| Enameling with a brush. | Price ₽: |
| 120 Size. Bathtub enamel | 3100 |
| 150 Size. Bathtub enamel | 3200 |
| 170 Size. Bathtub enamel | 3300 |
| Enameling the tray | 2500 |
| Cleaning a previously painted bathtub | 600 |
| 1 year warranty. | |
| Full price list for our services | |
Restoration of bathtubs in Moscow
Our portfolio
We understand that we perform a specific service. Unlike a physical product, which can be examined in detail before purchasing. Feel it in the store. Restoration with acrylic, as well as with enamel, is done in Moscow at home. And you can’t put it on display... Therefore, this section has been created where you can look at the final result. Everything is done by our employees. There are examples made in Moscow. Images are enlarged by clicking on them with the mouse.
Restoring bathtub enamel.
Self-leveling enamel, the most strong material to date.
Restoring the surface of a cast iron alloy bathtub. Since the time the house was built, it was installed with a backward slope, and now the water does not drain completely, constantly forming a puddle at the bottom. It regularly had to be “raked” by hand. Otherwise, the drying water formed a rim of limescale, which was very difficult to clean. The restoration of the bathtub enamel was carried out on site, without dismantling it and the adjacent tiles. Before restoring the bathtub, the dilapidated, “Soviet” drain was replaced. We strongly recommend this procedure be performed whenever possible. Since the siphon is new, it looks beautiful in the updated glossy bathtub. And the price for replacing the drain is quite reasonable, and cheaper than ordering it separately from plumbers. As for restoring the enamel of the bathtub, in such cases when the faucet is leaking openly rusty water, we recommend restoring the bathtub with NEM epoxy-acrylic enamel. In our studies, this material showed the highest acid resistance and resistance to impact and fracture.


Bathtub painting with acrylic coating.
All methods of painting bathtubs are possible.
A cast iron bathtub is a good and strong frame; its weak point is its enamel. It is this that becomes unusable over time. You can buy a new one, spending a lot of money and time on it. Or you can simply paint it with enamel, without removing it, the price will be much lower, and the work time will only be a couple of hours. As a result, the bath is again smooth, shiny and glossy, which is easy to clean with a household sponge.
In the photo there is just such an option:
Liquid acrylic was used to paint the bathtub. Made in Germany. The advantage of this acrylic is that the surface can subsequently be washed with acidic agents. The drain has also been replaced. If it is removable and open access, we strongly advise you to do so. Although it is permissible to paint the bathtub without removing the siphon.


Bathtub enamel.
When is it better than buying a new one?
Bathtub enamel Moscow, at the time of ordering it was 6 years old. As the client said, initially he had a good-quality one, cast iron, with smooth sides. Over time, it became rough; he decided not to enamel the bathtub and replaced it with a modern iron one. To enameled iron bath It didn’t rattle from the pouring water; it frothed the space between the bottom and the floor under it. I thought it would last a long time. She stayed with him for 6 and a half years. He no longer wanted to start repairs again. It was decided to order the service “enamelling with liquid acrylic”. He was right.


Restoration of bathtubs with liquid acrylic.
The optimal choice for areas with particularly contaminated water.
Restoration of bathtubs in Moscow. The plumbing is covered with a red coating that is very difficult to wash off. The customer hesitated for a long time about painting, pouring, or even replacing it with a new one. There is no point in changing it if rusty liquid flows from the tap, since the factory coating quickly wears out from aggressive cleaning agents. The surface can be restored with any material, but in this case the bathtub was restored with liquid acrylic, this simplifies its cleaning in the future and increases the service life of the restored enamel.


Bathroom update.
Renewing old enamel with liquid acrylic.
The bathtub enamel was renewed using the “Pouring” method, that is, it was filled with liquid acrylic white. The ferrous water left a rusty, yellow coating on the surface and it had to be washed with chemicals, which in turn corroded the surface layer. Restoring bathtubs with liquid acrylic corrects surface roughness and covers up any plaque stains. You can click on the photo to enlarge.


Good to know…
The capital and Moscow region are the largest region of our country.
Lots of baths. Many of them are very old, there are many people who want to update. Naturally, there are many companies on this basis. Offering a service for their restoration in our city. Some offer restoration with enamels, believing that acrylic is a waste of money, while others, on the contrary, carry out renovation with liquid acrylic or install liners and also, at any opportunity, insist that painting with enamel is not serious and will not last long.
Many people know the saying “every frog praises its own swamp.” And one can only be happy for those restorers who so zealously protect their business. But, as you know, people are not interested in the ideological beliefs of the masters, but in the most rational method of restoring bathtub enamel in your area. No matter how restorers claim, there is no clear panacea. Sometimes it is more rational to do the classic work “Enameling bathtubs”, and sometimes it is better to do the restoration with liquid acrylic.
And, to help you figure it out, it would be useful to read an article about the current methods of restoring bathtubs. About the pros and cons of these methods and how bathtubs are updated. This way you can answer for yourself the question of what is better, covering the bathtub with enamel or filling it with acrylic. Also, for clarity and understanding of what the restored surface will look like, we are posting several examples: see the photos in our portfolio.