Instruction
LEDs can serve well for many years, one quickly fails if they operate at high current. To correctly calculate the current strength, you need to know the voltage for which a particular LED is designed.
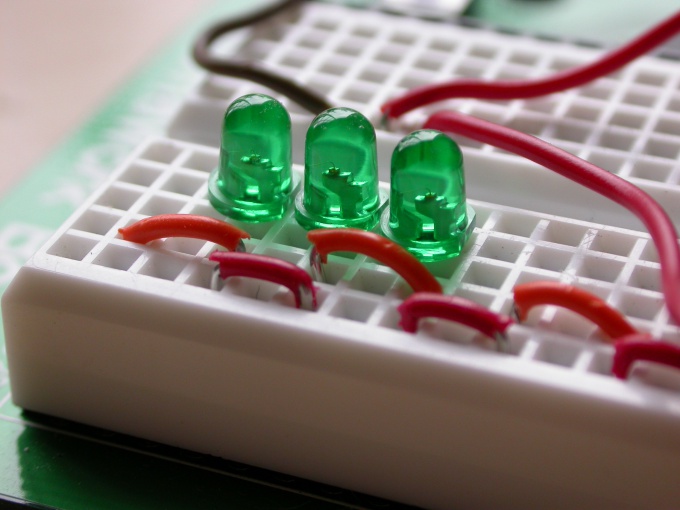
The supply voltage of most LEDs can be determined by the color of their glow. So, for white, blue and green LEDs, the supply voltage is usually 3 V (up to 3.5 V is acceptable). The red and yellow LEDs are designed for a 2 V supply voltage (1.8 - 2.4 V). Most conventional LEDs are rated for 20mA, although there are LEDs that can handle more than 150mA.
Estimating the rated current of an unknown LED in the absence of reference materials is quite difficult. Look at the bulb - the larger it is, the higher the rated current is usually. One of the signs that the set current is higher than the allowable one may be a change in the spectrum of the emitted light. For example, if the emission of a white LED acquires a blue tint, then the current strength is clearly exceeded.
Do not forget that LEDs are very sensitive to excess supply voltage. For example, by connecting a 2V LED to two 1.5V batteries in series (3V total), you can burn it out.
If a supply voltage higher than recommended is used, the extra volts must be extinguished with an additional (extinguishing) resistor. You can calculate the resistance of a resistor using the formula R \u003d U / I. For example, you need to power a 3 V LED from the car's on-board network at 12 V. You have an extra 9 V. With a nominal LED current of 20 mA (0.02 A), you get the desired value by dividing 9 by 0.02 - this will be 450 Ohm.
Having assembled the circuit with the LED, be sure to measure the current consumed by it by turning on the tester in an open circuit. If the current exceeds 20 mA, it must be reduced by increasing the value of the resistor. A slightly lower current - for example, 18 mA, will only benefit the LED, increasing its service life.
Make sure the LED connection is correct. The anode is connected to the plus of the power source, the cathode is connected to the minus. The cathode has a shorter lead; a cut (flat area) is made on the bulb from its side.
Recent advances in the field of LEDs have made a huge variety in the range of these radio components. Red, green, blue, flashing, big and small. However, each type LED has its own parameters, which differ significantly from another type. For instance, current red LEDs in most cases is 20mA, and current green is in the range from 5 to 20mA. In some cases, you need to know current LED without knowing its characteristics.
You will need
- laboratory power supply 12 V, fixed resistors: 2.2 kOhm; 1 kOhm; 560 Ohm, 470-680 Ohm powerful variable resistor, milliammeter, digital voltmeter, pieces of stranded mounting wire.
Instruction
Now assemble a relatively complex electrical circuit: replace the 2.2 kOhm fixed resistor with 560 Ohm for red LEDs, connect a variable resistor and a milliammeter in series to this circuit. In parallel with the LED, connect a voltmeter with a resolution of 0.1V. Set the variable resistor to its maximum resistance.
Connect this circuit to the power supply in accordance with the identified polarity. The LED will dimly glow.
Record instrument readings.
Gradually reduce the resistance of the variable resistor and observe the readings of the voltmeter. At first, the voltage will increase within 0.3-0.5V, in a relatively linear dependence on the angle of rotation of the variable resistor. Will increase current, glow brightness LED will also increase. Record instrument readings every 0.1 V of increasing voltage.
At the moment when the voltage will increase to a lesser extent than current, you should stop reducing the resistance of the resistor. At this point, the optimal current LED when further increase current and will not be accompanied by an increase in the brightness of the glow, but will only cause a decrease in its service life.
Protozoa LED The flashlight consists of an LED, a resistor and a battery. In some cases, a resistor is not required. Such a flashlight is less efficient than a more complex one equipped with a converter, but the low price and speed of assembly make up for this disadvantage.
Instruction
If you do not know the color of the LED, briefly connect it to a lithium battery size 2016, 2025 or 2032. At the same time, you will learn the polarity of the LED leads by trying to connect it in both ways. At the element, the marking is applied on the plus lining, which has a larger size. LEDs with a housing (that is, not made in SMD version), to such battery can be connected without a resistor. Never short an element.
If you are going to use a 2016, 2025, or 2032 size lithium cell to power an LED that has a housing, or three LR41 (L736, AG3) subminiature manganese-zinc cells connected in series, you can omit the resistor. For power supply from the same SMD diode power supplies, a resistor with a nominal value of about 30 ohms is recommended. When using three elements of the brand AG13 (LR44), the same resistor will have to be put in series with the housing LED.
Sometimes in industrial lanterns, two 2016 batteries without a resistor are connected in series to power blue or white LEDs. This cannot be done, because this will lead to rapid wear of the diode and the discharge of the element.
When connecting the LED to a power source consisting of AA or AAA batteries, use a resistor without fail. If the LED is red, yellow or green, you will need two elements connected in series, if blue or white - three.
The resistor itself is initially taken with a resistance of 100 ohms. Measure the current through the diode, and if it is more than the nominal, increase the resistance, if it is less, reduce it. For diodes whose nominal current is unknown, choose 10 mA (for lighting LEDs with a diameter of 3 mm), 20 mA (for lighting larger diameters) and 3 mA (for SMD and any indicator).
Then measure the voltage drop across the resistor, multiply it by the current drawn, and get the power dissipated across it. If necessary, increase the power rating of the resistor by first rounding it up to the nearest value from the standard range.
Until recently installed LEDs only in turning lights or the brake lights of a car. Currently, such samples are already being produced that are practically not inferior to incandescent lamps. You can improve the lighting system of your car yourself.


