Not one home repair is complete without well-formed lighting. Today it is customary to carry out something special, play on a palette of shades and decorate a room using non-standard light sources in the ceiling. In most cases, they come to the conclusion that the installation of an LED strip is necessary.
In fact, the procedure is quite simple, even if you are a beginner and have never encountered electrical work. In this article, we will look at the task of connecting the backlight in a drywall panel and other ceiling materials.
Before purchasing a product, you should select it. In this case, it is imperative to build on the characteristics that meet the quality of the device. It is important that the LED strip is made by a trusted and fairly popular manufacturer, the product should be free from defects and damage. The number of LEDs installed on the tape must correspond to the one stated in the lighting document in order to look perfect on the ceiling.
When choosing an LED strip for the home, it is important to decide for what purposes it will be used, since there is a difference in the power of the device for the main lighting and backlighting. Perhaps you should decide on the shade of the glow: monochromatic ones are more suitable for quiet rooms, and RGB are ideal for decorating and zoning a room.
Installing LED strip according to the rules
Having decided on the choice, we proceed to the direct preparation of the adaptation for work, for this we need the following materials to be at hand:
- scissors, nippers, soldering iron;
- LED strip, power supply, connector;
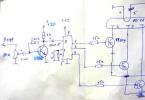
- schematic diagram of the LED strip connection.
After preparing the necessary tool, we proceed to install the lighting in a specific place to the plasterboard ceiling.

- Installation of the LED strip begins with the preparation of the area in the ceiling where it needs to be fixed. To do this, degrease the surface, remove the protective layer from the back of the tape and attach the device to the ceiling. It is better to fix the tape right away, and then start connecting, as this greatly simplifies the task.
- If necessary, we cut the LED strip, but we do it strictly in the marked place, there are contacts, which are then connected to electricity. After trimming, we clean the "plus" and "minus" contacts. We do this procedure carefully so as not to damage the strip, we remove all excess glue and a protective layer.
- If you chose a multi-color LED, then there will be 4 contacts on the tape, one of which is a minus, and three are the advantages of each of the shades.
- A connector with a lock is put on the prepared contacts and fixed on the tape. Ideally, do not use such a device, since it is more reliable to make the connection of the conductors using soldering.
- Further, in the one-color version of the LED strip, the phase conductor is connected to the plus of the power supply, and zero to its minus. If it is necessary to attach a backlight tape with 4 colors to the ceiling, a connector is used here, in which all connections take place. In the future, all the outgoing contacts are connected to the controller, from where to the power supply. In a plasterboard ceiling, it will be easier to make all connections without compromising the appearance of the ceiling.
- After the end of the connections, all the wires are hidden in a drywall niche, from where they are connected through a junction box to the main power panel. It is better if all the switching is done at once.
Installation of lighting in the surface of drywall for decoration
Often, instead of the main light, RGB strip serves as decorative lighting, providing zoning and sophisticated design in the room. The principle of connecting the backlight is similar to connecting a regular white tape, but nevertheless, it is important to place the decoration correctly in the niches.

Usually, a strip of LEDs is installed in the drywall frame, here it is important to correctly distribute the lighting and choose the appropriate shade. The backlight mechanism should be visible, since most often such a device is controlled by a remote control. See below the connection diagram for LED backlighting for decorating any zones.

In appearance, the LED strip is inconspicuous, so it is better not to leave it in plain sight. It is ideal to hide the structure in baguettes or ceiling levels. For ideal zoning, especially a small room, it is ideal to make drywall partitions and place LED colored lighting in them.
Calculation of LED strips and the choice of a power supply
Each LED strip has a distinctive LED density. Basically, this parameter is 30, 60, 120 pieces per meter. For a wide tape, where the LEDs are placed in two rows, the presence of elements in the amount of 240 pieces is characteristic, but such options are usually not used for plasterboard surfaces, since they are considered too overall.
If you use a tape more than one meter under the ceiling, you need to sum up the power of each of the LEDs and, based on these calculations, choose a suitable power supply. Consider, using the example of a tape of the SMD 5050 trademark, their consumption will be:

- with 30 diodes - 7.2 W;
- with 60 diodes - 14 W;
- with 240 diodes - 25 W.
The tape we have chosen with the placement of 30 diodes / m, is 6 meters in length, therefore, its total power must be at least 45 W. This means that it is better to choose a power supply with the same value, but it is better to purchase with a small margin.
Important! Try to choose a power supply that is suitable for the conditions of its use, even if it will cost a little more, but it will play an excellent service for a long time.


