LED strips are increasingly becoming part of our lives. This versatile light source is widely used for decorating not only the facades of buildings, parks or entertainment centers, but also at home, decorating them with multi-level ceilings, arches, kitchen facades and even aquariums.
Thanks to their flexibility and compactness, they can be installed in the most inaccessible places; and an exceptionally long period of operation allows you not to worry about the frequent replacement of "light bulbs". Their installation is simple and quite within the power of the home master.
An LED strip is a strip of dielectric material on which diodes emitting light are installed at regular intervals. The width of the tape is different (8-20 mm), and the standard length is 5 meters. They produce models open, for installation indoors and moisture-proof, for use in water or on the street.
 The intensity of illumination depends on the number of LEDs per 1 m, they can be from 30 to 240 pieces. The tapes are cut into segments of the required length according to special marks, and in order to simplify the installation of the tape, it is provided with a self-adhesive film on the reverse side.
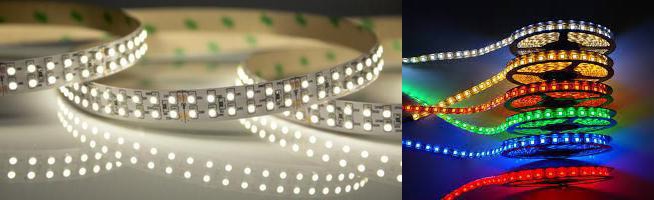
LED strips are classified according to the color of their glow into monochrome (SMD): white, red, green, blue and RGB strips, which provide lighting in any combination, but they will cost three times as much. Since the price of the tape is still quite high, they use it as additional or decorative lighting.
Power Supply Requirements
Any LED strip requires a power supply that will turn alternating current into direct current, and also “bring” the voltage to the desired parameter, since the tape has 12 or 24 V.
The calculation of the required power is simple: the power consumption of 1 m of tape, specified by the manufacturer, is multiplied by the length of the tape and 15-20% is added in reserve. If you plan to connect several tapes of 5 m each, it is better to purchase your own power supply for each.
Installation rules
You should not hurry with gluing the tape, since it will be possible to do this only once, so the surface must be smooth, dry and fat-free. You can bend the tape, but more than 20 mm, otherwise it can be damaged. You should cut only along the drawn lines and strictly observe the polarity when connecting the segments.
They install the tape on the ceiling plinth or use plastic mounting brackets, there are also special aluminum profiles that have an attractive decorative case, inside which tapes are glued: one or more.
The suspension profile offered by http://centrsvetnsk.rf/magazin/podvesnoy-alyuminievyy-profil is ideal for rooms with a "fresh" renovation or is used as an independent decorative element that simultaneously carries and functional load. Profiles can be U-shaped or rounded, which allows you to end up with a finished original lamp.

In no case do not connect the end of one five-meter tape to the beginning of another - the second tape will burn dimmer, the extreme lights will stop glowing at all, so the tapes are connected to the power supply only in parallel. The cut sections are connected by soldering or special LED connectors. Although their cost is high, it is a pleasure to work with them - just place the tape on the contact pad and close the lid. If soldering is required, then the soldering iron should have a small power.
Video: Mounting a profile for an LED strip
When installing multi-color ribbons, a controller is also included in the circuit, which is responsible for changing color combinations. They are controlled by the remote control. The controller is connected to the power supply with two wires: plus and minus, and four are already coming out of it to connect to the tape: black is a common plus and three colored ones: R - red, B - blue, G - green. If several colored tapes are mounted, an amplifier may be needed: it is installed between the first and second strip.
To simplify your task, it is better to purchase LED strips that are immediately equipped with the devices necessary for connection: a power supply and a controller.


