LED light sources, due to their qualities and technical characteristics, have gained wide popularity among consumers. However, under the influence of various factors, they, like conventional lamps, periodically fail. Due to the high cost of these products, many home craftsmen are trying to repair LED lamps with their own hands. It should be noted right away that most factory-made lamps cannot be repaired.
Elements of LED light sources
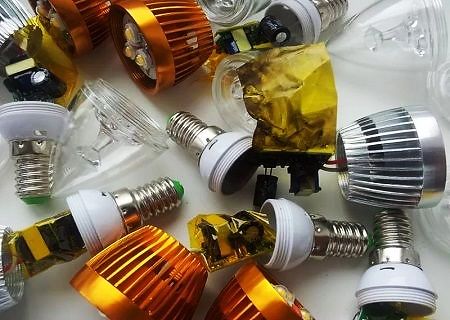
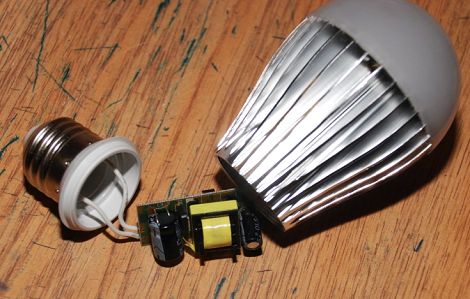
Before disassembling the LED lamp, you should first of all familiarize yourself with its structure and principles of operation. The standard design of such luminaires consists of a power board, a light filter and a housing with a base. In inexpensive budget models of luminaires, current and voltage limitation is carried out using capacitors.
As a light source, LEDs are used in the amount of 50-60 pieces,. The action of these devices can be compared with semiconductor diodes. The movement of current from the anode to the cathode occurs in a straight line, as a result, light fluxes appear inside the LEDs. Each element has a very low power, so they are installed in fixtures in large numbers. Finally, the luminous flux with the necessary characteristics is created using a phosphor coating.
The voltage supply to the LEDs occurs through a special driver that performs the functions of a converter together with diode groups. First, the voltage is supplied to the transformer, which slows down the operating parameters. At its output, a constant current is formed, which serves as power for the LEDs. An additional capacitor installed in the circuit prevents voltage ripple.
There are different types of LED lamps. However, despite the differences in the device, the number of elements and parts, they have a common design, which greatly facilitates their repair.
Causes of failure of LED lamps
Before repairing the LED lamp, it is recommended to accurately determine the causes of the malfunction. Very often, the service life declared by the manufacturer does not coincide with the real ones. In most cases, low-quality crystals become the cause.
The operation of LED lamps is also negatively affected by other factors:
- They have a negative effect on the elements, most often they provoke malfunctions.
- The lamp is not suitable for this LED lamp. In case of incorrect choice of the ceiling, the lamp may overheat.
- Poor quality of light-emitting elements leads to a quick failure of the lamp.
- The lighting system itself may be incorrectly mounted, as a result, the electrical wiring is adversely affected.
- The negative impact of a mechanical nature - shock, strong vibration, and so on.
In the event that there are no deformations that can be determined visually, the cause of the lamp failure must be sought using a multimeter or tester.
Among the most common faults that require intervention and repair, problems affecting the capacitor should be noted. To check the performance, you need to unsolder it from the board. After that, as well as the performance of the diodes.
Sometimes the LEDs start blinking. This condition occurs due to a faulty current-limiting capacitor. Another cause of failure is often associated with a burned-out emitter. LED failure is not always visually determined, so you will need to check every detail with a tester.
There are standard circuits used to test and repair LED light sources. Most often, after checking with a multimeter, it turns out that it is necessary to replace the capacitor. In this case, the defective part is simply replaced with a new one. The same applies to the driver, when replacing which, you should choose the option with the most suitable parameters and technical characteristics.
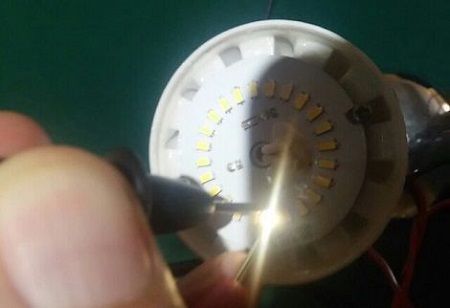
Current-limiting resistors also sometimes fail. Their performance is checked with a multimeter in dial mode. If the indicators deviate by more than 20% from the norm, then the element being checked is faulty. LEDs are more likely to fail. For testing, a battery is used, from which voltage is applied to each LED in turn through a resistor. All defective light bulbs are soldered and replaced with new ones.
Checking and repairing the lamp takes place in a certain order:
- First, the LED lamp must be carefully disassembled.
- Inspect the voltage rectifier for burning, if necessary, it is repaired.
- The next step is to check the capacitor and replace it in case of a malfunction.
- Then the resistors are checked for a break in the internal network.
- It remains to check the performance of the LEDs and replace the faulty elements.
- After replacing the damaged parts, the lamp is returned to its original state. The performance test is carried out by connecting to a standard network, voltage 220V.
When solving the problem of how to repair an LED lamp with your own hands, many are faced with the need to eliminate the blinking of the lamps. This phenomenon is extremely harmful to the eyes, so in residential areas the so-called blinking coefficient should not exceed 20%. Higher rates cause serious disorders of the visual apparatus, reduce the speed of thinking and concentration, and lead to increased irritability.

In the event of a constant blinking of the lamp, it is possible to eliminate this malfunction only after the causes of the violation have been clarified. Blinking may appear due to a manufacturing defect, expiration of the service life, incorrect connection to the network, the presence of an LED in the switch. Sometimes it is enough to correctly screw the light bulb into the socket or replace the switch.
There are several ways to fix the problem of blinking on your own:
- Draw a separate line for the lighting fixture.
- Add an incandescent lamp to the circuit to unload the capacitors.
- Adding a resistor to the circuit to compensate for a poor quality capacitor.
It is possible that inside the luminaire or on the line, the contacts are just loose or there is a short circuit.


