The growing popularity of cork floors is explained quite simply. Good sound and heat insulating qualities, impact resistance, quick installation with their own hands they make the coating very attractive in the eyes of homeowners.
But it should also be taken into account that the installation of an adhesive cork floor is more complicated than a conventional one, which is installed using the floating method ( lock system"tenon and groove").

Adhesive cork floor coverings are plates with a cross section from 4 to 8 mm and dimensions of 30x60, 15x45 or 15x60 cm. They are made from a mixture of granulated cork oak bark and thermosetting resins.
Often, to emphasize beauty and create beautiful panels, manufacturers produce multi-layer products, which are based on a slab of fine-grained cork or PVC base, with cork veneer glued on top, coated with durable varnish (polyurethane or alkyd-urethane). Various decors - from natural wood to metal, stone. Veneer can repeat or imitate texture natural materials.
Before gluing cork floors, you need to stock up the right tool and choose the optimal glue for this job. Tools you will need:
- Tape measure, square and pencil for marking.
- A small rubber roller for subsequent rolling of floor elements.
- Rubber comb spatula for spreading glue over the base.
- Rubber mallet.
- Drill for drilling holes for water pipes or heating pipes, columns and other immovable structures.
- Jigsaw with blade for wooden parts(small teeth) for cutting the tiles of the final and wall rows or a hacksaw for wood.
- Sponge or rag to remove glue residue from the surface cork covering.

When choosing an adhesive, you first need to focus on the quality of the cork tiles and the type of base. It would be a good idea to get advice at the place where you purchased the coverage. As a rule, manufacturers recommend selling certain type or a brand of adhesive product that is ideal for cork. The same instructions are given in the instructions on the package insert or information brochures from the manufacturer.
Let's consider the most popular adhesive compositions from the point of view of companies that sell cork coverings:
- Cascoflex. The adhesive has reactive components and does not contain a volatile solvent, therefore it is considered safe for people with diseases of the cardiovascular and pulmonary systems. The drying time is long - at least 2 days, so correction or adjustment of the tiles is allowed.
- Decol Vern. Universal two-component neoprene adhesive composition based on solvent. Suitable for any type of cork tile, due to the hardener it quickly polymerizes, so correction is possible only in the first 10-20 minutes after applying the composition to the base and reverse side cork floor.
- PVA. A water-resistant polyvinyl acetate compound that is recommended for installation of unsealed tiles with a protective polyvinyl chloride coating. Direct contact with the cork can cause the floor to swell and create cracks.
- HomaCol. Quick-setting water-dispersion adhesive, well suited for gluing cork to concrete and wooden base, quite safe, non-toxic.
- Thomsit UK 400. Universal adhesive composition, easy to use. Requires a perfectly smooth and dry base, applied to both surfaces to be bonded.


Proper gluing of cork tiles requires compliance temperature regime– from +18 to +24 °C, as well as a certain humidity – from 30 to 60%. Under these same conditions, acclimatization of the finishing material occurs.
Laying technology
The basis for laying a cork floor can be a concrete screed or wood covering. The main requirement is a smooth, dry base without defects (pits, chips, potholes), oil and other stains.
If necessary, the concrete floor must be leveled using cement-sand screed(at large differences or damage to the base) or dry ready-made mixtures on a gypsum and gypsum-cement base (floor levelers and self-leveling subfloors).
The preparation period can last for a month, since this is exactly the period required for the screed to gain the required strength and dry completely. After the expiration date, it is recommended to treat the base with a primer deep penetration for strengthening and dust removal.

Wooden floors require no less attention. The floor needs to be sanded or sanded with coarse sandpaper using parquet sanding machines, the “humps” must be removed, and various defects must be eliminated. Weak strips should be re-glued or tightened to the base with self-tapping screws.
If desired, you can lay plywood or OSB, secure with hardware in increments of 30-50 cm crosswise, and sand the surface surface grinder. Additionally, to protect against mold or bugs in the future, you can prime the floor with antiseptic compounds.
A day before installation, it is recommended to bring the adhesive cork flooring into the room and leave it unpacked for acclimatization. The floor covering is removed from packaging immediately before installation.
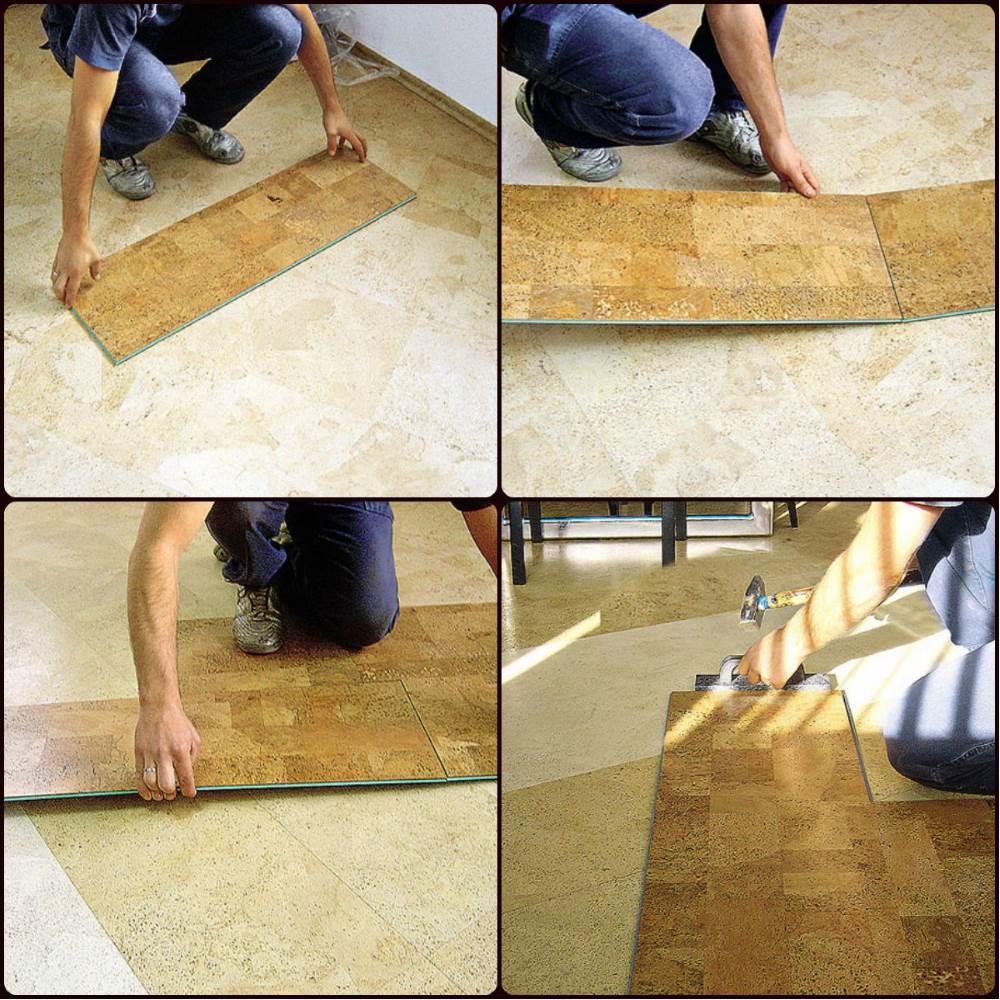
All tiles must be inspected for defects or different colors; it is advisable to make a preliminary layout on the floor. This will show both the design and ways to minimize waste. After preparatory stage the base is marked.

Installation starts from the center of the room. To do this, cords or fishing line are pulled diagonally from the corners and secured to rods or nails. The center is taken to be the place where they intersect. In addition, you will need guides (profiles) - two perpendiculars relative to the walls of the room.
You can begin a trial installation of beacon tiles. The process is carried out without applying glue. At this stage, the dimensions of the wall tiles that need to be cut are specified. Their width should be at least half of the solid plank.
For convenience, laying the cork floor with glue is done in two steps: first one half of the room, then the other. The cut tiles are laid in a final row along the outer wall.
It should be taken into account that when using two-component or water-dispersion adhesive compositions, the surfaces are bonded quite quickly, so adjustments must be made as soon as possible.
The actual laying of the adhesive cork floor begins with gluing 6-8 tiles in two directions at right angles. In this case, it is necessary to monitor the tight fit of the elements - gaps between them are unacceptable.
The glue is applied evenly to both the base and the back of the tiles. Less often - only on the basis. Area covered adhesive composition area of the main coating should be larger size laid tiles.
After allowing the adhesive mixture to dry a little, the tiles are firmly applied to the base and tapped with a rubber mallet to improve the fit. The surface of the tile along the edges is wiped with a damp sponge to remove any glue that has come out. Each next row is pasted with an offset relative to the previous one, that is, in a checkerboard pattern. The last to be glued are the cut tiles.

Depending on the type of adhesive cork floor (varnished or uncoated), after drying it is coated with alkyd-urethane or polyurethane varnish. This significantly increases the wear resistance of the coating. Acrylic compounds are not recommended for use, as they wear out quickly.
What to do if the cork floor comes off after installation
Unlike floating interlocking floors, adhesive cork floors come away from the base much less frequently. The fact is that between the tiles mounted using the tongue-and-groove method and the base there remains air gap, under which moisture may get in. Plus to this lock joints They don't always turn out perfectly dense.
If the installation is done poorly with adhesive, dampness can penetrate under the glued coating. In this case, there is a high risk of swelling of the cork floor and the appearance of mold and mildew. In this case, it is necessary to dismantle the affected area and treat it with special means.
You cannot glue old tiles; you will have to purchase new ones.
Also, cork panels can come off due to the “warm floor” heating system. The recommended level is no more than +25 °C. Failure to comply with this condition leads to the glue drying out, the appearance of cracks between the tiles, and finally, to swelling and damage to the integrity of the cork sheet.
Correcting the situation is quite simple. You don’t even have to resort to the help of specialists. You need to remove the peeling panel, dry it, clean the base and glue the tile back. If the moment has already been missed and a fungus has grown under the plug, then the affected panel needs to be replaced.
Video about cork floor installation technology and the main mistakes:
Cork flooring is soft, environmentally friendly and comfortable. This flooring is appropriate in a children's room and bedroom. It has high sound insulation characteristics. But in order for the coating to last as long as possible, the installation of cork flooring is carried out in compliance with technology. You can lay cork tiles yourself if you know some installation nuances and the specifics of choosing materials. We will also tell you how much cork flooring costs.
Types of adhesive cork for floors according to structure
Many useful and beautiful things are made from the bark of the cork tree, including finishing materials.
Floor adhesive plug has several varieties:
- adhesive agglomerated cork coverings;
- self-adhesive strips and tiles made from crushed cork;
- cork laminate.
Sinter plug
This type of cork is made from crushed material. It is then mixed with synthetic-based thermosetting resins and pressed. The result is blocks with a density of 450-800 kg/m³. The semi-finished product is cut into sheets up to 0.6 cm thick. Next, planks and tiles with a maximum width of 30 cm are cut out of these sheets on a machine. maximum length 1.2 m. Products are glued end-to-end because they have smooth edges.
Important! The cost of a cork floor made from agglomerated cork starts from $11.6 per square.
The agglomerated adhesive plug on the floor has following features:
- It is allowed to be placed on heated floors. But in this case you need to use a special elastic glue, which is marked that it can be used for heated floors.
- Manufacturers do not recommend glue such a plug onto the screed with electrical system heating
- If as finishing coating varnishing or waxing is used, then material suitable for installation indoors with increased traffic and significant loads on the floor, for example, in the living room, hallway, kitchen.
- Adhesive cork floors successfully combined with other floor coverings (laminate, ceramic tiles, parquet).
Self-adhesive plug

These are thin slabs of veneered or traditional agglomerate. An adhesive layer is applied to the back side of the material. It is protected with paper on top to prevent the glue from drying out. Self-adhesive products are very convenient to lay on the floor, walls and ceiling.
Important! If you are interested in self-adhesive cork flooring, the price per meter starts at $13.3 per square.
This cork covering is produced mainly in the form of square tiles with a side of no more than 300 mm. Their thickness is in the range of 3.6-5 mm. Less common are adhesive-based planks with a width of no more than 180 mm and a length not exceeding 900 mm.
This adhesive cork flooring has the following features:
- The front surface does not have a finishing coating and needs to be protected from the ingress of dyes, water, abrasive compounds and household chemicals.
- Gluing is carried out without the use of additional adhesive mixtures, but for better adhesion to the base it must be carefully and correctly prepared.
- Gluing is allowed on floors with a water heating system.
- Self-adhesive cork can only be installed on the floor in a room with normal humidity, for example, in a bedroom, nursery, living room.
- The coating is suitable for interiors in eco- and retro style.
Attention! Experts perform installation glue plug at a price of $4.8 per square. This price does not include foundation preparation services.
Glue plug installation technology

Before laying cork flooring, you need to prepare the necessary tools and materials:
- Before laying the coating, prepare the base. To do this, you will need repair and leveling compounds for a wooden or concrete base (epoxy or cement mixtures, self-leveling floors, plywood, OSB, chipboard, etc.).
- Tiles can only be glued to a primed base. Therefore for wooden base buy a fungicidal primer, and an adhesive primer is suitable for a mineral floor.
- The technology for laying agglomerated tiles requires the use of polymer adhesive.
- As a final protective coating use wax, oil, acrylic or polyurethane varnish.
- Brushes and rollers for applying protective compounds.
- To apply the glue you need a short-haired velor roller or a notched trowel.
- Level, tape measure, hygrometer, pencil, square, paint cord.
- Rollers or mallet for rolling the covering to the floor.
- Sponge to remove excess glue.
- Drill for making technological holes and cutter.
Important! The material is laid after it has been left in the room where it will be installed for 1-2 days.
Work is carried out subject to the following indoor conditions:
- heating appliances should not be running;
- get rid of drafts;
- the optimal air temperature is between 18-25°C;
- relative humidity 55-65%.
Choosing adhesive for cork flooring

The adhesive installation method involves choosing a suitable glue. Thus, cork coatings without a finishing layer can be glued using water-dispersion compounds. Tiles with varnish or vinyl protective layer fixed with solvent glue.
It's important to remember that everything adhesive mixtures Solvent-based products are flammable and slightly toxic, so work is carried out using protective equipment and in a ventilated area.
Important! Organic solvent adhesive is environmentally friendly and less toxic.
Adhesive compositions for water based They don’t like contact with water, so if the room is flooded there is a risk that the tiles will come off. If work is carried out in the cold season, then it is better to buy glue that is resistant to cold and temperature changes.
Selecting a laying scheme
If you use square tiles, then you can post them only in two ways:
- according to principle brickwork with a shift of the joint in each subsequent row by half an element;
- traditional checkerboard laying seam to seam.
Important! Elements of rectangular and square shapes are laid diagonally in the room or traditionally parallel to the walls.
Regarding the elements rectangular shape, then they are laid in several ways:
- traditional staggered masonry;
- plain and triple brickwork;
- diagonal laying;
- herringbone flooring;
- deck masonry;
- network;
- flooring in squares.
Preparing the base
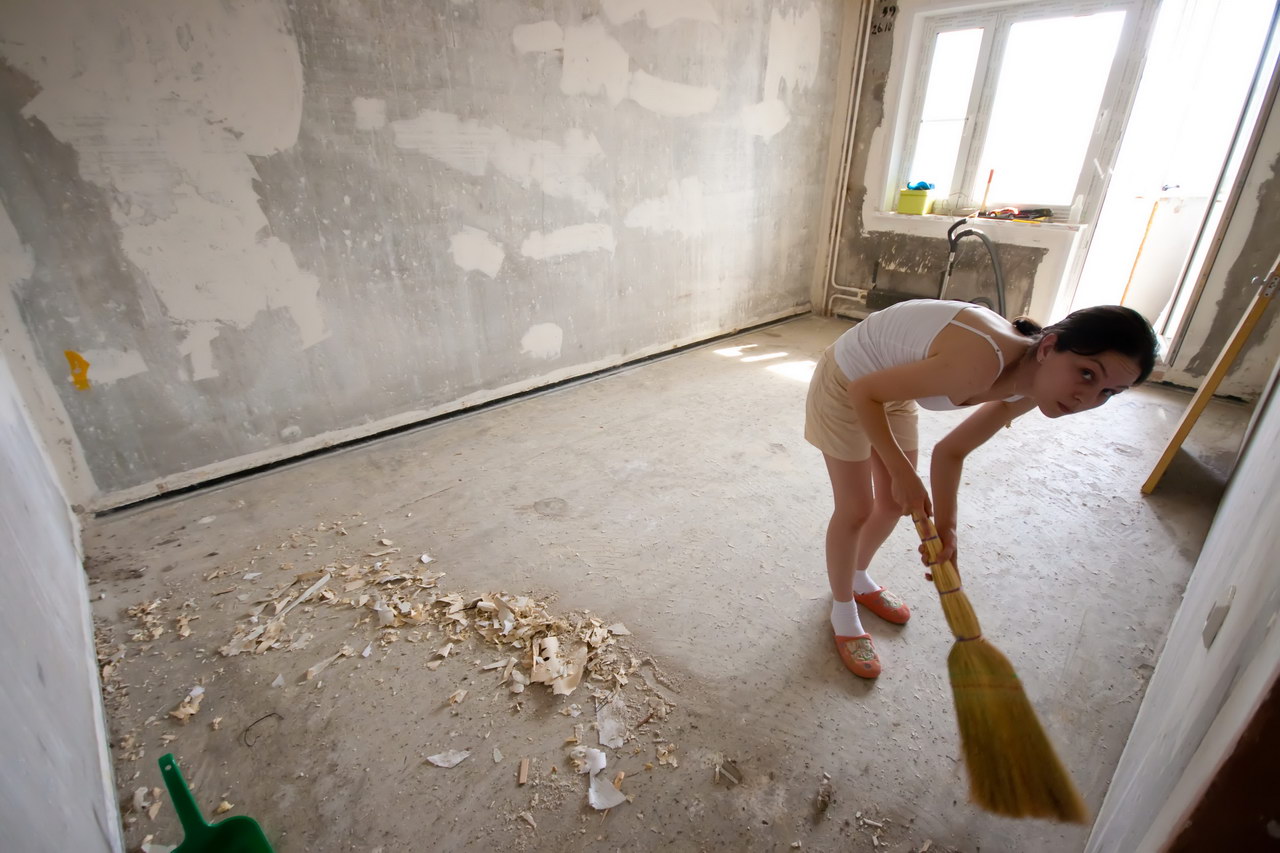
The step-by-step process of laying cork flooring begins with preparing the base. Since the elements are small in thickness, all defects in the base will be visible after they are laid. That is why the beauty of the floor depends on the quality of preparation of the base.
Requirements for the rough foundation:
- Compressive strength – not less than 150 MPa.
- The maximum permissible height difference is no more than 2 mm per two meters.
- The base should not have cracks, loose or rotten areas.
- There should be no traces of glue, soot, grease, soot, bitumen or remnants of the old coating.
- The residual moisture indicator for a wooden base is 8-12%, for concrete base within 0.5-2 percent.
Mineral screed or sheets are suitable for leveling the base. wood materials with bridging edges. Used to fill seams between sheets acrylic sealants or a mixture of PVA and sawdust.
To improve the characteristics of the base, deep penetrating and strengthening primers are used. If you need to increase adhesion to the base and make the absorbency of the floor more uniform, use an adhesive primer.
After this, begin marking the surface:
- Using a tape measure or laser level find the center of the room.
- Through the center, parallel to one of the walls, we draw a line from which we will lay the tiles. At diagonal laying the line is drawn at 45 degrees.
- We carry out a preliminary layout of the cork elements in a checkerboard pattern or with an offset.
- We cut the edge products to the required size, taking into account a centimeter gap around the perimeter of the room.
- If required, technological holes are cut in the elements.
- Sometimes the tiles are chamfered. To do this, the edges of the product are treated with fine-grained sandpaper, and the dust is removed with a damp sponge.
On the market building materials Cork flooring is becoming increasingly popular. This material is made from crushed cork oak bark by pressing. An ideal floor covering for those who prefer natural materials. Among the advantages of cork: resistance to combustion, antistatic, good sound and heat insulation.
When studying the issue in detail, laying a cork floor with your own hands is not so difficult process. Availability the necessary tool and a responsible approach will make it possible to independently complete the work with high quality and without the involvement of specialists.
Installation of cork flooring lock connection The technique is similar to installing laminate. It is not advisable to lay a cork floor without first laying a waterproof film. Residual moisture from the floor surface can negatively affect the cork board.
The film is cut into strips and laid out overlapping, as well as running onto the walls. The backing is laid on top.
The first panel is laid in the corner of the room, and then the following tiles are sequentially secured end to end using a lock.
The second and third rows are assembled in the same way. The rows are connected to each other by a locking connection. It is very important that when laying the panels there is an expansion joint between the wall and the covering.
Cork tiles with interlocking connection
If at the end the row is incomplete, the panel is cut off. The cut part is the beginning of the second row.
If the width turns out that the last row will not be full, then the panel is cut lengthwise.
There are times when the panel lock is cut off and the panel is glued to the floor with glue. Such cases happen in hard to reach places for styling.
 Laying cork tiles
 The essence of laying interlocking flooring is similar to a floating floor. This installation method is faster and easier. The interlocking cork floor has only one drawback - it is not resistant to moisture.
Laying tiles
Exist different ways, how to lay cork flooring. Cork tiles can be laid either flat (tile over tile) or offset (brickwork). When using cork panels irregular shape It is better to use the second method of flooring. This will help visually smooth out the unevenness of vertical lines due to different sizes cork tiles. The installation method is selected before work begins at the interior design stage.
 Laying methods
 Laying using the brickwork technique begins with laying a whole series of boards. The second row is laid in such a way that the beginning of the first board is located in the center of the board of the first row. All subsequent rows are laid in the same way. It turns out that each row is shifted relative to the previous row.
Adhesive coatings
Laying adhesive cork on the floor has one peculiarity - it is laid from the center of the room. Because of this important stage When laying, the markings are correct and accurate. This determines how the cork floor will look in the end.
 Marking before installation
 To mark the center of the room, draw a contour parallel to the wall. Another line is drawn nearby, retreating from the first by the width of two tiles. When laying diagonally, the second line is applied diagonally to the room.
To get a beautiful pattern cork board pre-lay out on the floor, after which you can secure it with glue.
The first tile is glued perfectly exactly according to the markings, because even a small error at the beginning can lead to a significant deviation at the end of the work, and the overall picture of the design will be spoiled.
 Applying adhesive to tiles
 Contact adhesive is applied to the floor and cork tiles using a spatula. The adhesive applied to the tiles is left in place for half an hour. Then you need to glue the plate to the floor.
When installing the floor, the tiles are overlapped to create a tight connection. The edge of the panel must be held. The free part of the tile is pressed, and the resulting wave is smoothed towards the joint. This creates a tight joint. Additionally, each joint is tapped with a rubber hammer for a tight connection.
 Leveling the base
 Before laying any material, you need to thoroughly prepare the base for laying. The quality of preparation of the base on which the cork floor will be laid will determine its service life.
The stages of preparing the floor base are as follows:
- Cleaning the surface from contamination;
- Leveling the base;
- Drying the floor surface.
Clean the surface from dust and dirt with a vacuum cleaner or dry brush. Next comes the process of leveling the surface depending on the base material of the floor.
 Vacuum the floor before laying
 If the base is a concrete floor that has cracks, holes, imperfections are removed cement mortar. If the concrete floor is curved or there are differences, then it is better to level it using a concrete screed. The surfaces are allowed to dry thoroughly to reduce the moisture content of the coating. It is recommended to use a polyethylene layer between the concrete and the cork covering to protect against possible condensation. Only after the preparatory work has been carried out is the adhesive plug or locking plug installed.
The subfloor in the form of a wooden floor requires checking for rotten boards. If the floor is uneven, then it is leveled using sheets of plywood or chipboard. In this case, the floor will not only be ideal surface for laying cork, but will also act as additional thermal insulation.
 Set of tools
 Installing cork on the floor yourself requires having a tool in your arsenal that will help you carry out this work efficiently and effectively.
To lay interlocking cork you need:
- Pencil for marking;
- Roulette;
- Hacksaw for cutting cork tiles;
- Wedges for installation in gaps between the wall and panels.
 Tiles on a backing
 Laying an adhesive cork floor requires the same tools as for a castle floor. You only need to add:
- Roller or spatula for glue;
- Rubber hammer;
- Dishes for glue.
 Gluing tiles
 The adhesive plug is glued to glue, which can be water-based or solvent-based. When applying water-based adhesive, you should understand that in the event of possible flooding, the adhesive panel on such adhesive may fall off.
Installing cork flooring with solvent-based adhesive requires the use of protective equipment to prevent harmful substances into the respiratory organs. Work must be carried out at open window for air intake.
 Floating floor installation
The floating floor method implies the absence of a tight connection between floor covering and the structure of the building, which makes it possible to avoid the impact of building shrinkage on the coating. In this case, the flooring material does not come into contact with the side walls, and sound waves are not transmitted from them. The floor installed in this way will be insulated from noise that is generated when the floor slab is impacted by walking, moving objects, etc.
How to lay cork floor using the floating floor method? The process begins by covering the surface with a film that does not allow moisture to pass through. The film is laid in overlapping pieces, which are connected with tape. To insulate the floor under the floor covering, it is possible to lay a cork underlay. Panels of an incomplete row are cut without affecting the groove. The panels are placed in transverse rows from the far left corner, inserting the tongue of the next panel into the groove of the previous panel. A gap of 20-30 mm wide is left between the wall and the coating. To do this, place a wedge in the gap for expansion. Excess film is cut off. At the finish it is attached to the wall cork plinth at a distance of 1-2 mm from the floor covering.
Today it is difficult to surprise anyone when they see cork floors. Such floors exactly replicate laminate; only a professional can find the characteristic differences. Cork tiles are compressed cork, also called MDF boards. Basically the cork is special material, which is obtained after removing the outer rind of cork oak. Such trees do not grow in Russia. They can be found in Portugal and other European countries. Grow cork trees and in northern Africa. You might even think that it is blasphemy to strip the bark from living trees. But cork is dead bark, so removing it is only better for the tree. After some time, another, renewed one will grow in place of the removed bark.
Cork floors are characterized by complete sound insulation, waterproofness, shock absorption, ease of installation, resistance to chemical influences, good grip, beauty and comfort.
Cork flooring is installed using a specific technology. In the same way, before covering the floor with another material, you need to carry out thorough preparation bases for future coating, level floors, remove dirt and dust. It is necessary to maintain the air temperature in the room at least 18°C at all times.
Floor installation: some features
When installing cork flooring, the normal humidity level for cork flooring installation is 25%. If the moisture content of the concrete is much higher, the base must be covered. plastic film. You can make the coating with other waterproofing material.
An additional film with a thickness of more than two millimeters is placed on the polyethylene coating. This gasket will give the floor additional hydro- and sound-proofing qualities.

Similar to other coatings, the surface under the cork floor must be completely flat. It should not have slopes or changes in height. If there are any irregularities, then such a defect can be corrected with cement concrete screed. At the same time, you need to remember one obligatory fulfillment of one point.
You might be interested in: How to do dry leveling gender?
After the screed has completely dried, it is necessary to install plywood sheets. Note that the thickness of the laid layer should be more than two centimeters. After completing the installation of the plywood, you can begin to assemble and install the cork floor.
Installing cork flooring is similar to installing laminate flooring. Basically, the cork slab is equipped with similar spikes, secured using the “click” method. Cork flooring can be installed in several ways. Moreover, each of them is very similar to installing laminate, but has some differences.
Return to contents
Installation using the tenon-to-groove principle using end fastening
To install a cork floor, you need a special glue that is used to lubricate the ends of the cork tiles, without fixing the cork to the main surface. This method came to be called “floating”.

To make the seams formed between two adjacent rows invisible, the cork covering is laid so that it is directed in the direction where the light falls. Spacer wedges are used to separate the wall and the last cork slab.
The resulting gap was left on purpose. It will be a kind of compensator if the dimensions of the cork slabs change due to a change in temperature or increase in humidity.
The first row of installed cork tiles is considered the reference. This row is used to align other rows. For greater accuracy, it is advisable to use a construction level gauge. The uniformity of the cork floor must be checked after installing several rows of slabs.
Tapping the cork tiles for better contact is done with a hammer, after coating the ends of the cork tile adhesive. There are times when it is impossible to complete a row due to the dimensions of the last tile. You have to cut the tiles with a jigsaw. If you do this operation manually, an ordinary saw will do.
With this method, one very important condition must be observed. Each new row should be offset by 0.5 times the length of the already installed row. As a result, the installation of other rows can be carried out using several tactical options. When the previously laid row is assembled only from whole tiles, the next one should begin sawn in the middle cork slabs. When the last row has half a tile cut off at the end, the remaining part will become the beginning of the installation of the next row.
You might be interested in: How to insulate a floor with foam plastic?
You have to cut the plug even when you encounter various obstacles, for example, heating pipes.

What is the technology for using the “tongue and groove” method, when gluing cork tiles directly to the base? This method very similar to the previous one. Its only difference was the gluing of the cork to the surface. The glue is spread onto the tile using a special spatula, and the area where it will be glued is also coated.
The brand of glue depends on how the coating will be installed. Gluing cork tiles can be done in several ways. The standard one involves one-sided gluing, the other one involves double-sided gluing.
For the standard method, classic acrylic glue is used.
Before starting installation using this method, it is advisable to first “rehearse” a little. Lay the first two rows of tiles, noting where each of them should be. When the fitting is completed, you can begin to perform direct gluing. For uniformity with this method, after laying the third row, it is necessary to take mandatory breaks to allow the glue to dry completely.
Cork flooring is chosen by connoisseurs of natural materials. There are two ways to install it: glue and tongue and groove.
The glue method is used when using natural cork, produced in the form of thick sheets. The tongue and groove is used when installing cork laminate, which top layer cork acts as a base, and NDF boards are used as a base, similar to laminate.
Preparation before installation work
Have you decided how to install your cork floor? In fact, at the preparation stage it doesn’t matter; the preparation of the base is carried out the same way. The base must be perfectly level and smooth. The better the floor is prepared, the longer the service life of the cork covering will be. Leveling the floor is carried out using beacons. The base is leveled using self-leveling mixtures. This process should be approached with full responsibility.
Note! A varnished cork floor will subsequently reveal the slightest irregularities.
The leveling mixture must dry completely. Otherwise, mold will appear under the floor covering. Based on this, to preparatory work It is worth starting in advance, about 3 weeks before the start of laying the cork.
Adhesive installation method

To install cork with glue, you will need the following tools:
- roulette;
- square ruler;
- pencil;
- notched spatula;
- rubber mallet;
- roller and container for applying varnish.
Stages of work
- Dust and prime the floor.
- After waiting for the primer layer to dry, apply markings.
- Draw one line in the middle parallel to the wall and mark the center on it.
- Start laying from a wall along which there is no furniture. In this case, there should be a gap of 5-10 mm between the cork and the wall.
- A couple of days before installation work It is necessary to remove the cork from the packaging and leave it in the room where installation is planned for acclimatization.
Laying the cork in a run-up
- Move the slabs halfway, imitating brickwork.
- Start laying the material from the wall and insert a piece of slab at the end, and start the next row with the remaining piece. In this case, the amount of waste is minimized.
Laying tiles using the adhesive method

Apply adhesive to the base in an even layer and place the first tile, pressing it firmly. The area of the applied adhesive should exceed the size of one tile, so that when laying the next one, you will not stain the already laid one. Then apply adhesive to the next section and secure the second tile.
If there is no chamfer on the edges, difficulties may arise at the joints. To fix this, take a rubber mallet and hammer in the protruding edge. The entire surface is covered in the same way.
Final row
Note! When laying the last row, you will most likely need to trim the material using a sharp knife and ruler. Do not break the material, but run the knife several times.
Laying technology may vary depending on the adhesive chosen. For example, glue on polymer based applied directly to the material, not the floor. To avoid unforeseen situations, carefully read the instructions before use.
Final stage
As soon as the cork coating has dried, a layer of varnish is applied to it.
Note! Particularly good in combination with cork acrylic lacquer water-based, odorless and harmless.
Before work, the floor is dust-free and all window and door openings are covered. Each speck will be very noticeable under a layer of varnish. If you have an unvarnished cork from the manufacturer, you will need to apply at least three coats of varnish.
Video
Installation using the tongue-and-groove method

This method is much easier and for it you need the following tools:
- Electric jigsaw.
- Roulette.
- Square ruler.
- Pencil.
- Backing cutter.
Cork laminated coating mounted in the same way regular laminate. The base is cleaned of dust and then laid cork backing, the joints of which are treated with tape, and the installation process begins.
Laying rules

The first row is laid from whole planks. The missing part is cut off with a jigsaw. When laying, it is necessary to leave a distance of 1 cm between the material and the wall.
The second row begins with the trim that remains from the first. The row is assembled separately, and then moves to the previously laid one. The tenon is inserted into the groove at an angle, and then the row is lowered and compacted by tapping the hand. If the room is long, it is advisable to do this work with a partner.
Note! Installation of cork laminate is carried out in the direction of the sun's rays.
The final row is cut one at a time, you will need to measure them separately. The entire trimmed row is also completed and snapped into place. Cork laminate does not require the application of a protective varnish layer, as this is provided by the manufacturer.
The work is completed and you can enjoy your new, environmentally friendly flooring.
Video


