A window opening in a wooden house has always been one of the most complex construction units. With the advent of PVC windows, to the problems caused by shrinkage processes, an extensive list of new restrictions and requirements associated with the universal design of metal-plastic profiles was added. In this connection, installing plastic windows in a wooden house with your own hands should be done only after a thorough study of all the features of this technology.
Let us immediately emphasize that the principle PVC fastenings windows differs in principle from the installation method of classic wooden frames, therefore, even experienced craftsmen who have not had practice in this area of construction work, it is advisable to study the relevant documentation and technological advice from window manufacturers.
You will find general information about the technology for installing plastic windows in our article, and today we will give step-by-step instructions for self-installation.
When preparing to install a plastic window yourself, you should pay attention Special attention preparation of tools and materials. Considering that in most cases, the installation of windows in wooden houses is carried out on-site (dacha, country house, etc.), the lack of one specific key or device can create considerable problems.
Let's look at the main groups of tools that are needed to properly install a window structure.
Mechanics
From a mechanical point of view, plastic windows have a far from standard design, so the usual set home handyman will clearly not be enough.
Below is a list mechanical tools, necessary for efficient work with PVC profile:
- iron and rubber hammer (an elastic striker is used to position the frame);
- universal screwdriver;
- set of hex keys;
- handle for removing pins (with hexagonal tip);
- electric drill;
- drills for concrete and metal (diameters from 3 to 10 mm);
- mounting wedges and gaskets;
- universal adjusting key;
- measuring kit (tape measure, square, building level, plumb line);
- device for gripping double-glazed windows (“glass jacks”).
Please note that a regular hacksaw may not be enough for cutting expansion profiles, since some types of extensions can be reinforced with metal. Cut this profile hand saw, of course, it is possible, but you will have to spend a lot more time on each detail.
Taking into account the above, it would be useful to supplement the above list with a mechanized version of the saw (a jigsaw or a circular saw), as well as devices for fixation (clamps).
It is advisable to take a clamp with a wide grip, since they may be needed not only for securing materials during cutting, but also for attaching expansion profiles.
Sealing
An integral part of the technology for assembling metal-plastic windows is sealing using sealing tapes and polymerizable substances.
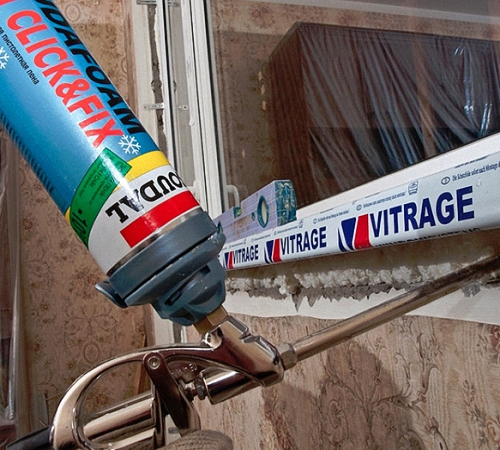
When installing PVC profiles with your own hands, you can use sprayers supplied with cylinders with polyurethane foam, but for professional work It is advisable to purchase a separate device that will significantly reduce the cost of consumables.
We would like to separately emphasize that, in addition to polyurethane foam, when installing windows made of polyvinyl chloride, silicone is often used, which is extremely difficult to squeeze out of the tube without a special “gun”.
Waterproofing
Any polymer sealant - and polyurethane foam is no exception - in the case of constant contact with outside air and moisture is destroyed quite quickly. To slow down this process, internal and external surfaces installation gaps must be protected with waterproofing (installed on internal surfaces, such protection is called “vapor barrier”).
This can be done either using special tape or through the application of special pastes (putties).
Depending on what type of waterproofing is preferred, the basic list of tools must be supplemented with scissors or a set of spatulas.
Preparing for installation
After the PVC window has been purchased and delivered, it is imperative to check the completeness and compliance of the actual dimensions with the parameters specified in the order.
Before you start technical description work on self-installation of windows, we list the main terms used to refer to the elements of their design:
- frame (power base of the window);
- sash (moving part of the window);
- double-glazed window (1-2-3 chamber set of glasses combined into a single block);
- impost (internal partitions of the frame);
- glazing bead (snap strips necessary for fixing double-glazed windows in the frame or sashes);
- fittings (window control and regulating elements);
- slope ( decorative panel, covering the end of the frame or the internal plane of the casing);
- windowsill;
- extension (an expanding profile used to adjust the geometric dimensions of the window).
Examination
As practice shows, window handles and other auxiliary fittings are often lost during transportation.
If the order included mosquito net– it is necessary to check the availability of fasteners for its installation.
In addition to completeness, the dimensions of the window and casing are checked for compliance. The main test criterion is simple - the installation gap should be no more than 2 cm (but not less than 5 mm!). It must be taken into account that when comparing linear dimensions, the above tolerances are multiplied by two. That is, if the internal width of the casing, for example, is 200 cm, then the total width of the frame should be no more than 200-2*2=196 cm.
In cases where the window was purchased with the expectation of adding extensions, measurements are made taking into account the mutual overlap of the locks.
 Next, you need to select fastening pins, the length of which should be such that when fully screwed in, they do not pierce through the casing.
This requirement is relevant only for those cases when the window installation is carried out with drilling of the profile. However, it should be remembered that this installation method is a backup and is used only in cases where the window is mounted in a frame consisting only of embedded timber.
The main method of fixing a PVC window in an opening is installation on anchor plates, the purchase of which should also be included in the list of preparatory work.

Disassembly and preparation for installation
The next stage of preparation for installation is disassembling the factory delivery kit. Despite the fact that window installation can be done without dismantling the double-glazed windows, we recommend using the option with complete disassembly, since it is much easier to install and center a light frame than a massive and inconvenient one for manipulation. window unit.
Below are step-by-step instructions for the disassembly and preparation process:
- remove the packaging and protective tape (you don’t have to remove the tape from the internal surfaces, but if you leave it on the outside, then after 1-2 months it will “stick” tightly to the frame);
- remove the glass units. To do this, you need to remove the glazing beads from the latches. You should start from the bottom;
- dismantle the frames, for which you will need to remove the locking pins (a special key is used for this operation, mentioned in the previous section);
- dismantle auxiliary fittings, otherwise they may be lost or damaged during installation (plugs for drainage holes, covers for hinges, etc.).
- if the window is installed in a reverse quarter, stick the PSUL sealing tape to the outer perimeter of the frame;
- drill holes for dowels or mount anchor plates (depending on the installation method).
We would like to highlight the following nuances:
- when removing double-glazed windows, you should note the original position of the left and right glazing beads;
- the lower edge of the double-glazed windows must be installed on special gaskets - their position must be noted;
- It is best to grab glass panels using a special device (it is also indicated in the list of tools listed above);
- The removed glass units should be handled with extreme care so as not to damage the edges (and also avoid vertical storage).
Installation methods
There are two different ways PVC installations do-it-yourself windows: with and without disassembling the window unit.
This difference is due to two factors: the window mounting scheme and the weight of the structure.
The first option is more universal and allows window installation in any way.
The second method is used only in cases where the window block is fixed in the opening using anchor plates. It is used for the installation of fixed windows, or for mass installation of standard format windows in a T-shaped casing.
Obviously, window installation without disassembly is an order of magnitude faster than with disassembly. However, due to the fact that most assembled metal-plastic window blocks have significant weight, for self-installation Only the first option is recommended.
Installation of plastic windows
To correctly install the window yourself, you should clearly understand the main rule of installation operations of this type: the efficiency of a window depends not only on the quality of the glass unit, but also on correct assembly the entire structure of the window unit, which includes several auxiliary subsystems.
In this case, “auxiliary subsystems” mean:
- waterproofing;
- additional seals;
- slopes;
- low tides;
- platbands.
Particular attention should be paid to the position and protection of sealants. The figure on the right shows the basic layout of additional seals.
Please note that the seal around the outer perimeter of the window is installed only when installed in a reverse quarter. If the window is mounted in a conventional T-shaped casing (which is the most common case), then the slopes play the role of such a seal.
Now let’s look step by step at how to properly install PVC windows in wooden houses.
Removing old windows
When dismantling windows in houses made of timber and logs, special attention should be paid to the safety of the frame, since making a new one will not be cheap.
In cases where the previous installation was carried out correctly, and the frames were fastened using self-tapping screws, the dismantling sequence consists of only three operations: removing the fasteners, removing the window block and cleaning the casing from the remains of the mounting foam.
Some problems may arise if the old window was nailed, to remove which you may need an additional tool - a nail puller.
It is important to consider that before installing a new window, it is necessary to inspect the casing frame. Namely: it is necessary to check for cracks, chips, as well as the absence of signs of rotting or woodworm damage. If any of the listed factors are detected, the pigtail should be replaced with a new one.
Let us note that regarding the replacement of the frame, you can find many conflicting recommendations on the Internet, among which there are those that claim that when renovating old houses, windows with metal-plastic frames can be installed without the frame. We consider this approach to be incorrect, since even old log house at seasonal changes humidity can create enough movement to cause the window to jam or even break.
Of all types of wooden buildings, only in frame house You don’t have to install a sliding casing, but even in this case, the window is installed in a finished wooden frame.
Unlike stone houses, in wooden buildings There is rarely a need for “pothole” repair of the installation site, since the casing almost always provides an even rectangular opening for fixing a new window.
The only exception may be a situation when it is necessary to insert a window whose dimensions are smaller than the previous one (the need for such a replacement often arises when renovating a bathhouse). In this case, preparing the internal opening consists of increasing the thickness of the casing strips.
Frame fitting
The most common mistake made when installing Euro windows with your own hands is taking the original dimensions incorrectly.
Therefore, before you start fixing the window, you need to make sure that it actually matches the installation opening.
Fitting the frame is simple - 1.5-2 cm thick supports are placed on the bottom casing strip. The frame is installed on them, after which a visual assessment of the remaining gaps is performed.
If in any part of the window they exceed 2.5 cm, you need to think about correcting the geometric dimensions of the frame with the help of extensions.
Let us separately note one nuance - if the size of the gap between the frame and the casing is more than 2 cm, but less minimum thickness available expander, then there is a temptation to blow it out with foam without any size correction. Many people do this, after which they cannot understand why the expensive PVC window blows so cold.
It is important to remember: polyurethane foam is not a full-fledged heat insulator, and in no case can it act as a substitute for a window profile.
Window frame installation
Once the size of the frame and the opening have been matched, you can begin the main operations.
Let's list them step by step:
- Initial positioning. It is carried out in the same way as fitting: the frame is installed on centering pegs, after which it is necessary to achieve a uniform thickness of the installation gap along the entire perimeter of the frame.
- Alignment of spatial position. For positioning in the vertical plane it is better to use a plumb line, in the horizontal plane - a building level. Working fixation is performed using side and top struts.
- After the installation accuracy has been confirmed, secure the vertical points first, and only after additional check - the lateral ones. As mentioned above, fastenings can be long screws or anchor plates.
- Immediately after completing the fastening, we recommend installing the drip sill, since after assembling the window, access to the corresponding mounting positions will be difficult (this point is especially relevant for windows located on the second floor).
- Installation of window sashes on workplaces.
- Installation of double-glazed windows. Please note that the glass panel cannot be placed directly on the plastic of the sash (special gaskets must be preserved during dismantling).
- Fixing double-glazed windows with glazing beads (in reverse order).
- Close the doors and check the positioning again.
- We carry out installation of fittings.
Let us remind you once again what you need to pay special attention to when installing the frame:
- position of the transverse line of the window – for wooden houses it should run exactly along the center of the frame;
- the length of the fastening dowels (if the through-fixation method is used) should not exceed the total thickness of the frame and casing boards;
- To secure the outer “tails” of the anchor plates, use fasteners whose length is less than the thickness of the casing frame boards.
Window foaming
The next step is to fill the installation gap with foam. Despite its apparent simplicity, this stage has several technical features:
- Polyurethane foam expands during polymerization and the force created by this can deform the metal-plastic profile. Therefore, blowing should only be done on a fully assembled and closed window.
- If you plan to use a tape version of waterproofing, it is much more convenient to immediately line the installation gap area from the outside of the frame.
- To simplify the installation of the vapor barrier, we recommend cutting the tape and fixing it on the window frame.
Blowing is done from the inside, after which the seam is immediately sealed with pre-installed pieces of vapor barrier tape.
Possible problems if windows are installed incorrectly
Avoiding lengthy discussions on the topic “which windows are better to install so that the savings are truly economical,” let’s formulate a simple rule: any window, even the most expensive, will not provide the declared characteristics if it is installed incorrectly.
Therefore, in addition to strictly following the above recommendations, you must avoid the following mistakes:
- incorrect position of the window according to the thickness of the frame. The consequence of the error is freezing and condensation. For classic houses Windows made of wood are installed along the center line. In cases where the house is lined with brick or lined with thermal insulation, we recommend contacting specialists to calculate the position of the window;
- lack of seasonal adjustment. The consequence of the error is a violation of air exchange standards. In those windows where this is possible, adjustment is performed using splines placed in the desired position.
Plastic windows can be installed in any kind of structure: stone, concrete, wood. But installation in a wooden structure requires more attention, since wood is prone to shrinkage due to drying out. Wood that dries turns into a strong press that can deform the window block. As a result, the window structure ceases to function correctly and may become askew. Let's look at how to avoid this situation and install windows without errors. Let us dwell on the specifics of polyvinyl chloride window construction, its strengths and weaknesses.
Advantages of PVC windows
PVC windows are window structures made of polyvinyl chloride. This material is a chemical synthetic based on petroleum ethylene and chlorine. This polymer is resistant to various influences and lasts a long time. Window structures made from the specified material are resistant to:
- sun rays;
- high humidity;
- exposure to insects;
- exposure to organisms invisible to the eye.

PVC for window structures is a rigid and durable material. The strength of the polymer is several times greater than the strength of wooden structures and can withstand changes of one hundred degrees - from fifty degrees below zero to fifty degrees above zero.
Polyvinyl chloride consists of the following components:
- stabilizers;
- modifiers;
- dyes;
- fillers;
- lubricants

The material lasts a very long time, manufacturers give a twenty-year guarantee, but it is still impossible to verify whether this is true. The service life of the first ones has not yet passed installed windows. Statements that even after fifty years windows will not lose their properties are possibly real. But window seals fail much faster. As practice shows, they need to be changed every eight to ten years. In general, the service life of the seal depends on the temperature of each specific area.
Among the advantages plastic structures the following can be distinguished:
- high quality material and resistance to various types of influences;
- tightness of the structure - while staying in the room, a person is reliably protected from noise, dust, gases and harmful substances;
- high sound insulation ability - windows can significantly dampen extraneous sounds;
- reliable thermal protection - complete protection from drafts and reliable heat retention;
- efficiency - saving heat resources;
- attractiveness of designs - you can use not only standard windows, but also bring design ideas to life.
Basic properties of window structures made of polyvinyl chloride
Supporters and opponents of plastic windows argue about the safety of these structures for health. Those who claim that structures are unsafe for human health argue that this is due to the presence of lead in the base of the raw materials. But lead in windows is completely safe, and most manufacturers have replaced this material with others. The fact that PVC window structures are quite economical and environmentally friendly is confirmed by certificates:
- thanks to PVC windows, heat is retained in the room and this allows you to save resources and money;
- Plastic structures save wood resources and thereby prevent deforestation.
In some countries, the government pays money to residents who install plastic structures for their personal contribution and concern for saving natural resources.
Opponents of plastic structures argue that over time, plastic becomes unsightly, as it turns yellow and fades. But nowadays the technologies for the production of plastic windows have improved and the color is not lost under the influence of natural forces.
In the event of a fire indoors, window structures of this type will “hold” the fire, since the plastic structure has high thermal insulation abilities.

Types of plastic windows
The construction segment offers a huge variety of plastic windows. They differ in many ways: shape, size, number of sashes, options for opening them, types of double-glazed windows, types of profiles. Currently, manufacturers offer windows with various types of decoration and varying degrees of transparency.
Based on the number of sashes, windows are divided into one, two and three-leaf windows. The chosen option depends on the location, the size of the structures and the individual characteristics of the home. For a small window it will be convenient to have one sash. For typical apartments It is recommended to install windows with a pair of sashes.
Regarding opening windows, the following options are distinguished:
- a blind design is the most ill-conceived window regarding its functional tasks;
- rotating elements;
- folding elements;
- combined elements.

Its operational capabilities depend on the characteristics of the profile. PVC itself has low thermal conductivity, but chambers with air inside the structure help retain heat several times better. The thermal conductivity of the window and the air temperature in the home depend on the number of chambers. There are from three to seven cameras.
Three-chamber windows are installed in rooms that do not require heating: outbuildings, sheds.
As for six and seven chamber windows, they do not perform their functions better than four or five chamber windows, so there is no point in overpaying for the design.
As for marking profiles with letters, there are types: A, B and C. Type “A” is used in homes. “B” and “C” are recommended for use in factory or warehouse premises.
The glazing of the structure itself can be done using two, three or four sheets of glass. They are fixed at the required distance from one another and form chambers.
Double-glazed windows can be one, two or three-chamber. This point can be confusing when buying a window. It is necessary to clarify which cameras are meant in the frames or double-glazed windows themselves.

Plastic structures for wooden houses
When installing plastic windows in wooden walls, you will have to study the theory of the issue in order to do everything correctly. Some people think that in old buildings wooden type It is impossible to install plastic windows. But in fact, no, this can be done in any type of premises. You can install windows yourself, provided that you have minimal knowledge of construction basics. The main thing is to take into account the characteristics of wood as a material and take into account the fact that the wooden frame of a house can also sag.
After you have selected windows for a wooden house, you need to familiarize yourself with the “jam” technology. This technique is aimed at preventing deformation of window structures, regardless of the selected material.
Statistics show that a wooden house shrinks up to thirty-five centimeters. Depending on the foundation of the structure, twelve months after the construction of the house it settles in any case; this is a natural process. The maximum error will be provided that the house is built from rounded timber, the minimum - from laminated veneer lumber. Regular timber can sag by thirty to forty centimeters. This is taken into account as a factor that can deform window structures. Deformation may manifest itself in the impossibility or difficulty in opening and closing the window.
Builders advise not to install plastic structures in new houses until they shrink. But as experience shows, old buildings can also cause windows to become deformed. But what to do, is it impossible to install plastic metal structures in wooden houses? In fact, experienced builders have developed installation technology that will allow you to use PVC windows to their full potential.

Installation instructions for plastic windows
For successful implementation installation work It is important to plan and carry out competent preparatory work; they consist of the following actions:
- it is necessary to dismantle the old window structure;
- clean out the recesses construction waste and dust;
- correctly measure the window opening, write down the calculations;
- If the window opening does not match the dimensions of the new window frame, it should be adjusted to the dimensions using special solutions for working with wooden surfaces.
At the preparatory stage, a decision is made on the shape of the window, the number of sashes, in what color scheme it will be in how many packages.
When all decisions have been made, double-glazed windows are ordered according to the requirements.
The pigtail is the next stage in installing a metal-plastic structure.

The window structure can be finally installed in a wooden structure after preparing the frame. This is a structure made of wooden beams aimed at supporting weight load-bearing walls and preventing the window from deforming. The required timber size is ten by fifteen centimeters. Using a chisel, connecting grooves are made on these bars, about five centimeters wide. Cuts are made longitudinally using a chainsaw. All manipulations are controlled by the building level.
Plastic structures are inserted into the prepared pigtail system and secured with fasteners. The installation procedure is as follows:
- with the help of fasteners the pigtail system is fastened into a single frame;
- a small distance is left below using a wooden wedge;
- a window frame is inserted into the system of the manufactured frame and secured with fastening structures;
- pre-removed window sashes are installed;
- all gaps must be filled with foam;
- the wooden wedge placed previously is removed.
A window frame specially installed in a wall made of wooden material performs several important tasks:
- does not allow the wooden structure to move vertically;
- does not prevent the log from shrinking vertically;
- strengthens the wall at the window opening.
Experienced builders insist on installing a frame even when installing plastic windows in an old wooden house. They argue that this measure is simply necessary. A structure made of wood constantly changes its size to one degree or another - it swells during rain, and dries out during heat.

Tool for installation of plastic structures
The most important process is the process of installing plastic structures in their intended place. To do this, it is advisable to prepare in advance all the tools that will be needed during the installation of the structure:
- drill for woodworking;
- screwdriver;
- fastenings: anchor bolts and plates;
- polyurethane foam;
- spray bottle with water.
Naturally, during work you will need other tools. Ideally, such work should be carried out with a partner who can supply the tool and hold the structure when necessary.
Installing plastic elements is a difficult type of construction activity. If you are installing plastic windows yourself, take into account all the recommendations of specialists.

Calculation of plastic windows
Correctly calculating the dimensions is not easy; it is a very difficult process that is best entrusted to a professional from a window workshop. IN Lately An online calculator for plastic structures has appeared, allowing you to find out the exact cost. It is very comfortable. The sites offer various filters:
- you can choose the layout of the future window structure;
- decide on the configuration;
- in the configuration, a choice is made by type, profiles, types of double-glazed windows;
- after that, just click on the button and the plastic structures will be calculated.
The cost of window structures is affected by the number of sashes, the choice of additional fittings, additional functions glass unit, profile color.
To imagine how plastic metal structures are installed in practice wooden houses, watch the video. In fact, you can install windows yourself; for this you need to take into account the specifics and features this method and follow the recommendations of specialists.
It is known that wooden windows in houses built from timber are rightfully considered the safest and practical solution, which favorably influences the indoor microclimate.
The fundamental thing in the presented case is that when it shrinks, the window system and walls behave uniformly. Their installation according to technology plays a decisive role here.
Features of installing windows in a wooden house
The assembly of windows in a timber building has certain features. As you know, wood shrinks. In houses made of chopped logs or during the first 5 years, shrinkage is about 10-13% of the height of the building, while shrinkage does not exceed 2%.
If there is warping of window structures, the formation of crown gaps in the walls or cracking of the glass unit, this indicates a violation of the technology during the installation process.
- In houses made of chopped wood, rounded logs, planed or profiled timber, it is advisable to install the window support after the house has settled (not earlier than 1.5 years after construction).
- Installing windows after the construction of a log house is not rational due to the lack of the ability to calculate wall shrinkage. This indicator depends on the moisture content of the timber.
- In houses made of laminated veneer lumber, installation of windows is allowed immediately after erection of walls and installation of the roof of the house.
- Installation of windows must be carried out exclusively through sliding connections - support beams and casing. Tying window blocks and frame structures to logs or beams is strictly prohibited. Tight fastening during drying leads to a violation of the integrity of window modules and the walls of the building. In fact, the window system must balance separately in relation to the wall.
- In the upper part above the window frames, it is necessary to provide a shrinkage reserve - gaps of 6-7 cm. Miscalculations of spare spaces can lead to poor closing of windows or roof gaps in walls.

Wooden window installation diagram
Preparing the window opening
Before installing the box, you should prepare the window opening. The opening must be rectangular shape without cracks, depressions, distortions and other defects. Construction debris, dirt, dust and deposits must be removed from all surfaces.
In order to avoid distortions in the future, it is necessary to take accurate measurements of the external, internal and lateral sides of the opening.
In the case where the skew of the opening is significant and it is not possible to correct it, it is recommended to expand the window parameters in such a way that highest level the external hole exceeded the width by 2.5-4 cm and the height by 1-2 cm.
Extension can be achieved by installing an additional profile on the window. This will prevent the appearance of gaps between the box and the hole in areas of maximum distortion.
In addition to the option of expanding the size of the opening to correct the distortion, there is such an option as increasing the parameters of the window frame.
Casing
A special design, which is a wooden box without a bottom crossbar, the purpose of which is reliable fastening windows and maintaining the shape of the window frame, regardless of the degree of shrinkage of the house, is called casing or jamb.
There are several types of this design:
- One piece. It is made from specially processed solid material.
- Glue. The individual components are made from type-setting boards, connected by means of microgrooves and glue. All burrs and small knots are removed.
- Mixed. Part of the casing is made solid, and the other is made using glue. Upon completion of installation, the pigtail is varnished. This type Suitable for use on large window sills.
The window frame is made according to the size of each window. Moreover, if it is planned internal lining, then a sample can be made for it. When facing on both sides, sampling is not performed.
Assembly of the casing can begin after preparing the window opening.
Its production is carried out as follows:
- Grooves are machined in the base, which is adjacent to the window opening. A beam of the same size is inserted into them, acting as the side of the casing.
- First, place the beam at the bottom of the opening, which will prevent displacement of the side elements.
- A compactor is placed under the timber from linen tow.
- Sealing material is placed in the recesses and install side boards.
- The final stage is fastening the top board of the structure.
- A space is left on top of the jamb for the wood to dry out and filled with sealant. This way, during the process of shrinking the logs, the load on the window opening will not be affected.
Window installation
Window installation is carried out in the following sequence:
- A waterproofing layer is placed on the lower part of the opening. and sealing material.
- Install window frame and fix it with the help of linings or wedges made of wood.
- Using a building level or plumb line, adjust the horizontal and vertical lines. In this case, you need to pay attention to the actual horizontal and vertical, and not to the sides of the window opening.
- On each side of the opening, in increments of 50 cm, drill holes.
- Using self-tapping screws fix the box.
- Insulate the space between the frame and the wall sealing material.
- Next, the frame is mounted. It is installed in the grooves of the box and secured to it with screws.
- Window blocks are installed on the frame using hinges(severable and inseparable). The difference between them is the possibility of removing the hinge. Detachable ones are convenient in areas where there is no possibility of raising the window transom. Smooth hinge fastening promotes even hanging window transoms. They are fastened using screws.
- The sash is locked using locking element or latch. After checking the opening and closing of the transom, you should secure the frame using nails.
- Next we move on to installing window sills. They are mounted from the inside so that the side edges extend into the walls by 4.5-5 cm on both sides.
- Immediately before installation, using a lime-gypsum mixture, align the lower part of the window opening.
- The window sill is fixed using wedges. After installation thermal insulation material it is finally fixed.
- Installation of drip linings is carried out from the outside of the opening– the entire width of the frame’s recess into the base.
- The gaps between the casing of the base and frame, as well as the top and sides of the window, are covered with platband. It is advisable to use the same type of wood from which the house is built as platbands.
- All parts of the casing are connected to each other. To do this, use spikes, nails or an adhesive solution.
- Placement marking is carried out in advance fastening elements (step is 10-12 cm).
- So that during the process of attaching the platbands they do not move, the structure can be placed on glue.
- The final stage is fixing the platbands with nails or self-tapping screws, and closing the gaps between the base and platbands with sealing material.
- For the manufacture of casing, wood with a moisture content of at least 10% is used., otherwise cracks will form inside the structure over time.
- When making a joint, it is strictly prohibited use metal fasteners.
- Construction foam should not be used as a sealing material when assembling the casing. In this case, the wood is bonded, which prevents its natural drying.
- When installing windows, it is important to make the holes for them correctly. The optimal distance from the window sill to the floor is 85-90 cm.
- Experts do not recommend installing windows without installing frames, even if the house was built many years ago and the frame is completely dry. This is due to the fact that throughout its lifespan the tree has a tendency to dry out.
- For greater efficiency and heat retention, wooden windows should be installed closer to outside window hole.
- It is necessary to choose hard wood as a material for the window sill. A window sill made of laminated wood has the longest service life; a window sill made of solid wood has the shortest service life (as a rule, the product is subject to warping).
- The angles of the window opening should be 90 degrees, and the diagonals should not differ by more than 10 mm. If the hole in the base is larger than the allowable size, more sealing material will be required. If you do not ensure that the corners are even, the box may warp.
- It is important to correctly calculate the seating depth of the window in the opening so that the dew point isoline, equal to 10 degrees, passes in its inner part. Then the formation of condensation on inside there will be no window.
Relatively recently, all residential buildings had ordinary wooden windows, which had to be sealed for the winter. Today it is almost a relic of the past. And most people strive to replace such windows with modern plastic window structures, and they are especially interested in installing plastic windows with their own hands.
This desire of the consumer is quite understandable - plastic windows not only have an aesthetic appearance, but also serve as interior decoration. They are also much easier to use, last an order of magnitude longer, and are significantly cheaper than their wooden counterparts.
If you have a desire to replace the old windows in your apartment with modern double-glazed windows, then you will certainly ask yourself whether it is possible to install a plastic window yourself. How difficult is it to install plastic windows, and can you do it yourself without the help of specialists?
Yes, it's quite possible. In order to install a plastic window with your own hands, it is not necessary to have a construction specialty. With certain skills and good tools Anyone can install a plastic window with their own hands.
Let's figure out how to do it right.
What does a plastic window consist of?
First, let's look at the design of a plastic window. Without this, you will not understand the installation process itself.
Plastic windows are made from special material, which is called PolyVinyl Chloride. That’s why plastic windows are called PVC windows in short. Like any window, the main element of a PVC window is a frame made of a profile consisting of cells. The more such cells in the frame (also called chambers), the warmer the window will be.
Typically the frame color is white. Although plastic can be black, brown, and even colored. The most common and most a budget option– white plastic windows.
In addition, the window consists of an opening part (sash) and a stationary part, which is called a “capercaillie”. The glass unit is directly inserted into these parts of the window, which is pressed against the frame with a special plastic strip. For tightness, a black rubber seal is placed.
Special mechanisms are installed on the window sashes, with the help of which the window opens and closes.
In addition, on the outside the window has a so-called ebb - a small board with the help of which precipitation is removed, and slopes - plates that seal the side and top parts from the street side.

Stages of installing plastic windows with your own hands
All stages of installing plastic windows with your own hands come down to the following:
- careful measurements;
- dismantling old window structures;
- preparation of window openings;
- DIY PVC window installation.
Taking measurements
Before ordering and, accordingly, installing a plastic window, you need to make several measurements. Moreover, how carefully they are done will determine how your structure will fit into the window opening. Remember that accurate measurements are almost half the battle. If you take the measurements incorrectly, when installing plastic windows yourself, the structure simply will not fit into the opening. In addition, the windows may begin to freeze.
First you need to carefully examine the opening. If the part of the window that is smaller on the outside, then measurements are taken according to the bottleneck. Moreover, it is highly advisable to make several of them, because window openings are rarely perfectly smooth. Find the smallest measurement value and add 3 to it. Measure the height, leave its value as it is.
If the window is the same size both inside and outside, measurements are taken slightly differently. You need to measure the width and height. Then you need to subtract 5 cm from the height, and 3 from the width. This will be the full size of your window, with width and height. We subtract the values in order to leave gaps for installing the window sill and special mounting foam.

Each owner chooses the window sill according to the size he wants. Some like wide window sills, some like narrow ones, and some make them at wall level. This is individual, and there are no rules here. This applies to width.
The length of both the window sill and the ebb should be taken with a margin - about 10 cm wider than the window opening.
Getting ready for installation
Do-it-yourself installation of plastic windows always begins with dismantling the old window. As a rule, even novice builders find dismantling particularly easy.
After you have broken out the old window, you need to carefully inspect the opening and remove anything that may fall off later. If some parts of the opening protrude from the walls after dismantling, they must also be removed and the surfaces smoothed. Potholes, if any. It should be sealed with cement mortar.
When installing PVC windows with your own hands, you must take into account the following circumstances:
- the plastic window structure should be carefully secured;
- the window structure must be leveled both horizontally and vertically, otherwise in the future it may simply warp;
- It is necessary to plaster the mounting foam on all sides, with which the structure is attached, also in order to avoid future problems such as deformation.

Plastic window installation technology
Install a plastic window with your own hands as follows:
- The structure should be fixed on four sides using wedges, and it should be determined how accurately the frame is positioned relative to the opening;
- secure the frame with special bolts;
- attach the structure with screws to the wooden part;
- seal the plastic structure using polyurethane foam, spreading it over a surface slightly moistened with water.
We need to start with the fact that there are two different ways DIY installation of plastic windows.
The first method is to drill holes in the window frame for special anchors, which are driven into the wall. This is enough difficult way, however, a more reliable fastening.

The second method is that metal plates are first attached to the frame from the outside, and only then these plates are attached to the walls. It is much simpler and quick way, however, such fastening is not reliable. The frame may simply warp even with strong wind. Therefore, if you nevertheless decide to make your life easier and install a plastic window with your own hands using the second method, use thick and wide metal plates. In this case, you can give your plastic structure greater reliability. However, if your city is very windy, this method is definitely not suitable for you.
Direct installation
Installing a plastic window with your own hands using the first method with reliable fastening is carried out as follows.
First, you should check whether the structure and the window opening are compatible. If everything is in order, we proceed directly to installation.
First you need to remove the window sash. For this:
- turn the window handle down, placing the window in the “closed” position, and use a screwdriver to remove the trim from the hinges;
- pull out the pin, which is located on the top hinge;
- open the shutter by turning the window handle to a horizontal position, then lifting window sash, you can easily remove it from the lower pin.
After you have removed the sash, you need to remove the double-glazed window on the capecaillie. For this:
- insert a small spatula or something similar, strong enough, thin and not wide, into the gap between the frame and the bead;
- move the glazing bead with a spatula, going along the entire length, and remove it from the frame.
After this, you can easily remove the glass unit itself. The main thing is that it does not fall out of the frame after the glazing beads you removed are no longer holding it. To avoid this, the window should be tilted.
The frame is freed from the glass unit, and now it should be covered around the perimeter with special tape. This tape is needed to keep the window warm.

As a rule, white self-adhesive protective tapes are glued to the frames. It is also advisable to remove them, because later, when they heat up in the sun and stick to the frame, fused with it, this will be difficult to do. In the meantime, the tapes are very easy to remove.
Now the frame needs to be inserted into the window opening. To do this, you will need mounting wedges, which are placed in the corners (this is a mandatory requirement), as well as in other places where you deem it necessary.
Using a drill and a drill bit, special holes are made into which the fasteners are inserted. The first hole is drilled at a distance of 1.5 - 2 cm from the top edge. The bottom hole should be approximately the same distance from the bottom corner. The gap between two fasteners should not be more than 5-7 cm.
The anchor is hammered into the hole and then tightened. At the same time, you must tighten the anchor carefully, trying not to overtighten, otherwise the profile will bend, and this cannot be allowed. This operation - tightening the anchors - is continued as many times as necessary.
After this, ebb tides should be installed outside. Before installation, self-adhesive waterproofing should be applied to the part of the frame that is located outside. Grooves are made in the side openings (the edges of these ebbs will need to be inserted there later).
On that part of the opening where the ebb will rest on the wall, a special profile is installed, to which the ebb will then be attached. If the height difference is small, you don’t have to install the profile, but simply apply a layer of polyurethane foam. Then the ebb should be placed under the ledge of the frame and attached to it with self-tapping screws. Along the lower edge of the ebb, you also need to fill it with polyurethane foam.
Now let's take a closer look at the second method of installing plastic windows with your own hands - using plates.
This method is much simpler, although, as we have already said, it is less reliable. Installation using this method involves installing thick metal plates.
They should be installed at the same distance as the anchors in the first installation method - approximately 2 cm from the edge, and no more than 7 cm between those in the middle. The metal plates are simply screwed to the profile using self-tapping screws.

In all other respects, do-it-yourself installation of plastic windows is completely identical to the first installation method. In the same way, the window is leveled in three planes, after which all actions are identical. Simply, unlike the first method, they attach not the frame itself, but metal plates, and attach them to the so-called dowel-nails. The peculiarity of the fastening is that they first drill a hole, then bend the metal plate, insert a dowel into the hole, put the plate in place and tighten the dowel.
The main mistakes when installing plastic windows with your own hands
If you install plastic windows incorrectly, this can lead to the fact that the house will be cold; water will flow into the room through improperly installed ebbs. And the expensive structures themselves will quickly become unusable. And if professional installers sometimes make mistakes when installing PVC windows, then, of course, an amateur who installs plastic windows with his own hands is not immune from them.
Let's look at the 10 most common mistakes made when installing plastic windows.
The window size is incorrect
This is usually a consequence of incorrect, careless measurement of the window opening, and, accordingly, the manufacture of an unsuitable window structure. And in case the window is too large in size. And if the size is very small, it is simply impossible to install such structures.

Poor preparation of the window opening
If the surfaces are poorly cleaned, there is construction debris, dust, potholes left on them, or, on the contrary, parts of the wall protrude on the surface of the opening, the polyurethane foam will not fit as tightly and evenly as is necessary for high-quality installation of plastic windows with your own hands. In addition, this kind of pollution absorbs moisture very well, and it will soon end up inside your apartment.
Ignoring wall insulation
If a plastic window is installed without taking into account the thermal insulation of the wall, then at the joints it will penetrate into the apartment. cold air. Therefore, it is imperative to take into account the layers of walls when installing plastic windows. If the wall consists of one layer, the window should be placed exactly in the middle of the wall. If the wall is double-layered, the window should be installed at the very edge, as close to the insulation as possible. And if the wall is three-layer, then it is necessary to install a PVC window directly in the plane of the wall insulation, in order to avoid heat loss.
Incorrect distance between the window frame and the slope
If the window frame is located too close to the slope, the seal in this place will be of poor quality, and moisture will begin to appear and accumulate in these places. If, on the contrary, the frame is located too far from the slope, then there is a risk of deformation, since the load on the anchors or metal plates is too great.
Incorrect size of window sill
The window sill should be slightly narrower than the window frame itself. If it is a different size, or they decide not to install it at all, then water will penetrate under the window frame due to the lack of a normal seal in this place, and as a result, the wall will constantly be wet. Metal parts can simply corrode after a certain time.

Poor quality fastening of PVC window to the wall
If you skimp on dowels or anchors and there are too few of them to attach the window structure to the wall properly, over time the position of the window will change, the frame will become deformed, and it will be difficult for you to tear off and close the window.
Not enough polyurethane foam
Polyurethane foam is practically the only material for insulating a window structure and the wall itself to which it is attached. If there is not enough foam, the heat will escape. Therefore, the gap between the slope and window frame you need to fill it properly, not sparing the foam.
No insulation tape
If you decide not to use the insulating tape required by GOST on the inside and outside of the window structure, be prepared for the fact that the thermal insulation will gradually become worse and worse. Accordingly, the windows will deteriorate much faster than you would like.
Therefore, if you decide to install a plastic window with your own hands, try to go through everything necessary steps and carry out all the necessary actions efficiently, carefully and without haste. Then your beautiful plastic windows, installed by yourself, will delight you and your household for many years.
Common plastic structures are actively beginning to give way to wooden counterparts. The installation of wooden windows is gaining popularity, since wood compares favorably with plastic structures due to its environmental friendliness and ability to “breathe”. You can install wooden windows in your house yourself, following the right technology. The installation technique is almost identical to the installation of PVC structures, with the exception of some nuances, which we will discuss below.
Installation work front
In order to carry out high-quality installation of wooden windows yourself, you need to break the work into small stages, thanks to which independent homework will turn out to be a success. So:
- we clean the window opening and take accurate measurements;
- install the window in the opening;
- fix the installed structure;
- create isolation;
- adjusting and customizing fittings;
- We are engaged in finishing slopes.
The technology of work will be the same regardless of where the installation takes place: be it windows in a frame house or an apartment. When intending to install windows in a house, it is advisable to complete the main stages of construction in order to avoid additional pollution. By the way, installing wooden windows will be inexpensive. One installation will cost approximately 3 thousand rubles, excluding the cost of consumables.
Preparing the window opening
To begin with, the window opening is cleared of remnants of previous plaster and other technical residues. In the case of brickwork in which voids have formed due to destroyed material, it is recommended to eliminate them.
 First you need to carefully and thoroughly prepare the window opening
 The principle of the preparatory stage is to adjust to required sizes, which must be carried out with special care, avoiding noticeable errors. All surfaces are cleaned of elements of previous plaster and other residues. Installation of wooden windows in accordance with GOST requires the presence of a gap of a fixed width around the perimeter of the frame, which, upon completion of the alignment of the entire structure inside the openings, is filled with polyurethane foam.
 Installation of a wooden window according to GOST requires the presence of gaps between the frame and the opening
 It is not recommended to leave excessively large gaps along the edge areas, preferring a width of 10 to 15 mm, so that later the voids can be well foamed. A gap of 40-50 mm is left along the bottom of the window structure. This nuance is necessary for high-quality alignment of windows inside openings. Always remember that before installing windows into openings, the geometry and dimensions are first checked. This step allows you to achieve the correct work, eliminating possible distortions and disproportion of parts.
Sometimes craftsmen violate technological points by making wall lintels incorrectly, since the window opening is used as formwork with a window walled up inside. Such actions lead to additional financial costs equal to the price of a new structure, because the window frame is placed very tightly between the edges.
 If you neglect the technological principles of installation, the structure will soon require replacement
 In extreme cases, complete removal of wooden windows may be necessary. Do not forget the GOST recommendations regarding gaps, then the work is guaranteed to be crowned with success.
End-to-end methodology
When installing wooden windows, the through installation method is often used, which involves the use of dowels. The method is characterized by low cost and relative simplicity, allowing you to install the window yourself. Upon completion of the installation work, the fixed box will be completely motionless inside the window opening and will be reliably protected from the influence of environmental factors.
 Through installation of wooden window blocks is simple and inexpensive
 The occurrence of accidental distortions is excluded, various kinds displacements and deformations of the structure during installation work. The use of dowels provides strength of fixation, which cannot be achieved with anchor bolts. Since the dowels are presented in the form of a hollow sleeve, it is impossible for the screws to penetrate deep into the wall. Perhaps these are the main advantages of the end-to-end installation system, which make it very popular among installers and customers.
It is worth mentioning the minor advantages. Firstly, installing windows using the end-to-end method will please you with minimal financial costs. Secondly, it will not require special tools, allowing you to get by with a set of existing ones. During the work, you only need to make holes using a drill, secure the dowels and finally attach decorative plastic plugs over the screws.
 Holes for dowels are made using a drill
 Using the through method, when installing windows, you need to pay attention to the correct choice of the place where the holes for the dowels will be located. The four-stage cross-section of window profiles allows you to drill holes at an exclusively uniform level. It should be borne in mind that experts strongly do not recommend making holes in different places.
Mounting blocks for window installation
Do-it-yourself installation of wooden windows involves the use of mounting blocks, which makes the process inexpensive and quick to complete. Mainly used pads whose thickness is 50 mm. They are a block of wood impregnated with an antiseptic, which is installed on a waterproofing layer. The arrangement is made exclusively horizontal, running parallel to the upper edge of the window structure. To ensure correct installation actions, you must first free the window frame from frames and other components.
 To install windows on blocks, you need a perfectly level opening.
 The structure is installed inside the mounting block using laser or simple level, carefully checking the levels on each side. It is advisable to make the top and side gaps the same, leaving 10-20 mm each. The number of pads can be determined using graphic image with possible accommodation options.

Mount using plates
The plates can be made yourself, although many window manufacturers include them in the package. A simple technique is designed to make the fixation and fastening especially strong. The method is very simple to implement: the plates are screwed with self-tapping screws to the window frame on both sides, placing two of them on the top and two on the bottom.
 The plates ensure reliable fixation of the window
 If the window exceeds 1.5 meters in height, two additional plates are attached to the center of the product. As the wedging of the body inside the opening is completed, the plates protruding from both sides are secured along the edge of the openings with screws and dowels. Before foaming the seams of a wooden window, the protruding wedges can be pulled out. But it should be borne in mind that subsequently it will be necessary to carry out an additional check to ensure the correct horizontal position of the housing.

There is another simple way to install wooden windows yourself, which is highly reliable and durable, which we will consider further. When installing wooden windows with double-glazed windows or glass, they must be removed, which is very easy to do: carefully separate the glazing beads and carefully pull out the glass.
 Installation of the frame using self-tapping screws is carried out without glass - it is installed in last resort
 Next, along the sides and top of the inner surface of the frame, places for holes are marked, followed by drilling. Before you start drilling, be sure to insert the frame into place and carefully level it using a level. Then screw in the screws, taking into account that they can be moved without effort, since the body still needs to be adjusted vertically and horizontally. Finally, a double-glazed window is installed and the structure is cleaned of dirt.
We insulate wooden windows
The correct technology for installing wooden windows ensures minimal thermal conductivity and excellent insulation, protecting the room from humidity and air masses. It is important to take into account that a high degree of the listed characteristics is achieved by the increased cost of the window, since in order to create a high-quality thermal insulation system it is necessary to run it along the entire perimeter of the body. In this case, preference should be given to polyurethane foam for installation, which is easy to buy in most specialized stores.
 Thermal insulation of the installed wooden window block is performed using foam
 When filling the space with foam, it is necessary to monitor the thickness of the applied layer, which should not extend too far along the edge when expanding. Excess foam will only stain the space and lead to banal overspending. It is also necessary to control the humidity, since water ingress is unacceptable to ensure adhesion and reliability of work.
Even a new recruit will be able to install wooden windows independently and with high quality. The main thing is to follow the basic rules and move step by step, without missing important details.


