An integral attribute of any home is a table. Despite the fact that the variety of shapes and materials of this piece of furniture can amaze even the most demanding and sophisticated buyers, many amateur furniture makers try to make a table with their own hands. There is nothing complicated about this, because the design of the table is not much more complicated than a regular stool. Armed with a saw, drill, hammer and other tools, you will be able to assemble such a product in literally half a day, and it will look no worse than a store-bought one. One of the main advantages of making this furniture yourself is the opportunity for creative self-expression. In addition, a DIY table can become the central element of any interior.
It's no secret that the main function of the table is to organize a place for dining and receiving guests. In addition, it often serves as a place for family pastime, during which you can enjoy various entertainments: playing cards, monopoly, lotto, dominoes, etc. In addition to significant savings and demonstrating your carpentry skills to others, making a table with your own hands provides a person with an excellent opportunity create a unique item that is ideal in all respects: shape, size, material and reliability. By following the instructions and recommendations of professionals, you will see from your own experience that you can make this piece of furniture yourself at home.
Today, various building materials are used to produce tables: metal, glass, plastic, stone, but furniture is often made from such high-quality material as wood. For creating wooden table With your own hands, you can use soft (spruce, pine, cedar, fir), hard (birch, walnut, oak, maple, ash) or very hard (dogwood, yew) wood species that have good resistance to rotting and mechanical stress.

Walnut has the most valuable qualities for furniture - it combines high hardness and excellent viscosity. If you are new to carpentry, it is recommended to give preference to furniture made of pine, birch and oak. Having decided to make a pine original table with your own hands, you can use cheap knotty boards, but they should be free of falling knots, cracks, stains and signs of rot.
Before you begin to analyze specific points and recommendations that will help you make a table with your own hands, it is important to decide on the design of the desired product. Due to the excellent combination of naturalness and environmental friendliness of wood with the dacha concept, a homemade wooden table will be an excellent option for garden furniture. A small table made of wood with your own hands, as if deliberately aged, will also fit well into the design of a city apartment made in Scandinavian or Provence style. It is noteworthy that in terms of the complexity of the work, this piece of furniture for most craftsmen is almost like a homemade piece of wood, since homemade table It's very easy to assemble. This fascinating process is reminiscent of assembling a construction set.
A DIY kitchen table is both an opportunity to save money and a way to provide the kitchen with unique furniture that fits perfectly into the existing space. However, it is important to correctly determine the dimensions and shape future design.
How to make a wooden dining table
A table made of solid wood is beautiful, natural and, as a rule, expensive. But you don’t have to buy such a table, because you can make it yourself with no less quality and for much less money.
So to do dinner table with your own hands you will need:
- 4 things. baluster legs for the table, 73 cm high and not too thin;
- For countertops: 4 dry edged wooden boards 1 m long (for a table 60 cm wide);

- For the frame: 2 boards 80 cm long and 2 boards 40 cm long.
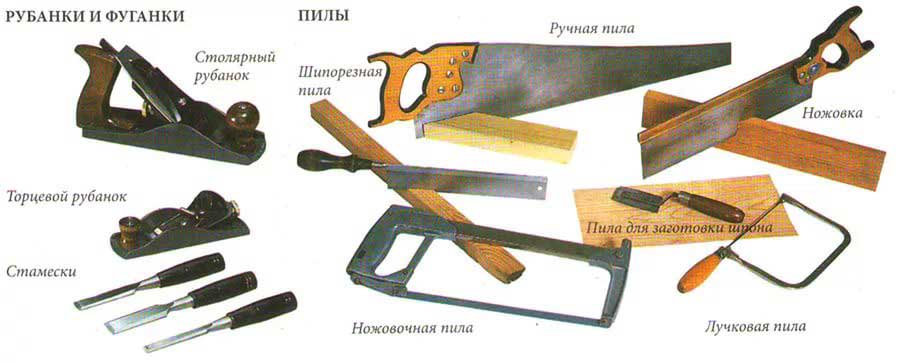
Prepare your tools: plane, grinder or grinder, jigsaw for cutting boards, circular saw, drill (with 8 mm drill), screwdriver, sandpaper, self-tapping screws (30 mm), wood glue, dowels, clamps (preferably). And, of course, a pencil, tape measure, gloves and safety glasses will come in handy.


For finishing The table will need varnish, stain or paint along with a primer. First we'll make the tabletop. To do this, you need to adjust all 4 boards as accurately as possible to the same length - 100 cm. If your boards were not sawn on a sawmill, then they also need to be trimmed in width and thickness. Then they need to be carefully sanded with a plane. The better you sand the wood, the smoother the countertop will be. Finish the edges well so that the boards fit together as tightly as possible.
We will connect the boards not with screws and nails, but with glue and dowels (chops). To do this, we make identical marks on the edges of all boards in increments of 10-15 cm and drill holes for the dowels with an 8 mm drill. Then we sand the edges and apply wood glue to them and into the holes made. Now we drive the chopsticks treated with the same glue into the holes and connect all 4 bars one by one. We remove excess glue on the surface with sandpaper and sand it, as well as all edges, with a plane. At this stage, you can go over the countertop with a metal sponge to give the wood texture.

So, the tabletop is ready. Now you need to fasten the legs and make a base for it.

To do this, you need to evenly fasten the balusters with short transverse boards with glue and screws. The glue dries for at least 12 hours.


We attach the legs to the long crossbars and drill holes in them in order to install the tabletop later.

After the glue in the frame has dried, you can begin installing the tabletop on it (frame).

If you want to make the table longer and wider, then you need to strengthen the table with two additional cross bars, as shown in the photo.

So, the table is almost ready, all that remains is to treat it with varnish or stain, or paint it, having previously primed it.

What color should I paint the table? Based on personal preferences and the color of the rest of the furniture. Below is the most versatile option - the table top and legs are covered with stain.

You can see the main mistakes in staining wood with your own hands in this video.
If you like gloss, then the surface of the table can be covered with stain, and on top - with varnish (example in the photo below), or simply coated with varnish.

You can paint the legs White color, and cover the tabletop with stain to get a design like the one in the next photo.

How to make a kitchen table from chipboard
A DIY kitchen table made of laminated chipboard is a practical and budget-friendly solution. These countertops are covered with decorative plastic that is abrasion-resistant. In the standard version, the dimensions of the tabletop canvas are 3000x600x36(26) mm, but today it is not difficult to purchase chipboard sheet, sawn to the required dimensions or negotiate at a furniture workshop to sell suitable trim.
You will also need:
- Connecting and end strips;
- End edges;
- Ties.
Even if you purchase a countertop of suitable dimensions, you will need to additionally process the ends - this will make the result more attractive and also protect the base from moisture. For these purposes, you can use a special furniture edging based on polyvinyl chloride or glue edge tape. The option with edging is considered more practical for the dining table and suitable for home craftsmen.
For a kitchen table you will also need appropriate supports - you can buy legs separately or give preference to a ready-made base. It all depends on which option your drawings provide. The most common option is round legs D = 60 mm and height 71 cm. They can be collapsible, height adjustable, and also vary in design - matte, painted, shiny.
In our case, these will be chrome-plated shiny rod legs with a diameter of 60 mm, as well as a tabletop made of white laminated chipboard with a thickness of 36 mm and a white plastic mortise T-shaped edging with girths matched to it.

So, how to make a dining table with a chipboard top:
- Markings are applied to the material according to the drawing. The corners must have a radius of 60 mm or more.

- The tabletop is shaped using a jigsaw.

You should use a saw with reversible teeth, otherwise the plastic coating may chip. First, the corner of the chipboard is cut with a jigsaw with a margin of 2 mm, and then it is finally rounded with a grinding machine.
- The groove for the furniture edging is milled.

- The edging is getting stuffed. Before this, the ends of the product must be covered silicone sealant. The sealant is placed both in the edging and on the top edge of the tabletop. A rubber mallet is used to fill the edging. After which the excess sealant is removed.

- The legs are attached. To do this with reverse side The tabletop is marked with a pencil. In most cases, the legs are placed 100 mm from the edge.

To fasten the holders, self-tapping screws with a countersunk head about 20 mm long are used. After this, the legs are put on the holders and secured with a hex key - that’s it, yours new table ready.

How to correctly determine the dimensions
Using the principles described above, you can make tables larger or smaller in length and width. How to choose the optimal size for your family?
If we're talking about O standard kitchen dimensions from 6 to 8 squares, then the drawings will show a typical design with a height of 750 mm and a perimeter of 800 * 500 ... 1200 * 600 mm.

A DIY dining table should be designed for a certain number of people. Usually it corresponds to the number of residents - 3-9, but a couple of free places are still added for guests. For large companies good decision will become .

Calculations are carried out as follows: multiply the number of people by 60 (“working” perimeter per person). As for the width of the tabletop, here we follow the recommendations of experts - its optimal values– from 800 to 1100 mm. Narrow tables are difficult to serve, and wide tables are uncomfortable for those sitting.
If you decide to make the kitchen table oval (round) with your own hands, then you will have to calculate the circumference - diameter * 3.14.
Form selection rules

The shape of the kitchen table plays a significant role in the perception of space. Universal design - rectangle or square with right angles. It is balanced and can be installed close to the wall or in the center of the room, saving space.

Oval models are also quite comfortable and beautiful, but they are not very spacious - the largest product will accommodate no more than 8 people. In addition, they require large areas– more than 8 sq. meters, because you can’t put them against the wall.

It can also be called a universal and traditional option, suitable for both very large and large kitchens. But it has less capacity than a rectangular table.
The best option is a rectangular table with rounded corners. We have already described above how to make just such a table from chipboard with your own hands.
Rules for caring for furniture
After the dining table is made, you will need to take care of the long service life of the product.
Thus, furniture made of wood, polished and varnished, needs careful care, as it can be easily scratched. In addition, there may be traces from contact with hot water. For basic wood care, a universal polishing compound is selected.
If we are talking about a countertop made of MDF or chipboard with a plastic coating, then caring for it is not difficult and involves regular washing with detergents.
Do not forget that kitchen furniture need to move away from heating devices and from the walls bordering the street. Harmful to wooden furniture There will also be direct sunlight.
We will send the material to you by e-mail
Not everyone likes to buy finished goods for home use. The soul of some people requires creative and practical self-realization. The editors of the online magazine website invites those interested to learn how to make a wooden table with their own hands, what is required for this, and whether there are any pitfalls in such work.
Beautiful wooden product for the kitchen or living room, made with love
Professional carpenters are unlikely to find our step-by-step recommendations, but for novice amateurs the advice will come in handy. First, let's look at what products you can make with your own hands from wood.


Of course, the more skills a person has, the more complex model he can do it. But to build a table with your own hands from wood, there are ready-made drawings and photos to help beginners.
How to choose a material for making your own wooden table for home and garden
What to make your own dining table from? Best of all - made of wood. The most pliable wood for a new master will be pine. Products made from poplar will look more solemn. For the street you can take mahogany.
If you want a simpler option for your home, then you should consider laminated chipboard with optimal thickness at 25-35 mm. You can use wooden boards on the tabletop, birch plywood with a thickness of 35 mm. Legs can be made of metal or wooden beam(about 50 mm thickness).
In order not to make a mistake with the amount of material, a preliminary drawing of the future structure is made with precisely specified dimensions.
Advice! The suitable height of the product varies between 750-800 mm.
Related article:
DIY wooden furniture: for the garden, children's room, kitchen, bathhouse, garden, gazebo; how to restore pieces of furniture, useful tips and recommendations from experts - read in our publication.
What tools are needed to make a wooden table with your own hands?
It doesn’t matter what shape the future table will be: working with wood requires a certain set of tools. You can’t do without a jigsaw, and it will be much easier to work with electric model. To secure all structural elements, use either a drill with a multi-stage drill for holes, or confirmations. To polish the product to perfection, you need a special attachment for a drill.

For greater fastening strength, the tools include wood glue.
How to make a wooden table with your own hands - step-by-step instructions
We have selected four types of structures that can be made on your own, even with a minimum of carpentry skills. We invite you to learn about the stages of manufacturing a round and rectangular table, coffee table and models for garden gazebo.
Making a wooden round table
Easiest to do round table top and a connecting ring of or dimensions 1500 × 1500 mm and 1280 × 1280 mm. You will also need two laminated chipboard strips (1110 × 120 × 25 mm). We will make the legs from four wooden blocks measuring 120 × 50 × 750 mm.

How to make a countertop
How to draw a circle perfectly straight? Place your own on a sheet of plywood in the center thumb hands with a string attached to it with a pencil. The length of the rope from the base to the top should coincide with the radius of the future tabletop. Holding your finger in one place, draw a circle around the full length of the rope with a pencil. All that remains is to cut it out with a jigsaw.
The underframe circle is cut out in the same way.


Making legs
A round table made of wood or chipboard will look charming if you do everything consistently. You won’t have to bother with the legs if your plans aren’t too original. The bars are divided into 4 parts according to the desired size of the table height minus the thickness of the tabletop. First, one leg is cut off, and the other three are aligned along it.
All processing grinder is carried out immediately.
Advice! You shouldn’t rush into sanding, as the first coat of varnish will reveal all the imperfections.
Assembly of the structure and processing of the finished product
Assembly is carried out in stages. First, align the planks groove to groove. Then the crosspiece of the planks is connected to the legs with confirmations, as in the figure below:

If you want to make the structure stronger, before connecting the legs to the tabletop, coat their upper base with glue.
Advice! Nails are not used in this type of work: a self-tapping screw or confirmat can be unscrewed without problems, and the connections will be much stronger.
Making a rectangular wooden kitchen table
The rectangular design is classic and very useful in everyday life: it is convenient to cook on such a table and you can comfortably dine at it.

How to make a countertop
A wooden tabletop for a table is made either from a whole sheet of plywood, or from individual edged boards processed to perfect smoothness.

Having fastened the boards with screws and glue, they begin to make the frame.
Making wooden legs for a table and frame
At the heart of the quadrangular models is a frame. It serves to securely fix the legs, ensuring the stability of the entire structure. The tabletop is turned over, a depth of 3-4 cm is measured on each side and the measurements are transferred to the boards. As a result, you will need two boards of shorter length and two longer.

The frame is made of four elements: according to the approximate ratio, these are two boards of X cm and two of 2X cm. They are connected to each other with an overlap one by one, building a rectangle. In order not to break the 90° angle, use any board when working with a screwdriver: it is used to press the structure while tightening the screws.
As soon as the frame box is ready, they begin to make the legs. You can take ready-made balusters for the table, buy metal supports or cut them out of bars according to the desired length according to the drawing.

Both the frame and the legs are subject to mandatory thorough sanding!
Product installation and final finishing
The frame is screwed to the tabletop with glue or self-tapping screws. Then the product is turned over and the legs begin to be attached.

Important! It's better to make holes for the screws in advance. This eliminates the possibility of the wood splitting.
Why don't they use nails and a hammer? Not everyone has the skills to work with a hammer - it’s not only dangerous to hit your finger. Overdoing it can easily damage the wood by splitting it. Confirmations and self-tapping screws hold the tree much more firmly.
As soon as the leg is secured, the angle is immediately checked: there should be no deviation from 90°. The operation is repeated with other legs. You can attach the legs directly through the tabletop, but this will affect the aesthetic component of the product.


Related article:
: photo best ideas. What can be made from pallets for an apartment, office and cottage; rules for selecting and processing pallets; Master classes on making a table, sofa, bench, armchair and shelving - read our publication.
Making your own wooden coffee table
Not only a beautiful interior element, but also a useful one. There is no need to look for a visible place to put a book, gadget, glasses, or TV remote control. Such necessary designs made from different materials: metal, glass, plastic, chipboard, wood. But let's leave other materials alone and concentrate on working with wood.


Choice wooden table top for the table depends on the expectations of the owner of the product. Some people want something massive, while others prefer lighter options. Let's stick to a simple solution.
We purchase five boards 30 × 150 mm and process them to perfect smoothness. We cut it straight onto the tabletop desired length: You should get 6 identical canvases. We take four bars for the legs, 6 shorter pieces for the lower tabletop, and 4 narrow slats for the frame.
| Illustration | Description of action |
|---|---|
 | To brush wood, use a grinder with a brass brush attachment. The procedure will expose the structure of the wood, giving the product a special flavor. |
 | We go back and forth along each board on the side that will be the front. |
 | We treat the wood with fire. The flame is gradually moved from place to place: the board will acquire a beautiful darkish tint. The procedure will completely destroy unnecessary soft fibers wood We actively wipe the entire surface with a felt boot or a piece of felt. |


Let's start the assembly process small table with your own hands made of wood.
- The lower and upper tabletops are laid on work surface wrong side towards you. The boards are laid tightly together, gluing them together. Once the boards have set, slats are attached to the top tabletop. They will serve as a frame and fastening element. They can be glued or screwed with self-tapping screws. The self-tapping screw is screwed into the center of the slats into each of the boards.
- The legs are screwed to both the tabletop and the slats. You can use furniture corners.
Video: the process of making a coffee table from wood
Making your own wooden table with benches for a gazebo
It's time to take the time and build a wooden garden table.


It's best to take boards standard sizes. IN hardware store Studs (suitable with a length of 16 cm), washers (24 pieces) are purchased. For a garden gazebo, long nails (8 cm) will do.

Whether to paint a product or simply varnish it is a matter of taste.

This piece of furniture is one of the most versatile in use. The table can be a dining room, a utility table, or installed in a living room, on a veranda, on a property, in a workshop, and so on. In a word, it is impossible to do without it. But many people are not satisfied with purchased products in terms of a number of parameters - size, design features, form or for any other reason.
Considering that wood is relatively easy to cut and sand, making a table from it according to your own drawing, with your own hands, is not a problem for a good owner. And it will come out much cheaper. Plus - satisfaction from such work.
Room
Ideally, this is an extension, a barn, an empty garage, although small area under a canopy. Working with wood on the site, under open air- means completely dependent on the vagaries of the weather. If there are suitable ones for making furniture " square meters", then you should worry about quality ventilation in advance. Natural is sometimes not enough (besides, it depends on changes in wind direction and pressure), and a hood is installed.

Arguments that if you use protective equipment, you can work in closed space, do not stand up to any criticism. Wood dust will immediately settle on everything, including the sample with which some action is being performed. Neither precise cutting along the line, nor high-quality surface treatment of wood (not to mention impregnation and finishing coating paint and varnish composition) cannot be obtained.
One cannot ignore the fact that many preparations used for wood processing contain toxic components. For example, varnishes, paints, impregnations: if they are not natural, then harmful fumes are guaranteed.
Tools
Their selection depends on the extent to which it is planned to “ennoble” simple design made of wood, what shape to give it and a number of other nuances. If the master does not lay claim to the elegance of a wooden table and does not aim to achieve its originality, then an ordinary carpenter’s set will be enough.
For more “delicate” work in the process of making a table of unusual shapes, external design special devices will be needed.
El/jigsaw. It will not be possible to make an inclined vertical cut with a regular saw, maintaining the angle exactly. The canvas will begin to “play”, and therefore the quality of work will be extremely low. The electric jigsaw is universal in use, and also gives high accuracy cutting wood or making cuts in it.


Many of the listed devices can be rented if making furniture is not a hobby, but a necessity.
Impregnating and other compositions
Rot protection:
- Working off machine oil- effective and also free tool. But not for dining tables.
- Flaxseed oil. A natural and effective product that penetrates deeply into the wood structure and protects it from mold and mildew. The downside is the high cost. But if the table is intended for eating, this is a great option. The drug has no color, therefore, after processing lumber, it does not leave any traces in the form of darkening, stains, or streaks, unlike processing.
- Water-polymer emulsion. It is characterized by long-lasting action and safety for health.
- Acrylic varnishes. They have practically supplanted their predecessors in the “NC” category, since they are harmless and in many respects better than compounds that are diluted with solvents.
- PVA, bone glue and a number of others. More detailed information about carpentry compositions - .

To decorate a tree:
- Clear varnishes are used not only to protect the material from moisture. With their help, you can preserve the texture of the wood and shade it.
- Stains.
- Varnishes with a coloring effect (tinting).
- Paints (but only for wood!).
- Putties.
Using colorless varnish and pigments, you can make a coloring composition of any shade. It is enough just to correctly determine the proportion of components. This is easy to do by experimenting with mixing and applying a sample to a discarded board. This will allow you to choose an acceptable tone. It is more than advisable, since it is not always possible to purchase exactly what you need on the market.
Fasteners
It is better to ignore all advice on assembling a wooden table using nails (the reasoning is simple, quick and cheap). The reasons are as follows:
- The nail easily pricks dry wood (and this is exactly what is used; more on that below).
- It is quite difficult to direct its leg correctly (strictly vertically). In some cases, it is even more difficult to redo your mistake.
- A tree, even the most protected from rot, succumbs to it over time. The maintainability of a table knocked down with nails is extremely low. Practice shows that it is rarely possible to remove such fasteners without damaging adjacent structural parts. As a result, instead of the planned replacement of one element, 2–3 will have to be changed.
- When assembling a wooden table, if glue alone is not enough, you should use only self-tapping screws.
- Sometimes its individual parts (at joints) require reinforcement. Strengthening the strength with hardware with a thicker and longer leg is impractical. The reason is the same - the likelihood of the tree splitting. For these purposes, metal strips, brackets, and corners are used.

Features of choosing wood
Some people focus on the cost of lumber, others care about the wood’s resistance to rot, and for others, its texture. What can you recommend to a novice furniture maker? Do not use the same type of wood for a table unless it is intended to be installed somewhere in a utility room or garage. This is exactly what many novice “craftsmen” do, selecting the same type of boards and bars from what is left from construction or renovation and gathering dust in the barn.
When making a wooden table for a living space, veranda, etc., you need to take into account the properties of individual species. Naturally, if you do not have sufficient experience in assembling furniture, you should pay attention to cheaper wood. The first table (chair, stool) in your life is just a kind of training in making and gaining experience.
Tabletop. Here, strength and minimal moisture absorption come first. It is on this part of the table that something constantly spills. The optimal choice is pine, larch, oak (although the latter is more expensive). Thickness – at least 3 cm.If the size of the countertop is small, then you can use wood-based slab products (OSV, OSV and the like). But only with lamination to prevent the material from swelling when liquid gets on the table surface. For example, chipboard.

Low-grade lumber is not used in the furniture industry. This is not economically feasible, since pre-treatment of wood increases the production cycle time. But when making anything, wood of lower grades, substandard wood is just right. The same pallets left over after using stacks of foam blocks or bricks.
And not just because it is free or relatively cheap. Many of the disadvantages of such wood can be turned into advantages with the right approach. For example, after coating with colorless varnish, the tabletop acquires a unique, original look.

The main thing is that the boards do not have obvious defects in the form of rot, cracks, falling knots and wormholes.
If pine is chosen for the countertop (this also applies to many other coniferous species), then you need to pay attention to the location tree rings. These arches are called humps. The cuts of the boards show how they are oriented, and this is taken into account when laying them in a row. Samples obtained by tangential cutting are arranged alternatingly (one top down, the next one up); radial cutting - the same (with arcs in the same direction). The nuance is insignificant, but compliance with this recommendation eliminates the risk of warping and splitting of the boards.

For furniture, if you think about its durability, you should take only dry lumber. As wood shrinks, it will become deformed; This is a natural process, and its consequences in the form of twisting, warping, and bending are inevitable. Such a table will quickly become warped, and you will have to repair it. And here you need to decide whether to purchase highly dry wood or rid it of moisture yourself. The first option is simpler, but such a tree is more expensive. The second one will cost less, but there are a number of purely technical difficulties.
- Firstly, it is necessary to ensure stable temperature regime at the place where the workpieces are stored. Changes in its value will lead to uneven evaporation of moisture, which will negatively affect the strength of the tree.
- Secondly, good ventilation must be organized.
- Thirdly, and perhaps this is the most unpleasant moment - you will have to wait up to about six months, depending on the initial moisture content of the tree. But this is not a guarantee that the result will be as expected; Even this requires practice.
This once again confirms the idea that when starting to make furniture from wood for the first time, you should focus on simple table For economic needs made of cheap lumber, without pretensions to its sophistication and originality of design. For example, for a barn, garage and the like.
Options and patterns of wooden tables
It should immediately be noted that any work related to the design and self-assembly- the process is creative. There are no stereotypes in this matter, so you can only take the model you like as a basis, and everything else - linear parameters, shape, manufacturing specifics - depends on the purpose of the product and your own imagination. Here are just a few examples of what wooden tables can be like. For example, for summer cottages, small utility rooms It is worth choosing designs whose geometry can be easily changed - folding, hiking, hanging, garden, level, and so on.

Tables that are supposed to be used for eating, games, as coffee tables for installation in living rooms intended purpose, they are made stationary, that is, unchangeable in size. These assemblies are more “solid”, since all articulated parts are rigidly fixed; no hinge joints.


Features of assembling wooden tables
If a person undertakes to make something, it means that he knows how to use tools, read blueprints and work with lumber. Such home handyman There is no need to learn the basics of carpentry. But it would be worth noting a number of nuances when making a wooden table. These notes will only help in the process.
Let's start with the types of connections. There are quite a few of them, but for a table that you assemble with your own hands, the ones listed below are quite enough.
On the dowels
In this case, the parts are fastened by placing them on an adhesive composition (Fig. 1 – 3).

The nuance is that to make the “cylinders” that are inserted into pre-drilled “channels”, a tree of a denser structure than the table elements is taken. This is what ensures the strength of the connections. Before installing them, chamfers are removed from the edges of the dowels and holes.
These round sticks are available for sale in any furniture showroom in several sizes. Turning them, even if you have a carpentry machine, is a waste of time. It is not recommended to purchase plastic dowels for the table; they are used for dismountable connections. For example, frame furniture(walls, multi-level shelving, etc.).
You should not use nails to fix table elements (Fig. 4). Metal and wood differ in the degree of thermal expansion. Such a connection will not last long - it will begin to “shatter”, especially if the table is intended to be installed on the territory or in an unheated room.
On the kings
It is advisable to make such connections if the table either has to be disassembled periodically, or without this it is impossible to move it through the doorway. Although not all drawers require dismantling the structure. The most commonly used options are shown in the figures.


Bolted
Such connections are used mainly for garden furniture or those installed in extensions; for utility tables. An example is shown in the figure.

The nuance of working with fasteners
In order for the self-tapping screw to be easily screwed in and “go” in the desired direction, a hole is first made at the point of its installation using a drill with a diameter slightly smaller than the fastener leg. The main thing is to maintain the coincidence of the axial lines, that is, to prevent skew. In this case, to “plant” the screw, you can do without a screwdriver.

Features of wood processing
Everyone knows that a plane is used first, an abrasive with a large grain, and then a fine one. But sometimes it turns out that the last stage, polishing, has to be done many times. Much depends on the type of wood and the degree of drying. After applying the first layer of varnish, the fibers may “stand up”. Nothing wrong with that. You should wait for the workpiece to dry and repeat its processing with abrasive. The work is painstaking and takes time. But it is precisely this method that can bring “problem” wood to ideal “smoothness.”
To eliminate the risk of injury to a person, all edges and corners of the table should be slightly rounded.
Features of external decoration
- Minor defects in the form of cracks and chips are eliminated with putty.
- Once sanding is complete, all wood dust must be removed. In this case, a regular household vacuum cleaner with an appropriate attachment will help out. It is recommended that after such cleaning, wipe the entire table with a slightly damp cloth, let it dry and repeat removing any remaining dust. After this, you can safely start applying stain or varnish - there will be no “pellets” on the wood.
- You can add originality to the table not only with the help of curly cutouts, an unusual shape of the table top or legs, or a combination of textures different breeds and so on. One of the good options is artistic painting.
And finally. The work of independently making something out of wood (for example, a table) is just the initial stage of mastering the skill of a “designer-assembler”. Having developed technologies and techniques on wood and acquired the necessary skills, it is enough to simply switch to other materials - metal, plastic, glass. So the benefits of a wooden table made even by yourself simple drawing(besides the pleasure of work and the money saved) is obvious - time well spent.
In the conditions of modern small-sized apartments, it is quite difficult to give free rein to your imagination and purchase pieces of furniture that would suit everything. Among other things, it is quite difficult to find interior elements that would be attractive not only in design, but also in price. These two problems can be solved using the method self-made wooden furniture. This could be, for example, a table. You can do it by preparing everything necessary materials and tools. This piece of furniture can be used both in the kitchen and in the living room.
Preparatory work
In order to make a wooden table with your own hands, you will need to prepare some materials. Will need furniture board, the thickness of which is 19 millimeters. This material is highly durable and looks very attractive. Shields on preparatory stage It will be necessary to mark, and then cut out blanks from them. It is important to stock up on the necessary fasteners for assembly. Thus, you will need to prepare 6 boards that will make up the lower support. Their size is 19 x 100 x 965 millimeters. There will be 4 legs, their dimensions are 19 x 215 x 680 mm. The same amount of leg molding will also come in handy, but the dimensions of these elements should be 1938 x 470 mm. The tabletop supports will be blanks with dimensions of 19 x 125 x 610 mm. Wooden table for a gazebo with your own hands you can make it to the same dimensions. The master must prepare two dowels for the legs with dimensions of 10 x 32 mm. Two lintels with dimensions of 19 x 140 x 1100 mm should also be highlighted.
Additional items

You will need a steel tie in the amount of two pieces, its size should be 150 mm. The tabletop will be limited to the following dimensions - 19 x 1020 x 1900 mm. The tabletop plank must be cut in two pieces and have dimensions of 19 x 19 x 1750 mm. Screws, washers, ties, and dowels will be used as fasteners.
Preparing tools

It will be impossible to make a wooden table with your own hands if you don’t stock up electric jigsaw, circular saw, hacksaw, drill with drills, plane, milling machine, file, clamps, brush. To attach the parts you will need carpenter's glue; the wood can be treated with sandpaper. The table will look good if you treat it with polyurethane varnish, which can be glossy or matte.
Manufacturing technology

If you decide to make a wooden table with your own hands, then you need to know that each supporting structure consists of 3 blanks glued together. An opening should be formed in the central part. Immediately you need to cut out 6 elements for two supports. Next, the master must make straight cuts using a circular saw. Corners should be rounded. Two blanks need to be cut central part so that the groove falls on the central part of the support. The width of the groove should be slightly smaller compared to the thickness of the tenon in the leg. This will prevent the structure from loosening during swelling and drying.
At the next stage, you can glue the supports. After applying glue to the surface of the parts, they must be folded so that the upper edges are flush. Reliability of fastening will be ensured by clamps. After the supports have dried, you need to get rid of excess glue. After the clamps are removed, you need to plan the lower and upper edges.
Working on the legs

When making a wooden table with your own hands, you need to prepare four legs. Afterwards, the vertical edges must be planed and rounded using a milling machine. At the ends of long workpieces, it is necessary to mark and then cut out tenons, placing them at the bottom and top. This can be done using a circular saw, which must be equipped with a combination blade. After the moldings are cut and brought to the required dimensions, you can round all 4 ribs. It is necessary to make grooves for glue on the back surface of the moldings.
Work on supports

If you decide to make a wooden table with your own hands, photos of the design will help you decide what features this piece of furniture will have.
The next step is to cut out blanks for the supports. For gluing, select a 10 mm groove in each workpiece. It is preferable to perform these manipulations immediately. In order to simplify the task, you need to prepare a cardboard template, marking the location of the grooves on it. Next, you can perform pairwise gluing so that the cut is located in the central part. Everything needs to be tightened with clamps. Once the glue has dried, you need to clean the cuts using emery cloth.
Installation of legs

If you are making a wooden table with your own hands, you must first review the photos. It is important to initially adjust all connections without using glue. At the wide edges, the connections should be tight. A gap of 1.5 millimeters must be provided on the side to compensate for changes in the size of the wood. When edging, these elements will be decorated.
The walls and spikes must be treated with glue, after which you can begin pairing the legs with vertical supports. Without waiting for the glue to dry, you need to make holes and reinforce the connection using dowels. If you decide that you will make a wooden table with your own hands, it is recommended to prepare the drawings at initial stage. For the legs, cut the moldings to the required length. They need to be glued and tightened using clamps. The glue is applied and then left until it dries.
If you decide to make a wooden table with your own hands, you can borrow the drawings from the article. The jumper should be installed high, so that those sitting at the table do not touch it with their feet. It is necessary to make gluing using two strips, which are previously edged with molding.
After the glue has dried, you need to remove the clamps and then chamfer. Holes must be made on the short sides to install fasteners. The tabletop can be made independently; its dimensions may differ from those presented above. At the ends you need to select tenons using a jigsaw.
Next, the cut areas are cleaned with a file. Along the long edges of the workpiece, it is necessary to install strips, which are pulled together with clamps and dried. Using an edge cutter, you need to align the edges of the moldings. They should be fixed to the planks, and then dried and the joints cleaned using a grinding machine.
When you make a wooden table for your garden with your own hands, the drawings will allow you to understand how the tabletop and legs are connected. To do this, use U-shaped brackets. On long sides the base should be chosen with quarters to fix the sidewalls. The ends of the last elements need to be rounded and cleaned. Afterwards everything is glued and compressed with clamps, and then left until dry.
Final works
Before you make a wooden table with your own hands, you need to familiarize yourself with the technology of the work. At the next stage, with a deviation of 100 millimeters from the edges of the base, it is necessary to make holes, the diameter of which should be equal to 20 millimeters. A through groove should be placed between them. The holes are required to prevent the base from splitting. If you are making a wooden table for your garden with your own hands, the drawings should help you carry out the work.
Now the master can assemble the table; to do this, it is necessary to fix the jumper to the legs. Using a pencil, you need to mark the position of the legs so that they are perpendicular to the ends of the lid. The brackets should be installed according to the markings. You need to make 10 holes in the tabletop to install screws. Next, you can strengthen the brackets. It is necessary to place a washer under each screw; this will compensate for shrinkage; this is the only way to make a folding wooden table with your own hands.
You can change the technology and dimensions of the table at your own discretion. However, it must be remembered that the design should be as strong and reliable as possible. It is important to protect wooden elements from negative impact external environment, this is especially true for those pieces of furniture that are supposed to be used in the kitchen or outdoors.


