For comfortable year-round living, Vacation home must have a heating system. Regardless of its type, whether it is gas or wood, combustion products are removed through a chimney pipe, which is discharged outside through the roof of the house. The main purpose of roofing trim around chimney– protection of the roof from leaks and overheating. Read on in our article to learn how to carry out the entire complex of work correctly and avoid making serious mistakes.
Sealing a pipe on the roof
Sealing of the chimney on the roof is carried out taking into account the shape of the pipe and the topography roofing:
For rectangular and square designs, a metal apron is suitable;
For round exits Elastic rubber or polymer penetrations are often used;
Sandwich-type pipes are equipped with a metal cone fixed at an angle to a steel apron;
Slate or metal tiles are equipped with lead abutment strips or the Master Flash system.
Installing a pipe on a metal roof
Places where pipes pass through the roof
There is a pattern - the lower the pipe is placed along the roof slope, the more effort will be required to waterproof the joint between the chimney and the roof.
Roofs made from corrugated sheets are equipped with pipes in the following areas:
–Near the ridge. According to SNiP 41-01-2003, the installation of the device near the ridge will reduce the likelihood of the formation of snow pockets and the appearance of condensation.
Insulation of the chimney on the slope. The passage of the chimney is at a distance of 500-700 mm. from the roof ridge reduces the risk of leakage and preserves the rafter structure. Elastic penetrations or additional apron elements will help protect the joint.
STRUCTURAL ELEMENTS OF THE ROOF CONNECTION TO THE CHIMNEY
When planning to make a chimney passage through the roof with your own hands, start with a wooden box.
1. Select bars that correspond to the thickness of the floor beams (minimum 5-10 cm), and measure a length that increases the size of the pipe by 15-25 cm.
2. Connect the boards to form a square or rectangular structure (corresponding to the shape of the chimney), attach to the horizontal and vertical floor beams.
3. Prepare Additional materials: upper and lower apron, tie (a long smooth sheet with a flange to drain rainwater), sealant.
4. The abutment strips that form the apron are installed on the sides, top and bottom. An internal flashing is placed under the roofing material to drain water. A tie with a length equal to the distance of the lower apron to the cornice is placed under it. External junction strips perform decorative functions and prevent moisture from entering the area where the chimney passes through the roof.
5. Basalt wool will help close the hole around the pipe and floor beams. The distance between the concrete and brick chimney, relative to the elements of the rafter system, is 13 cm; a gap of 25 cm is left from the ceramic non-insulated pipe; in the presence of a heat-insulating layer, 13 cm.
6. The gap between the pipe and the combustible material is covered with sheet metal. The tightness of the roof is ensured by a special film, which is cut through with an envelope and the edges are fixed on the outer part of the pipe or wooden box. 
When organizing the output of a round pipe, it is enough to select an elastic seal, eliminating the need for additional waterproofing protection around the penetration.
SKATE CUTTING
A smooth metal apron and a decorative seal made of slate or corrugated board will allow water to be drained away from the smoke system passing through the ridge.
1. Place a tin sheet (tie) near the pipe, placed under the roofing.
2.Fix the bottom, then the side and top abutment strips.
3. Fill the joints near the pipe with silicone-based sealant.
4.Press with the top strips of the apron.
 Drainage of rainwater from the chimney
 ROAD WALKING
When constructing a small penetration, fix the drainage gutter on the roof slope.
Cutting for pipes with a width of more than 80 cm will require the creation of a slope on the roof slope to drain water coming from above to the center of the chimney.
Two short valleys (grooves) are formed on top. The lower valley strip is installed at the joints of negative angles, protecting against water entering the under-roof space. It is placed before laying the corrugated sheets. The top bar performs purely decorative functions.
 Chimney installation round section will require additional costs, since it proper organization needs additional components
 BYPASSING THE RAFTER SYSTEM
A high-quality connection of the roof to the chimney pipe is possible with a rigid sheathing, which allows the load to be evenly distributed. The chimney is usually installed before the rafter system is strengthened.
If the withdrawal is carried out later, it is important to provide a distance from the rafters of more than 20 cm, otherwise it will be necessary to dismantle the sheathing, weakening the overall system.
 Chimney sheathing
 1.Install under the elements rafter frame support posts, cut off the ceilings and connect them to the entire rafters using horizontal jumpers.
2.Equip a reliable frame around the smoke outlet, firmly connected to rafter system and roofing sheathing.
Chimney passage through a metal roof
Waterproofing a chimney on a metal tile roof requires the preparation of the following tools and materials:
Construction pencil or marker;
Drill and drill set;
Grinder with 2 mm disc;
Silicone sealant;
Riveter;
Aluminum tapes and clamps;
Metal corners;
Roofing screws;
Long ruler or tape measure;
Pliers and hammer.
 Tools and materials necessary for work
 Bypassing a chimney on a metal tile roof involves the creation of two protective layers, which are done as follows:
1. An internal apron covering the roof and chimney is assembled on the sheathing.
2. Prepare the external decorative strips covering the roofing material and the lower apron.
If the smoke system is located near the ridge, then the edge of the upper strip is inserted under the ridge element.
The arrangement of the internal apron begins with the lower wall of the riser.
1. Each element covers the slope by 200 mm and rises vertically along the ventilation structure to a height of 150 mm.
2. The side strips go under the ridge of the metal tile, cover the lower element of the apron along the entire length, extend beyond the pipe by 20 cm.
3. All parts are firmly connected with self-tapping screws.
4.Measure 15 cm on the pipe, use a grinder to make a groove 15 mm deep.
 When pouring silicone, you don’t need to spare it, it should fill all the voids between the pipe and the apron
 Important! The upper part of the apron should fit tightly into the groove filled with sealant.
All that remains is to lay the roofing material and attach the top strips to the chimney with self-tapping screws, and fill the sealing line with waterproofing mastic.
 To ensure that the screws do not stand out against the background of the roof, the color of their heads should be matched to the tone of the roofing
 Cutting for round pipes: metal penetration
A ready-made apron-cap, represented by a metal sheet with a hole, covered with an inclined truncated cone, will help seal a round chimney.
1. The sheet is attached to the sheathing, the pipe is passed through a cap, the upper part of which is pressed to the chimney with a steel clamp with a heat-resistant gasket.
2. In order to direct the flow of water downward, a bead is made along the edge of the sheet using pliers and a hammer.
Interesting to know! An apron for a round chimney is made from black steel with a thickness of 1-3 mm. The metal is coated with heat-resistant enamel that can withstand heat up to 600 degrees. It is also possible to produce stainless steel parts with a maximum thickness of 2 mm.

Master Flash - these are elastic penetrations made in the form of a stepped pyramid with an aluminum or lead soft base. The design can withstand an operating temperature range of 50°C (+ 130°C), and is easily adjusted to the steepness of the roof.
Installation of the elastic assembly of the passage through the roof is carried out in the following order:
1. Select a seal ring with a gap 20% less than the diameter of the ventilation system.
2. The seal is pulled along the pipe, having previously been moistened with a soap solution.
3.The cap is secured with sealant and screws equipped with neoprene or rubber gaskets. Step - 35 mm.
Important point! Elastic penetrations with a flexible lead or aluminum ring are equipped with an adhesive layer located under protective film. To enhance fixation, use additional adhesive.
 The Master Flash chimney seal is convenient and easy to install
 ALUMINUM AND LEAD TAPES
An alternative to ready-made penetrations is to waterproof the chimney with self-adhesive aluminum/lead tape based on bitumen or modified polymers. It allows you to seal the joints between the pipe and the roof.
Waterproofing a pipe using self-adhesive tape is done in several stages:
1.Clean the area where the tape will be applied, then press the film tightly.
2. Cover the vertical part of the chimney with sections, simultaneously covering the horizontal roof covering.
3.Clamp the tape with a metal strip and secure with heat-resistant dowels.
 Pipe sealing tape - great way save time and money
 Sealing rectangular and square pipes
To ensure the reliability of the roof in the areas of valleys and junctions, a tie made of metal parts (junction strips), which are inserted 150-200 mm under the covering, will help.
The junction of the apron with the corrugated sheet around the chimney is sealed with roofing sealant. Eaves outlets are installed at the bottom and sides, directing the flow of precipitation onto the roof slope.
Before applying corrugated sheeting, it is necessary to seal the passage of the riser with a membrane.
1. A cross-shaped cut is made in the material and glued to the walls of the chimney at a height of more than 5 cm.
2.Self-adhesive tape “Vakaflex” is attached under the upper junction bar: from below, from the side, then from above.
Sometimes a chimney is installed in a finished roof, cutting a hole in the corrugated sheet with a margin of 1.5-2 cm. To do this, the metal sheet at the junction of the rectangular pipe is bent and glued waterproofing membrane and install the lower, then the upper sheathing, pressed tightly against the roofing pie and the chimney.
 Safety precautions when installing a chimney must be strictly observed
 Plastering a pipe
To avoid the formation of a thick layer of plaster, you should know how to properly insulate pipes:
1.First, seal all existing irregularities on the pipe with cement mortar;
2.Then cover the walls with reinforcing mesh;
3.The final stage is applying plaster.
Important! Before covering the first layer, bring the solution of lime, cement and slag chips (or sand) to the consistency of sour cream, sprinkle without leveling. The second coating is denser; it is applied with a trowel, rubbing until a smooth surface is obtained.
 The reinforcing mesh will allow the plaster to adhere well to the pipe and not crack when drying
 Strengthening the pipe with asbestos cement
Lining a chimney with asbestos cement requires the use of a cement-lime mixture applied to the surface of the slabs.
1. The chimney is reinforced with a mesh and the first layer of solution is sprayed.
2.A new layer of the mixture is applied to the insulation sections and attached to the surface of the chimney.
Asbestos contains carcinogens that are dangerous to humans, so experts do not recommend using it in residential areas.
Sheet iron cladding
When insulating a metal pipe, you should maintain a distance of 60 cm from the chimney from flammable materials.
1.The structure is wrapped in mineral wool 5 cm thick, overlapping, and clamped with steel wire. The top is wrapped with a metal sheet.
2. Rivets are inserted into the pre-prepared gaps and the heads of the clamps are closed with a special tool.
WHAT IS THE GOAL?
When preparing drawings, it is important to provide for the direct location of the pipe coming from the furnace.
The maximum heating temperature of the outer wall of the chimney should not exceed 50 degrees.
Waterproofing a brick chimney on the roof allows you to comply with established standards, and metal elements will require additional insulation to prevent the formation of condensation.
After installing the pipe, it is enough to carry out plastering followed by laying millite silica, thermal insulation wool MKRR - 130 or rolled felt MKRF-100.
 If the outer part of the pipe is 2 meters or more in height, it is strengthened with additional braces
 Chimney fire protection
Today, ready-made “sandwich” panels made of steel or ceramics are available for sale. Their installation proceeds as follows:
1. To install a modular system, an asbestos gasket is installed between the stove and the chimney.
2.Then apply a layer of solution on which the module is placed. Level, and secure subsequent blocks with a layer of mortar.
3. The places where the smoke device passes through the roof are well insulated. Fire-resistant insulation of the roof will be provided by a galvanized steel box, secured with staples to the rafters and cross beams at the point where the pipe passes.
Pipe waterproofing
Quick and reliable protection of the chimney from leakage is carried out by applying roll materials.
MAIN STAGES OF INSTALLATION WORK:
1. The pipe is coated with a primer and covered with a superdiffusion membrane. Instead of a primer, it is possible to use polymer-bitumen mastic. The membrane is glued to the roof, the edges are placed on the pipe.
2.The top and bottom ties are made from metal. The bars are stuffed onto the sheathing and the corners are secured.
3. The rolled material is laid overlapping, allowing for proper water drainage on soft or metal roofing. The length of the bottom sheet reaches the roof overhang.
4. The joints are insulated bitumen mastic. The corners are secured to the sheathing with dowels. The cracks are treated with heat-resistant sealant.
5. Lay the roofing deck, place a PVC apron on top using Onduflesh tape, and complete the sealing.
 Device for connecting the roof to the pipe
 Fixing a roof leak near a pipe
There is a leaking pipe on the roof of the house - bitumen tape, a polymer cap or a tin apron will solve the problem.
INSULATION WITH BITUMEN TAPE IS 5 STEPS:
1. Using a metal brush, clean the roof around the chimney along the outer lower part.
2. Remove dust and dirt with a damp cloth.
3. At the junction of the pipe and the roofing pie, pieces of bitumen tape are glued.
4. The segments are warmed up gas burner, pressed as tightly as possible to the roof and smoke outlet.
5.Fixed from above wooden blocks or boards. The service life of the tape is 2-3 years.
Ch Do-it-yourself chimney sealing using bitumen tape
Polymer cuffs reliably protect the joint between the roof and the oval pipe and do not cause any particular difficulties during installation:
1. In the upper section of the cuff, a cutout is made with a diameter less than the thickness of the chimney.
2.Put it on the outer part of the riser and lower it to the roof level.
3. In places where the roof comes into contact with the cuff, use protective layer sealant.
 Polymer sleeves for pipes are an excellent and inexpensive way protect the roof from leaks
Creation of metal bends
To protect against water, a tin apron with parameters similar to the dimensions of the pipe is put on the chimney pipe. The upper part of the covering is fixed to the vertical structure, compressed with clamps and sealed. The lower part of the apron is installed on the roof over the roof sheathing and secured with self-tapping screws.
Special “layouts” will also help prevent water from penetrating into the ceiling - wide metal strips with a side edge that seals the gap between top layer roofing pie and pipe. Layouts are placed between the ridge and the passage of the pipe, covered on all sides.
 Sealing a pipe using metal “layouts”
 Roofing the chimney is an important stage of construction, requiring correct selection materials and compliance with the sequence of operations.
When creating waterproofing for the junction of the roof and the chimney system, you should ensure maximum safety and comfort, without fires or leaks.
Today we will try to figure out how to correctly perform one of the most complex junctions - the passage of process pipelines for the chimney and ventilation through the roof. It is not for nothing that many methods have been tried for this, the best of which we will share with you.
Rafter systems and chimney configurations
The passage of the chimney through the roof can be carried out at almost any slope inclination, with the exception of pyramidal and folded roofs with an angle of more than 70°. Limitations are imposed for the most part by the common shapes and sizes of special fittings for insulation - the chimney roof trim.
The pipe outlet to the roof must be located on a flat slope, at a distance of at least 1 meter from the ribs and valleys. Firstly, this is the only way to properly install the apron and lining, and secondly, no major interventions in the rafter system will be required.

If ventilation ducts can be routed through the roof with a minimal layer of lining, or even without it at all, then chimneys need additional thermal insulation from the roof pie. We will touch on this issue later, but for now we need to make a choice between round and rectangular cross-section well. A well made of brick can be installed quickly and efficiently through the roof; it has the most suitable geometry. Both ventilation pipes and a chimney can be grouped in one well.
A round passage is also possible, but the chimney in this case will require a casing pipe with a diameter of 350-400 mm larger than the chimney. Difficulties arise in securing it in the roof pie; moreover, not every roof cut has a wide enough cuff.

Placement: what you need to know
It is optimal if you are constructing a rafter system with wells and pipelines already installed, however, the sequence of work may be forced to change.
If the channels are already installed, all that remains is to correctly assemble the frame system. The rafters closest to the pipelines should be 50-70 mm away from the ventilation ducts; they should be 200-250 mm away from the chimneys. IN heating season The thermal radiation from the chimney is high enough to cause uneven shrinkage of the wood and its warping. Change the installation pitch of the rafters and do not be afraid to place pairs of trusses closer than the design distance.

It is better to place the chimney 15-20 cm from the top ridge: this way the protrusion of the chimney above the roof will be minimal and there will be no difficulties with sealing the upper part of the cut. Decide for yourself how to implement this: build a well as close to the ridge as possible or make the roof slopes unequal and bring them directly above the chimney.
Unloading the roof
If you have to break critical elements of the rafter system, which can happen if the rafter installation step is less than the thickness of the well, it is necessary to unload the roof. At 40-50 cm from the upper and lower boundaries of the passage, you need to place horizontal beams 5-6 spans long under the rafters. They are supported by vertical posts so that each of them is located strictly above one of the attic floor beams.

Using a plumb line, the attachment points are marked vertical racks, taking part of the load from the rafters. Each of the broken rafters must be supported in two places - above and below the cut area. If there is a brick well, it is better to unload the rafter system onto it by replacing part wooden racks angle steel bevels.
Even if the opening fits between the rafters, they should be tightened with horizontal jumpers of the same width, forming a convenient pocket for laying a thermal insulation belt. Sometimes, for reasons of saving material, it makes sense to install vertical jumpers at the same distance from the pipe or well.
Cutting an opening in the roof
If the construction of the rafter system and the remaining stages of installation are carried out with the well or pipes laid out, the opening is formed as the roof is assembled, which in most cases does not cause difficulties. If you need to cut an opening in an already finished roof, you should follow a certain procedure:
- The roof is unloaded and all the necessary lintels are installed.
- The jumpers that form a pocket for thermal insulation are installed at a distance from the ventilation pipes equal to the thickness of the roof insulation.
- The walls of the box for unlined chimney pipes are installed with an indentation of 200-250 mm. For brick wells and insulated sandwich pipes, the lining is done in the same way as for ventilation pipes.
- Using a plumb line, the profile of the through opening is transferred to the sheathing in the shape of a pipe or well.
- If the roof covering is not resistant to high temperatures, it is cut exactly along the perimeter of the pocket.
- Almost any covering can be cut well with an electric jigsaw or reciprocating saw, if you first screw the cut out fragments of the sheathing to it.
- The distance from the walls of the pocket allows you to cut the coating from the inside, but if the cutting is done around the perimeter, you can transfer the markings to the street using through holes at key points.

As a result, the roof is ready for installation of a pipe or further protection from moisture and heat leaks. The specific method of arranging a passage channel depends on its type.
Ventilation ducts, cuttings and cuffs for them
Ventilation passages for a cold attic space may not need to be insulated at all; it is enough to make a neat hole in the insulation, sheathing and roofing. But if warm air from the house or attic passes through the pipes, an imbalance in temperature can lead to condensation. For this reason, a small belt made of moisture-resistant material such as PPS or polyurethane foam is required around the pipe. The belt is cut into two equal parts and placed in a pocket on both sides of the pipe and secured with polyurethane foam. She also needs to seal the seams and cracks, and then sew up the pocket with plywood, cutting it out in a similar way and placing it perpendicular to the insulation.

On the front side of the roof, a roof groove is installed for the appropriate pipe diameter and slope angle. Most are installed over the roof; some may require simple trimming and sealing.

Chimney lining - do it safely
After installing the chimney pipes, the gap in the opening is lined from below with a fine steel mesh. If the pipe is round, then a galvanized steel strip is attached at four points of the opening, forming a casing sleeve. You can avoid this step by filling the entire pocket with thermal insulation, but this will take up more material: the insulator must be packed tightly. For chimney lining, it is recommended to use foam glass or stone wool 120 kg/m3.

The advantage of the casing sleeve is a smooth and neat oval hole in the roof, convenient for laying insulation and tightly covered with cutting. For round chimneys, galvanized steel trims are used.

Rectangular wells should be improved from the outside using prefabricated aprons. Special cases for chimneys of various shapes are quite common; their main task is to prevent slanting rain from entering the place where the neck adjoins the well.

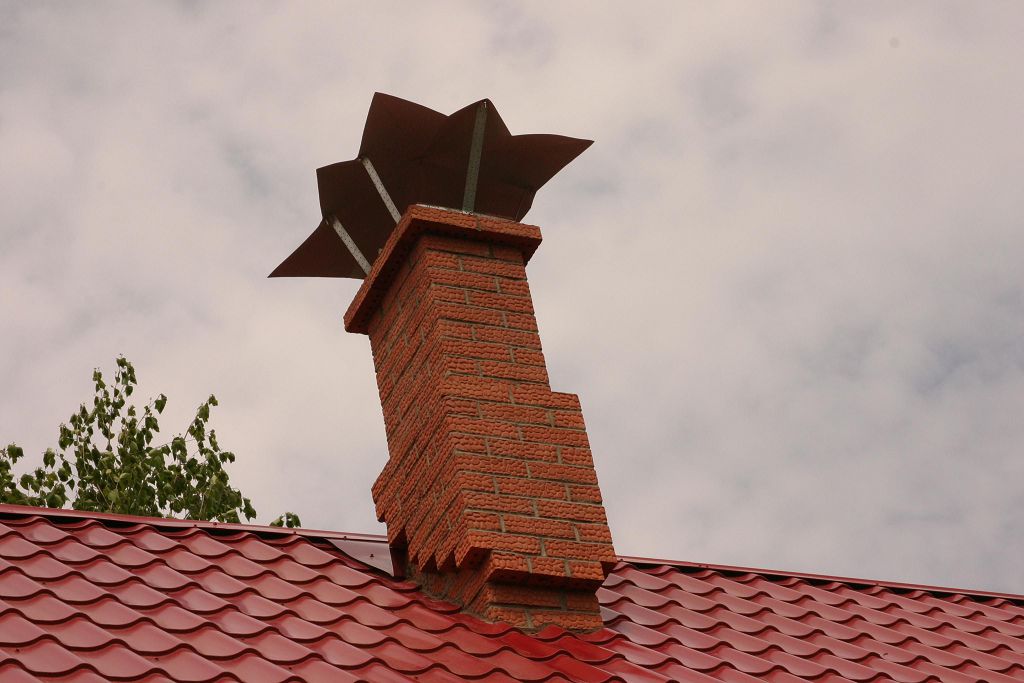
With proper installation of corrugated sheeting on the roof of a house, you can be guaranteed to avoid leaks during rains and spring melting of snow. By this criterion one can judge the reliability of the roof. It should be remembered that any roof structure consists of many elements. The list includes valleys, front strips and ridge. However, based on practice, the most risky element in terms of leaks is the chimney.
Several decades ago, stove makers dealt with this problem by thickening the brick chimney. However, such work requires certain knowledge and skills, and modern designs are increasingly being built from metal. Typically, chimneys are made with a round cross-section. It will help you figure out how to seal a pipe on a roof made of corrugated sheets simple instructions.
Causes of leaks
The roof, covered with a profiled sheet, must be equipped with several openings through which the chimney pipe and ventilation channels will be routed. As a result, the integrity of the waterproofing may be disrupted, which will increase the risk of leaks. It is quite difficult to solve this problem if the chimney had to be routed through an already constructed roof.
To ensure high-quality sealing of the areas where the pipe meets the corrugated sheet, you need to put in quite a lot of effort.

If the work is done poorly, many problems arise:
- Water begins to flow. This happens if the sealing of the joint between the chimney and the corrugated sheet is poorly equipped.
- The rafter system began to rot. After water gets inside the roofing pie, the wood from which most of the roof elements are made gets wet. As a result, the structure is deformed.
- The roofing material itself begins to rust. Corrugated sheeting is not very well protected from corrosion from below.
- Aging of thermal insulation. When insulation gets wet, its effectiveness is significantly reduced.
To increase the reliability of the roof, you need to correctly select the location of the chimney and ventilation ducts. This will make sealing the pipes much easier.

Installation features
What needs to be done to ensure that there are no leaks at the points where the pipe joins the corrugated sheet? To do this, you need to properly seal the joints. Experienced installers note that when solving a problem, it is important to take into account the location of the chimney. The closer the chimney pipe is located to the ridge, the less water gets to its junction with the chimney. In this case, the risk of leaks is reduced.
In addition, the pipe installed as high as possible along the slope has smallest area, located in the cold air zone. This allows you to minimize the formation of condensation, which contributes to the growth of soot inside the chimney. In addition, if condensation constantly forms in the pipe, the walls of the pipe are exposed to acid, which corrodes the metal.

You should separately consider different designs of chimney pipes in order to figure out how to design their joint with a corrugated roofing.
Rectangular products
That's all today more manufacturers makes sure that the joints of the roof and chimney pipes are reliably protected from water. For this purpose, special additional elements are being developed. They are installed near valleys, ridges, and pipes. Such elements are called aprons.

The main purpose of the apron is to collect water flowing down the chimney and roof slopes. With the help of such devices, moisture is diverted to the eaves into the drainage system. However, during the installation process it is important to consider one important point. You need to take care of proper waterproofing. As you know, it is imperative to lay under corrugated sheeting waterproofing film. It doesn't matter whether the roof is insulated or not. At the junction of the pipe to the roofing, a cut is made for the installed chimney. The edges of the cut are left wide from 50 to 100 mm. In the future, they will be fixed directly to the chimney structure.
However, these are not all the points that need to be taken into account. At the joints it is necessary to create a reinforced layer of waterproofing. Therefore, quite often a special tape is installed under the apron. It must be placed under the apron strips located on top. The tape partially extends onto the corrugated sheet. The scheme of work when creating a waterproofing layer should be as follows:
- first the tape is applied to the lower edge of the chimney pipe;
- after this, the joints must be sealed on the sides of the pipe structure;
- At the final stage, the upper edge of the chimney is glued.

Situations often arise when it is necessary to run a stove pipe through an already created corrugated roof. This job can be done quite simply. However, one subtlety must be taken into account. It is necessary that the hole for the chimney in the roofing material be 1.5-2 cm smaller than the pipe itself. In this case, the chimney will not be able to fit through. But to do this, the edges of the corrugated sheeting are simply cut and bent.
After installing the chimney, they will fit tightly to it. This allows you to create additional protection joint from leaks. In this case, it is imperative to install the lower strip of the apron under the corrugated sheeting, and a waterproofing tape on top.

Pipe connection at the ridge
The easiest way to seal the joint between a pipe and a corrugated roof is if it is routed through a ridge. This increases the reliability of the connection. In such structures, the formation of snow pockets is impossible. The risk of leaks arises precisely when they are present. Such options also have one significant drawback - to pass the pipe through the top of the roof, the ridge element must be divided. This means that two additional posts need to be installed under the edges of the plots. You can seal the junction using an apron. However, it must have a certain configuration. This element is made from smooth metal sheets.
Attention! Often the space between the corrugated sheeting and the apron is filled with silicone-based sealant. Modern manufacturers offer consumers the use of self-adhesive tapes, which are made of butyl rubber.

The upper junction zone must be sealed using the standard method - using the upper elements of the apron, sealed on top with sealant. The silicone composition is not afraid of high temperatures.
Joint of pipe and corrugated sheet on the slope
Not in all cases, the layout of the building allows the chimney to be brought out through the roof ridge. Therefore, another path is chosen - to make a hole on the slope. In this case, the work on sealing the junction becomes significantly more complicated.
The main goal is to correctly install the top element of the apron. Therefore, the main rule is to install this element under corrugated sheeting.
Attention! If the upper side of the chimney structure is more than 80 cm wide, a shaped apron with a slope is installed on it. This design resembles a breakwater that drains water into different sides from the chimney.

Installation of such an apron is associated with certain difficulties. In addition, at the junction of its elements and corrugated sheeting, two valleys are obtained. They need to be sealed in the same way as valley roofs. This requires the installation of additional strips and increased waterproofing.
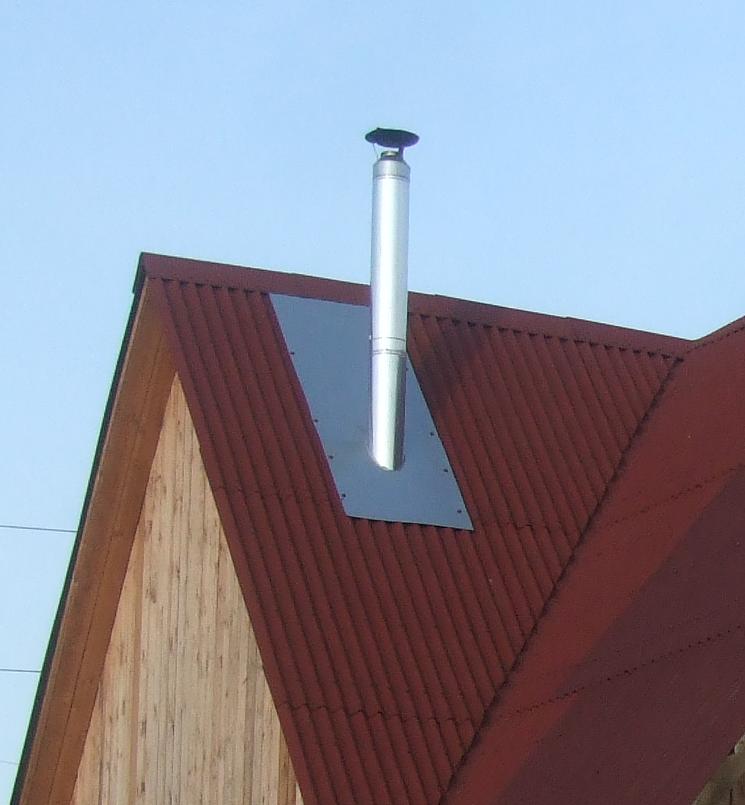
Round pipe
Many chimney structures for stoves are equipped with round channels made of sheet metal. Such products are multi-layered and are additionally insulated. Such a pipe is sealed in many ways. It’s worth looking at the most popular ones:

When there is a residential attic space under the roof of a house, the passage for the pipe must not only be sealed, but also thoroughly insulated. The gap formed between the apron and the pipe must be closed using a special heat-resistant gasket. It is attached to the plane of the product.
As you can see, you can install the joint between a corrugated roof and a chimney yourself, knowing the installation features various designs. In the process of work, it is important to follow technology. This will ensure sealing of the junction.
How to make a passage in corrugated sheets without disturbing the rafter system
If the insulated roofing pie has already been completed, there will be many problems with passing the chimney through it. The main difficulty is compliance with fire safety requirements. At the same time, it is necessary to maintain the integrity of the vapor and waterproofing.
The chimney structure should be located at some distance from the wooden rafters. Therefore, the passage of the pipe through the corrugated roof is created in a special box, which consists of rafters located next to the chimney duct. Two beams are fixed between them. They are placed above and below the chimney structure. From cross beams and rafter legs to the chimney structure is selected in accordance with fire safety standards. This figure ranges from 130 to 250 mm. It depends on the material from which the chimney structure is made.

The inside of the box must be filled with insulation with non-flammable properties. usually used material high density made using basalt fiber. It has low hygroscopicity compared to conventional insulation.
To ensure the tightness of the roof, it is necessary to cut through the corrugated sheeting with an envelope for hydro- and vapor barrier in the place where the pipe passes. Its edges should be secured to the outside of the wooden box.
To cut corrugated sheeting for a pipe in the place where it will be laid, you should create a continuous sheathing. Thanks to this, it will be possible to firmly secure the lower junction strip and the roofing material near the walls of the chimney structure.

conclusions
The choice of method of sealing the joint between the pipe and the corrugated sheet depends on the shape of the chimney and the features roofing structure. You can create a reliable connection using an apron (for rectangular structures) and additional elements (for products with a round section).
The choice of the chimney outlet location is also of great importance. The lower the pipe is located on the slope, the more water accumulates at the joints. This increases the risk of leaks. The best option location of the chimney opening - at the ridge of the roof or close to it.
By following the technology of sealing the junction of the pipe and corrugated sheeting for certain chimneys, you can reliably protect the roof from leaks. It is especially important to do this if you have an insulated veranda.
The times when the stove in the bathhouse was heated black are long gone. A chimney now rises proudly above each steam room, like a spire. But this component of the design, however, is something to be proud of - thanks to the pipe, the room quickly warms up, and vacationers in it are protected from smoke, soot and suffocation. The ceiling trim for the chimney, which is the fire insurance of the building and the custodian of your property, requires special attention. Let's talk about her.
Purpose and functions of the chimney
Before we start learning how to build a passage through the ceiling for a chimney, it wouldn’t hurt to get to know the main “hero” for whom, in fact, this work is being carried out. So, you already understand that the chimney is important and necessary. Why? How does it function? Thanks to this miracle pipe, the furnace already gets fresh air, separated from gases.
Where do the harmful compounds that appear as a result of burning wood go? They go through the pipe into the sky. Moreover, without any motors, levers, current or intervention of human hands, but in a simple way - under the influence of traction of natural origin. Here is a magical device that seems extremely simple, but to achieve this natural simplicity, you will have to work hard. Ready?
Immutable rules
What are the requirements for the chimney and its passage through the ceiling of the bathhouse?
So, remember this important list:
- the most suitable pipe length is 5 meters;
- the prefabricated structure should not contain protrusions (the main guideline is the vertical position);
- the optimal height above the roof level is up to 1.5 meters (otherwise stretch marks will be required);
- the distance between the pipe and the ceilings must be at least 13 cm with cutting the passage and 30 cm without it;
- Smoke elements cannot be joined in roof or ceiling structures;
- contact of the pipe with communications (plumbing, ventilation, wiring, sewerage) is unacceptable.
This is important to know! To avoid unforeseen situations, inspect the chimney at least once a year. An excess of soot, accumulation of soot at seams and joints can damage the structure.
Work plan
Now that you are familiar with the design and the basic requirements for it, you can learn how to construct a chimney passage through the ceiling. Learn a step-by-step case study:
- Surface cutting and marking.
- Box installation.
- Sheet installation.
- Arrangement (insulation) of the opening.
This, as you understand, is a theory that needs to be put into practice, and that’s what we’ll do.
Practical lessons
And now about each action in detail.
Some pioneers in bathhouse construction are wondering: how to determine the location of the pipe? To avoid further frustration, remember: this location is determined at the stage of drawing up the steam room design.
When marking, it is important to determine the vertical axis of the pipe. The beginning of the layout is the outlet pipe coming from the stove. The axis starting from this structural element, resting on the ceiling, is the center of the skylight that you have to make. If the steam room has an attic, then the axis extends all the way to the roof.
And don’t forget about the rule: the distance from the chimney to the ceiling is at least 13 cm.
Worth paying attention! Before installation, structural elements (pipes, adapters, bends, etc.) must be prepared. Remove the film, stickers, price tags (which many people forget to do) and degrease the surface of the parts.
What dimensions should the ceiling trim for the chimney have? Many people think that these parameters depend on the materials from which the chimney is made. This is not so, the only important thing is that the structure does not touch the ceiling, but is not too far from it, since the hole will be difficult to repair, and besides, the heat that is so necessary in the steam room may subsequently evaporate through it.
You probably already remember about the gap of 13 cm, now understand one more indicator - the thickness of the insulating sandwich should not exceed 5 cm. Are you afraid that the insulation will slip out and fall down? Don't worry, the iron sheet that you attach below will serve as insurance against such situations.
This is important to know! When buying iron sheets, keep in mind that galvanized material is not very suitable for bath room, because heated zinc is a source of harmful substances formed after the decomposition of the substance.
Many people confuse the purpose of the insulating layer, thinking that it is done for beauty, to make it cozy inside. Not only that, its main mission is to protect the steam room from fire and cold. The ideal materials are fiberglass, asbestos, mineral or basalt wool.
However, insulating the hole is not enough; you need to additionally create a heat-reflecting screen around the chimney, which we already briefly mentioned above. A piece of polished stainless steel, ideally with a mirror coating, will do an excellent job as a screen. Creating the greatest possible reflective effect for infrared waves is your goal when installing an iron surface.
To reduce the opening, a ceiling-passage assembly is constructed, providing a kind of air gap, which serves as additional insurance against heat leakage from the steam room.
Construction assembly details
You already know the wisdom of the process, let's assemble the device? So, the cutting of the bath consists of:
A galvanized box with parameters 40x40 cm is installed from the attic side. And from the inside of the bathhouse, an iron sheet is attached to it, the dimensions reaching 50x50 cm. The pipe at the lining is covered with a clamp in order to avoid stress on the stove. And only after that, insulation is placed into the hollow part of the body - usually the surface is covered with insulation and covered with expanded clay. Then you can install the final fragment - part of the pipe going through the roof to the street.
Worth paying attention! In order for the chimney to serve for a long time, the joints of the clamps should be sealed, and parts of the structure susceptible to corrosion should be coated with heat-resistant paint.
Ceiling cutting for the chimney is a troublesome, but necessary stage of the bathhouse construction work.
The passage of the chimney through the ceiling between floors - ceiling cutting - is one of the most critical stages in the construction of a bathhouse. This is due high frequency fires due to the ignition of wooden structures near chimneys, and this is exactly what the ceilings and ceilings in baths are like.
Pipe passage through the ceiling of the bathhouse
Safety rules dictate the need to exclude unprotected contact between hot pipe and flammable materials. To comply with them, when installing a chimney in a bathhouse, you need to build a special ceiling passage unit in the form of a box using fire retardant materials, and carry it out in strict accordance with the standards.
You can make a passage through the ceiling with your own hands
Fire safety standards and regulations
Any developer can become familiar with what chimney equipment is considered safe according to SNiP 41-01-2003.

Construction norms and rules of the Russian Federation SNiP 41-01-2003
We are interested in clause 6.6.22, which dictates a setback of 130 mm in the area of passage through the floors for a brick pipe made with wood protection. It is known that brick and concrete pipes have lower heat transfer than modern metal ones, which are most often used in baths. This means that when arranging the cutting of a single-walled metal pipe without thermal protection, you should be guided by other deviation numbers that are indicated in Appendix “K”:
- 500 mm to wood without thermal protection;
- 380 mm from the heated pipe to the flammable pipe behind a layer of thermal insulation.
These figures should be considered as distances from the smoke inside the chimney to the tree.
Errors in arranging a ceiling passage assembly
Manufacturers of stoves and chimneys provide documentation that necessarily indicates the possible value of the distances to ceilings made of various materials. They should be used as a guide when independently constructing a passage for a bath pipe through the ceiling.
What materials can be used for fire protection when installing polyurethane foam?
Both brick, ceramic, and metal parts of interfloor cutting units are heated to temperatures that create a risk of wood fire. To reliably isolate the flammable elements of the ceiling pie, you need to make a gasket made of protective materials.


These are materials that can protect wooden parts from charring and fire at high temperatures in a high-heat zone. But the primary cladding of the ends of the floor, if the necessary indents are observed, can be carried out not only by them. For these purposes, it is allowed to use materials with flammability class G1 (low flammability).

Glass-magnesium sheet (GML)
The choice of thermal insulator can play a decisive role. It should be remembered that ordinary mineral wool, which is sometimes recommended to be used for filling the passage unit, sinteres when heated and quickly loses its fire-retardant properties.
Stone wool has a fiber sintering temperature of over 1000ºС
High temperature leads to a change in its structure - while remaining unchanged in appearance, it can heat up significantly and can no longer cope with thermal insulation. To ensure reliable thermal insulation of the chimney, it is necessary to use basalt wool, designed for operation at temperatures of 800-1000°C.

An example of insulating a ceiling groove with basalt wool
The PPU box is filled with heat-insulating basalt fiber
It is also safe to lay mineralite, asbestos or basalt cardboard. There is also a time-tested a budget option thermal protection - sand was used for it (the passage box was filled with it) and clay. For example, sufficient thermal insulation of the part of the ceiling to which the box is attached is achieved by applying an even layer of clay about 2 cm thick to a metal sheet with a flange.
Comparison of materials for fire resistance
Features of using a “sandwich” chimney when passing through the ceiling of a bathhouse
Modern metal sauna stoves are often complemented by steel pipes made of ferrous or stainless metal. Wanting to reduce hard IR radiation and make the contact point between the chimney and the ceiling above the stove safer, bathhouse owners use a “sandwich” - a double pipe with a thermal insulation layer.
Important! In no case should the connection of the chimney elements be at the level of the ceiling passage.
Contrary to popular belief, the outer casing of a stainless steel sandwich is not much cooler than the main chimney. This pipe design, in principle, does not serve to protect the bathhouse from fire - the sandwich provides best conditions for sustainable traction, this is precisely its main task. When considering fire protection measures, one should not hope that the use of a sandwich at the passage point makes it possible to reduce the distance of indentations.
It is known that due to the burning out of volatile compounds in the pipe itself, the temperature in it increases for some time as the altitude increases. If at the level of the furnace exit the gases have a temperature of 800°C, at a level of 1.5-2 m the measurements will already show 850°C. Under these conditions, the outer casing can be heated to 300°C, as evidenced by the tarnished colors on its surface.
Wanting to heat the bathhouse faster, overheating the stove, it is easy to exceed the optimal regime for the passage of combustion products through the pipe. According to the standards of the Ministry of Emergency Situations, the temperature in stainless steel chimneys should not exceed 400°C; tests for certification are carried out precisely at these values. Most steam lovers far exceed these parameters. The metal quickly burns out due to overheating, and you need to understand that the sandwich can turn into a single-walled sandwich at any moment. The insulation with which the sandwich is stuffed also does not serve as a panacea for fire. If you assemble a chimney “for smoke” and not “for moisture”, the thermal insulator heats up during combustion, and after cooling it is saturated with condensate - as a result, over time it loses its useful properties.
All of the above leads to a certain conclusion - you should not frivolously reduce the recommended margins, hoping for a protective sandwich casing.
Drawing of a ceiling passage unit
Important: when using metal stoves and stainless steel chimneys when installing a ceiling passage, the optimal distance from the smoke to the wooden structures is 380 mm!
Stages of ceiling cutting installation
The main tasks that the builder faces when arranging the passage of a chimney through the ceiling of a bathhouse are protection from fire of the ceiling and an even vertical installation pipes. The work takes place in three stages:
- determination and arrangement of the location of the cutting unit;
- installation of a ready-made or self-made protective casing;
- final thermal protection gasket.
This general rules, and specific methods of work depend on many factors - the allocated budget, preferences in the choice of materials, even on whether the technologies were followed during the construction of the bathhouse.

Preparing a place for the chimney passage through the ceiling
The center of the pipe passage is determined using a plumb line. The cutout is made according to the markings, slightly reducing the size of the sides so that the future decorative panel completely covers it.
A self-made passage, as a rule, is decorated on the steam room side with a sheet of metal - galvanized or stainless steel, which also serves as a heat shield. The dimensions of the sheet must exceed the size of the cutout for the pipe.
- A vertically positioned chimney will pass through both the ceiling and the roof. When marking the chimney, you should start from the highest point and use a plumb line.
- When using ready-made polyurethane foam structures, they are guided by the hole sizes recommended by the manufacturer.
- By passing the chimney through the ceiling independently, without an industrially manufactured unit, a preliminary calculation of the passage duct is made. Strictly above the passage of the pipe in the ceiling pie, it is necessary to make a through hole, the dimensions of which allow the required indentations to be observed. They are calculated as follows: for example, a pipe diameter of 120 mm, a sandwich with 50 mm insulation will pass through the ceiling. The resulting outer size is 230 mm. We will find the permissible distance by adding the two distances of indents with the internal diameter to the smoke. According to safety standards, this is 2*380+120=880 mm.
Important! It’s good if the exact location of the sauna stove and chimney is thought out while drawing up the project. In this case, it is easy to calculate the installation of load-bearing floor beams in order to provide the necessary space for the safe passage of pipes between them.

Construction of an opening for the chimney
Otherwise, the first thing you need to start work with is changing the design of the ceiling above the stove. Part of the beam that is too close to the hot chimney is cut out and strengthened by installing jumpers firmly attached to the resulting ends. Then the ceiling is covered.
Installation of a finished cutting unit - feedthrough pipe
The advantages of using a factory design are the ease of installation and the obviously aesthetic appearance of the ceiling in the steam room.
It is assumed that a sandwich will be used as a chimney when inserted into the finished polyurethane foam. The dimensions of standard devices are small to ensure reliable insulation of a single-wall chimney.
Ceiling passage units of various configurations are available for sale. The design is based on a rectangular or round box, rigidly connected to a sheet that serves both for protection from heat from below and for decorative finishing. In the center there is a cutout for the pipe; the unit is selected according to its diameter. Ready-made walk-through structures are made of metal, most often stainless steel, and mineralite, with or without a thermal insulator gasket. The best in terms of their properties are combined ones, having an internal metal box and an external mineralite box with an air fireproof layer between them.
Install the floor passage unit in this way.
- The ends of the hole cut in the ceiling are covered with a layer of heat insulation, beating wood around the perimeter.
- The bottom sheet of the device and all places of possible contact between metal and wood are laid with a non-flammable layer sheet material. Good ones here: mineralite, asbestos and foil basalt cardboard.
- The finished structure is placed on the elbow, which will be located in the passage unit, and brought to the hole cut in the ceiling. From the steam room below, the finished unit is fixed to the ceiling with self-tapping screws; usually the holes for them are provided in advance by the manufacturer.
- The diameter of the bore hole is always greater than the diameter of the pipe. Rigid binding is unacceptable due to thermal deformations; a gap of at least 5 mm is required. Based on what material will be used as fire protection near the pipe, a decision is made on the advisability of insulating the gap. If necessary, the pipe at the junction is wrapped with asbestos cord.
- From above, on the ceiling of the attic, additional thermal insulation is carried out. The box is filled with expanded clay or fire-resistant mineral wool.
- In the attic, the cutting unit is left without exterior finishing. If the upper floor is residential, the passage structure is decorated with a metal sheet.
Homemade pipe passage through the ceiling of a bathhouse - step-by-step instructions with photos
- tin for making cutting boxes;
- minerite;
- stainless steel sheet;
- sheet of gypsum board or basalt cardboard;
- The material for filling the box is expanded clay, but dry clay can also be used.
The pipe passage in this example is carried out at the stage before finishing the ceiling. This is not important; the sequence of operations does not change.
Proper cutting of the chimney
The cut is an element of the chimney that is performed when the chimney passes through the ceiling or roof. Proper cutting is the key to long-term functioning of the chimney itself, as well as warmth and dryness inside the room. At the same time, even professionals can make mistakes when choosing and installing cutting. To control the services of a specialist or complete the design yourself, you need to understand some of the nuances.
Cutting functions
The main function of cutting is to pass the pipeline through the fence. By fencing we mean the ceiling or the roof itself. The passage must be sealed.
When cutting is carried out correctly, not a single drop of external precipitation enters the room, not to mention internal space premises.
Fire safety is a special consideration. The fact is that the flue gases heat the pipe to significant temperatures. Even after passing through all the heat exchangers, the exhaust gases have significant temperatures, which, if the pipe comes into contact with a flammable surface, can serve as a source of fire.
Therefore, the space between the cutting elements and the pipeline is filled with sealant. In most cases, this is basalt-based mineral wool. In addition, the internal cutting elements include a metal apron, which protects the surrounding surface from elevated temperatures.
When cutting is done correctly, not a single drop of precipitation gets into the room.
Basic rules and regulations
In fact, there are not so many standards in cutting. To be honest, only one thing is correct, everything else is purely recommendations obtained through long construction experience. The rule dictated by SNiP states: when making a chimney made of concrete or brick, as well as any other insulated materials, the distance to the rafter beam and any other flammable surface must be at least 13 cm. In any other case: at least 25 cm.
Experienced roofers advise that when making a passage through the roof on the inner surface of the roofing pie, make an apron made of rectangular metal with indentations from the end of the passage opening of approximately 30 cm.
Types of ceiling penetrations
Pass-through units are divided by shape, depending on the insulation used, as well as the main structural material.
According to the main material there are:
- Steel components made of steel with a thickness of 0.5 mm. The most popular option, since metal components combine ease of installation, strength and resistance to mechanical damage.
- Asbestos. Asbestos is a cheap and reliable, but fragile material. Any mechanical damage can ruin your purchase.
- Minerite. New material on construction market. Very often, the manufacturer recommends this material for installing aprons and protective surfaces, but many buyers remain dissatisfied with the quality of the product. Therefore, it is better to be careful and purchase the usual steel assembly.
 Ceiling pass-through unit for round pipe
Depending on the insulation, structures with materials are distinguished:
- Expanded clay
- Vermiculite
- Basalt mineral wool with foil. It is used more often than others, as it is easier to use and more suitable for self-installation and managed to establish itself in the building materials market.
Any node always has a rectangular base, but the shape of the passage itself varies, so there are two types of node according to the shape of the passage:
- With double cylinder
- With double rectangular box
The best choice would be a steel passage unit with mineral wool insulation. The shape of the passage unit is selected based on the shape of the pipeline and the personal preferences of the owner.
 Roof cutting for round pipes
Factors influencing chimney cutting
The shape of the chimney cut is primarily influenced by the type of roof: flat or pitched. A flat roof does not accept the techniques inherent in a pitched roof. As a rule, cutting into flat roof are made of concrete, while materials for cutting pitched roof vary, but most often it is made of metal.
The shape of the chimney is of particular importance, since the shape of the passage opening depends on it. The round shape is better for the chimney itself, but if we talk about passage holes, then it is much easier to make a rectangular chimney. For a round cross-section you will have to make the correct cut in the roofing pie; for a rectangular chimney this is much easier to do.
The choice of installation technology is also influenced by the presence of cladding and the shape of the roofing. The lining makes cutting much more difficult. The fact is that the cladding can allow moisture to penetrate inside the roofing pie, which is unacceptable. Therefore, it would be logical to make the groove wider using cladding, but the groove itself also needs to be hidden somehow. Therefore, structures under cladding remain the domain of professionals. You need to have too many specific skills to do everything unnoticed and really beautiful.
If we talk about the type of coating, then it is better to use corrugated sheets for cutting. Other types are associated with certain difficulties. You have to calculate the coverage. Since the apron is supposed to be tucked under the element finishing coating roofs, and because of this, some types may stand on the roof at an angle or become bristling, which makes the coating leaky.
Installation technology and roof access
Installation technologies for cutting round and rectangular pipes are different. The fact is that the very shape of the passage unit is changing, which means the technology for carrying out the penetration is changing. The shape of the chimney is determined only by the wishes of the owner. The fact is that soot will not accumulate on a round pipe. Besides outer part such a chimney has a more streamlined shape, which improves the aerodynamic protection of the pipe. But a rectangular pipeline is easier to hide. It is more advantageous from an aesthetic point of view, so it is sometimes used.
Installation of a ceiling passage unit
Round pipes
For round pipes, it will not be possible to make the passage parts yourself, so you will have to use purchased elements. Aluminum-based flanges enjoy well-deserved popularity in the market. A movable silicone or rubber corrugation is attached to the round base using rivets, which is pulled onto the pipe. On the inside and outside, the passage elements are connected to each other, resulting in a reliable and strong connection.
For cases where it is not possible to tighten the connection onto the pipe, there are split flanges that, thanks to special technology, can be wrapped around the pipe and tightened with a minimum gap between the groove and the pipe.
Rectangular pipes
Rectangular pipes are popular for a variety of design projects. In addition, the main cutting parts can be made independently from sheet metal. This:
- Wall profile or internal apron
- Tie
- External apron
All these elements are corners with cuts at the bend. The upper part of the apron is bent inward, so from the corner an element of a wall profile is obtained, which will overlap the adjacent element.
A tie is a triangular flat sheet of metal that protects part of the counter sheathing under the pipeline from soaking.
 Scheme for cutting a rectangular pipe
Features of cutting brick pipes
There are only 2 features of brick pipes:
- The brick pipe rests on the foundation. This means that it is stable and does not require additional fastenings in the form of brackets. At the same time, making such fastenings with rigid tightening of the clamps can lead to deformation of the pipe or roof, which can lead to a fire or collapse of the building.
- Brick is a porous material, so it needs a little more protection from cutting. Therefore, wall profiles are mounted in a special groove, which is made in a brick pipe by grooved using a grinder.
 Cutting a brick chimney
The procedure for cutting a brick chimney is as follows:
- The chimney is grooved after the counter-lattice. The goal of the groove is to create a groove for the bottom rail of the wall profile.
- The lower wall profile is mounted. Fasten it with bolts to the counter-lattice. A tie is attached to the bottom rail. The tie is a sheet of metal in the shape of a triangle with the end slightly bent upward. The end of the sheet is bent to prevent water from penetrating into the attic.
- The wall profile is coated with sealant.
- Side and top strips are installed. After which the wall profile is covered with a coating, which is pressed against the aprons.
- The top apron is removed under the decking sheet or under the ridge if the pipe is located next to the ridge.
Cutting a chimney is quite an important process. Therefore, all fastenings must be made efficiently and reliably, otherwise the roof may leak in the chimney area. Compliance with instructions and standards will allow you to do everything correctly and lastingly. A properly installed chimney will last for decades.
Instructions for installing chimneys made of stainless steel sandwich pipes.
Let's consider the sequence of cutting the ceiling to ensure safe passage
chimney between floors. The passage of the ceiling is carried out using the serial passage pipe of our
production.

Preparing the feedthrough pipe for installation
First you need to prepare the feedthrough for installation. A layer is installed along the walls of the pipe
insulating material - for example, foil mats made of basalt fiber. The internal cavity of the passage is isolated
pipe and parts adjacent to the ceiling.


Preparing the floor for installation of the passage pipe
Now you need to prepare the ceiling for installation of the passage pipe. Determine the place in the ceiling where it should
go through the chimney pipe. The size corresponding to the installation of the passage pipe is marked and an opening is cut out in
overlap Mineral wool insulation is used to insulate flammable ceiling materials at the point of contact with the passage
pipe

A passage pipe can be installed in the prepared opening. The ceiling is ready for installation of the chimney.
![]()


Chimney passage through the ceiling
We pass the chimney elements through the ceiling. The parameters of the chimney should be calculated so that in place
When passing through the ceiling, the chimney pipe passed entirely - without joints with other elements. Docking elements
in these places
elements of the nozzle and pipe (the diameter of the bore of the serial nozzle is slightly larger than the diameter of the serial pipes).
After passing through the chimney pipe, we secure the protective elements of the pipe.

Vertical check
We check and, if necessary, align the vertical of the chimney trunk. The ceiling has been successfully completed.
Chimney installation procedure
Let's look at the installation of a chimney using the example of installing a double-circuit chimney system.
The elements are installed from the bottom (from the heating unit) up. During installation, the inner pipe goes inside
the previous one, and the outer pipe is put on the previous one, which prevents moisture from entering the mineral wool
insulation. The mnemonic rule is simple: internal pipes- “by condensate” (condensate, flowing down, should not
encounter obstacles in the form of a pipe seam and should not flow into the pipe).
For better sealing of pipes, it is advisable to use a sealant with operating temperature not less than 1000 degrees.
The joints of pipes and other products (tees, elbows, etc.) must be fastened with clamps. Every two meters
chimney, it is necessary to install a mounting bracket to the wall, and the tee must be secured using a support
bracket.
The stove chimney should not have horizontal sections longer than 1 m.
Smoke ducts must not come into contact with electrical wiring, gas pipeline and other communications.
When chimneys pass through walls, ceilings or roofs, insulated pipes should be used.
in accordance with fire safety standards.
To clean the chimney, a removable part (glass) or a hole with a door (revision) should be provided at its base.
The chimney needs qualified maintenance. Cleaning should be carried out at least 2 times per heating season.
chimney.
In order to be confident in chimneys and the operation of heating units in general, their installation and care
it's better to leave it to professionals.

Requirements for the elevation of the chimney above the roof
It is prohibited to lay floors or make hemming close to the walls of the main pipe or furnaces; they should only reach the cutting edge. In this case, concrete or ceramic tiles are used above the cutting.
When installing a stove between combustible wooden walls or partitions, a space of at least 130 mm is made between them, with wood insulation on the cutting side, and the distance between the wood and the “smoke” must be at least 250 mm.
Without wood insulation, this distance is increased to 380 mm.
The retreat is sometimes closed (filled) from the sides. In this case, the wooden wall is insulated with the so-called “cold quarter”, that is, a wall 1/4 brick thick, which is laid over felt.
In new houses with log or cobblestone walls, given that they will give a large settlement, when the retreat from the sides is closed, it is necessary to install a wooden panel attached to the wall so that it slides between the fastening parts and does not interfere with the settlement of the wall.
On this board a “cold quarter” is also made over the laid felt.
Since it is practically very difficult to hold a brick on felt, you must first lay felt on a board or wall, nail it down so that it does not fall off, and then lay the brick on a clay mortar, securing it with nails with washers on or making wire weaving over the nails. After laying, the brick is plastered with clay or other, more durable mortar (Fig. 95).

In a closed air gap, for air circulation between the stove and the “cold quarter” at the bottom and top on the sides, holes must be made, covering them with grates (Fig. 96). The “cold quarter” is made with a height and width in indentations equal to the width and height of the oven, but not less (Fig. 97).


When a kitchen stove stands in the opening of a wooden partition or between wooden walls, cutting is done on the sides of the stove in half a brick, above the stove - in two bricks.
Vertical cuts do not allow ligation with the masonry of the furnace or pipe, regardless of the mortar used to make these cuts.
It is imperative to leave a gap from the top of the ceiling to the stove ceiling (roof) of at least 350 mm, and when insulating the ceiling - 250 mm. It must be accessible for inspection, repair and dust cleaning. If the stoves are heat-intensive, weighing up to 750 kg, then the gap is left at 350-450 mm, and for non-heat-intensive stoves - 700-1000 mm.
Wooden ceilings above the stoves are plastered over felt or insulated with two layers of felt so that this insulation for both plaster and roofing steel is 150 mm larger on all sides than the dimensions of the stove.
If the stove is connected to a chimney using a pipe, then the distance to the wooden ceiling or partitions is set at least 500 mm or 380 mm if there is insulation.
Wooden floors in front of the firebox of any stove are insulated with two layers of felt and covered with a sheet of roofing steel measuring at least 500x700 mm, covering the plinth with roofing steel.
Under kitchen fireplaces or stoves with legs, wooden floors must be covered with asbestos or two-layer felt insulation. The size of this insulation must be equal to or greater than the furnace on all sides by 150 mm.
Furnaces and pipes should be systematically inspected and any defects corrected immediately.
In winter, you need to especially carefully monitor stoves and chimneys, as they are heated more often.
Temporary furnaces are placed at a distance of at least 1 m from combustible structures. It is strictly forbidden to place flammable materials near the fireboxes.
It should also be noted Special attention for laying chimney pipes and maintaining them in the appropriate order (see section “Installation of chimney pipes”).
The cuttings are laid on clay, lime, lime-cement or cement mortar. They should not be tied to the pipe masonry and be as thick as the wall or partition. The usual cutting thickness is 1/4 or 1/2 brick.
The part of the combustible structure adjacent to the cutting is insulated with sheet asbestos or two layers of felt. It is advisable to pre-impregnate the felt in an anti-mole compound. The thickness of the felt insulation must be at least 20 mm. If the felt is thin, then it is laid in two or three layers.
The width of the indentation or cutting is considered “from the smoke”, that is, from the inner surface of the stove or chimney, and is equal to 380 mm for structures not protected from fire and 250 mm if they are protected from fire by insulation.
Often in the walls where smoke ducts pass, it is necessary to lay wooden beams(Fig. 98). They must be located so that between the beam and the inner surface of the duct there is a distance of at least 250 mm for chimneys from conventional stoves and 380 mm for stoves with long-term combustion. The ends of the beams on the channel side are insulated, but the ends are left open. It is more reliable to leave a distance of 380 mm between the beams, their ends and chimneys with the obligatory laying of an insulating layer.

Sometimes the beam is opposite the chimneys and it is impossible to move it to one side or the other, then it is shortened and a short transverse beam is cut into the crossbar, which in turn is laid on two beams. They are fastened to each other with a dovetail spike (Fig. 99). The ends of the beams embedded in the wall and the crossbar adjacent to the wall are insulated.

At main and mounted pipes, as well as at walls where channels pass at the level of interfloor and attic floors, during the process of laying walls or pipes, horizontal grooves or fluffs are made, which are made during the process of laying pipes, increasing the thickness of the groove. For brick kilns with short-term combustion, the thickness is taken to be one brick. This distance is considered from the “smoke” to combustible wooden structures, which must be covered with sheet asbestos cardboard or two layers of felt. If there are no insulating materials, the cutting thickness is increased to one and a half bricks. However, even with such cutting, insulation is needed (Fig. 100).

If stoves or kitchen hearths (stoves) are heated for more than 3 hours, then the cutting should be one and a half bricks long with mandatory insulation. If there is no insulation, the cutting is adjusted to two bricks.
Masonry cutting is a complex matter, therefore, in interfloor and attic floors, it is best to use a reinforced concrete slab 50 mm thick to support the brickwork. On this slab, after laying the riser, cutting can be easily done (Fig. 101).

When arranging cuts, you should take into account the different settlements of the building walls, main pipes and furnaces. Stone walls, pipes and furnaces give a small (insignificant) settlement. Wooden chopped walls, especially those made of non-dried material, settle on average up to 150 mm. The rise and settlement of walls also occurs during windowing. Along with the walls, the floors also settle. Before fencing work begins, the insulation around the groove is removed. It must be remembered that it is prohibited to rest cutting masonry bricks on beams or flooring. During settlement, a crack may form there, which will lead to a fire.
When the walls give more sediment than the root or capstan pipes, then the cutting is carried out so that it has a reserve at the bottom inside the room. If the main pipe and the furnace with a mounted pipe give more sediment than the walls and ceiling, then the fluff should have a reserve at the top in height (in the attic) (Fig. 102). The attic floor is often covered with light, low-heat-conducting combustible materials: sawdust, peat, dry wood leaves, etc. Such materials must be covered with slag, earth, and sand on top with a layer of 20 mm. In this case, the cutting should rise above the backfill by at least 70 mm, and in general, the more, the better. A completely fireproof backfill with a thickness of at least 100 mm is made around it.

Wooden rafters and sheathing must be at least 130 mm away from the outer surfaces of brick pipes. For combustible roofs, the distance between the roof and the pipe must be at least 260 mm. The remaining gap is covered with roofing steel or asbestos-cement sheets.
When performing furnace work, it is imperative to observe “ Rules for the work and repair of stoves, chimneys and flues" Below is a presentation and explanation of those points without knowledge of which it is impossible to carry out furnace work.
- 3.2.1. In places where combustible and non-combustible building structures (walls, partitions, ceilings, beams, etc.) are adjacent to stoves and smoke ducts (chimneys), it is imperative to provide cuttings made of non-combustible materials. When the stoves are located in the opening of a wooden wall or partition, vertical cuts are made to the entire height of the stove, hearth or chimney.
Rice. 1. Vertical fireproof furnace cuttings:
1 - heating stove; 2 - felt or asbestos; 3 - brickwork; 4 - metal sheet.
When passing a smoke duct (chimney) through an attic or interfloor ceiling, horizontal cuts are made. Vertical cuts are placed in ½ brick or ¼ (per edge) on good solution without bandaging the seams with the masonry of the stove or chimney. Horizontal cuts are placed with ligation of the seams and are carried out simultaneously with the laying of the channel. They represent a canal wall enlarged to a safe size. To carry out cuttings, you can use other fireproof materials - reinforced concrete slabs, ceramics, metal, asbestos-cement slabs. When arranging cuttings near furnaces, it is necessary to provide for possible shrinkage of the walls wooden buildings, it can reach 4% of the building height. In interfloor and attic floors, the cutting height increases by the height of possible shrinkage. When trying on insulation made from flammable materials (moss, sawdust, peat, etc.) in attic floors, the groove at the chimney must be raised higher by 2 rows of bricks.
When performing horizontal cutting in an interfloor or attic floor it is necessary to ensure that the brickwork does not rest on beams or flooring; the outer walls must be smooth so that cracks do not form during shrinkage. All seams must be tightly filled with mortar. Frequent causes of fire are cracks that form in the mass of the stove and smoke channels due to uneven settlement or spalling of the mortar from the seams. Therefore, the main means of fire prevention is the protection of wooden and flammable structures with fireproof materials. Non-thermal conductive materials are used for protection: wool felt and asbestos. Felt conducts heat poorly and is a good heat-insulating material. When ignited, it smolders, releasing smoke with a pungent odor, signaling the danger of fire. To make the felt more resistant to fire, it is impregnated with a liquid clay solution before laying. All wooden structures adjacent to the cuttings are covered with 2 layers of felt or asbestos. The structure in this case is considered protected.
- 3.2.2. The distances from the inner surface (from smoke) of furnaces, ducts and chimneys to the combustible or non-combustible building structure should be no less than those indicated in Table 1.
- 3.2.8. The distance from the stove ceiling to the ceiling should be 350 mm to unprotected and 250 mm to protected.
- 3.2.9. When installing them through roofs, the outer surfaces of brick chimneys should be removed from combustible structures (beams, sheathing) at a distance of at least 130 mm.
- 3.2.11. To protect the floor under the furnace door of the stove there must be a metal sheet measuring 0.7 x 0.5 m, laid long side along the stove.
- 3.4.7. Foundations for furnaces and chimneys are laid in accordance with the general Rules of Maintenance stone works according to SNiP 11.17.78.
Between the foundations for the stove and the foundations of the building walls, a gap of at least 5 cm is left, filled with dry sand.
- 3.4.11. The masonry (of the stove) must be made in compliance with the horizontality of the rows, the verticality of the outer surfaces and corners, the shape and size of the internal channels. Each row of masonry must be made with ½ brick joints. In rows where ¾ bricks should be used, bandaging with ¼ bricks is allowed.
- 3.4.12. The thickness of the seams of stove masonry made from ordinary clay bricks should be no more than 5 mm, and from refractory and refractory bricks 3 mm.
The thickness of the joints of the chimney masonry, made with a complex mortar, must be no more than 10 mm, the horizontal and vertical joints of the masonry must be completely filled with mortar. During the laying process, the internal surfaces of the channels (furnace) and chimney must be treated by mopping.
- 3.4.15. The grates must be placed in the firebox 714 mm below the combustion hole and laid in place with a 5 mm gap around the perimeter filled with sand. The grate slots should be located along the firebox.
- 3.4.21. The external surfaces of the stoves are finished by mopping and grouting with dry brick or plastering. The thickness of the plaster layer should not exceed 10 mm.
- 3.4.22. External surfaces of chimneys in attic spaces must be grouted and whitewashed.
It is allowed to build stoves with outer walls ¼ brick thick provided they are enclosed in a metal frame or a case made of roofing steel.
It is not allowed to connect the ash pit of the furnace to the underground for the purpose of ventilating them during the firing of the furnace.
Very often, in private houses, stoves and fireplaces are used for heating, and in these houses you can also find solid fuel stoves for cooking.
Sooner or later, when installing heating equipment, a very important moment comes: insulation.
This procedure can be divided into a couple of stages:
- Initially, complete fire safety should be ensured in the places where the pipe passes from the stove through the roof deck;
- After this or during the process, high-quality insulation from moisture should be made, i.e. prevent precipitation from penetrating through the hole made in the roof.
Attention! The first step is to determine exactly where the pipe will exit the roof. Very a good place the outlet of the chimney is, of course, the ridge of the roof.
This can be confirmed by the following facts:
- Through the ridge of the roof, the exit of the chimney is quite simple (compared to the slope);
- Less snow accumulates on the ridge itself, which in turn will reduce the possibility of water leaking through the roof deck at the hole.
So, how to properly seal the chimney outlet? The method of installing a chimney through the ridge of a house has a very serious disadvantage. So, when installing the rafter frame, you have to abandon the ridge beam - this allows you not to compromise the reliability of the roof.
Advice!
- In this regard, the chimney outlet is often made near the ridge. However, the outlet should not fall on the roof slope;
- It is not recommended to install the furnace outlet at the junction of the slopes at an angle;
- Do not install the chimney in places where there is a lot of snow and rainwater accumulation.
If, when designing a house, the basic requirement of the chimney outlet was not taken into account, and the pipe from it does not reach near the ridge, you should install additional elements into the chimney pipe.
How to make a fireproof chimney outlet through the roof deck?
 Ensuring high fire safety at the point where the pipe exits through the roof is very important point installation, as this will protect you and your family in the future.
If you look at some construction standards, you can find out that the temperature at the point of contact of chimneys with combustible materials is no more than 50 degrees.
If you are installing a brick pipe, then in order to reduce the temperature at the contact point it is necessary to increase the thickness of the brickwork, this way you can very effectively lower the temperature of the outer wall of the chimney.
Cutting a brick chimney, as a rule, is carried out up to 380 mm. If such a brickwork is laid, then there is no need to worry about fire safety.
What should you consider when cutting a pipe?
- It is necessary to accurately take into account the distance between the roof and the rafter system. So, this distance should not be less than 25-30 cm, regardless of the type of roofing material.
For flammable materials, this distance should be 15-30 cm.
For non-combustible materials this distance ranges from 10 to 25 cm.
- The most difficult moment in removing the smoke exhaust pipe is the passage of the roof deck.
Roof decking- This is a very complex multi-component system, which includes insulation, vapor barrier, waterproofing material and the roofing material itself.
If, when removing the pipe, the integrity of the pipe is broken and the seal is depressurized, moisture will freely enter the internal layers, which will lead to loss of thermal insulation.
It is also worth noting that the films that are located inside the roofing cake are flammable materials. In this regard, there simply must be a gap between the chimney pipe and the roofing itself.
In this state of affairs, you should start making a special box that will separate the pipe from the roof. Such a box can be assembled from rafter boards and transverse beams. In this case, it is necessary to leave a distance between the box and the smoke exhaust pipe. This distance should be about 14-16 cm. After this, the gap is filled, for example, with mineral wool, i.e. non-flammable material that is not afraid of moisture.
When making a hole in the roof, the edge of the vapor barrier film will come up. This film must be cut with an envelope and the edges attached to the nearest beam or rafter. Fastening must be done using nails.
All elements inside the roofing pie should be pressed with lathing or frames. To secure the joints more securely, it is necessary to wrap the edges with tape. There are special tapes for this procedure.
Waterproofing a chimney pipe
 Often, if water leaks through the roof at the point of contact between the pipe and the roofing pie, this is due to poorly done sealing. It will leak from above if the pipe is cut above roofing pie, and will leak from below if the cutting is carried out under the flooring.
If you properly waterproof the place where the pipe passes through the roof deck, you can easily protect all the rooms located under this place. Thus, in any weather (rainy or melting snow) there will be no problems with leaks into the premises, which will reduce dampness in them and will not ultimately lead to the development of various colonies of microorganisms.
As a rule, to make a good one, you need to install an apron on the pipe.
Installation of such protective aprons is carried out in several stages:
- A drainage gutter must be installed in the waterproofing layer. In particular, the material for this gutter is usually stainless steel. This gutter is installed to effectively drain water away from the chimney.
- If you correctly install the apron inside the roofing material, it will seal the end surface of the roofing deck.
- Having finished installing the apron, we proceed to installing the tie. It is a sheet of material that is mounted to the bottom of the chimney apron. If you use metal tiles or slate as roofing material, then the edge of the tie can be placed between the individual sheets. Also, on the edge of the exposed tie, make small sides that will direct water to the roof slope.
- After this, we cover the entire surface around the pipe with roofing material.
- Then, an external apron must be attached to the lower part of the pipe protruding from the roof, which is attached in the same way as the internal one, only directly to the pipe itself.
Advice! In addition to making aprons yourself, you can buy ready-made ones. Also for round smoke exhaust pipes there are special wiring through the roof.
 The presented passage allows for sealing between the roof and the pipe. Such passages are made from steel sheet. When in use, this passage is fixed to the apron. A chimney pipe is passed through the internal opening of the passage.
Attention! There is also one point that is often overlooked. So, during operation, any roof will shrink. In this case, the tightness of the roof remains at the same level, but at the joints the integrity may be compromised.
The same result is observed when the chimney pipe itself is deformed. In particular, the apron is deformed and the tightness is broken. To avoid such a problem, the fastening should not be of a rigid type, but rather through a steel skirt that has a heat-resistant gasket for contact with the pipe. This combination will ensure that even if the pipe and the roofing material itself are deformed, the tightness of the entire deck will not be lost.
From the video you can get a lot of useful information about the installation of chimney pipes and their insulation.
If, when building the roof of your house, you carefully think through all the nuances of removing the chimney pipe, as well as waterproofing it, you will ensure coziness and comfort in your home for many years.


