What is topiary?
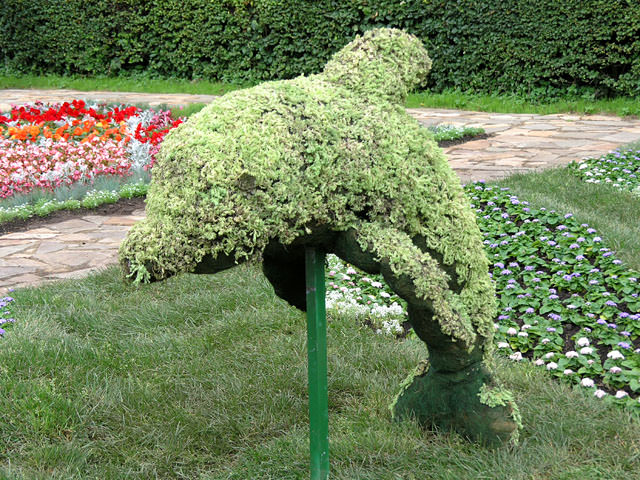
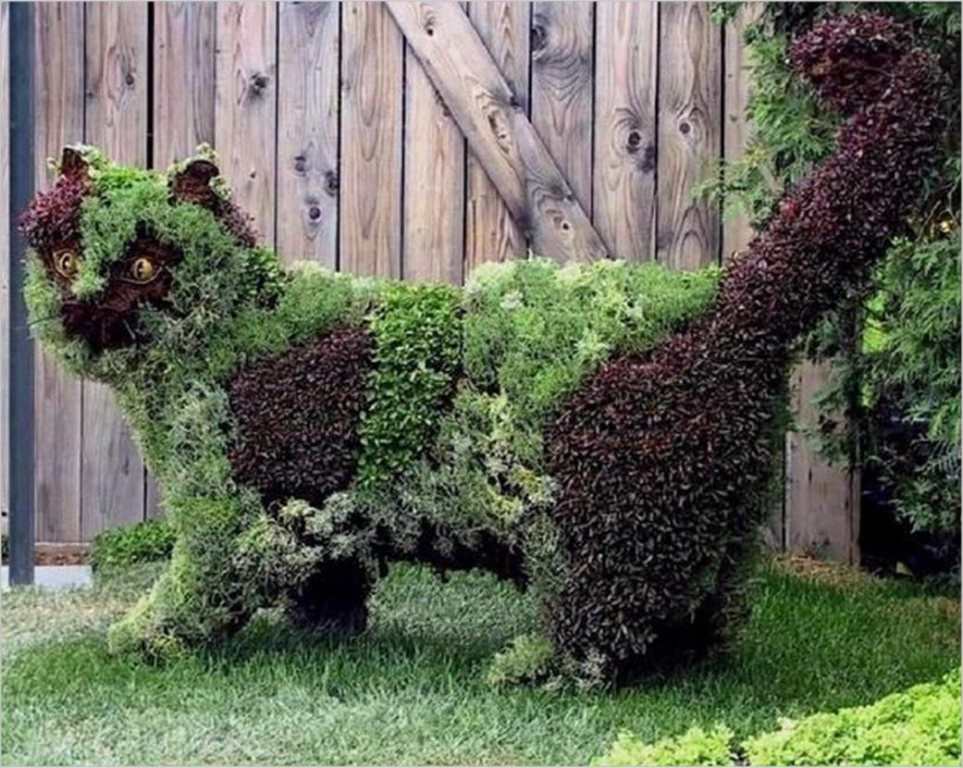
Topiary (from Latin Topiarius - gardener) is the creation of masterpieces from plants by giving them various forms. Topiary includes both figuratively trimmed trees and shrubs, and figures created using soil and low-growing vegetation planted on it and constantly trimmed.
On city streets, green figures are created more and more often, becoming more and more popular and are already merging into the large-scale Green Art movement.
And many are already thinking about creating such beauty in their summer cottage. Yes, it's not easy. Topiary is quite a new trend, not yet so widespread among us, and there is not much information about it in Russian-language literature (with the exception of proposals for making custom-made figures). However, if you want, everything is possible. Even create topiary with your own hands.
And to learn more about this art, you should turn to the 17th - 18th centuries. Then Topiary was a real boom in Europe.


From the history.
England, France, Italy of the 17th and 18th centuries were literally buried in gardens strewn with topiary masterpieces. One of the most striking examples is the French Versailles. 
And British gardeners have completely elevated topiary to a cult. Remember the famous english gardens with labyrinths of trimmed bushes.
But this art appeared much earlier. There is information about the spread of “geometric” gardens (with trees and shrubs of various geometric shapes) back in Ancient Egypt and Persia.
Topiary appeared in Russia thanks to Peter I.
With the advent of the era of classicism, topiary was a little forgotten.
Kinds.
 Classic topiary
Curly trimming of trees and shrubs by eye or according to a template using a frame. The frame is installed on the plant and as the branches grow, they are tucked into the frame or trimmed along the contour.
 New (or American) topiary
Trimming a plant on a metal frame. The frame is initially installed in the crown and as the crown grows, it is adjusted to the contours of the frame. Or the frame is filled with soil and low-growing plants are planted on it, which are trimmed as they grow. The invention of the Americans greatly facilitated the process of creating complex sculptures.
With my own hands.
If you want to create topiary with crown trimming, limit yourself to simple forms: ball, cube, cone. You can try to create hedge or trim the bushes along the paths beautifully and evenly. For trimming, choose coniferous or small-leaved plants; their crown is thicker and denser. It is better to train on annual plants.
A little later, you can move on to a more complex stage - trimming the crown along the frame. Again, it is better for a beginner to limit himself to small and not very complex forms. The frame is installed on a very young plant; cutting begins when the branches of the plant begin to protrude beyond the boundaries of the form.


But for creating complex shapes the best solution there will be a purchase metal frame followed by filling it with soil and planting plants, flowers, and lawn grass on it. 
If you are confident in your abilities, you can make the frame yourself from wire, but this is not as easy as it seems at first glance.
Feel free to try combining different herbs and flowers, preferably annual ones, so that next year try something else. Don't be upset if good result It won’t work out right away, practice is needed in any business.
Green figures made from frame, soil and vegetation require standard, but very careful care. Regular watering from a watering can with a strainer, feeding with liquid mineral fertilizers. At good selection plants, weeding will be required only at the very beginning, after planting. Most ground cover plants and lawn plants, grasses and flowers, grow and kill the weeds themselves.


Good luck in your new business!!!
Read about how to make a garden figure with your own hands
IN last years came into fashion garden sculptures from synthetic turf (otherwise called artificial topiary).

It must be said that the popularity of these products is growing for good reason. They are attractive, fit well into a garden setting and are durable. These sculptures are easy to care for and can be moved around the garden without assistance.
Do it yourself!
A similar product can be purchased, but you can also make it yourself. It's not as difficult as it seems at first glance.
The lesson for “garden sculptors” is based on the example of a cute bunny figure. Visitors are strongly encouraged to pet the finished animal and even sit astride it - this makes it clear that this thing is very strong and pleasant to handle. The master class lasts two hours. During this time, it is impossible to create a hare from scratch and turnkey, but presenter Evgeniy Sluchich managed to show all the most essential aspects of the manufacturing process, including subtleties developed through practice. Under his guidance, I tried to perform the necessary operations myself, and it was very exciting. For those who are interested in the idea of making such a sculpture, I will tell you about the technology for its production.

Photo: From personal archive/ Elena Kozhina
What will you need?
Welding machine with all necessary accessories.
Rubber coated gloves
Metal wire (so-called wire rod) with a cross section of 5-6 mm. You can buy it in a store, but it will be cheaper at metal collection points. Sometimes builders even throw away such wire (it is used for packaging). Don't be confused by the curvature of the wire - it can be easily removed.
Hammer
Plaster network with 2×2 mesh 1 mm thick, for individual parts- more subtle.
Artificial lawn, preferably with an “undercoat” and a backing painted to match the color of the lawn. Then sharp kinks (for example, on the ears of animals) will be fluffy and without bald spots. The price for coverage of this quality starts from 750 rubles. per m. The color and length of the pile is to your taste.
The wire is about 1 mm thick.
Wire cutters or metal scissors.
Pliers
Tailor's scissors
Furniture needles, curved, preferably stronger, 8-15 cm long.
Fishing line, 0.4-0.5 mm. If the seam is thinner, it can burst and make work difficult.
Trimmings metal pipe square section for the stand.
It is very important to do everything step by step and in strict sequence, without skipping the necessary steps.
Step 1: Create a Layout
First you need to come up with a future sculpture (it is desirable that it be relatively simple in shape). Then draw her silhouette in profile in life size on paper of the appropriate size. Select in the drawing the main outline of the head and body (not including the limbs, ears and nose).

Step 2. Make the main frame
Bend the drawn wire outline, applying it to the drawing. It is not necessary to accurately measure the length of the wire in advance. The missing pieces are welded. Finished contour using welding machine must be installed on a work stand (for the convenience of all further work).
After this, you need to add volume to the silhouette using rings different diameters. Wide rings are bent by hand, and for thin ones they use a pipe of a suitable size as a blank and use a hammer. The rings must be welded to the silhouette at all intersection points.
Install transverse stiffeners from the same wire and weld all overlaps. While the wire is hot from welding, it bends easily: you need to take advantage of this to give the ribs the desired shape. Total frame elements depends on the size of the figure: we need cells that will not allow the plaster mesh to be pressed down even under the weight of an adult. But it is important not to overdo it, otherwise the figure will turn out too heavy.

Photo: From personal archive/ Elena Popleva
Step 3. Add parts to the frame
Then, according to the corresponding contours, all other parts of the sculpture (legs, ears, etc.) should be made and attached to the body. Then add additional stiffeners to them and also weld them at the intersection points. Shape using these ribs chest. The configuration of the figure can be corrected along the way by heating and bending the wire in the right places. Individual mistakes are also not terrible: if something goes wrong, you can cut off the wrong part and do it again.
Attention! Silhouettes of animal paws are not placed straight when installed, but are taken to the outer side- this way the figure will look natural. It is convenient to make small convexities (tail, nose) from half rings.
Step 4. Cover the frame with mesh
The skeleton is ready! Now it needs to be covered with a metal mesh to create a supporting surface. To do this, you will have to attach “shreds” to the frame. plaster mesh one by one, connecting them to each other as they go. It’s better to start with the muzzle and back. Each piece of mesh is attracted to the skeleton by pieces of thin wire about 15-20 cm long in several places (along the contour and where it departs from the frame). It’s good if, when cutting out the mesh, you leave “tendrils” perpendicular to the edge - they will be useful for connecting pieces of the mesh to each other (the pieces of wire are hooked together like a kind of locks). “Patches” can be cut where the mesh rests on the frame. All protruding ends of the wire must be directed inside the figure (otherwise it will not be smooth, but dangerous).
Important: Leave an open (without a mesh) window in the side of the sculpture, into which it is convenient to stick your hand. This way you will have access to the surface from the inside and outside until the end of the work.

Photo: From personal archive/ Elena Popleva
Step 5. Provide the figure with a fur coat
You need to attach pieces of artificial turf to the finished metal figure: also one after another, making sure that the direction of the pile coincides. Each piece needs to be secured in several places with wire (not too tightly so that the “fur” can be moved in the desired direction if necessary). The wire is also always tucked inside the figure. Each subsequent flap is sewn to the previous one with large stitches using a furniture needle and fishing line over the edge. At each attachment point and above each stitch, you need to carefully fluff the undercoat with a needle - then the joints will be invisible.
You need to know this. The finished “fur coat” should cover absolutely the entire surface of the figure from all sides, including completely inconspicuous places (supporting surfaces, animal paw pads, etc.). If the contour is not closed, wasps may live in the sculpture.

Photo: From personal archive/ Elena Popleva
Step 6. Install the sculpture
U finished product you need to replace the working stand with a permanent one. It should be large in area (so that the sculpture does not tip over) and strong. Use durable pipes square section. Cut out appropriate stripes in the lawn and install the sculpture buried in the ground.
Design of sculptural structures from vegetation on a summer cottage: alternative solution regarding topiary
Topiary- This is trimming shrubs and trees using a decorative method. Using this technique, plantings acquire an unusual and bizarre shape. This is how they decorate. It is worth noting that topiary requires regular care, and only a professional gardener can trim the vegetation. To decorate trees and bushes beautiful shape, you need to wait until they grow up, and this can be from 3 to 5 years. However, there is an alternative solution that allows you to do without forming a topiary - this is frame form for garden figures, it is overgrown with grass or flowers.

Steel wire 8 mm thick;
rope for a bundle or welding to hold the wire together;
mesh made of steel or polypropylene (allowed with a smaller cross-section);
black soil and straw;
a mixture that nourishes plants and is intended for planting grass;
welding machine;
trowel, watering can with water.
Related video: What is topiary and how to use it
The technology is quite simple, but requires some time. We present to you the sequence of actions that will need to be followed.

Step 1 – determine the shape of the sculpture for the garden
The shape of the sculpture should be harmoniously combined with the overall landscape dacha area and in style.
Currently famous:
shapes of geometric figures in the form of a cube, ball or pyramid;
fairy tale heroes;
animal figures.

The base frame is made of steel wire, which is then fastened by welding for reliability and long service life of the figure. If you do not have a welding machine, you can use the material that will need to be used to connect the individual parts.

Chernozem is used as a base, which is mixed with a nutrient composition. The ratio of components is usually indicated on the packaging of the mixture. To ensure that the base of the sculpture does not collapse and is viscous, straw should be added to the composition. Pre-moisten the soil with water.

The steel mesh serves to protect the earth from scattering and for the stability of the structure. If the sculpture will have a vertical position, it is necessary to wrap its lower section with mesh. When the base takes horizontal view, that is, lying down, you should fasten its side parts.

Moisten the soil with straw in advance and pour the mixture into the base using gentle movements. It is worth noting that the composition of the mixture must be thick so that it does not penetrate outward through the frame. Remove the remaining mixture with a trowel. There should be no gaps in the base so that it does not lose its shape after the soil shrinks.

Step 6 – sowing seeds
After creating the base frame, we proceed to sowing seeds of low-growing vegetation or grass. For the sculpture to acquire original look, it is recommended to combine flowers with grass. For example, the head of a lion can be made of flowers, and the body of the animal can be decorated with grass.
Step 7 – taking care of your figure
To wait for the grass and flowers to germinate, you need to water the sculpture. To do this, you should use a watering can, because under the pressure of the hoses the ground can be washed away and the figure will lose its shape.
Sometimes it can be difficult to decide what kind of thing you would like to see on your site. Perhaps it will be a rabbit on the front lawn or a duck near a pond, or perhaps a simple geometric figure, complementing the composition of the flower bed.
First, you can practice: take an easy-to-bend thin wire and make a mock-up of a ball. In order to clearly imagine the future frame, it is better to sketch a drawing, because the frame of the ball can also be made in different ways. For example, from 5 metal rings of different diameters or from 2 rings and 4 arcs. And so on the drawing all the parts and places of their attachment are worked out.
You also need to provide a hole through which you will need to fill the inside of the planned figure. Having figured out how a simple frame is made, you can move on to a more complex figure.
The frame can be used:
To create a neat trimming of the crown of a bush;
For climbing plants;
For planting plants in it (flower crops, lawn grass);
For filling with moss, polyurethane foam;
For filling with stones (gabions) or other bulk materials;
As a basis for concrete sculpture.
Squirrel made of moss and metal
This master class is dedicated to creating a simple sculpture that is done quickly and does not require large expenses. We will talk about a sculpture made of moss. It is advantageous to use such material in autumn period, since it is not afraid of future frosts and, with proper maintenance, the moss will retain its green color until spring.
Here are the green moss sculptures I made of a goose and a bear.

Through trial and error, I had to develop my own way of creating sculptures. In order for you to avoid them and speed up the creation process, it is better to carefully read this master class, using proven and correct technique execution.
For a sculpture of a squirrel about 75 cm high you will need:
- Steel wire, cross section 6-8 mm, about 7 meters;
- Knitting wire, cross-section 1-1.5 mm, about 3 meters;
- Welding machine (spot);
- Circular saw for metal;
- Gloves;
- Pliers;
- Wire cutters;
- Warm water;
- Soil, 5 l;
- Straw, 10 l;
It is very fortunate if there is a forest near your site in which you can find moss, but if there is no such place nearby, it does not matter. Moss can be bought at a flower shop. Can be used different types moss, but the most suitable is sphagnum.
Collect moss with a reserve, since, firstly, you will need to select suitable “tufts” based on color and texture for different parts, and secondly, it must be laid with a little compression. When collecting it in the forest, it is better to use 2x2 film instead of bags and carefully place the collected layers of moss on it for subsequent transportation. Moss should be chosen that is low, densely growing, and rich green in color. The most valuable moss is the one that can be collected in one piece, approximately 60x80 cm.
Removing the moss is very simple: you must wear gloves and lift your hand under the selected area of moss. In order not to disturb the environment, you cannot collect moss in only one place. Be sure to cover bald spots with soil and nearby foliage so that the cover quickly restores its integrity.
Progress:


1. For a better idea of where and how to bend the wire, I advise you to sketch the squirrel in profile, preferably life-size. This can be done on whatman paper, wallpaper, or cardboard. Please note that when filling the sculpture, its size will increase by about 1-2 cm. So, calculate the dimensions of the frame in advance so that later the flexible and thin squirrel does not turn into a well-fed hamster.
2. We prepare 5-6 cm pieces of flexible knitting wire, about 15 pieces - they will be useful for temporarily fastening frame parts before welding. You can immediately prepare 4 pieces of thick wire, each approximately 2 m.
First, we begin to form the base, and then, according to the drawing, we bend the central vertical arc - these will be the main supporting parts. We fasten them, leaving “tails” so that you can adjust the length and then trim off unnecessary parts.
Next, we select horizontal details in the form of ovals, which will create volume (thickness) for the sculpture. And so, gradually, we continue to add vertical arcs, bending them along the kennel of the squirrel figure. I recommend bending the wire while wearing thick gloves and using pliers.
Be sure to leave space in the upper part of the frame so that it is convenient to fill internal space moss and soil.
3. Having completed the supporting parts of the frame and observing the proportions, we form and attach the ears, upper and hind legs and tail. Don't rush to use welding right away.


4. Unfortunately, metal wire has the unpleasant property of rusting. To protect the frame from corrosion, it is coated with a double layer epoxy resin or any other available in any hardware store, anti-corrosion agent. This procedure will have to be repeated as necessary (once every 2 years). You can simply paint the frame by spraying green or brown paint.
When performing figures of more than a meter along the inner perimeter, provide drip irrigation. In our case, this need not be done. But if in the future you plan to plant flowers (violet, saxifrage, sedum, bryozoan, etc.) in place of moss in the frame, then it is better to install an irrigation system at this stage.
5. We begin to fill the finished frame from the inside with small parts: paws, head, tail. In this case, the moss must be damp. Dry moss is soaked for 3 minutes in warm water, squeeze a little excess moisture. Very soon the moss will straighten out and become elastic.
The main task of moss is to hide the frame and create a uniform green color to the sculpture. You need to immediately check whether brown spots combing the surface with your hand and immediately correcting imperfections. If the cells seem large to you, you need to use knitting wire, weaving an additional mesh between the existing cells. It can also be wrapped over the part to be filled so that the moss does not protrude and accurately follows the contours of the sculpture.
6. To save moss, give the desired shape and for the weight of the sculpture we use a mixture of earth and chopped straw. The mixed mass must be moistened, formed into small lumps, then placed in the center frame structure and tamp down.
I filled the small parts of the frame with compacted moss, but the body was different. We start filling it by laying moss on the sides. At the bottom of the body, in the center, we place a “nest” of straw, after which we compact the remaining internal cavity with the prepared plastic earthen mixture. And so, gradually, dressing the squirrel in “green skin”, we complete the topiary. Despite the fact that you compacted the inner soil part, slight shrinkage is possible, so top part body, to hide the details of the frame, you can then add a little moss.
7. The sculpture can be supplemented with such elements as: eyes, nose, mustache. Attach a cone to the paws or garden lantern on solar powered. The main thing is not to overdo it with details.
So, it took about 6 hours to realize my idea - a sculpture of a squirrel made of moss.

Recommendations: It is advisable to install such a topiary sculpture somewhere in a cool, shaded place, for example, under a tree, on a veranda, on a balcony. In bright daytime sun, the moss will gradually fade. Try to prevent this from happening.
To keep the sculpture's rich green color longer, moisten the surface of the sculpture with a sprayer from time to time. Moss most likely will not be able to take root; it requires a special microclimate and a certain acidity of the soil.
For those who are lazy, I will suggest an even more simplified process for creating a green sculpture. You can make a small frame by wrapping some large children's toy with wire, then cut the resulting frame into two components and fill it with moss, tamping it down. You can also purchase a ready-made frame from landscape companies or flower shops. Instead of moss, you can use a lot of other materials, for example: artificial lawn, birch branches, polyurethane foam etc.
Don't be afraid to experiment, I'm sure you'll do great!
Image gallery


The copyright holder of all materials on the site is LLC « Construction rules » . Full or partial reprinting of materials in any sources is prohibited.
If you want to decorate your garden with something new and bright, make figurines and sculptures with your own hands! Are you an avid gardener and devote all your energy only to your brainchild? Do you want more variety in your garden? But superficial knowledge is not enough to create high-quality decoration for your garden. We offer you easy way diversify the landscape of your garden. Surely you immediately had thoughts that you would not succeed. But don’t despair: there is always a way out! This article will help you in the difficult task of decorating. summer cottage garden figures.
Here are some techniques that even a beginner can use. The result of the work depends solely on your efforts.
Animal sculptures will perfectly decorate your garden. First, let's stock up on equipment - we will need: steel wire with a diameter of about 1 cm, knitting wire (to secure the frame of the future animal), propylene or metal grid. Don't forget to purchase flower seeds (preferably low-growing varieties), grass for the lawn and what we will feed the plants with. Soil and straw are also useful in making sculptures.

Frame
Carefully draw the image of the future animal in your imagination - and then you can begin creating the sculpture. Transfer the shape of the animal onto the wire by bending it and securing it with binding wire. You can use welding to secure the frame, but it’s easier to do this with regular wire. The bottom of the future sculpture must be wrapped in a net and specially prepared soil must be poured there. Preparing it is quite simple: you just need to add it nutrients and straw - the frame filled with earth is ready.

Green cover
Next, you should plant grass and flower seeds. You should not forget that you are making an animal. It is necessary to highlight the eyes, nose and skin pigmentation. It is preferable to make the nose pink, while the eyes should contrast with the color of the grass. Skin pigmentation is best done with variegated colors. Don't forget to water your creation! To prevent the soil from being washed away, you need to water your animal carefully.
DIY garden figures (video)
We wish you good luck in creating garden figures with your own hands and further arranging your landscape!
Garden animal figures (20 photos)


Reviews and comments
Larisa 02/01/2014
I saw such beauty in the neighboring area. I even had time to envy it, it looks so bright and interesting. I was inspired to put one on my own, I like the certain originality and unusualness in the execution. Thank you for the article, it was very interesting and informative to read. I am your regular reader, continue to delight us with your high-quality and informative articles for those summer residents :)


