The whimsical outlines of the branches involuntarily attract attention, and you want to capture this subtle beauty not only in memory or in photographs, but also in real life. If desired, you can add an unusual decorative touch to the interior by creating interesting compositions or creative products with utilitarian features. Crafts from tree branches are a great hobby that allows you to create beautiful decorative elements with your own hands without investing any financial costs. The interior of a house, decorated with this natural material, acquires a special sophistication, where everything is aimed at emphasizing its individuality. Before starting work, the blank for the future craft should be carefully prepared, taking into account individual characteristics wood.
Crafts from branches - material preparation
For creative activity To decorate the selected room (it could be, or even) you will need well-dried branches. They are easy to collect during forest walks, and also to pick up in a public garden or park. You can independently dry the branches that remain after performing sanitary pruning measures.
Before working, dry the material carefully for further use:
Inspected for cracks;
Cleaned from dust and dirt;
Peeling areas on the bark are sanded.
To prevent the appearance of unwanted larvae in the house, it is necessary to carry out disinfection using a low concentration solution of potassium permanganate, known to many. Depending on the design, the branches can be painted in the desired tone, covered with stain or varnish.


Decoration of various items
Having brought home a bouquet, you can quickly make a creative vase using branches. To do this, take any suitable jar - tin, glass, and cut pieces of branches slightly longer than the height of the container.
They are placed close to each other in the vertical direction on outer surface jars and secure them, tying them with a beautiful braid or ribbon. You can plant twigs on glue. Flower pots are decorated in the same way.


To make this wonderful vase, in addition to the glass base, you will need: a glue gun, dry willow or birch sticks, and wire cutters.
- Harvested branches need to be cleared of bark. It is better to do this when the wood has not yet dried, so it will be much easier to remove the bark;
- Next, using wire cutters, cut the bare branches into small pieces. Their size should be calculated based on the height of your workpiece;
- After the material has dried, we glue each stick to the base so that we get a kind of lathing;
- It remains to give the glue time to dry for 10-15 minutes. Congratulations, the twig vase is ready!
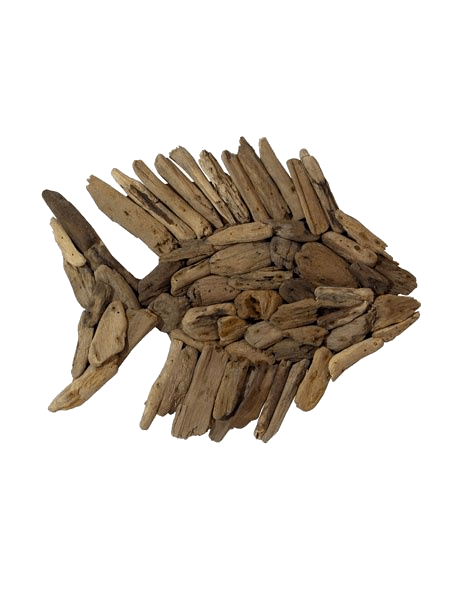
Crafts made from branches will always find their worthy use in decorating the interior of a house or apartment. Their shape and size can be completely different, because for their manufacture you can use various material. Products made from bark, wood chips, driftwood, sawn logs or large branches, etc. will look good. It all depends on your imagination and personal preferences.

Branches installed inside will look no less original glass jar continuous layer over the entire lateral plane. To prevent them from falling apart in a makeshift vase, the bouquet should be quite voluminous.
For the products described above, you will need fairly even trimmings from the lower ends of the branches. The upper thin stems will help create a delightful evening with the flickering of candles. To do this, simply place them in a glass container so that they rise above it, pour no more than half the volume with water and lower the floating candles.


Charming compositions from branches
To bring an unusual accent to a room, for example, a bedroom, trunks topped with a web of thin branches, placed at the head of the bed in a niche cut into one side of the coffee table top, will help. A high ceiling will look elegant in a dining area or office. floor vase, in which dried cereals will be located along with the branches.
Bizarrely curved branched thin tree trunks are placed in a vase and decorated with colors that match the interior decorative elements. These can be sparkling stars or snowflakes on the eve of the New Year, bright valentines on the eve of the corresponding Valentine's Day, or simply butterflies with fancy patterns on their wings, birds, flowers, fruits, leaves from any available material.


By attaching graceful branches to velvet fabric, the color harmonizes with the overall decor, and placing, after gluing on cardboard, the resulting composition in a wooden frame, you can get an elegant interior decoration.
A beautiful branch can be complemented with golden bows, New Year's balls or forest cones. This decoration will help good mood and evoke only positive emotions. In addition, New Year's decorations will create a festive atmosphere on the eve of the main winter celebration.


Branches in the interior: step-by-step master class
Tall trunks of shrubs (usually willow) will allow you to do this in an unusual way. For example, separate the sofa corner from the rest of the space in the living room. This partition is made very simply:
- To do this, use it as a stand wooden beam required length. You can use absolutely any type of wood.
- Two rows of non-through holes are drilled in the timber in a checkerboard pattern, in which prepared branches are fixed vertically to glue. Their length should be about a meter less than the height of the room. The step depends on how openwork the resulting screen should be.
- To make the product look stylish, it is varnished.


Current bedroom design ideas are limitless - birch trunks in the interior are proof of this

Trimmings of trunks with a diameter of 8-10 cm with strong branches extending upward from the side at an acute angle easily turn into dear hangers. They can be mounted on the wall in the hallway, creating a natural corner with a specific purpose. Among the designer finds you can find birch trunks that act as cornices and even posts near the bed for attaching a canopy.
Will complement the picture coffee table, the base of which is a bundle of branches fastened vertically into a stable cylinder, and the tabletop is durable glass of a round or oval shape.
You can make an option with an unexpected effect by fastening the branches in the shape of a cube and laying it on the floor on the side edge. A plastic or glass square table top is placed on top.


Wall mirrors are often decorated with branches. They can be glued along the entire perimeter perpendicular to the frame or along it. There can be many options. Craftsmen easily make frames for photographs, children's drawings, and reproductions of favorite paintings from scraps of thin trunks.
A gracefully curved thick branch can become the basis table lamp. A branch with many branches, mounted on the wall near the mirror on dressing table, will allow you to easily place all the jewelry.


This kind of work requires gentle female hands and special attention

Creative inspiration is the main incentive for a person who wants to create beautiful crafts made from branches with your own hands.
IN spacious hallways one wall can be turned into a fairy forest by installing trunks that reach the ceiling behind a high plinth with a wall mounted near the floor LED backlight. This is one of the best ways Give your interior a picturesque look. Both thin and thick tree branches can be used as material.
Small items made from dried driftwood will look original. For variety, you can use tree bark and wood chips, later combining everything into a single composition.
We make decor from branches with our own hands
Crafts made from branches are always distinguished by their originality and unique design. With the help of these simple sticks and twigs you can create beautiful designer decor on absolutely any theme. , paintings, wreaths, flower pots, fancy animal figurines - this is just a small part of what can be created from this wonderful natural material.
- Making a wreath from branches is probably one of the most simple task, which even a child can handle. Take thin rods willow tree and weave them together into a tight ring, then carefully tie them with copper wire. As an additional decoration for the wreath, you can use tree leaves, flowers, and forest cones.
- You can revive an inconspicuous tree branch using ordinary snowflakes. Cut them out of paper, foil or colored felt and hang them on each branch. Such compositions will look great in the house against a wall with beautiful wallpaper.
- If you have any broken light bulbs, they can also be used as decoration. From soft wire make a special mount with which you can hang them on a branch so that the bulb base is at the top. Next, through a hole specially made in the base, the light bulb is half filled with water. All that remains is to give our miniature an elegant look. To do this, the branch can be decorated with decorative braid, ribbons and bows.
Despite the fact that the process of creating some crafts is quite long and labor-intensive, the result of the work done will be amazing.


Even the most ordinary painted twigs can be an excellent material for making fun crafts. For example, unique products made from star-shaped branches will look very beautiful and fun in interior design. You can make them with your own hands on a regular table.
- Preparation of material. For each craft we will need 5 sticks. These can be branches of any tree, the main thing is that they are even and of the same length. The material should be dried and varnished in advance, so your products will last longer. We also need thread, rope or thin ribbon. With their help we will tie the ends of our sticks.
- Making a star. Place the sticks on the table so that they form a closed pentagonal star shape. Tie each formed corner with thread or rope and decorate with satin ribbons. The resulting star can be hung on the Christmas tree or given to friends.

To create something unique for your interior, do not copy someone else’s ideas, but try to do everything yourself. Feel the mood of your home, think about what exactly is missing in it, what things and objects could highlight your own style. Write down everything that comes to your mind in a notebook - these thoughts may be useful to you when creating an interior design.
Pay attention to the little things. It is they, in creative union with non-standard design solutions, that create an unsurpassed atmosphere and place emphasis on a specific element of the interior.


Original floor lamp - creative decoration interior


Crafts from branches are not only beautiful, but also profitable. The main advantage is that their production does not require any funds, because the material itself is literally lying under our feet. Moreover, all compositions can be created with your own hands, involving your children in this entertaining process.
Crafts made from branches can be easily and quickly sold, because this unique decor, which is always in high demand. You can also earn extra money by teaching paid master classes on creating designer jewelry for beginners.


We really hope that this article was useful to you. Create, be creative, experiment and perhaps this interesting hobby will grow into yours. professional sphere activities.
Designers are confident that wood has its own natural form will add warmth and comfort to every home.
In Celtic culture, a birch tree can convey to a person its most best qualities: stability, resilience, ability to withstand severe blows of the elements and fate. In addition, this tree has a narrow trunk and white bark, which makes birch an ideal decoration and addition to home style.
And although birch is currently often used as wood for making furniture, today designers have taken a step further and use natural wood - without processing - to decorate the interior.
Living room walls
Such a natural element in the interior will add interest to the space and transform the color and texture of the walls. Birch will also add height to the room and give the home a rather unique look!
Charming screen wall
Corner in the bedroom
Trees in the interior of a room will become a real work of art! They can be used in the most different options. Use your imagination to create your own unique decor - then your home will be truly unique!
Beautiful headboard
The sight of trees in nature and in paintings always evokes thoughts of space.
The idea of painting trees on walls in urban housing has been developed by apartment interior designers.

Living rooms, children's rooms, bedrooms, hallways, kitchens - now it is fashionable to decorate with trees.

Draw a tree with your own hands
Deciding to decorate your home with wood as a wall decoration, you need to decide what it should look like.
You can simply draw it, or you can make it three-dimensional. It all depends on the color of the wall, general style, with which the room is decorated, lighting, furniture.

It's easy to draw a tree using real dry branches. Having sketched an outline along them, then you need to glue these branches along it, the foliage can be made from large and small branches to make it look realistic, and the trunk can be lined with pieces of bark.
The crown can be imitated by cutting out leaves from colored paper or self-adhesive film the desired shape, and stick them on the wall. Or paint them with paints - they are good for drawing on the wall acrylic paints. When cutting out leaves, you can use live leaves as a stencil.

You can paint a real sheet of paper and press it against the wall like a stamp, then you will get realistic prints. You can make leaves from self-adhesive film.

Decorative wood in the interior can be drawn with chalk. A tree drawn with a simple pencil will look very stylish.

Before you draw on the wall, you need to make a sketch on a sheet of paper - depict the tree in detail, adjust the drawing to achieve realism, and then accurately transfer it to scale from the sheet of paper to the wall.

You can cut the product out of paper - an unnecessary roll of wallpaper or thick rolled paper will do. First you need to draw an outline, and then color it with colored pencils or watercolors.

The finished drawing can be completely pasted onto the prepared area, or the tree can be cut out along the contour. It will be easier if you draw on self-adhesive paper.

If you have a lot of old glossy magazines at home, you can cut a tree from them. It will turn out extraordinary and colorful, and will not require any money at all for materials.

Using imagination, such a tree can be made very unusual, for example, its branches can be made themed, decorating them with pictures of the same theme: in the kitchen a tree with branches on a culinary theme will be relevant, in a child’s room – on a cartoon or toy theme.

You can make a tree from fabric. Painting on fabric the right tree, then cut out and attach the applique to the wall.

Best fit thick fabric, you can take burlap, canvas, a piece of flax or upholstery fabric. With the help of multi-colored patches, the applique will turn out to be creative.


A stencil made of thick cardboard will help simplify the work of creating a decorative tree. To make the drawing clear, the stencil can be glued to the wall with tape.

Any tree you create with your own hands is a masterpiece. A selection of photos of decorative trees will help you decide which one is best to make, or give you an idea, and also see how such trees look in different interiors.

Ideas for trees in the interior
If there are shelves hanging on the wall, then a tree can be placed between them, then the shelves will be its branches, and books, vases or figurines will stand on the branches.

The original version is a family tree, its branches will be decorated not with leaves, but family photos within frames, wood will look especially stylish if all the frames are the same.
The branches of the tree can be decorated with images of butterflies, bees, birds, flowers, and fruits.

The tree does not have to be even, because there are no ideal trees in nature. It is not necessary to draw it completely - with a trunk and foliage, you can depict a part of the tree that will simply fit into the surrounding interior.

In building materials stores you can buy ready-made stickers with images of trees made of vinyl - it’s quick, if the tree gets bored, it can be removed without a trace, in addition, vinyl makes it easy to clean with wet water.

Volumetric decorative trees
More interesting, but more difficult to manufacture, will be a three-dimensional tree. It can be made from a foam plate.


Wood can also be made from yarn. To do this, you need push pins, which need to be fixed on the wall, marking the silhouette with them - and the threads are wound between them. Such a tree will look like an exclusive handmade masterpiece.

A three-dimensional image can be obtained using toilet paper. To do this, dry paper is rolled into bundles, moistened and weaved into the desired shape.

It’s even better to make gypsum wood; the packaging with gypsum indicates the technique for working with the material. A plaster tree will look expensive and give the room a luxurious feel.


Functions of ornamental trees
Trees can become not just decoration, but also a functional decorative element. The branches will make it possible to place shelves asymmetrically - at different levels - on which you can place various small items or toys.

In this case, it is better to paint it green or brown- so that they and the tree form a single whole.

If a tree decorates the kitchen wall, towels and oven mitts can hang on its branches, and bottles of cosmetics can stand in the bathroom.

But there is nothing better than real wood in the interior. If the area of the house allows, then it is better to have living plant in a pot, placing it in a corner - it will become both a decoration and will hide the empty space in the room.

Photo of decorative wood in the interior


It is not for nothing that the orange color scheme is considered optimistic, life-affirming and fresh; it is identified with the sun.
Orange has absorbed the energy and vigor of red with the warmth and optimism of yellow, it improves mood and gives positivity.

Nowadays you can find many design solutions using orange shades for interior elements of all rooms, but the most common and acceptable option is an orange kitchen or dining room.

Benefits of using orange in kitchen design
Heat and energy sunny shades Ideal for rooms with windows facing north, they can warm up on rainy, gloomy days or long winter evenings.

It is a known fact that saturated bright shades This color can irritate taste buds, increase appetite, and improve the digestive system.


Food prepared in an orange kitchen is much tastier and more nutritious.
People who are struggling with excess weight should not forget about this, but the resulting charge of energy and vigor will help burn calories faster.

The optical ability of orange to visually enlarge or bring pieces of furniture closer without complicating their perception is often used by many designers in their projects to adjust the layout of the room itself, if it is small, disproportionately narrow or long.

A variety of options are presented in the photo of the orange kitchen.


Focus on details
Despite many positive aspects, when using orange in design kitchen area We should not forget about its richness and aggressiveness. It is necessary to thoughtfully and carefully fill the room with unbridled energy, alternating with lighter calm tones, light textures, smooth lines.

You can allow yourself a lot of orange, half combining it with another color, if:
- all household members are energetic, mobile, and lead an active lifestyle;
- you need to create comfort and warmth in a large kitchen space;
- the room is poorly lit, the windows face north;
- I really wanted drastic changes.

In this case, the most ideal combinations will be with white, beige or gray tones without the use of other color inclusions.

Still, if the owner is not a fan of extreme sports, and the orange kitchen in the interior is designed to bring warmth, comfort and not get boring, it is more correct to use this color in less abundance, as an additional one.

Individual elements can be solar: , tabletop, part kitchen set, textiles, table, chairs, chandelier, dishes or other.

The term “orange kitchen” often refers to the use of orange kitchen units. The design of an orange kitchen can be represented by furniture of any style, such as modern know-how, and traditional ethnic direction.

A bright set is guaranteed to attract all attention; the walls, floor, and ceiling will become completely invisible.

It would be more judicious to use combinations of bright colors with more muted shades of orange or with contrasting calm white and gray elements in the headset itself.


Visualization using orange color
Small kitchen in orange tones can become tangibly larger, and disproportionate optically acquire proportions. Using the ability of orange to visually reduce distance and increase walls, you can visually enlarge a small kitchen.

Paint all but one accent orange wall with a neutral light gray or beige color you can make the ceiling visually higher. If you make an orange splashback or paint half the walls orange, you can visually expand the space of the room.

Rectangular kitchen, painting the far wall a rich orange or Orange color, it will turn out to make it visually more square.

Shades and styles
Orange is most successfully used in ethnic styles, eco styles, country style, using harmonious colorful combinations of orange kitchen with green, brown shades, natural materials wood and stone.

It has become very fashionable now to combine the energy and exuberance of orange with the restraint and coldness of the clear, straight lines of metallic hi-tech.


Such a contrast will enliven and embellish any interior.

The classic combination of white and orange can be a win-win option.

On a white background, all elements will become visually more expressive and voluminous; white enhances the perception of orange, so it is better to use muted shades, such as peach, apricot or amber.

If you want to bring harmony, comfort and warmth to your home, orange kitchens will be a great option.

By intelligently and rationally combining shades of this beautiful, bright and rich color, you can create the perfect interior.


Photo of orange kitchen design