Manufacturing and installation of flashings provides protection window openings from the harmful effects of atmospheric phenomena such as rain, snow and condensation that forms on the glass due to the difference between internal and external temperatures. Windows with ebbs take on a finished look, complementing decorative design exterior of the building.
Types of window sills, classification by materials
Incorrectly selected material for the manufacture of flashings can cause a number of undesirable consequences, such as leaks on the facade of the building, partial destruction of window slopes, peeling of the coating of the flashing with subsequent corrosion.
To do right choice, you need to have an idea of which products are more preferable in each specific case. The modern market offers the following varieties.
Galvanized casting
When using this option for window drainage, first of all it is necessary to pay attention to the quality of the zinc coating, which must be uniform and of sufficient thickness. Otherwise, atmospheric influences will lead to rapid corrosion and subsequent destruction of the ebb.
The thickness of the galvanized steel used for manufacturing also matters. Products that are too thin are more susceptible to deformation and create more noise because they react to even minor gusts of wind. Excessively massive products should not be used, due to their unreasonably high price and unwanted loads on the window sill area of the facade. Most often, a material with a thickness of 0.3 to 0.5 mm is used.
Positive qualities of galvanized ebbs:
- low cost;
- availability of self-production of profiles;
- can be used on any windows.

Aluminum window sill

These are ebbs made of aluminum or its alloys. For production, rolled sheets with a thickness of 1–2 mm are used. Depending on the manufacturer, such window sills may have a single color polymer coating or a coating that imitates natural materials(stone, wood). Also for decorating and protecting the drainage profile from atmospheric influences Anodizing of the surface is applied.
Aluminum window sills are high-quality, expensive products that are resistant to mechanical stress and designed for long-term use in different climatic conditions. Their disadvantages include the relatively high cost and, typical of all metal products, noise during rain or hail.
Plastic molding for windows
Using plastic sills on windows is the most practical and aesthetically sound option. They are durable, easy to maintain, do not corrode, have a presentable appearance and are easy to install. It is especially appropriate to use polyvinyl chloride drainage pipes to drain water from plastic windows.

Laminated window sills
It is covered with decorative film metallic profile. To manufacture such products, galvanized steel is used, which is first coated with polymer paint, after which it is covered with film. The service life of laminated ebbs directly depends on the quality of galvanizing, the integrity of the film and the professionalism of the work preceding its gluing.

Window moldings using epoxy resin
This is a window drain made from epoxy resin, reinforced with fiberglass or other fibrous filler, such as carbon fiber. Resistant to mechanical damage and aggressive environmental influences. Products made of epoxy resin do not tend to create noise during rain or rain: fiberglass absorbs sound well.
Flaws:
- relatively high cost;
- limited color selection (white, black and brown).
The manufacturing technology consists of coating galvanized metal with a polymer paint composition, which, as a rule, consists of several layers. The quality of the product depends on the thickness of the metal and the materials used for painting.
You can make such a cast yourself by purchasing a sheet of the appropriate metal; you can buy a finished product or order it if the suitable size is not available. When installing plastic windows, it is these ebbs that are most often installed.

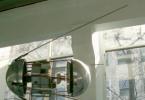
Window metal sill - diagram
Positive traits:
- corrosion resistance;
- relatively low cost;
- ease of installation;
- wide choice of colors.
Flaws:
- make noise when it rains;
- They require careful treatment, you cannot walk on them, knock on them, they are not resistant to scratches and other harmful influences.

Making a window sill with your own hands
To ensure water drainage from window openings, it is not at all necessary to buy expensive factory-made products. For buildings technical purpose And country houses ebb tides are just as necessary as for other buildings, but you can make them yourself. Especially if you have confidence in your own skills, free time and a minimum of tools.
Materials and equipment required for making castings
- Metal sheet. For independent work, it is better to use galvanized steel or metal with a polymer coating with a thickness of 0.3–0.5 mm.
- Metal scissors. Will be necessary for cutting out the tide. If they are absent, you can use an angle grinder.
- Tape measure, square and marker for marking material.
- Mallet, pliers.


Window sill manufacturing process
First you need to measure the width of the opening. This is done with a tape measure. Add 4–5 cm to the resulting size to make it possible to bend the ebb to the slopes. It is better to make the rough workpiece 2–3 cm larger; the excess can be trimmed off later, during the installation process.
Then you need to find out the width of the future drainage. To do this, you need to measure the distance from the seat on the window to the edge of the wall and add 3-4 cm to it (the overhang of the tide) so that the water flows at a certain distance from the wall and does not contribute to its premature destruction.
The size obtained in this way will be an even part of the ebb, in addition to it you need to add the width of all bends:

- 15 mm - a shelf that is screwed to the window;
- 25 mm – drip with rolling (5 mm).
The markings are carried out with a marker; pencil marks on the metal are very difficult to see. The lines should be on the outside of the bend corners, so that they can be seen while bending the metal. It is advisable to press a groove on the inside of the corner with a sharp object. This must be done so as not to damage the polymer coating or galvanized layer.
It is convenient to bend metal by clamping it along the bend line between two wooden blocks. If there are no clamps, you can twist the bars at the edges with self-tapping screws so as not to damage the metal. After the sheet is clamped, it is bent in the desired direction with light blows rubber mallet or mallets.
Having a sheet metal bending machine can greatly simplify the process, but not everyone has such a machine.
Window sill installation
This procedure requires the presence of a casting of suitable sizes, a minimum set of tools and materials.
Tools and materials required for installing window drainage: 
- metal scissors or grinder;
- tape measure, marker, square, construction knife;
- construction level (can be water);
- drill or screwdriver;
- mounting foam, roofing or silicone sealant;
- may also be needed cement mortar and trowel;
- plugs for the ends of the ebb.
Drainage installation
The sequence of actions for installing a metal sill is also suitable for products with zinc or polymer coating:
- Trimming the casting to size with a hem allowance. For example, if the window opening is 90 cm, then the ebb needs to be cut 94 cm (2 cm per side).
- At the ends of the drainage system, cuts are made to the amount of the allowance (in this example, 2 cm) and bent upward at a right angle.
- The ideal option is if the treatment of the slopes will be carried out after the installation of ebb and flow and the bends will subsequently end up under a layer of plaster.

If during the operation of the tide there is a possibility that people will walk on it, for example, to wash windows, then to prevent its deformation the base should be prepared accordingly. For this you will need cement-sand mortar. They lay out the base in such a way that the drainage line is adjacent to it along the entire plane, and if this plane is stepped on, the entire load will fall on the cement, and not on the thin metal drainage.
In most cases, no one does such complex foundation preparation. The empty space between the drainage system and the bottom of the window opening is filled with polyurethane foam. It is applied in a sufficient layer: one strip directly under the window, the second - on the edge of the wall, in the place where the tide overhangs.
Without waiting for it to harden polyurethane foam, the ebb is screwed onto self-tapping screws of the “press washer” type. Silicone sealant is first applied to the seat.
You need to screw the ebb so as not to block the drainage holes at the bottom of the window. The drip tray must be set clearly in level, this is necessary for uniform drainage of water. Otherwise, water will flow from one edge of the ebb, a drip will form on the wall, and finishing material will deteriorate prematurely and crumble.
Flashings are part of the drainage system, which is necessary for any roof covering. The presence of these elements allows you to quickly remove moisture from the roof and prevent rotting, corrosion of the material and leaks in the structure. To achieve these goals, it is necessary to correctly select and install ebb tides, taking into account the characteristics roofing material.
Correct installation of roof ebbs
Gutters connected to each other and to other elements of the drainage system are called ebbs. They can be triangular, rectangular or round section, which is the most common. The principle of their operation is that water flows down the surface of the roof and enters the gutters, and through them enters the drainage communications. Thanks to this, moisture does not accumulate on the roof, which helps prevent corrosion, rotting and damage to the coating.
Roof flashings are matched to the color of the roofing
The design of ebb and flow always requires the presence of connecting elements, thanks to which it is possible to create a drain required length. At the same time, installation of the system on different types of roofing requires adherence to technology.
When installing yourself, you should consider the following features:
- The ebb tide is located with a slope towards the water intake funnel, which will ensure effective removal of sediments. For 1 m of pipes, a slope of 4–5 mm is required;
- The diameter of the gutter depends on the roof area. For example, a roof of 90 m2 requires an element with a diameter of 8 cm;
- flashings are placed 3 cm below the edge of the roof overhang. This is necessary to prevent damage to the element as a result of snow melting;
- vertical drainage pipes are installed every 5 m, and with complex roof structures they are located at every corner;
- The gutter is supplemented with a teardropper, which prevents drops from bouncing off the ebb in different directions.
Self-installation of ebb tide
The gutter can be plastic or metal, but in any case it is important to prepare the tools and Additional materials for work. A saw, screwdriver and rope, as well as self-tapping screws will help secure the structure. It will be possible to check the angle of inclination with a building level; special brackets are used for installing ebb tides.
The gutter should be located with a slope towards the funnel and wastewater intake system
To work, you will also need all parts of the system, for example, a funnel, plugs, corners connecting inserts. First you need to determine the location and extent of the system. Funnels are often placed in the corners of the building, where vertical drainage pipes are located.
Flashing for the building's gable
Drainage elements of the roof can be different, and one of the options is the ebb of the gable. This part is a canopy that is considered part of the building and serves to drain water from walls and windows.
The canopy is built on a sheathing and equipped with a low tide gutter
To create this low tide option you will need corrugated sheeting, wooden blocks 50x80 mm, roofing screws. Fastening wooden parts to each other can be done with nails and a hammer. These parts must be made of wood with a moisture content of no more than 12%, and they must also be pre-treated with an antiseptic.
The visor can be supplemented with a gutter-shaped ebb
The complex of works to create a pediment ebb involves the following actions:
- The angle of inclination of the rafters for low tide should be from 20 to 45°, and the width of this element should be from 500 to 600 mm. The bars are sawed into parts of the appropriate size and taking into account the angle of connection of the elements.
- The frame for the ebb is assembled from the bars, attaching them to the roof rafters and the wall of the building with nails and anchor bolts.
- A covering of corrugated sheeting or metal tiles is installed on top of the finished sheathing, making an overlap of about 5 cm and carefully treating the seams with sealant.
Roofing screws are used to fasten corrugated sheets. In places where the structure adjoins the pediment, the wall must be fixed with the same self-tapping screws metal corner, and fill the seam with sealant. This ensures the strength of the ebb and prevents moisture from entering the structure.
Video: installation of ebb for the pediment
Installation of plastic drip
The drainage system made of plastic is lightweight and does not load the roof, and modern products are durable. Therefore, plastic casting is often the most cost-effective and practical solution to protect the roof from moisture accumulation.
The plastic ebb is fixed with self-tapping screws
The stages of installing a plastic drip sill are as follows:
- After installing the rafters and fixing waterproofing film You need to pull the cord along the bottom of the slope, taking into account the required slope of the direction of the ebb.
- On the outer roof sheathing, which is covered waterproofing material, install brackets for the gutter. Screw these elements with self-tapping screws at equal distances from each other. The optimal step is 50–70 cm.
- Connect the gutter modules into a system of the required length, and install plugs at the ends. Fix the parts one by one on the brackets.
To check the tightness and correctness, you need to pour a bucket of water into the system at one of the ends and at the corner of the building and observe the movement of the liquid. If it reaches the special pipe and ditch quickly and does not accumulate in any area of the ebb tides, then the work has been done correctly.
Video: installing a PVC drain
Installation of metal gutters
Metal flashings can be copper, aluminum or alloy steel. Such products weigh more than plastic ones and therefore require the same durable brackets. To install metal systems, you need to strengthen the sheathing in the area where the brackets are fixed, and for this, boards with a section of 50x150 mm are used.
Metal casting requires careful fixation, because it has a lot of weight
Installation of metal gutters involves the following steps:
- A rope is pulled along the bottom of the slope at the desired level of the drainage location and taking into account the slope. This is carried out before installing the waterproofing film, but after completing the rafters and strengthening the sheathing.
- The gutter elements are fastened together with rivets and then attached to brackets installed on the roof front board. The plugs are mounted on the outer elements, having previously installed rubber compressor and supplementing the joint area with roofing sealant.
- The gutter with a plug is mounted in hangers. If you plan to install a funnel, then a hole in the gutter is created in advance with a hacksaw or electric drill and a special crown of the required diameter.
- After installing the drip tide, attach the drainpipe with a funnel, carefully waterproofing the joints. The system is then tested for efficiency by filling it with water.
Video: example of installing a metal drain
How to install ebb corners of different widths
Forming a roof drain on a complex roof or bypassing a protrusion requires connecting flashings at the corners. In this case, it is often necessary to connect the ebb tides different widths. For this purpose, special angles are used, namely internal connectors and external couplings, which can be of different angle sizes.
External couplings will help connect gutters of different widths at the corners of the building
The process of connecting gutters at corners is no different from fixing straight elements. The brackets are placed close to the corner, which will ensure the strength and reliability of the system. If the corner has short edges, then the place where they meet with the straight gutter is carefully waterproofed with roofing sealant.
Some manufacturers produce corners with markings for the drainpipe
There may be a drainpipe at the corner of the building and therefore it is necessary to provide a hole for installing a funnel. Using a hacksaw or a drill with a metal bit, make a hole at the corner joint for the gutters, but first you need to carefully measure the diameter of the funnel. There are also ready-made sets of funnels and corner gutters that do not require complicated installation.
Video: option for joining the gutter in the corner area
Drainage for soft roofs
Roof surface covered with bitumen shingles does not provide rapid removal of moisture and therefore for soft roof gutters are required. For installation, you can choose plastic models, but metal options with a polymer colored coating are more durable.
For a soft roof of any shape, gutters are needed
If plastic brackets are used, they are fixed on the front board with a distance between elements of 60 cm. Metal supports are attached to the outer board of the sheathing before laying the material.
The technology involves the following stages:
- At one end of the edge of the sheathing or front board, attach a self-tapping screw and draw an inclined line, taking into account the fact that for every meter there is about 5 mm of slope. At the end of the line, attach another self-tapping screw and tighten the rope.
- The brackets are fixed along this line at a distance of about 50–60 cm from each other. The extreme supports are mounted at a distance of 15 cm from the end of the board.
- When installing the gutter, the edge of the element, which is located closer to the edge, is inserted into the fastening clamp. Release the bracket, apply a little pressure and secure the opposite edge. Glue is applied to the corner from the inside and the gutter is promptly folded. You need to push the corner all the way. Next, the gutter with the glued corner is placed in other brackets.
- After this, glue is applied to the inner area and the elements are connected. Plugs are installed on the end parts.
Repair of roof gutters
As a result of snow and ice melting, heavy rains and strong gusts of wind, the gutters of the drainage system can be damaged. The most unstable to such factors are plastic structures, metal ones are more durable, but in any case, system repair may be required.
Any type of gutter can be damaged by climatic factors
Low tides are exposed to many factors, and disruption of the functionality of the drainage system requires operational repair. The following situations are common:
- Poor drainage is often due to dirt, fallen leaves and debris accumulated in gutters. It is easy to fix the problem by cleaning the system of foreign objects;
- If a crack occurs in the gutter, then the element must be replaced. If there is a break across the entire surface, this part must be completely replaced. Small cracks can be easily repaired with two-component cold welding;
- if the elements of the drainage system are separated, then you need to clean the damaged area from dirt, remove old fasteners and carefully connect the parts, treating the joint with sealant;
- Rust occurs on metal products with a damaged protective layer. You can clean it with a sponge and cover the area anti-corrosion paint. If rust has affected the entire system, then it is best to replace the ebb tides;
- After many years of operation, deformed pipes are always replaced with new ones. This is necessary for plastic and metal products, which have not been repaired for decades.
Integrity and correct installation Roof flashings are the key to good protection of the building from moisture. The gutter system has a simple design, but allows you to protect walls, windows and foundations from harmful effects water. Regular repairs are just as necessary as proper installation of gutters, as they extend the life of the drainage structure.
Plastic moldings are becoming increasingly popular every year due to their ease of installation, affordable price and aesthetic appearance. The technology for producing plastic drainage systems has been used for several decades. During this period, special weather-resistant types of plastic were created, products from which in terms of their quality characteristics are almost not inferior to metal ones.
In the presence of necessary tools and instructions, the installation of such ebbs can be done independently. Prices for such gutters are significantly lower than for metal ones. Products of various sizes are available on the market:
- for pipes – from 50 to 160 mm;
- for gutters – from 70 to 200 mm.
Concerning color range, then in the case of plastic products the choice is much wider than, for example, when using metal castings, which is their important advantage.
Requirements for low tides and their types
A variety of materials are used as the basis for the manufacture of ebbs: plastic, galvanized steel sheets, etc. They can be made in a variety of forms.
Since the main function of ebb tides is to collect water from the roofing surface and then discharge it into the drainage system, their essential properties must be:
- increased level of strength;
- resistance to corrosion;
- high level of resistance to loads and mechanical deformations.
In addition, products must have an aesthetic appearance. In terms of functionality, it does not play a specific role, but it is very important from the point of view of the possibility of creating a harmonious exterior of the building.
Water ebbs differ in the material from which they are made.
- Drains made of galvanized sheet steel up to 1 mm thick. The production process of such products includes the application of an additional coating of polyester, pural, plastisol, which muffles the sound of falling raindrops, since steel does not have noise-insulating properties: on the contrary, it increases the intensity of sounds. Steel castings are resistant to mechanical damage and sudden temperature fluctuations. The use of a polymer coating makes it possible to achieve exceptionally wide color palette. Thanks to this, the selection of ebb tides for any roof covering is greatly simplified. Perfectly protecting the facade from moisture, galvanized systems are quite affordable in terms of price.
- Aluminum castings. Their thickness is 0.8-1 mm. To protect the material from corrosion, it is coated on both sides with a special varnish. To obtain a specific shade, varnishes of the corresponding color are used. Distinctive properties aluminum products are lightness, strength, ease of installation. Features of production technology help to achieve a completely smooth surface and the ability to maintain the original appearance throughout its entire service life.
- Drains based on raw copper with a coating applied by oxidation or brass plating. The distinctive quality of this type is its long service life, excellent quality characteristics, and attractive appearance. Among the disadvantages are high prices.
- Castings based on plastisol, polyester and other polymers have become widely used only in recent years. Their main advantages are:
- ease;
- strength;
- noiselessness;
- resistance to moisture, ultraviolet radiation and chemical compounds;
- duration of operational life (can reach 50 years);
- ease of installation;
- no noise level;
- non-degradability;
- possibility of use in a wide range temperature range: from minus 50 to plus 50 degrees;
- affordable price.
The latter quality, together with the possibility of choosing stylistically consistent products in a wide color spectrum, often becomes decisive when choosing plastic ebbs with a polymer coating.
In most cases, the manufacture of drip tides is carried out regardless of the specific type in the same shape (rounded or rectangular): these are small-depth gutters with special brackets with which fastening is carried out. The length of the flashings is determined by the dimensions of the roof and can range from 1 to 6 m. The dimensions of the gutter are 70-200 mm.
It is also possible to select a product that matches the color of the roofing covering and elements drainage system.
The need to use ebb tides
The main advantages of using roof flashings are:
- reliable protection installed roof and walls from exposure excess moisture, which helps prevent deformation, destruction, and various damage as a result of frequent and prolonged contact with water;
- increasing the level of roof strength, giving the structure additional rigidity and the ability to withstand heavy loads;
- extension of service life regardless of the presence of negative environmental factors;
- creating a harmonious and complete appearance of the building by masking the joints that inevitably form as a result of laying the roofing material
Parts required for fastening and installation rules for drip sills

In many cases, ebb tides can be installed yourself - especially if you choose plastic or aluminum products.
You can also make them yourself. The simplest way is to cut a standard pipe with a diameter of at least 160 mm. The incision is made in longitudinal direction, as a result you get two gutters. They must be treated with special compounds and painted in the required shade. Pural or polyester is used for this. After this, they begin to consolidate finished product in the right place.
Calculations of the drainage parameters required for a specific roof are made at the design stage. When replacing these elements, the same calculations are used.
For every 8 meters of gutter, at least one drain pipe. In this case, the design features of the roof should also be taken into account.
Another rule: the installation of drains must be done immediately after covering the roof to protect the foundation already at initial stages construction.
Basic requirements that must be observed when installing the drip sill, the following:
- To attach the gutters, you need to use standard brackets - they are included in the finished system. The brackets must be screwed to the surface of the front roofing board, rafter beams or roofing board.
- The brackets are installed so that the axis of the gutter coincides with the edge of the roof. To ensure the necessary structural rigidity, the brackets are installed with a gap of 60 to 70 cm between them.
- To increase the efficiency of water flow, gutters are installed with a minimum slope of 3-5% in the direction of the drainage funnel.
- The distance between the drainage gutters and the wall should be 5-8 cm - this is necessary to prevent the wall surface from being exposed to excess moisture and the subsequent development of mold.
- When installing flashings, you need to use a special rubber gasket 1-2 mm thick. It is needed to prevent damage to the paint or varnish layer when attaching the gutter to the mounted bracket.
- An important rule is to install flashings before installing the waterproofing layer of the roofing pie. This measure is necessary to ensure that the sills are attached directly to the Mauerlat: after installing the waterproofing, it will be closed.
- Installation of drainpipes should be carried out opposite the location storm sewer. A distance of 15 to 30 cm should be maintained between the lower end of the pipe and the ground.
To count required quantity ebb tides, you need to calculate the perimeter of the building, and then divide the resulting value by the length of the ebb tide.
Stages of work

- As already mentioned, when attaching the brackets, a slope of 3-5%, or 3 millimeters per 1 meter of length, should be observed. Thanks to this, the water will be completely removed from the gutter, which will prevent its stagnation and further formation of ice.
- The next step is to mark this slope. Using a level and a board of sufficient length, a “zero line” is drawn along the upper or lower edge of the mounted holder. It should reach the attachment point of the outermost (furthest from the funnel) holder. Then calculate the difference between the mounting height of the final and installed holders (the length of the segment between them, expressed in meters). The indicator is multiplied by 3 and the result is obtained in millimeters. The bracket is fastened taking into account the above calculations.
- The next step is to lay out the line for attaching the holders using a tracing cord. They should be at a distance of 50-60 cm. First of all, markings are made for all the necessary holders, then they are attached.
- After this, they begin to adjust the length of the gutters. The gutter sections must be arranged in the holders in such a way that the areas for the connecting inserts are located between the holders. If necessary, gutters can be shortened. The end cap is placed directly on the ground. The laid fragments are connected using inserts, which almost always have boundary marks. Basically, between the edges of the attached gutters there should be a distance of 6 to 10 cm. After assembly, the gutter is installed in the holders.
- After completing the installation of the gutters on the brackets, the system must be checked. To do this, a stream of water is released through a constructed gutter. When done correctly, the gutter can handle even very intense water flow.
- After making sure that the system is working properly, proceed to installing the drainpipe. It should start from the top (from the funnel). The pipe is connected to the funnel directly or using an elbow - the specific method depends on the distance from the wall. As a rule, standard length pipes are within 2 meters. For this reason, the necessary connecting elements must be prepared in advance.
Important points when installing plastic ebbs
 The choice of plastic-based drip tides is largely due to the ease of their installation and the ability to carry out the work yourself. But even in this case, it is necessary to adhere to the following basic principles:
- Produce preliminary calculations, and as carefully as possible. This makes it possible to simultaneously purchase all the required parts and carry out high-quality installation.
- Places for drains should be thoroughly prepared: they should be located in areas where they will not harm green spaces or simply interfere.
- Since drainpipes will be subject to increased loads from time to time, only strong and reliable steel hooks should be used as fastening elements, which can ensure the strength of the created structure.
- Maintaining slope installed pipe at least 0.3 cm guarantees the maximum speed of water outflow, so there will be no need to frequently clean the gutter from dirt accumulating in it.
- Carrying out periodic inspections and preventive measures (in particular, autumn seasons) ensure a long service life of both plastic drip trays and the entire drainage system.
CONCLUSIONS:
- Plastic moldings are becoming increasingly popular due to their ease of installation, affordable price and aesthetic appearance.
- Galvanized sheet steel, aluminum, plastic, etc. are used as the basis for the manufacture of ebbs.
- The undeniable advantages of plastic products have made them especially popular.
- The length of the flashings is determined by the size of the roof and can range from 1 to 6 m.
- Low tides are necessary for reliable protection roofs and walls from exposure to high humidity.
- Calculations of the drainage parameters required for a specific roof are made at the design stage.
- Failure to comply with the required diameters of drainage elements leads to overflow of the entire system.
- To fasten the gutters, you need to use standard brackets installed at intervals of 60 to 70 cm.
- Only strong and reliable steel hooks should be used as fastening elements.
- To completely remove water from the gutter, when attaching the brackets, a slope of 3-5%, or 3 millimeters per 1 meter of length, should be maintained.
- After completing the installation of the gutters on the brackets, the system must be checked by running a stream of water through it.
Find out all about the features of installing plastic ebbs in a detailed video.
Moisture on the roof, leaks and other negative phenomena can cause destruction of the walls of the house, therefore modern roofing coverings are equipped with special elements through which excess moisture is removed. The importance of their device cannot be underestimated.
Let's try to understand in detail the system for draining water from the roof: what is the principle of operation, what are the types of drains for the roof, how to install and secure it.
Their main purpose is to prevent:
- accumulation of water after precipitation;
- water getting into the joints;
- erosion of the foundation.
Water collected from the roof through various special devices discharged into the drainage system.
The benefits of installing ebb tides are obvious. DIY installation is a reality. Anyone who knows how to handle tools can install it themselves, the price is reasonable. Thus, with a relatively modest investment, you can protect the blind areas of the house from destruction, the roof will stop being damaged, and the soffits of a garage or residential building will become an additional decor.
Today construction market offers various options executions of these elements: plastic, galvanized (photo below) and others.
Types of tides

Drainage systems may differ in both material and shape. However, they all have one thing in common:
- increased strength,
- resistance to mechanical loads and resistance to deformation,
- anti-corrosion coating,
- attractive look.
As a rule, they have a semicircular or rectangular shape.
Plastic and metal
Let's start with metal systems.
- Galvanization. Until recently they were in high demand. The secret of such popularity of galvanized roof flashings is their affordable cost. However, they were not durable, since the zinc coating is sensitive to acid rain, which has been falling more and more often lately, and is destroyed under its influence.
Manufacturers today offer the galvanized type to developers in a different version, which takes these disadvantages into account. The production uses thin (up to 1 mm) galvanized steel sheets, onto which an additional polymer coating is applied. Pural, polyester, plastoizol muffle the sounds of rain and, most importantly, reliably protect against corrosion.
- Aluminum. They have a longer service life. They are protected from corrosion by a layer of special varnish applied both on the outside and on the inside. You can also use varnish that matches the color of a particular building, which will undoubtedly make it more attractive.
- Copper. This is the most durable option. made of pure material, onto which a brass-plated or oxidized layer is then applied. What distinguishes them is high quality, aesthetics, durability and, unfortunately, high cost.
- Plastic. Plastic is also used in production. They are distinguished by lightness, noiselessness and fairly high quality. Ebb tides differ from similar products in price and. Do-it-yourself installation of this type is possible for any homeowner, since it does not require special skills. The main, but significant, disadvantage is the low degree of frost resistance. If this circumstance is not taken into account, ice build-up in the pipes can cause them to burst.
Main components of the system

Regardless of the material and shape, the structure is assembled from the following components:
- Gutter. This is probably essential element systems. It collects water flowing from the slopes, and from here it is discharged into pipes. This is a prefabricated fragment, the length of its components depends on the type of system.
- Gutters. Another prefabricated element through which water is drained down: first into specially prepared receivers, then into trenches and then beyond the boundaries of the site.
- Receiving funnel. This is a transition link through which the gutter is connected to the pipe. According to SNiP, the step between them is 10 m along the length of the slope. IN suburban construction Usually they get by with one or two funnels.
- We also note such auxiliary elements as brackets, hooks, connecting inserts, clamps and plugs. Their number depends on the type of roof and the height of the walls.
Calculation of ebb tides for the roof

When analyzing how to make ebb tides on the roof, it should be noted that the work actually begins with planning. One of important aspects This is the correct calculation of the components included in the system. This is done quite simply.
- To calculate the length of the gutter enough sum the lengths of the slopes and gables. The result must be taken with some reserve. Their number is calculated based on the length of the drains. Funnels are installed in increments of 8–10 m. The same number of drainpipes is needed as funnels. For one side, one funnel is enough, but funnels installed in the corners look much more aesthetically pleasing.
- Mounting brackets are calculated, based on the condition: installation step – 50–60 cm and a couple more per funnel. For example, for a gable roof with a slope of 6 by 8 m, their number will be 36 pieces.
- Of particular interest is product diameter, since inaccurate calculation can lead to water overflowing, and it will fall from the edge of the gutter onto the walls. The main parameter influencing the choice of diameter, is . The smallest possible cross-section is 1.5 cm 2 for each m 2 of roof surface.
- The area of the already indicated slope is 24 m2, so it turns out that the cross-section of the tray cannot be less than 35 cm 2. In practice, the dimensions of flashings for a roof with these parameters are 7–20 cm. The diameter of a round drain, the size of which is 7 cm, is 76 m2, which is quite consistent with our assumptions.
- The slope must be directed towards the drainage pipe. In private construction it is customary to choose 20–30 mm for every 10 m. As a rule, such an inclination is sufficient to ensure the operation of the system. It is logical to assume that drains with a greater slope will drain water more efficiently. But then they won't really fit in general form building.
How to do it yourself

Before installing the ebb tides, wells are installed to receive the drained water. If their installation is not provided for by the project, then the funnels are positioned so that they do not go onto the sidewalk or green area.
How to mount correctly
- To fix the brackets, several options are used: to the sheathing, rafters or front boards. The reliability of the fasteners depends to a large extent on how to insert the hooks on the roof. Fastening in the first and second cases is carried out before the roofing. Either long metal brackets or short ones equipped with extensions are used. The plates of the fastening hooks are bent at the required angle.
- First, install the outer brackets. In this case, the desired slope of the gutter is taken into account. To fix them, self-tapping screws are used - two for each.
- A cord is pulled between them. It will become a definite guide when installing intermediate fastening hooks.

- Brackets are required on each side of the funnel. The fasteners are placed quite close - approximately at a distance of two centimeters.
- The gutter elements are attached end-to-end or overlapping. To close the joints, special linings are used.
- When assembling plastic gutters, the parts do not fit together immediately. First, special glue is applied to the bottom trim from the inside, after which the fragments are fixed at the junction of the gutters.
- In plastic products, the end caps are installed with an adhesive composition. In galvanized ones, the edge is bent, a plug is put on, then the bent edge is returned to its place.
The method of attaching the funnels is different for products made from various materials.
- Galvanized: holes are made on the gutter in the right places, then, pushing the funnel from bottom to top, they snap it into place.
- Plastic: First, the elements are mounted, then the gutter fragments are inserted.
The cross-sectional shape of the roof drain affects the appearance of the house, but not the ability to drain precipitation. And the number of drains, their location and installation complexity depend on the roof design. At the same time, any drainage system solves one problem: to collect water flowing from the roof and drain it into the ground, away from the facade and foundation. If desired, the homeowner can install the drip lining on the roof of his house himself. The technology for this work is simple; the conditions for fastening and assembling structural elements must be observed.
Differences in the installation of drainage systems
Drainage systems are made of galvanized steel, aluminum, copper, PVC. The do-it-yourself drip assembly diagram does not change depending on the type of system, but the size range of gutters and pipes may differ. An important value depends on this parameter - the distance at which the brackets need to be fastened.
For example, for a plastic system maximum distance between holders is 600 mm. For steel – 400 mm. It is within these limits that the brackets are installed, so for copper and aluminum ebbs it is advisable to take a step of 500 mm. It should be said that brackets are often located at this distance for any drainage system.
Calculation of system components
For work you will need the following consumables:
internal and external corners.
If the roof drainage system will be located only along straight sections, corners will not be needed. This option is suitable, for example, for a 2-pitched roof: 2 drains are located on the long sides of the roof.
The calculation is carried out as follows:
how many corners the roof has, so many corners will be needed for installation (except for straight drains);
to determine the number of gutters, the length of the roof along the eaves (perimeter) is divided by the length of the gutter (standard 3 m); the resulting figure is rounded up;
a funnel is installed every 10-15 m of the gutter length; the number of funnels is determined by dividing the perimeter by this figure; rounded down;
if the system is not closed, you will need 2 plugs;
to connect gutters, connectors are needed, their number is calculated by dividing the total length of the system by 3 (3 is the length of the gutter in meters);
the number of funnels determines how many drainpipes are needed; the length of the pipe is equal to the height of the house, and pipes are sold in sections of 3 m;
One drain needs one of its own elbows and 2 pipe elbows.

Important: the system must have a slope towards the drainpipe. It is 3 mm per linear meter. To control this parameter, use the building level.
Stage 1: attaching brackets
The installation of drainage systems begins with fastening the brackets. The element starts under cornice strip and is attached to the sheathing board with self-tapping screws. As the system progresses, the holders can be fixed to the rafters and the front board.

The first bracket is screwed to the place furthest from the drainpipe. Then the last holder is attached where the pipe is attached. After this, intermediate brackets are installed.
It is better to mark the location of each of them in advance by pulling a cord between the first and last holders (taking into account a slope of 3 mm every meter). In this way, you can make the ebb on the roof as efficiently as possible, as specialists do. Correct slope will ensure precipitation runoff in the required volume.
Stage 2: connecting the gutters
A gutter connector is attached between each pair of holders. It is recommended to lubricate its rubber seals to avoid difficulties during installation. Each channel will connect to the other inside the connector.
Stage 3: Entering the Funnel
A hole for the outlet funnel is cut out in the cavity of the gutter (at its bottom). You can make it yourself using a hacksaw. The assembled section is installed on brackets. Here it is important to observe the temperature marks that the roof drainage system of almost any manufacturer has. The edge of the gutter should reach the mark corresponding to the air temperature.
Stage 4: attaching the corners
Each corner, internal or external, is first attached at one end to the gutter. After installing the resulting pipe with the angle on the holders, the 2nd groove (on the other side) is brought to the angle. The corner, like all components of the system, is fixed to the roof beams (boards) with self-tapping screws. You should know how to ensure good sealing of roof flashings. To do this, all joints are treated with sealant.
Stage 5: installation of drainpipes
After installation suspension system vertical drains are installed. Pipes are attached to façade wall at home with clamps. The standard distance between clamps is 1 m. The maximum allowable is 1.8 m.
Connectors are installed at the junction of two drainage pipes. The direction of the pipe is set using an elbow. This elbow brings it closer to the wall of the house when the pipe is connected at the upper end to the funnel.
Clamps are always installed on both sides of the knee (at a distance of 150 mm). In this case, the following condition must be observed: each pipe section must be attached to the facade with at least one clamp.

Drainage of water from the foundation
From the drainage pipe, sediment must flow into the drainage system of the site. Sometimes the installation of such a system is ignored, and over time the integrity of the foundation is threatened. With hidden drainage, the pipe enters the ground, providing the entire system with a neat appearance, and the soil near the facade with the necessary dryness.
How to make roof ebbs with your own hands, installation of gutters
How to make roof tides with your own hands. Calculation of required components. All stages of installation.
Roof flashings: design, types and rules for do-it-yourself installation
 Water drainage is a vitally important measure when constructing a roof, which eliminates leaks and prevents water from penetrating into the under-roof space and façade of the building. Once accumulated, it can destroy roof structure and the walls of the building. In winter, ice along with icicles break off and, when falling, pose a threat to human life. This situation can only be avoided by eliminating stagnation of water by organizing its drainage from the roof.
Flashings for water drainage are made with a high degree of strength, protection from rust and emphasizing the attractiveness of the structure as a whole. To make them, they are used various materials and the shape of the structure itself.
Various types of water ebb from the roof
The type of roof structure is determined by the material used for its manufacture.
- Low tides where thin galvanized steel sheets up to 1 mm are used. This material requires additional coating with a polyester compound to muffle the sounds of dripping water. After all, even a small blow to a steel sheet is accompanied by an unpleasant sound.
- Roof drains made of thin aluminum sheets up to 1 mm, onto which it is advisable to apply a special coating with an anti-corrosion mixture.
- Flashings for draining water from sheet copper. A protective oxidized layer is applied to the sheets. Such ebbs are distinguished by durability, strength, safety and decorativeness, but also by high cost.
- The use of polymers or plastics in the production of drainage systems. Such designs are quite solid and have light and silent operation.

Plastic drainage systems
Plastic roof ebbs differ from other structures in their low cost and easy installation. They can be easily installed by the homeowner himself, who does not have special skills. However, they have a rather significant drawback - low level frost resistance. Ice formations in plastic pipes can cause them to burst.
The tides can be made in different colors; the choice of colors is made by the homeowner himself according to his taste. However, it is recommended that the shade of the ebb and color of the roofing carpet or walls be combined. This will make the entire building more decorative.
How to make drainage systems with your own hands
The easiest to work with are plastic, galvanized steel sheets and aluminum. In this regard, you don’t need to invite professional workers, since you can make drainage systems yourself without any problems and much cheaper.
Most in a simple way is cutting a thin-walled metal pipe with an approximate cross-section of 150 mm along its length. Thus, two gutters for drainage are obtained.

Following the recommendations of specialists, both obtained parts are coated with a special mixture or varnish of the appropriate color, which will ensure the anti-corrosion resistance of the material. Then the gutters are installed using fastening brackets in the catchment area.
There is another simple solution to how to make ebbs on the roof, if you use galvanized steel sheets to obtain them, which are given rectangular shape. You need to have the following items available:
- steel sheet, minimum thickness which is 7 mm,
- a machine on which metal structures will be bent.
In general, you can get by with a hammer or mallet and a piece of angle or rail, but the design will lose its decorative properties and is unlikely to become a decoration of the building.
The steel sheet is cut into strips of the required width, and are approximately 3 m long. Each metal strip is then placed in a machine to form a bend. They are then covered with protective composition, dried and the finished cast is prepared for installation.
Installation rules by stages
You should prepare special brackets and secure them correctly at a distance of about 0.5 m from each other, then you can begin the installation of roof ebbs.
- It is necessary to organize a good drainage, which depends on how accurately the required slope of the gutters is made. The slope of the gutters is approximately 3 mm per 1 m of the length of the tidal structure.
- In the area where the ebb tides are installed, the string is pulled while maintaining the inclination of the ebb tides. Brackets are installed along it. This stage of installation should be treated carefully, since it is this stage that guarantees the maximum possible drainage, the absence of stagnation, and will eliminate ice from low temperatures.
- A rubber seal is laid between the ebbs and fastenings or another one is used soft material, which will allow you to firmly connect both elements, protect the surface of the gutter from rust and prevent changes in the size of the structure due to temperature changes.
- Before installing steam, waterproofing and roofing coatings, it is necessary to install flashings on the roof. The sheathing is reinforced with a board at the bottom, which will help support the weight of the drainage gutters. It is to its edge that the brackets are attached. When the eaves overhang is small, reinforcement is not necessary. Then the brackets are attached directly to the wall of the building.
- Upon completion of installation of ebb tides, they should be checked.

Drainage mounting diagram
It is necessary to fill the upper tide area with a large amount of water and observe the speed of its flow. Water should not overflow from the gutter during heavy rains and wet the walls, otherwise their destruction will begin over time.
We calculate the diameter of drainage pipes
The accuracy of drainage calculations is explained by its width and height. If they are insufficient, then water may overflow over the edge of the gutter and then fall onto the walls. As a result, the facade begins to collapse.
To calculate, you need to determine:
- total area of the roofing carpet;
- interval from the drainage system to the point where the gutter turns.
Then take into account the location of the gutter - above the drainage system. Turns are carried out taking into account a certain distance to the drains running in the middle of the drainage system. On the slopes, ebb tides under the roof are arranged in twos, the slope of which is directed in the direction of the drainage pipe. Based on the roof area, it is selected required diameter gutters.
For example, to completely remove water from a roof with an area of 90 m2, it is necessary to select a gutter diameter of about 8 cm. If you need to increase the throughput of the drainage system, you should consider calculating the increased diameter of the gutter and pipe. For an area of 160 m2, the cross-sectional size will be 10 cm.
In addition, the average annual precipitation in the region where the building is located is taken into account. To prevent frost with icicles in winter, it is better to install heating of the drainage system specialized devices powered by electricity.
The installation of ebb tides on the roof provides the homeowner with a number of advantages:
- frost and water do not have a destructive effect on the roof and walls;
- you can build a drainage structure yourself, the result will be a not very high price for roof flashings;
- the strength and safety of the roof increases significantly;
- By covering the joints of structural parts with drainage elements, you can make the building structure more decorative;
- the roof structure and the structure itself last longer.
It doesn’t matter what kind of flashings are installed under the roof, the main thing is that you need to take care of them, namely, periodically clean out the dirt and debris brought by rainwater draining from the roof.
Particular attention to low tides must be shown at late autumn period, because with the onset of frosty weather, residual water can break the tightness of the ebb tides.
Roof flashings: do-it-yourself installation video, installation steps
“Roof flashings” are roof drainage structures with gutters, funnels and downpipes.
Plastic drain: how to make ebbs on the roof with your own hands - installation steps
What are the advantages of installing plastic flashings on the roof of a private house?
It is no secret that the elements of the drainage system differ not only in diameter, but also in the type of material from which they are made. Many still make gutters and galvanized metal pipes yourself. However, if you take into account the features of plastic products, then preferences can change dramatically:
- Simplicity of installation work.
- Affordable price.
- Light weight structure.
- Corrosion resistance.
- Wide range of colors.
- No noise when it rains.

Before you make roof flashings with your own hands, for an objective assessment, you should also add disadvantages to the above plastic material. These include: the inability to independently manufacture and repair system elements. In addition, PVC gutters are only suitable for low-rise construction.
The installation features not only save time, but also money for the homeowner, because drains can be installed simultaneously with the construction of the roof. Any hardware store offers numerous sets of plastic gutters various configurations and sections. The number of elements and their parameters will have to be determined at the preparatory stage.
What is the price of plastic gutters for the roof of a private house?
The cost of current plastic drainage components is affordable to a wide range of homeowners. Such elements are much cheaper than copper or titanium analogues. At the same time, vinyl products are highly aesthetic and environmentally friendly. The tightness of the plasticized system practically does not suffer from temperature changes, because the connection of the elements is equipped with a rubber seal.

It must be admitted that high-quality roof flashings are made of plastic and the price is appropriate. Below is the cost of products from some popular manufacturers among developers:
- Gutter 3 meters Docke – from 437 rubles.
- Pipe 3 meters Docke – from 529 rubles.
- Docke gutter funnel – 275 rubles.
- Gutter 4 meters Nicoll – from 840 rubles.
- Pipe 4 meters Nicoll – from 1120 rubles.
- Nicoll gutter funnel – from 597 rubles.
- Gutter 4 meters Roofart – from 787 rubles.
- Pipe 4 meters Roofart – from 1294 rubles.
- Roofart gutter funnel – 512 rubles.
Each of plastic systems has its pros and cons. For example, Rufart has special rigidity profiles that make it possible to withstand severe mechanical loads in the event of icing or heavy rain.
Calculation of materials for roof drainage
The required cross-sectional area of the groove can be established using SP 17.13330.2011. The document states that per square meter of roofing area there should be 1.5 cm² of gutter cross-section. Any competent installation of roof tides is also accompanied by a calculation of the average annual precipitation in the region. The procedure makes it possible to determine the cross-section of drainpipes in accordance with the recommendations of SP 32.13330.2012. It remains to determine their diameter in accordance with the instructions of SP 30.13330.
Some manufacturers provide their own selection tables effective system drainage Having decided on the standard size of the drainage system, all that remains is to select the elements of the kit. For example, on a straight wall for a riser you will need:
- Funnel groove.
- One elbow for lower outlet.
- Two elbows for connecting the pipe to the wall.
- One fastening for the funnel assembly and two for each pipe.
To get around the protrusions on the wall, you will need 4 more elbows and 2 pipes for connection. The ends of the gutter must be closed with plugs. The segments are arranged in such a way as to obtain a minimum of waste. Based on the number of joints, the number of connecting elements with seals is calculated.

Each gutter component is fixed with brackets at the ends with a 150mm offset. Along the remaining length, the fastenings are distributed at a distance of no more than 600 mm from each other, which corresponds to the pitch of the rafters. To install a 3-meter gutter, you need 6 brackets with a pitch of 500 mm.
Technology: how to make plastic flashings on the roof of a one-story building with your own hands?
Practice has proven that the optimal installation option is on a cornice board using brackets. If this is not possible, then they are attached to the sheathing or rafters until the roofing material is laid. The possibility of choosing fastening materials must be clarified at the stage of system selection.
The procedure for installing plastic ebbs on the roof of a house is as follows:
- Fix one bracket at the highest point, and fix another bracket on the opposite side of the funnel. The central axis of the gutter should be under the edge of the roof, and the outer edge should be 20-30 mm below the roof plane.
- The extreme bracket is attached on the basis that each subsequent one is fixed 15 mm lower than the previous one. Tie a piece of twine to the fixed brackets. So the process is no more complicated than radiator mounting markings heating.
- The location of the tee is marked with vertical lines.
- The second bracket is attached at a distance of 150 mm from the tee line.
- Distribute and mark the position of the fastening units.
- Install tees and funnels, and then the remaining elements of the gutter.
In order to compensate for thermal expansion, the gutters are fixed with a gap of 10-15 mm. After assembling the horizontal drainage line, begin installing the vertical risers.
Fastening downspouts
There are two types of fastenings - for wooden and brick wall. In the first case, it is a V-shaped plate with 2 fixation points, and in the second, it is a single-point anchor fastening. The pipe itself in both cases is secured with a clamp.
In version with anchors Places for drilling installation holes for fastening are pre-marked on the wall:
- lower finishing knee;
- for each pipe section there are two fastenings with a distance of 150 mm from the edges;
- the upper knee that fits the wall.

When using a V-shaped fastening, a clamp with a bracket is put on each elbow and pipe, after which it is assembled vertical pipeline on the wall, and the fastenings are fixed with self-tapping screws. Before you make plastic ebbs on the roof with your own hands, it is important to remember that the connection into the socket is not made completely, but a 15 mm gap is left to stabilize thermal expansion.
To avoid obstacles in the way of drainage installation, corner elements are used for external and internal rotation of the gutter. They are fastened taking into account the general slope, going around the edge of the roof along the contour. The completion of installation should be completed by checking the operation of the system, for which water is supplied to the extreme points of the grooves. At correct assembly it should move evenly towards the funnel along the entire length of the channel.
How to install roof ebbs: installation plastic drain on one's own
Gutter: how to correctly make plastic roof flashings with your own hands, the main stages of installation and the price of gutter kits.